Sunday, November 29, 2009

Cardi gratinati


Cardoons are one of my favorite winter vegetables but they can be hard to find. So when I spied some in the market the other day I did a double-take and smiled. I hadn't had them quite literally for years. The bunch I found was a bit bruised but would still be quite usable after they were trimmed.


Cardoons look like overgrown celery but taste very much like artichokes, which is not surprising since they are of the same botanical species as globe artichokes. They need to be properly trimmed of their leaves, which grow from the top and edges of the stalks, then cut into lengths, scraped on their outer sides to remove the fibrous ribs and hard green skin. (It helps to split them in half lengthwise so they lay flat on your cutting surface.) Like artichokes, they should be immediately submerged in acidulated water to prevent them from discoloring. They then should be simmered in salted water for about an hour (or 15 minutes under pressure) until they are quite tender. You are then ready to use them in a variety of ways.


One fine and easy way to make cardoons is to simply gratinée them. Place them neatly in layers in a buttered baking dish, each layer sprinkled with copious amounts of grated parmesan cheese and melted butter, seasoned with salt and pepper and—my little extra touch—a few spoonfuls of cream. (I also sometimes sprinkle some bread crumbs as well over each layer.) Bake in a very hot oven (220C, 250F) until nicely golden brown on top. Allow to cool off a bit before serving.


NOTES: Cardi gratinati would normally be a side dish. Cardoons have a wonderfully subtle flavor that goes with just about any roasted or braised meat, or even fish. But  made this way they are so satisfying you could easily make a light dinner out of them, served with crusty bread and followed by some fruit and cheese.

For an even richer version of cardi gratinati, top each layer with a fairly loose and well-seasoned béchamel and grated parmesan cheese, dotting with butter on top. Nutmeg adds a nice extra bit of flavor as well. In Puglia, a very different version of cardi gratinati calls for baking the cardoons with minced garlic, capers, pitted olives, grated pecorino cheese, sprinkled with bread crumbs and drizzled with olive oil.

Cardoons are also very good prepared in a myriad of other ways: in soup, simmered in tomato sauce, with anchovy and butter sauce, simmered in cream. It really is an incredibly versatile vegetable. (If you read Italian, see this useful webpage for a good survey of recipes.) Personally, I particularly like them breaded and fried. And cardoons are one of the classic vegetables to serve as part of a bagna caôda, one of the signature winter dishes of Piemontese cuisine.

For more background on cardoons, see this article.


Saturday, November 28, 2009

Memorie di Angelina in the news...

 
Dear readers,

Yours truly was recently interviewed by Half Hour Meals, a popular recipe website, about Memorie di Angelina. I enjoyed the questions, perhaps you'll enjoy the answers! 

Cheers, 
Frank

Wednesday, November 25, 2009

Pappardelle all'anatra


When one thinks of Tuscan cooking, one of the first dishes that comes to mind—along with such icons as fagioli all'uccelleto and bistecca alla fiorentina—is pappardelle sulla lepre, wide ribbon pasta with hare sauce. Its fame is perfectly justified; it is truly delicious. Finding hare is just about impossible where I live now, so I have cast about looking for substitutes. Rabbit would seem an obvious choice, being unusual but not impossible to find. But rabbit actually has a quite different, much milder and less gamy, flavor from that of hare. Although a completely different animal, I find that duck fits the bill. Made using a similar technique, it captures the 'gaminess' of pappardelle sulla lepre if not the exact flavor. And it is, in any event, not merely a substitution, but a traditional Tuscan dish in its own right: pappardelle all'anatra.

Step 1: Cutting up the duck: You begin by cutting up your duck into eight pieces, in the same manner you would a chicken: two wings, two legs and the breast, separated from the back and cut vertically down the breast bone and then each half itself cut in half across its midriff into four pieces. The cut up duck, ready for cooking, should look like the photo at right. As you cut up the duck, make sure trim off any excess fat and skin from around the cavity or the neck. (Do not throw this away—see notes below.) The back, the neck and the giblets (other than the liver) can be used to make an excellent stock, in the same way you make broth.

Step 2: Getting the sauce started: Then make a battuto of red onion, carrot, celery, a few sage leaves and pancetta, all finely minced. To make short work of the task, you can pulse these ingredients in a food processors (having roughly chopped them beforehand to ensure an even consistency) until you have a fine mince, almost—but not quite—a paste. Sauté in abundant olive oil until very soft, then push what is now a soffritto to the edges of the pot and add the duck pieces, turning them frequently and allowing them to brown lightly on all sides. Season with salt and pepper and then splash a generous amount of red wine into the pot, turning the contents to allow them to absorb the wine.

Step 3: Braising: When the wine is entirely reduced, add a large can of peeled tomatoes, crushed with your hands or passed through a food mill, into the pot. Then tomatoes should nearly cover the duck pieces. If not, add water or broth. Cover partially and allow the duck to braise for an hour, stirring from time to time. If the sauce seems to be drying out, add a bit of water or broth. But more likely, the sauce will be a bit thin after an hour, so uncover and allow the sauce to reduce slowly for another 30 minutes or so.

Step 4: Finishing the sauce. A few minutes before the sauce is done, remove the duck pieces from the sauce. You can do one of three things with them: (1) you can keep them warm and eat them as a secondo after the pasta, accompanied by the vegetable contorno of your choice, (2) you can serve them on top of the pappardelle as a one dish meal or of piatto unico or (3) you can remove the meat from the bones and remove the skin from the meat, then chop the meat roughly and return it to the sauce. Personally, I prefer the third option, as duck that has braised this long tends to be a bit too dry for my taste to eat on its own. If you want to serve the duck as a secondo, some recipes call for braising the duck whole rather than in pieces which provides a better presentation and will also help avoid overcooking the duck meat.

When the sauce is done—it should be well reduced and darkened—skim the excess fat from the surface. Depending on the duck, there may be quite a lot of excess fat. Some recipes call for you to make the sauce ahead and cool it, to allow you to remove the fat, but I find this is unnecessary and, in any event, you do want some fat in the sauce to add flavor and help it coat the pasta.

Step 6: Making and saucing the pappardelle: Meanwhile, you can be making your pappardelle by mixing fresh pasta dough, rolling it out quite fine and cutting it into strips 2-3cm (1 inch) wide. In the alternative, if you lack the time or the energy to make your own, there are some quite fine pappardelle available commercially. Boil the pappardelle in abundant salted water until slightly underdone. Drain (but not too well) and return the pappardelle to the pasta pot, then add a few ladlefuls of the duck sauce, mix well, and allow the pasta to simmer in the sauce over moderate heat until it has almost entirely absorbed the sauce. Pour into a warmed serving dish and ladle additional sauce over the pasta. Serve with grated parmesan cheese on the side for those who want it.


NOTES: Try to find a smallish duck for making this sauce. Most recipes call for a duck of around 1 kilo (about 2 pounds) but it may be hard to find a duck that small. Most ducks in the US are four pounds and up. Also, try to find a fairly lean duck, like a Muscovy. Ducks, like the ones used for making Peking duck, can be excessively fatty.

Using the rest of the duck: Ducks are not cheap, but you can use just about every bit of them one way or another. As mentioned above, the back (trimmed of its skin), neck and giblets make a very fine duck stock, which can be used like any other stock for risotti or soups, or to add flavor to a stew. And don't throw away the skin or excess fat: you can render the fat out by putting it in a skillet just large enough to contain all the bits of skin and fat in one layer, just cover with water and allow to simmer very gently until the water has evaporated and the skin has given off all of its fat and is nicely brown. Pour off the rendered fat into a jar and keep it for cooking—it is absolutely fabulous, for example, for sautéing potatoes. And the cracklings (the crispy brown bits of skin left over from rendering out their fat)  are delicious just sprinkled with a bit of salt and pepper. In my house, this is a special treat for the chef...;)

There are a good number of possible variations for this dish: The use of red onion is typical of Tuscan cookery but if you don't have a red onion on hand, a white or yellow one will do fine. Some recipes call for the addition of parsley or nepitella or even fennel seeds to the sauce as it simmers. Given the size of many modern ducks, some recipes call for using only the breast, which works fine, but you lose some flavor—and there is much flavor in the bones and the thighs. You can make a duck ragù by mincing the duck breast finely and adding it to the soffritto, as if you were making a ragù alla bolognese. Some recipes, conversely, call for using only the duck legs, which tend to be more flavorful (if less tender) than the breast, and hold up better to a long braise. Some recipes call for prosciutto rather than pancetta in the battuto, and/or white rather than red wine. Some recipes call for braising the duck in tomato paste diluted in broth rather than canned or fresh tomatoes. Add, finally, some recipes call for fresh or dried wild mushrooms for an even more rustic effect.

Pappardelle on Foodista

How to make broth


Making broth is so easy to do, and the results are so wonderful and so almost infinitely useful, I really don't understand why it's almost disappeared from home cooking. Well, actually, I can guess: fewer and fewer people cook anything at all, let along things like homemade broth, which has an undeserved reputation for being difficult to make. Add to that the undeniable fact that broth takes time, something people seem to have less and less of. But, except for the first few minutes, broth can be left virtually unattended until it's done. I usually start the broth on a lazy Sunday afternoon and just let it simmer while I read a good book, watch a movie or do whatever else I feel like around the house. When it's done, just turn off the stove and leave it until you're ready to eat, then reheat.

Making Broth

Anyway, the essence of making broth is as simple as it gets: you boil meat--usually beef and/or chicken, but veal also makes a nice stock--with vegetables that, in Italian, they call odori because they are meant to provide flavor: onion, carrot and celery. (As I've mentioned often before, these are the same that are used for soffritto, the base for countless sauces, stews and soups.) To these basic flavorings, I often add a spring of parsley and/or a bay leaf, as well as a few whole black peppercorns and a clove or two.

Step 1: If your main objective is some flavorful broth, you add whatever meat(s) you're using to a large pot of cold, well-salted water. Tonight, I used a lovely free-range chicken and a beef shank:


Step 2: You bring the meats just to the boil, skimming off the scum that inevitably rises to the top as it comes to the boiling point:

NB: If your objective is nice boiled meat and the broth is secondary, then bring the water to the boil first and add your meat(s) to the boiling water, and then proceed.

Step 3: While the water is coming to a boil, prep your vegetables:

NB: See notes below for details.

Step 4: Immediately lower the heat to a very gentle simmer, skim off any residual scum and then add the vegetables:

Step 5: Let the meat and vegetables simmer until the meat is quite tender and the broth has a rich flavor. The total simmering time depends on the meat being used: chicken will take an hour or two, depending on the type of chicken, while beef will take about three hours. If you're using both and plan to eat the boiled meats, then you may want to remove the chicken so it does not completely overcook. The water should totally cover all the ingredients, so add more if the water reduces too much, as it will tend to do. Test for seasoning, and don't be shy about adding generous amounts of salt. Broth should not be bland.

NB: You can considerably reduce the time it takes for this step by using a pressure cooker. See notes below for details.

Step 6: Once the meats are cooked and the broth has developed good flavor, switch off the heat and let the broth cool a bit. You can even let it rest on the stove (uncovered) overnight.


You can also use the broth immediately if you like, but it has a deeper, richer flavor after this 'rest'.

Step 7 (optional): If you want a clear broth --important when making a clear soup--strain the broth through the fine sieve or cheesecloth to remove the particles. (If you want a really clear broth, see note below.) If you wish to de-fat your broth, leave it in the fridge overnight; any fat will form a solid white layer on the top, which can then be easily removed.

NOTES:

On the meat
: If making a beef broth, use the same cuts of meat that you would for stewing or other long cooking. I love short ribs, but shank, brisket or chuck would all do fine. Adding a few marrow bones will add both flavor and a bit of body to the broth. Chicken is a bit tricky, especially in the States, as most of the chickens sold in US supermarkets are too young and bland to make a good broth from. However corny it might sound, a free-range, organic bird makes the best broth. A roaster is better than a fryer. Even better would be a stewing hen, if you can find one--if so, you'll need to cook it much longer, up to three hours or perhaps longer. I have found a nice chicken, grown from Italian stock, that goes by the rather odd name of "Pollo Buono" or "Good Chicken". Even though it appears to be a young chicken, it has rather firm but very flavorful flesh, which is great for making broth. When dealing with a regular supermarket chicken, however, truth be told, I sometimes cheat and add a bit of bouillon to boost the flavor. (I like the brand with the obnoxious name of "Better than Bouillon".) My favorite broth is made from both beef and chicken, sometimes called
brodo classico, or 'classic broth', in Italian .

On the vegetables: To make broth I don't cut the veggies fine, but rather leave them in large chunks or even whole. I usually peel the carrot and cut them and the celery into long segments (about 2 in/5cm long), trimming off the ends. The onion I usually leave whole, including the skin, which provides some pleasant color to the broth, but slit it about halfway down the middle (from the top, not the root, of course) and nestle one or two cloves (chiodi di garofano) inside. You can add some additional vegetables, if you like, including most commonly tomato, garlic and, occasionally an unskinned firm-fleshed potato. (A mealy potato would fall apart and cloud the broth.)

On using a pressure cooker: You can considerably reduce the cooking time by using a pressure cooker. Bring the broth up to pressure and let it cook for about an hour (for beef or 'classic' broth) or 30 minutes for chicken broth. Once you're done, it will take some time to de-pressure on its own, so you can run the cooker under cold water to speed up the process. Since pressure cooking involved little or no evaporation, the broth will tend to be a little 'thin' unless you use less water than you would ordinarily do or (and I would recommend this in any event) you simmer the broth for another 20-30 minutes off pressure to concentrate the flavor.

On clarifying the broth: If you want a really, really clear broth, after straining and de-fatting the broth, bring it slowly to a simmer while you add in the whites of several eggs (perhaps one per liter/quart) stirring all the while. The egg whites will eventually coagulate. By some process that remains mysterious to me, any impurities in the broth will cling to the egg whites, and you will be left with a perfectly clear broth, good enough for consomme or gelatin.

Uses for homemade broth
: Broth has an infinite number of uses. Really good broth is wonderful on its own, with some rice or small pasta like quadrucci or fine pasta like capelli d'angelo broken up into small lengths. It is also lovely with passatelli, a kind of string dumpling made with egg, cheese and bread crumbs. Broth with beaten egg mixed in until it coagulates is called stracciatella, or 'torn apart' soup (after the appearance of the eggs) and is a classic Roman dish. It is best to cook the pasta separately to avoid clouding the broth, then add it to the broth to simmer for just a few moments before serving.

Broth is also a crucial ingredient in making risotto, in all kinds of soups, in sauces, in stews... you name it. And don't throw out the meat. It makes wonderful eating, as a bollito (boiled dinner) either on its own with some salsa verde or rifatto in various ways.


Broth vs. stock: Stock is made in same way as broth, except that you use only beef bones or the carcass of a chicken (or rabbit, duck or turkey) instead of pieces of meat. The bones or carcass are sometimes roasted in the oven before using to bolster their flavor.  You can also the scraps from a leftover roast to make stock as well. Making stock is a great option if you have roasted a bird (say, a Thanksgiving Day turkey) and want to make the most out of your leftovers. But, of course, you will not wind up with any lesso to eat afterwards, and I find the taste not quite as rich as a broth. Use stock in the same way you use broth.


Monday, November 23, 2009

Risotto alla «zucca»


Some readers may wonder why they have not seen a recipe so far this Fall for risotto alla zucca, one of the most popular autumn and winter risottos. Zucca is Italian for pumpkin, but Italian pumpkins are quite different from their American cousins: their taste is more intense and much sweeter, their texture finer, less fibrous. Most recipes aimed at the non-Italian cook recommend substituting butternut squash, but, truth be told, most butternut squash I have been able to find in the US is rather bland in flavor and slightly gritty in texture. It pales in comparison with zucca. I have tried various stratagems to coax some extra flavor from butternut squash—by roasting it, by simmering it in broth, by braising it in butter. All of these improve things and, if you use a rich broth, plenty of onion for the soffritto and ample parmesan cheese for the mantecura to make up for the flavor deficit, you can wind up with an agreeable finished product. But the fact remains, butternut squash risotto doesn't really taste like a true risotto alla zucca.

So what to do? Having tried various kinds of winter squashes without finding an adequate substitute for zucca, I finally tried something completely different that I had stumbled upon in the market: baby sweet potatoes, usually marketed as 'baby yams'. Eureka! While the taste isn't quite the same, baby yams share the intense sweetness and velvety texture of the zucca I had known in the 'Old Country', producing a risotto that was remarkably like a true risotto alla zucca. The only downside is that baby yams don't appear in the markets until well into November, so you'll have to wait a bit longer before you can enjoy this seasonal dish.

So there you have it: just make the risotto as you normally would, starting with a soffritto of onion sautéed in butter. Here you want only butter, and a lot of it, to underscore the sweetness that is characteristic of the dish. Then add your baby yams, peeled and cut into small dice, and allow them to insaporire. Then proceed in the usual manner, toasting your rice, then adding successively white wine and broth, and ending with a mantecatura of both grated parmesan and a dab of sweet (preferably cultured) butter. The yams will have dissolved completely into the risotto, lending its sweet flavor, lovely golden color and a subtle, velvety texture to the rice.

NOTES: Although I have used the term 'yam' in this post, true yams are a tropical vegetable grown in Africa and the Caribbean (among other places) but rarely found in the US. Sweet potatoes, which are widely cultivated in North America, are not related botanically to yams, but growers of sweet potatoes decided to call them yams as a marketing device, to distinguish them from regular potatoes and from a firmer fleshed varietal of sweet potato that had previously predominated the US market.

There are several varietals of the Italian zucca but all fall under the botanical species of cucurbita maxima. Pumpkins grown in the US are of the same genus cucurbita and various species, including cucurbita maxima, are cultivated here. So it is a mystery to me why there is such a difference in taste and texture between those grown in Italy and those in the US. If anyone can enlighten me, I would be much obliged!

965MZQMCAVP3

Saturday, November 21, 2009

Ossobuco and risotto alla milanese


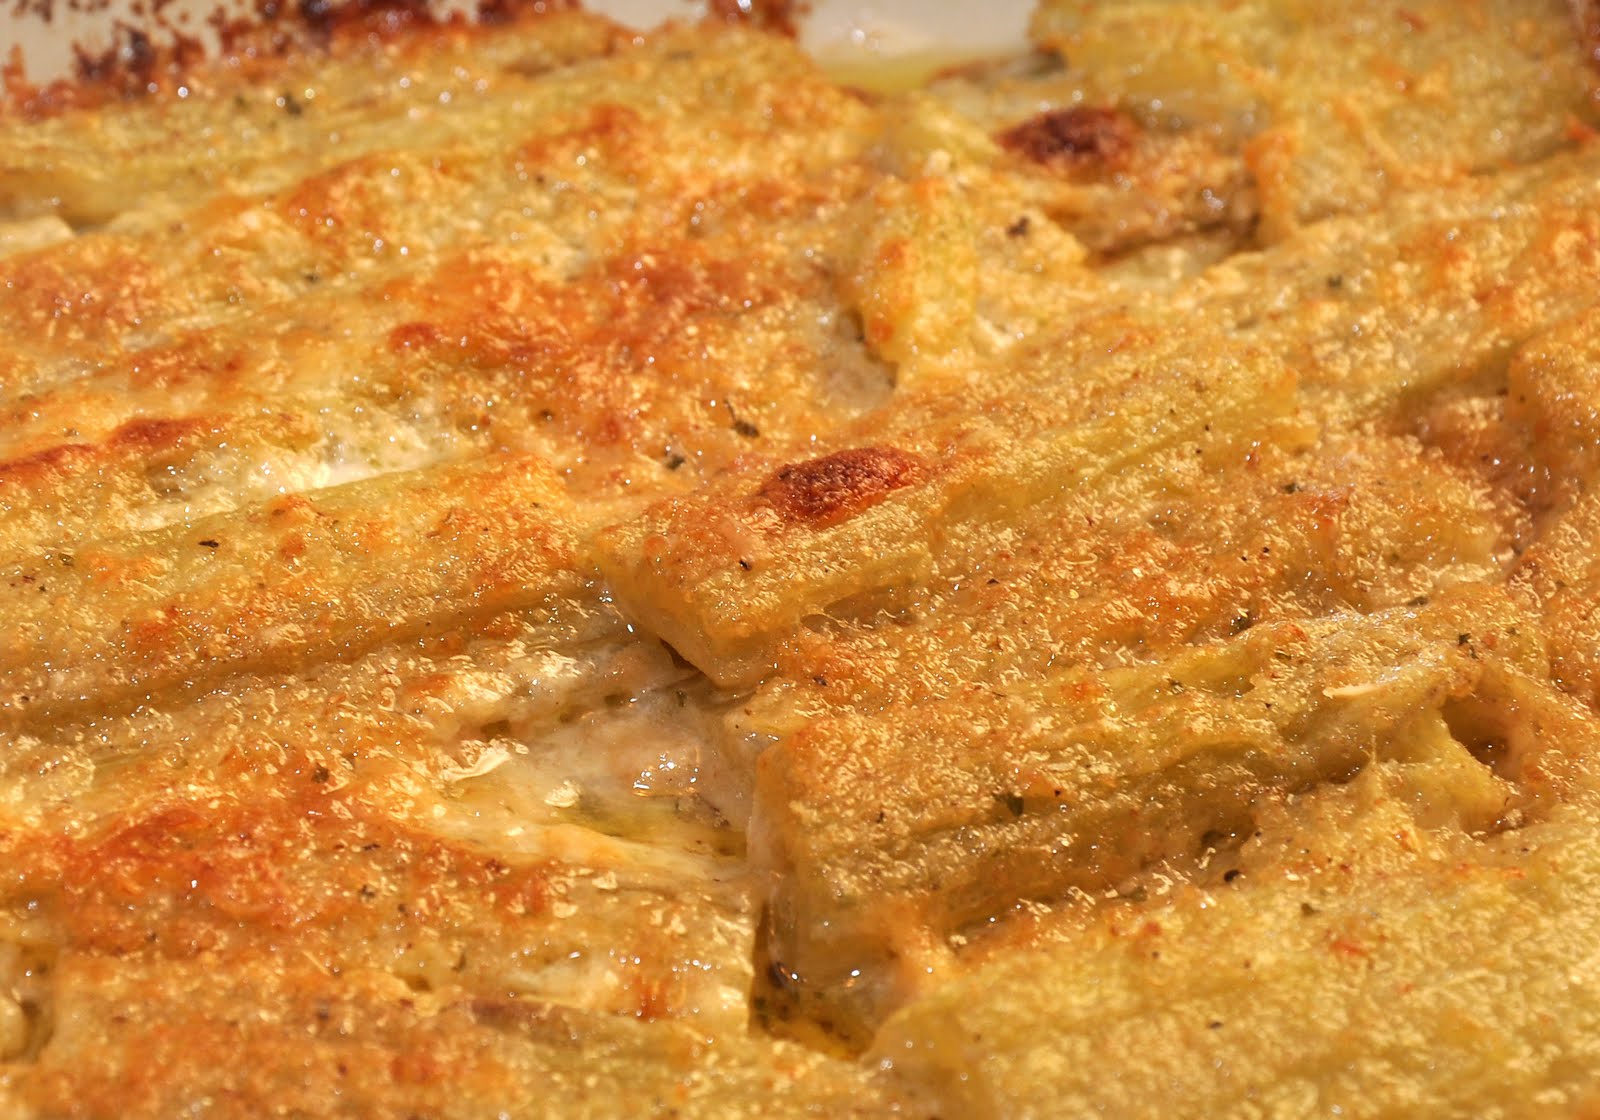
Perhaps the most emblematic dish of the cuisine of Lombardy, the northern Italian region of which Milan is the capital, ossobuco (or oss bus in Milanese dialect) is veal shank, cut into thick rounds of shank meat around a marrowbone. It is typically served with risotto alla milanese, one of the few examples in traditional Italian cooking of the piatto unico combining both a primo and secondo on a single plate.

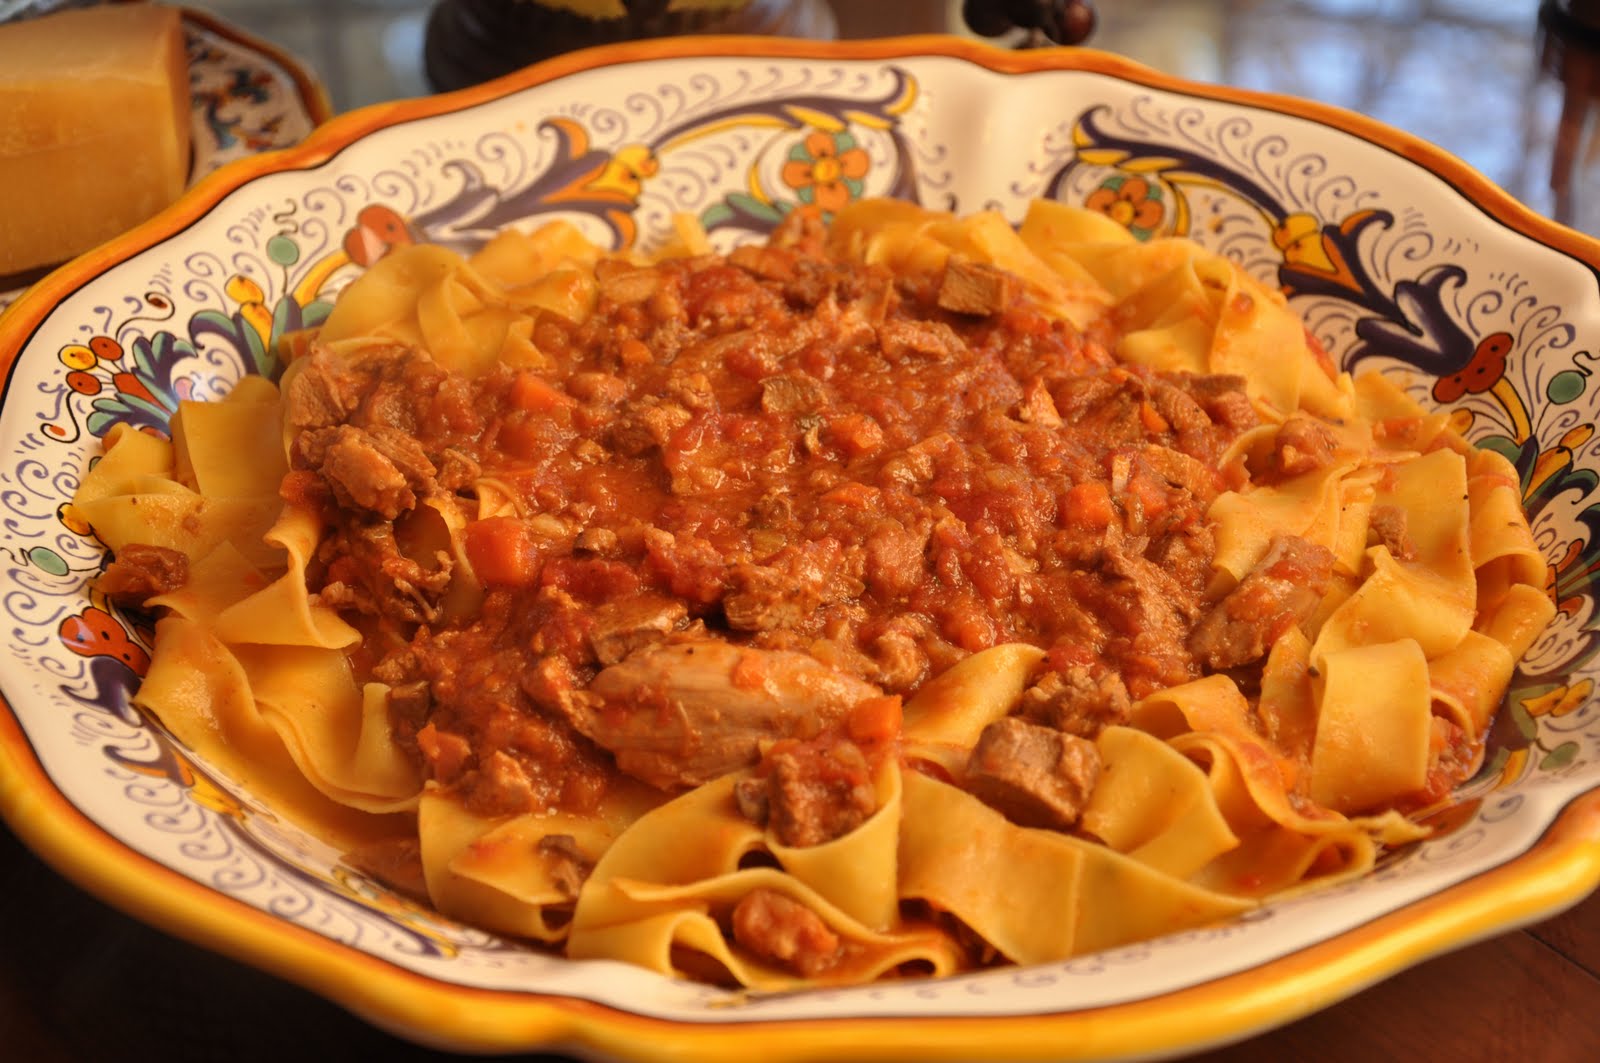
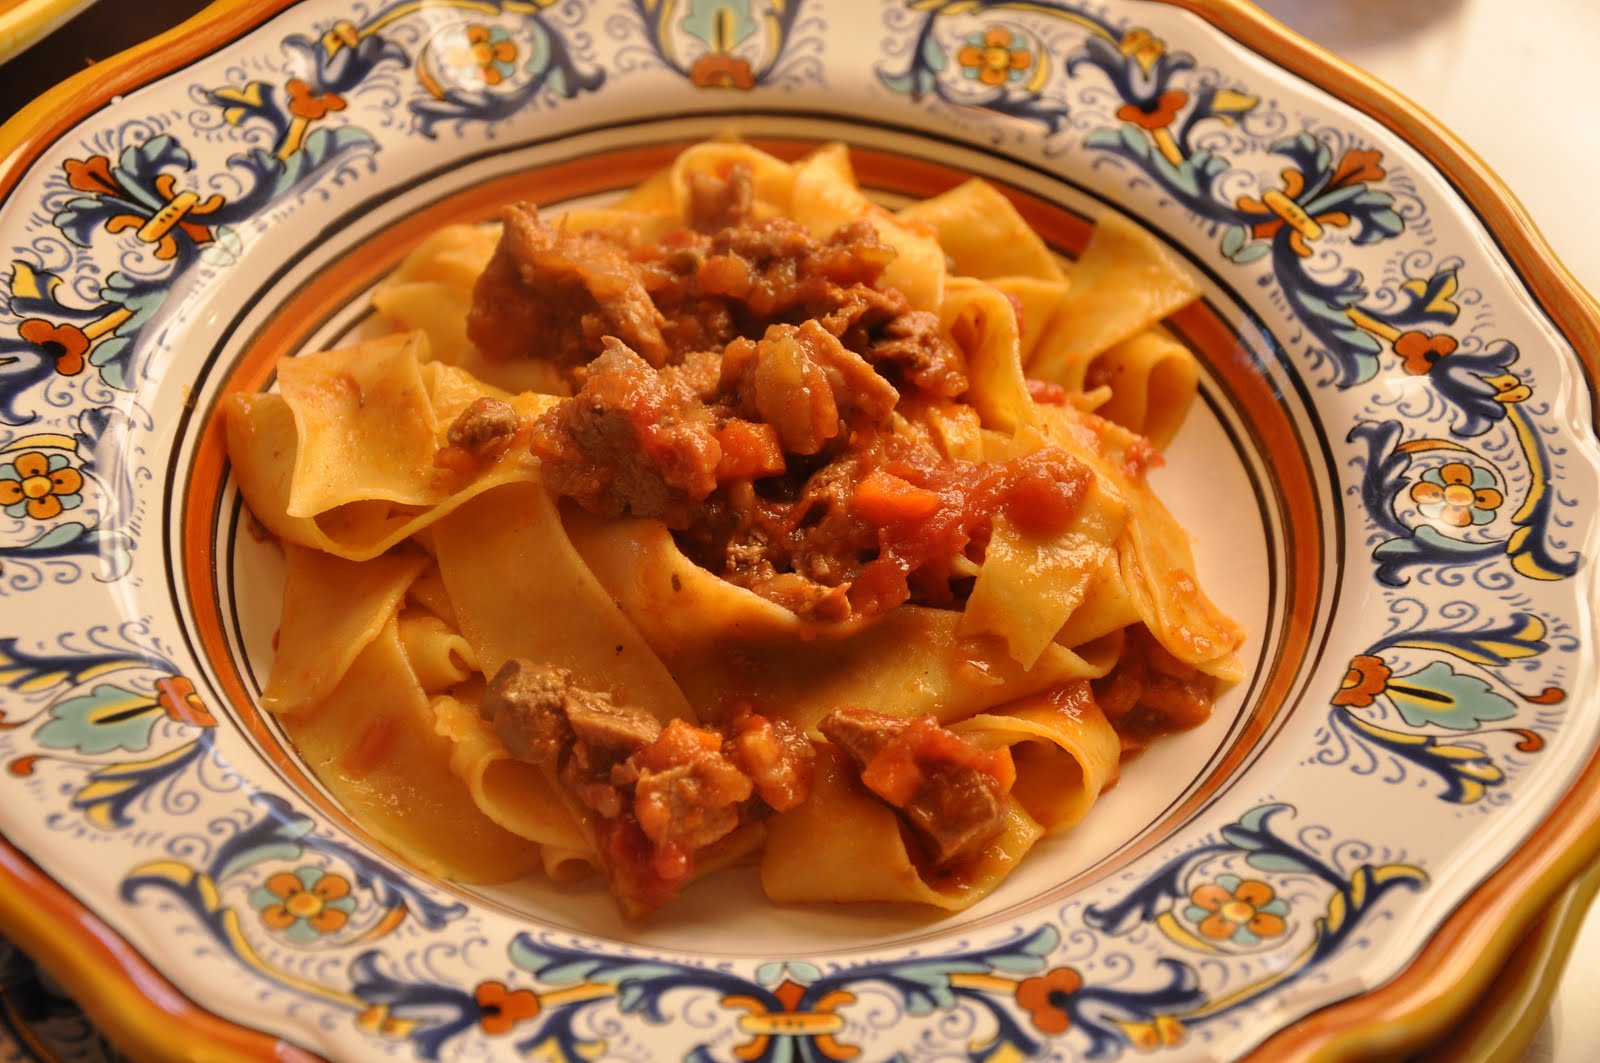
To make the veal shanks: There are numerous versions of ossobuco, but most Milanese recipes call for making a simple soffritto of chopped onion sautéed in butter (or butter and oil). Once the onion is well softened and translucent, place rounds of veal shank, lightly floured and trimmed (see below), and brown nicely on both sides. (Some recipes call for removing the onion to prevent its browning, but I find that simply shifting it to the edge of the pot works fine.) Then splash the veal shanks with wine, scraping up the sucs that will have formed at the bottom of the pot, lower the heat and cover. (Most modern recipes call for some chopped or puréed tomatoes—which I like to add—but the original recipe is in bianco.) Simmer until quite tender, generally anywhere between 1-1/2 and 2 hours or more, depending on the age and quality of the veal. Add wine or water from time to time if necessary to prevent the pot from drying out, although some veal actually gives off quite a bit of liquid as it braises. At the end of cooking, the juices in the pan should be fairly abundant but thick. Serve on a bed of risotto alla milanese, topped with gremolata—a mixture of parsley, garlic, lemon zest finely chopped together (a food processor comes in handy here) and mixed with salt and pepper—then nap each shank with the pan juices. You can, if you prefer, mix the gremolata into the sauce at the last minute before pouring over your veal shanks.

To make risotto alla milanese: A risotto alla milanese is made in the same way as any other risotto, with the addition of two key ingredients: bone marrow and saffron. You begin as usual with a soffritto of onion in butter, but adding finely chopped bone marrow and allowing it to melt completely. Then add your rice and proceed as for a normal risotto until the rice is almost cooked. Meanwhile, soak some threads of saffron in hot water or broth. When the rice is almost done, add the saffron liquid to the rice and continue until done. Finish off, as usual, with a mantecatura using abundant parmesan cheese. Since this risotto will serve as a 'bed' for your ossobuco and its pan juices, the risotto should be rather more stiff than runny.

NOTES: Ossobuco is one of those traditional dishes that has evolved many variations over the years. The above classic recipe appears in La cucina lombarda by Alessandro Molinari Pradelli, one of the excellent "Quest'Italia" series, and, with some minor variations, in Cuochi si diventa by Allan Bay (who, despite his Anglo-Saxon name, is a well-known contemporary Milanese gastronome) and many other cookbooks. One variation—which you will find in Artusi but also in Marcella Hazan's Essentials of Classic Italian Cooking, is the use of the so-called soffritto italiano, made with the 'holy trinity' of onion, carrot and celery rather than just onion. Perhaps it is just coincidence, but both Artusi and Hazan were romagnoli, not lombardi. Artusi, in fact, concedes that he is not an expert and the making of ossobuco should be left to the Milanese. That does not stop him, however, from offering his version of the dish. Still, made this way ossobuco is very, very good—perhaps more delicious than the more austere original version. In another version, in Le ricette regionali italiane, a single clove of garlic is very lightly browned in the butter and removed from the pot before veal shanks are added. 
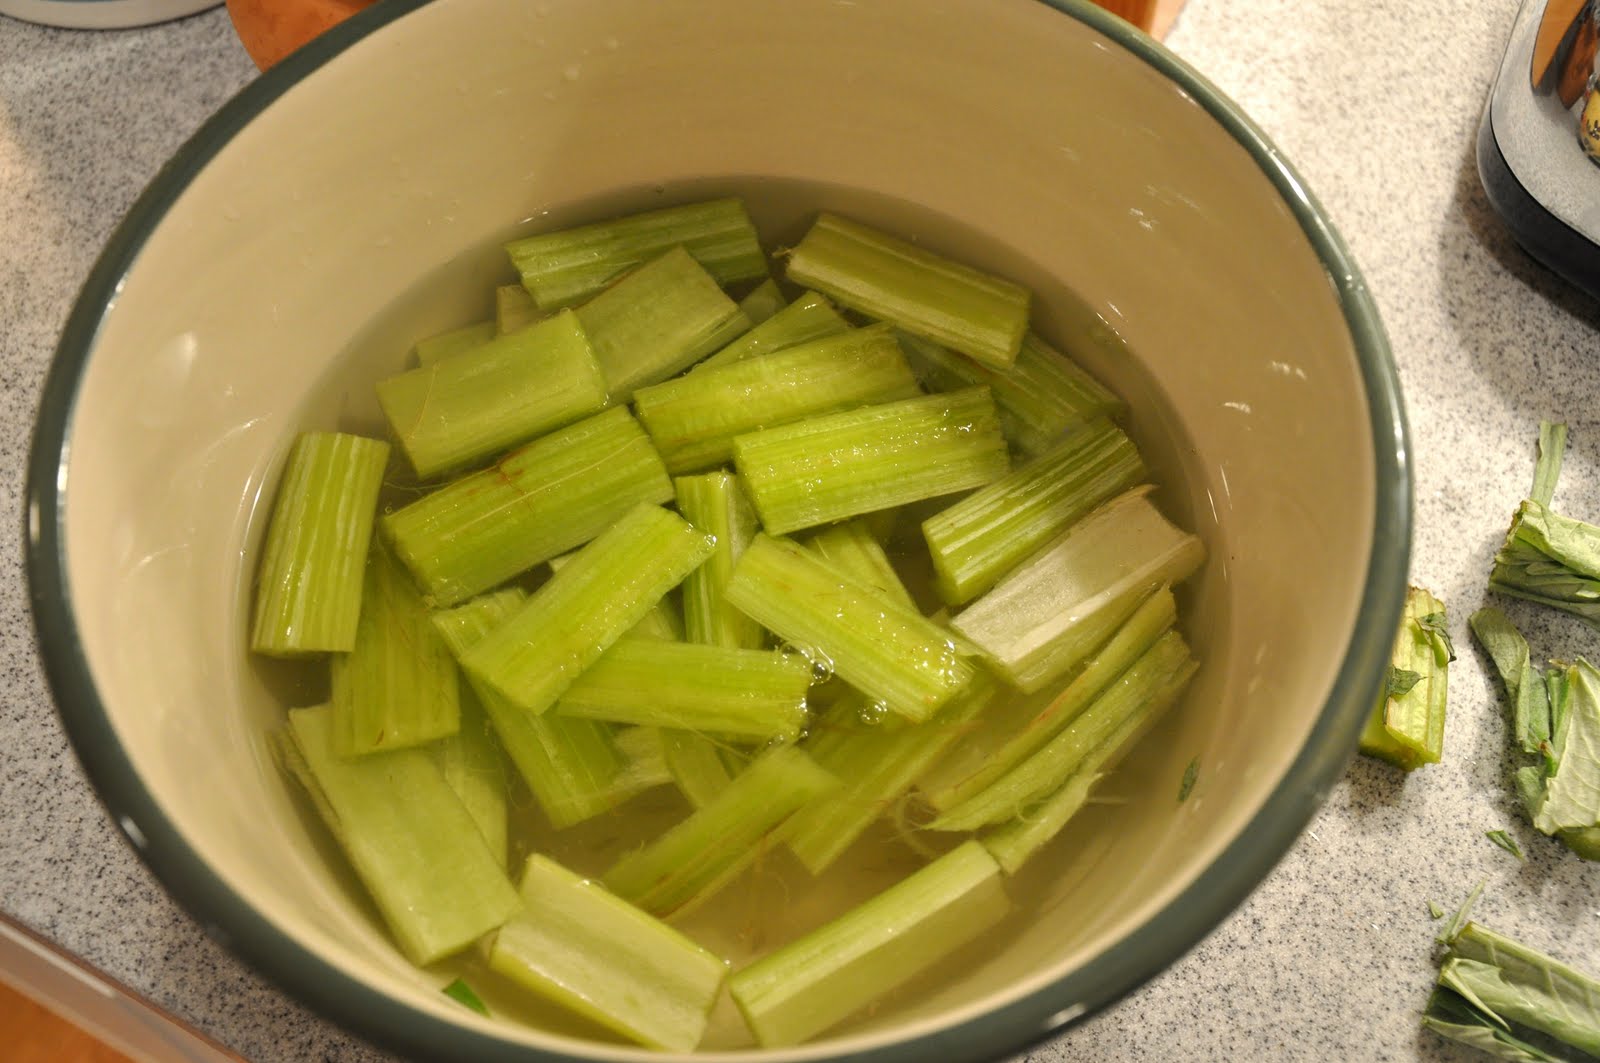
Il cucchiaio d'argento suggests adding carrot and celery not as part of the soffritto but to the braising liquid. As mentioned above, the addition of tomato, which is very common today, is not original to the dish, but, again, it adds a lovely extra layer of flavor.

Recipes also vary widely as to the type and amount liquid in which to braise the veal shanks. White wine is perhaps most common braising liquid, but some recipes call for broth or even just water. The classic recipes call for adding only a bit of liquid to the pot at a time, a typically Italian technique of braising meat called 'arrosto morto', literally 'dead roasting' but more commonly referred to as 'pan roasting' in English. Hazan's version, on the other hand, has you adding white wine and allowing it to evaporate completely (in the usual Italian fashion) before adding enough broth almost to cover the shanks, then placing them, covered, in a hot oven to braise in the typically French manner. This "Frenchified" version is quite good, and I may like it even better than the original.

The gremolata sometimes includes anchovy, as suggested by Ada Boni in Il Talismano della Felicità. I have also seen recipes that include rosemary and/or sage along with the parsley, and some include a bit of meat such as pancetta or prosciutto. I am not a fan of these variations, but try them if they appeal to you. And while risotto alla milanese is the classic accompaniment, ossobuco also goes very well with a plain risotto in bianco or mashed potatoes, or even just with some nice crusty bread.

The veal shank should ideally be from a very young, milk-fed calf, or it will lack the tenderness and delicacy of a true ossobuco. In fact, Allan Bay suggests foregoing ossobuco altogether and cutting older veal shanks into pieces and using it for stew. If you are less fastidious than Bay, just braise the veal for a bit longer until it is quite tender and almost falling off the bone. For older veal—which is most veal sold in the US—the Hazan method of braising the meat in abundant broth rather than the usual Italian arrosto morto method works better. You should trim the shanks by cutting slits in the membranes that hold the shanks together; otherwise, they will tend to curl up on themselves rather lay flat in the pot. Some cooks then tie the shanks with trussing string to prevent them from falling apart—a step that I normally skip do unless I'm making the dish for company.

The use of bone marrow, called midollo in Italian, is consider by most to be a must for an authentic risotto all milanese. You can sometime find it in stores, but more often you'll need to buy marrowbones (also called 'soup bones') and remove the marrow yourself. There are various way to do this. You can scoop out the marrow raw, with a sharp small knife. This can be fiddly work, and not very practical if the bone has not been cut into short enough lengths. To make things easier for yourself, you can either blanch the bones in boiling water or roast them in a hot oven until the marrow has softened up. I often just use the marrow from bones left over from making broth. Marrow that is pre-cooked in this way melts much more readily as well.

Risotto alla milanese is also a dish with some variations, albeit perhaps less profuse. You can, for example, omit the bone marrow if you cannot find it in the store. The result will be less rich and, for many, not a true risotto "alla milanese", but it will be very nice. Some will use the grease from a veal roast instead of, or in addition to, the bone marrow. When not paired with osso buco, some people will top this risotto with some drippings from a roast. (I had this version once in Milan and can tell you the results are superb.) Some recipes call for omitting the wine, which for some give the dish too much acidity. Some even call for red wine instead of white, reportedly a custom imported from nearby Brianza. Perhaps most unusually, the famous iconoclastic Milanese chef Gualtiero Marchesi suggests adding the onion soffritto, mixed with cold butter to form a cream, at the very end of cooking, as part of the mantecatura. Some authors, like Allan Bay, call for using powdered saffron instead of threads, to ensure that they dissolve properly into the dish; saffron is one ingredient that cannot be spared.

There are a number of stories in circulation about the origins of the dish. If you read Italian, this page gives you some of the most common ones. The dish has ancient antecedents, but the modern recipe as described here dates from the very early 19th century.

The word 'ossobuco' comes from 'osso' meaning bone and 'buco' meaning hole. It refers to the 'hole in the middle of the shank'—the marrowbone. A special treat for the diner is to scoop out the soft marrow from the bone and savor it. The operation is done with a tiny spoon sometimes jocularly called an 'agente delle tasse' or an 'esattore'—a tax collector!

Osso Buco on Foodista

A Word of Thanks


Dear readers,

Memorie di Angelina has reached another milestone: it now has over 750 followers and subscribers! Some of you follow the blog through Google Friends Connect, some through Facebook's Networked Blogs, some by email or a reader, some on Twitter. Whichever way you choose to follow these posts, thank you for your attention and loyalty. Nonna Angelina would be so proud!

Sincerely,
Frank

Friday, November 20, 2009

Fregula e salsiccia


A friend recently gave me a gift of fregula, a typical Sardinian pasta. I had heard of fregula, but had never eaten it—nor did I know any recipes for preparing it, so I dove into my cookbooks and surfed the internet for more information, finding this recipe for making fregula with sausages that intrigued me.

You basically proceed as if you were making a risotto, starting with a soffritto of onion sautéed in olive oil. When the onion is translucent and quite soft, add 100g (3-1/2 oz.) of crumbled sausage meat and allow it to insaporire over moderate heat for a few minutes, until the sausage meat has lost its raw coloration without caramelizing. Then add your fregula (170g or 6 oz.) and allow it in turn to absorb the flavors of the onion and sausage for a minute or two. Then add broth to cover and simmer, covered, until the fregula has absorbed all the broth and is cooked al dente. Top with grated pecorino if you like and serve.

NOTES: Fregula, as mentioned above, is a typically Sardinian pasta made from semolina flour reminiscent of large-grained Israeli couscous, with origins in Moorish cuisine. The semolina dough is rolled into small balls and lightly toasted, which gives it a pleasantly nutty flavor. If you haven't tried it, it is definitely worth seeking out!

The best known fregula dish is fregula con arselle (the latter being tiny clams found on the beach but are rarely found these days—you can substitute small littlenecks or Manila clams). Fregula is also made with soup, in particular bean soups. This page on about.com has some interesting fregula (and other Sardinian) recipes.

You can add a bit of peperoncino to your soffritto if you like a little heat. I later found this lovely sounding recipe for fregula with sausage and leek, a bit more involved than the one above.

Saturday, November 14, 2009

Strozzapreti ai funghi


There are all sorts of mushroom sauces, some of which have made their appearance on this blog: the mushroom and tomato sauce, for example, that goes so well with dried pasta, or the mushroom cream sauce for gnocchi or even ox tongue. None of these are very hard to make, but this mushroom sauce may be the simplest mushroom sauce of all: just begin with a simple garlic soffritto, then add sliced mushrooms and sauté, seasoning with salt and pepper, until they have rendered their juices and softened. Turn off the heat and add chopped parsley—while there is still ample mushroom liquid in the skillet.

Meanwhile, boil your strozzapreti (or other pasta of your choice) in abundant, well-salted water until al dente. Add to the mushrooms and mix well, allowing the pasta to absorb the mushroom juice. Serve immediately. No need for grated cheese.

As always, a good rule of thumb is to use equal amounts (by dry weight) of mushrooms and pasta. Use enough olive oil to cover the skillet nicely. The other ingredients—garlic, salt, pepper and parsley—are all to taste. 

NOTES: Any mushroom will work for this dish, including plain button mushrooms, but, of course, wild mushrooms will provide a much more interesting flavor. Porcini or chanterelles (pictured) are particular nice choices. If you are working with button mushrooms, you can give the dish more character by adding dried porcini as described in the post on penne ai funghi. And if your mushrooms, for whatever reason, do not give off any juice, you can add a bit of broth.

The choice of pasta is pretty open. Egg pasta like fettuccine or tagliatelle would also go nicely with this dish, as would spaghetti or a stubby pasta like penne or, as pictured here, strozzapreti. The name of this pasta means 'priest strangler' and resemble elongated cavatelli. The name is also used to describe a few others dishes as well. (See this article for details.)

In addition to, or instead of, parsley, if you have access to it, the herb called nepitella gives the dish a nice flavor. (See penne ai funghi for a bit more background on nepitella.)

The sauce for this dish can actually serve as a side dish if you continue cooking the mushrooms until their juices have been absorbed and the mushrooms begin to sizzle and brown. It is usually called fughi trifolati, of 'truffled mushrooms' because thinly sliced mushrooms made this way are said to resemble truffle shavings.

Tuesday, November 10, 2009

Fagiolini in umido


While Sundays dinners at Angelina's house were once-a-week, belly-busting, meaty affairs, she practically lived on vegetables during the week. This was long before vegetarianism went mainstream and she would not have thought of herself as a 'weekday vegetarian' or anything of that sort. It was just the way that she grew up eating in a family of modest means living in small southern Italian village. But frugality had its benefits, and sure lydiet was one reason Angelina lived to be 98 years old.

In any event, when I was growing up one of my favorite vegetable dishes in Angelina's repertoire were these green beans (or string beans, as we used to call them) stewed in a simple tomato sauce.

You start, as so often, with a soffritto of onion and/or garlic sautéed in olive oil. Then you add best quality canned tomatoes, crushed in your hands, and allow them to simmer. Meanwhile, blanch your trimmed green beans in abundant, well-salted water until crisp-tender, add them to the tomato sauce along with some of their cooking water and allow them to simmer until quite tender.

NOTES: This recipe is quite forgiving, and even green beans of indifferent quality will turn out nicely. In fact, if anything, I find that regular 'garden variety' green beans turn out better cooked this way than the fancier—and more expensive—French green beans. (French green beans, on the other hand, are preferable when making fagiolini all'agro, where their tenderness and delicate flavor can really shine.) If you can find them, the extra long string beans sometimes sold in Asian markets in the US, known in Italy as serpenti, are especially nice.

It is important to cook the green beans to the right degree of doneness. They should fully cooked, not crisp-tender, with no trace of that green bean raw taste, but not overcooked and soggy either. It is impossible to give a standard cooking time, since it varies wildly according to the freshness and thickness of the beans, anywhere between 10 minutes for very tender young green beans to 30 minutes or more for more mature ones.

Angelina would vary the dish from time to time by adding other vegetables to simmer along with the green beans, typically sliced carrots, cubed potatoes or boiled (or fresh) cranberry beans. In the summer, adding a few leaves of basil give the dish a nice fresh taste. Another variable is the 'sauciness' of the dish. Angelina's version of this dish was actually quite brothy, with lots of rather thin tomato sauce to sop up with bread. In modern-day Italy, however, where this dish is a standard contorno, it is customary to reduce the sauce down until the dish is almost dry. And while Angelina's version was obviously Neapolitan, in Tuscany they also make fagiolini in umido, but with a soffritto of onion, carrot and celery rather than onion and garlic.

Some recipes call for adding the raw green beans directly into the simmering tomato sauce, rather than putting them through an initial blanching. I've tried it both ways and, for reasons I cannot really explain, the blanching really does result in finer flavor and texture.

The dish is typically a side dish or contorno, but like Angelina I sometimes eat just this, with some crusty bread, as a light supper.


Sunday, November 8, 2009

Moules au curry


Here's a wonderfully rich but yet light supper dish—steamed mussels in a curry cream sauce—from Belgium, the world capital of mussel dishes. With a crusty baguette to sop up the delicious sauce, you have a one-way ticket to culinary nirvana.

Begin by lightly sautéing chopped shallot and parsley in butter (or butter mixed with some olive oil), sprinkle this soffritto with a bit of cayenne pepper (not too much, just enough to give the dish a little 'kick') then pour over a cup or so of white wine. Allow to simmer for a few minutes, then add your mussels, in their shells. Cover and allow the mussels to steam until they open, then transfer the mussels with a slotted spoon to a heated serving vessel (I find that an enameled cast-iron soup pot is ideal) and keep warm while you make the sauce.

Allow the juices in the pot to reduce for a minute or two over high heat, then add a good pour heavy cream and sweet curry powder (or curry paste if you have it) to taste. Allow to reduce to a saucy consistency and pour over the mussels. Sprinkle with a bit more chopped parsley and serve immediately.

As for measurements, I find that 500g or a pound of unshelled mussels is about right for someone with a healthy appetite, if you are serving this as the main course of a light supper. As a starter, count on half of that. For each serving of mussels, use one small shallot and a sprig of parsley for the soffritto, and a small glassful each of wine and cream. The amounts of cayenne and curry are a matter of taste, but I'd add a small spoonful or the cayenne and several good shakes of curry. But exact measures here, as for so many dishes, are not that important. Your judgment and experience are your best guides.


NOTES: Try to find smallish mussels, which have more delicate taste and texture. These days mussels are raised in 'mussel parks' rather than collected on the shore so that they carry very little (if any) sand, but if you have any doubts about it, you can soak them in water for about an hour before cooking. Check the juices after you have removed the steamed mussels from the pot; if you see any sand, then strain the juices through cheese cloth before proceeding. Mussels also used to come with 'beards'—those threads that the mussel used to attach itself to whatever it was growing on. These days mussels are also sold de-bearded but if not, the beard needs to be removed.

The dish is not really meant to be 'hot' but simply savory. The curry should be of the 'sweet' variety and the cayenne used with discretion. But there is something about the combination of sweet—from the cream and shallots—and savory from the curry that is just exquisite. Do try it some time.

If you omit the cream and curry, this dish becomes the classic moules marinières. Mussels steamed this way is the departure point for an incredible variety of variations, with tomatoes, saffron, fennel... and many other variations on the theme. In Belgium, steamed mussels are often paired with French fries (which are really Belgian, not French, in origin, by the way) and washed down with a good beer. Italians also make steamed mussels; if you want to try one example, see my recipe for a sauté di cozze.


Saturday, November 7, 2009

Tagliatelle al tonno e panna


Here's a dish for iconoclasts: tagliatelle with tunafish simmered in butter, cream and parmesan cheese—a dish that violates one of the cardinal rules of Italian cooking: never mix fish and aged cheese. But this may be one of those exceptions that prove the rule, as the result is really very good.

Sauté a can of good quality tuna packed in olive oil, together with a minced anchovy fillet, in some sweet butter, mixing well and shredding the tuna with a wooden spoon as you stir. Add cream to cover and allow the cream to reduce until it reaches the nice 'saucy' consistency. Add a generous amount of chopped parsley and keep warm.

Meanwhile, cook your tagliatelle al dente and add to the pot, along with some of the pasta water and a generous dusting of grated parmesan cheese. Allow the tagliatelle to simmer in the tuna sauce, mixing well, for a minute or two until nicely coated. Serve immediately, with more grated cheese on top if you like.

NOTES: In Italian cooking, pasta dishes with tuna almost always come either in rosso (with a tomato sauce) as in this post, or in bianco, where the tuna is simmered in olive oil, often with a soffritto of garlic and parsley. In either version, capers and olives are often paired with the tuna. But this version is a real departure from these more common versions but you may like it a lot. For readers in North America, on the other hand, the taste will be familiar, reminiscent of a good old tuna casserole.

The same sauce works equally well—perhaps even better—with canned or chopped smoked salmon. I've seen a menu item calling for the addition of saffron, which I have not tried but sounds intriguing. You can omit the anchovy for a milder flavor and/or sauté a bit of finely chopped shallot, white onion or garlic in the butter before adding the fish for a more savory effect.

Besides tagliatelle, this dish would work well with the wider pappardelle or even stubby dried pasta like penne or rigatoni. I would avoid long dry pastas like spaghetti or linguine.

Friday, November 6, 2009

Taglierini al sugo d'arrosto


Here's a neat idea for a really quick and savory pasta whenever you happen to roast  veal, chicken, beef or pork. Save the drippings and use them as a sauce for pasta—a sugo d'arrosto. It's that simple. If your roasting pan is flameproof, you can even throw your pasta right into the pan. Otherwise, deglaze and scrape up the sucs from your roasting pan (together with the fat and any bits and pieces of meat and vegetables if you like) then save it for your pasta. Gently heat up your sugo d'arrosto in a skillet and add your cooked pasta, and mix well over low heat, adding some of the pasta water to help coat the pasta. with the sauce. Depending on the roast, you may want to mix in or top with a little grated parmesan cheese.

For this dinner, I used the all juices and bits and pieces of pancetta, chicken and rosemary left over from the pollo in porchetta I had made the previous evening. It was so tasty on its own that it didn't need or want cheese.

NOTES: This sauce, which hails from the Piemonte region, where it is also called tocco d'arrosto, meaning literally a 'touch of the roast'. It is typically used to dress taglierini (known as tajarin in Piemontese dialect) as picture above, but it is lovely also with tagliatelle or even to dress stuffed pasta like agnolotti. Almost any fresh egg pasta would probably do, as would even a 'factory' pasta like rigatoni. If you want an elegant dish, you can strain the sauce through a sieve, but personally I really like all the bits and pieces.

If you haven't made a roast, Marcella Hazan offers an alternative recipe in her Essentials of Classic Italian Cooking. It calls for making a 'mock' sugo d'arrosto—which for some reason she calls a butter and rosemary sauce—by sautéing a sprig of rosemary and a few garlic cloves in butter and then melting a beef bouillon cube into the resulting sauce. It's not bad at all, although obviously second best to using real sucs from a roast.

Wednesday, November 4, 2009

Spaghetti alla puttanesca


Spagetti alla puttanesca is another weeknight stand-by in our house. So quick and—for lack of a better word—lusty.

You begin as if you were making an aglio, olio e peperoncino, lightly sautéing a few cloves of garlic, along with a peperoncino or two, in olive oil in a skillet until the garlic is just beginning to brown a bit. Then add canned tomatoes, crushed with your hands, and simmer until the tomato is well reduced to a saucy consistency and separated from the oil. Add, to taste, capers, anchovy fillets and black Gaeta olives. Turn off the burner and let them cook just with the residual heat. If you like, you can also add some chopped parsley, just before you add spaghetti, cooked very al dente in well salted water. Mix well and serve immediately.

NOTES: Of course, as with all classic dishes, there are any number of variations on the theme. The above recipes is my personal variation, actually, on the classic recipe, which would have you add the anchovies, (chopped) capers and, if using, olives to simmer along with the tomatoes. In the classic version, these garnishes lend their flavor to the sauce. Personally, I prefer to leave the anchovy fillets whole, and add  these garnishes at almost the very end, barely cooking them only with the residual heat in the skillet. This preserves the individual 'personality' of each ingredient. The portions of capers, olives, anchovies and peperoncino can be adjusted to your personal taste. Some recipes omit the olives, while some call for chopped parsley to be added to the sauce just before the pasta. I've seen recipes calling for onion and/or basil as well, although these ingredients would tend to give the sauce a 'mellower' character that I personally don't associate with a puttanesca.And, please, no grated cheese...

The sauce is at its best if you use salted anchovies (which need to be filleted and rinsed) and salted capers, but if you don't have any on hand, anchovies packed in oil and capers in vinegar will do. (Rinse the capers, whether in salt or vinegar before using them.)

As some of you probably know, the name of the sauce comes from the word puttana, which means "whore". (Hey, don't kill the messenger!) The dish is also sometimes called by the slightly more genteel name of pasta alla malafemmina, which loosely translates into something like 'naughty lady' or even ' evil woman' or just 'streetwalker'. It is also known by the even more euphemistic pasta alla belladonna--'beautiful woman'. I've always heard two stories about where the name comes from. One is that the name is a tongue-in-cheek allusion to the 'lusty' nature of the sauce. The other is that being very quick to make, this dish was favored by professional ladies because it could be prepared and eaten between 'shifts'. The dish is probably Neapolitan in origin, although some think it may be Sicilian. But stories abound about how the dish got its name. (For those who want more background and read Italian, check out this interesting blog entry or this one. For some background in English, click here.)


Tuesday, November 3, 2009

Zuppa di scarola e fagioli


Here's a quick and easy dish, typical of the Campania region of Italy, that is a cold weather weeknight staple at our house: escarole and bean soup.

You begin, as always, with a soffritto by sweating a thinly sliced onion in olive oil until translucent, then add a small head of escarole, sliced into very fine ribbons. Cover and allow the escarole to reduce, mixing from time to time so they absorb the flavor of the soffritto. Then add boiled or canned cannellini or borlotti bean along with enough water or broth to cover the ingredients. Cover and allow to simmer until the escarole and beans are quite soft, about 15-20 minutes. If, like me, you like a thick soup, then along the way crush some of the beans with a wooden spoon against the side of the pot. Place slices of day old bread, either toasted or fried in olive oil if you like, in the bottom of your soup bowls, then pour the soup over. Drizzle with un filo d'olio, top with a generous grinding of black pepper and serve. That's all there is to it.

NOTES: If you like a little heat, you can add some red pepper flakes to the soffritto. For a bit more assertive taste, make the soffritto with garlic, either instead of or along with the onion. And for a meatier dish, you can add some pancetta and/or cook the soffritto in lard instead of olive oil. And if you would like your soup in rosso, add a bit of tomato purée after the soffritto is done, allowing it to reduce before you add your escarole. Some recipes call for blanching and squeezing the escarole dry before adding it to the pot, but I find this unnecessary.

Sunday, November 1, 2009

Arrosto di maiale al latte


I first read about this simple pork roast braised in milk in Marcella Hazan's first cookbook The Classic Italian Cook Book: The Art of Italian Cooking and the Italian Art of Eating (1973), but you can find this well-known dish in many recipe books, including the venerable Artusi and Ada Boni's indispensable Talismano. If you have somehow missed trying this dish, it will be a revelation. 

Season a pork roast (see below) with salt and pepper, then brown it in butter (or butter mixed with a bit of oil to retard burning) along with a clove or two of garlic and a sprig of rosemary in a Dutch oven or casserole in which the roast fits snugly. (Remove the garlic as soon as it begins to brown.) Pour enough milk to come halfway up the roast, cover and allow to simmer slowly until the pork is done and the milk has reduced and separated into dark brown curds and fat. If the pork is done before the milk has reduced—which is likely if you are using a pork loin or tenderloin—then remove it and keep it warm while the milk continues to simmer, then return the roast to the casserole to reheat when the sauce is ready.

If you are having a family-style meal, you're done. Just slice the roast, nap with the sauce and serve. It will not be particularly pretty but it will be very tasty. If you want a more elegant effect, then you can do one or both of two things: add some heavy cream to the milk, which will cause the sauce to amalgamate, and continue simmering until the sauce is dark and smooth (see photo). You can also blend the sauce (with or without the additional of cream) to a smooth and perfectly even consistency.

NOTES: The dish is simplicity itself, but there is one point you need to watch out for: the old recipes called for braising an arista (pork loin) for a couple of hours, enough time to allow the meat to become fork-tender and the milk to reduce completely. But these days pork (at least in the US) is bred for leanness, which means that cooking a loin for that long is likely to result in dry, overcooked meat. So try to find a pork loin with as much fat on it as you can, then carefully gauge the internal temperature after the first 30-45 minutes until you reach 65°C/150°F, at which point you can remove the roast from the casserole and let it rest while the sauce continues to simmer. The meat will continue to cook as it rests. (NB: The USDA recommends cooking to 70°C/160°F for health reasons, particularly pregnant women, children, the elderly and those with decreased immune function.)

In the alternative, you can use another cut of pork that will tolerate a longer cooking time without drying out, such as the shoulder. The taste will be lovely, but a shoulder roast tends to 'shred' when carved, so don't expect the neat little round slices you get from the loin.

Artusi's recipe (No. 551 in La scienza in cucina, if you're curious) calls for placing the pork roast raw into the milk and then browning it at the end, when the milk has reduced into fat and curds. He then tells you to remove the roast, skim off the excess fat and add some fresh milk, which will have the effect described above of turning all the curds into a smooth sauce. Boni's recipe calls for rubbing the roast the night before with salt and pepper and allowing it to marinate overnight, omitting the garlic and rosemary. She also suggests an elegant finishing touch of shaving white truffles on top of the roast. (Sounds wonderful, if you can afford it!)

Some other recipes call for using cream instead of milk—which is no doubt delicious, but might be a bit heavy for modern tastes. Hazan's recipe is even more austere than the one described here: like Boni, she omits the garlic and rosemary, seasoning the dish only with salt and pepper. Other recipes, on the other hand, call for the addition of some cloves (chiodi di garofano),  sage and/or a bit of lemon zest; others call for a splash of cognac or other liqueur. If you prefer, after the initial browning, you can braise the roast in a hot oven (200°C, 400°F).

I find the ideal casserole for this dish is an oval, enameled cast iron Dutch oven, of the kind made by Le Creuset or Staub. The shape allows the roast to fit snugly, and the heavy cast iron ensures slow, even cooking.