Showing posts with label Toscana. Show all posts
Sunday, November 28, 2010
Zuppa di porri
'Tis the season for soups! When the temperatures dive, there is simply nothing that takes the chill off like soup. The wonderful thing about soups is their enormous variety: they can be thick and stick-to-the-ribs, whole meals in themselves, or they can be light, even austere, just enough to whet the palate as the start of a formal meal or as a light supper.
Here is a lovely example of a medium-bodied soup, none too heavy but very satisfying at the same time. It's particularly nice during the holiday season, when you may feel like something warming but not too filling, a nice respite between those humongous holiday meals. The starring role is played by the leek, an often overlooked member of the onion family. Or, at least, I tend to overlook it, which is too bad because it has an incomparably savory yet mellow taste that makes any dish that contains it truly special.
Ingredients (for 4-6 servings)
5 leeks
100g (4 Tbs.) butter, or a combination of equal parts butter and olive oil, or just olive oil
20g (2 Tbs.) flour
Salt and pepper to taste
1 liter (4 cups) broth
4-6 slices of good-quality crusty bread
Grated parmesan or gruyère cheese
Directions
Rinse the leeks if necessary (see below) and trim off the root end and green tops. Cut the stalks into thin slices.
Sauté the leek slices in the butter, butter and oil mixture or the oil over gentle heat until they are well reduced and quite tender, without browning, about 15-20 minutes. Season the leeks with salt and pepper just after you add them to the skillet.
Sprinkle the flour and mix it in well, letting it sauté as well for a minute or two. Then add the broth, mix it well to fully incorporate the flour into the liquid, and let simmer, semi-covered, for another 15-20 minutes.
Meanwhile, toast your slices of bread and place each slice in the bottom of a soup bowl for each diner. Sprinkle the slices with some grated cheese. When the soup is done simmering, ladle over a nice serving into the soup bowls. Sprinkle over some more cheese and top with a nice grinding of black pepper and—if you like—a drizzle of best quality olive oil.
You can serve this soup immediately, but it is best after a few minutes' rest, which allows the soup to soak into the bread.
NOTES: These days leeks are often sold pre-washed, and can be used without fuss. But if you see that your leeks are gritty, make sure to wash them well before using. You will need to split them down the middle to make sure you remove all the grit. And, by the way, don't throw away the green tops—they are a great addition when making homemade broth, either instead of or in addition to the onion.
Speaking of which, for a simple soup like this one, where success or failure will depend on the quality of the ingredients, the broth should really be homemade. (See this post for the master recipe.) You can make your broth with beef (the usual choice) or chicken or a mixture of the two—the so-called brodo classico—and, this time of year, you can also use a turkey carcass if you happen to have one around the house…If you want to go vegetarian, then vegetable broth will, of course, do the job.
The choice of sautéing medium will subtly influence the dish. The traditional recipe calls for all butter, which gives the recipe a pleasant sweetness. But, personally, I prefer to use olive oil or a mixture of butter and olive oil, which provides a more 'rustic' taste. Some recipes add potato to the soup, which gives it more body. You can pass the soup through a food mill for a smoother texture. And instead of the toasted bread, you can fry up some croutons in olive oil, which again makes the soup a bit richer.
If you want to get fancy, you can gratinée this soup in terracotta soup bowls as you would a French onion soup, placing the bread on top of the soup, then sprinkling over all the cheese (use gruyere for this variation), drizzle with some olive oil (or melted butter) and run the soup under the broiler or in a very hot oven for a few minutes, until the top is nicely browned.
Labels:
Fall,
primi piatti,
quick,
soup,
Toscana,
vegetable,
vegetarian,
Winter
Sunday, November 21, 2010
La ribollita
We've already gone over the basic recipe for minestrone on this blog. Once you've mastered that, it is a lot of fun to explore the many varieties of minestrone from all over Lo Stivale (meaning 'the boot' one of the many nicknames Italians give to their country).
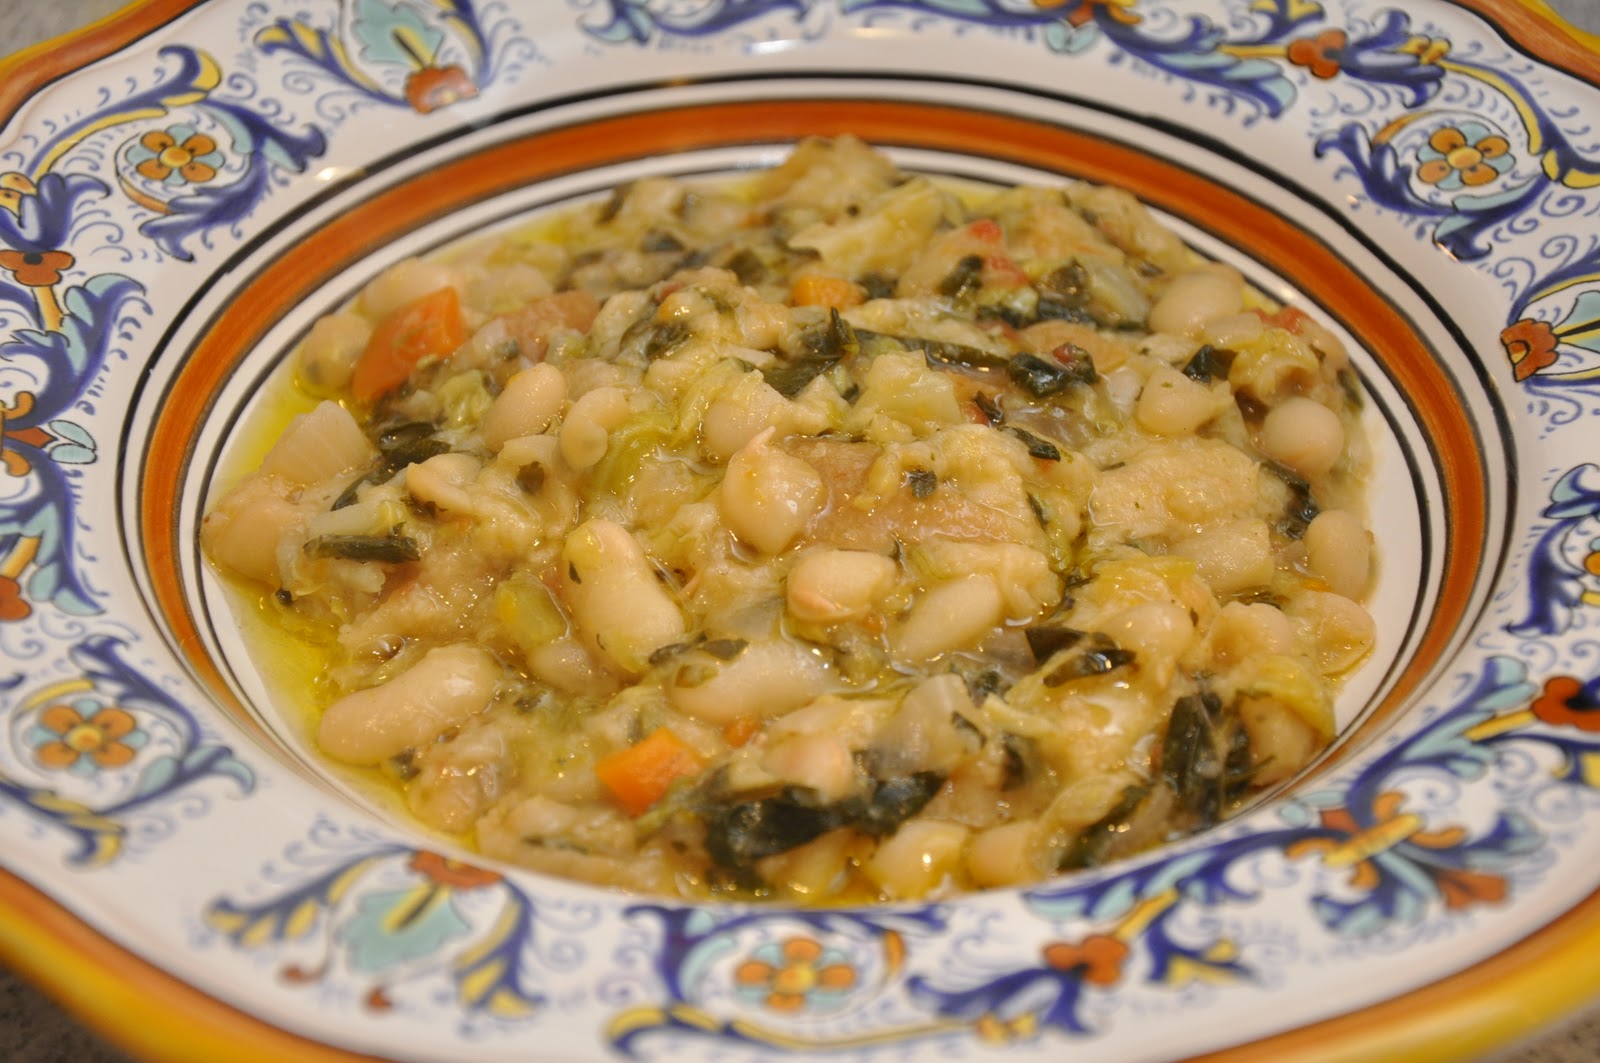
Perhaps the most delicious version of all is the Tuscan classic called la ribollita, or 're-boiled' because it is made ahead, layered with bread in a pot (preferably made of terracotta) and reheated before serving. Like any minestrone, it tastes so much better the day after—or even after a few hours—and the bread gives it a special flavor.
Ingredients (for 4-6 servings)
For the flavor base:
Olive oil
1 large red onion, cut into cubes
1-2 carrots, cut into cubes
1-2 stalks celery, cut into cubes
A handful of finely chopped parsley
1 leek (optional)
1 thick slice of pancetta, cut into cubes (optional)
More vegetables:
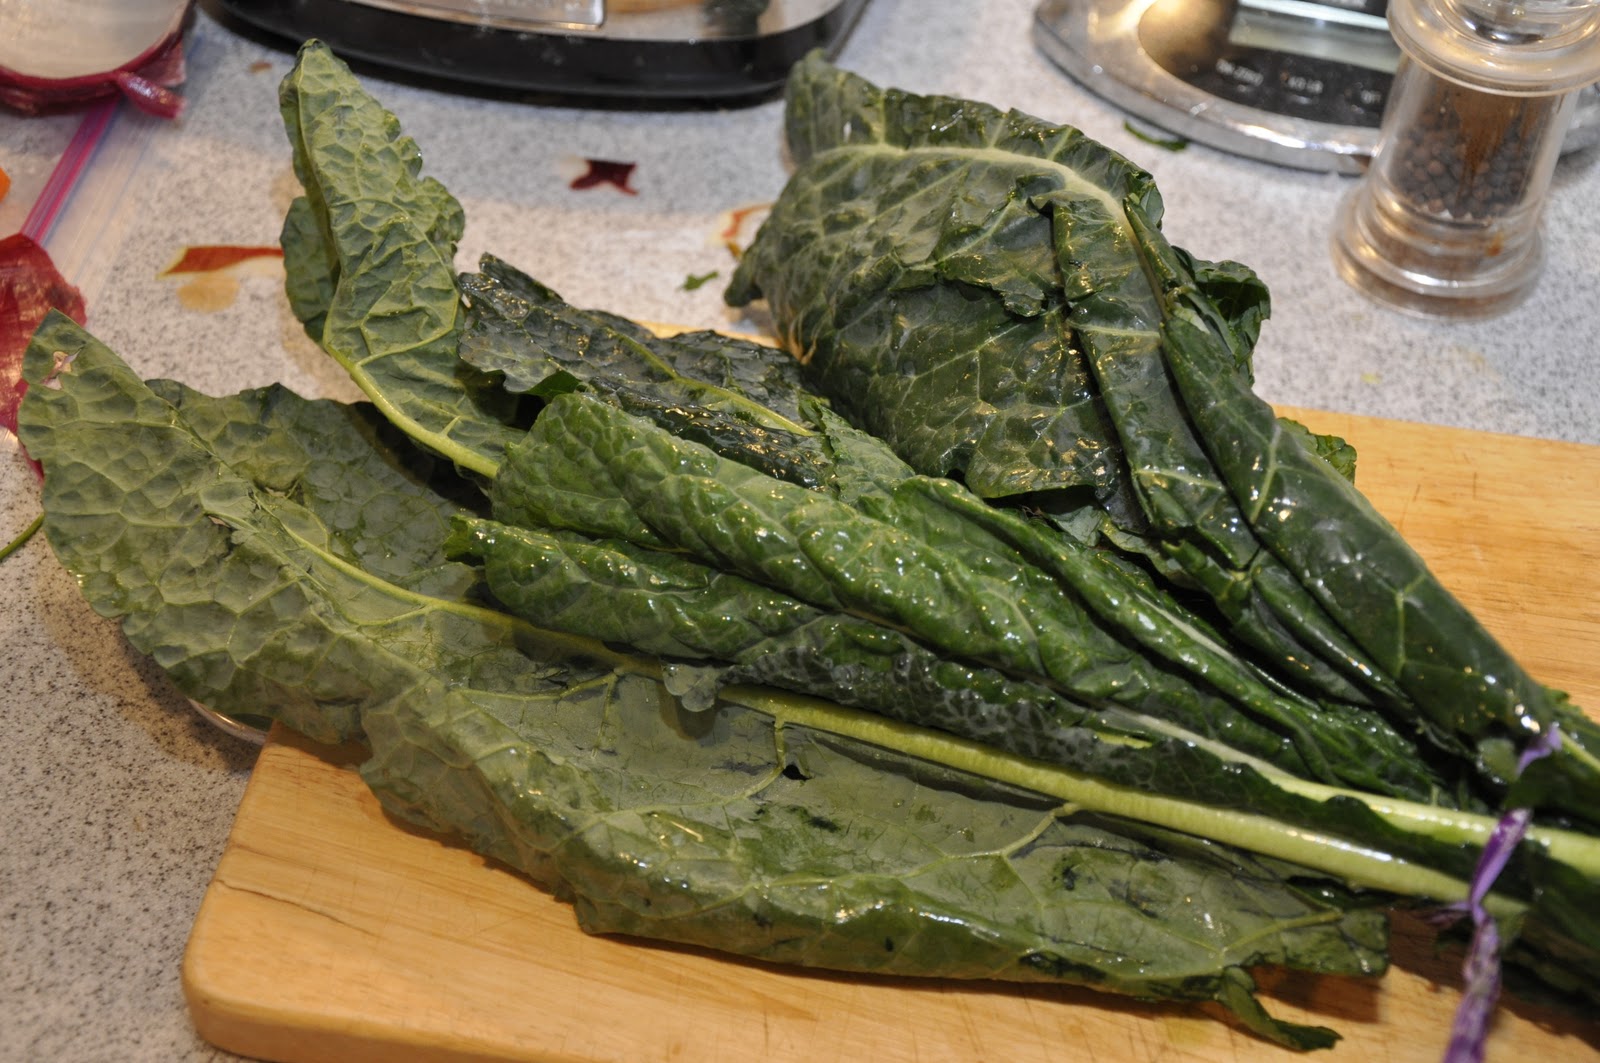
1 bunch black kale (aka lucinato kale), stemmed and shredded
½ head of Savoy cabbage, shredded
1 bunch Swiss chard (optional)
A few canned tomatoes, cut up (or some tomato paste)
250g (1/2 lb.) potato
250g (1/2 lb.) or more boiled or canned cannellini beans, drained
For the final assembly:
Slices of well-structured bread (preferably saltless Tuscan bread)
To finish:
Best-quality, fruity olive oil
Freshly ground black pepper (optional)
Directions
Make your minestrone, using the above ingredients, following the master recipe.
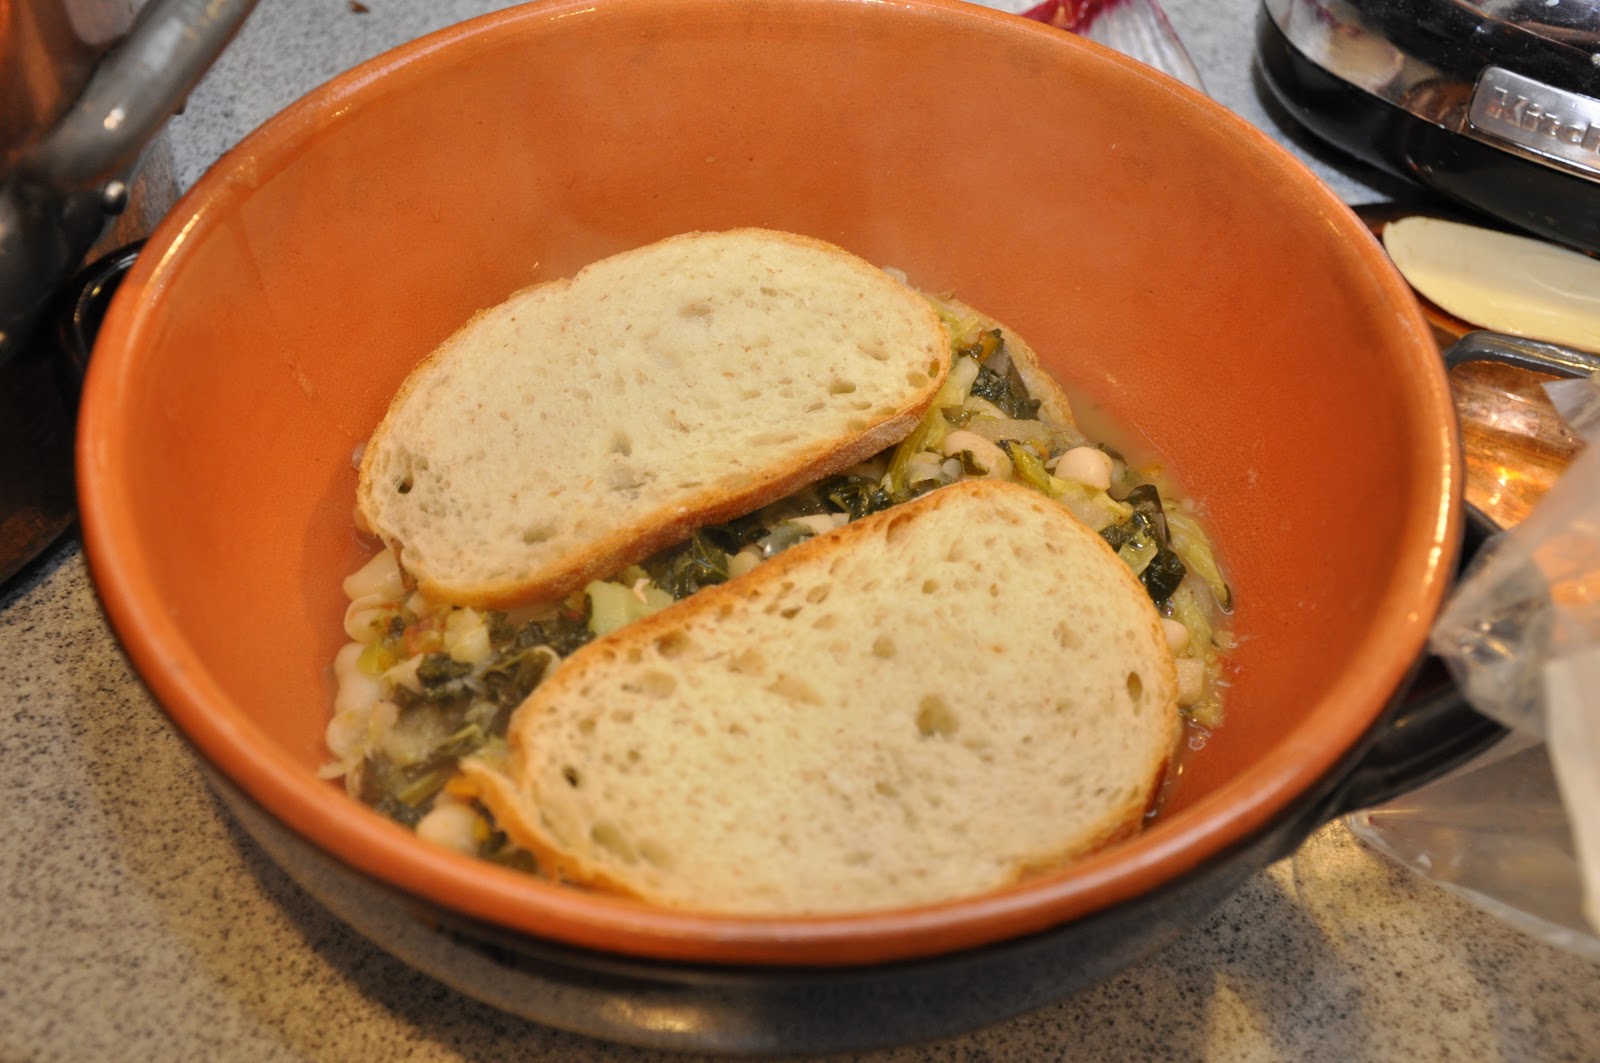
When the soup is done, place some slices of bread in the bottom of a good-sized terracotta casserole or soup pot (if you don't have a terracotta cooking vessel, the enameled cast iron or, in a pinch, a regular soup pot will do). Then ladle over a good portion of the soup.
Add another layer of bread, then another layer of soup, and so on, until you have filled the pot or used up your ingredients. End with a layer of soup.
Let the soup rest for several hours or overnight.
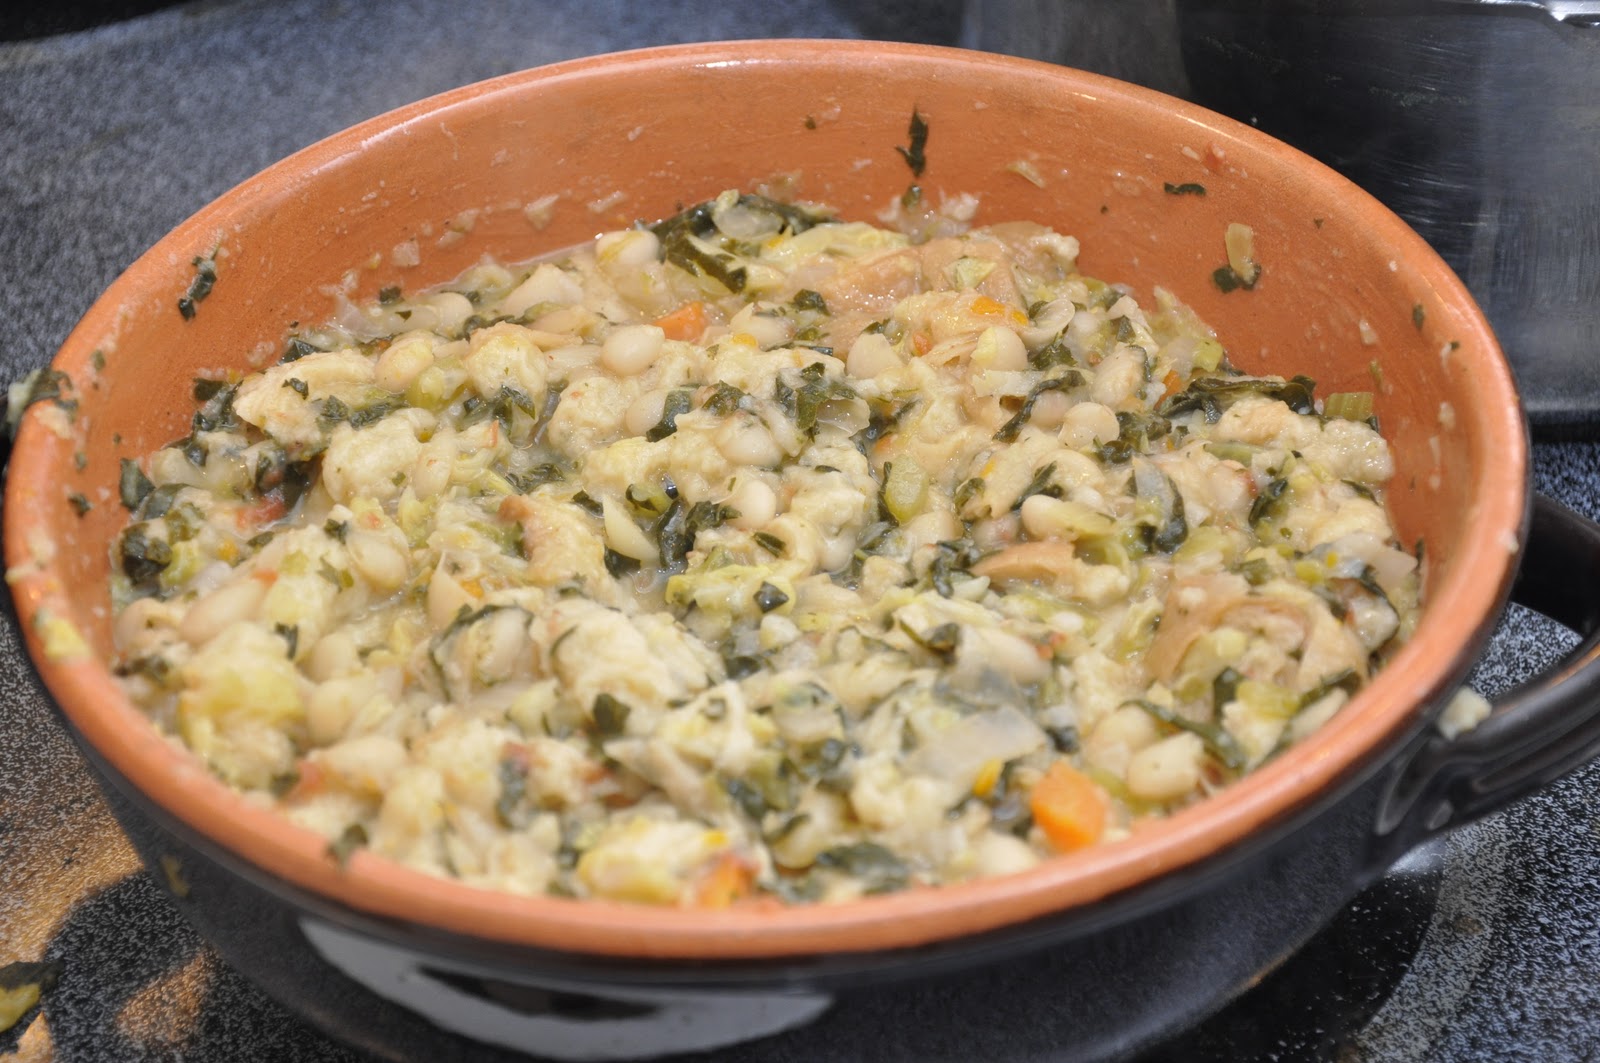
When you are read to eat, gently re-heat the soup. As the soup heats up, mix it up with a wooden spoon, which will break up the bread and mix it in with the rest of the ingredients. The result will be very thick, almost more a stew than a proper soup.
Serve when nice and warm, drizzled on top with un filo d'olio and, if you like, some freshly ground black pepper.
NOTES: The number or types of vegetables vary quite a bit from recipe to recipe, but the two essential ingredients—typically Tuscan—are the cannellini beans and the cavolo nero, or black kale, also marketed as lucinato kale or Tuscan kale. I have even seen a recipe that called it 'dinosaur' kale—not sure where that came from! Once impossible to find, I am happy to report that I now find black kale pretty regularly at my local supermarket here in the US. Similar in flavor to other sorts of kale, it has long, rather slender dark-green (not literally black!) leaves.
Black kale is much more tender and has a more subtle taste. To use it in the soup, you need only to remove the central stem, which can be very tough, then roll it up and shred it with a sharp knife. Other leafy greens, like Savoy cabbage or Swiss chard (or even beet greens) add a nice variety but can be omitted if you don't have them on hand, as can the leek, another vegetable used more frequently in Tuscany than in most other parts of Italy. Another typically Tuscan touch is the use of red onion, which Tuscans seem to prefer, but of course yellow or white onions will do if you don't have red onions on hand.
The choice of bread is of utmost importance. If you have Tuscan bread around, that is, of course, the best choice. Failing that, any well-structured bread that will stand up to cooking will do, although I would avoid sour-dough just because it has too strong a taste. Above all, avoid sandwich breads, which will turn to mush and give your ribollita an uncharacteristic texture.
Ribollita is best when made the day before, but you can make it in the morning for dinner or even an hour or two before—although the longer it sits, the better. The texture is thick and hearty but not heavy, and the bread gives a flavor that is really something very special.
Labels:
bean,
primi piatti,
soup,
Toscana,
vegan,
vegetable,
vegetarian
Saturday, November 13, 2010
Stracotto alla fiorentina
Some readers may remember last winter's post on brasato al vino rosso, the wonderful red wine pot roast from northern Italy, in particular Lombardia and Piemonte—where it is often made with Barolo, the local big red, and called brasato al Barolo. Well, here is another typical pot roast, this time from central Italy: Florentine-style 'stracotto', which literally means 'overcooked', made with tomato sauce.
Ingredients (for 4 servings)
One eye round roast (about 1-1.5 kilos/2-3 lbs.)
A carrot (young and thin if possible)
A small chunk of pancetta (cut into four thin strips)
Olive oil
1 medium onion, chopped
1 carrot, chopped
1 stick of celery, chopped
Salt and pepper, q.b.
Red wine
1 large can of tomatoes (500g or 1 lb.)
A spoonful of tomato paste (optional)
Water or broth
Directions
Eye round is a nice cut for company since it keeps its shape, but it can be a bit dry and tasteless as compared with chuck, so it needs a little help. This comes in the form of 'larding' the roast with a carrot and some strips of pancetta. If you have a larding needle, that's the best tool for the task, but if not, you can simply take a paring knife and force it through the middle of the roast like so, creating a small 'tunnel' for your carrot:
As you can see, the knife should come out the other side. It should then be a fairly simple matter of shoving the carrot through the roast, trimming off any part of the carrot that sticks out on either side.
You do the same now with the strips of pancetta, making a tunnel on each side of the carrot, except that, being soft, you cannot simply push the pancetta through the meat. (Here's where a larding needle would really come in handy!)
Use your finger to open the 'tunnel' up a bit, then guide the pancetta through, again with your finger playing the part of the larding needle. Rather than trying to pass a two long strips of pancetta all the way through the roast, I take four shorter pieces and guide them halfway through from each side.
Now tie the roast up with kitchen string to help it keep its shape. (These days, roasts often come pre-tied in the store, in which case you simply need to be careful not to break the strings as you lard the roast.) Salt and pepper the roast generously.
Now that this chore is done, you're on Easy Street for the rest of the recipe: Make a soffritto by sautéing onion, carrot and celery in some olive oil in a Dutch oven (preferably oval) and when they have wilted, raise the heat a bit and add the roast, browning it lightly all over.
Pour over a bit of red wine and turn the roast so it is covered all over with the wine. Let the wine evaporate completely, as you scrape any brown bits from the bottom of the pot.
Now pass the tomatoes through a food mill into the pot. Turn the roast again. Add the tomato paste, if using, and enough water or broth to come up at least 2/3 of the way up the roast, if need be.
Allow the pot to come to a simmer, lower the heat and cover the pot. Let the roast braise until it is quite tender, turning every 15 minutes or so and adjusting the heat so that the tomato sauce simmers very gently (what the French call 'mijoter'). Most recipes call for a cooking time of 2 hours, but it may well take longer, up to 3 hours, depending on the meat and the size of the roast. Add water or broth if the sauce gets too thick, and adjust for seasoning at the end of cooking.
Serve, sliced, on a warmed platter with boiled potatoes. Pour some of the tomato sauce over the roast slices and serve the rest in a gravy boat for guest to add more, which they are very likely to do.
NOTES: Usually I like chuck (shoulder or spalla) for pot roast, as it is very juicy and turns very tender after a slow braise like this. Exquisite eating, but not the prettiest cut—it has an irregular shape and tends to fall apart when cooked. So when cooking for company, a bottom or eye round, from the hind quarter is probably a better choice. They are also roughly equivalent the cuts that most Italians would use for a brasato or stracotto: the scamone, girello or noce, although in Italy, too, the shoulder cuts like girello di spalla are popular for slow cooking These cuts are leaner than chuck and tend to have less flavor, however, hence the larding, which takes a bit of work. Of course, larding is not strictly necessary, but it makes an incredible difference in the final flavor. The carrot sweetens the meat and the fat from the pancetta keeps it nice and juicy.
If you like, you can add some herbs to the sauce as it cooks for an extra layer of flavor: bay leaves, a sprig of fresh rosemary or fresh thyme, or a bouquet garni of all three, would all be nice. Some recipes call for adding a clove of garlic to the soffritto.
You will probably have extra tomato sauce, which is delicious over pasta—perhaps better than the meat itself! The taste, if I may say so, is very reminiscent of a good Neapolitan ragù.
Wednesday, November 10, 2010
Quick Note: Crema di cannellini
Here's a quick and easy weeknight supper for you: a purée of cannellini beans, seasoned with garlic and rosemary, and thinned out with water or broth to create a soup. Nothing could be simpler or more satisfying. And if you are using canned beans—which you can, why not?—the soup can be done in five minutes. There is no cream in this soup, by the way, the Italian word crema does not mean cream, as in the dairy product, but simply refers to any smooth, creamy textured purée.
Ingredients
Olive oil
1-2 garlic cloves (or more if you like), whole but lightly crushed
A sprig of fresh rosemary
Boiled or canned cannellini beans
Broth or water (or the cooking liquid if using boiled beans)
Salt and pepper
A handful of parsley, finely chopped
NB: No exact measurements for this one; use as much or as little of each ingredient as you need or feel like using. This recipe is pretty much ad lib.
Directions
Begin by lightly sautéing your garlic and rosemary in abundant olive oil over moderately low heat. Once the garlic takes on some color, remove both the garlic and the olive oil from the pan. Then pass your cannellini beans through a food mill into the seasoned oil. Allow the beans to insaporire for a few minutes, then add enough water, broth or cooking liquid to thin out the bean purée to the consistency of a soup. Simmer the mixture for a few minutes to let the flavors meld. About a minute before its' done, stir in the chopped parsley. Drizzle with raw, best-quality olive oil just before serving.
NOTES: This basic recipe is incredible flexible and versatile. Usually, it can be served with some crusty bread on the side, or top of a piece of toasted bread laid at the bottom of the plate, or topped with croutons fried in olive oil, and—as picture above—with boiled rice mixed in. Or some soup pasta instead of the rice.
The same method lends itself to just about any other bean or legume: borlotti, lentils, fagioli all'occhio (black eyed peas), chickpeas… you name it. For a more 'refined' taste, you substitute a soffritto of onion, or onion, carrot and celery, for the garlic, in which case don't remove them from the pan as you would the garlic. For a bit more substance, you can also fry some cubed pancetta in the seasoned oil. Or top your crema with some sautéed shrimp or scallops, which makes for an elegant presentation fit for company.
Boiling dried beans takes some time but is very easy. If you have the time, soak the beans in water to cover them amply, either overnight or save yourself some time by bringing them to a boil and let them soak in the hot water for an hour. Pre-soaking is not strictly necessary, but it does save time and helps the beans to retain their taste and texture—although that's not too important if you're going to use them in a purée, of course. Then simmer them in water to cover generously, along with a drizzle of olive oil and a sprig of fresh sage (if you have some on hand) until tender. Season with salt a few minutes before the beans are done. The simmering liquid has lots of flavor and can be used to thin out the crema.
If using canned beans, on the other hand, make sure to rinse them off and drain in a colander. The canning liquid has stuff you don't want to ingest and, besides, it gives a funny 'canned' taste to the dish. When using canned beans, it is best to use broth to give the crema some extra flavor.
Crema di cannellini, when it is kept quite thick, makes for a nice topping for crostini.
Labels:
bean,
Fall,
primi piatti,
soup,
Toscana,
vegan,
vegetable,
vegetarian,
Winter
Friday, August 27, 2010
Panzanella
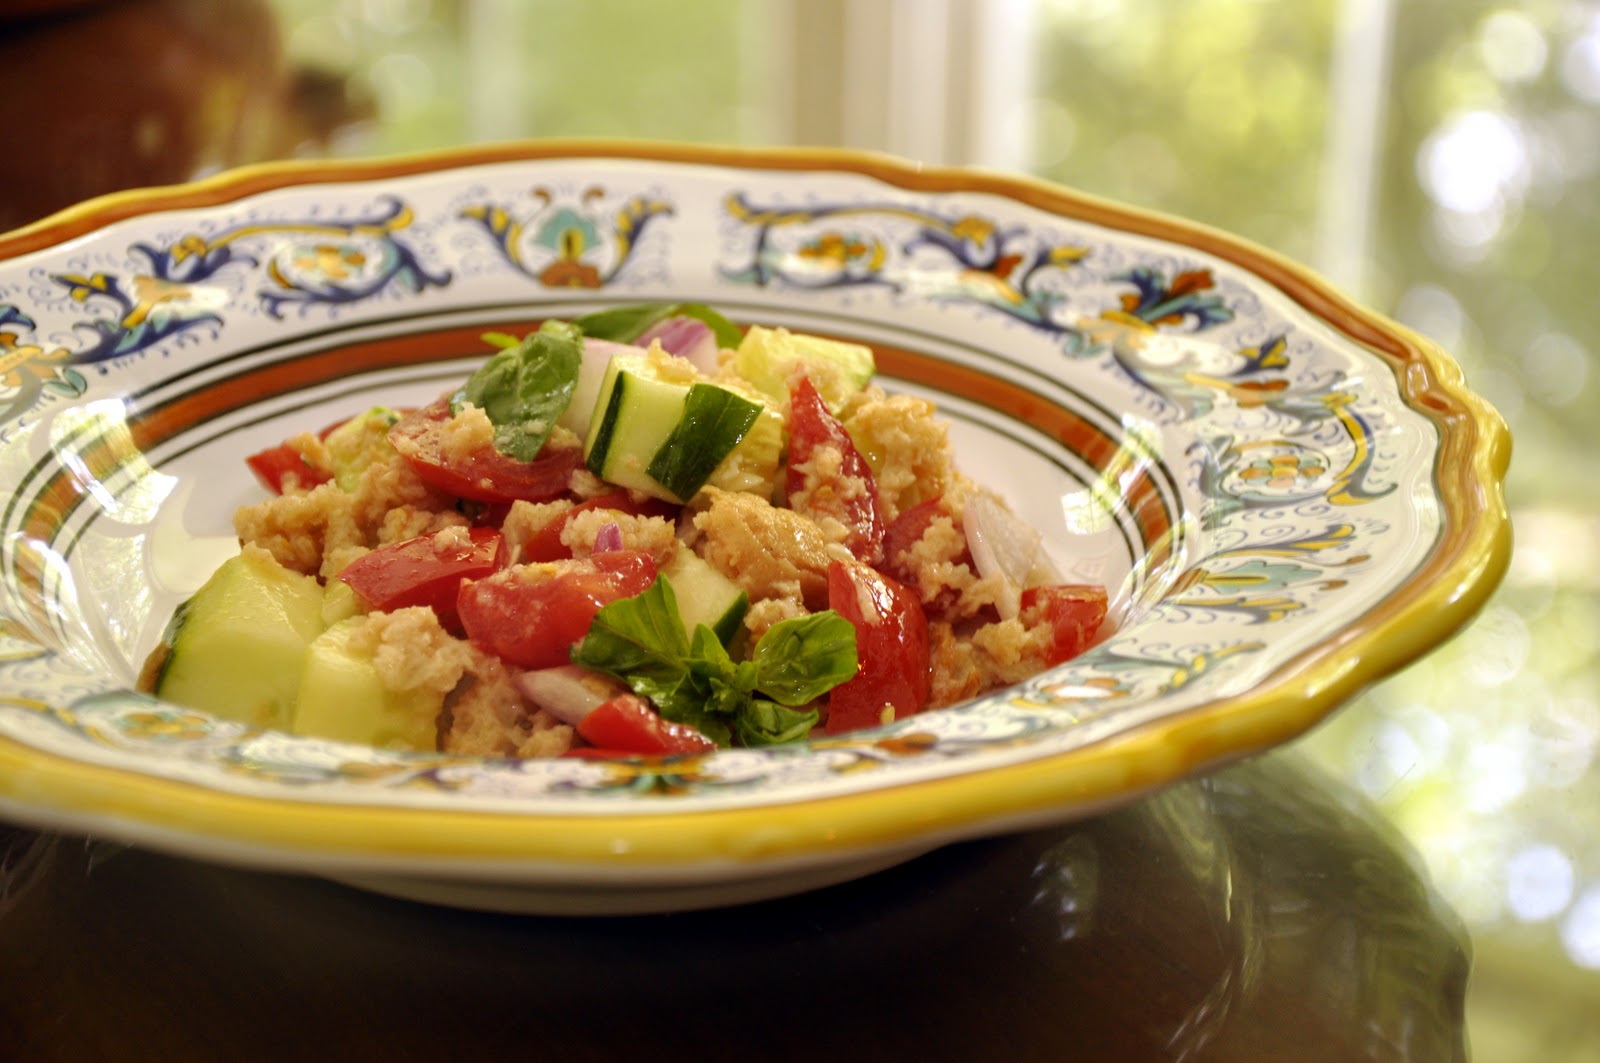
Panzanella, a Tuscan bread salad, is a great way to use old bread and avoid cooking in hot weather at the same time. And it is so simple to make, too. Take some slices or chunks of stale bread and dunk them in water until they begin to soften. This should not take long. Remove them and squeeze out the water, then shred the bread with your hands into a salad bowl. Throw in some chopped ripe tomatoes, sliced or chopped red onion and a few basil leaves. Dress your salad in the usual manner, with abundant olive oil, some wine vinegar, salt and pepper. You can serve panzanella immediately if you like, but it doesn't mind a wait. In fact, it develops flavor if let it rest for a while, say an hour or two. It can even be made well ahead, in which case you may want to hold off on the vinegar, which can become overpowering, until you are ready to serve.
NOTES: It is quite common to add some chopped cucumber to the above basic recipe, which I do whenever I have it on hand. It lends a certain brightness to the recipe. Chopped celery can also be a nice addition. In fact, I sometimes like to experiment with panzanella—with apologies to my Tuscan friends—with all sorts of additional ingredients (see my post on panzanella «con un po' di tutto»).
Red wine vinegar is usual for panzanella—remembering that Tuscany is the home of Chianti wines—but personally I prefer to use white wine vinegar which doesn't 'stain' the salad and, to my taste anyway, has a less assertive flavor. A few drops of lemon juice would not be amiss, either. There are also recipes that omit any acid altogether. Some recipes call for you to add the vinegar to the water in which the bread is soaked, rather than as part of the dressing.
Whether you chop your vegetables large or small is also a matter of taste. I vary according to my mood, although I tend to like moderation in all things, so I usually use a 'medium' chop. So those of you who like to get fancy, you can use a very fine chop and form the panzanella in a ring mold in individual portions as an antipasto for an elegant summer meal.
The ideal bread would, of course, be Tuscan bread, traditionally the darker pane scuro. But if you don't happen to live in Tuscany, any good quality, well-structured bread will do the trick. Just make sure it is the kind of bread that will stand up to being soaked, squeezed and shredded without turning into mush. Sandwich bread won't do—you need the kind of bread that you buy in a whole, unsliced loaf. One good test to see if the bread has adequate structure is to squeeze the loaf when you buy it: if it collapses easily (like Wonder bread) then it won't work for this dish. The more resistance it gives, the better—well, to a point, of course…
The measurements are really totally up to your taste. I've seen the dish made with mostly bread, or with mostly vegetables. This being an old peasant dish, surely the proportions depended entirely on what was on hand at the time you made the dish, and that is what I do, too. A good rule of thumb, however, is that bread should make up about half the volume of the salad.
Labels:
antipasti,
piatti unici,
salads,
Toscana,
vegan,
vegetable,
vegetarian
Sunday, August 22, 2010
Pollo fritto alla toscana
Is there anyone who doesn't like fried chicken? Nice and crispy on the outside, tender and juicy on the inside… I can get hungry just thinking about it!
Tuscans have a particularly savory and simple way to fry chicken: you cut up a young frying chicken, called a pollo novello in Italian, into smallish pieces, making sure to cut the breasts in half and split the thighs from the drumsticks. If you like, you can bone the pieces, which is relatively easy to do when the chicken is cut up.
You then dredge the pieces lightly in flour, then in beaten egg and shallow-fry them in olive oil over moderate heat. When they are nice and golden brown, season them with salt and serve them right away, with lemon wedges if you like.
And that's all there is to the basic recipe! It could hardly be simpler.
NOTES: Of course, this kind of simplicity relies on the best quality ingredients for success. The chicken, in particular, needs to have great flavor. Modern chickens, as we all know, can be pretty flavorless, so if you're not working with a fine, organic free-range chicken you are confident about, although it is not part of the original recipe, you may want to marinate the chicken beforehand. My favorite marinade for chicken includes salt, pepper, a finely chopped garlic clove, chopped fresh rosemary, freshly squeezed lemon juice and a good splash of olive oil. Leave for an hour or so before proceeding with the frying.
You can use pre-cut chicken pieces, of course, which saves time. This time, I happened to have some chicken 'tenders' (cut up and boned chicken thighs) on hand, and they worked very well indeed.
The main alternative to this version of Tuscan fried chicken is to substitute a pre-made batter for the usual flour and egg. The batter is made with flour, salt, olive oil and egg, then thinned out with some white wine. It needs to rest for an hour or two before using. You can also add some seasoning to the beaten egg, some grated cheese, chopped parsley, salt, pepper, although these additions are definitely heterodox. In fact, many traditional recipes admonish you not even to add salt to the egg, but to salt the chicken when serving, to keep the batter crisp and the tastes 'clean', in true Tuscan style.
In Italy, fried chicken is typically accompanied by fried vegetables appropriate to the season. For this meal, some nice fried zucchine 'sticks', dipped in the same flour and egg, went very nicely. And you can add to that other fried meats, typically chicken and calves' brains, for a fritto misto.
The trick to making fried chicken lies in maintaining the oil at the right temperature while you fry. If the oil is too hot and the chicken will brown before it is fully cooked inside; if it is not hot enough, the chicken will turn out a greasy mess. Keep your flame moderate, adjusting it up or down as needed while the chicken fries so that the oil bubbles up around the chicken pieces in a lively but not furious manner. If you have any doubts about the chicken being fully cooked, you can pop them in a hot oven for a few minutes as well—which you should do anyway to keep the chicken warm if you need to fry in batches, or to keep the chicken hot while you enjoy your first course. I find a rack is perfect for the task; it allows the hot oven air to circulate around the chicken pieces, ensuring they stay nice and crispy.
Pollo fritto alla toscana is, in fact, very similar to—albeit a bit more austere than—the Jewish-style fried chicken for Hannukah that I blogged about back in December.
Sunday, August 1, 2010
Maiale Ubriaco
They don't make pork like they used to. Modern pork is raised lean for health reasons but in the process a lot of flavor got lost. But there are ways to make up for the lack of intrinsic flavor, like this simple Tuscan method for making pork chops called maiale ubriaco, or 'drunken pig'. (NB: It could also be translated as 'drunken pork', since Italian does not have separate words for 'pig' and 'pork'.)
Make a trito by finely mincing a garlic clove or two and a handful of parsley. Add it to a skillet large enough to hold all your pork chops in a single layer, together with salt, pepper and a sprinkling of fennel seeds. Sauté over moderate heat until you begin to smell the garlic and fennel.
Add your pork chops (well dried with a paper towel to aid browning) and brown just lightly on each side, for about 3 or 4 minutes per side, taking care to regulate the heat so that the garlic does not burn. Pour over some red wine, just a glassful or so, lower the heat a bit so the wine simmers gently. Continue simmering, turning the chops from time to time to ensure even cooking and coating with the red wine. They should turn a nice burgundy color as they absorb the wine.
When the red wine has almost completely evaporated, transfer the chops to a serving dish. Raise the heat to high and add a bit more red wine to deglaze the pan, reducing the wine to a syrupy consistency. Pour over the pork chops and serve immediately.
NOTES: This version of the dish is suitable for lean pork chops like loin and center cut chops, as it cooks fairly quickly, no more than 20-30 minutes total. This relatively short cooking time should ensure that the chops do not dry out too much, but do look for chops with a bit of fat on them.
Another version calls for adding much more red wine—enough the barely cover the chops—and a much longer cooking time (45-60 minutes) covered. Of course, this gives the pork a much more intensely 'winey' flavor and produces a wonderfully thick sauce. A nice dish for cooler weather. For this 'winter' version of the dish, you need a cut of pork that will stand up to long, slow, moist cooking, like a pork shoulder chop.
Some recipes do not call for the fennel seeds, but they are typical of this dish and lend a nice, somewhat unusual flavor. In some versions, you reduce the wine until it has entirely evaporated and serve the chops without a sauce. Conversely, some other versions will have you cook the chops completely without wine, remove them, and then add the trito, sauté briefly, then deglaze the skillet with red wine. You then pour the resulting sauce over the chops.
For the wine, a Tuscan red would naturally be ideal. You could simply use a bit of whatever wine you plan to drink with your meal. Nothing too fancy, mind you, a young Chianti or a simple sangiovese would do nicely. For the winter version, you may want a wine with more body.
Monday, May 31, 2010
Bistecca alla fiorentina
One does not always associate steak with Italian cooking, but one of the glories of Tuscan cuisine is, indeed, a simply prepared Porterhouse steak, grilled rare, over a wood fire: bistecca alla fiorentina, or literally 'Steak Florentine'. The dish is so typical that if you ask for a fiorentina in a restaurant, without saying more, this is what you will be served.
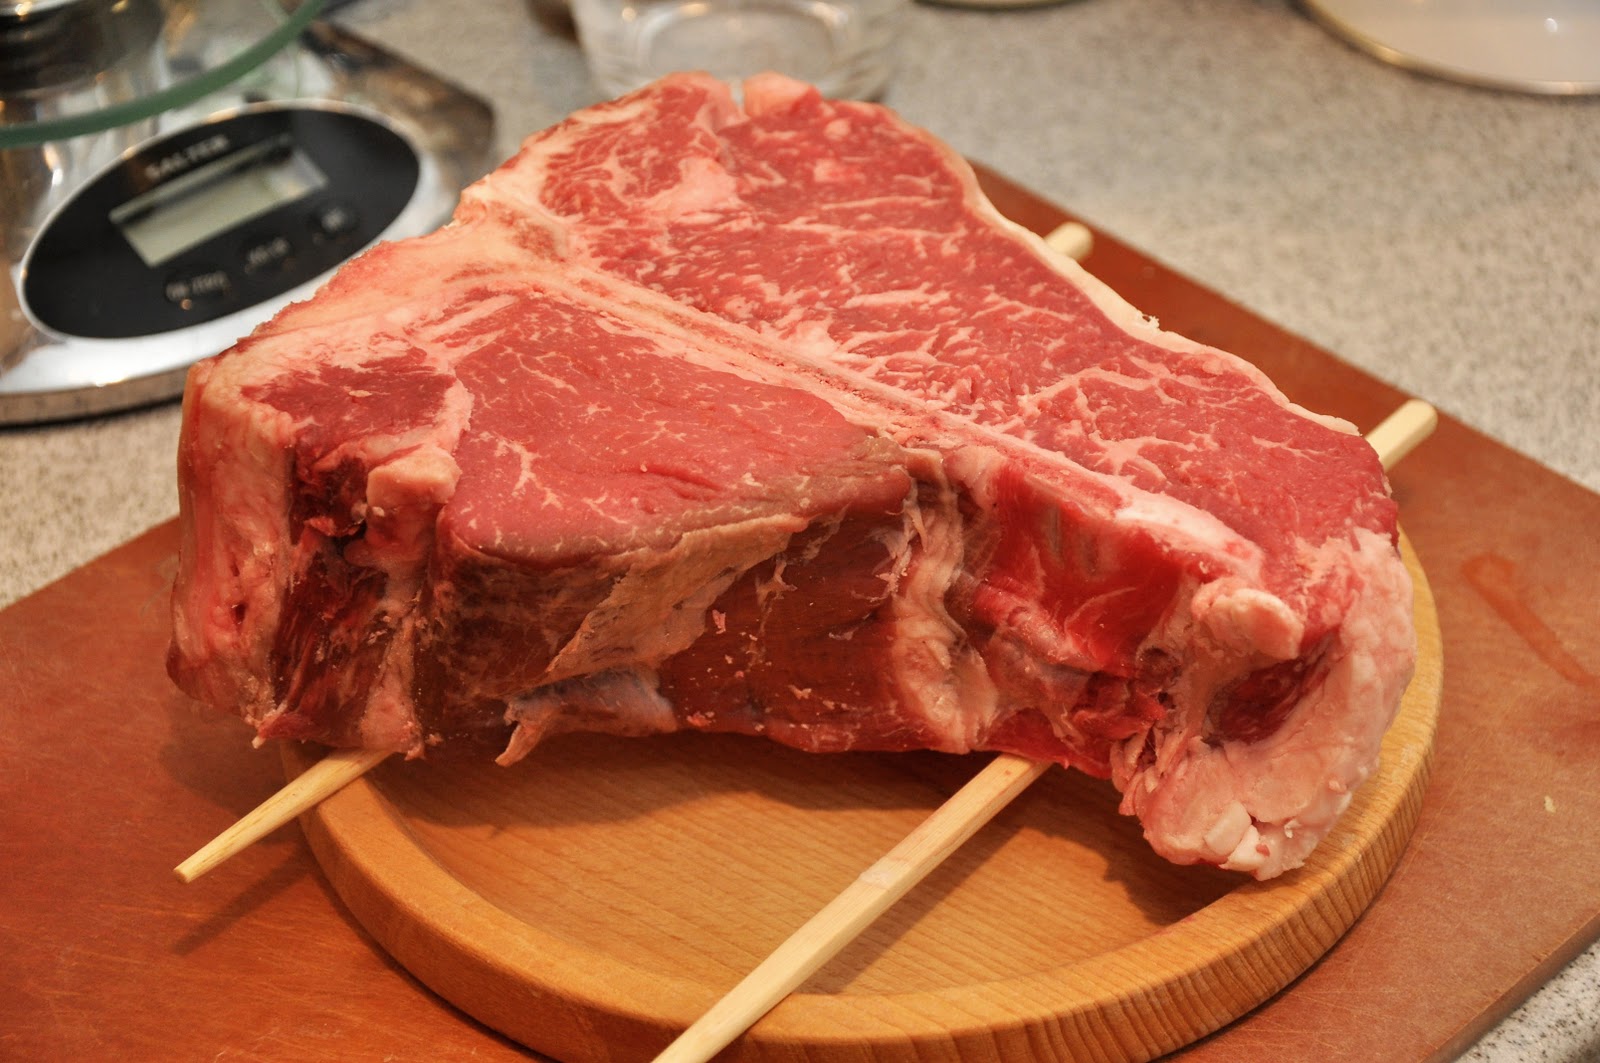
The recipe is exquisitely simple, but as for any other kind of steak, there are some key points that you need to bear in mind, starting with the quality of the meat. In Italy, a true bistecca alla fiorentina is made with Chianina beef, raised in the Chiana Valley. Chianina beef is apparently now being raised in the US, although I have yet to find it in any market. You can make a beautiful steak with good quality beef of any origin. In the US, look for choice or, better, prime grade meat. For this holiday meal, I found a beautiful side of prime Porterfhouse displayed at the local butcher, which could be cut to order—which brings me to another key point: a bistecca alla fiorentina must be cut thick, at least 1-1/2-2 inches (3-5 cm) but even better at 3 inches (7.5 cm) thick. This allows a nice crust to form on the outside of the steak while the inside remains rare. A fiorentina is never, ever served well done (nor, in my opinion, is any good steak).
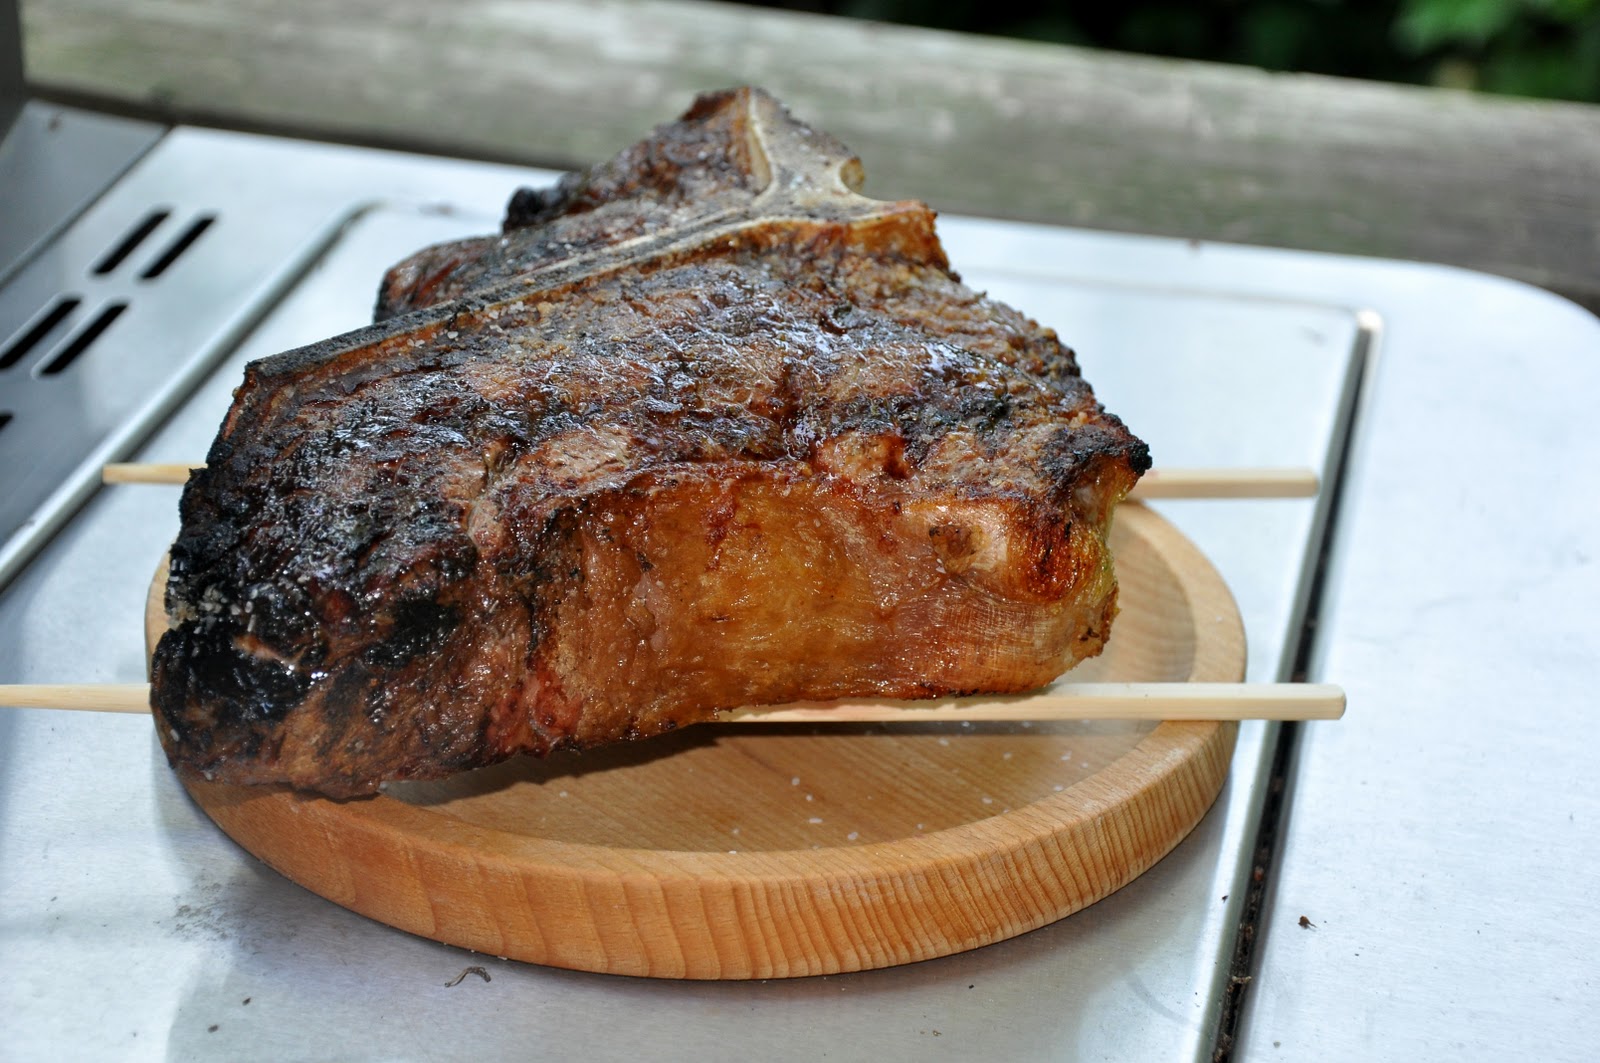
Preparing your steak for grilling. There are also certain preparatory steps that are critical to ensure the best results. If you get your steak from a good butcher, it should already be aged and rather dry to the touch—as it should be. But if you buy your steak in a supermarket, it is likely to be rather wet, in which case it helps to air dry it in the fridge for a few hours or even overnight. Place the steak on a rack or—if you don't have a rack—you can prop it up with two chopsticks, over a plate to catch any blood that may drip out. This will allow air to circulate around the steak, top and bottom, so it dries evenly. Even so, turn the steak every so often to ensure even drying on the outside and circulation of the blood inside the steak. If you air dry your steak for more than a few hours, cover it loosely with a towel to prevent the meat from drying out too much.
Even more important than air drying is tempering the meat: making sure that the meat is room temperature before you cook it. If you plan to eat the meat the same day you buy it, just leave it out until you plan to cook it (unless you live in a tropical or sub-tropical climate). But if you have refrigerated the meat, take it out of the fridge an hour or so before you plan to grill it, so that it come back to room temperature. This operation will ensure more even cooking.
Grilling. Now get your grill nice and hot. (Some sources will warn against excessive heat, which supposedly can toughen the meat, but I have not found this to be true in practice, at least not with good quality meat.) Wood is the fuel of choice here—oak is traditional—or charcoal. If you must, a gas grill will do, although the final product will lack the characteristic smokey flavor of a true fiorentina. But don't sweat this too much; I make do with a gas grill myself. If you have a smoker box, pre-soaked chips of oak or another a mild wood will add character to your dish.
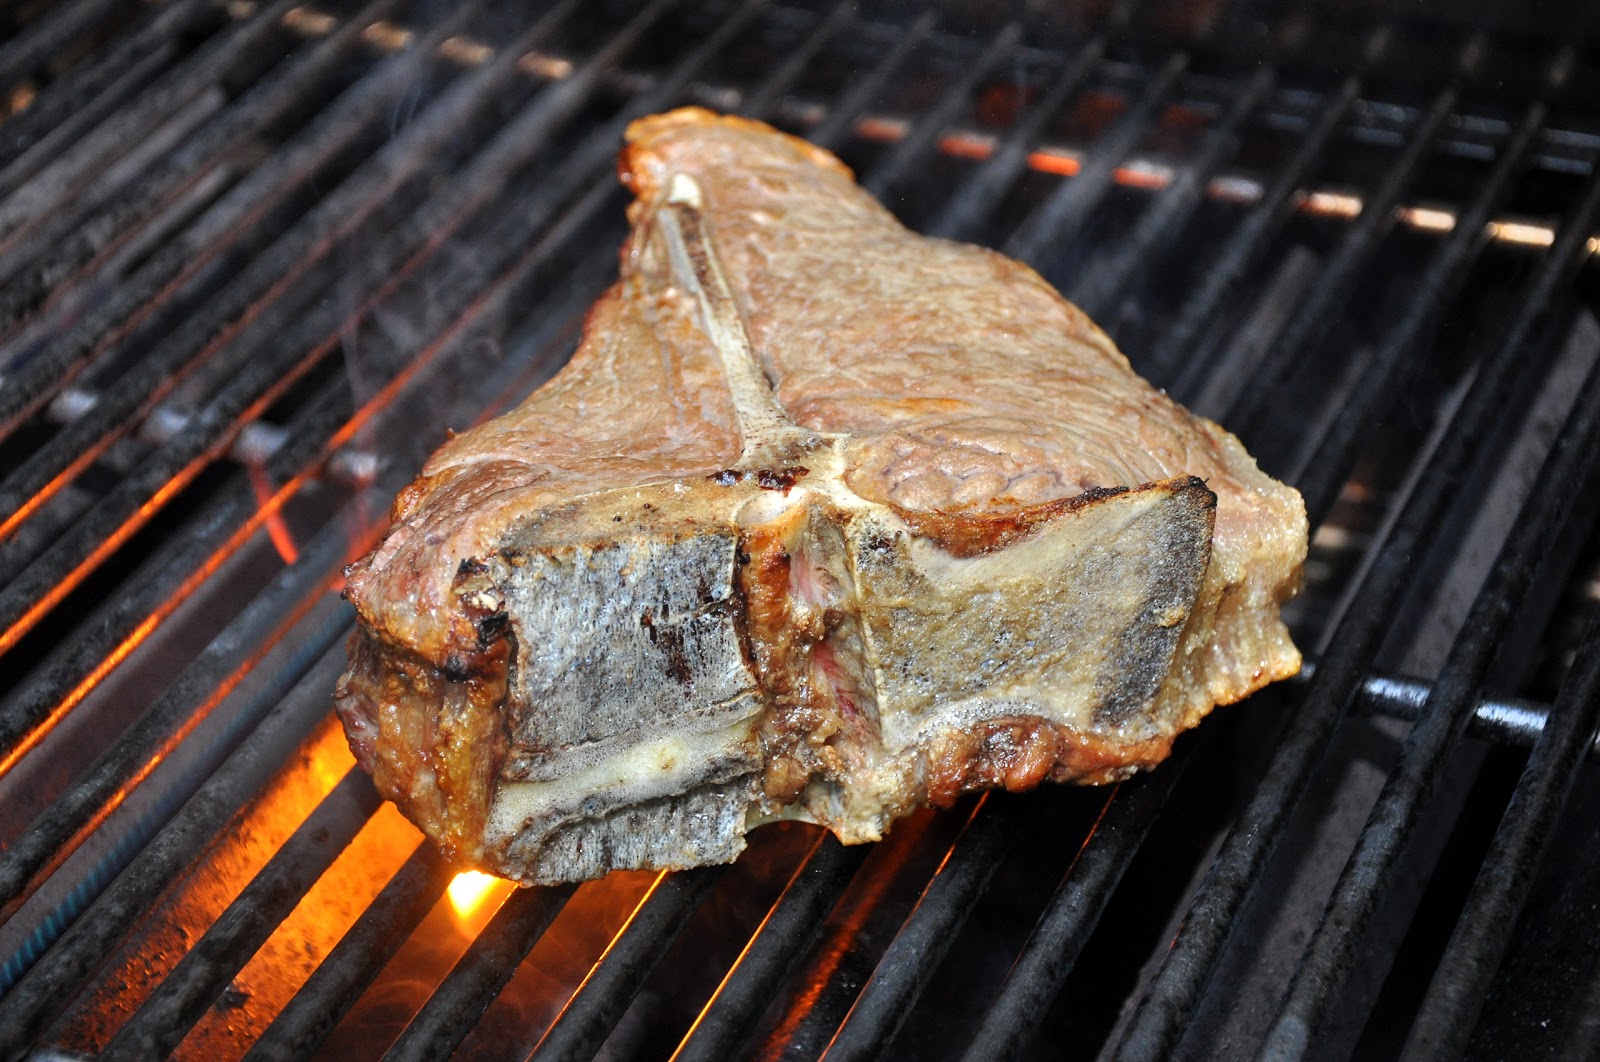
Place the steak on the grill. If your meat is cut thick as it should be, lower the heat a bit, to 'medium-high', and grill it for five to ten minutes on each side, depending on the thickness of the steak (See notes below). If you like cross-hatched grill marks, place the steak across the grates diagonally, starting at 'ten o'clock':
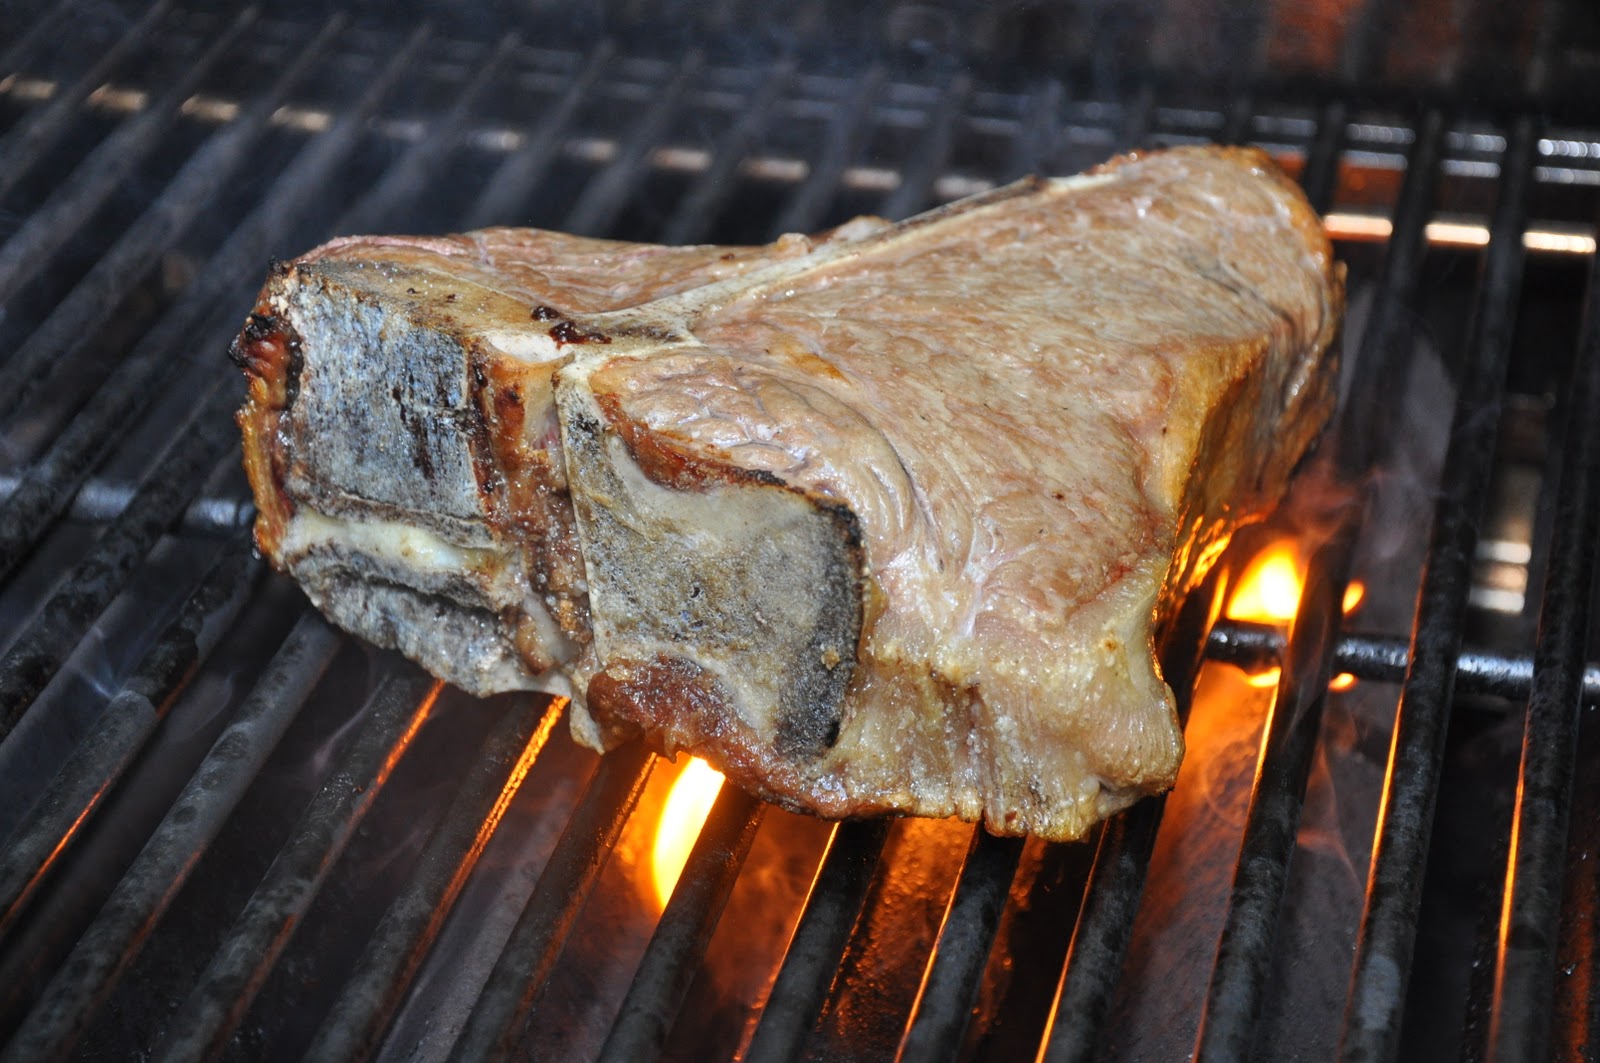
Then, halfway through the cooking time for this side, turn the steak to 'two o'clock':
When you turn the steak over to cook on its other side, you will see the lovely cross-hatched grill marks that are the pride of so many 'grillmeisters' (see first photograph above). Now season the steak liberally with salt as the steak cooks on the other side, repeating the two and ten o'clock positions if you like. Turn the steak over and season it again on its just-cooked side. Finally, for a 3-inch monster, you can and should grill the steak on its flank for another five minutes or so, using the bone to prop the steak up. This will drive the blood away from the bone for more even cooking.
The total grilling time for a 3-inch monster fiorentina will be about 25 minutes (see Notes below for details on cooking times and testing for doneness.
Resting. After your steak is done, remove it from the grill and let it 'rest' for about ten minutes. This resting is another crucial step (perhaps the most crucial of all) that ensures that the meat will remain juicy when you carve it. Use a rack or chopsticks, just as you did for the air-drying, to ensure circulation all around the steak; this avoids the crust getting soggy underneath.
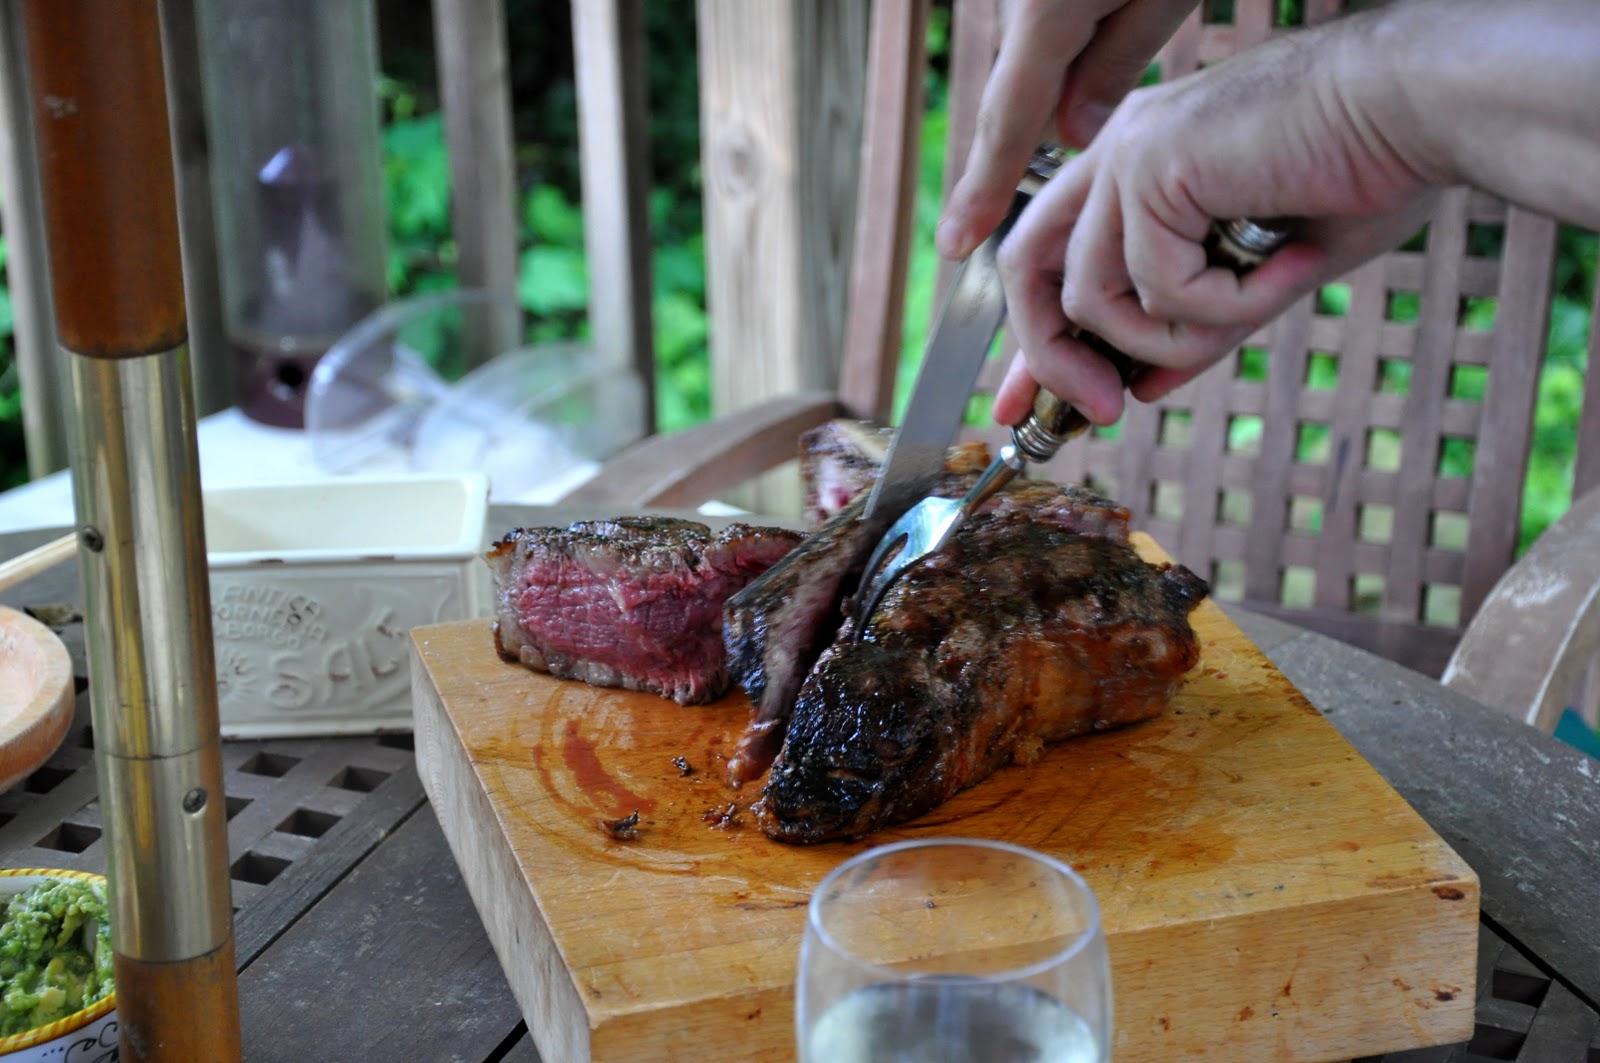
Carving and Serving. A fiorentina is too big to serve individually. It is typically carved up, first by removing the filet and then the contrefilet from the T-bone, then each against the grain:
| Removing the filet (aka tenderloin) |
| Removing the contrefilet (aka strip steak) |
Each diner helps themselves to as much steak as they want. Many people serve the meat with lemon wedges, but as far as I'm concerned a sprinkling of salt—and maybe pepper—is all this steak needs!
NOTES:
Cuts of beef: While a top quality, thick cut Porterhouse steak like the one shown in this post is what you need to make a true fiorentina, this kind of eating does not come cheap. (The 'monster' shown here set me back a cool $90.) In our house, a steak like this is a treat for special occasions, so I don't mind the expense. Still, if you are looking to spend less, the same technique can be used for just about any cut you prefer. T-bone would be the next closest thing, followed by a strip steak (which is nothing more than the contrefilet served on the bone.) And my personal favorite cut for steak, a bone-in ribeye, also called a 'cowboy steak', is wonderful made this way. Of course, if you can't afford—or can't find—aged prime beef, 'choice' grade (which is what you are likely to find in a supermarket) will also be delicious. I would not use this technique on lower grades of meat like 'select', which really need some help—like a marinade—to make for good eating.
There is much debate among steak connoisseurs about the precise best way to prepare a fiorentina or, for that matter, any other steak. Here are some brief explanations of the major 'issues':
Cuts of beef: While a top quality, thick cut Porterhouse steak like the one shown in this post is what you need to make a true fiorentina, this kind of eating does not come cheap. (The 'monster' shown here set me back a cool $90.) In our house, a steak like this is a treat for special occasions, so I don't mind the expense. Still, if you are looking to spend less, the same technique can be used for just about any cut you prefer. T-bone would be the next closest thing, followed by a strip steak (which is nothing more than the contrefilet served on the bone.) And my personal favorite cut for steak, a bone-in ribeye, also called a 'cowboy steak', is wonderful made this way. Of course, if you can't afford—or can't find—aged prime beef, 'choice' grade (which is what you are likely to find in a supermarket) will also be delicious. I would not use this technique on lower grades of meat like 'select', which really need some help—like a marinade—to make for good eating.
There is much debate among steak connoisseurs about the precise best way to prepare a fiorentina or, for that matter, any other steak. Here are some brief explanations of the major 'issues':
Seasoning. Some sources, including the august Artusi, solemnly warn against seasoning the steak at all before it is entirely cooked, on the theory that salt will draw out the juices. More modern sources allow seasoning the seared side of the meat, as suggested in this post. Other sources even recommend seasoning the meat before cooking—something that had been thought to be anathema but actually works well if you season the meat an hour or so before grilling, which allows enough time for the salt to penetrate the meat, which draws the juices back in.
Turning while grilling. Then there is the traditional school of thought that the steak should only be turned over once. But more modern sources call for turning the steak several times, which is said to ensure more even cooking. I have tried both and, quite frankly, can't tell much difference in the taste or texture of the final product. Turning often does allow you to season the steak more thoroughly but you sacrifice those nice, neat grill marks.
Dressing. Some of the earliest sources, including Artusi, call for dressing the cooked steak with a dab of butter. This touch, so uncharacteristic of Tuscan cooking, is said to have been invented for ex pats—specifically, the English—who played such a prominent role in the life of 19th century Florence (as portrayed in the film Room with a View). More common these days—and more consonant with Italian culinary tradition—is a drizzle of olive oil.
Rubbing and Marinating. It is also common to rub the steak with some olive oil before grilling, which helps it brown and form a nice crust. Some sources (including Artusi, again) condemn the practice and says that it gives the steak a terrible 'off' flavor, but I have not found this to be the case. A nice rub of olive oil can help when you are using a less-thickly cut steak. When you are using a thick steak, you will have enough time for the steak to brown nicely on its own. You will even find some recipes for a 'fiorentina' that call for marinating the steak with rosemary, garlic and other aromatics. These variations can be delicious—and for lesser grades of beef, almost obligatory—but they are definitely not authentic.
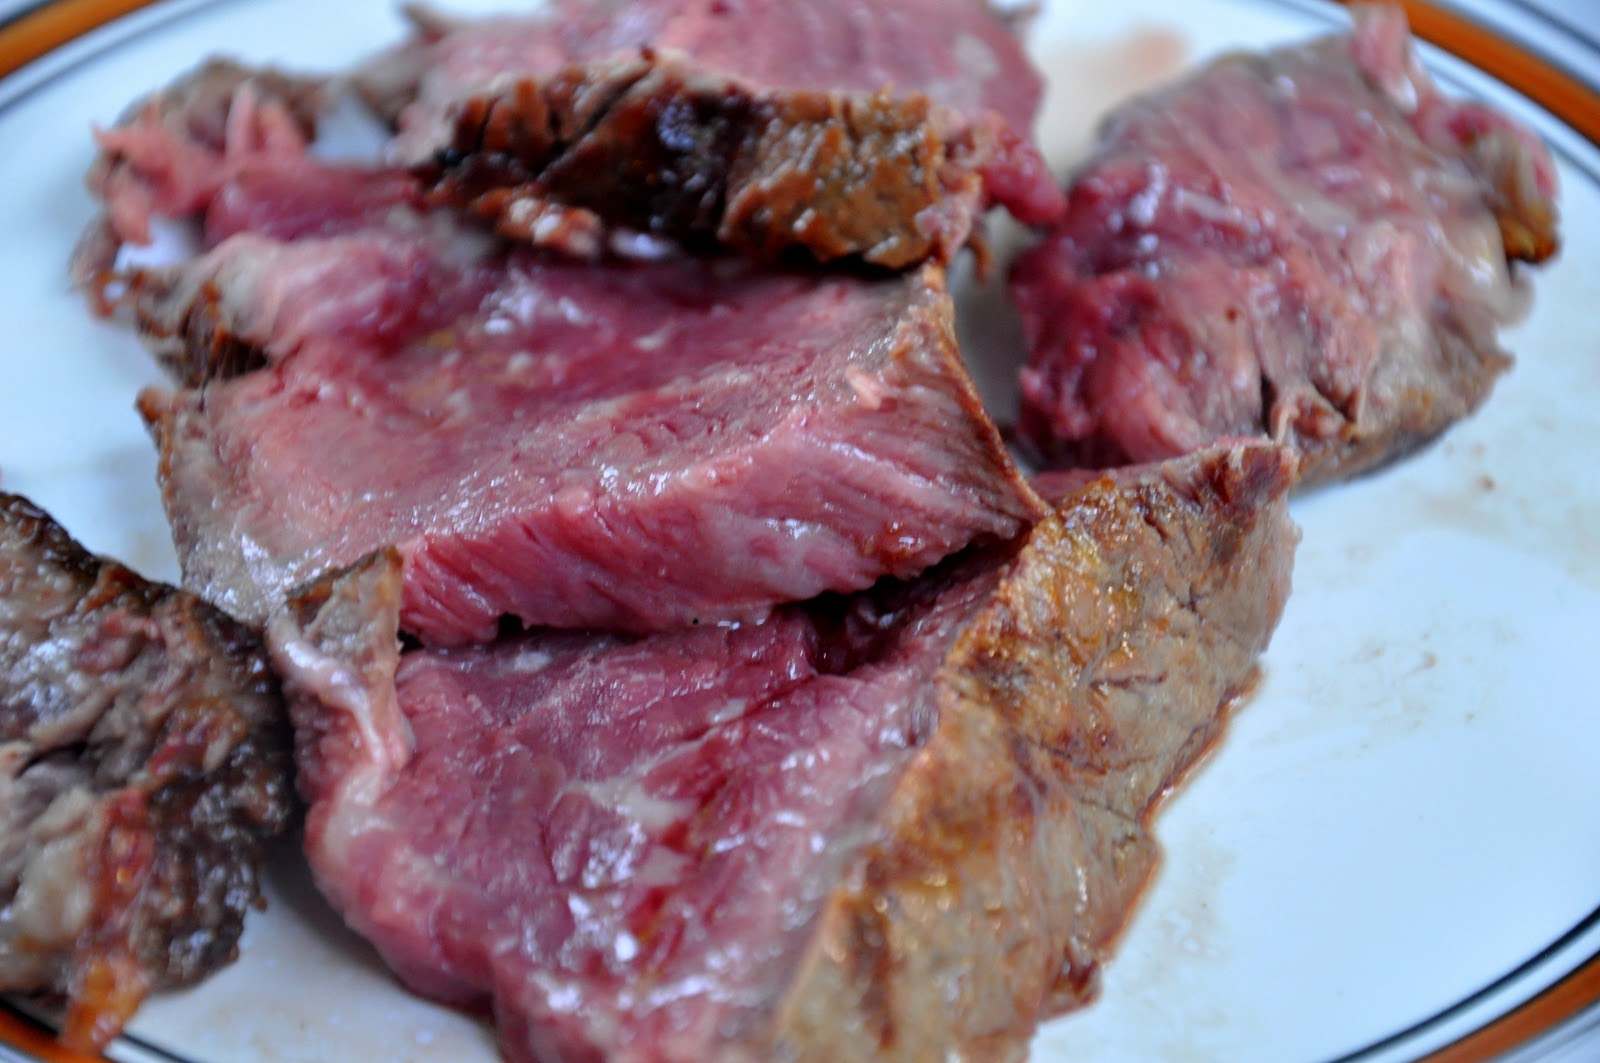
Cooking Times. As mentioned at the outset, a true fiorentina is served rare—very rare. For those who cannot stand the idea of a blood red steak—if you really must—you can serve it medium-rare. However, a well-done fiorentina is heresy. Most traditional recipes call for cooking the steak about 5 minutes per side, for a 1-1/2 to 2 inch (3-5 cm) steak, which makes for a very rare piece of meat. You can increase this to as much as 10 minutes per side for a thick cut steak. (This article contains a convenient chart on steak grilling times by thickness.) A 3 inch (7.5 cm) 'monster' Porterhouse will take a total of 25 minutes, including 5 minutes on its bone side, for a rare steak as pictured in this post.
| A properly cooked fiorentina is served very rare... |
Testing for doneness. The most exact way of testing a steak for doneness is to use an instant-read meat thermometer. Steak is rare at 125 degree Farenheit (52 C), medium at 140F (60C) and well done at 170F (77 C). But using a thermometer will puncture the crust and allow juices to flow out of the meat, so most grillmeisters prefer the touch method, using the so-called 'rule of thumb': raw meat feels like the muscle just below your thumb (sometime called the 'mound of Venus', particularly in palmistry) when your hand is open or slightly cupped. If you if touch you index finger with your thumb, this muscle will contract a bit, becoming a bit firmer—the same firmness as a rare piece of beef. when you press it gently with your index finger Touch your middle-finger for medium-rare, and so on. The following diagram illustrates this 'rule' well:
And a final note on Tuscany's most famous butcher...I always associate bistecca alla fiorentina with Dario Cecchini, who may be the first—and only—celebrity butcher in the world. And here is short guide to the way Dario prepares this dish. Dario has his own website and blog. He has been featured on any number of 'foodie' TV shows, including Gourmet magazine's Diary of a Foodie and Anthony Bourdain's No Reservations. It's well worth catching one of these episodes if you can: Dario is quite a character—the only butcher I know who regularly quotes Dante!
| The remains of the day... |
Notice that a properly prepared steak, even when served very rare, exudes only a minimal amount of blood. Those delicious juices are still inside the meat....
Thursday, May 20, 2010
Pinzimonio
When things are really hectic at work, as they are now, even a hardcore food fanatic like myself doesn't always feel like cooking. Or perhaps you've had a heavy lunch or midday dinner and feel like a light dinner. Or you're looking for something to serve an easy and convivial antipasto to start a warm weather meal or a light something to serve with drinks? Well, for times like these, may I recommend the classic Tuscan pinzimonio?
Pinzimonio is, quite simply, olive oil, seasoned with salt and pepper in which various crudités of your choice can be dipped. It's healthy, it's easy and it's almost infinitely variable. If you have decent knife skills, you can make enough to serve four in five minutes or under.
The choice of vegetables is yours, but a typical pinzimonio will include carrots, peeled and cut into matchsticks, celery and/or fennel, also cut up into dippable pieces, and radishes. From there, you can add any other vegetables that you enjoy eating raw: tomatoes, cut into wedges, green onions, ramps, very tender asparagus… Other common vegetables include bell peppers and cauliflower, although personally, I don't care for these vegetables eaten raw. And although really tender raw baby artichokes are a favorite served in pinzimonio, I've yet to find any State-side that aren't unpleasantly bitter when eaten raw.
To the dipping oil, you can add additional ingredients if you like to spice things up—freshly squeezed lemon juice or wine vinegar, a bit of mustard or some minced garlic, for example—but I prefer the simplicity of olive oil, salt and pepper. Of course, use the best possible quality ingredients that you can find: impeccably fresh, young Spring vegetables that the Italians call primizie dipped in fruity, cold-pressed extra-virgin Tuscan olive oil, sea salt from Trapani and freshly ground Tellicherry black pepper would give you the ne plus ultra version.
The name 'pinzimonio' is a combination of the word pinze, or tweezers, and matrimonio, or marriage, referring to how you pinch the vegetables between two fingers (the tweezers part) and marry it to the seasoned oil. Poetic, no? The term is sometimes used, in error, as a catch-all for any dish of crudités served with a dipping sauce.
And speaking of knife skills, a great place to learn them online is by watching the excellent instructional videos at the Rouxbe Online Cooking School.
Monday, May 17, 2010
Pollo alla diavola
Pollo alla diavola, or Devil's Chicken, is a simple and delicious way to grill chicken.
Begin by butterflying a young chicken: cut away the chicken's back bone with kitchen shears and spread the chicken flat, skin side up. Cover the chicken with a sheet of waxed paper and, with the bottom of a frying pan, give the chicken a few good whacks to flatten it even more, but without breaking it up.
Place the chicken on a platter and season it generously on both sides with olive oil, salt and red pepper flakes. To this, I often add the juice of half a lemon. Let the chicken marinate for about an hour or so.
Heat up your grill and grill the chicken on both sides, over a moderate flame, until nice and golden brown all over, about 15-20 minutes per side. A little charring on the edges is perfectly fine—and even desirable. I find that a grilling basket makes the job very easy and helps keep the chicken flat, but you can simply place the chicken directly on the grill if you prefer, placing a brick or other heavy weight on top to keep the chicken flat.
NOTES: The better the chicken, of course, the better the flavor will be, so an organic, free-range chicken will really make a difference. But the beauty of the marinade is that it will lend flavor even to those bland 'industrial' chickens—just up the seasoning to make up for the flavor deficit.
The marinade can include other elements if you like: fresh rosemary leaves, freshly ground black pepper, either in addition to or instead of the red pepper, even Tabasco sauce. The proportions are entirely to taste. I like to add enough pepper to make the dish spicy—that is the defining characteristic of the dish—but not so spicy that it overwhelms the taste of the chicken itself. The longer you marinate, of course, the more intense the flavors will become. I find an hour is quite enough, but you can prepare it several hours ahead and put it in the fridge. You can even skip the marination stage; just dress the chicken and place it on the grill immediately.
If you don't have a grill or prefer to cook indoors, the chicken can be made al mattone, either in a terracotta cooking vessel specially made for the purpose, or on a griddle or in a heavy skillet or sauté pan, weighed down on top with another skillet or—as the name suggests—with a brick. Why all this trouble to keep the chicken flat, you ask? It ensures that the chicken cooks quickly and evenly, and gets nice and crusty all over.
The name "Devil's Chicken", as you may have guessed, is a tongue-in-cheek reference to the 'hot as Hades' nature of the dish and, I surmise, the well-charred exterior of the bird.
Saturday, May 8, 2010
Fagioli all’uccelletto
Tuscans love beans. They eat them as part of many of the famous Tuscan soups like ribollita, they eat them in a salad with tuna as an antipasto, and, of course, they eat them as a contorno, or side dish, especially with grilled meats like the mythical bistecca alla fiorentina. In fact, they are so well known in Italy for their love of legumes that Tuscans are sometimes jocularly called mangiafagioli, or 'bean eaters'.
I love Tuscan cuisine not only because I love legumes of all sorts, but also because it embraces the qualities that, for me, epitomize good eating: it is simple but delicious, rustic yet elegant, hearty yet healthy. This dish, fagioli all'uccelletto, or beans made in the manner of little birds, is a perfect example.
You begin by making a simple tomato sauce: gently sauté a few garlic cloves and some fresh sage leaves in olive oil. When the garlic is just beginning to brown, add either fresh or canned tomatoes, which you will have puréed through a food mill, and let it simmer, always on gentle heat, until the tomatoes have reduced nicely to a saucy consistency. Then add boiled or canned cannellini beans, season with salt and peppers, and allow them to simmer in the tomato sauce for about 10 minutes or so, just long enough for them to absorb the flavor of the sauce. Test for seasoning, adjust if need be, and serve immediately. I like to drizzle a little olive oil over the top before serving.
As far as measurements go, the key is the ratio (by weight) of tomatoes to beans: if you want a rather 'saucy' dish, then use a ratio of 1:1. For a drier, less tomato-y version, add more beans, up to a 1:2 ratio.
NOTES: Fagioli all'uccelletto, as mentioned, is a usually served as a side dish. It goes particularly well with roasted or grilled meats, and is a staple of our backyard barbecues—that is, when I don't opt for the equally delicious fagioli al fiasco. It is a forgiving dish, and because of the assertive flavors of the tomato sauce, I find that canned beans work very well here. Just make sure that you buy a brand that is not too 'mushy' straight out of the can, and then rinse and drain them well before adding them to the sauce. If you use canned tomatoes as well, the dish is extraordinarily quick to make—I usually use the side burner on my barbecue to make it while the meats are grilling. It is done in about the same time.
Although cannellini are the beans typically associated with this dish, of course many different kinds of beans—and other legumes—lend themselves well to this treatment. Feel free to experiment!
According to Florentine gastronome Giuliano Bugialli, the curious name of this dish comes from the manner in which little songbirds were traditionally cooked.
By the way, Il mangiafagioli is the title of a well-known painting by the Baroque painter Annibale Carracci. If you're ever in Rome, it hangs in the Galleria Colonna. It is also featured on the cover of various editions of the iconic Italian cookbook, Il Talismano della Felicita'.
![]() |
| A. Carracci, Il mangiafagioli (1583-84) |
Saturday, February 6, 2010
Coniglio alla cacciatora
Rabbit is a wonderful meat, leaner but yet tastier than most chicken you'll find in these days of industrial agriculture. Many people (at least in the US) have an aversion to eating rabbit, but it is quite popular in Italy, Spain, France and elsewhere in Europe. And why not? Those furry creatures make great eating.
One of my favorite ways of making rabbit is alla cacciatora, or 'hunter's style'. The term, one of the most widely used in Italian cuisine (and is often associated with Tuscany) encompasses many variations. The original meaning referred to a way of making game, of course. Dishes made alla cacciatora are generally some sort of spezzatino, which is to say, unboned meat cut into smallish pieces that are subjected to dry heat and then moist heat cooking. Vinegar is often used either as part of a marinade or as a braising liquid, as its acidity helps to 'cut' the strong flavor of the game meat. These days, dishes alla cacciatora are, more often than not, made in rosso—with tomato, either puréed or in concentrate, but tomato being a relatively recent addition to Italian cuisine (a fact that astonishes many) the original recipe, lost in the mists of time, surely did not include it. This version does not include vinegar but the smoother taste of red wine, and it contains just a little bit of tomato concentrate.
You start by cutting up your rabbit. It is done very much like you cut up a chicken, as the bone structure of a rabbit is quite similar. Like a chicken, you start by separating thighs and legs (two sets rather than one) from the carcass. But you will quickly notice a few differences. First of all, rabbit bones, though quite thin, are much harder than chicken bones, so you'll need to strong knife or cleaver to cut through them. And the body of the rabbit is quite a bit longer; it has a mid-section called the 'saddle' rather than a breast, running along its backbone than needs to be cut into sections. For a detailed description of how to cut up a rabbit, see this useful article.
Begin cooking by sautéing a soffritto of finely chopped garlic, rosemary and sage in olive oil, over gentle heat in a large sauté or braising pan or casserole, preferably of terracotta or enameled cast iron. When the soffritto is just lightly golden, raise the heat to medium high, add the rabbit pieces and turn them so that they are even coated with the aromatics. Sauté the rabbit until it, too, is lightly golden on all sides. Then season with salt, black pepper and red pepper flakes. Pour over some red wine and allow the wine to evaporate completely.
Add about 2 tablespoons of best-quality tomato paste in about a cup of water, along with a bay leaf, to the pan. Mix well, lower the heat again to a very gentle simmer, cover the pan and let the rabbit braise for about 20-30 minutes. Add a bit more water if the pot dried out. When the dish is done, the rabbit should be quite tender and the sauce, being quite reduced, should coat the rabbit pieces. Serve hot.
NOTES: Like most spezzatini, this dish can be made ahead and, in fact, tastes even better when it is.
As mentioned above, there are many different methods that go by the name alla cacciatora. Perhaps the most common involves chicken and begins with a classic soffritto italiano—made of onion, carrot and celery like a French mirepoix—rather than garlic and herbs and then simmered in tomato sauce. (Here's a typical version demonstrated in a video. Pancetta is sometimes added to the soffritto for extra depth of flavor, a good idea with today's bland chickens. It can be excellent eating if you don't drown the dish in tomato, as if all too often the case. Artusi's version calls for a soffritto of onion only, sautéed in lard and simmered in red wine and just a half cup of tomato. There is a wonderful baby lamb dish made with a paste made out of garlic, rosemary and anchovies diluted with a bit of vinegar.
Rabbit is a great meat. Besides making it alla cacciatora, it is also lovely simply roasted or grilled with garlic and herbs, boned and stuffed, as part of a bollito misto, or in any number of spezzatini. In fact, just about any chicken recipe can be used for rabbit. Rabbit can be hard to find, but if you have access to an Italian butcher, ask for it. I have also seen rabbit in some Asian supermarkets here in the States.
This recipe is an adaption of the recipe for pollo alla cacciatora in The Fine Art of Italian Cooking by G. Bugialli.
Wednesday, November 25, 2009
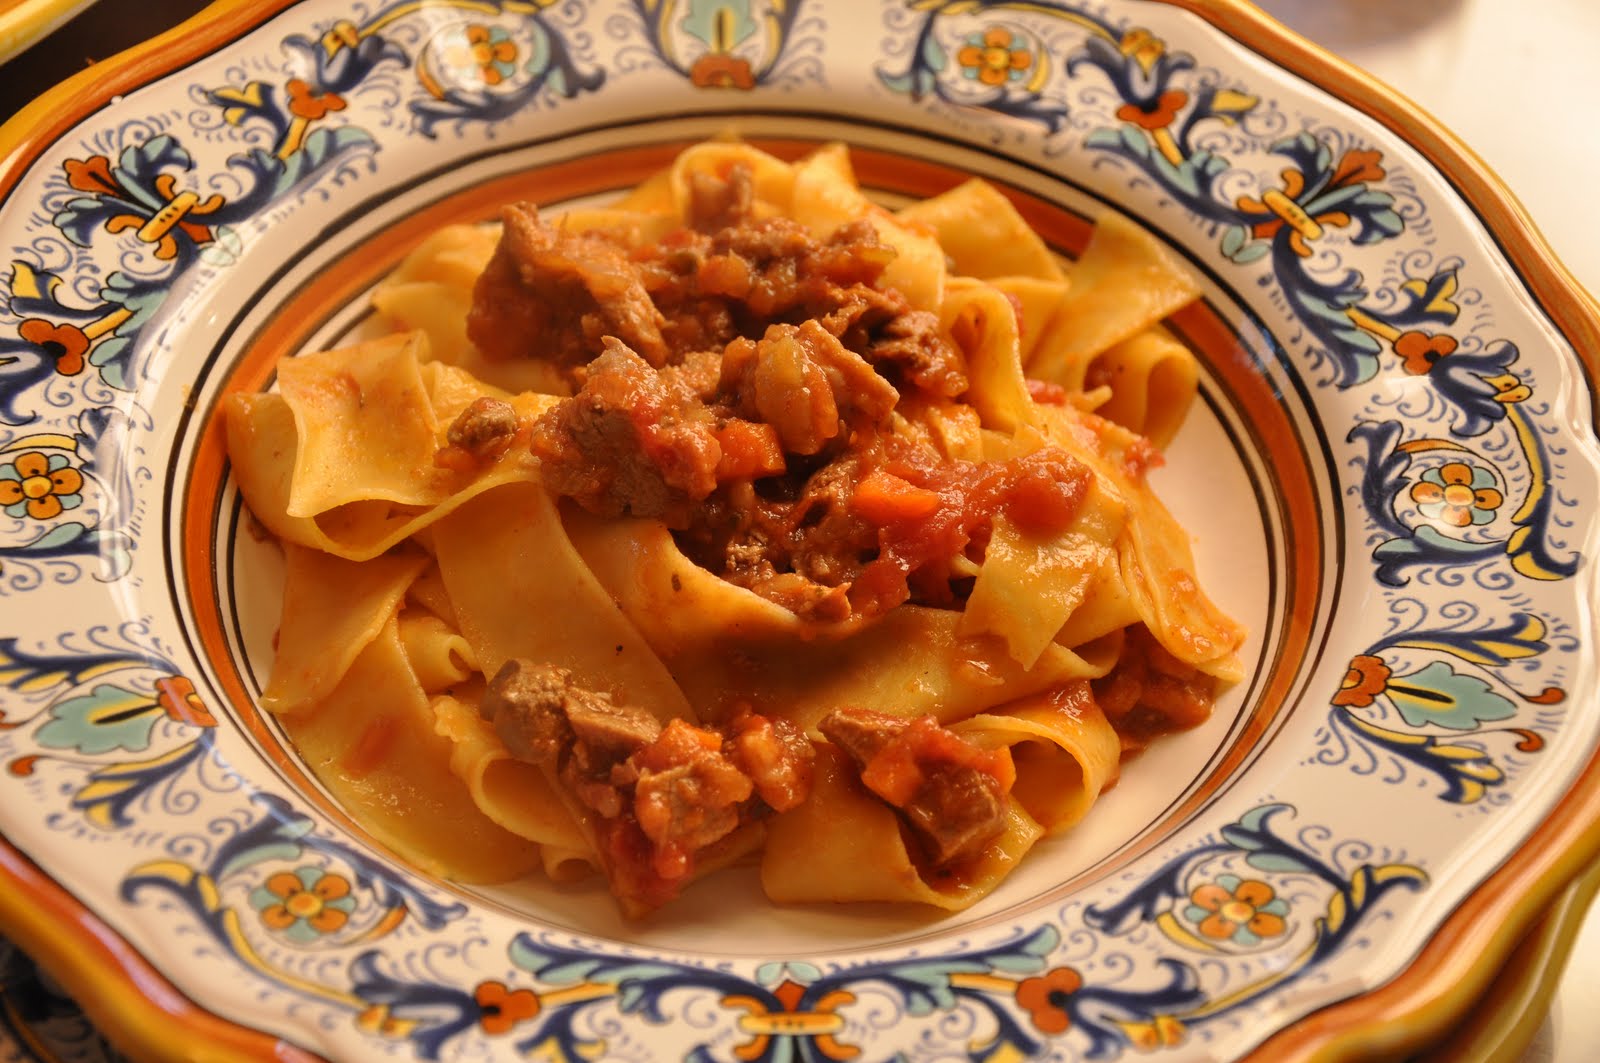
Pappardelle all'anatra
When one thinks of Tuscan cooking, one of the first dishes that comes to mind—along with such icons as fagioli all'uccelleto and bistecca alla fiorentina—is pappardelle sulla lepre, wide ribbon pasta with hare sauce. Its fame is perfectly justified; it is truly delicious. Finding hare is just about impossible where I live now, so I have cast about looking for substitutes. Rabbit would seem an obvious choice, being unusual but not impossible to find. But rabbit actually has a quite different, much milder and less gamy, flavor from that of hare. Although a completely different animal, I find that duck fits the bill. Made using a similar technique, it captures the 'gaminess' of pappardelle sulla lepre if not the exact flavor. And it is, in any event, not merely a substitution, but a traditional Tuscan dish in its own right: pappardelle all'anatra.
Step 2: Getting the sauce started: Then make a battuto of red onion, carrot, celery, a few sage leaves and pancetta, all finely minced. To make short work of the task, you can pulse these ingredients in a food processors (having roughly chopped them beforehand to ensure an even consistency) until you have a fine mince, almost—but not quite—a paste. Sauté in abundant olive oil until very soft, then push what is now a soffritto to the edges of the pot and add the duck pieces, turning them frequently and allowing them to brown lightly on all sides. Season with salt and pepper and then splash a generous amount of red wine into the pot, turning the contents to allow them to absorb the wine.
Step 3: Braising: When the wine is entirely reduced, add a large can of peeled tomatoes, crushed with your hands or passed through a food mill, into the pot. Then tomatoes should nearly cover the duck pieces. If not, add water or broth. Cover partially and allow the duck to braise for an hour, stirring from time to time. If the sauce seems to be drying out, add a bit of water or broth. But more likely, the sauce will be a bit thin after an hour, so uncover and allow the sauce to reduce slowly for another 30 minutes or so.
Step 4: Finishing the sauce. A few minutes before the sauce is done, remove the duck pieces from the sauce. You can do one of three things with them: (1) you can keep them warm and eat them as a secondo after the pasta, accompanied by the vegetable contorno of your choice, (2) you can serve them on top of the pappardelle as a one dish meal or of piatto unico or (3) you can remove the meat from the bones and remove the skin from the meat, then chop the meat roughly and return it to the sauce. Personally, I prefer the third option, as duck that has braised this long tends to be a bit too dry for my taste to eat on its own. If you want to serve the duck as a secondo, some recipes call for braising the duck whole rather than in pieces which provides a better presentation and will also help avoid overcooking the duck meat.
When the sauce is done—it should be well reduced and darkened—skim the excess fat from the surface. Depending on the duck, there may be quite a lot of excess fat. Some recipes call for you to make the sauce ahead and cool it, to allow you to remove the fat, but I find this is unnecessary and, in any event, you do want some fat in the sauce to add flavor and help it coat the pasta.
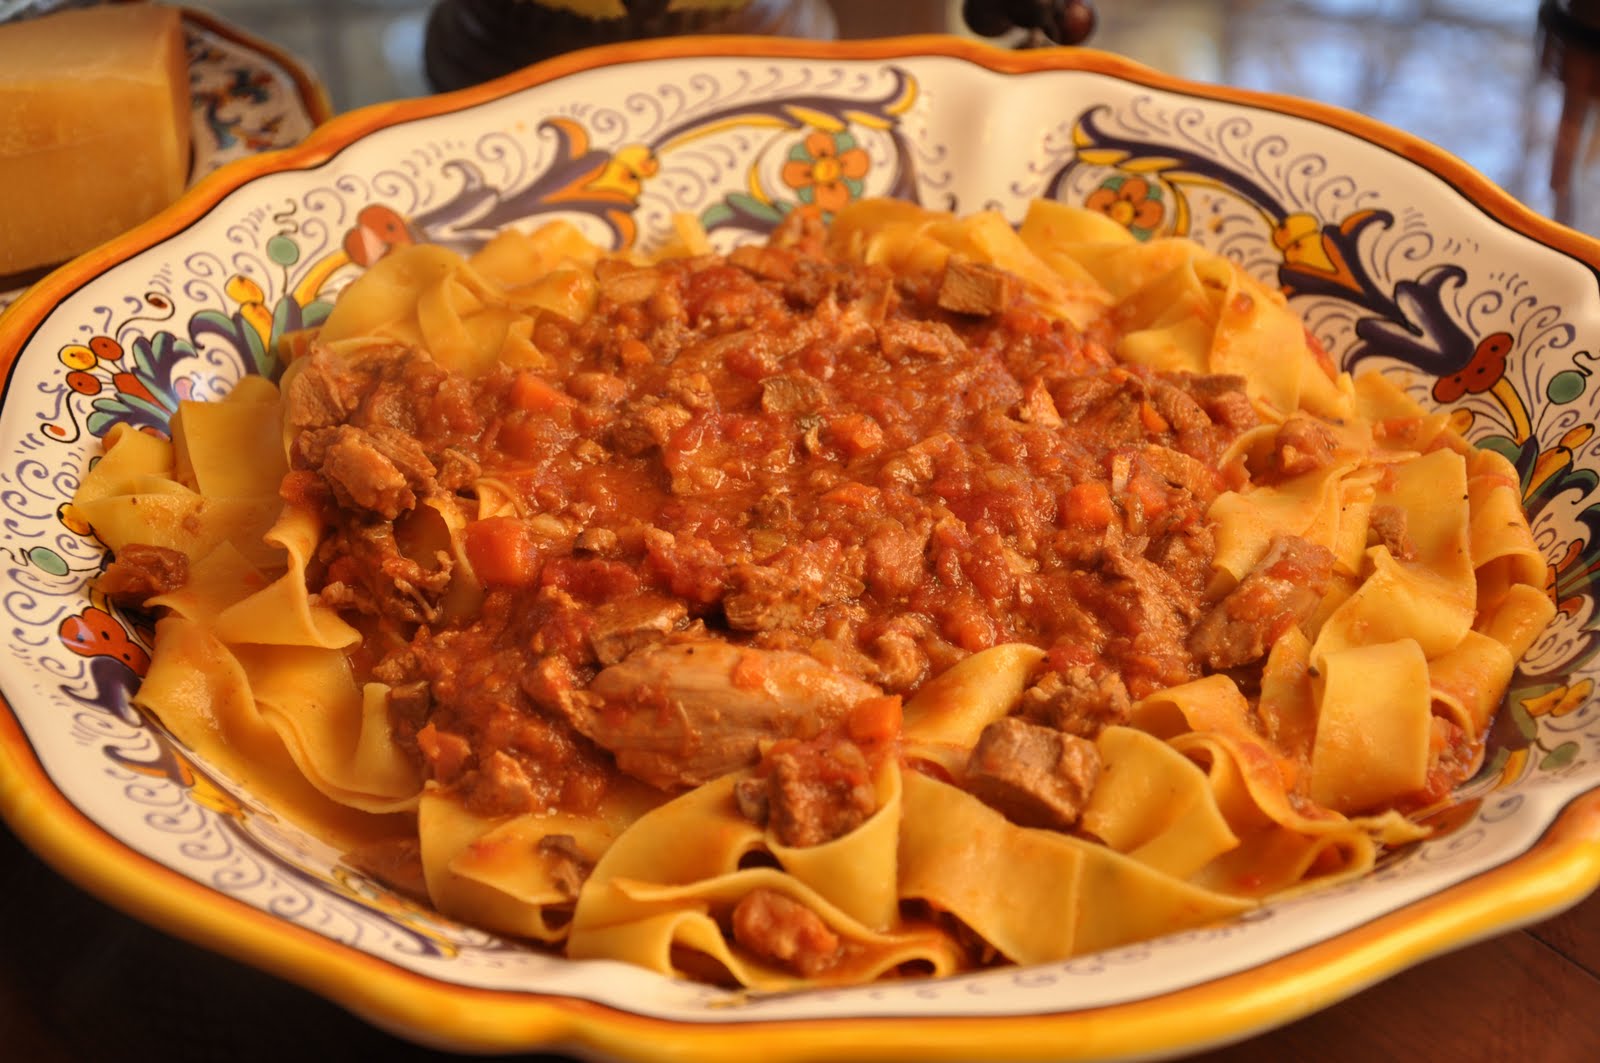
Step 6: Making and saucing the pappardelle: Meanwhile, you can be making your pappardelle by mixing fresh pasta dough, rolling it out quite fine and cutting it into strips 2-3cm (1 inch) wide. In the alternative, if you lack the time or the energy to make your own, there are some quite fine pappardelle available commercially. Boil the pappardelle in abundant salted water until slightly underdone. Drain (but not too well) and return the pappardelle to the pasta pot, then add a few ladlefuls of the duck sauce, mix well, and allow the pasta to simmer in the sauce over moderate heat until it has almost entirely absorbed the sauce. Pour into a warmed serving dish and ladle additional sauce over the pasta. Serve with grated parmesan cheese on the side for those who want it.
NOTES: Try to find a smallish duck for making this sauce. Most recipes call for a duck of around 1 kilo (about 2 pounds) but it may be hard to find a duck that small. Most ducks in the US are four pounds and up. Also, try to find a fairly lean duck, like a Muscovy. Ducks, like the ones used for making Peking duck, can be excessively fatty.
Using the rest of the duck: Ducks are not cheap, but you can use just about every bit of them one way or another. As mentioned above, the back (trimmed of its skin), neck and giblets make a very fine duck stock, which can be used like any other stock for risotti or soups, or to add flavor to a stew. And don't throw away the skin or excess fat: you can render the fat out by putting it in a skillet just large enough to contain all the bits of skin and fat in one layer, just cover with water and allow to simmer very gently until the water has evaporated and the skin has given off all of its fat and is nicely brown. Pour off the rendered fat into a jar and keep it for cooking—it is absolutely fabulous, for example, for sautéing potatoes. And the cracklings (the crispy brown bits of skin left over from rendering out their fat) are delicious just sprinkled with a bit of salt and pepper. In my house, this is a special treat for the chef...;)
There are a good number of possible variations for this dish: The use of red onion is typical of Tuscan cookery but if you don't have a red onion on hand, a white or yellow one will do fine. Some recipes call for the addition of parsley or nepitella or even fennel seeds to the sauce as it simmers. Given the size of many modern ducks, some recipes call for using only the breast, which works fine, but you lose some flavor—and there is much flavor in the bones and the thighs. You can make a duck ragù by mincing the duck breast finely and adding it to the soffritto, as if you were making a ragù alla bolognese. Some recipes, conversely, call for using only the duck legs, which tend to be more flavorful (if less tender) than the breast, and hold up better to a long braise. Some recipes call for prosciutto rather than pancetta in the battuto, and/or white rather than red wine. Some recipes call for braising the duck in tomato paste diluted in broth rather than canned or fresh tomatoes. Add, finally, some recipes call for fresh or dried wild mushrooms for an even more rustic effect.
Labels:
duck,
Fall,
meat,
pasta,
piatti unici,
poultry,
primi piatti,
Toscana,
Winter
Tuesday, November 10, 2009
Fagiolini in umido
While Sundays dinners at Angelina's house were once-a-week, belly-busting, meaty affairs, she practically lived on vegetables during the week. This was long before vegetarianism went mainstream and she would not have thought of herself as a 'weekday vegetarian' or anything of that sort. It was just the way that she grew up eating in a family of modest means living in small southern Italian village. But frugality had its benefits, and sure lydiet was one reason Angelina lived to be 98 years old.
In any event, when I was growing up one of my favorite vegetable dishes in Angelina's repertoire were these green beans (or string beans, as we used to call them) stewed in a simple tomato sauce.
You start, as so often, with a soffritto of onion and/or garlic sautéed in olive oil. Then you add best quality canned tomatoes, crushed in your hands, and allow them to simmer. Meanwhile, blanch your trimmed green beans in abundant, well-salted water until crisp-tender, add them to the tomato sauce along with some of their cooking water and allow them to simmer until quite tender.
NOTES: This recipe is quite forgiving, and even green beans of indifferent quality will turn out nicely. In fact, if anything, I find that regular 'garden variety' green beans turn out better cooked this way than the fancier—and more expensive—French green beans. (French green beans, on the other hand, are preferable when making fagiolini all'agro, where their tenderness and delicate flavor can really shine.) If you can find them, the extra long string beans sometimes sold in Asian markets in the US, known in Italy as serpenti, are especially nice.
It is important to cook the green beans to the right degree of doneness. They should fully cooked, not crisp-tender, with no trace of that green bean raw taste, but not overcooked and soggy either. It is impossible to give a standard cooking time, since it varies wildly according to the freshness and thickness of the beans, anywhere between 10 minutes for very tender young green beans to 30 minutes or more for more mature ones.
Angelina would vary the dish from time to time by adding other vegetables to simmer along with the green beans, typically sliced carrots, cubed potatoes or boiled (or fresh) cranberry beans. In the summer, adding a few leaves of basil give the dish a nice fresh taste. Another variable is the 'sauciness' of the dish. Angelina's version of this dish was actually quite brothy, with lots of rather thin tomato sauce to sop up with bread. In modern-day Italy, however, where this dish is a standard contorno, it is customary to reduce the sauce down until the dish is almost dry. And while Angelina's version was obviously Neapolitan, in Tuscany they also make fagiolini in umido, but with a soffritto of onion, carrot and celery rather than onion and garlic.
Some recipes call for adding the raw green beans directly into the simmering tomato sauce, rather than putting them through an initial blanching. I've tried it both ways and, for reasons I cannot really explain, the blanching really does result in finer flavor and texture.
The dish is typically a side dish or contorno, but like Angelina I sometimes eat just this, with some crusty bread, as a light supper.
Wednesday, October 21, 2009
Lesso di manzo rifatto
Waste not, want not, they old saying goes. There are a myriad of old recipes in the Italian repertoire for making use of boiled beef leftover from beef broth, a brodo classico or a bollito misto. Of course, boiled beef can simply be gently reheated in its broth and served with salsa verde or salsa rossa, but there other, perhaps more imaginative ways to use it. Here are three examples:
Lesso rifatto con le cipolle. This may be my favorite way to use leftover boiled beef, and it has to be one of the simplest: you simply sweat thinly sliced onion in olive oil until it is softened. Season with salt and pepper as it sweats, and add a drop or two of water, if need be, to prevent it from browning. Then lay sliced leftover beef over the onions (slice it cold so it does not fall apart) and then pour in beef broth almost up to the top of the beef. If you have a sprig of sage or rosemary on hand, you can nestle it between the beef slices. Cover and simmer over gentle heat until the beef has been warmed up, then uncover and allow the broth to reduce until you have a nice, unctuous sauce. Do not stir or move the beef slices, or they may break up.) Serve either by itself or with mashed potatoes as a piatto unico, accompanied if you like with a green salad.
NB: This dish is often made in rosso, in the Tuscan tradition, with red onions, a bit of tomato or tomato paste and touch of peperoncino.
Lesso rifatto alla pizzaiola. This is a recipe that I 'invented'—sort of. Fettine di manzo alla pizzaiola (beef slices 'pizza-style') is a well-known dish from Campania, but is made with slices of raw beef. In all honesty I don't much like it when it's made that way; the beef inevitably turns out rather dry. But made with slices of lesso, it is wonderful! Make a sugo di pomodoro with oil, garlic and tomato, then lay the beef slices in the sugo, season with salt and pepper and sprinkle with fresh or dry oregano. Simmer gently until the beef is nicely reheated and the sauce is well reduced and clings to the beef slices. (Not pictured.)
Lesso rifatto alla ciociara. This is a recipes I found on the internet, and liked very much. You sweat onions in olive oil (or lard) until quite soft, then add tomatoes (canned tomatoes are fine) and cubed waxy potatoes. Allow the tomatoes to reduce into a thick sauce, then add boiled beef cut up into pieces, then enough broth to almost cover the beef. Simmer gently until the broth is well reduced (the recipe says 40-50 minutes, but imho 15-20 is quite enough). Season with salt and pepper, then chopped parsley.
NOTES: The word ciociara, by the way, means in the style of the Ciociaria, an area located in the southern part of Lazio, the region of Italy of which Rome is the capital. Whenever I hear the word, I always think of the wonderful neorealist film La Ciociara, directed by Vittorio DeSica. (The English title is Two Women.) The film takes place during World War II and portrays an infamous episode that occurred immediately after the battle of Monte Cassino, from the perspective of a so-called marocchinata, a victim of the mass rape committed by the Gourmiers, Moroccan colonial troops of the French Expeditionary Forces (CEF). The writer Alberto Moravia wrote a novel about the episode called La Ciociara, which de Sica made into the film. It starred in the title role Sophia Loren, who won the Oscar for Best Actress in 1960, at the tender age of 23. It was the first time in the history of the Academy Awards that the Best Actress award had been given for a non-English speaking role. The film made Loren an international star. If you have a chance, I heartily recommend it. The story, as you can well imagine, is not a happy one, but both the film and Loren's performance is wonderfully moving.
Sophia Loren in La Ciociara
Post scriptum: By the way, just realized that this is the 100th post on Memorie di Angelina... I guess this blog is now officially grown up.
Subscribe to:
Posts (Atom)