Sunday, June 27, 2010

Happy Birthday, Memorie di Angelina!

My love of food goes back a long way!

Hard to believe, but it's been one whole year since I started this blog with a short welcome message and a promise to fill it with my favorite recipes. Well, I'd like to think that I've made good on that promise with the nearly 200 recipes I've posted since then. In fact, I've covered most of my personal favorite dishes and provided what I might immodestly call an in-depth, if hardly exhaustive, overview of cuisines of the two regional Italian cuisines I know best, those of Naples and Rome. If I do say so myself, if you are looking for an overview of  these cuisines, you could do worse than look here. 

Over time, as I have learned more about this odd pastime called food blogging, I've come to realize that Memorie di Angelina is actually very different in both intent and content from what a lot of my fellow bloggers are up to. For one thing, the primary—almost exclusive—focus is on the food and how to cook it, described not in traditional recipe format but in what I like to call 'food stories', with a focus on the experience of cooking rather than exact measurements and cooking times. Whenever my knowledge and time allow, these stories include a little historical and cultural context to help the reader understand the origins of a particular dish, its evolution over time, and the possible variations in preparation and ingredients. Luckily, my chosen subject, Italian cuisine, provides fertile ground to this sort of culinary tilling. 

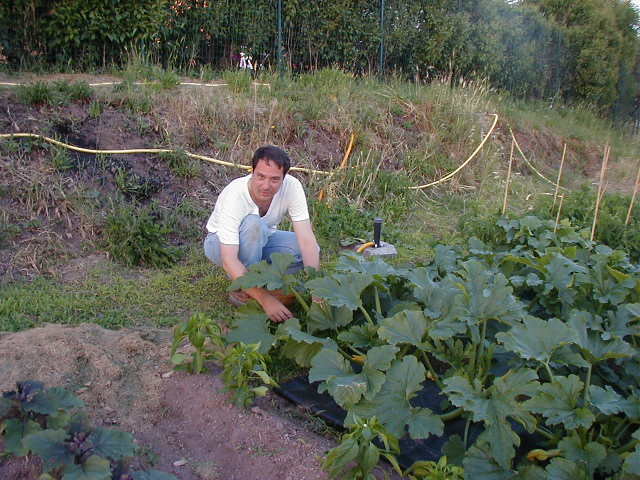
Another kind of tilling: yours truly tending the zucchini plants in my Roman garden...

The result, I hope, is both informative and entertaining, but perhaps less personalized than other food blogs you are likely to encounter. I'll tell you about the experiences that have shaped my cooking and thinking about food, but you'll rarely if ever read here about my personal problems, or how much my guests or family may have liked or disliked a dish, or any of those little personal touches that can make a blog so charming. Yes, I would like to charm you, dear reader, not with the compelling but false sense of intimacy that the internet can encourage, but with passion for my subject and attention to all the little details that makes for truly good cooking. 

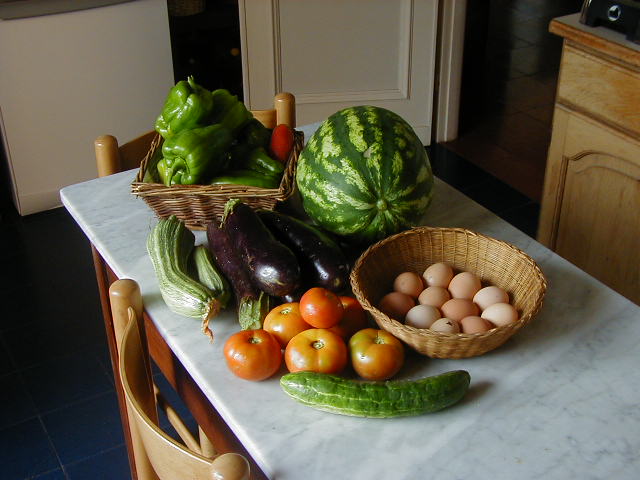
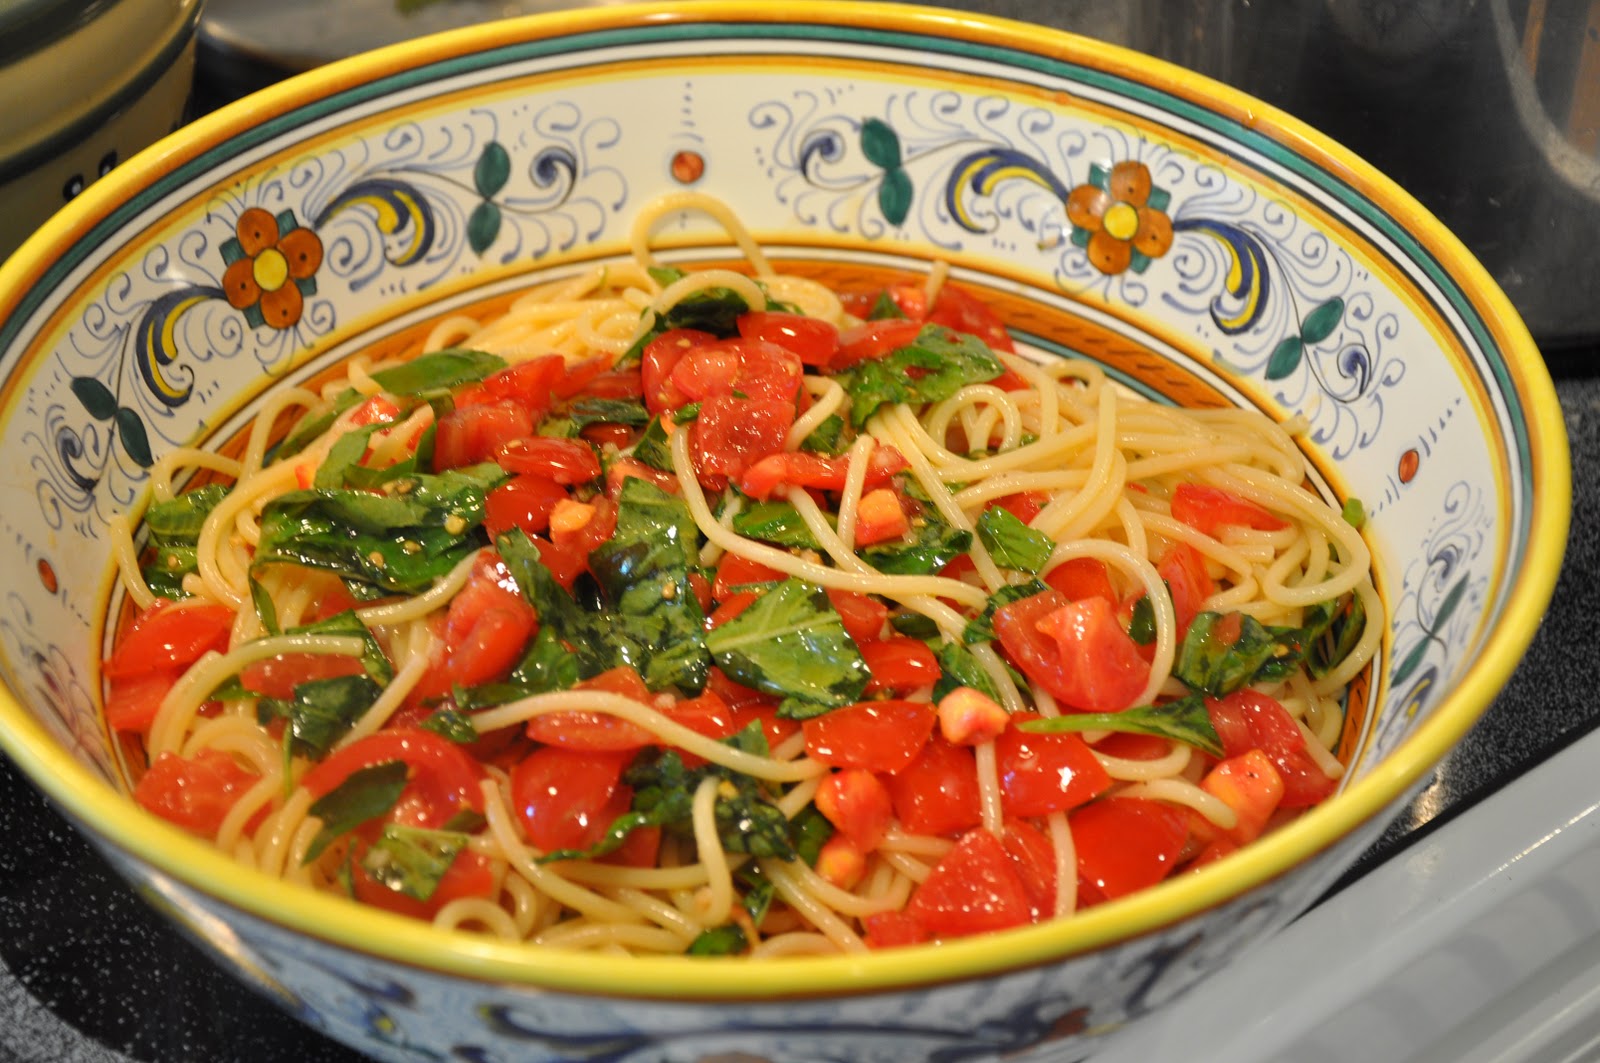
The fruits of my labor on our kitchen table. This is what good food means to me.

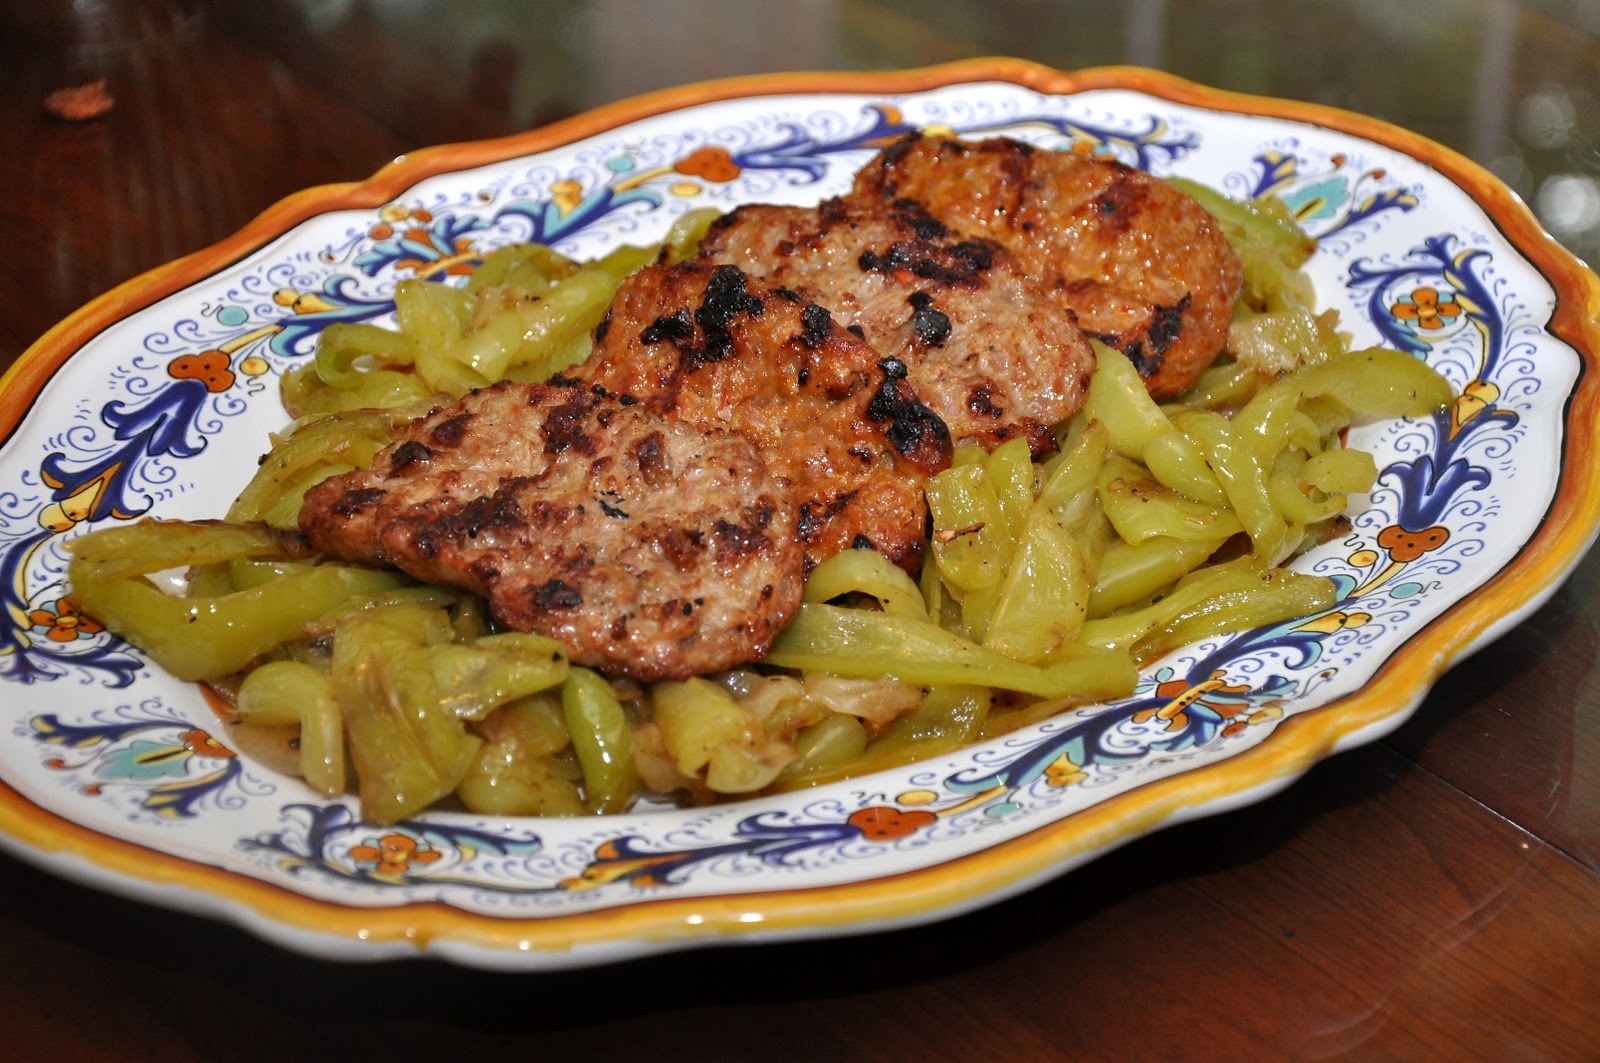
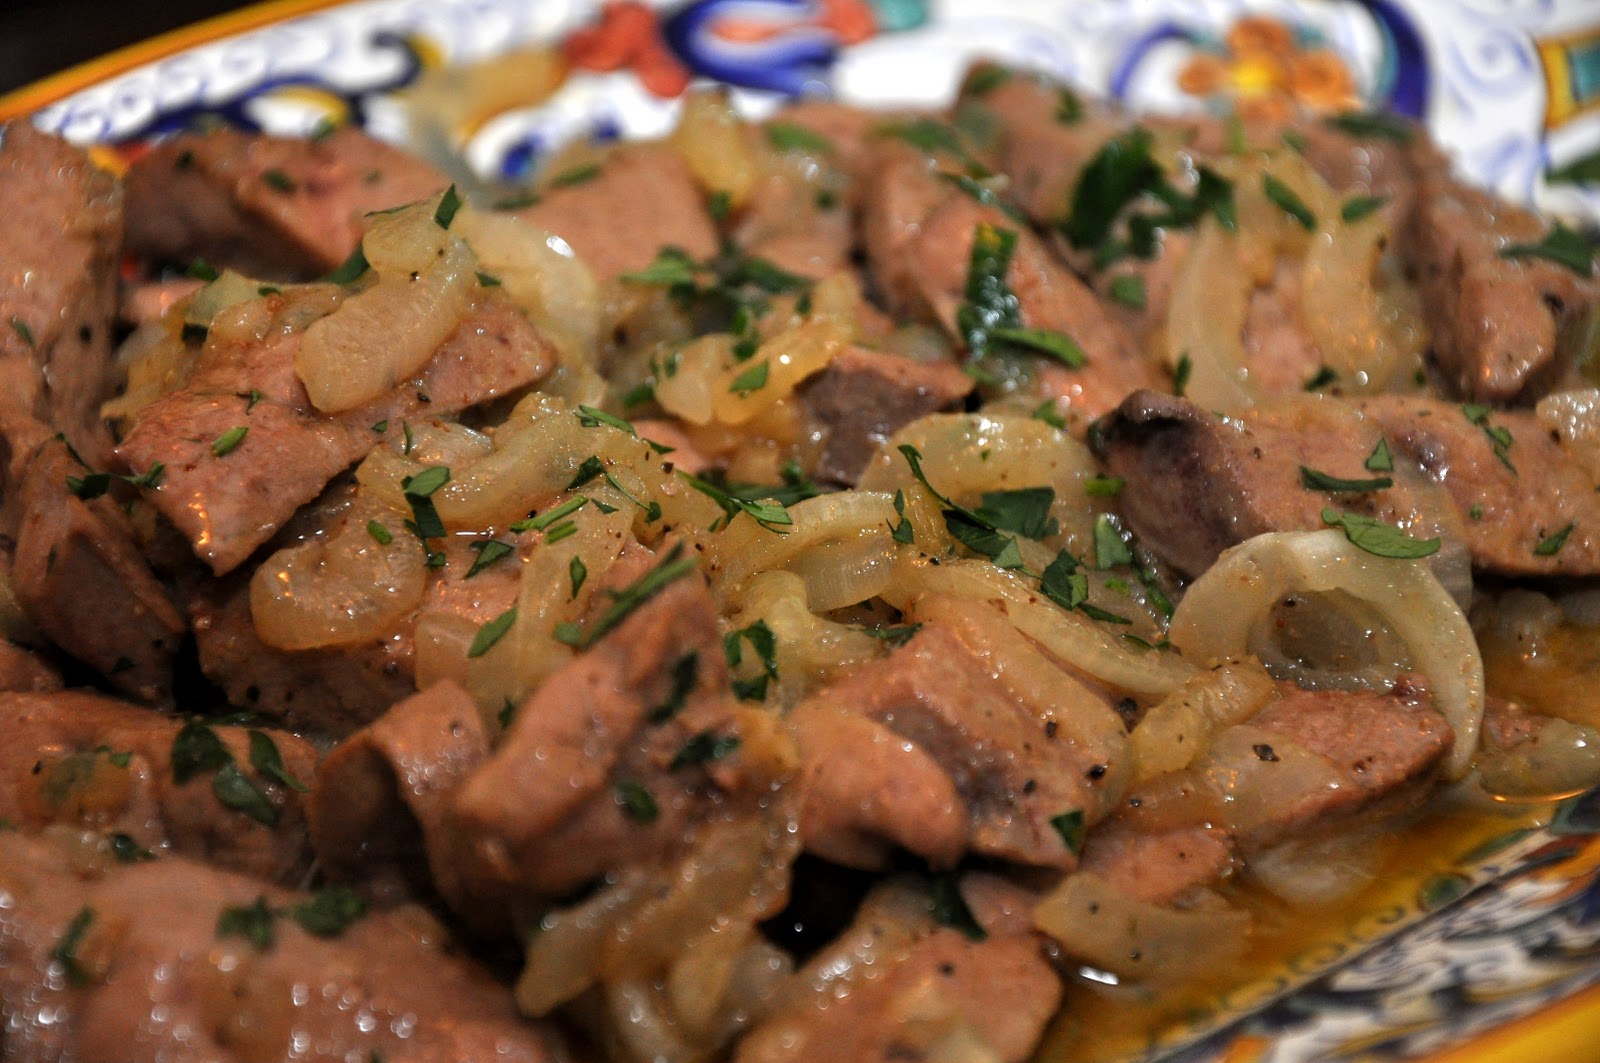
Memorie di Angelina does not try to be innovative, creative or original. It's not about 'fancy' food. It's not about the newest 'fad'—have you seen any cupcakes on this blog?—or simply about what we've been eating at home, although, yes, everything you see here is what's been for dinner at home. In fact, I've been systematic about trying to cover the most classic, iconic home dishes of each region of the peninsula, first and foremost my nonna Angelina's home cooking from Campania and the lusty cooking of Rome, where I lived for so many years, but also classics from other regions, from the Venetian classic risi e bisi to Sicily's pasta alla Norma. In short, more than a blog, this website aspires to be an online cookbook, a resource for learning about and preparing the best of Italian home cooking.

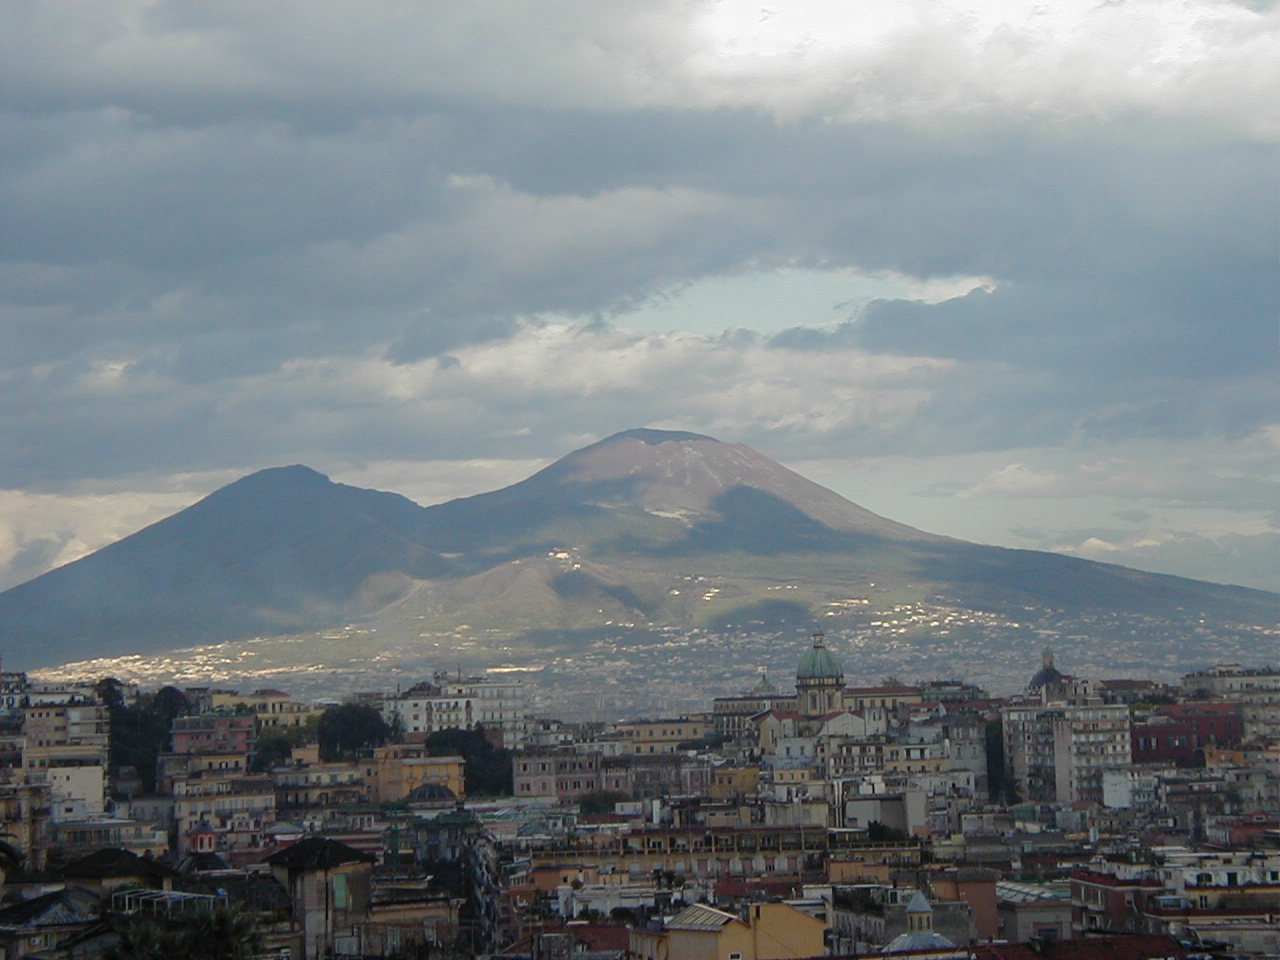
Back to my roots: majestic Mount Vesuvius ...

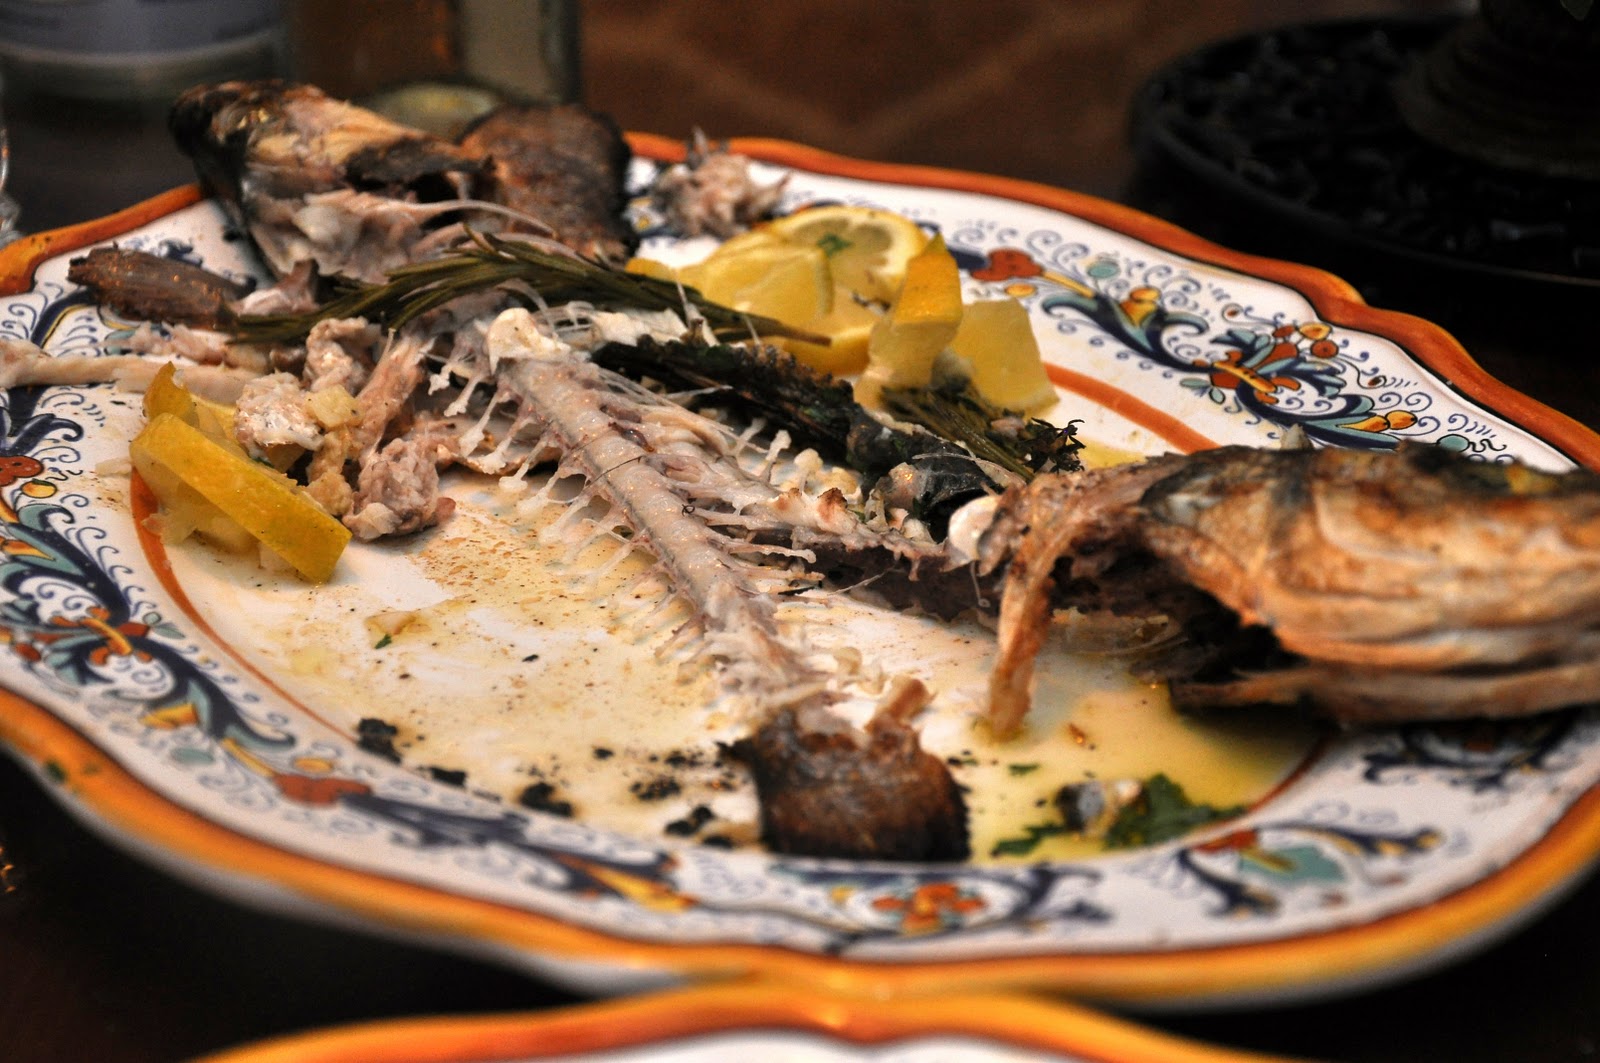
One rude awakening that has shaken me a bit over the past year is  the extent to which blogging—like the internet itself—is a visual medium. That's been a real challenge. I've never been much for food styling. You'll hardly ever see any garnish on my dinner plate other than the occasional lemon wedge for fish. And I'll be the first to admit, you will not find the best food photography on the web here at Memorie di Angelina. And yet photography is the thing that is supposed to attract readers and separate the truly 'big' blogs from the myriad others. I've wanted to improve the photos here for quite a while, even went out and bought myself a fancy dSRL camera and some lighting equipment. But this blog being a labor of love that I squeeze in—mostly on the weekends—whenever my day job allows, it has been a struggle to find the time to master an art that is as complex as cooking itself. 

But even if I did become the next Lou Manna, sometimes I wonder whether this blogging business isn't, at bottom, an exercise in futility. For me, food is fundamentally about taste and texture. But, ironically, those are the two sensations that are hardest to convey in words or pictures. Neither writing nor photography will ever be a substitute for actually experiencing the taste and 'mouth feel' of a dish. And some of the best eating, especially when it comes to home cooking which is the focus of this blog, does not make for a pretty picture. Nor can it really be captured in words—the English language, its huge vocabulary notwithstanding, fails when it comes to these sensations. (Think, for example, of all the sublime and ridiculous terms of art that wine connoisseurs resort to.) Sometimes frustration with this basic limitation of the medium can drive me almost to despair.

And yet, this quirky blog, with its odd, unpronounceable 'foreign' name, 'plain Jane' graphics, too much text and mediocre photography has, seemingly against all odds, met with a modicum of success. As I've proudly pointed out before, the regular readership of Memorie di Angelina has been growing steadily into the thousands and its online traffic comes, quite literally, from all over the world: about one third from here in North America and the rest from large contingents from Europe, Latin America, Asia and Africa. It's the second most popular blog under cooking and recipes, and the third most popular under food, on NetworkedBlogs, the biggest blog directory on the web.

Well, now that I'm off my soapbox and done with my bragging and belly-aching, let me say it again: thank you all for your loyal readership and support. It means a lot. It's what keeps me at it, even when I'm feeling frustrated, even when I'm tired from a long week and would rather just veg' in front of the television and throw back a cold beer. That, and the love of cooking.

So what next for Memorie di Angelina? I'm lucky that my chosen subject is vast. I may have covered most of the 'greatest hits' of Rome and Naples, but there is much more out there to explore. And other regions to cover as well, in particular the other cuisines of central Italy that I love so much: Tuscany, Umbria, Abruzzo and the area of northern Lazio known as the 'Tuscia'. And I have always wanted to learn more about the cooking of the rest of southern Italy, in particular Puglia, the region of Italy that my paternal grandfather Lorenzo—Angelina's husband—hailed from. And then there's Sicily, a region of Italy that I have always found rather mysterious, with its fascinating and colorful history which has produced a cuisine with unique blend of influences. But then, we mustn't forget about the refined cuisine of Piemonte, the Germanic-influenced cuisines of Alto Adige, Friuli or Trieste… In short, there's still a lot of ground to cover. Some of the more encyclopedic Italian cookbooks have literally thousands of recipes. 

In the near future, I also want to make the growing collection of recipes that make up this website more easily accessible. I am tinkering with different strategies for allowing users to browse recipes more easily, perhaps through the use of indexes, so you can see the full gamut of dishes featured here by region, type of dish and so on. 

And, finally, one of these days I want to get back to a project that has been on my 'to do' list ever since I began blogging—to introduce you to my grandmother Angelina, the lady whose wonderful home cooking inspired this blog. That, I hope, will be a post worth waiting for. 

Thanks for your readership and happy cooking! 

Frank

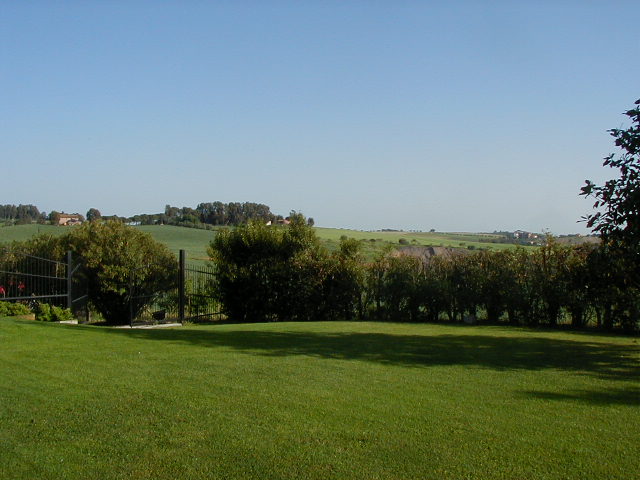
The view from our backyard outside Rome, where we enjoyed so many al fresco dinners.

Saturday, June 26, 2010

Frank’s Sausage and Peppers


What would summer be without this perennial Italian-American favorite? It's hard to imagine an Italian street fair without the enticing aroma of sausages being grilled on portable barbecues while peppers and onions are sizzling away on a near-by griddle. Isn't just the thought of it enough to make you hungry? Here's my take on this classic.

First you make a kind of peperonata—the fried peppers and onions that make for such a popular summer side dish—by taking a nice heap of 'frying peppers', the thin, longish light-green peppers that Italians call friggitelli, cutting off their tops and slicing them in half from top to bottom. Remove the seeds and any white ribs you find inside. (This kind of pepper has a lot less than regular bell peppers, but you will still find some.) Then slice them vertically into thin strips:


Measurements don't much matter, but I find that a half pound (250g) of peppers per person is about right. That may look like a lot of peppers to begin with, but they reduce considerably while cooking.

Then peel an onion and slice it in half from top to bottom. Trim off the root and then slice each half vertically into thin but not paper-thin slices. Make sure you slice the onion vertically—that is, from  root to tip with the grain. If you slice onion horizontally—across the grain—the onion pieces will 'melt' into the dish as it cooks. That's what you want for most dishes where the onion is there purely for it savory flavor. But in this dish, the onion is more than just a flavoring, it is a component in its own right: put another way, it's not just part of the harmony, it has a solo:


The exact amounts don't much matter, but in this dish the peppers are the real star, so one medium onion is enough for a pound (500g) of peppers. Now heat a skillet and when it is hot, add a generous amount of olive oil. Before the oil begins to smoke, add you sliced peppers and onions. Mix well with some tongs (or a spatula) and lower the heat. 


Maintain a moderate flame so that the vegetables are sizzling nicely in the oil without browning too much. As they cook, the peppers and onions will reduce considerably. Hold off seasoning the dish, as adding salt early on will tend to 'melt' the onion. Instead, season well about halfway through the cooking time (which is to say, after 10-15 minutes) with salt and pepper. Make sure that the vegetables are nicely coated with olive oil—they should glisten like a salad. If they are a bit dry, don't hesitate to add some more oil. When the peppers are just about tender—and they should be fully tender, neither crisp-tender nor mushy—turn up the heat and let the vegetables caramelize, mixing often so they brown nicely but don't burn. Then take them off the heat and cover them. Let them 'rest' like that while you turn to the sausages.


Now it's time to grill the sausages. As you probably know, when cooked whole it is best to prick sausages here and there with the tip of a paring knife or the prongs of a fork. This prevents the filling from 'exploding' out of its skin as it cooks. But there is another way to treat sausages before grilling: butterfly them by slitting them down one side and opening them like a book. This not only allows the sausages to cook more quickly, but exposes more of the sausage to caramelization. If you like the taste of crisy pork, you are bound to like this technique. Your sausages should like something like this before cooking:


Then place the sausages on a hot grill, skin side down first, turning them from time to time, When they are nicely crisp and brown on both sides, serve them on top of the peppers and onions, which you will have laid out on a platter as a bed for the sausages to lie on. 


NOTES: It may come as a surprise, but sausages and peppers is not a particularly common dish in Italy. Although it is not unheard of to add sausages to cook along with a peperonata, the dish has nothing like the iconic place in Italian cooking that it does in Italian-American tradition. You will look in vain in the major Italian cookbooks for sausages and peppers, even those specializing in Neapolitan  or southern Italian cooking. In southern Italy, it is far more common to pair sausages and broccoletti or cime di rapa, known as broccoli rabe in English. Typical of Neapolitan cooking is the use of the young shoots of the same plant, which are known as friarelli. (NB: Confusingly, frying peppers or friggitelli are sometimes also called friarelli.) In the north, you are more likely to find sausage cooked with Savoy cabbage, radicchio or Tuscan kale rather than peppers. None of which to belittle this dish. On the contrary, the match of sausage and peppers is a delicious match, one that was really meant to be. 

A common variation of this dish is the addition of tomato or some tomato sauce to the peperonata when it is about halfway done. By the time the tomato reduces the peppers should also be done. Some people like to add a bit of red pepper flakes as well, although I don't recommend it. If you like some spice, use 'hot' sausages—although I usually not very partial to them, they really go well in this dish. You can also add just a pinch of oregano to the peperonata, but not too much, as the flavor of oregano is very pronounced. But do avoid the use of too many dried herbs or that awful invention called 'garlic powder', which makes everything it touches taste rancid. The elements of this dish—the sausages, onions and peppers—all have tremendous flavor. They don't really need the 'help' of artificial ingredients. 

If you don't have a grill handy, the sausages can be fried in the same skillet. You can brown them at the very beginning, then remove them to make your peperonata, then add them back to the skillet when the peppers are almost tender to finish cooking. Or, when the peppers are almost tender, you can push the peperonata to the sides of the skillet and brown the sausages in the center, then mix everything up and let it cook gently until the sausages are cooked through and the peppers are tender. 

Sausages and peppers are often eaten as the filling for a 'hero' sandwich, but I like it just as it is, with some crusty bread on the side. If you have leftovers, the dish reheats well; it also makes a fantastic filling for a frittata. Some people also use it as a condimento for pasta. Not my cup of tea, as they say, but if you do use it this way, make sure to cut up the sausage into bite-sized pieces. Here a little tomato sauce helps give it a saucy consistency that works well with pasta.


Wednesday, June 23, 2010

Spinaci ripassati in padella


Here's a 'master recipe' for one of the most common techniques in Italian cookery for preparing vegetables, particularly green, leafy vegetables. The technique is called rispassato in padella or saltato in padella which literally means 'tossed in the skillet' and could be translated simply as 'sautéed'. 

As an example, spinach is a good place to start. If you are using very tender 'baby' spinach, simply rinse it well in water without drying it out. Then make a soffritto by very lightly sautéing a clove or two of garlic, slightly crushed, until it just begins to give off a bit of fragrance. If you're cooking for company, you can remove the garlic at this point for a more elegant presentation. But at home I just leave them in for extra flavor (and it wards off vampires, too).

Then add your raw spinach leaves with the water that clings to them, along with a sprinkling of salt. 


Toss the spinach leaves well and they will quickly begin to wilt under the heat of the hot oil. 


 Allow the spinach to simmer and absorb the flavors of the soffritto for just a couple of minutes, until the spinach is well reduced and tender. Adjust the seasoning to taste.

And that's all there is to it! 

Now, if you are using more mature spinach—the kind with dark green, crinkly leaves and thick stems—you should trim the leaves of their stems and blanch them for a minute or two in salted water before sautéing. They are easy to trim: just hold each leaf in your hand on each side of the stem. Then pull the stem off with your other hand—it should come off easily. Drain them before adding them to the soffritto. Some recipes, in fact, call for rinsing and squeezing them dry, but, except for specific uses where you really need a 'dry' vegetable (such as in a filling for stuffed pasta) I generally leave a little bit of moisture on the vegetable, and that's the way that Angelina used to do it. 

NOTES: The same technique, as mentioned, can be used with just about any leafy vegetable. You can judge for yourself whether the vegetable needs pre-boiling or not: delicate greens like watercress generally do not, while most, including more robust greens like escarole, chicory, broccoletti (broccoli rabe) or kale, generally do. Pre-boil them until they are just a bit under-done, then transfer them to the skillet. Other vegetables can also be made this way, including broccoli, cauliflower, reen beans, peppers. And then there are other vegetables like funghi trifolati that have another name but use essentially the same technique, with some minor adjustments to account for the different textures involved. 

Vegetables made this way make wonderfully simple but savory contorni to accompany grilled or roasted meats or fish. They can also star on their own as a light vegetarian second course. And they can go into other dishes, most commonly as a kind of condimento for pasta, as in dishes like orecchiette ai broccoletti, or as a component in a vegetarian stuffed pasta like lasagne in bianco.

When pasta is tossed in a skillet with a sauce, it is also sometimes called in padella—in fact, one of the most popular frozen prepared pastas in Italy is called Quattro salti in padella or 'four tosses in the skillet'. Other kinds of food can also be prepared in padella, in particular scallops, shrimp or calamari, but let's leave those dishes for another post.

Saturday, June 19, 2010

Angelina’s Green Beans with Onions and Mint


Although our favorite way of having green beans when we were kids, especially in the summer, was in umido, or stewed with tomatoes, Angelina had another nice way of making green beans with sautéed onions and mint. As it turns out, at least according to this article, the recipe is from Puglia and is called fagiulini spilusieddi, meaning 'imaginative green beans' in the local dialect. Now, I have two theories about this: my grandfather being from Puglia, it is possible that she learned this Puglian way of making green beans to please her husband. It is also possible that in her area, which is not very far from Puglia, they also made green beans this way. 

In any event, the dish is very simple, tasty and definitely worth a try: you boil green beans in well salted water until tender. While the green beans are cooking, sauté sliced onions (perhaps half as much by weight as the green beans) in a generous amount of olive oil over moderate heat until they are nicely softened.  (Adding a sprinkling of salt and a spoonful of water helps them to cook more quickly.) Mix a handful of chopped parsley and mint into the onions. Then, if you like, add some bread crumbs, turn up the heat a bit and let them saute until they turn golden. Otherwise, turn off the heat.

When the green beans are tender, drain them and add them to the skillet with the onions and herbs. Turn them to coat well and let them stew for just a few minutes to insaporire. Before serving, sprinkle the beans with a bit of freshly squeezed lemon juice, just enough to brighten the flavors, season with salt and pepper, and serve hot. 

That's it. Simple but delicious! 

NB: I wanted to dub this dish 'fagiolini alla pugliese' but, just to confuse matters even more, it turns out that there is such a dish, more or less identical to fagiolini in umido, but with a bit of peperoncino for spice. Go figure…

Friday, June 18, 2010

Pico de gallo


I guess it's Mexico week here at Memorie di Angelina and why not? If you think of it, some of the foods that most typify Italian cooking—tomato, zucchini, peppers, pepperoncino, corn for polenta, just to take a few examples—all come from the New World and more specifically from Mexico. (Potatoes, another New World import, are from Peru.) So it should come as no surprise that there are similar tastes in Mexican cooking and even some dishes that you might even mistake for Italian. 

Pico de gallo, which means "rooster's beak" in Spanish, and  is often  called 'salsa' in English, is a prime example. A simple relish of tomato and onion, seasoned with jalapeños, cilantro and lemon juice, it goes perfectly well with any number of Italian dishes, in particular with grilled meats and fish. 

Take some best quality tomatoes, split them in half and remove the seeds. Then chop the flesh into small cubes. Chop an equal amount of white onion, a handful of finely chopped cilantro, a finely chopped jalapeño or other chile. Season generously with salt and sprinkle with a bit of freshly squeezed lemon or lime. Let the pico de gallo rest for a few minutes so the flavors meld before serving. 

NOTES: Obviously, the results will depend on how ripe and delicious the tomatoes are. They should be nice and ripe but not at all mushy—despite its English name 'salsa', pico de gallo is more of a relish than a sauce. The very best choice would be locally grown, farm tomatoes. (See my recent post on spaghetti al pomodoro crudo for some tips on choosing tomatoes when these are not in season.) If you can't find good tasting tomatoes, personally I would not bother making it. There are a few tips out there for adding flavor to less than ideal tomatoes; Jacques Pépin, for example, advocates adding a spoonful of ketchup. Well, Jacques is probably my favorite celebrity chef—one of the few I actually admire, in fact—but on this one we part company. For me, at least, pico de gallo is all about freshness. 

Some recipes I've seen call for adding quite a bit of liquid—either lemon, lime or even orange juice—so the result really is sauce-like. Not my favorite way to make pico de gallo. I prefer the dry, relish-like variety, which is why I often will remove the seeds. But if you're in a hurry or like a bit more liquid, there is no crime in leaving in the seeds. A few recipes I've seen call for a bit of  oil, but personally I don't see the need. And some recipes call for cucumber, radishes, avocado or even mango (!) Again, I like to keep it simple.

Apparently, there are various stories to explain the name of this dish, many of them relating the reference to the rooster—a symbol of machismo in Latin culture—with the hot chile. But not all variations of the dish contain hot chile. Others say that the name refers to the look of the dish—a combination of small diced ingredients that resemble bird feed. Another story is that the name is a double entendre: pico, which is beak, sounds like the verb picar, which means to chop or mince, and to 'pick' or 'peck' (like a bird) in the sense of eating lightly. Take your pick! 

Pico de gallo is sometimes called salsa mexicana, but is should not be confused with salsa roja, which is a cooked sauce made with similar ingredients (but no lemon juice) and very popular in Tex-Mex cooking, featuring prominently in Mexican restaurants in the US, served before meals with tortilla chips. Personally, I much prefer the raw version.

Wednesday, June 16, 2010

Guacamole


I spend a lot of time on this blog in wistful remembrances of the delicious fruits and vegetables that I used to enjoy in Italy and, conversely, moaning about the lack of flavor of much of the produce you are likely to find here in the US. But there are times when the New World outdoes the Old. One example is the avocado which remains an 'exotic' fruit in much of Europe but can be found in any supermarket in North America and, of course, Latin America as well. Not surprising, I suppose, since it is native to these parts—to the Mexican state of Puebla, to be specific—and requires a hot climate to thrive. 

I can eat avocados straight from the shells, sprinkled with a bit of salt and lemon juice. But surely my favorite way to eat avocado is in a classic guacamole, a Mexican dish that goes all the way back to Aztec times. (The name means 'avocado sauce' in Nahuatl.) Traditionally made in a molcajete, the native variety of a mortar and pestle, guacamole is a simple dish to make, but like all simple dishes, it requires due care and attention to be at its best. 

The basic recipe. You begin by mashing avocado. To do this, I usually simply use a mixing bowl and a wooden spoon rather than a mortar and pestle. Add some freshly squeezed lime (or lemon) juice immediately, since like artichokes, avocados will discolor when exposed to the air without it. The acidity also 'brightens' the flavor of the dish and helps balance the natural richness of the avocado. (But don't add so much that the taste turns sour!) Season well with salt, and that is guacamole at its most basic.

Variations. Of course, most versions of guacamole include additional condiments, in particular chopped cilantro, chiles and white onion. Many versions call for chopped tomatoes also. One variation of the recipe calls for green tomatoes. But while I love tomato (another Mexican native) I prefer the 'purer' taste of a tomato-less guacamole, in bianco as one would say in Italian. 

A variation on guacamole calls for cutting the avocado in small dice rather than mashing it, which provides more texture. (I like the textured variety, but rather than dicing I simply make sure not to mash the avocado too finely.) The original recipe, at least according to this source, omits anything spicy and calls for mashing all the ingredients together into a smooth paste, making a guacamole suave, or 'soft' guacamole. (It was this version that I recently had during my wonderful but brief trip to Mexico City last week.)

But however you make it, guacamole is sure to be a hit. It is no wonder that it has become a favorite in the US and many other countries. But please, do make it yourself. It is so easy to make, as you can see, so there is no reason to eat the store-bought kind, which never fails to disappoint.

Sunday, June 13, 2010

Fegato alla veneziana


A good many people have an aversion to organ meats. Perhaps that's because they are often not very well prepared—overcooking, which tends to accentuate the 'mineral' taste of organ meats and toughen their texture, is all too common. Or perhaps it's just the idea of eating an organ, although why someone would happily eat certain parts of an animal but not others never made much sense to me. 

If you fall into the latter category, you might want to just skip this post. But if you belong the first group, or have an open mind on the subject, you might want to try this dish, Venetian-style Calf's Liver,  which is probably the best known way to prepare calf's liver in the Italian repertoire. It couples thinly sliced liver with lots of well-caramelized onion, which adds sweetness to balance out the liver's earthy flavor, and a splash of vinegar, white wine or even lemon juice to balance out the sweetness of the onion. The combination, I think you will agree, is one that was meant to be. 

Begin by sautéing thinly sliced onion in a combination of butter and olive oil (or just butter) over medium to medium-low heat in a wide skillet until the onion is well-wilted and very soft. The onion should not color—regulating the heat carefully and add a bit of water or wine and salt will help the wilting process along and prevent browning. 

When the onion is ready, push it to the edges of the skillet. Add a bit more olive oil if need be, raise the heat, and add sliced calf's liver, trimmed and sliced into thin strips, to the skillet. Sauté over lively heat, just until the liver has lost its raw color. Then mix the onions and liver well, adding a handful of finely chopped parsley to the mix and seasoning well with salt and pepper. After a minute or so, remove the liver and onions to a warm serving plate. 

Add a good slash of white wine to the skillet and deglaze, scraping up the sucs that will have formed with a wooden spoon or spatula. When the wine has reduced to a syrupy consistency, pour it over liver, sprinkle with some additional chopped parsley and serve immediately.

As for measurement, the main point is to use an approximately 1:1 ratio of onion and liver by weight. The flavor of the onion must balance that of the liver, but not to overwhelm it. The rest is entirely a matter of taste. 


NOTES: The best onion to use for this dish, to my taste, is the white onion, which is mild and sweet. If you are in the US and have access to those sweet Vidalia onions. they work extremely well—and that's what I used this time. In a pinch, regular old yellow onion will also do fine, just make doubly sure that they are well reduced, which will intensify their natural sweetness. 

The original recipe for Venetian-style liver used vinegar rather than white wine. Personally I find that this adds a bit too much astringency to the dish, but no doubt in the old days it was a good way to use wine that had turned and the bolder flavor of vinegar may have been a way to disguise the flavor of less than immaculately fresh liver in the days before refrigeration. (Organ meats are extremely perishable.) In any event, I would suggest you use the freshest liver you can find. A few recipes call for lemon juice, rather than wine or vinegar, something I have yet to try. 

Some recipes, by the way, call for liver than has been cut into small pieces rather than strips. But I find the strips give the dish a more delicate flavor—the liver melds more completely with the other ingredients—and makes the liver cook more quickly, which keeps it tender. Liver slices bought at the store often need to be well trimmed of any 'skin' left around the edges, If you leave the skin on, the liver will tend to curl up, although cutting it into strips will also help avoid this. You can also make lamb's liver this way, and it will be very good. Beef liver, however, is a bit too strong for this treatment.

The final deglazing of the skillet after having removed the liver and onions is actually my personal take on the dish. The original recipe calls for adding the liquid—be it vinegar, wine, lemon juice, plus, in some recipes, a bit of broth—to the skillet with the liver and onions and allowing the whole to simmer together for a few minutes. But I like my liver still pink inside, so I remove it as soon as it is cooked to my taste. 

Some recipes call for you to remove the onions from the skillet before you add the liver, then add it back when the liver is almost done. This avoids any risk of the onion burning, but if you slice the liver into strips, it cooks so quickly there is little risk of that. 

The most typical way to serve fegato alla veneziana is with polenta, either warm and soft or cooled, cut into squares and grilled.  In the Veneto, by the way, the usual polenta is made with white polenta flour. Served this way, the dish can be a piatto unico. But if you want to precede your liver with a primo, it is perfectly delicious accompanied by some steamed potatoes or simply by itself, along with some crusty bread to sop up those wonderful juices.


The original name of the dish, in Venetian dialect, is figà àea Venessiana.  The dish has a longer history, with antecedents going back to ancient Roman days, when they would combine liver with figs, with the same intention of balancing the flavor of the liver with something sweet.

Wednesday, June 9, 2010

Quick Note: Spaghetti con le zucchine


A very quick post since I am quite literally running to catch a plane to Mexico…

As we've seen before, pasta and vegetable dishes are a quick and easy solution for weeknight dinners, when you don't have the time or the energy for anything fussy or fancy. This may be the easiest of them all: spaghetti with fried zucchini. 

You begin, as many of these dishes do, with an aglio e olio base: pour a generous amount of olive oil into a skillet (remember, this is going to be your sauce and you can always leave the excess oil in the pan when you serve) and in it, lightly sauté one or two crushed cloves of garlic over a lively flame. When the garlic is just beginning to color, add thinly sliced disks of zucchini. Season with salt and pepper, and cook over high heat, tossing the zucchini slices from time to time to ensure even cooking, until they have become quite tender and lightly browned, about 5-10 minutes at most. 


Meanwhile, get your pasta on the boil and, when it's al dente, drain it (but not too well) and transfer it to the skillet with the zucchini. Add some minced parsley. Mix well, allowing the pasta to absorb some of the flavored oil. Serve immediately, with a some additional minced parsley as a topping. 

NOTES: Of course, you can dress this dish up a bit more: add some pepperoncino if you want some heat (although I find that it tends to overwhelm the delicate flavor of the zucchini). One variation that I particularly like is to add a dollop of ricotta cheese, some grated parmigiano and a few shredded basil leaves at the very end and mix well. It turns the dish in an entirely different direction. (If you want a richer dish, you can add an egg yolk as well to the ricotta and basil mixture.)

Spaghetti is the classic choice, but you can really use the dry pasta of your choice. Linguine would also be nice, as would rigatoni. The dish is not really apt for fresh egg pasta. 

Some recipes will tell you to fry the zucchini disks in a single layer, and turn them individually so they brown evenly on both sides, etc. etc. If you're like me, you'll be perfectly satisfied with a less pignolo method mentioned above. Just be sure to keep the flame high, use plenty of oil and toss frequently, and even if some zucchini disks will turn out a bit less browned than others, the dish will turn out fine. But by all means, if you have the time and inclination to fry the disks individually, more power to you!

Back on Sunday… Happy eating, or should I say: buen provecho

Sunday, June 6, 2010

Sorbetto di mango


As regular readers of this blog have probably figured out by now, I don't have much of a sweet tooth. Even as a kid, I was not into sweets—much to the delight of my dentists. Dessert at our house, such as it is, usually consists of a piece of fresh fruit or perhaps some fruit cut into chunks and dressed up with sugar and lemon juice in the typical Italian manner. 

But when the temperatures begin to rise, I am fond of frozen desserts. Italian cuisine encompasses several main categories of frozen desserts: everyone knows the Italian way of making ice cream, gelato, which is by far the most well-known of the lot. But equally good are sorbetto, granita and the semifreddo. Also much appreciated is the flavored shaved ice called grattachecca, known abroad as "Italian ices", which has roots going back to ancient Rome. We'll examine all of these over the course of the summer.

In this post, we take a look at the perhaps the simplest of these basic categories of frozen desserts, the sorbetto. By far the most common type of sorbetto is the sorbetto di limone, which is a classic way to end of fish dinner or, during very formal multi-course meals, to provide a 'palate cleanser' between courses. I will blog about this very soon, but let me begin my exploration of Italian frozen desserts with the favorite sorbetto in our home, sorbetto di mango. To my mind, mango is the perfect fruit for making frozen desserts because it has a wonderful smooth texture, especially when puréed, that gives a wonderful silky texture to your sorbetto. But you can use the same recipe for any kind of fruit that lends itself to puréeing. 

At its most basic, the sorbetto is essentially a variation of the good old sugar-and-lemon dressed fruit dessert. The sugar and lemon enhance the flavor, as always, but instead of pure sugar, you use of syrup that prevents the fruit from becoming rock solid when the concoction is frozen. Unlike most dishes you will find on this blog, the measurements are rather important, so let me present this recipe to you in the 'normal' way:

Sorbetto di mango

Ingredients: for four servings:
200g/2 cups cut up mango or other fruit
100g/1 cup simple sugar syrup (see recipe below)
Juice of ½ lemon, freshly squeezed

Preparation: Purée the mango or other fruit of your choice in a food processor or blender. When the mixture is perfectly smooth, mix in the sugar syrup and freshly squeezed lemon juice. 

Now take the resulting 'batter' and chill it in the fridge for at least 20 minutes to get it nice and cold and allow the flavors to meld. Pour the batter in an ice cream maker, following the instructions. Most will tell you to churn the batter for about 20-30 minutes. You can tell it's done when the batter clings to the paddle:


The resulting sorbetto can be served as is—if you like a 'soft serve' consistency—or placed in the freezer for an hour or two if you like a firmer consistency.

How to Make Simple Sugar Syrup

To make sugar syrup, you take equal amounts by volume of sugar and water and simmer them together until they turn into a light, clear syrup. Nothing could be easier, but, like anything else, it may help to see it before trying it yourself, so here goes.

First, pour the sugar into a saucepan:


Then add the water:


Mix until the sugar is suspended in the water, which will look cloudy: 


Then turn on the heat to medium-high, stirring from time to time. As the water begins to heat up, the sugar will melt, leaving a nearly clear liquid:


Bring to syrup to a simmer and let it continue simmering for about five minutes:


Turn off the heat and let the syrup cool completely. The syrup should be perfectly clear and have an ever so slightly golden color:


It helps to chill the syrup before using but if you're in a hurry, just make sure it's room temperature. If you are really in a rush, you can immerse the saucepan in ice water to cool it down quickly. Since it keeps indefintiely, I  usually like to make a large batch, say 1 liter/2 pints at a time, and keep what I don't need in the fridge so I have some on hand to make sorbetto whenever the spirit moves me

NOTES: I like to serve sorbetto di mango with berries or, as shown here, with crème de cassis. The contrasting colors and flavors are, to use an over-used adjective, awesome. Some recipes call for folding in whipped egg white into the batter just before churning in the ice cream maker. This is meant to give the sorbetto a smoother texture but I prefer the eggless version. As mentioned above, any fruit that lends itself to puréeing can go into a sorbetto; cherries and other berries are particularly nice, but so are soft summer fruits such as peaches and plums. Juice-based sorbetti are prepared in a slightly different way, so I'll save those for another post. 

Sorbetto of any type will keep in the freezer more or less indefinitely. Just take it out of the freezer about 15 minutes or so before you want to serve it so it softens up a bit. The texture of a proper sorbetto can be soft or firm, but it should never be hard. 

The classic sorbetto di limone, in fact, is often served slushy, almost liquid—which is true to the original. The word sorbetto comes from Turkish 'sherbet' (which passed directly into English) but it has a double-meaning in Italian, since the word sorbire means 'to sip'. And that is indeed how sorbetti were originally consumed when they were imported into Italy in the 16th century from the Middle East, being essentially a frozen fruit juice mixed with a sweetener, often honey. Even today, it is not unusual to have sorbetti with sparkling wine—which is indeed a wonderful way to have them. It seems it was the French that developed the 'eatable' sorbet in the 19th century from fruit pulp. [Source: Alan Davidson, The Oxford Companion to Food (Oxford University Press, 1999)]

Like gelato, sorbetto was first introduced in Sicily—a by-product of the Moorish invasion—and is said to have been frozen with the snows of Mount Etna. This may also account for the fact that the most common ones in Italy are made from citric fruits: lemon and, a distant second, orange. The first recorded recipe for sorbetto is found in the Opera of Bartolomeo Scappi (1570) and, interestingly, called for cherries or plums, not lemon. If you read Italian, this article gives a detailed history.

The Arabic word for sherbet, by the way, sharab, changed meaning early on and entered Italian as sciroppo and from there into French as sirop and then into English as 'syrup'.

Thanks again!


Gentle readers, 

Only a month ago I was crowing about reaching the milestone of 4000 subscribers. Well, it's hard to believe, but that figure has grown to nearly 7500! Another 5100 or so are regular readers of these posts on our affiliated Gnocchi ai funghi Recipe Exchange Club. A heartfelt welcome to all of you newcomers, and sincere thanks to all you 'old timers' for your loyalty. It's a great tribute to the enduring appeal of simple, honest home cooking! 

Evviva Angelina! 

Frank

Saturday, June 5, 2010

Pesce alla griglia


The beauty of grilling is that just about any foodstuff lends itself to the technique. Here on Memorie di Angelina, we've grilled vegetables, chicken, lamb, pork and, most recently, beef. But grilled fish is equally easy and delicious, and very popular in Italy. Some people shy away from cooking fish, thinking that there is something mysterious about it. This post will hopefully dispel that notion. Grilling fish is just as easy as grilling any other kind of food. 

In Italy, fish is usually grilled whole, cleaned of its viscera but with head and tail still on. It is said that the fish is tastier that way, and I fully agree. Just like with meat, the bones provide extra flavor. If you are squeamish, however, the same technique can be used with fish fillets. 

Most fish has a rather delicate (some would say bland) flavor and is very lean, so it is customary to marinate it first to add flavor and make sure it stays moist when subjected to the intense heat of a grill. About 30 minutes before you want to cook, score both sides of the fish at regular intervals, insert a sprig of rosemary or fresh oregano, or both, in the fish's cavity, and pour a mixture of olive oil, freshly squeezed lemon juice, salt and pepper over the fish. Allow the fish to marinate in this mixture, turning the fish several times so that the marinade penetrates evenly. 

Then grill your fish over a hot flame, until nicely browned on both sides. Total time will depend on the thickness of the fish. The general rule of thumb is 10 minutes per inch (3 cm.) of thickness. But you will probably need more time for small fish, so that it has time to brown nicely. A minimum would be 5 minutes per side over a hot flame. If you have a larger fish that needs longer cooking, then use a moderate flame to avoid the skin burning. Take care with the tail, as well, as it tends to burn quickly; you can either cover it with aluminum foil or position your fish so that the tail gets only indirect heat. 

When the fish is fully cooked, place it on a serving platter, drizzle with best quality fruity olive oil, sprinkle with salt and pepper, then with a bit of finely chopped parsley. Serve with lemon wedges. 


NOTES: Most kinds of fish lend themselves to grilling whole, but some are more suitable than others. In Italy, branzino or spigola (seabass, pictured here) and orata (seabream) are particularly popular. River fish like trout are also wonderful grilled. Tuna and swordfish are wonderful grilled but, of course, they are grilled as steaks. Try to avoid fish with too delicate a flesh, as it will tend to fall apart as you turn the fish, although this is less of an issue when grilling a fish whole, as the skin and carcass help keep it all together—another reason to prefer grilling fish this way. To avoid (in my book, at least) is fish with a strong flavor like mackerel. Shellfish, especially shrimp, is also delicious grilled, but the technique is a bit different, so I'll leave that for another post. 

I like to grill fish in a grilling basket (as pictured) which makes turning a snap. If you don't have a basket, you'll need to be very careful when you turn the fish over not to break the fish up. It helps to do this only once—with a basket you can turn as often as you like, for even cooking—and to use a large flipper (or two at a time). If you do use a grilling basket, make sure it is well oiled (or use some grilling spray) so that the fish does not stick to it. 


The main possible variations of this dish lie in the marinade: you can add more or different fresh herbs, for example, or add a bit of chopped garlic or peperoncino. Personally, I avoid these additions, as they tend to burn and, in any event, overwhelm the delicate flavor of the fish. But, in cooking as in life, 'to each his own' is the best philosophy. 


All gone...

Friday, June 4, 2010

Spaghetti con pomodoro crudo

Summertime is fast approaching, the temperature is climbing, and my culinary imagination is starting to turn to dishes that quick but tasty and require minimal cooking. Here's one of the 'go to' summer pasta dishes in our house: spaghetti with a raw tomato sauce. 

The sauce should be made at least an hour ahead: take some best quality tomatoes (see Notes), cut them in half and scoop out the seeds, then chop them up into small chunks. Throw the tomato chunks into a large bowl, add a few cloves of finely chopped garlic (this is one of the few cases where a garlic press actually comes in handy), a handful of fresh basil, chopped as well, freshly ground pepper and enough olive oil to moisten all the ingredients very well—it should almost cover them. Let this mixture rest for at least an hour and up to three or four hours. This lets the flavors develop and meld. Leave it too long, however, like overnight, and the garlic flavor—which intensifies over time—may become overwhelming.

You need to salt this 'sauce' generously. Most recipes call for you to add the salt together with other ingredients. But if you are planning to leave the sauce to rest for more than an hour and/or if your tomatoes are watery, then hold off salting until about 30-60 minutes before you are ready to eat. 

Once the sauce has rested, boil your spaghetti (or other pasta—see Notes below) al dente and add it, well drained, to the sauce and serve immediately. No grated cheese is needed or wanted for this dish. 

Measurements: The main ratio is that of tomato to pasta. I find that the usual 1:1 ratio of condimento to pasta works fine, but you may even want to up this to as much as 1.5:1. So if you are having four people, say, use 400-600 grams (14-21 oz.) of tomato and 400 grams (14 oz.) of pasta. I usually use about one garlic clove per person (if they're not too big) and enough basil to balance out the tomato—see the picture to see what I mean. As usual, exact measurements are not particularly important. 

NOTES: This being a simple dish based on raw ingredients, the freshness and quality of those ingredients is crucial to the success of the dish. Most importantly, the tomatoes must not be overly watery and should actually taste like something. This dish is at its best when local tomatoes start arriving in the markets. But I have found that very small tomatoes, like cherry or grape tomatoes, or the greenhouse-grown 'Campari' tomatoes have excellent flavor and are not overly watery. If all you can find are those pinkish supermarket tomatoes, you may want to try another dish.

If your tomatoes are young and flavorful, they can be cut up as they are and added to your mixing bowl. But if you have any doubts about them, you can also improve the flavor and texture of your tomatoes by sprinkling the chunks in salt and draining them in a colander for 30 minutes or so before mixing them with the other ingredients. This should purge them of their excess water and concentrate their flavor. If you are dealing with larger tomatoes, you may want to peel their skin, which can be tough. Peeling a raw tomato is almost impossible to do, so you may want to either blanch them very briefly in boiling water or char them over a gas flame, which makes peeling much easier. 

Of course, besides the tomatoes, the basil and garlic should be as fresh as it can be and the olive oil as green and fruity as you can find it. 

Variations of this basic recipe abound: my favorite is to add some red pepper flakes, to taste, to the raw sauce. (NB: Like garlic, the flavor will intensify the longer it rests, so beware.) You can also add other typical summer ingredients like capers, olives, mozzarella, tunafish, anchovies. In addition to or instead of the garlic, some chopped white or red onion is very nice. (Avoid yellow onion, which has too strong a flavor to use raw, but if you have no other choice, soaking it in several changes of cold water will mellow it out.) A nice variation in technique is to place the raw sauce in the fridge, taking it out only just before adding the hot pasta; the combination of hot and cold produces some sort of reaction that gives the dish a very special taste.

In Roman cookery, this dish, made with slightly underripe tomatoes, olives, capers and fennel seeds, and often mozzarella and/or caciotta cheese, goes by the rather impolite name of pasta alla checca. (The word 'checca' being a pejorative Roman slang word for a gay guy, perhaps a reference to the fennel seeds, since the Italian word for fennel, finocchio, is another slang word meaning the same thing.)

You can also use other types of pasta. Linguine, of course, but also those stubby, concave pastas like conchiglie work very well with this sauce—perhaps even better than long pasta, as their nooks and crannies catch bits of tomato or other ingredients.