Showing posts with label vegetarian. Show all posts

Sunday, January 2, 2011

How to Roast Chestnuts


Chestnuts roasting on an open fire, Jack Frost nipping at your nose...

Toasted chestnuts evoke wistful holidays images of days gone by. But how many of us have actually roasted chestnuts on an open fire? Too few, I imagine. And a shame, too, since anyone with a fireplace can do it easily. All you need are chestnuts, a good knife and a roasting pan.

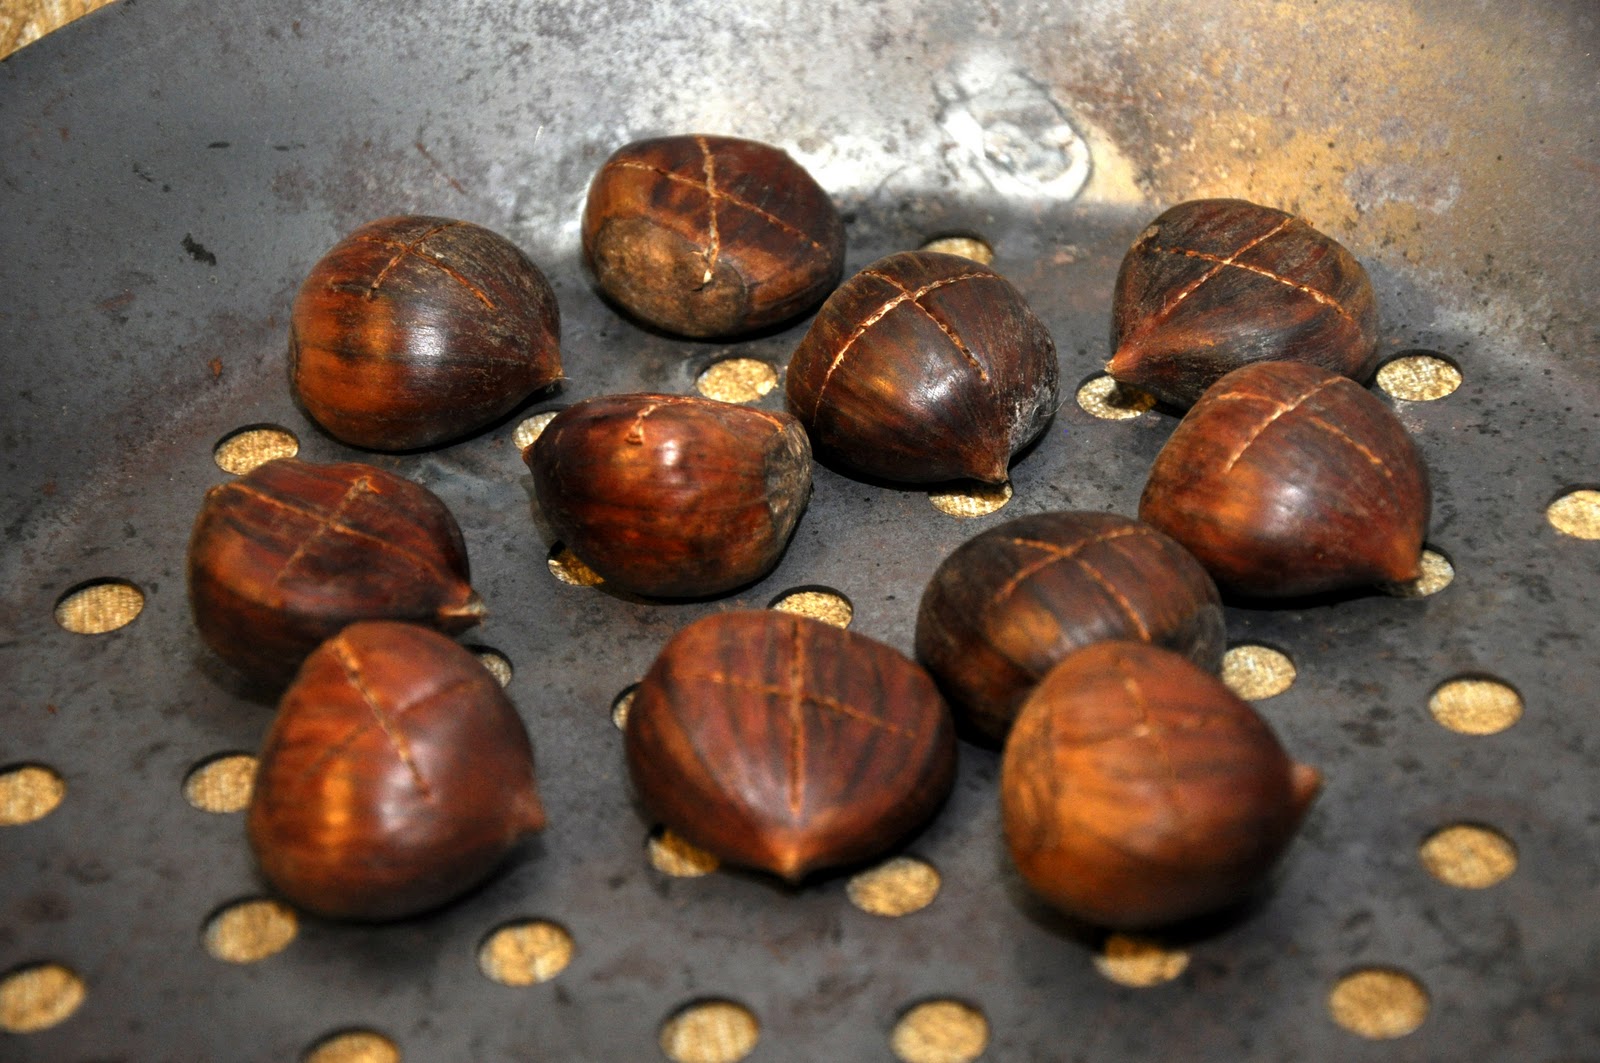
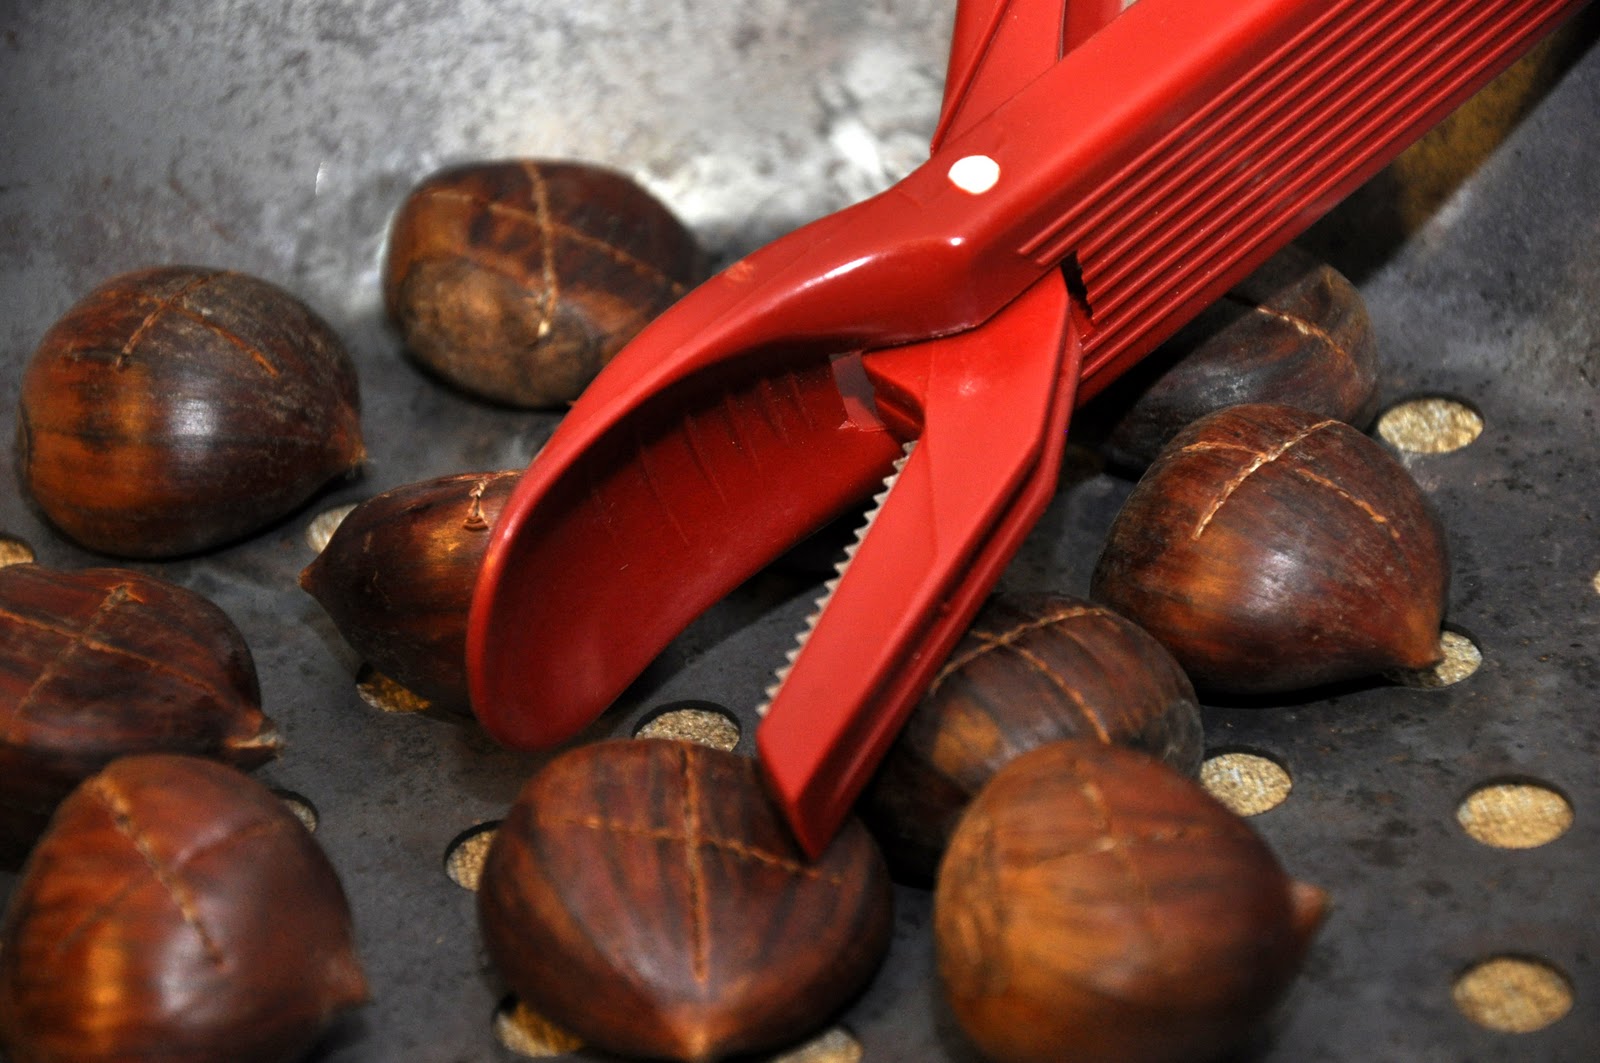
Just take as many chestnuts you and your dining companions want to eat and cut a cross in their sides as picture. This will prevent them from 'exploding' while they roast. You can do with this a good, sharp knife. They also make chestnut knives as well as a special instrument for the job (pictured below), which you can find at specialty stores or online; it makes the job a lot easier.


The typical pan for roasting chestnuts is made of carbon steel and has large holes in its bottom to let the heat of the fire through. They are sometimes available in specialty cookware shops and online. You can also use a popcorn popper, the kind they make for fireplaces, with long handles.


Now take the pan and lay it over some hot embers. If your fireplace is big enough you can just clear out a space and pull some embers into place below your pan. You pan should lay a few centimeters/inches above the embers, which should be glowing red hot, but not actually on fire. An actual flame  would  char the outsides of the chestnuts before they are done inside.


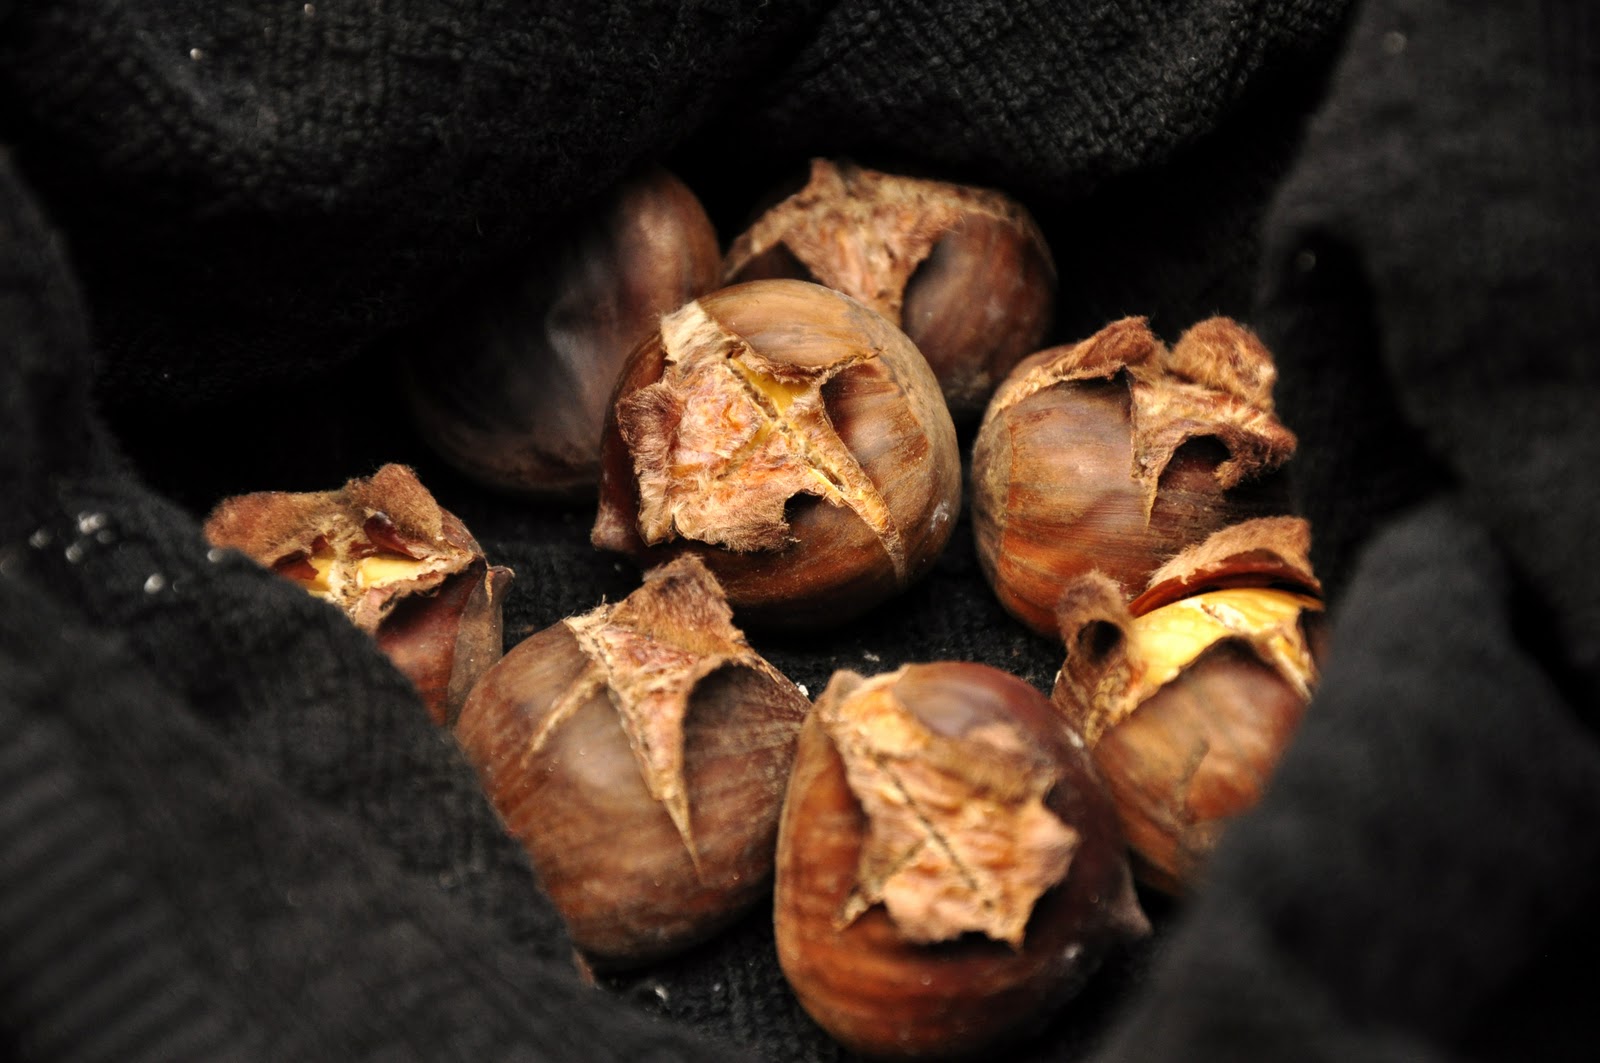
Tossing them from time to time, let the chestnuts roast for about 20 minutes or so. As they roast, the slits you have made in their sides will begin to open. This is fine. The chestnuts will char a bit on the outside, which is perfectly normal and, in fact, desirable, as it gives them a nice smokey flavor. Some recipes tell you to sprinkle some red wine or other liquor over them as they roast, which you can certainly do if that appeals to you.


Once they're done, remove them gingerly from the pan into a cloth towel.  (They will be very hot at this point, as will your pan, so be careful.) Wrap the chestnuts up for a few minutes to let them cool off a bit and soften further. Then open up the towel and eat them, preferably with your hands. They have both shells and a rather woody skin. You can eat the latter if you like, but they are much nicer without. The skins should, in any event, come off quite easily if they chestnuts are still warm.

NOTES: If you don't have a fireplace or an appropriate pan, the same basic technique can be used to roast chestnuts on a baking sheet, in a hot oven.

Chestnuts make for a wonderful 'dessert', made after dinner, say while watching a film and sipping some whiskey or grappa on a cold winter's night. Or while singing yuletide carols, perhaps... 

Wednesday, December 29, 2010

Fagiolini alla panna


When most people (myself included) think of Italian style green beans, fagiolini in umido (green beans in tomato sauce) is likely to come to mind or perhaps fagiolini all'agro, a simple green bean salad. Here is a less well known but perfectly delicious dish from Lombardia that I recent came across while  perusing a little cookbook called La cucina lombarda by Alessandro Molinari Pradelli: green beans simmered in cream. I can almost guarantee that once you try this, it will become a regular part of your repertoire!

Ingredients (for 4-6 servings)

1 kg (2 lbs.) green beans
A shallot, fine chopped
50g (3 Tbs) butter (or more if you're feeling indulgent)
2 dl (3/4 cup) cream (or as much as you need)
Nutmeg
Salt and pepper
A handful of parsley, finely chopped

Directions

Trim off the ends of your green beans, then plunge them into a big pot of well-salted boiling water. Cook them until they are quite al dente, remembering that they will cook some more later. This should take no more than 5 minutes or so, depending on the size and quality of the beans.

While the green beans are boiling away, gently sweat your chopped shallot in the butter in an ample skillet or sauté pan until soft but not browned.

Transfer the green beans from the boiling water right into the skillet and mix them well with the butter and shallot soffritto. [NB: If you like, you can 'refresh' the green beans in cold water before adding them to the skillet, which will help them retain their color, but being a bit lazy I often skip this step.] Raise the flame just a bit and let the green beans braise for a few minutes, stirring frequently, so they can absorb the flavors of the soffritto.

Now add your cream, enough to just about cover the beans. Season with salt, pepper and nice scrape of nutmeg. Raise the flame a bit more so that the cream bubbles fairly vigorously. Continue stirring from time to time, and simmer until the cream has thickened into a saucy consistency. Taste and adjust for seasoning if need be.

Mix in the chopped parsley and serve immediately.

NOTES: The great thing about this dish, as for any braised vegetable dish, is that you can use green beans that may have been around for a while without much trouble. That is, in fact, what I did this time and I can tell you the results were more than satisfactory. 

This makes for a fine contorno for grilled meats, in particular. I would not serve it, on the other hand, with a braised meat dish. And I actually had it as a vegetarian lunch one day, with a nice chunk of crusty bread.


Wednesday, December 22, 2010

Struffoli!


Struffoli, small balls of dough fried and then covered in honey, is the quintessential Christmas sweet of Naples and its region of Campania. Although I don't have much of a sweet tooth, it is very dear to my heart; it was one of nonna Angelina's signature dishes, and it never failed to make an appearance each year around the holidays. In our family they were known as 'Nana's honey balls'. As a child I took the name literally, and until I moved to Italy, I thought that they were my grandmother's invention. You can imagine my surprise then, when, on vacation on the Amalfi coast one year, I peered into the window of a pasticceria and saw... Nana's honey balls! Where on earth, I thought to myself, had they gotten the recipe? Well, I soon enough learned that Nana's secret recipe was actually no secret at all. In fact, the recipe is ancient, dating all the way back to the Greeks who settled southern Italy, founding, among other things the city of Naples or Neapolis, meaning 'new city' in Greek.

In any event, these little babies are actually quite simple to make, but, like many old-fashioned dishes, they require a bit of time and tender loving care:

Ingredients (for a small plateful of stuffoli)

300g (3 cups) flour
3 eggs
Butter, a walnut-sized chunk or 3 Tbs. oil
Rum,  or other spirit (optional)
Zest of one lemon
Salt, a pinch

Vegetable (or olive) oil for frying

300g (1 jar) honey
Candied fruits (optional)
Confettini or candied 'sprinkles'

Directions

You begin by making dough with the first six ingredients. This was traditionally done by making what the Italians call a fontana, or fountain of flour, in the middle of which you make a well for other ingredients, then slowly incorporating the flour into the well by hand as you beat the eggs and other liquid ingredients with a fork. These days, however, a stand mixer makes short work of this. Just put in your flour, then the other ingredients, and mix until you get a nice dough, just as if you were making pasta.

Once the ingredients have formed a smooth dough, form it into a ball and wrap it in plastic wrap. Let the dough rest for a good 30 minutes or so.

After the dough has rested, take a handful of it at a time and roll them out into 'cords' as if you were making gnocchi, about the thickness of your little finger (if you can manage it, otherwise as close to that as you can get). Then cut the cords into short lengths, again just like you are making gnocchi.


 Take each little piece of dough, one by one, and quickly rub them between your palms in a circular motion to form little balls, the smaller the better. Place the little balls on a floured towel as you work, making sure that they are all in a single layer so they don't stick. Just before proceeding to the next step, you grab the ends of the towel and swish the balls around to lightly flour them.


Heat the oil in a large pan. You want lots of oil so the little balls can deep fry in it. When the oil is nice and hot, but not boiling, plunge the dough balls into the oil a handful at a time. The oil will immediately bubble up vigorously. Not to worry, it's supposed to be that way.


Fry the dough balls until they are lightly browned. Drain on paper towels while you proceed to the next step.


 Now, in an ample sauté pan or saucier large enough to hold all of the dough balls, gently heat the honey until it liquifies. Add the dough balls, stir them gently to coat. Allow the balls to soak up the honey for just a minute or two. (They should not get soggy at all.) If using candied fruit (see Notes below) you will want to add some at this point.


Remove your struffoli from the pan with a slotted spoon and arrange them on a plate. It is common to arrange struffoli in a ciambella or ring, but you can also simply pile them high. I like to form them into a little 'Mount Vesuvius' as picture above. Then sprinkle your pile with confettini  (or candy sprinkles). It is also customary to decorate and flavor struffoli with candied fruits, in particular little bits of candied oranges and cherries, in addition to the spinkles. You can do this if you like, although—as far as I can remember—Angelina never did, so I follow suit. They can be eaten immediately, but improve with age.

NOTES: Although it takes a few steps, the recipe is really pretty much foolproof. The only trick, the extent there is one, is to make your struffoli as small as you can manage, as that will mean more honey flavor and less chance of an undercooked middle.

There are a few variations on the dish, although none that change its essential character. Like many traditional recipes, the original fat for both making and frying the dough was strutto or lard, not oil. Today, it is more usual to use butter for the dough and vegetable or even olive oil for frying. Not all recipes call for the liquor. And some recipes call for orange rather than lemon zest. And the ratio of egg to flour varies from recipe to recipe. Here I have indicated the same 'golden rule' as for pasta dough: 1 egg per 100g (1 cup) of flour. But recipes may call for more or less egg, some for an extra yolk for color and richness. Some recipes omit the fat from the dough—be it butter, oil or lard—altogether, while others call for significantly more fat than indicated here. And, finally, some modern recipes, especially Italian-American ones, call for a pinch of baking powder, which lightens the honey balls considerably but is obviously a modern permutation.

To tell you the truth, struffoli were not all that popular among the younger generation of my family. I like them well enough, but one of my sisters actively despised them. Being a natural born politician, however, that didn't stop her from complimenting our grandmother profusely one Christmas. Well, our ever thoughtful grandmother took note and the following Christmas  brought a double batch of her 'honey balls', one for the family as usual, and another just for my sister, since she loved them so much! You should have seen the look on my sister's face as Angelina handed her that enormous second bag full of struffoli...

Sunday, November 28, 2010

Zuppa di porri


'Tis the season for soups! When the temperatures dive, there is simply nothing that takes the chill off like soup. The wonderful thing about soups is their enormous variety: they can be thick and stick-to-the-ribs, whole meals in themselves, or they can be light, even austere, just enough to whet the palate as the start of a formal meal or as a light supper.


Here is a lovely example of a medium-bodied soup, none too heavy but very satisfying at the same time. It's particularly nice during the holiday season, when you may feel like something warming but not too filling, a nice respite between those humongous holiday meals. The starring role is played by the leek, an often overlooked member of the onion family. Or, at least, I tend to overlook it, which is too bad because it has an incomparably savory yet mellow taste that makes any dish that contains it truly special.


Ingredients (for 4-6 servings)


5 leeks
100g (4 Tbs.) butter, or a combination of equal parts butter and olive oil, or just olive oil
20g (2 Tbs.) flour

Salt and pepper to taste

1 liter (4 cups) broth

4-6 slices of good-quality crusty bread

Grated parmesan or gruyère cheese


Directions


Rinse the leeks if necessary (see below) and trim off the root end and green tops. Cut the stalks into thin slices.


Sauté the leek slices in the butter, butter and oil mixture or the oil over gentle heat until they are well reduced and quite tender, without browning, about 15-20 minutes. Season the leeks with salt and pepper just after you add them to the skillet.


Sprinkle the flour and mix it in well, letting it sauté as well for a minute or two. Then add the broth, mix it well to fully incorporate the flour into the liquid, and let simmer, semi-covered, for another 15-20 minutes.


Meanwhile, toast your slices of bread and place each slice in the bottom of a soup bowl for each diner. Sprinkle the slices with some grated cheese. When the soup is done simmering, ladle over a nice serving into the soup bowls. Sprinkle over some more cheese and top with a nice grinding of black pepper and—if you like—a drizzle of best quality olive oil.


You can serve this soup immediately, but it is best after a few minutes' rest, which allows the soup to soak into the bread.


NOTES: These days leeks are often sold pre-washed, and can be used without fuss. But if you see that your leeks are gritty, make sure to wash them well before using. You will need to split them down the middle to make sure you remove all the grit. And, by the way, don't throw away the green tops—they are a great addition when making homemade broth, either instead of or in addition to the onion.


Speaking of which, for a simple soup like this one, where success or failure will depend on the quality of the ingredients, the broth should really be homemade. (See this post for the master recipe.) You can make your broth with beef (the usual choice) or chicken or a mixture of the two—the so-called brodo classico—and, this time of year, you can also use a turkey carcass if you happen to have one around the house…If you want to go vegetarian, then vegetable broth will, of course, do the job.


The choice of sautéing medium will subtly influence the dish. The traditional recipe calls for all butter, which gives the recipe a pleasant sweetness. But, personally, I prefer to use olive oil or a mixture of butter and olive oil, which provides a more 'rustic' taste. Some recipes add potato to the soup, which gives it more body. You can pass the soup through a food mill for a smoother texture. And instead of the toasted bread, you can fry up some croutons in olive oil, which again makes the soup a bit richer.


If you want to get fancy, you can gratinée this soup in terracotta soup bowls as you would a French onion soup, placing the bread on top of the soup, then sprinkling over all the cheese (use gruyere for this variation), drizzle with some olive oil (or melted butter) and run the soup under the broiler or in a very hot oven for a few minutes, until the top is nicely browned.

Sunday, November 21, 2010

La ribollita


We've already gone over the basic recipe for minestrone on this blog. Once you've mastered that, it is a lot of fun to explore the many varieties of minestrone from all over Lo Stivale (meaning 'the boot' one of the many nicknames Italians give to their country).

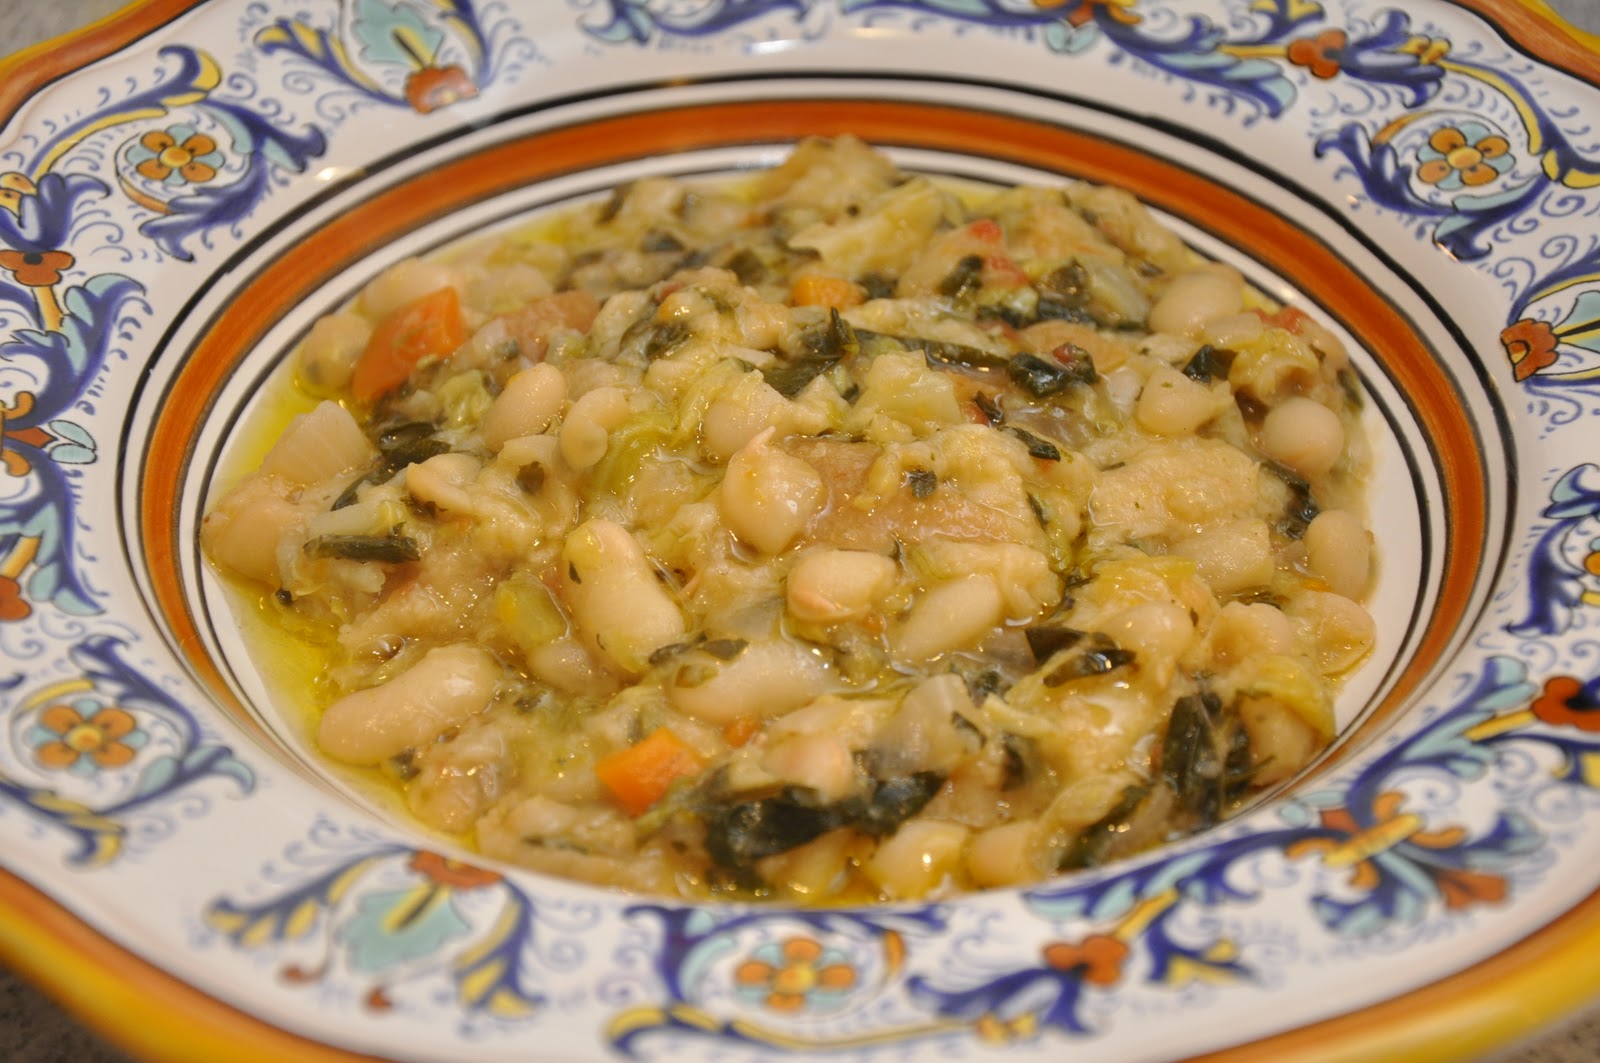
Perhaps the most delicious version of all is the Tuscan classic called la ribollita, or 're-boiled' because it is made ahead, layered with bread in a pot (preferably made of terracotta) and reheated before serving. Like any minestrone, it tastes so much better the day after—or even after a few hours—and the bread gives it a special flavor.

Ingredients (for 4-6 servings)

For the flavor base:
Olive oil
1 large red onion, cut into cubes
1-2 carrots, cut into cubes
1-2 stalks celery, cut into cubes
A handful of finely chopped parsley
1 leek (optional)
1 thick slice of pancetta, cut into cubes (optional)

More vegetables:
1 bunch black kale (aka lucinato kale), stemmed and shredded
½ head of Savoy cabbage, shredded
1 bunch Swiss chard (optional)
A few canned tomatoes, cut up (or some tomato paste)
250g (1/2 lb.) potato
250g (1/2 lb.) or more boiled or canned cannellini beans, drained

For the final assembly:
Slices of well-structured bread (preferably saltless Tuscan bread)

To finish:
Best-quality, fruity olive oil
Freshly ground black pepper (optional)

Directions

Make your minestrone, using the above ingredients, following the master recipe.

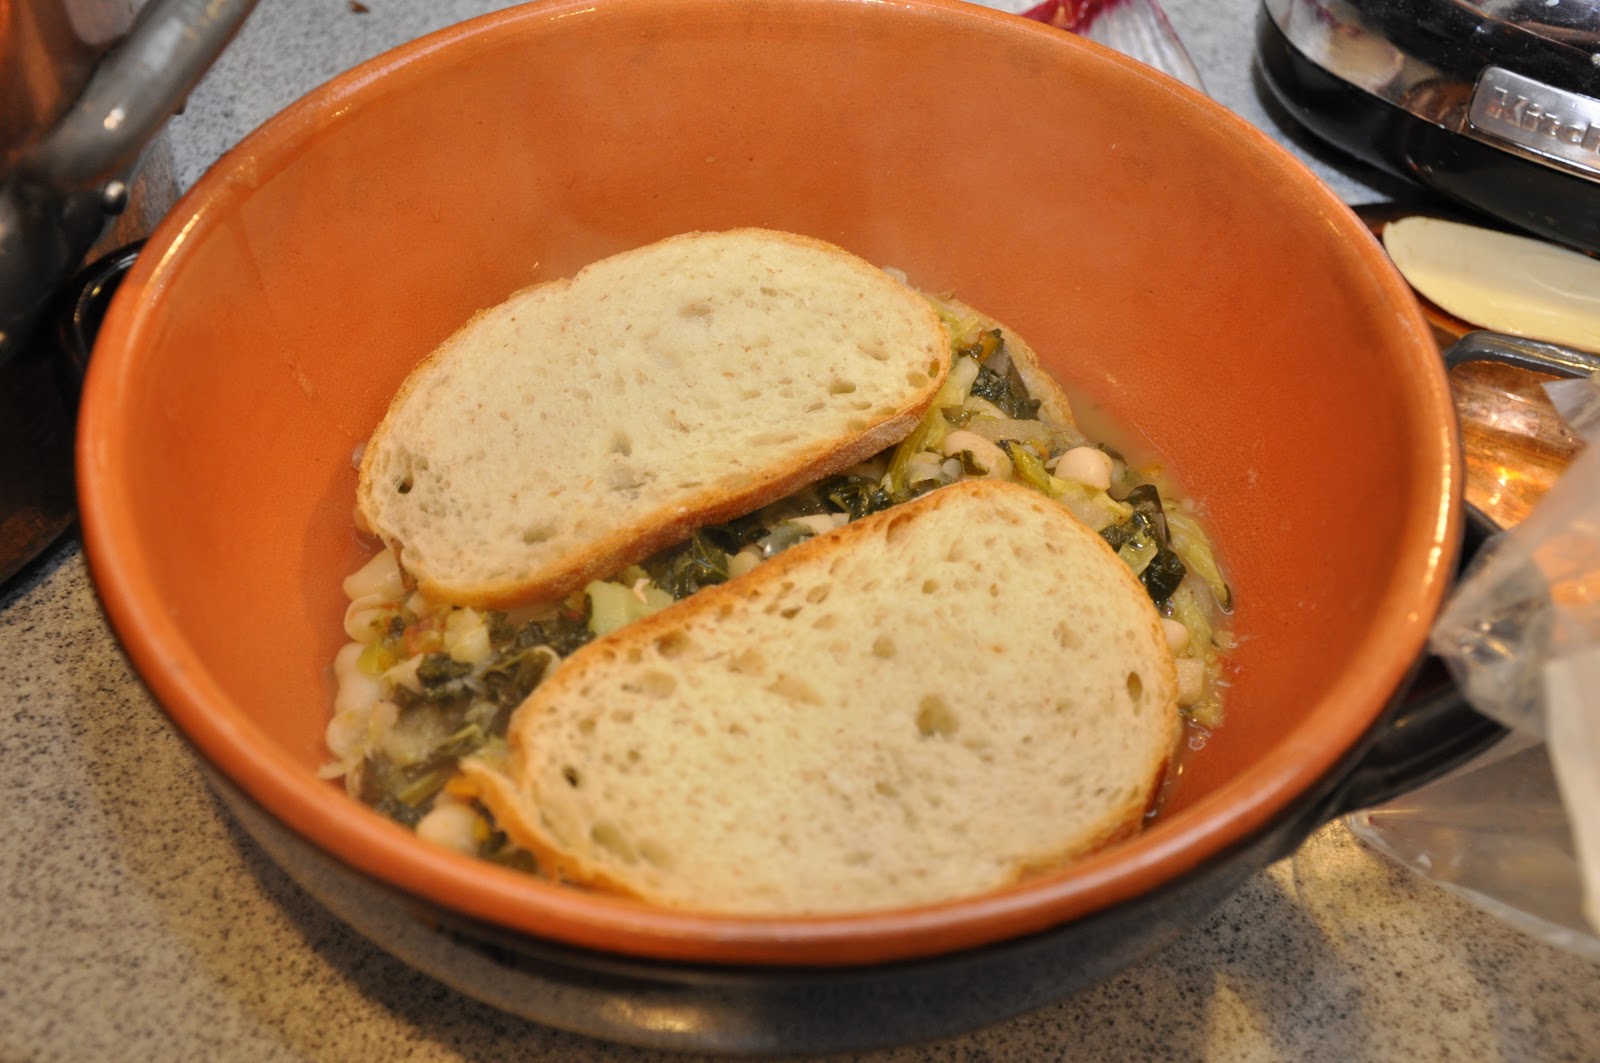
When the soup is done, place some slices of bread in the bottom of a good-sized terracotta casserole or soup pot (if you don't have a terracotta cooking vessel, the enameled cast iron or, in a pinch, a regular soup pot will do). Then ladle over a good portion of the soup.


Add another layer of bread, then another layer of soup, and so on, until you have filled the pot or used up your ingredients. End with a layer of soup.

Let the soup rest for several hours or overnight.

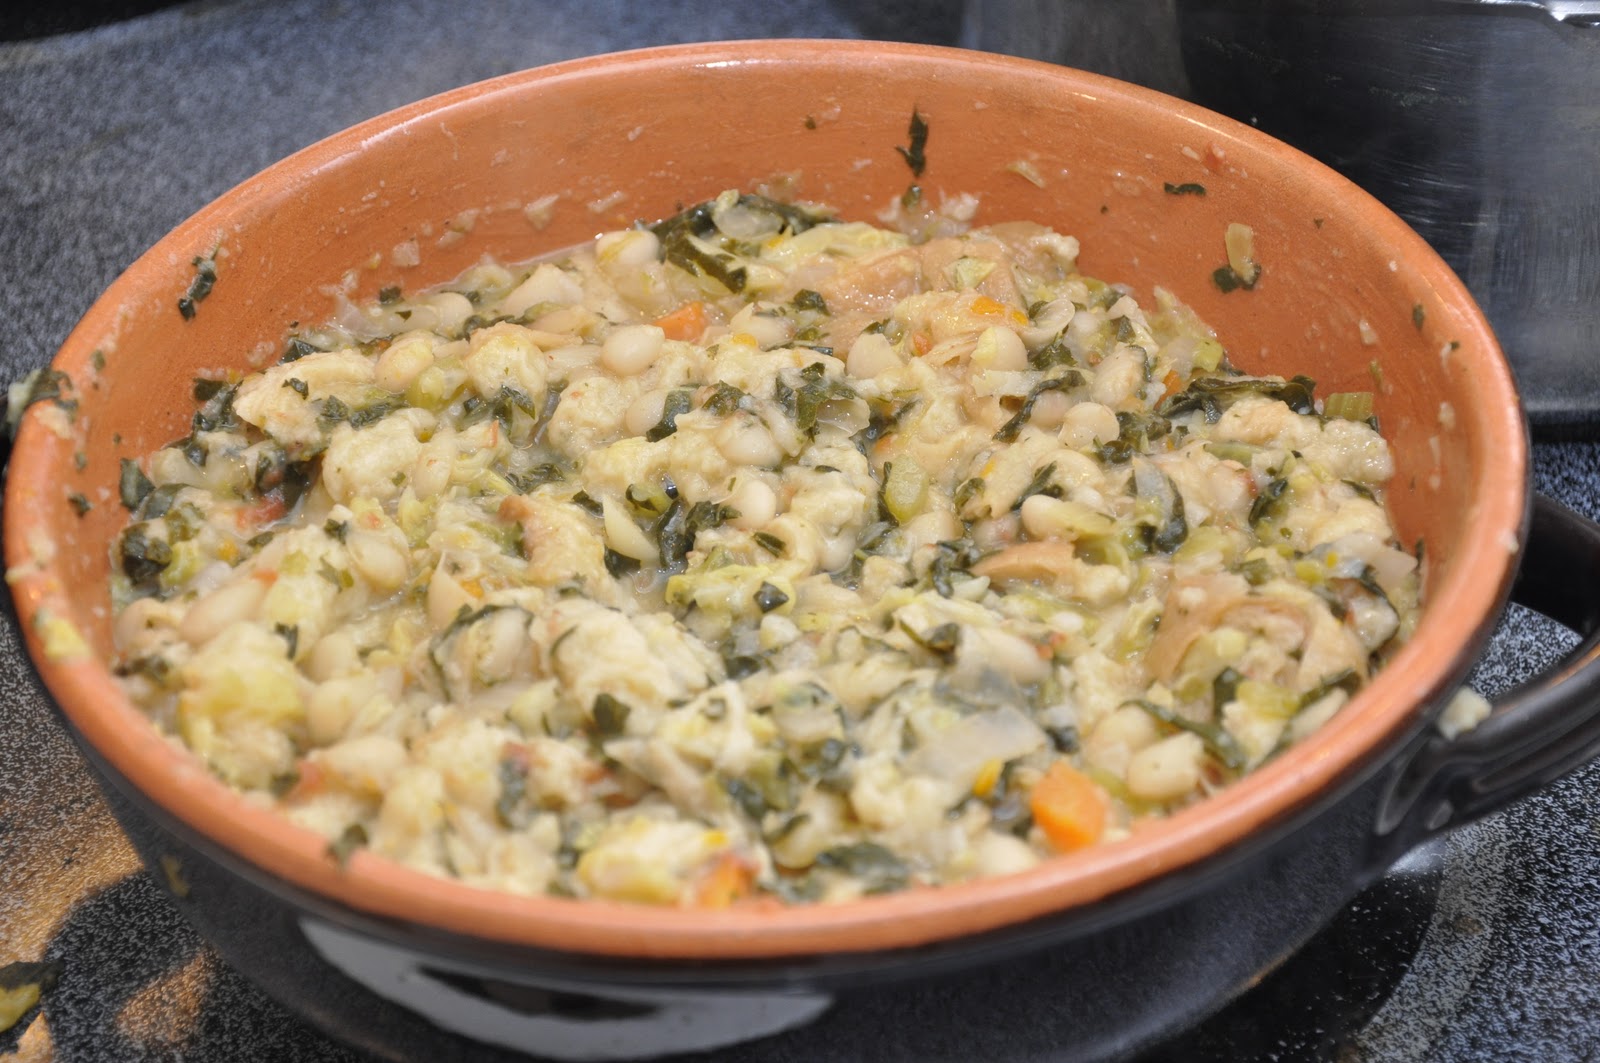
When you are read to eat, gently re-heat the soup. As the soup heats up, mix it up with a wooden spoon, which will break up the bread and mix it in with the rest of the ingredients. The result will be very thick, almost more a stew than a proper soup.


Serve when nice and warm, drizzled on top with un filo d'olio and, if you like, some freshly ground black pepper.


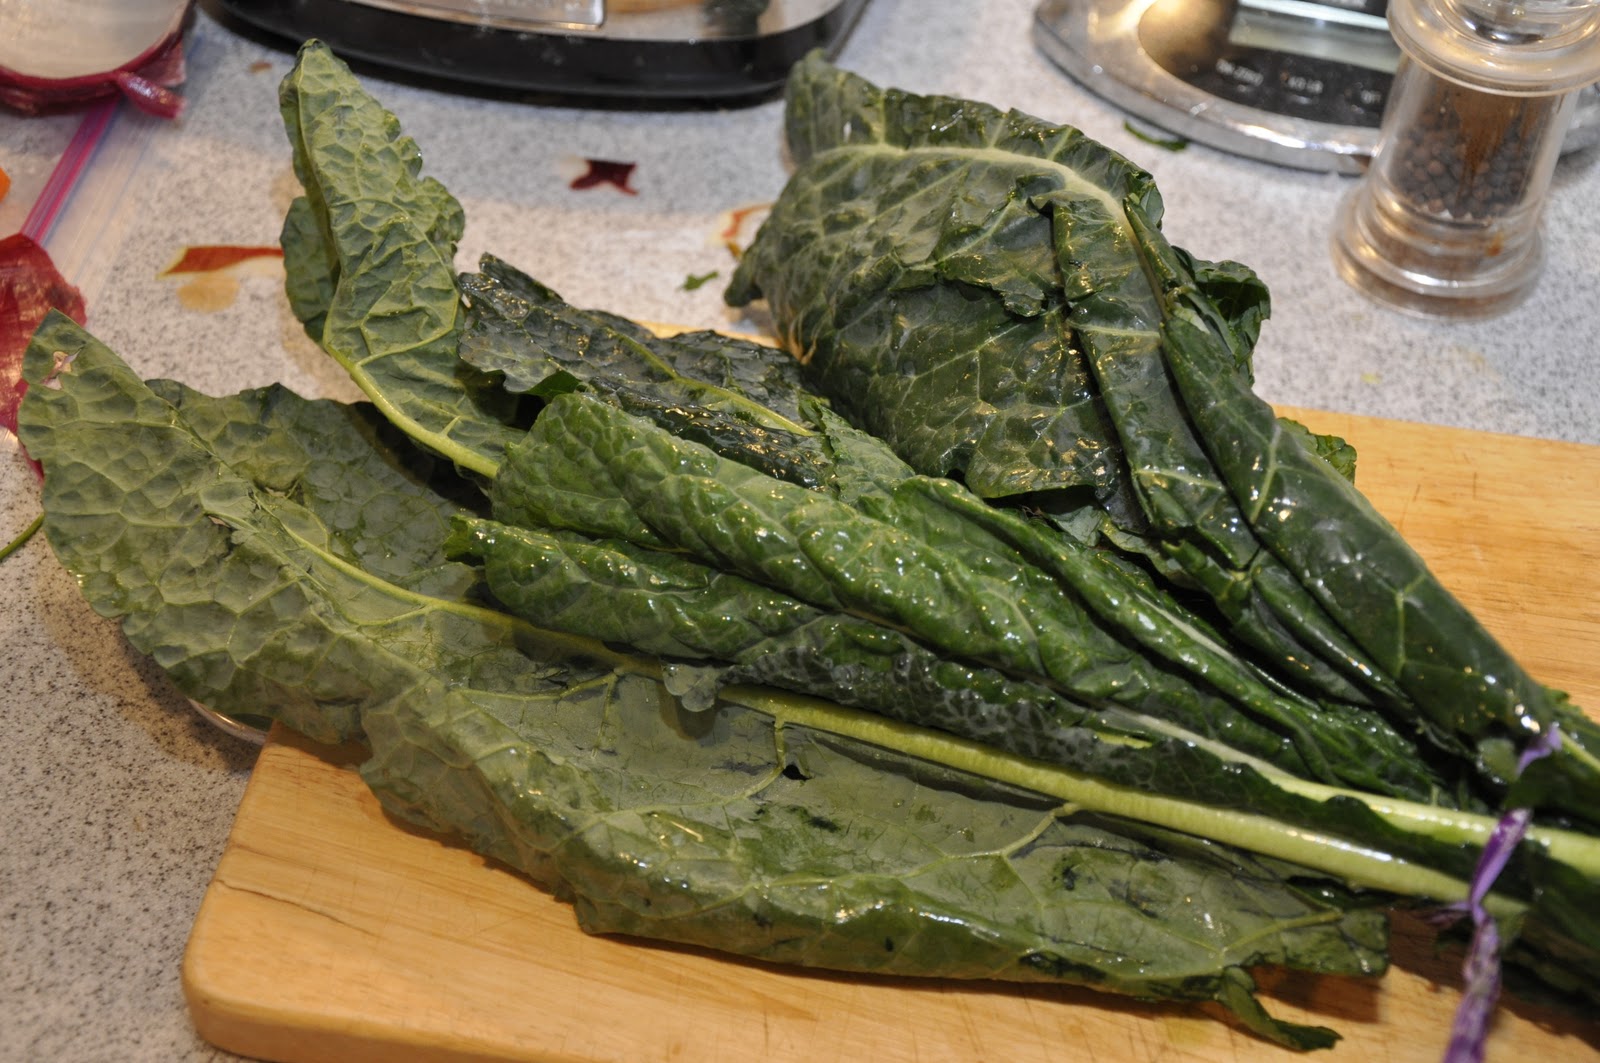
NOTES: The number or types of vegetables vary quite a bit from recipe to recipe, but the two essential ingredients—typically Tuscan—are the cannellini beans and the cavolo nero, or black kale, also marketed as lucinato kale or Tuscan kale. I have even seen a recipe that called it 'dinosaur' kale—not sure where that came from! Once impossible to find, I am happy to report that I now find black kale pretty regularly at my local supermarket here in the US. Similar in flavor to other sorts of kale, it has long, rather slender dark-green (not literally black!) leaves.


Black kale is much more tender and has a more subtle taste. To use it in the soup, you need only to remove the central stem, which can be very tough, then roll it up and shred it with a sharp knife. Other leafy greens, like Savoy cabbage or Swiss chard (or even beet greens) add a nice variety but can be omitted if you don't have them on hand, as can the leek, another vegetable used more frequently in Tuscany than in most other parts of Italy. Another typically Tuscan touch is the use of red onion, which Tuscans seem to prefer, but of course yellow or white onions will do if you don't have red onions on hand.

The choice of bread is of utmost importance. If you have Tuscan bread around, that is, of course, the best choice. Failing that, any well-structured bread that will stand up to cooking will do, although I would avoid sour-dough just because it has too strong a taste. Above all, avoid sandwich breads, which will turn to mush and give your ribollita an uncharacteristic texture.

Ribollita is best when made the day before, but you can make it in the morning for dinner or even an hour or two before—although the longer it sits, the better. The texture is thick and hearty but not heavy, and the bread gives a flavor that is really something very special.

Wednesday, November 10, 2010

Quick Note: Crema di cannellini


Here's a quick and easy weeknight supper for you: a purée of cannellini beans, seasoned with garlic and rosemary, and thinned out with water or broth to create a soup. Nothing could be simpler or more satisfying. And if you are using canned beans—which you can, why not?—the soup can be done in five minutes. There is no cream in this soup, by the way, the Italian word crema does not mean cream, as in the dairy product, but simply refers to any smooth, creamy textured purée.

Ingredients

Olive oil
1-2 garlic cloves (or more if you like), whole but lightly crushed
A sprig of fresh rosemary
Boiled or canned cannellini beans
Broth or water (or the cooking liquid if using boiled beans)
Salt and pepper
A handful of parsley, finely chopped

NB: No exact measurements for this one; use as much or as little of each ingredient as you need or feel like using. This recipe is pretty much ad lib.   

Directions

Begin by lightly sautéing your garlic and rosemary in abundant olive oil over moderately low heat. Once the garlic takes on some color, remove both the garlic and the olive oil from the pan. Then pass your cannellini beans through a food mill into the seasoned oil. Allow the beans to insaporire for a few minutes, then add enough water, broth or cooking liquid to thin out the bean purée to the consistency of a soup. Simmer the mixture for a few minutes to let the flavors meld. About a minute before its' done, stir in the chopped parsley. Drizzle with raw, best-quality olive oil just before serving.

NOTES: This basic recipe is incredible flexible and versatile. Usually, it can be served with some crusty bread on the side, or top of a piece of toasted bread laid at the bottom of the plate, or topped with croutons fried in olive oil, and—as picture above—with boiled rice mixed in. Or some soup pasta instead of the rice.

The same method lends itself to just about any other bean or legume: borlotti, lentils, fagioli all'occhio (black eyed peas), chickpeas… you name it. For a more 'refined' taste, you substitute a soffritto of onion, or onion, carrot and celery, for the garlic, in which case don't remove them from the pan as you would the garlic. For a bit more substance, you can also fry some cubed pancetta in the seasoned oil. Or top your crema with some sautéed shrimp or scallops, which makes for an elegant presentation fit for company.

Boiling dried beans takes some time but is very easy. If you have the time, soak the beans in water to cover them amply, either overnight or save yourself some time by bringing them to a boil and let them soak in the hot water for an hour. Pre-soaking is not strictly necessary, but it does save time and helps the beans to retain their taste and texture—although that's not too important if you're going to use them in a purée, of course. Then simmer them in water to cover generously, along with a drizzle of olive oil and a sprig of fresh sage (if you have some on hand) until tender. Season with salt a few minutes before the beans are done. The simmering liquid has lots of flavor and can be used to thin out the crema.

If using canned beans, on the other hand, make sure to rinse them off and drain in a colander. The canning liquid has stuff you don't want to ingest and, besides, it gives a funny 'canned' taste to the dish. When using canned beans, it is best to use broth to give the crema some extra flavor.

Crema di cannellini, when it is kept quite thick, makes for a nice topping for crostini.

Sunday, October 24, 2010

Tortelli di zucca


One of the nicest parts of this, my favorite season, is the arrival of wonderful Fall produce: mushrooms, endive, chestnuts, cabbage, radicchio… but for me no other vegetable is as typical of the season as hard squashes. They are sometimes called 'winter squashes' but they start appearing in the early Autumn and are a fixture of our October table.

Italy does not have the variety of winter squashes that we have here in North America—squashes are a New World plant, after all—but Italy may have the most delicious of them all, the wonderful zucca barucca. As I've mentioned before, the zucca looks for all the world like your average pumpkin, but its flesh is much less stringy and has a much more intense, sweet flavor than any pumpkin I've had on this side of the pond. Most stateside recipes call for butternut squash as a substitute, but that, too, lacks the intensity of zucca. For risotto, I usually find that baby sweet potatoes have a remarkably similar taste to zucca, even if their texture is a bit grainier. And today I tried another gambit—those smaller 'pie' pumpkins—for making one of the most popular stuffed pastas, tortelli di zucca, or 'pumpkin ravioli'.

You make tortelli di zucca just like ravioli (although they can vary in shape—see below) but the stuffing changes the whole character of the dish. Here is how you make the stuffing:


Ingredients (for 4 servings):


One 'pie' pumpkin or butternut squash, about 500g (or 1 lb.)
 
50-100g (2-4 oz.) amaretti cookies, finely crumbled 
50-100g (2-4 oz.) grated parmesan cheese 
50-100g (2-4 oz.)  mostarda (pears and apples only) 
Nutmeg, salt and pepper, q.b. 
Breadcrumbs (if needed)

Directions:


Cut open your pie pumpkin, cut it into large wedges and clean out the seeds and fibers with a spoon. Roast your pumpkin wedges in a moderate oven (180C, 350F) for about 45 minutes, or until the flesh is quite tender when pricked with a fork. (It's fine if the pumpkin browns a bit around the edges but you do not want a lot of caramelization.) Let the pumpkin cool, turning it over to allow any excess liquid to drain out. (If the pumpkin pieces seem watery still, you can wrap them in cheesecloth and squeeze them dry.) Scrape out the cooked flesh, leaving the skin behind, into a food processor.


Now add the amaretti, parmesan and mostarda, and process them until you have a perfectly smooth, stiff paste. You will note that the measurements are left pretty loose, and you will find that kind of variety among the many recipes for this dish. If you don't have real Italian zucca on hand, I would tend to go for more rather than less to make up for the blander taste of the vegetable. Do make sure each of these three main flavoring ingredients are added in balanced amounts. The thing that makes this filling unique is its harmonious combination of contrasting flavors: the sweet-bitterness of the amaretti, the savoriness of the cheese and spiciness of the mostarda, which marry so well with the natural sweetness of the squash. Season the mixture generously with freshly grated nutmeg, fresh ground pepper and salt.


Taste and adjust for seasoning. If the stuffing mixture is a bit soft or wet, mix in some breadcrumbs, a bit at a time, until the stuffing is stiff and rather dry.


*                *                 *

Now it's time to make your egg pasta, in the usual manner. (See this post on making fresh pasta.) Roll the pasta out rather thinly (setting 6—or even thinner if you want—on a pasta roller) since you will be folding the pasta into a double thickness, into long, rather slender sheets.  
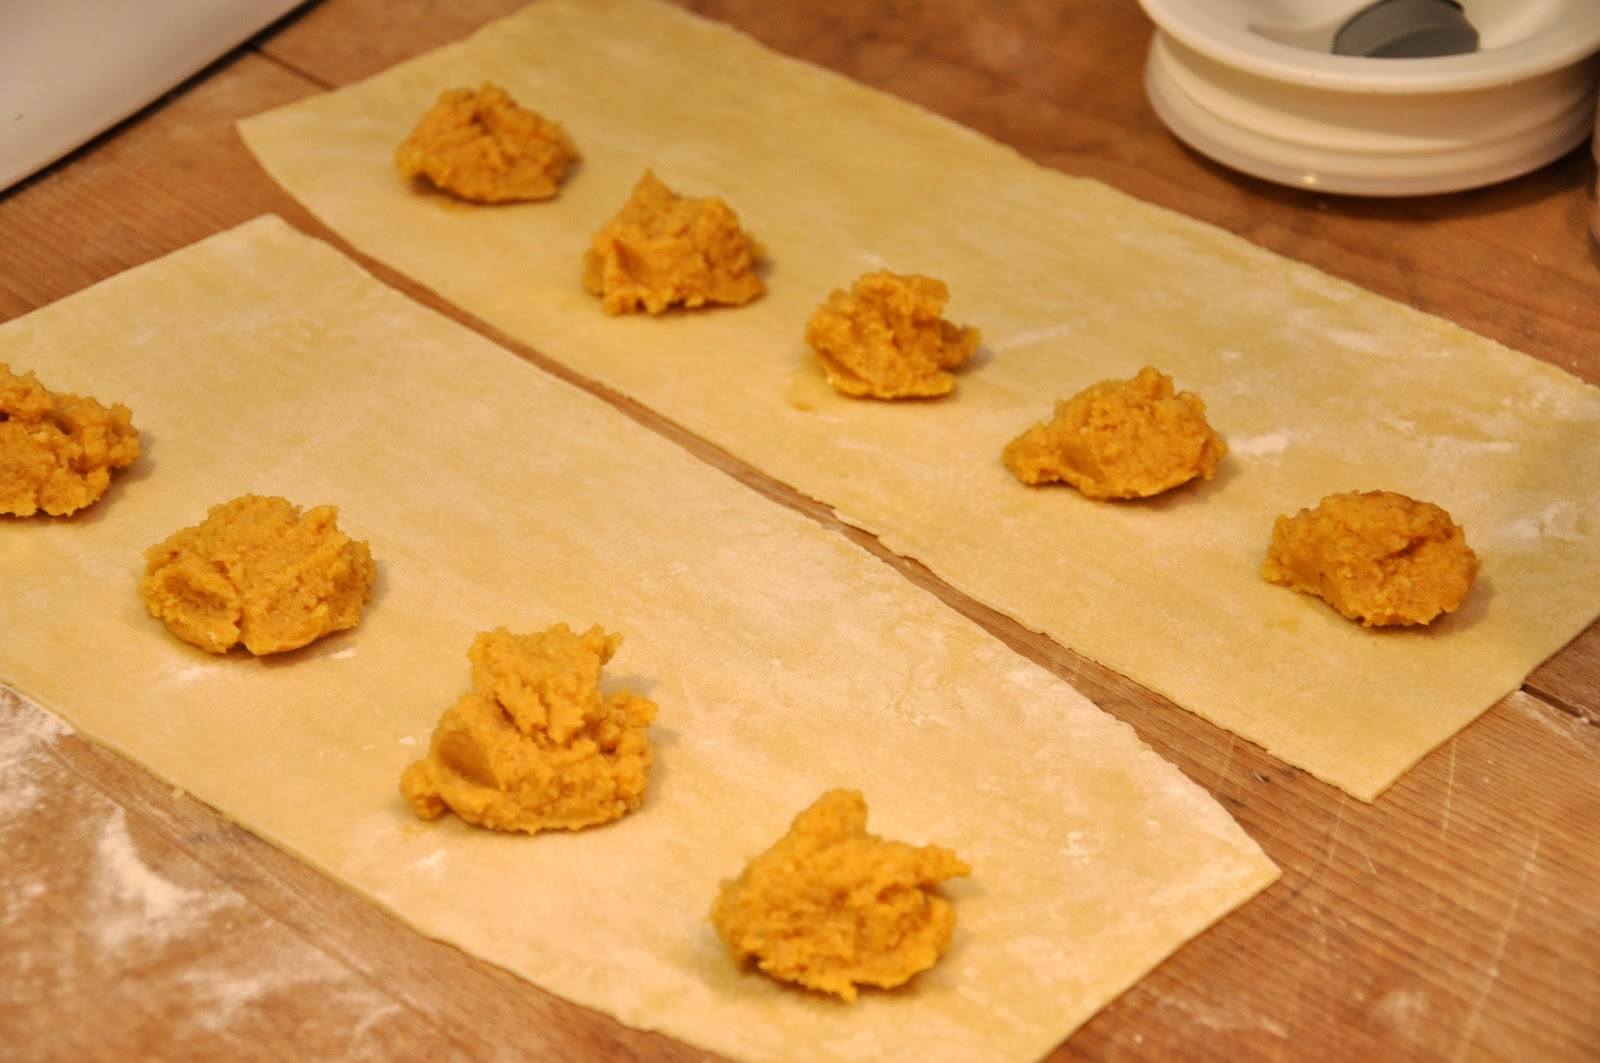
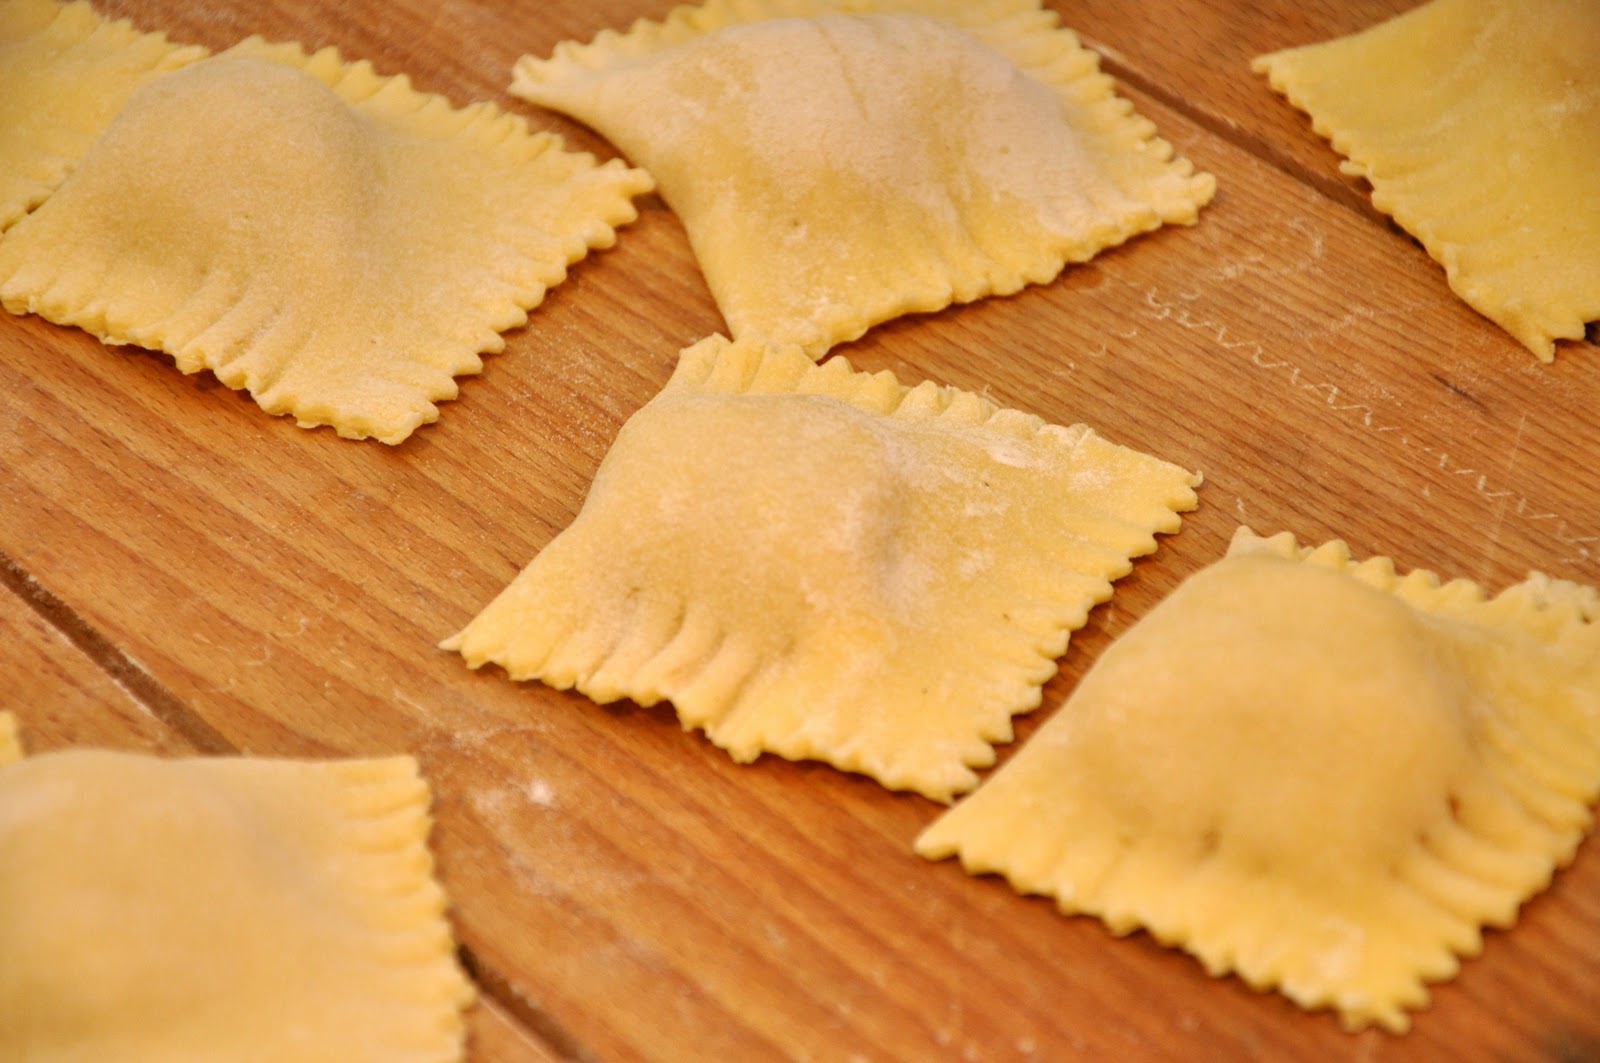
Place heaping teaspoonfuls of the stuffing about 5 cm (2 in.) apart along the length of your pasta sheet, just off center down the middle of the sheet.


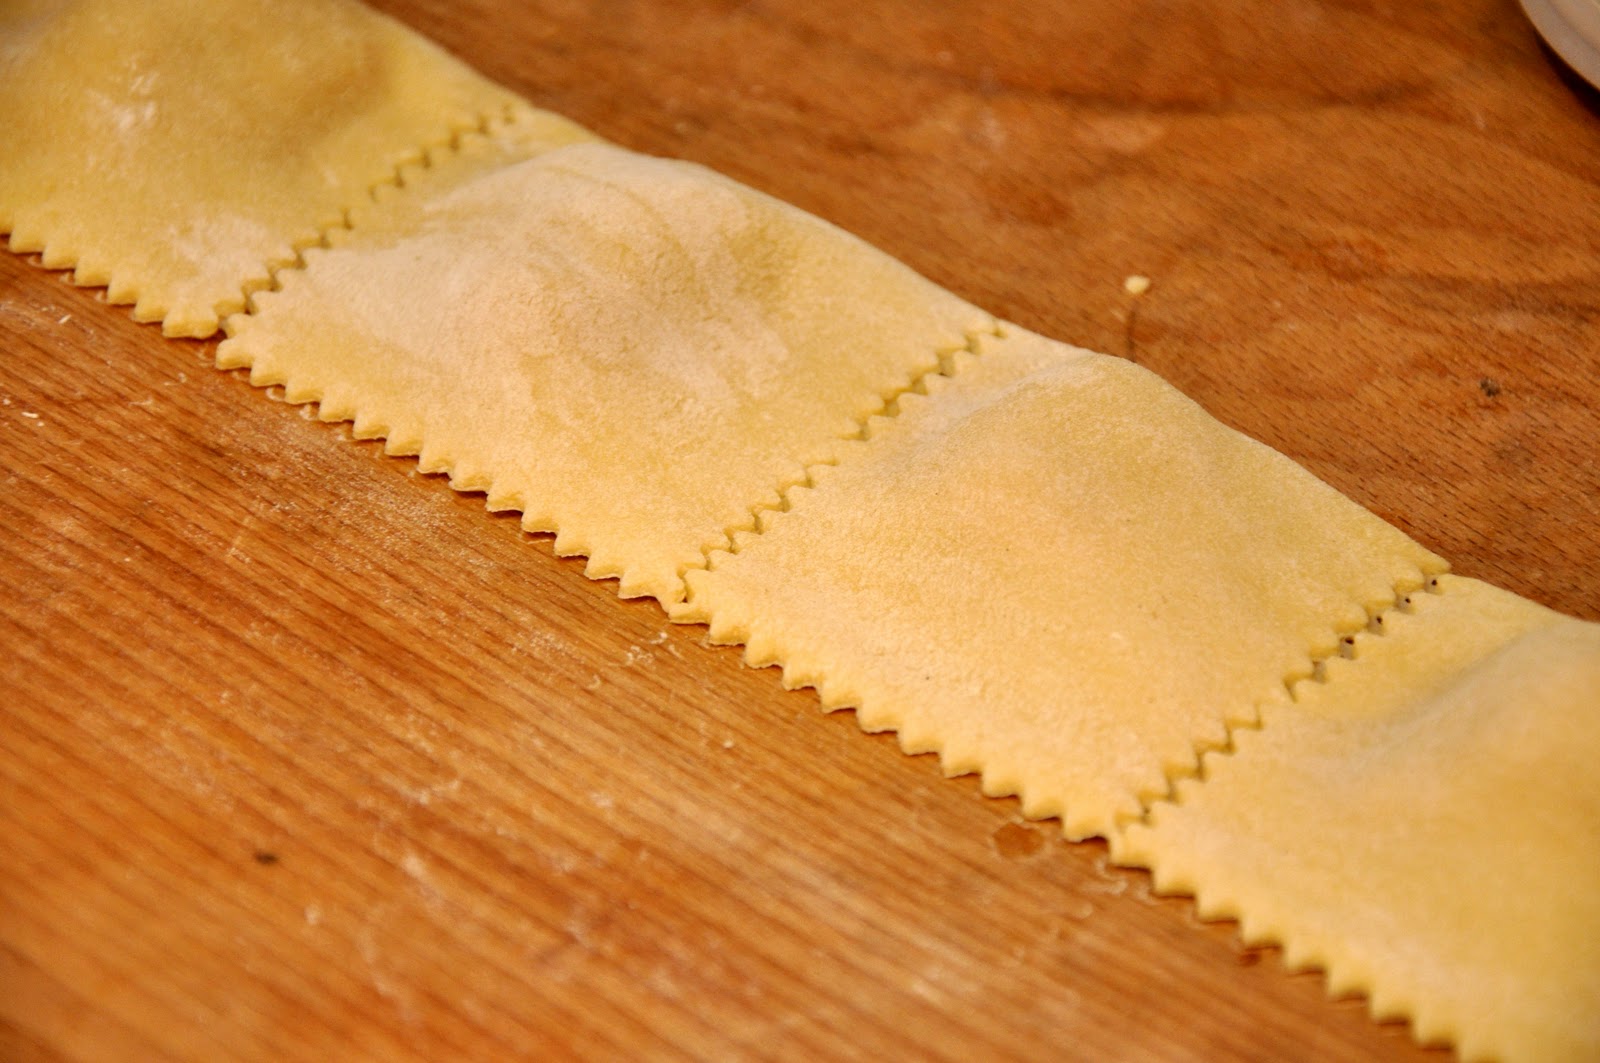
Fold the longer half of the sheet over the stuffing, pressing down with your fingers all around the stuffing to seal the top and bottom layers of pasta together. With a serrated pasta cutter (if you have one, otherwise it's fine to simply use a knife) cut out your tortelli along the three unfolded sides:


For the final touch, you can ensure a tight seal while making your tortelli ever so pretty by pressing down the edges with the prongs of a fork like so:

 
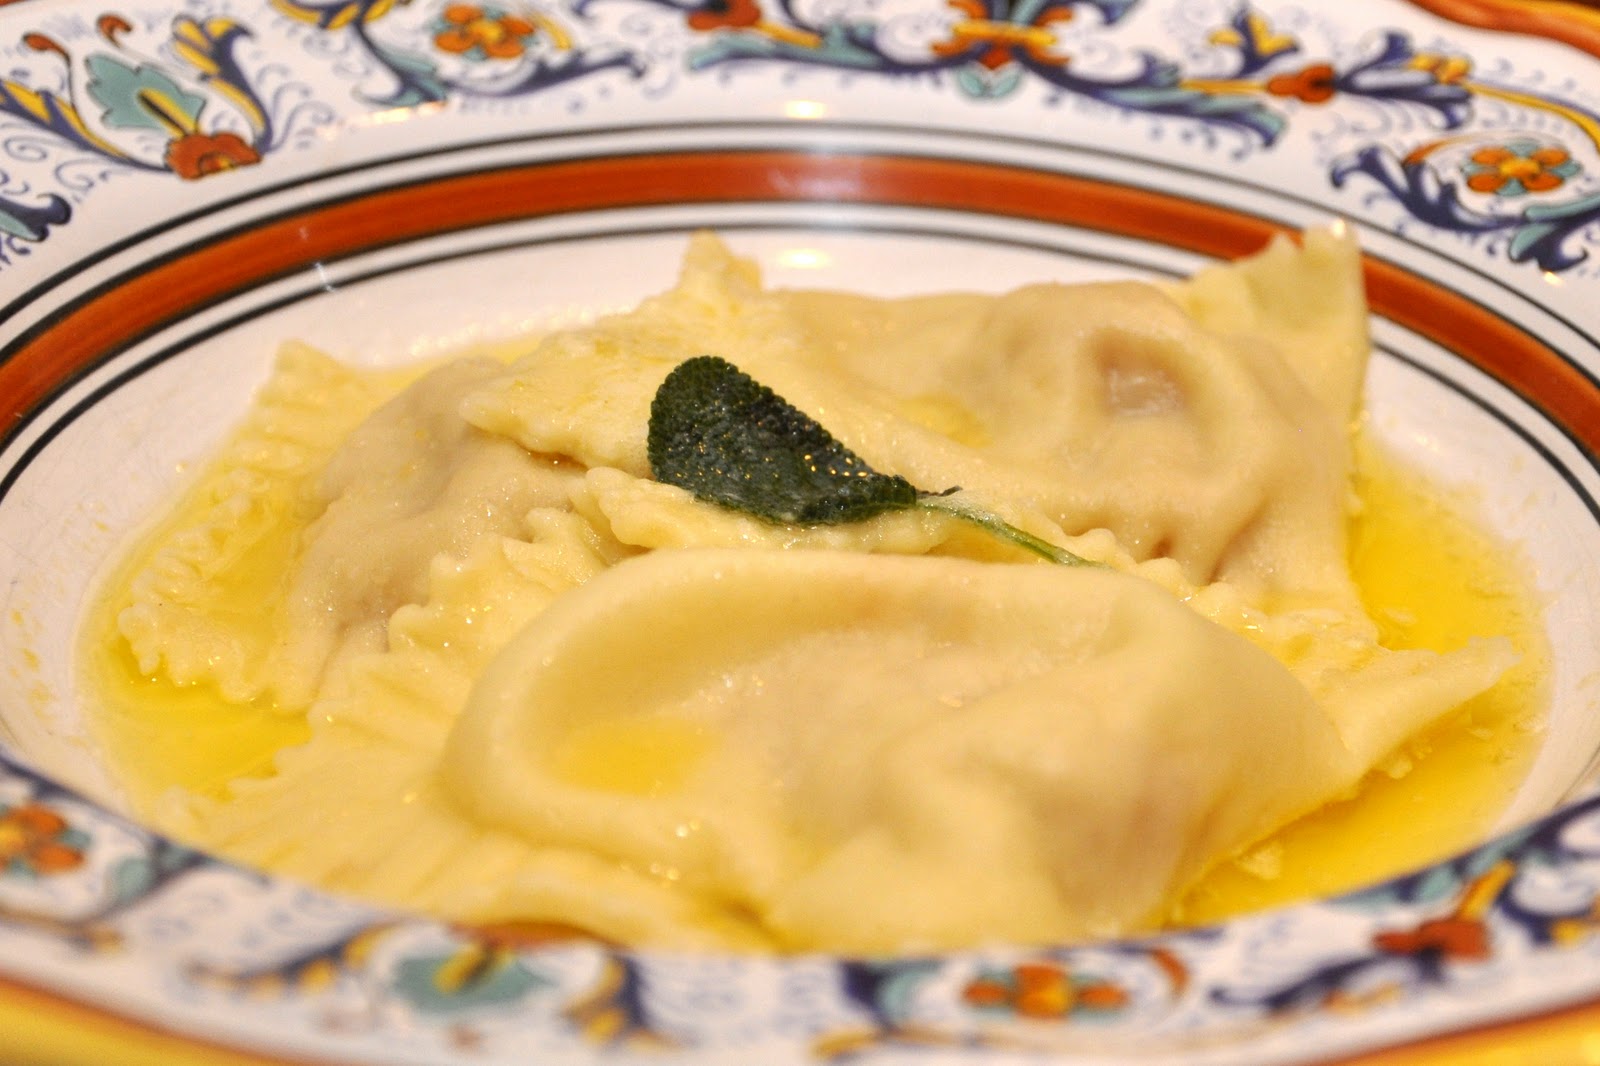
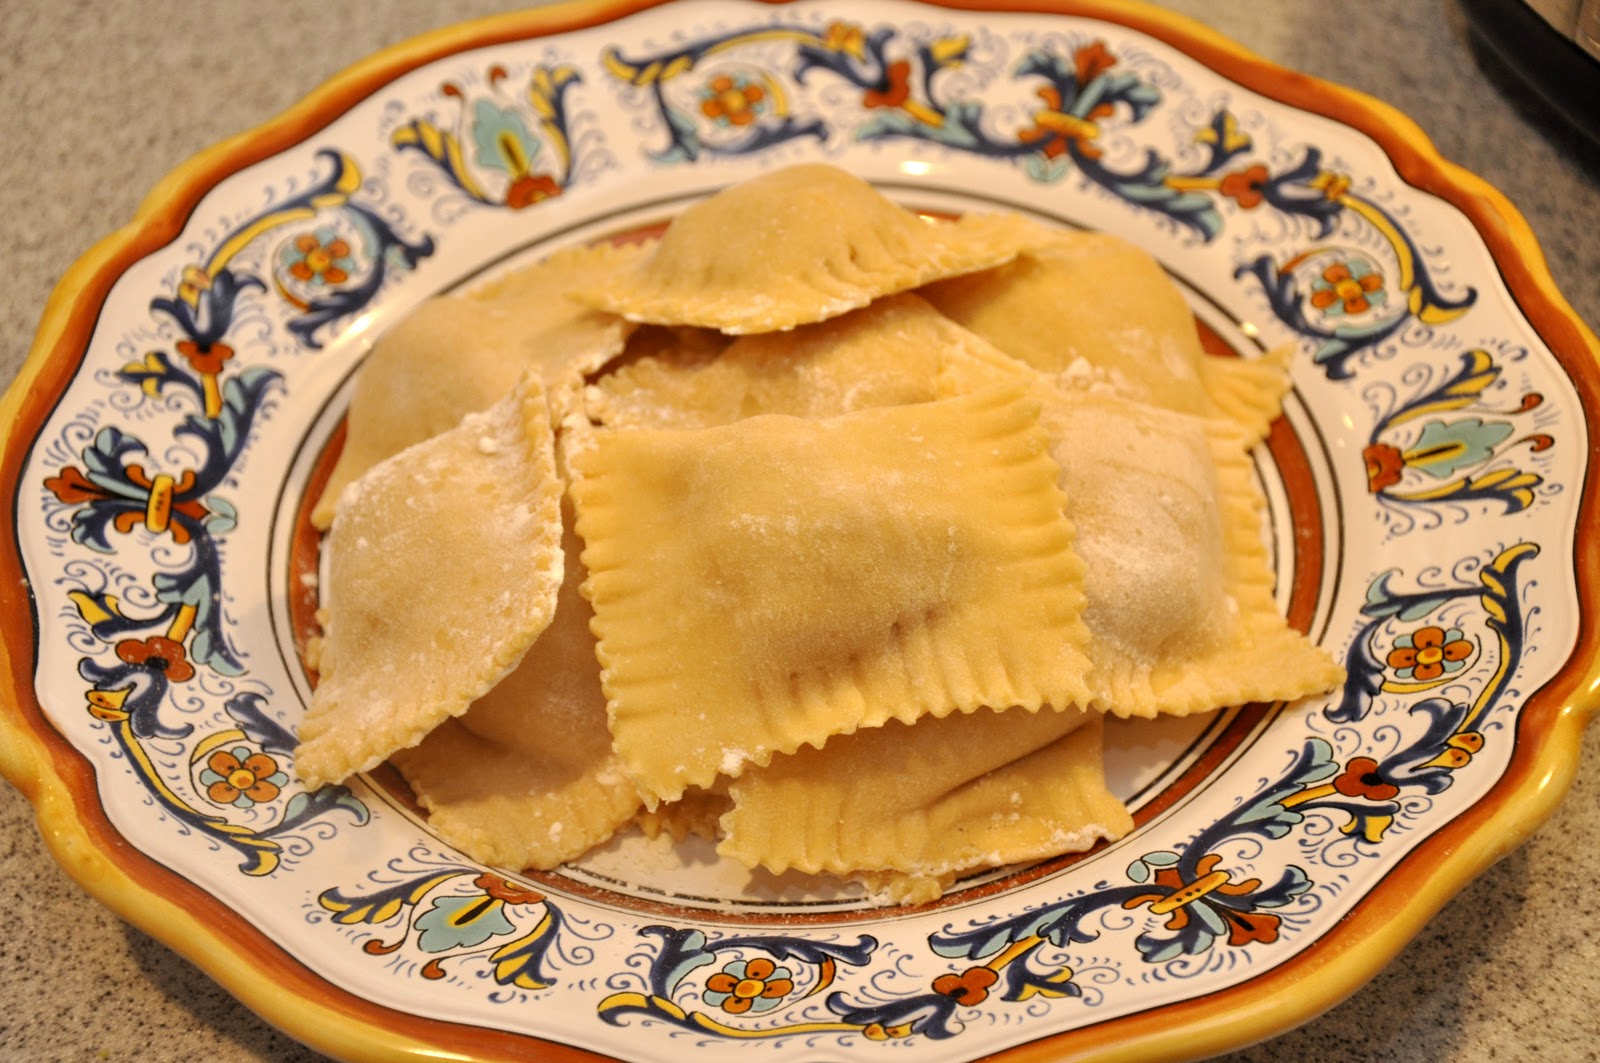
You should cook your tortelli for a good 5-7 minutes, depending on the thickeness of the dough. They take a bit longer than fresh pasta usually does, because of the double thickness of the pasta and the filling. While the tortelli are cooking, gently melt lots of butter in a small saucepan, adding a sprig of fresh sage if you like to steep along with the butter. (I have read that the sage is not original to the dish, but I like it.) Serve immediately, topped with the melted butter and—if you like—more grated parmesan on top.


NOTES: This dish comes from the region of Emilia-Romagna, and more specifically from  the city of Mantova, often called "Mantua" in English. For this reason, they are also sometimes called tortelli mantovani. But similar versions are made in the near-by towns of Parma, Reggio-Emilia, Piacenza and Cremona. In Ferrara they also make this stuffing but without the amaretti cookies. Speaking of which, it can be hard to find amaretti, which are a kind of almond macaroon—not the ubiquitous almond biscotti. If you can't find amaretti, then substitute an equal amount by weight of unflavored breadcrumbs, with a few drops of almond extract if you like.


And then there is the mostarda. Don't let the name fool you: it is not mustard at all, but a chutney-like relish typical of the cuisine of Emilia-Romagna. It is perhaps best known as an accompaniment to bollito misto, but it makes its appearance here as a flavoring. Mostarda has a unique flavor, both sweet and spicy. It is basically fruits that are candied in sugar syrup spiced with (hence the name) mustard seeds. There are various types of mostarda made in the region, but the most famous, by far, is mostarda di Cremona. If you're feeling ambitious, you can actually make it at home. (Here's the recipe.) You can also buy it in many of the finer Italian specialty shops—if they don't have it, give them a proper scolding for having neglected one of the most typical products in Italian cookery. Or you can buy it online. Mostarda di cremona contains a variety of fruits—pears, quinces, cherries, apricots, peaches, figs, but for this dish you really want another mostarda—the one from Mantova, which is made with pears or apples only. So if not making your own mostarda, just pick out the pears from the jar and use them.


Now if you can't find mostarda and don't feel up to making it yourself, you can omit it, as  you will find in most recipes for 'pumpkin ravioli'. But I would urge you to try to find it—it lends a very special, unusual taste to the dish.


You can also dress your tortelli di zucca, if you like, with a more elaborate sauce. Personally I don't think that the pumpkin stuffing goes particularly well with tomato-based sauces, but some wild mushrooms sautéed in butter with pancetta, for example, would be delightful.


The term 'tortelli' is one of the most confusing in the lexicon of pasta shapes. It can be another word for ravioli, but can also be rounded, or rounded and twisted as for a larger version of tortellini. And you will sometimes find tortelli di zucca in these shapes as well. And in Ferrara, they make cappellacci di zucca, made with a very similar stuffing (without the amaretti, as mentioned above). The pasta is cut into squares but then the two corners are joined to form a little 'hat' (hence the name, which comes from cappello, Italian for hat, since the shape was said to resemble the straw hats that local peasants used to wear.


The pie pumpkins, by the way, worked very well for this dish. True, they did not have the intensity of zucca, but their texture was perfect and, with all the added flavorings, the stuffing was perfectly delicious.  And if you have some leftover stuffing but don't feel like making another batch of pasta, you can use the stuffing to make a fine version of risotto alla zucca. 


By the way, don't throw away those pumpkin seeds! They are wonderful roasted in a slow oven with just a few drops of oil or melted butter until lightly brown (about 30-45 minutes) and seasoned with some sea salt. Or, for something a bit fancier, try out these two wonderful recipes by my fellow foodie, "Cookin' Canuck".

Saturday, October 9, 2010

Cappelle di funghi alla griglia


Grilling need not come to an end just because the summer is over, especially if the weather is still fine, as it is this weekend where we live. Beautiful cloudless skies and mild temperatures are perfect for grilling—even better, if you ask me, than the sultry days of August and early September. And many seasonable vegetables are wonderful grilled, none more so than mushrooms. Grilled mushroom caps are a special early autumn treat. Their meaty texture and smoky flavor resembles nothing so much as a nice, juicy steak. And they're just as simple to make.


Just make a quick marinade from abundant olive oil seasoned with a finely minced garlic clove, finely chopped parsley, salt, pepper and a pinch of oregano or—if you have some—that special herb called nepitella which goes perfectly with mushrooms. Take some large mushroom caps and brush them generously with the seasoned oil, top and bottom. Then grill them over a hot fire, about 3 minutes per side, and serve on a bed of greens or—for that special Fall feeling—some radicchio leaves dressed with oil, salt and pepper. Drizzle some olive oil over the top, season generously with salt and pepper and sprinkle them with some finely chopped parsley. Ecco fatto!


NOTES: The finest mushrooms for grilling, and the most typical in Italy, are fresh porcini. But if you can't find them or just don't want to pay through the nose, then other firm-fleshed mushrooms like portobellos will do. Large whole caps really do make for great eating, but smaller mushrooms also grill up fine—just reduce the grilling time according to size. Some people like to slice the mushrooms before grilling, in which case make sure you use a fine grate or grilling basket so they don't fall on to the coals.


Mushrooms absorb a lot of condiment, so do be generous with the marinade and make sure to dress them well before serving. In fact, I like to have some extra olive oil, salt and pepper on the table so your dinner companions can add more seasoning to the mushrooms if they want.


Radicchio really marries well with mushrooms, but you can also serve your grilled mushrooms, like a fine tagliata di manzo, with arugula, or just on their own. They make for a nice antipasto or a vegetarian (vegan, if fact) second course. They can also serve as a topping for an actual steak if you feel like meat.

Sunday, October 3, 2010

Sformato di finocchi


The sformato (a term literally meaning 'unmolded') is something like a savory flan or perhaps a soufflé without the puff. At its most basic, it is actually a rather simple dish, a mixture of puréed or finely diced vegetables with béchamel and eggs, baked or steamed in a mold until set.

A sformato can be made with practically any vegetable which can vary according to the season, so you can serve a sformato all year round: peas or asparagus in the spring, zucchini or green beans in the summer, and so on. Now that the weather is rapidly cooling off here in the northern hemisphere, I turned to one of my favorite cool weather vegetables, fennel. Now fennel is delicious raw, served in a salad or even on its own, after dinner, as a kind of palate-cleansing 'fruit'. When cooked, its anise flavor mellows considerably and becomes, for lack of a better word, 'buttery' in flavor, and marries very well with butter, cream, cheese and other dairy products. That makes it a perfect candidate for a sformato.

Begin by boiling, or even better, steaming fennel bulbs, trimmed of their stalks and cut into halves or quarters, according to their size. For a family-sized sformato, about 500g or a pound of fennel, two large bulbs, should do well. When they are tender—a knife should slide easily in and out of them—drain them well. Let them cool a bit and, when they are cool enough to handle, either cut them into small dice or purée them, as you prefer. (I also like to add some of the fronds from the stalks for extra flavor.) A food processor works well for the purpose. Then melt a good amount of butter in a skillet and add your fennel, allowing it to absorb the flavor of the butter and to evaporate any residual liquid.

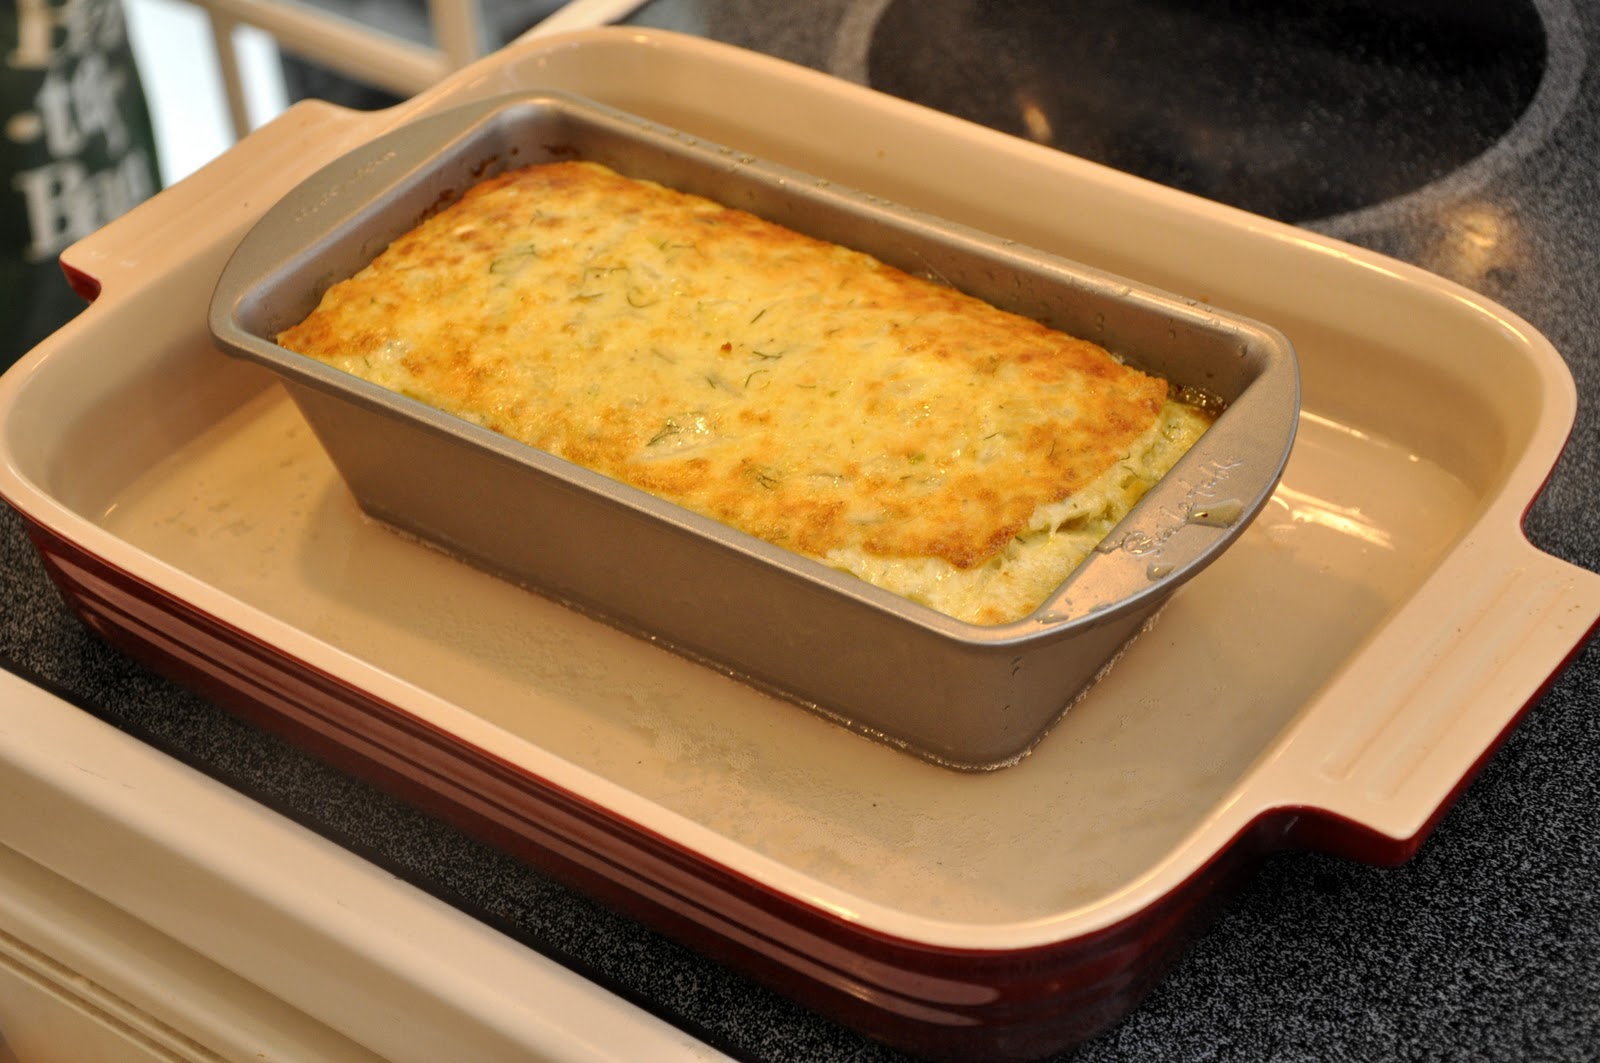
Now make some béchamel in a separate saucepan, in the usual way (see this post), using 2 cups of milk for every 500g (or pound) of fennel. Add the béchamel to the sautéed fennel, and season to taste with salt, pepper and a handful of grated parmesan cheese. Allow the mixture to cool off and  then add four eggs. Mix everything up well and pour into a well-greased loaf pan or other mold (see Notes below). Place your mold into a larger baking pan and pour water around the sides, to make what the Italians call a bagnomaria or 'bain-marie' in French and English:

 
Place the baking dish into a moderately slow oven (about 325F, 170C) and bake until the mixture has fully set. To test doneness, insert a paring knife or skewer inserted into the mold; it should come out completely clean. Baking time varies according to the size and shape of your mold, but for the loaf pan shown in the picture, it took about an hour. Individual molds will, of course, take much less time, as little as 15-20 minutes.


 Let the sformato cool for about 15 minutes or so. Loosen the sformato from its mold by running a knife along the edges of the pan. Then unmold itonto a serving platter. This can be done by placing the platter over the loaf pan or other mold, then holding pan and platter together with both hands, flipping it over. Gently remove the pan, revealing your sformato in all its glory. Serve warm or at room temperature.


 NOTES: As I mentioned, you can use the above basic recipes with just about any vegetable, using the same technique and the same proportions. I find that 'solid' vegetables like green beans, carrots, mushrooms and the like work best with the above basic recipe. Softer vegetables that tend to 'melt' when cooked, like pumpkin can also be used but you should reduce or even eliminate the béchamel and up the number of eggs to maintain the proper texture. You can also make sformati with other ingredients, including pasta, but the recipe is sufficiently different that it deserves a separate post.

The number of eggs varies from recipe to recipe. For 500g or a pound of vegetable, some recipes call for as few as a single egg, or as many as the four indicated in this recipe. Obviously, the more eggs, the firmer the texture of the final dish. Some recipes call for yolks only, which I imagine also produces a firmer result. You can also vary the texture by making the béchamel thicker or thinner, according to the amount of flour you use. (Too thin, though, and the sformato may not hold together.)

One important point: make sure that your vegetables are not 'water logged' when you mix them with the rest of the ingredients. That will tend to result in a rather flaccid texture. This is why steaming is better then boiling, and why it is important to sauté the vegetable in butter until quite dry. (The sautéing also gives it a wonderful flavor.)

As mentioned, you can use any number of different types of molds: a simple loaf pan works very well, but you can make a sformato in a round mold, or a ring mold, or a square mold, as you like. And rather than making a single 'family style' sformato, for more formal occasions you can use individual ramekins (or even a muffin pan!) to make individual sformati, which make for an impressive 'gourmet' presentation on the plate. For an even more elegant presentation, serve your sformato with a sauce—a creamy cheese sauce or a light tomato sauce or a coulis made from a vegetable with a complementary flavor. You can also garnish the sformato with sautéed vegetables, either the same vegetable as you used to make the dish, or some other vegetable that would go well with it.

At its most basic, though, this is actually a very simple, light yet rich, dish very suitable for home cooking. The only really tricky part is the unmolding. If you're lucky, the mold will come off perfectly cleanly, leaving a perfectly formed sformato. But if not, no worries—the taste will be just as good. You can just use garnish or sauce to hide the imperfection. To increase your chances of success, be generous when greasing your mold. And to be doubly sure, you can use a piece of wax paper, cut to size, to line the bottom of your mold. You then just gently remove the paper from the unmolded sformato before serving. Or, for a very informal meal, you forget all about it and just serve the sformato directly from the pan at table, with a spoon or metal spatula. Of course, technically you will not have a 'sformato' at that point, but I'm sure no one will mind.

The sformato is a usually vegetable dish, but it is too elaborate, really, to serve as a side. Traditionally, it served as an intermezzo, the course that came after the primo and before the secondo in very formal dinners. If you want to impress your guests, you can use it that way. For everyday eating, a sformato is very versatile. It can be an antipasto, a first course or even a vegetarian second course, as you prefer. There are even sweet sformati for dessert… but that's a subject for another post.
Sunday, September 26, 2010

Risotto verde


As explained in my post on the ABCs of making risotto, it is one of those infinitely versatile dishes that smart cooks live by. Once you know the basic recipe, you've actually formed an entire repertoire by just varying the flavoring ingredient, which can be meat, fish, vegetable or even fruit. One of my favorite ways of making risotto is called risotto verde, or green risotto, made with green vegetables, most commonly—and my personal favorite—spinach. It has a wonderful flavor and, to my mind, looks very pretty on the plate.

You simply follow the basic recipe for making a risotto in bianco, starting with a soffritto of onion or shallot sautéed in butter—and I think butter tastes best here—and proceed to add your rice, then a splash of white wine, then ladlefuls of broth, one by one, until the rice is almost done. Then add some baby spinach, which you will have rinsed well of any grit and puréed in a blender with a bit of broth until perfectly smooth. Continue until the rice is done al dente, then proceed to the usual mantecatura, adding grated parmesan cheese and a dab of butter or—as I prefer—a slurp of heavy cream. The cream is not very orthodox, but I find that it complements the taste of the spinach very well. Serve immediately, with additional cheese on the side for those who want to top their risotto with it.

As for measurements, follow the general rule of 75-100g (2-1/2 to 3 oz.) of rice per person, and an equal amount by weight of spinach. The rest is to taste or, as in the case of the broth, quanto basta or as much as you need.

NOTES: I find that this dish works best with baby spinach, with has a lovely sweet taste and fine, velvety texture when puréed. But if you have older spinach on hand, then make sure to trim off their stems, and briefly blanch the leaves in boiling water, before you puréed them. They will need less broth to form a purée. If you want a richer dish, you can sauté the spinach purée in some more butter, and season it with salt, pepper and some grated nutmeg.

Some recipes, by the way, call for adding the spinach, in the more typical fashion, to the soffritto at the beginning of the cooking process, but I find that this robs the spinach of its sweetness, so I think this is one of those cases where you are well advised to wait until almost the end.

Spinach is typical but you could make risotto verde with another leafy green vegetable like swiss chard, arugula, watercress or even kale—although kale needs a lot of cooking, so you should definitely blanch it, and add it at the beginning, not the end. Some recipes combine spinach or another leafy vegetable with other green vegetables like peas or asparagus. And while my favorite version tends towards using dairy, there is a version (from Abruzzo, according to the Accademia italiana della cucina) that begins with a soffritto that combines onion, garlic and carrot sautéed in olive oil, and end with a mantecatura using some grated parmesan but no cream at the end. I have also found one recipe online that 'gilds the lily' a bit, suggesting the addition of ricotta—a classic combination with spinach, of course—along with cream and parmesan cheese.

Saturday, August 28, 2010

Lasagne in bianco


As the summer wanes here in the northern hemisphere and the temperatures begin to dip, it will soon be time to think about turning the oven on again. And, in our house, that means it's time to get ready for lasagna! One of the most versatile ways of making lasagna is in bianco, meaning without tomato sauce. It is a style typical of central and northern Italy. Instead of tomato sauce, you fill your lasagna with béchamel layered with whatever condimento you feel like, whether meat, fish or, my personal favorite, any sort of vegetable in season, sautéed in butter or oil olive, often with garlic or onion to lend savor.

Back in the spring, I made an example of this style of lasagna, lasagne agli asparagi. That post took you through the basic technique, with step by step, illustrated instructions, so I won't go into details here. The same technique can be used with any other vegetable, with the only difference being how you treat the vegetable condimento.

This time, rather than asparagus, I used spinach as my condimento. If you are using young spinach, you simply prepare them in padella, adding the rinsed spinach directly into your seasoned olive oil, without draining them too well, and sauté until they have fully wilted, no more than a few minutes. If you are using older spinach, the kind with crinkly leaves, you'll need to trim the leaves of their stems, then parboil the leaves in abundant salted water for a minute or two before sautéing them.

Then proceed as usual, layering fresh pasta, béchamel, sautéed spinach and abundant grated parmesan until you have exhausted your ingredients, ending with bechamel sprinkled with grated cheese and dotted with butter. (Don't build up more than four layers, however.) Bake in a hot oven (200°C/400°F) for about 20 minutes, or until just a bit browned on top. As with all lasagna, you should let it cool off for at least 10-15 minutes before serving it. 

The first layer: pasta covered with bechamel, sauteed spinach and cheese

NOTES: As mentioned, the same technique can be used with just about any filling that strikes your fancy. In the late summer, I particularly like zucchini, for example, which you can sauté just like the spinach in garlic and olive oil. Or, something different, why not try some luscious summer tomatoes? Fellow blogger Don Hogeland, also known as "Sortachef", just posted an especially nice version of lasagna, a kind of caprese style, with fresh, uncooked tomatoes and mozzarella.

If you are not feeling too ambitious, you can save considerable time by using store-bought lasagna sheets. Here, though, you need to be a bit careful. A lot of so-called 'fresh' store-bought pasta is made with semolina flour, which makes for a tougher dough that is fine for southern-style lasagna but not very apt for a delicate lasagna in bianco. Your better bet is actually using dry 'no boil' lasagna, but be aware that no boil pasta absorbs a lot of liquid as it cooks, so use a rather loose béchamel, and lots of it.

As the weather cools off, you may want to switch fillings—I think mushrooms are particularly wonderful, or radicchio, pumpkin, butternut squash… but I am getting ahead of myself. Late summer is a special time of year, with its abundance of fresh produce, so enjoy the last of the summer vegetables while we can—and this is a particular delicious way to do so.

Friday, August 27, 2010

Panzanella


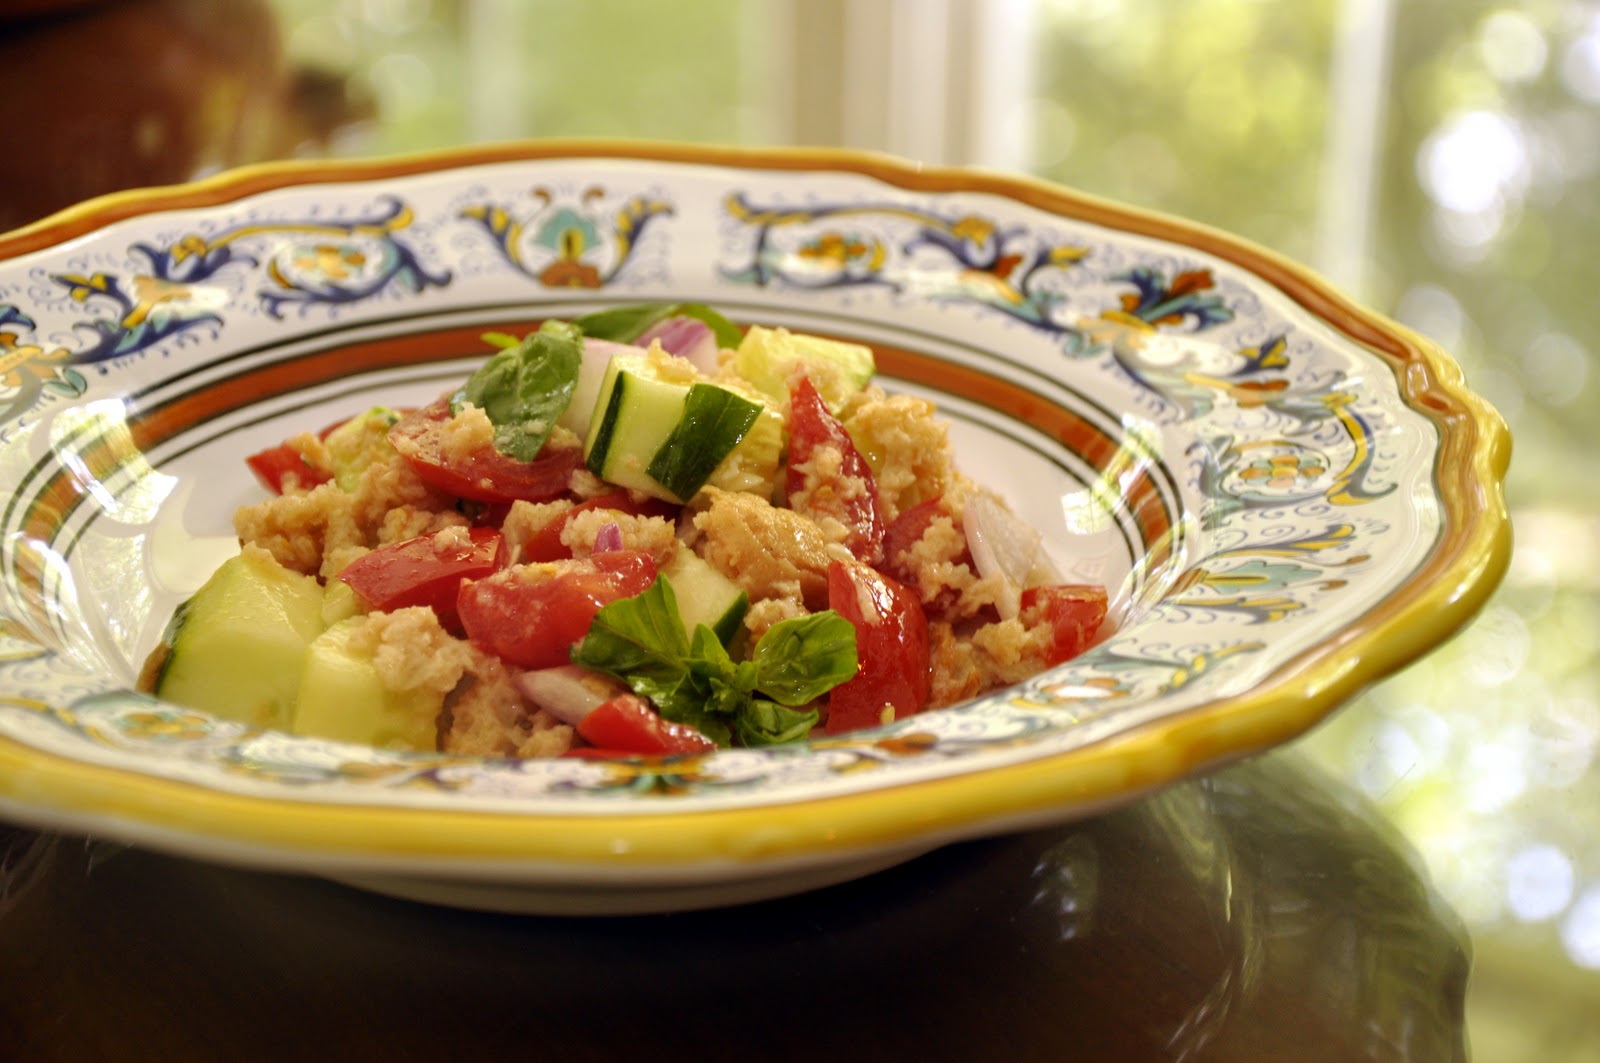
Panzanella, a Tuscan bread salad, is a great way to use old bread and avoid cooking in hot weather at the same time. And it is so simple to make, too. Take some slices or chunks of stale bread and dunk them in water until they begin to soften. This should not take long. Remove them and squeeze out the water, then shred the bread with your hands into a salad bowl. Throw in some chopped ripe tomatoes, sliced or chopped red onion and a few basil leaves. Dress your salad in the usual manner, with abundant olive oil, some wine vinegar, salt and pepper. You can serve panzanella immediately if you like, but it doesn't mind a wait. In fact, it develops flavor if let it rest for a while, say an hour or two. It can even be made well ahead, in which case you may want to hold off on the vinegar, which can become overpowering, until you are ready to serve.

NOTES: It is quite common to add some chopped cucumber to the above basic recipe, which I do whenever I have it on hand. It lends a certain brightness to the recipe. Chopped celery can also be a nice addition. In fact, I sometimes like to experiment with panzanella—with apologies to my Tuscan friends—with all sorts of additional ingredients (see my post on panzanella «con un po' di tutto»).
 

Red wine vinegar is usual for panzanella—remembering that Tuscany is the home of Chianti wines—but personally I prefer to use white wine vinegar which doesn't 'stain' the salad and, to my taste anyway, has a less assertive flavor. A few drops of lemon juice would not be amiss, either. There are also recipes that omit any acid altogether. Some recipes call for you to add the vinegar to the water in which the bread is soaked, rather than as part of the dressing.

Whether you chop your vegetables large or small is also a matter of taste. I vary according to my mood, although I tend to like moderation in all things, so I usually use a 'medium' chop. So those of you who like to get fancy, you can use a very fine chop and form the panzanella in a ring mold in individual portions as an antipasto for an elegant summer meal.

The ideal bread would, of course, be Tuscan bread, traditionally the darker pane scuro. But if you don't happen to live in Tuscany, any good quality, well-structured bread will do the trick. Just make sure it is the kind of bread that will stand up to being soaked, squeezed and shredded without turning into mush. Sandwich bread won't do—you need the kind of bread that you buy in a whole, unsliced loaf. One good test to see if the bread has adequate structure is to squeeze the loaf when you buy it: if it collapses easily (like Wonder bread) then it won't work for this dish. The more resistance it gives, the better—well, to a point, of course…

The measurements are really totally up to your taste. I've seen the dish made with mostly bread, or with mostly vegetables. This being an old peasant dish, surely the proportions depended entirely on what was on hand at the time you made the dish, and that is what I do, too. A good rule of thumb, however, is that bread should make up about half the volume of the salad.

Tuesday, August 3, 2010

Pomodori ripieni di riso

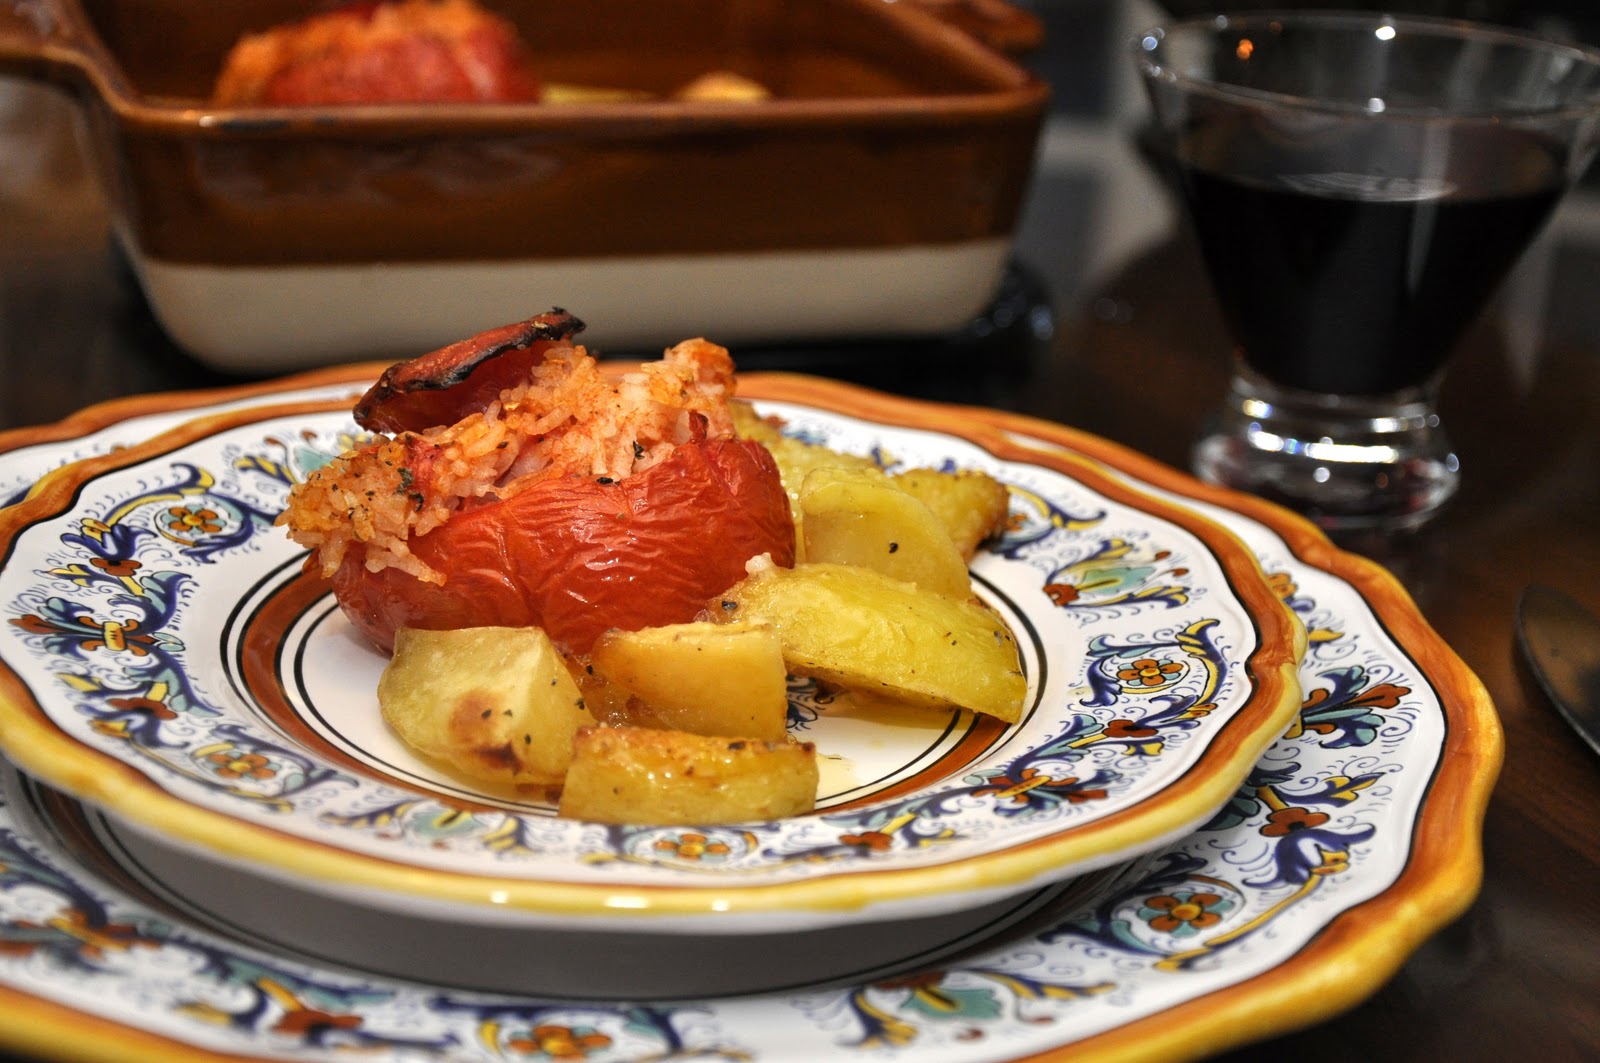
A staple of summer picnics and tavole calde, pomodori ripieni di riso, tomatoes stuffed with rice and oven roasted, make for a simple and relatively quick weekend dinner, part of a buffet or a tasty antipasto for a summer dinner for guests. Here's the recipe:

Take as many tomatoes as you have dining companions, cut off (but don't discard) the tops. Scoop out the insides of the tomatoes and chop them up, making sure you don't lose the juices. Mix the chopped up insides with some rice, which you will have parboiled until they are about half-tender. Season the rice mixture with salt, pepper, a drizzle of olive oil, just a bit of finely minced garlic and some minced herbs, typically oregano, basil and/or parsley.

Spoon the seasoned rice mixture into the insides of the tomatoes, taking care not to pack them too tightly, and place their tops back on top of the rice stuffing. Place them in a well-oiled baking pan and scatter some wedges of potato around the tomatoes. Season the dish with salt and pepper and, if you like, a sprinkling of oregano. Drizzle everything with some more olive oil. Roast in a hot oven (200C, 400F) for about 45 minutes, or until the rice and potatoes are fully cooked, the tomatoes nicely roasted—they will crinkle up and their edges will char a bit. Check on the dish from time to time while it is roasting. If it seems dry, drizzle over a bit more oil. You can also move the potatoes around so they cook evenly and are well coated with the oil.

Pomodori ripieni di riso are usually left to cool and eaten at room temperature or just slightly warm.
 

NOTES: In Rome at least, these tomatoes are invariably served with potatoes but if this is too much carb for your taste, you can omit them. Some recipes call for reserving a bit of the tomato pulp and mixing it with the potatoes so they too get some tomato flavor and a bit of color.

You can also play with the rice stuffing. As indicated, the herbs can vary with your taste. Some recipes omit the garlic, others call for some grated pecorino or parmigiano. Some add capers, olives and/or chopped anchovy, although these ingredients would change the character of the dish pretty radically and, in my humble opinion, upset the balance of flavors.
Needless to say, the success of this simple dish will depend on the quality of its ingredients, especially the tomatoes. This is really something you should save for the best, tastiest summer tomatoes you can find. The tomatoes themselves should be large enough to stuff, of course, but should not be gigantic, either, or you will wind up with too much stuffing, making for a rather stodgy dish. The tomatoes should be fully ripe, but not at all mushy, or they will disintegrate in the roasting process.

As far as the rice is concerned, the typical rice would be short-grained, but this is a forgiving recipe. You can even use leftover Chinese take-away, which is what I used tonight! Some recipes calls for adding raw rice, but in my experience this inevitably leads to a dry, chalky filling. As mentioned, it is important not to pack the stuffing too tightly or to overstuff the tomatoes; they will otherwise expand and rip open the tomatoes—not the end of the world by any means, and the tomatoes will still taste good, but you may fare una brutta figura (make a bad impression) if company is coming…

Friday, July 23, 2010

Fave e cicoria


It has become quite fashionable in Italy, even at some chic restaurants, to serve the traditional peasant dishes of what is called la cucina povera, or the cuisine of the poor. These dishes, based on 'humble' ingredients (some of which have ironically become quite expensive) and simple cooking techniques, were born out of necessity but are well loved in these relatively prosperous times, partly out of sheer nostalgia for what now seem like simpler times, partly because they represent an authenticity that seems to have been lost in modern life—but mostly, I suspect, just because they taste too good to give up, even when you can afford something 'fancier'.

This dish from my grandfather Lorenzo's native Puglia epitomizes, for me at least, the whole cucina povera concept. It is made from two ingredients—dried fava beans and wild chicory—that were and still are dirt cheap. In fact, as I've mentioned before, wild chicory, or cicoria selvatica, can be found growing in open fields in Italy. I can scarcely think of two more unpretentious ingredients and yet, put them together and you get a unique taste experience. It's a dish that shows how, with a little imagination, simplicity can be sublime.

Begin by soaking your fava beans. You can do this one of two ways: either leave them overnight with cold water to cover or boil them briefly (for, say, 5 minutes) and remove them immediately from the heat and let them sit, covered, for about an hour. Unlike other beans, favas need to be peeled, as they skin, while not entirely inedible, does not make for good eating. This is not difficult—once soaked the skins should slide off fairly easily, leaving a pod of two loosely attached halves—but it does require some patience, so sit down with your bowl of favas and listen to some music while you peel.

Put your peeled favas in a pot large enough to contain them and enough water to cover by a couple of centimeters (about an inch). Season well with salt and pepper and, if you like (although this is not original) a garlic clove or two, and/or a small onion. Simmer about an hour or more, until the favas have become very tender. Stir frequently and top up with more water as needed to prevent the beans from drying out and scorching, but you do want to water to reduce, so that by the time the favas are tender, the water will mostly have evaporated.

When the beans are tender, begin to mash them with the side of your wooden spoon, until the beans have formed a kind of 'cream'. Add a good filo d'olio to enrich the beans. Continue simmering, stirring all the time, until the beans have formed a purée thick enough that you can form a little 'canal' with a wooden spoon like so:


Taste and, if necessary, adjust for seasoning. Keep warm until you are ready to serve.

Meanwhile, take a good head of chicory (if you can find wild chicory, so much the better) or another bitter green—dandelion greens also work well—and boil them in well salted water until tender. Trim off the root but do not cut the greens into pieces; the leaves should remain whole (see Notes below).

Now you are ready to serve. Place your fava bean purée in the bottom of a soup plate, forming a little well in the middle, then using some tongs, grab some of the boiled greens, let them drain rather well (but not completely) and place them in the center of the plate. Sprinkle with salt and pepper, then drizzle with a generous amount of the best, fruitiest olive oil you can find. Serve immediately.

NOTES: The beauty of this dish lies in the contrast of the bitterness of the greens with the smooth, nuttiness of the beans. The best way to eat it, then, is to take a bit of the greens with your fork, twirling the leaves as you would strands of spaghetti in the purée, which will form a kind of 'sauce' for the greens. Eaten this way, you can make sure you get a bit of greens and a bit of bean in each bite.
There are a few variations on this dish, mostly aimed at the making the dish more refined or savory. As mentioned above, one common variation is to add some aromatics to cook along with the fava beans, usually garlic and/or onion, but also carrot and celery, fresh herbs, etc.  Some recipes call for a bit of tomato and/or potato. Some folks like to add a little peperoncino for heat, either by adding some to the  beans or by dressing the final product with oil infused with chili at the end.  Some recipes call for dressing the chicory separately from the favas with garlic and oil, a bit like making them in padella. And  then some recipes will have you pass the puree through a sieve or food mill to make it  perfectly smooth. But would a peasant do that? I don't think so. And there are different ways to serve the dish. Rather than placing the chicory on top of the fava bean puree, it is also very common to place them side by sides on the dish.

In the US, dried fava beans can be a bit hard to find, but if you have access to a Latin market (or a supermarket with Latin products) the Goya brand carries them. And, of course, Italian markets catering to immigrant Italian-Americans—not the upscale ones, which tend to neglect southern Italian products—should have them also.

You can cut down the cooking time for the fava beans by using a pressure cooker. It should take about 15 minutes once it gets up to pressure. De-pressurize immediately. Since there is less evaporation than using a conventional pot, you may need to drain the beans and do the final simmering in another pot.

For this dish, you really want good, fruity, extra virgin olive oil to given this dish the proper character. If you use any other kind of oil, even the lighter olive oils, will not do. And, of course, if you can find olive oil from Puglia, so much the better! The Cento and Alessi brands both sell Apulian olive oil. 

Tuesday, July 13, 2010

La genovese


Besides ragù alla napoletana, la genovese is probably the most iconic of all Neapolitan pasta sauces, and yet it is little known outside Italy or, for that matter, little seen outside Naples itself. And, for reasons I cannot quite figure out, it did not seem to survive the trans-Atlantic voyage; in my experience, la genovese does not form part of the Italian-American repertoire. All of which is really a shame, because this has got to be one of the most delicious sauces ever devised for dressing pastasciutta. 

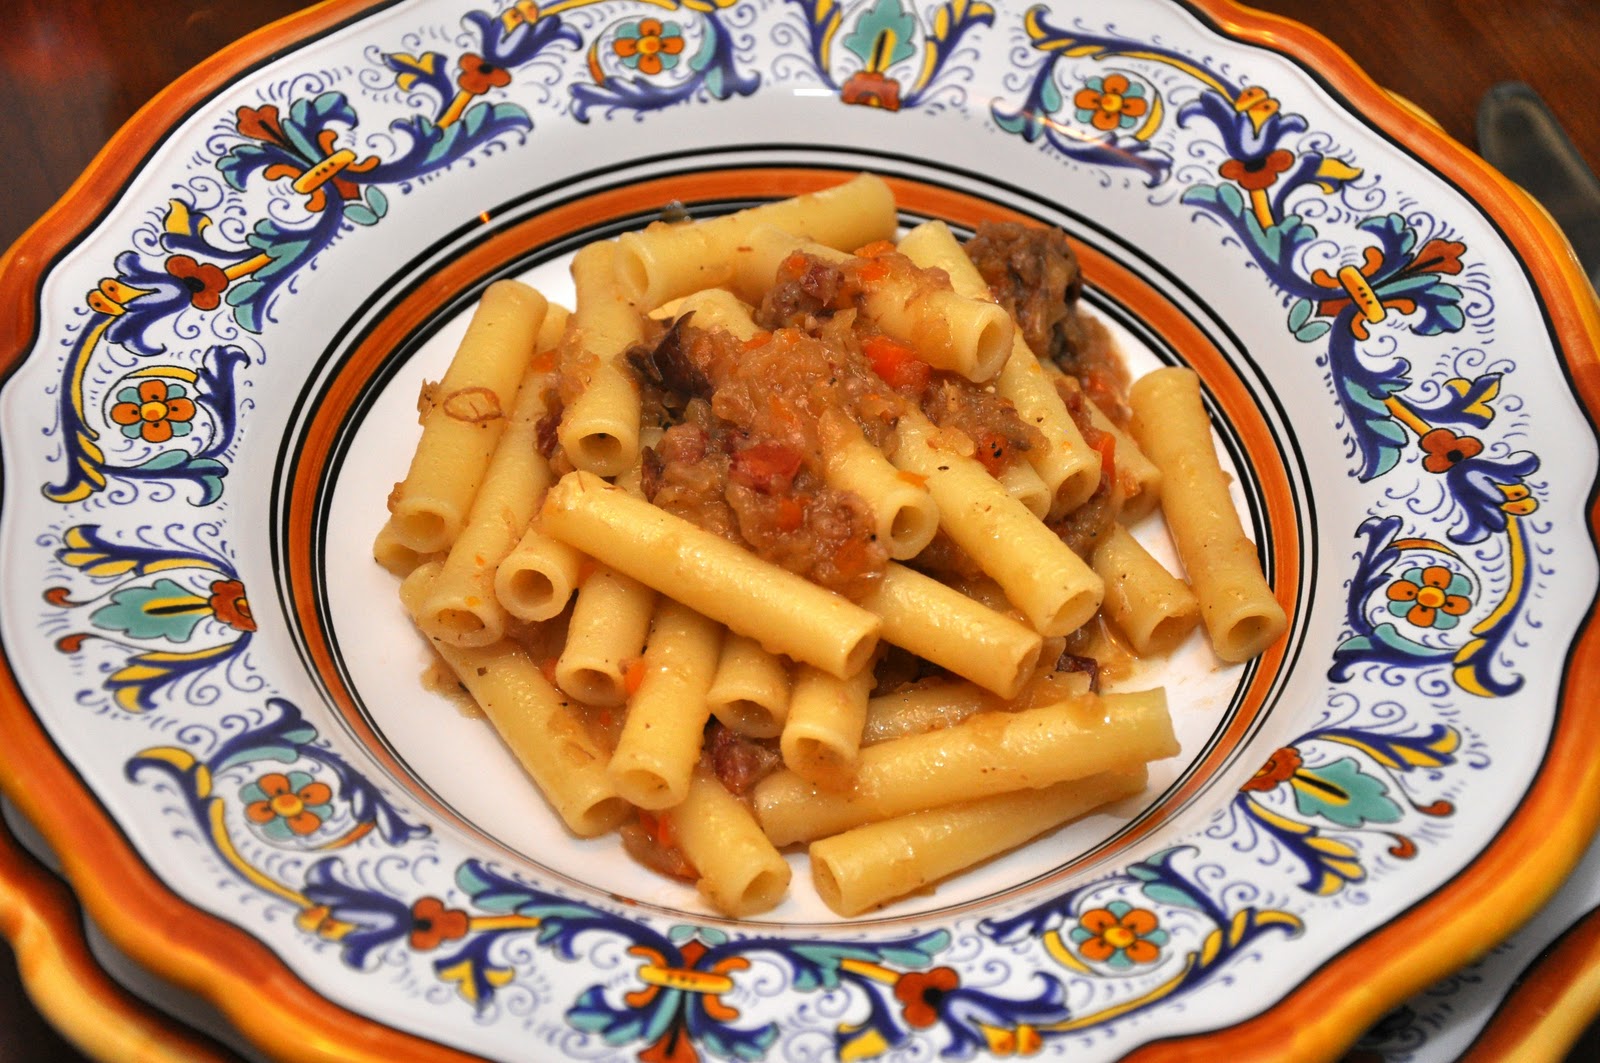
La genovese requires long, slow cooking but can simmer unattended for most of the time. You cover the bottom of a large pot, preferably either terracotta or enameled cast-iron, with a generous amount of olive oil or, if want true authenticity, melt a heaping wad of lard. I usually compromise and melt just a spoonful of lard in olive oil to give it that special savory flavor. Then add lots of finely chopped onion to the pot (see below for measurements) along with a carrot and a stalk of celery, both chopped finely as well. Then add a nice, large piece of stewing beef—my favorite is chuck, for its rich flavor—and some finely chopped bits of salumi (salame, pancetta and/or prosciutto) along with a glassful of white wine or water. Season the ingredients well with salt and pepper, cover and allow this mixture to simmer over very low heat for about 3 hours, uncovering the pot and stirring from time to time, and adding a bit of water if needed to keep the mixture moist, until the meat is fork-tender and the onion is well reduced and melted into a kind of 'cream'. 

At the last, raise the heat and allow the onions to caramelize until they are nice golden brown color—but be sure not to burn them. Remove the beef for another use, possibly as a second course. The remaining onion cream is your sauce. Use the onion sauce to dress ziti or other stubby pastas. If you like, serve with grated parmesan or pecorino cheese. (I prefer the former over the latter.) 

Measurements: To make enough genovese to dress pasta for 4-6 people, use 1.5 kilos (3 lbs.) of onions. Recipes range in the ratio of meat to onion, from almost 1:1 (usually a bit less meat than onion) to 1:2, with most calling for 1:1.5, so for four-six people, add 1 kilo (2 lbs.) of meat. Use just a bit of the salumi, perhaps 100 grams (3-1/2 oz.)

NOTES: The most common variation of this dish, much used for an everyday version of la genovese, is to omit the beef and simply use the bits of salumi to provide savor to the onions (it's a good use for any spare bits that may be hanging around your fridge) or even no meat at all. Either of these versions can be called la finta genovese or 'mock genovese'. Some recipes call for a bit of tomato purée or paste towards the end, by the original—and my preferred—version is in bianco. Some versions also call for adding a great deal of water, enough to immerse the meat, and letting it reduce over time, rather than adding it bit by bit, using the so called arrosto morto technique. 

The typical pasta, as mentioned, is ziti, especially the long type that you break into sections by hand (pictured in the post on zitoni al forno) but another stubby pasta like penne would also do. I have seen recipes calling for bucatini, also know as perciatelli, a kind of thick, hollow spaghetti that is popular in both Naples and Rome (and is indispensible to make the Roman classic bucatini all'amatriciana). 

You may have cottoned on to the fact that genovese means 'from Genoa'. So why is this name for a typically Neapolitan dish you may ask? Well, no one really knows for sure, but the most popular story has it that it was invented by Genovese merchants living in Naples in the 16th century. When they left, their chefs stayed behind and started cooking the dish for the natives. The original version, as detailed by the estimed gastronome Ippolito Cavalcanti in the 19th century, was more like a typical French daube, a meat dish braised in a mirepoix. Somewhere along the line, the onions became the star of the show, and the dish was transformed from a secondo to a primo. (This article gives some interesting details, along with another recipe for the dish.)

Saturday, July 10, 2010

Baba Ghanoush


I love eggplant and I am always looking for new ways to prepare it. One of the simplest and yet most delicious in my book is Baba Ghanoush, a specialty of the Levant. If you've ever made hummus, then the recipe will sound very familiar.

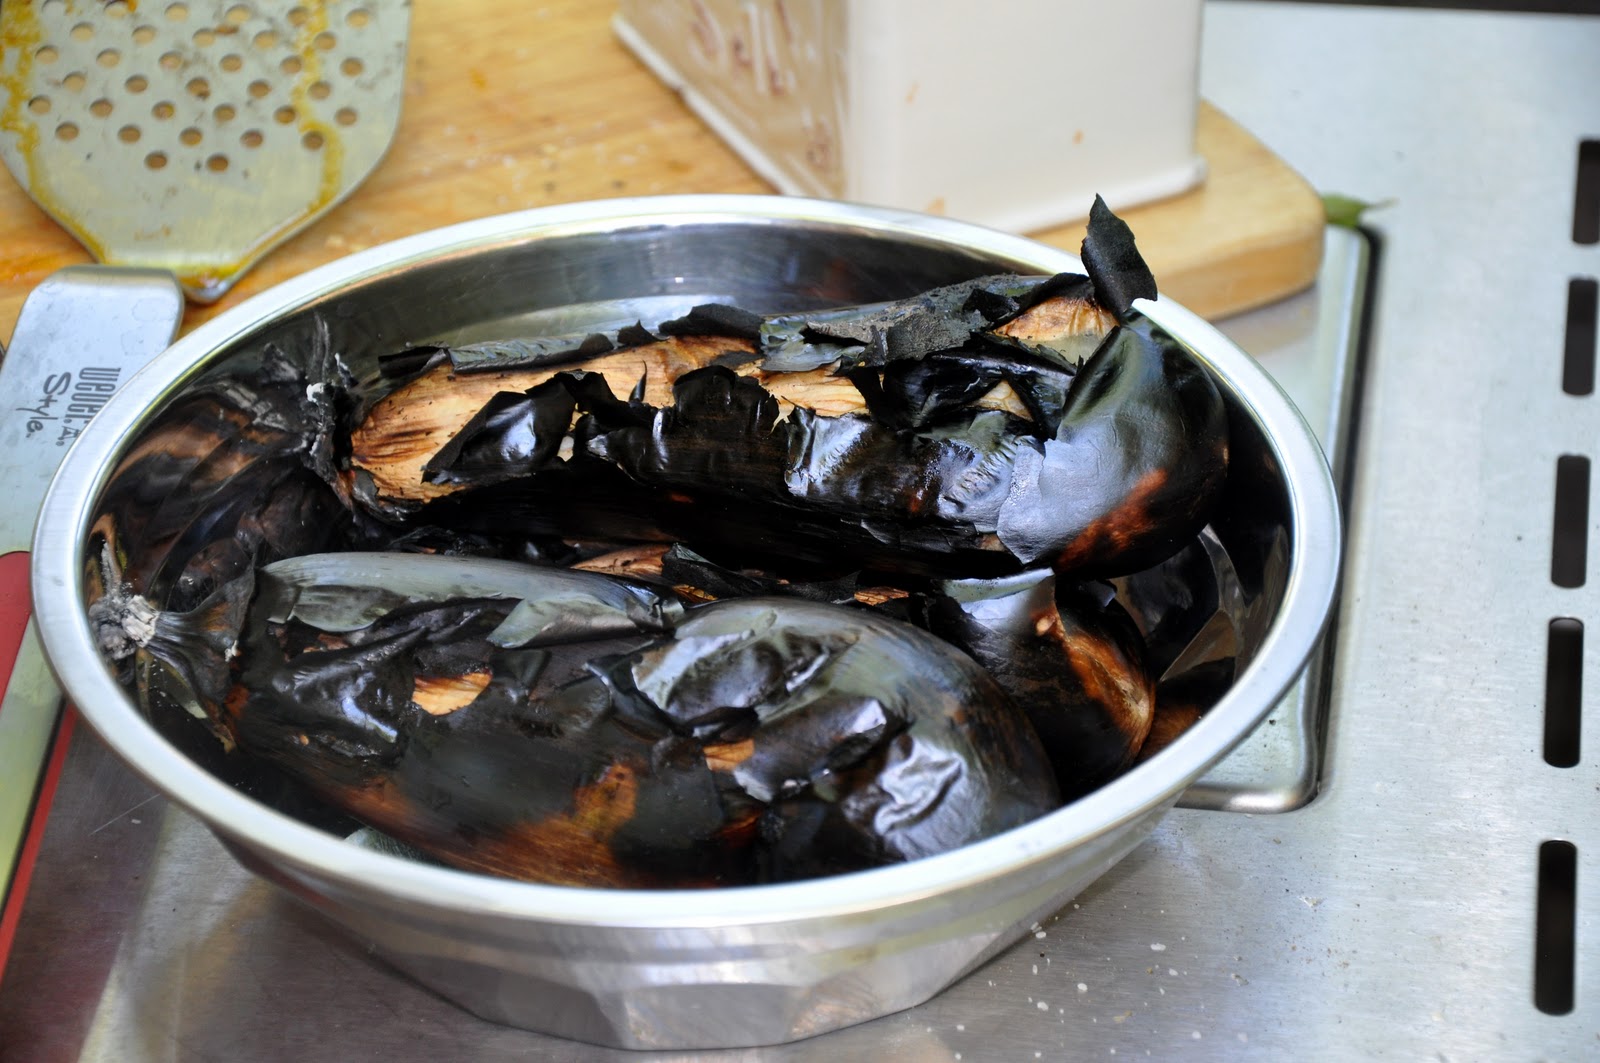
Place a whole eggplant (or several, since the eggplant reduces quite a bit when cooked this way) on a hot grill (or in a hot oven) and roast until the eggplant is fully tender and the skin well charred, turning from time to time to ensure even cooking. This will take anywhere from 30-45 minutes, depending on the size of your eggplants.


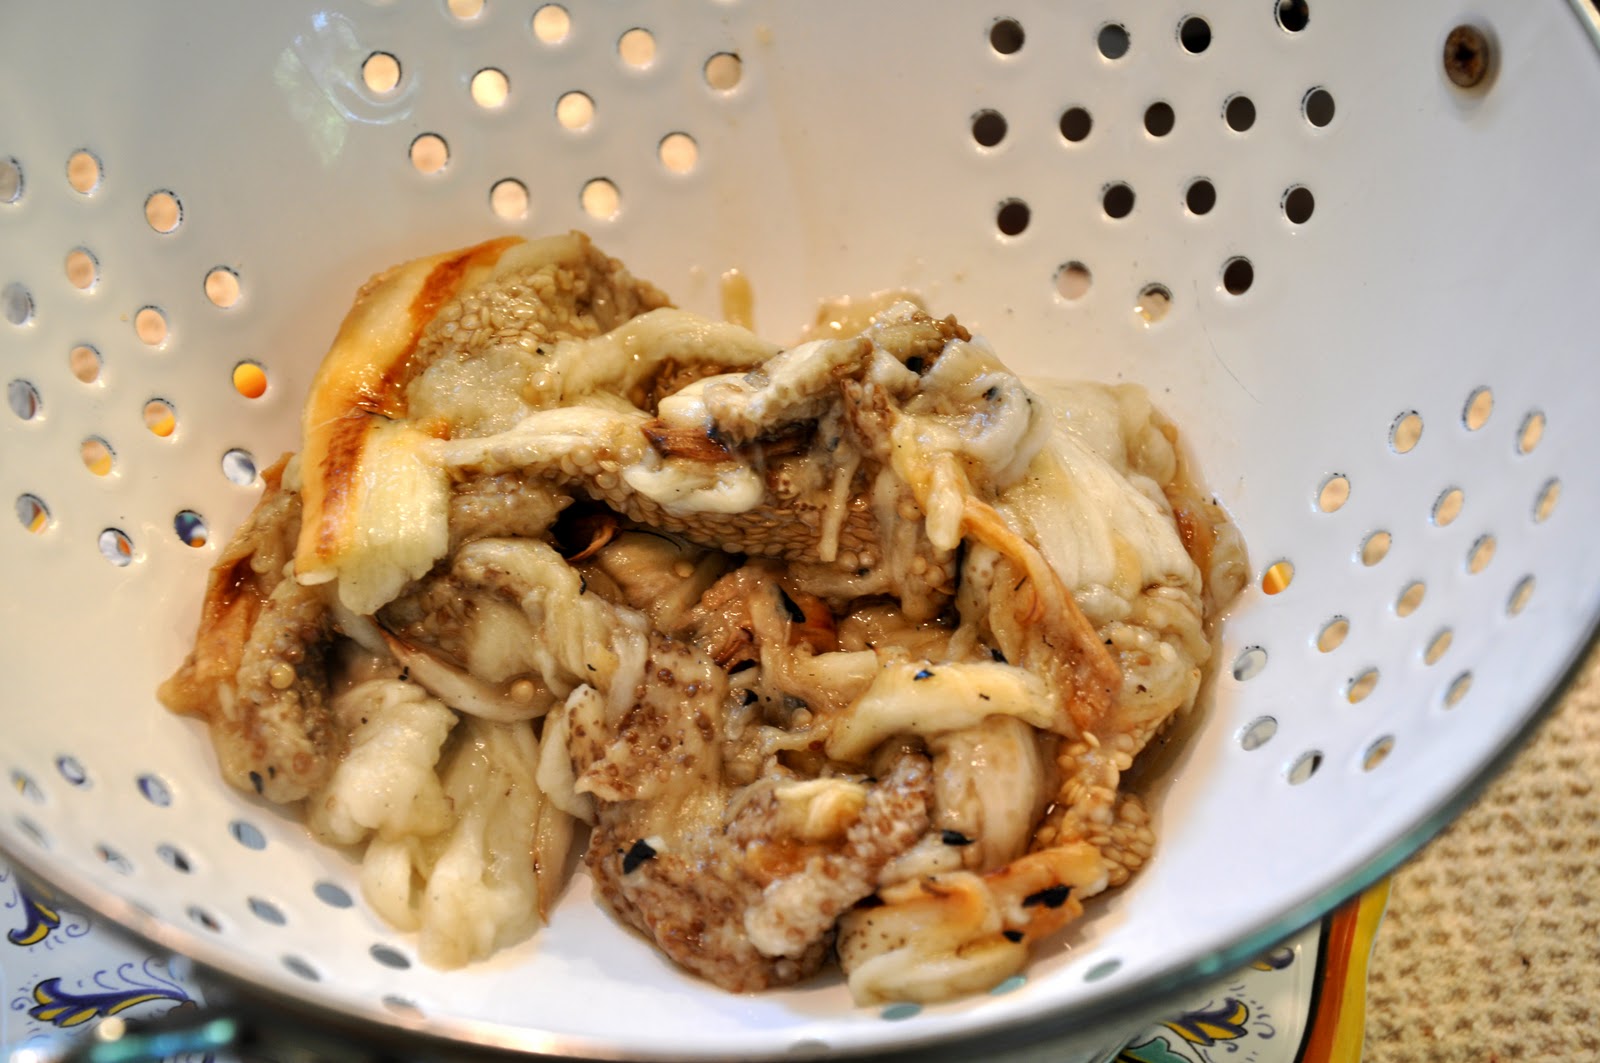
Remove the eggplants from the heat and let them sit, covered, until they have cooled off enough to handle. Then split the eggplant in half and scrape out the tender pulp from the inside, making sure to leave the charred skin behind. Drain the pulp in a colander for at least 15 minutes to remove any excess liquid. 


In a food processor, spin a couple of cloves or garlic around with some salt. Then add your eggplant pulp, a bit of freshly squeezed lemon juice and tahini (sesame paste). If you like, add a bit of cumin or chili powder, mint or parsley. Process until smooth. 

 
Serve on a platter or in a bowl and top with a drizzle of olive oil and a bit more parsley or mint for color. 

NOTES: The amounts of all to taste. The amount of tahini, in particular, varies wildly from recipe to recipe. You can add as little as a spoonful or two if you want a 'light' version or lots more if you want a richer version.
(I usually just taste and adjust as I go, although using this method you risk winding up with precious little to actually serve after you're done...) Some recipes specify that the eggplant pulp should be chopped not mashed or puréed.

Baba ghanoush is typically served as a dip to be eaten with pita bread, but I ate it with—hold on to your hats—some tortillas chips I had left over from a party. It was perfectly delicious, although I must admit that the chips may have overpowered the delicate taste of the dip. Next time I'll stick to pita. 

This dish is a wonderful example of how using many of the same ingredients, the peoples of the Mediterranean basin have come up with such different taste experiences. For someone from an Italian background, the taste of this eggplant dip is familiar and yet, for lack of a better term, exotic. It works perfectly as an antipasto in an otherwise Italian menu, or as part of a buffet or as a nice savory snack.

This blog post, from the Green Prophet website, has an excellent discussion of Baba Ghanoush and its many variations.