Showing posts with label pasta. Show all posts

Friday, October 29, 2010

Maloreddus alla campidanese


Maloreddus are a kind of pasta typical of the island region of Sardinia. Also called gnocchetti sardi or 'little Sardinian gnocchi' after their dumpling-like shape, maloreddus are made from durum wheat flour, water, salt and—a very Sardinian touch—a pinch of ground saffron. They lend themselves to a variety of sauces but perhaps my personal favorite way to make them is alla campidanese—with an utterly simple but delicious sausage and tomato sauce that is vaguely reminiscent both of the Roman amatricana and the Neapolitan ragù.

Ingredients (for 4-6 servings)

400g (14 oz.) maloreddus

For the sauce:
200g (7 oz.) mild Italian sausage meat
Olive oil
1 garlic clove
400g (14 oz.) best-quality canned tomatoes
1 tablespoon tomato paste
1 large or 2 small bay leaves
A few fresh basil leaves (optional)
A pinch of saffron threads, ground in a mortar 
Salt and pepper to taste

To finish:
100g (3-1/2 oz.) of freshly grated pecorino cheese (preferably Sardinian)

Directions 


Remove the sausage meat from its casings and crumble the meat into a skillet with a healthy drizzle of olive oil. Allow the meat to brown lightly, breaking up the sausage meat into even smaller bits with a wooden spoon as it browns. Remove the sausage meat with a slotted spoon. 

In the fat remaining in the skillet, sauté the garlic clove, which you will have slightly crushed with the side of a knife, just until it begins to give off its aroma. Immediately add the canned tomatoes, with your hands, crushing them between your fingers as they go in. Add the rest of the sauce ingredients and let the sauce simmer until it thickens nicely, about 15-20 minutes. 

Meanwhile, boil the maloreddus in abundant, well-salted water until al dente, usually about 12 minutes. Drain and add your pasta directly into the skillet and toss it all together. Add the grated pecorino and serve immediately, with more pecorino on the side for those who want some.
 
NOTES: Maloreddus are actually fairly easy to make, certainly no harder than, say regular gnocchi. You mix your dough in the usual way, using a glassful of teipd water for 400g of flour, a pinch of salt and a pinch of ground saffron. Taking a handful of the dough at a time, roll it out as you would for potato gnocchi into 'cords' but rather thinner, about the circumference of a pencil. Cut the rope at 2cm (1/2-inch) intervals and then roll the pieces using the back of your thumb, against the prongs of a fork or a gnocchi board, to create a small, ridge-backed shell-like gnocco. If you use ground saffron, your maloreddus will have a lovely golden color almost like egg pasta. But you can omit the saffron if you prefer, which is how most factory maloreddus is made.

If you can't find maloreddus in the store and don't have the time or inclination to make your own, the same sauce is perfectly delicious with more conventional stubby pastas like pennette.
 

Sunday, October 24, 2010

Tortelli di zucca


One of the nicest parts of this, my favorite season, is the arrival of wonderful Fall produce: mushrooms, endive, chestnuts, cabbage, radicchio… but for me no other vegetable is as typical of the season as hard squashes. They are sometimes called 'winter squashes' but they start appearing in the early Autumn and are a fixture of our October table.

Italy does not have the variety of winter squashes that we have here in North America—squashes are a New World plant, after all—but Italy may have the most delicious of them all, the wonderful zucca barucca. As I've mentioned before, the zucca looks for all the world like your average pumpkin, but its flesh is much less stringy and has a much more intense, sweet flavor than any pumpkin I've had on this side of the pond. Most stateside recipes call for butternut squash as a substitute, but that, too, lacks the intensity of zucca. For risotto, I usually find that baby sweet potatoes have a remarkably similar taste to zucca, even if their texture is a bit grainier. And today I tried another gambit—those smaller 'pie' pumpkins—for making one of the most popular stuffed pastas, tortelli di zucca, or 'pumpkin ravioli'.

You make tortelli di zucca just like ravioli (although they can vary in shape—see below) but the stuffing changes the whole character of the dish. Here is how you make the stuffing:


Ingredients (for 4 servings):


One 'pie' pumpkin or butternut squash, about 500g (or 1 lb.)
 
50-100g (2-4 oz.) amaretti cookies, finely crumbled 
50-100g (2-4 oz.) grated parmesan cheese 
50-100g (2-4 oz.)  mostarda (pears and apples only) 
Nutmeg, salt and pepper, q.b. 
Breadcrumbs (if needed)

Directions:


Cut open your pie pumpkin, cut it into large wedges and clean out the seeds and fibers with a spoon. Roast your pumpkin wedges in a moderate oven (180C, 350F) for about 45 minutes, or until the flesh is quite tender when pricked with a fork. (It's fine if the pumpkin browns a bit around the edges but you do not want a lot of caramelization.) Let the pumpkin cool, turning it over to allow any excess liquid to drain out. (If the pumpkin pieces seem watery still, you can wrap them in cheesecloth and squeeze them dry.) Scrape out the cooked flesh, leaving the skin behind, into a food processor.


Now add the amaretti, parmesan and mostarda, and process them until you have a perfectly smooth, stiff paste. You will note that the measurements are left pretty loose, and you will find that kind of variety among the many recipes for this dish. If you don't have real Italian zucca on hand, I would tend to go for more rather than less to make up for the blander taste of the vegetable. Do make sure each of these three main flavoring ingredients are added in balanced amounts. The thing that makes this filling unique is its harmonious combination of contrasting flavors: the sweet-bitterness of the amaretti, the savoriness of the cheese and spiciness of the mostarda, which marry so well with the natural sweetness of the squash. Season the mixture generously with freshly grated nutmeg, fresh ground pepper and salt.


Taste and adjust for seasoning. If the stuffing mixture is a bit soft or wet, mix in some breadcrumbs, a bit at a time, until the stuffing is stiff and rather dry.


*                *                 *

Now it's time to make your egg pasta, in the usual manner. (See this post on making fresh pasta.) Roll the pasta out rather thinly (setting 6—or even thinner if you want—on a pasta roller) since you will be folding the pasta into a double thickness, into long, rather slender sheets.  
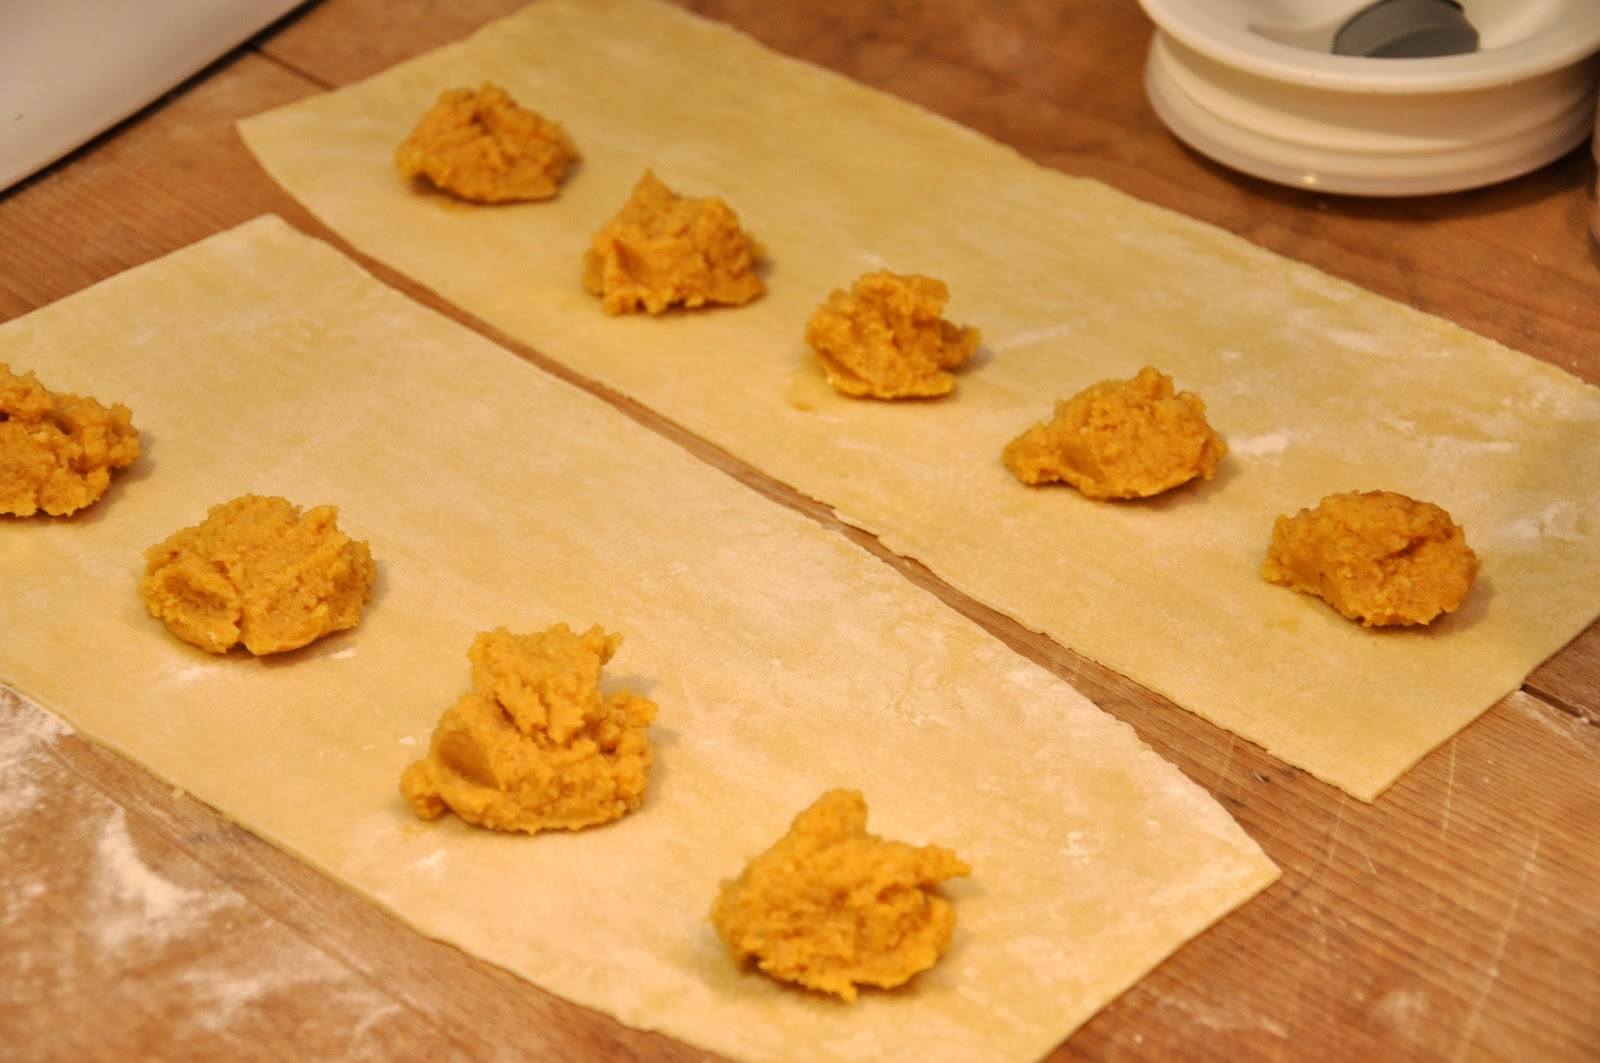
Place heaping teaspoonfuls of the stuffing about 5 cm (2 in.) apart along the length of your pasta sheet, just off center down the middle of the sheet.


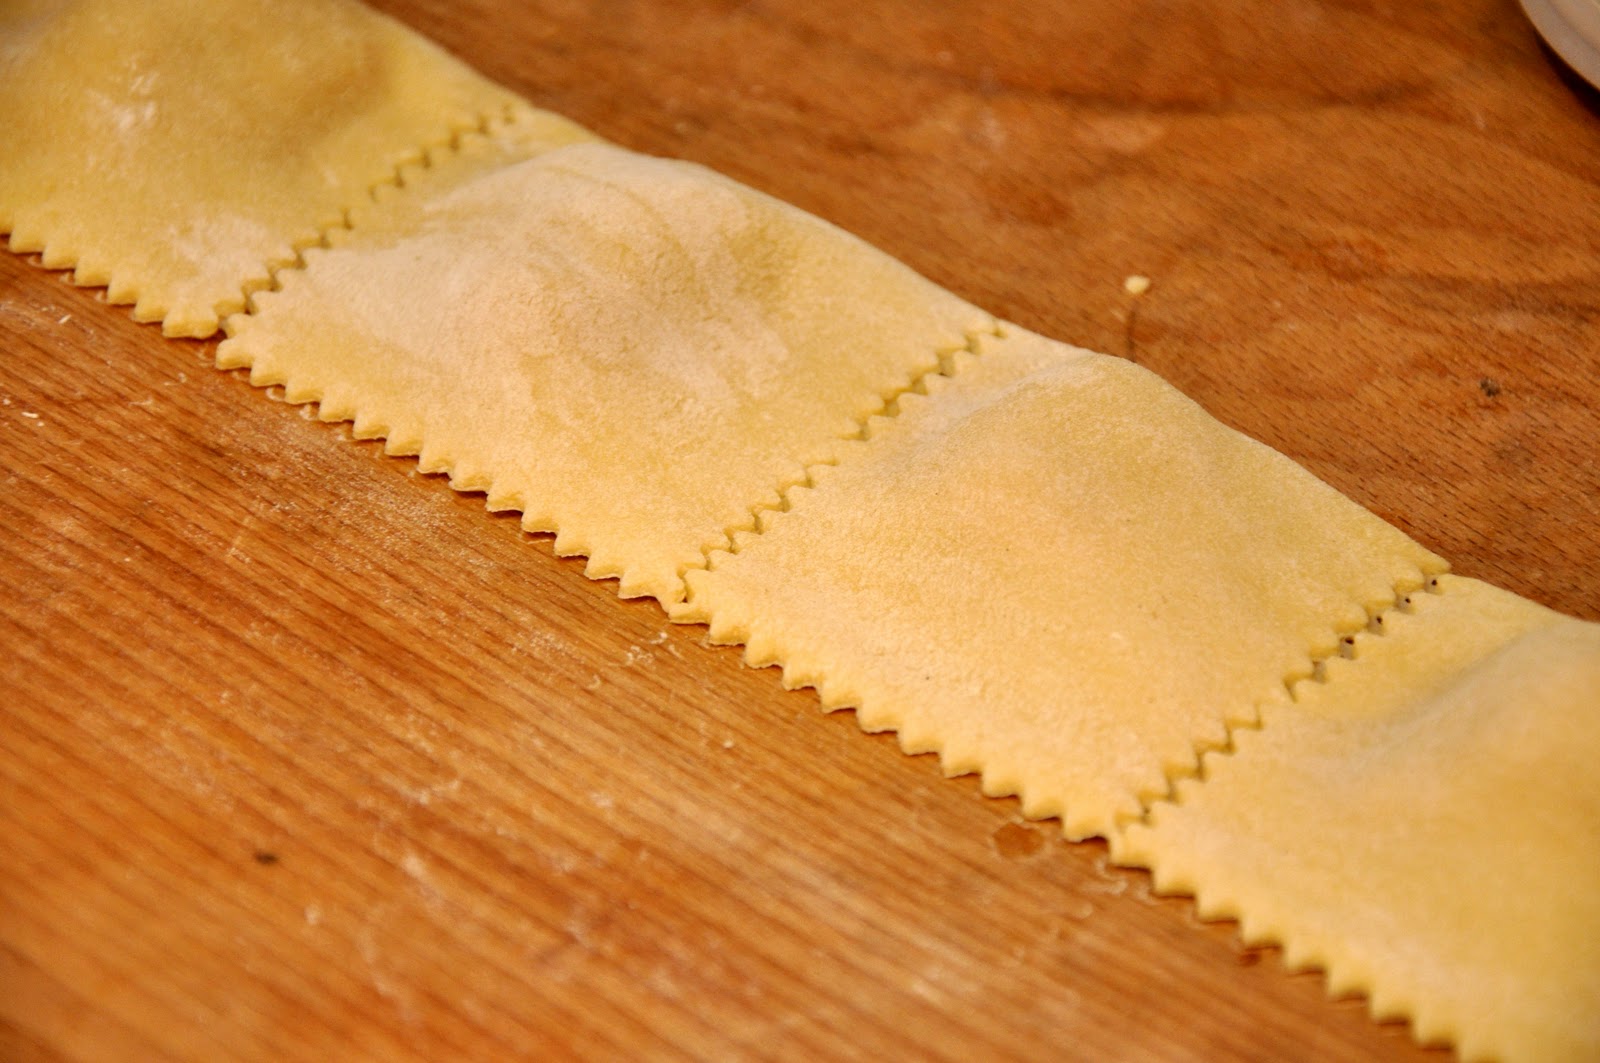
Fold the longer half of the sheet over the stuffing, pressing down with your fingers all around the stuffing to seal the top and bottom layers of pasta together. With a serrated pasta cutter (if you have one, otherwise it's fine to simply use a knife) cut out your tortelli along the three unfolded sides:


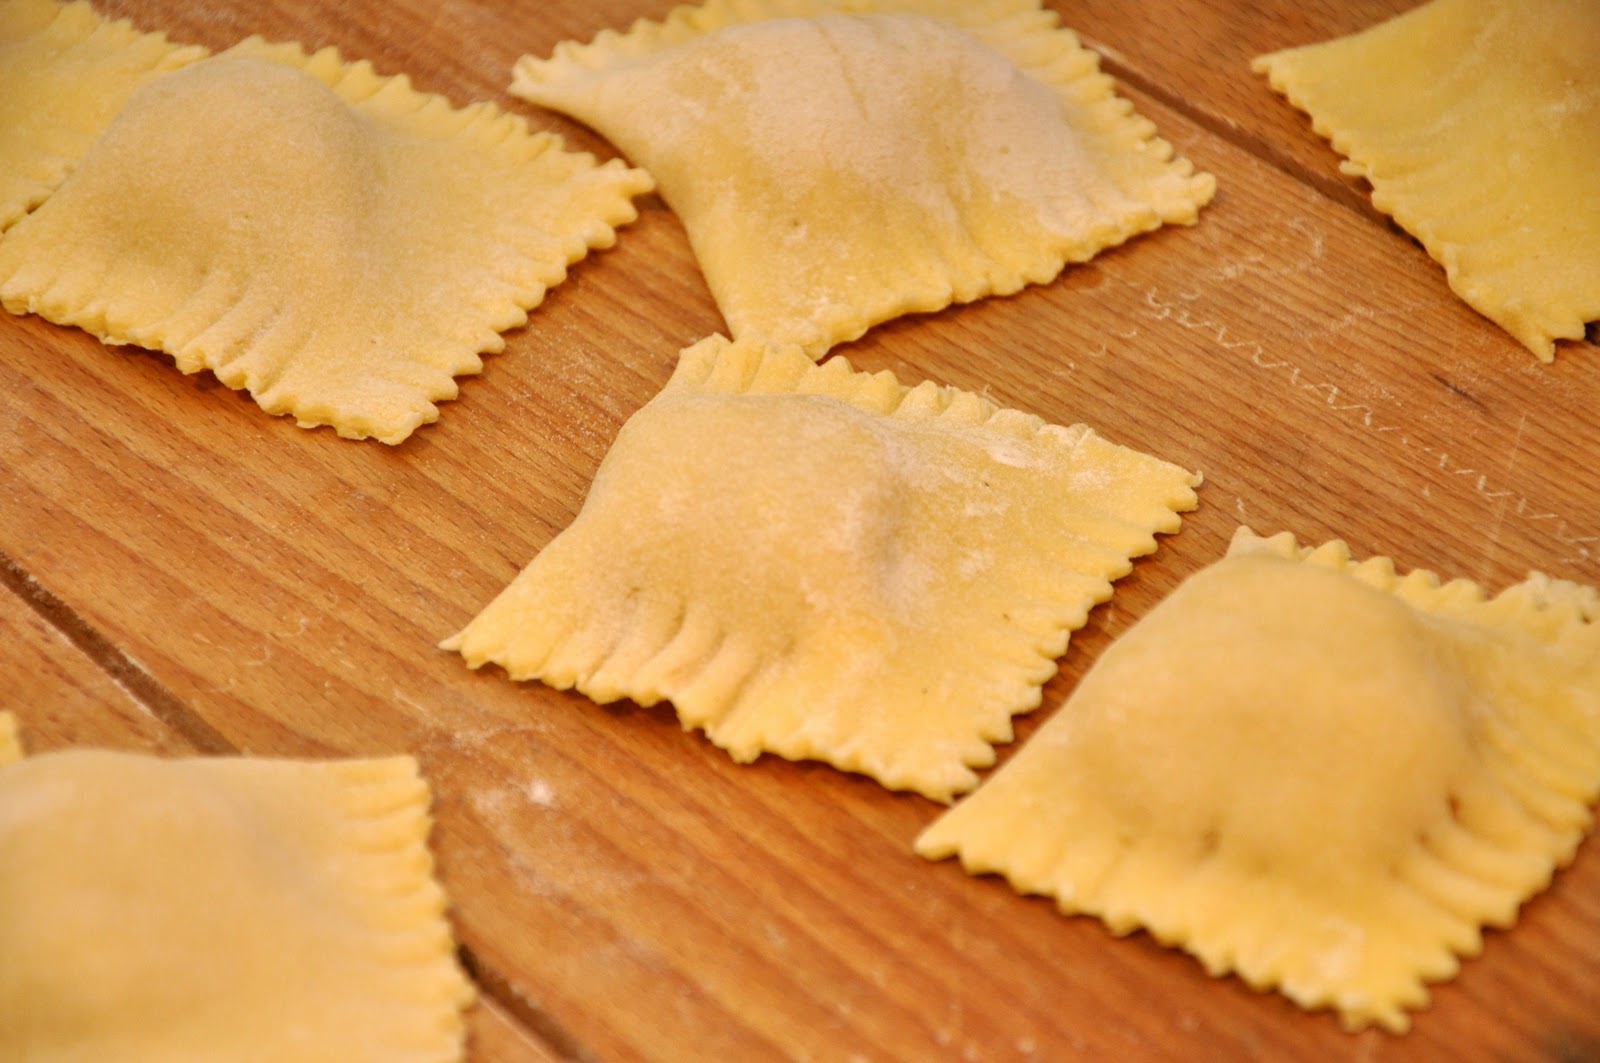
For the final touch, you can ensure a tight seal while making your tortelli ever so pretty by pressing down the edges with the prongs of a fork like so:

 
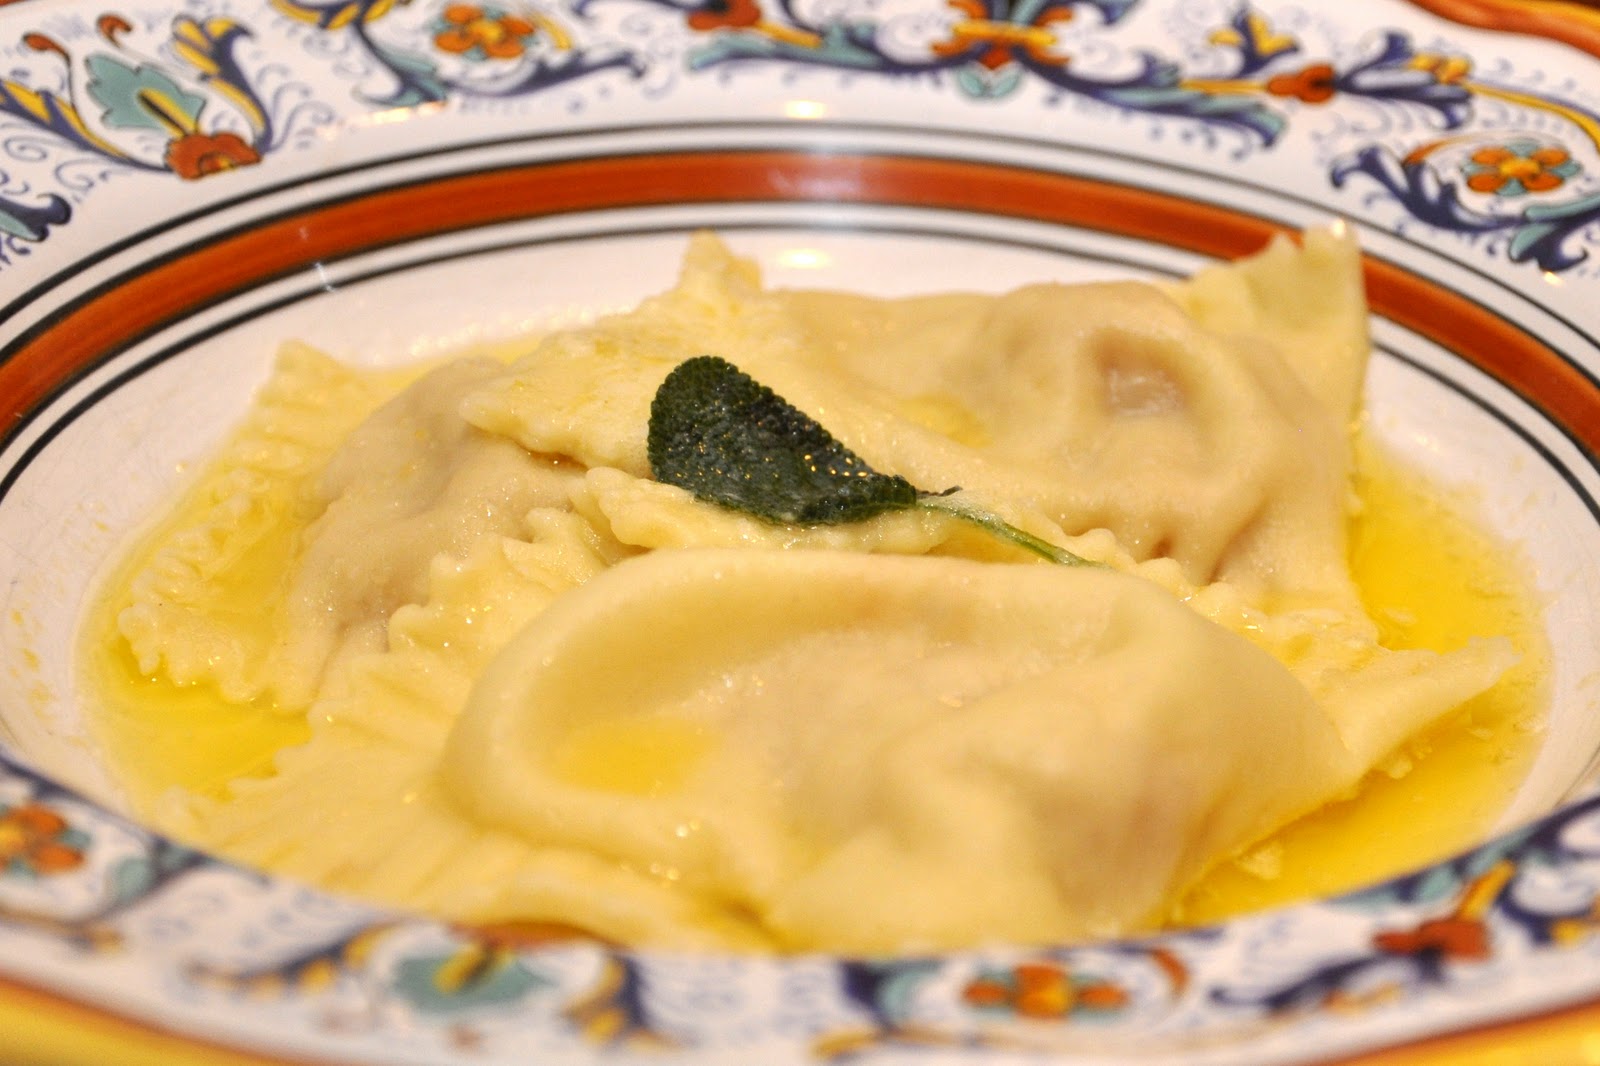
You should cook your tortelli for a good 5-7 minutes, depending on the thickeness of the dough. They take a bit longer than fresh pasta usually does, because of the double thickness of the pasta and the filling. While the tortelli are cooking, gently melt lots of butter in a small saucepan, adding a sprig of fresh sage if you like to steep along with the butter. (I have read that the sage is not original to the dish, but I like it.) Serve immediately, topped with the melted butter and—if you like—more grated parmesan on top.


NOTES: This dish comes from the region of Emilia-Romagna, and more specifically from  the city of Mantova, often called "Mantua" in English. For this reason, they are also sometimes called tortelli mantovani. But similar versions are made in the near-by towns of Parma, Reggio-Emilia, Piacenza and Cremona. In Ferrara they also make this stuffing but without the amaretti cookies. Speaking of which, it can be hard to find amaretti, which are a kind of almond macaroon—not the ubiquitous almond biscotti. If you can't find amaretti, then substitute an equal amount by weight of unflavored breadcrumbs, with a few drops of almond extract if you like.


And then there is the mostarda. Don't let the name fool you: it is not mustard at all, but a chutney-like relish typical of the cuisine of Emilia-Romagna. It is perhaps best known as an accompaniment to bollito misto, but it makes its appearance here as a flavoring. Mostarda has a unique flavor, both sweet and spicy. It is basically fruits that are candied in sugar syrup spiced with (hence the name) mustard seeds. There are various types of mostarda made in the region, but the most famous, by far, is mostarda di Cremona. If you're feeling ambitious, you can actually make it at home. (Here's the recipe.) You can also buy it in many of the finer Italian specialty shops—if they don't have it, give them a proper scolding for having neglected one of the most typical products in Italian cookery. Or you can buy it online. Mostarda di cremona contains a variety of fruits—pears, quinces, cherries, apricots, peaches, figs, but for this dish you really want another mostarda—the one from Mantova, which is made with pears or apples only. So if not making your own mostarda, just pick out the pears from the jar and use them.


Now if you can't find mostarda and don't feel up to making it yourself, you can omit it, as  you will find in most recipes for 'pumpkin ravioli'. But I would urge you to try to find it—it lends a very special, unusual taste to the dish.


You can also dress your tortelli di zucca, if you like, with a more elaborate sauce. Personally I don't think that the pumpkin stuffing goes particularly well with tomato-based sauces, but some wild mushrooms sautéed in butter with pancetta, for example, would be delightful.


The term 'tortelli' is one of the most confusing in the lexicon of pasta shapes. It can be another word for ravioli, but can also be rounded, or rounded and twisted as for a larger version of tortellini. And you will sometimes find tortelli di zucca in these shapes as well. And in Ferrara, they make cappellacci di zucca, made with a very similar stuffing (without the amaretti, as mentioned above). The pasta is cut into squares but then the two corners are joined to form a little 'hat' (hence the name, which comes from cappello, Italian for hat, since the shape was said to resemble the straw hats that local peasants used to wear.


The pie pumpkins, by the way, worked very well for this dish. True, they did not have the intensity of zucca, but their texture was perfect and, with all the added flavorings, the stuffing was perfectly delicious.  And if you have some leftover stuffing but don't feel like making another batch of pasta, you can use the stuffing to make a fine version of risotto alla zucca. 


By the way, don't throw away those pumpkin seeds! They are wonderful roasted in a slow oven with just a few drops of oil or melted butter until lightly brown (about 30-45 minutes) and seasoned with some sea salt. Or, for something a bit fancier, try out these two wonderful recipes by my fellow foodie, "Cookin' Canuck".

Saturday, August 28, 2010

Lasagne in bianco


As the summer wanes here in the northern hemisphere and the temperatures begin to dip, it will soon be time to think about turning the oven on again. And, in our house, that means it's time to get ready for lasagna! One of the most versatile ways of making lasagna is in bianco, meaning without tomato sauce. It is a style typical of central and northern Italy. Instead of tomato sauce, you fill your lasagna with béchamel layered with whatever condimento you feel like, whether meat, fish or, my personal favorite, any sort of vegetable in season, sautéed in butter or oil olive, often with garlic or onion to lend savor.

Back in the spring, I made an example of this style of lasagna, lasagne agli asparagi. That post took you through the basic technique, with step by step, illustrated instructions, so I won't go into details here. The same technique can be used with any other vegetable, with the only difference being how you treat the vegetable condimento.

This time, rather than asparagus, I used spinach as my condimento. If you are using young spinach, you simply prepare them in padella, adding the rinsed spinach directly into your seasoned olive oil, without draining them too well, and sauté until they have fully wilted, no more than a few minutes. If you are using older spinach, the kind with crinkly leaves, you'll need to trim the leaves of their stems, then parboil the leaves in abundant salted water for a minute or two before sautéing them.

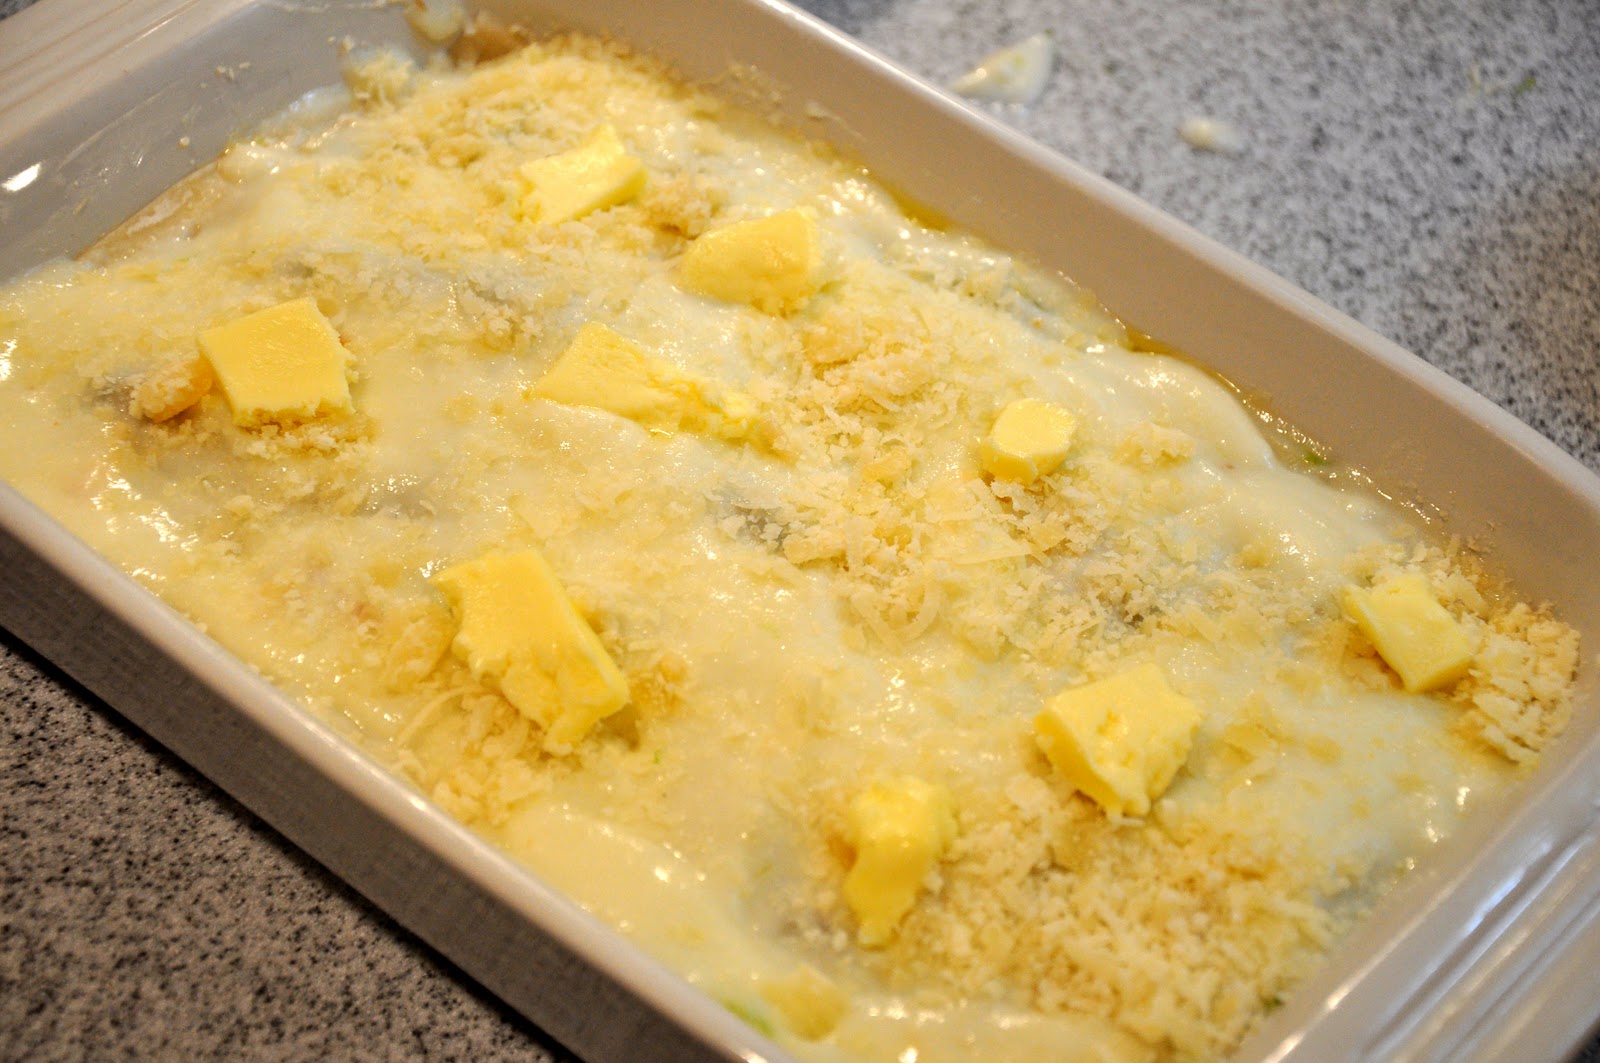
Then proceed as usual, layering fresh pasta, béchamel, sautéed spinach and abundant grated parmesan until you have exhausted your ingredients, ending with bechamel sprinkled with grated cheese and dotted with butter. (Don't build up more than four layers, however.) Bake in a hot oven (200°C/400°F) for about 20 minutes, or until just a bit browned on top. As with all lasagna, you should let it cool off for at least 10-15 minutes before serving it. 

The first layer: pasta covered with bechamel, sauteed spinach and cheese

NOTES: As mentioned, the same technique can be used with just about any filling that strikes your fancy. In the late summer, I particularly like zucchini, for example, which you can sauté just like the spinach in garlic and olive oil. Or, something different, why not try some luscious summer tomatoes? Fellow blogger Don Hogeland, also known as "Sortachef", just posted an especially nice version of lasagna, a kind of caprese style, with fresh, uncooked tomatoes and mozzarella.

If you are not feeling too ambitious, you can save considerable time by using store-bought lasagna sheets. Here, though, you need to be a bit careful. A lot of so-called 'fresh' store-bought pasta is made with semolina flour, which makes for a tougher dough that is fine for southern-style lasagna but not very apt for a delicate lasagna in bianco. Your better bet is actually using dry 'no boil' lasagna, but be aware that no boil pasta absorbs a lot of liquid as it cooks, so use a rather loose béchamel, and lots of it.

As the weather cools off, you may want to switch fillings—I think mushrooms are particularly wonderful, or radicchio, pumpkin, butternut squash… but I am getting ahead of myself. Late summer is a special time of year, with its abundance of fresh produce, so enjoy the last of the summer vegetables while we can—and this is a particular delicious way to do so.

Saturday, July 31, 2010

Tonnarelli cacio e pepe


 Cacio e pepe, literally 'cheese and pepper', is a very typical Roman dish, usually made with spaghetti, bucatini or—for the ne plus ultra version of this dish—tonnarelli, a kind of square spaghetti made with egg pasta popular in Lazio and Abruzzo, as well parts of  Molise, Puglia and Le Marche. At its simplest, literally all you do is boil the pasta in well salted water, drain it (but not very well) and pour it into a heated bowl. Then add a generous amount of pecorino cheese and lots of freshly ground pepper, and mix well. The hot water that clings to the pasta should meld with the cheese to make a kind of creamy sauce. If the dish is too dry, you can add a bit more of the pasta water. If, on the other hand, you can still see water at the bottom of the bowl, add more cheese. Then top with more pecorino and another healthy grinding of pepper. That's it!


 NOTE: Like many simple dishes, cacio e pepe is easy to make passably well, but hard to master. You need to mix the pasta quickly but thoroughly, making sure that the cheese melts properly into a cream rather than clumping up into bits. The key is to balance water and cheese—and that can only really be done by eye as you mix. What I like to do is to keep a generous amount of grated pecorino on hand, about half as much as there is pasta by weight, and use as much as I need. Any leftover cheese can be sprinkled on top or kept for another use. But as often is the case with this sort of thing, no amount of coaching will substitute for practice, practice, practice.

There are some other ways to make cacio e pepe. A common modern variation, a bit more elaborate but less tricky than the traditional method, is to mix cheese and pepper with pasta water in a separate skillet and allow that to meld together over gentle heat until it forms a creamy sauce that you pour over the pasta. Some recipes also recommend adding a bit of butter or un filo d'olio before (or after) you mix the pasta, for a creamier texture. And finally, some people mix pecorino with the milder parmigiano-reggiano. To me, however wonderful parmigiano is, the salty 'bite' of pecorino is one of the attractions of the dish, so I wouldn't dilute it with anything else. But, as they say, les goûts ne se discutent pas. If you like the idea of any of these variations, by all means try them and let us know how you like them!
 
*             *               *
 
On making tonnarelli: 

In Rome, pre-made tonnarelli are sold in any supermarket but elsewhere, you may find you have to make them yourself. That makes this dish considerably less quick, of course, but I think it's worth the extra effort. Tonnarelli really are the best pasta for this dish—being an egg pasta, it absorbs the sauce more readily than either spaghetti or bucatini. At the same time, due to its thickness (and the optional use of semolina flourt) it provides more 'bite' than your average fresh pasta. 

To make tonnarelli, you need a special instrument called a chitarra, or guitar, which is why tonnarelli are also called spaghetti alla chitarra. Here's a picture of a pasta 'guitar': 


The guitar is fitted with wire 'string's top and bottom that are used to cut the pasta. The strings are narrowly spaced on one side, and widely spaced on the other. For tonnarelli, you want to use the side with the narrowly spaced strings. 

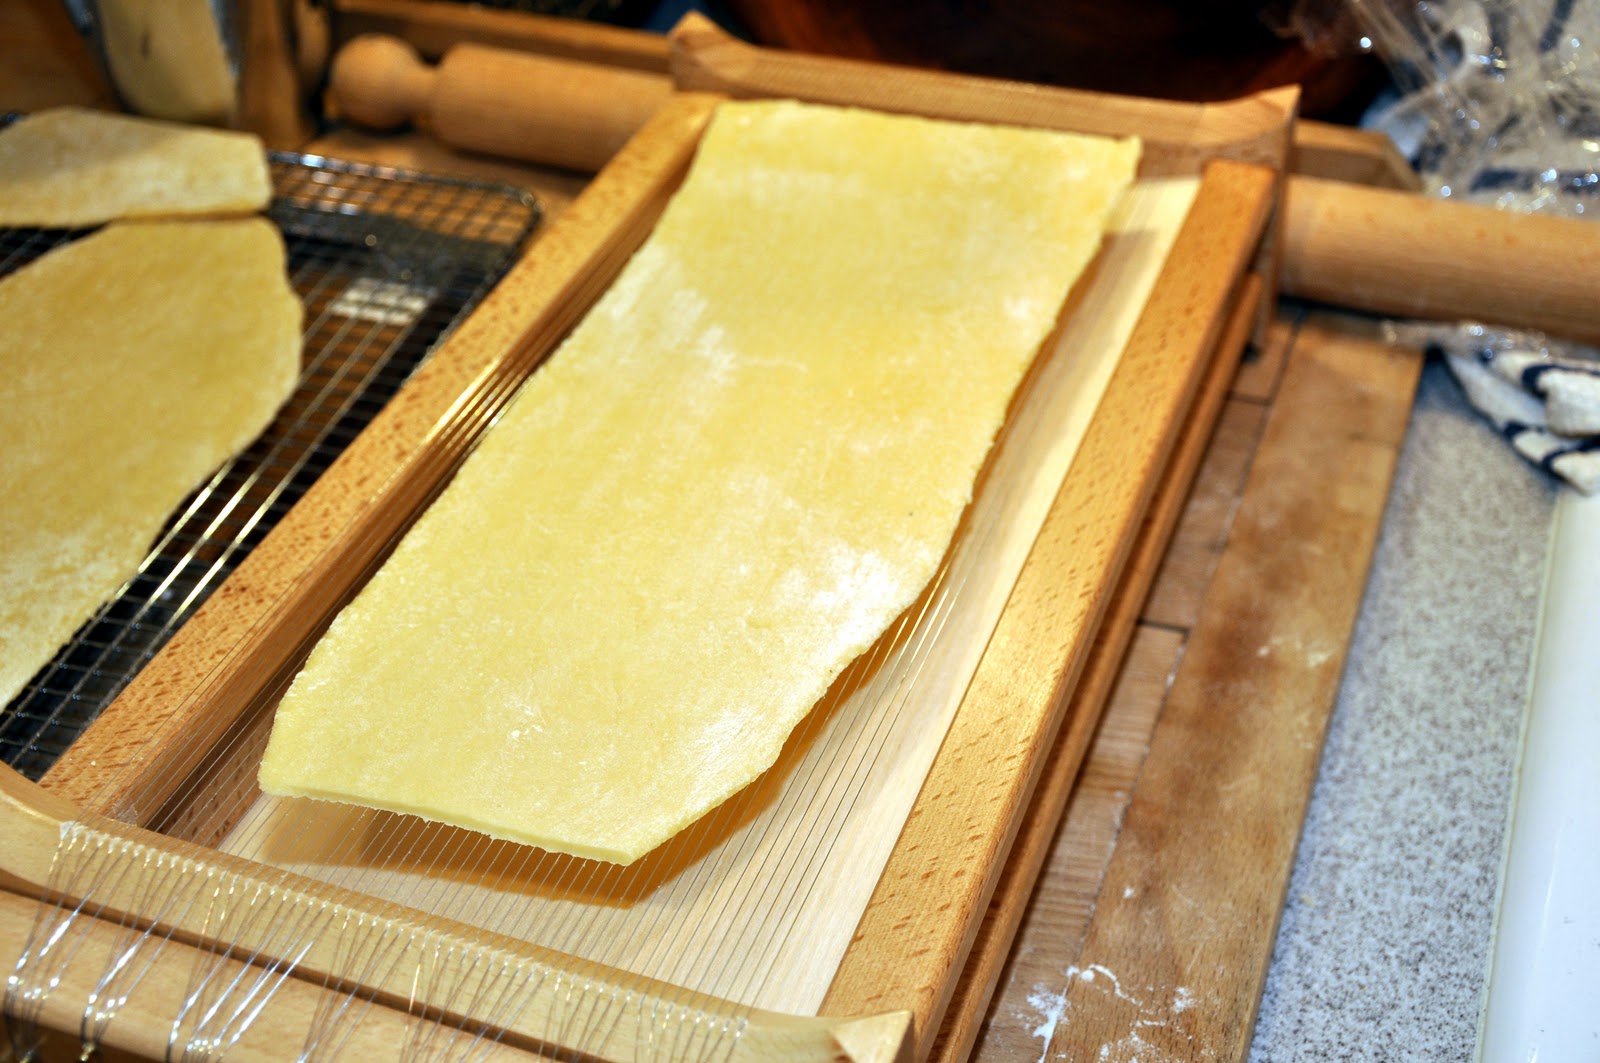
To begin, make some fresh pasta dough in the usual way—adding just a tablespoon or two of semolina flour per egg if you like for extra 'bite'—and roll it out quite thick. The pasta should be as thick as it is wide, so you can be guided by the strings of your 'guitar'. (Using a KitchenAid mixer attachment, use Setting 1 or 2.) Let the pasta sheets dry out for a good while (at least 20 minutes) so they will not stick too much as they are cut by the guitar. 

Cut your pasta into sheets about as long as the chitarra, leaving some room on each end for the pasta to stretch out, which it will as you proceed. 


Then, with a rolling pin, begin to flatten the pasta against the strings.


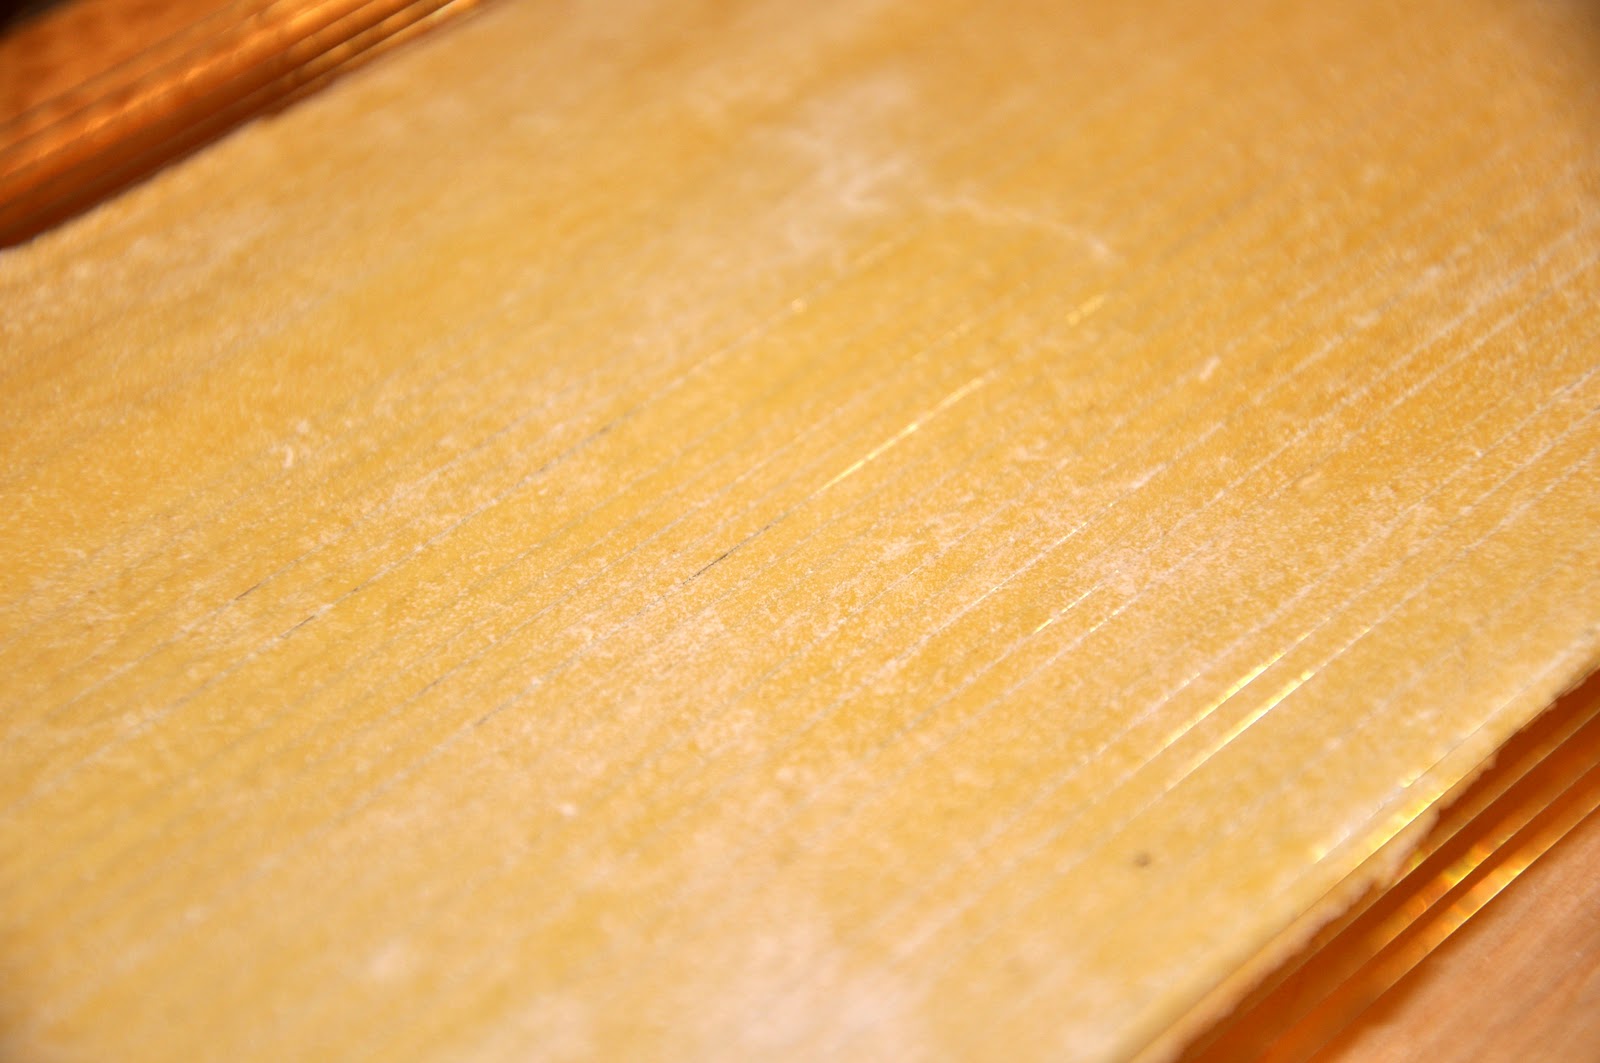
Very soon, the pasta will have passed between the strings, but will still cling to them, so that they will show flush with the pasta like this:


Now it's time to 'play' your guitar. Run your fingers along the length of the strings until the pasta begins to detach from the strings:


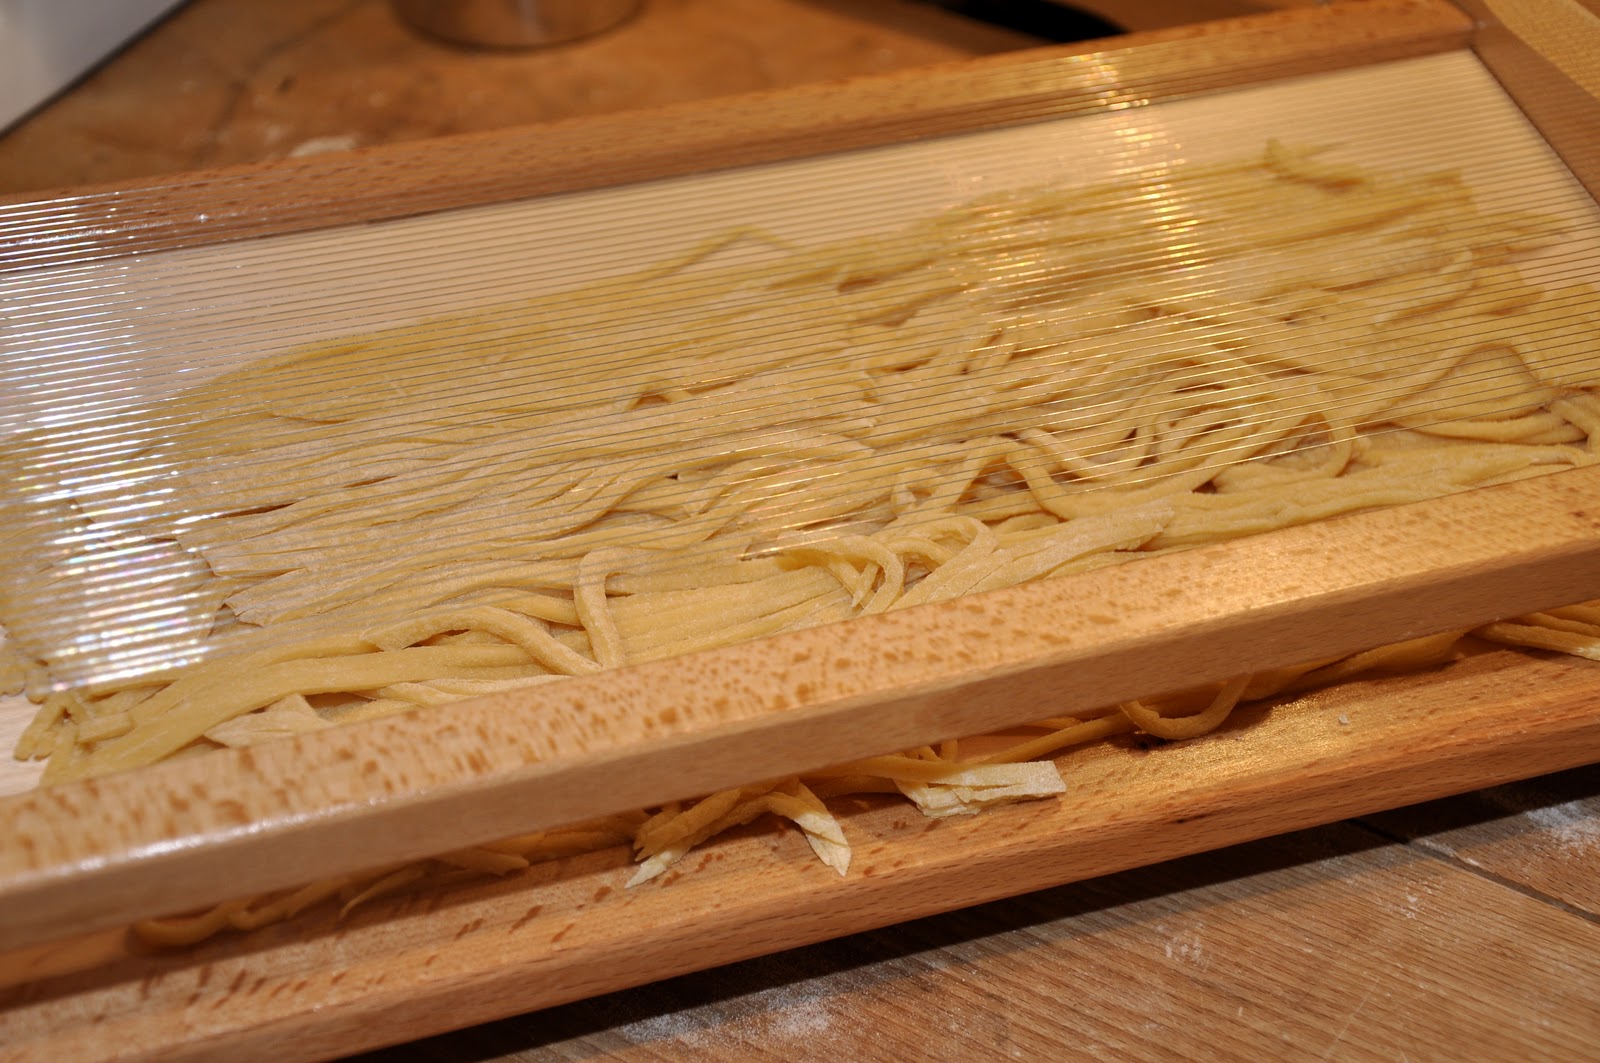
Continue playing your guitar until the pasta has detached completely and fallen into the tray below: 


Slide the tonnarelli out of the chitarra and lay them out to dry on a wooden board or towel. Repeat the operation with each additional pasta sheet. (NB: Depending on how dry the pasta sheets are, you may need to separately some of the strands by hand.)

Due to its thickness, tonnarelli take a bit longer to cook than other kinds of fresh pasta, as long as 5 minutes or more depending on how long it has been drying.

NOTES:  Tonnarelli as sometimes made exclusively with hard durum wheat flour (semolina) and sometimes just with "00" flour, which changes the character of the pasta considerably. I prefer neither 'extreme' and use mostly "00" (or simply all-purpose) flour with just a spoonful of semolina. 

Besides their use in the Roman classic cacio e pepe, in the cooking of Abruzzo,  spaghetti alla chitarra (as tonnarelli are called there) are typically dressed with a lamb-based ragu.' Tonnarelli are also very good with shellfish sauces. Indeed, they are extremely versatile and lend themselves to all sorts of sauces and condiments. 

De Cecco makes a dry pasta version of spaghetti alla chitarra, which is available through amazon.com. I have not tried it, but I have to imagine that the dry version, while surely good, will not give the same results as the fresh.

Tuesday, July 13, 2010

La genovese


Besides ragù alla napoletana, la genovese is probably the most iconic of all Neapolitan pasta sauces, and yet it is little known outside Italy or, for that matter, little seen outside Naples itself. And, for reasons I cannot quite figure out, it did not seem to survive the trans-Atlantic voyage; in my experience, la genovese does not form part of the Italian-American repertoire. All of which is really a shame, because this has got to be one of the most delicious sauces ever devised for dressing pastasciutta. 

La genovese requires long, slow cooking but can simmer unattended for most of the time. You cover the bottom of a large pot, preferably either terracotta or enameled cast-iron, with a generous amount of olive oil or, if want true authenticity, melt a heaping wad of lard. I usually compromise and melt just a spoonful of lard in olive oil to give it that special savory flavor. Then add lots of finely chopped onion to the pot (see below for measurements) along with a carrot and a stalk of celery, both chopped finely as well. Then add a nice, large piece of stewing beef—my favorite is chuck, for its rich flavor—and some finely chopped bits of salumi (salame, pancetta and/or prosciutto) along with a glassful of white wine or water. Season the ingredients well with salt and pepper, cover and allow this mixture to simmer over very low heat for about 3 hours, uncovering the pot and stirring from time to time, and adding a bit of water if needed to keep the mixture moist, until the meat is fork-tender and the onion is well reduced and melted into a kind of 'cream'. 

At the last, raise the heat and allow the onions to caramelize until they are nice golden brown color—but be sure not to burn them. Remove the beef for another use, possibly as a second course. The remaining onion cream is your sauce. Use the onion sauce to dress ziti or other stubby pastas. If you like, serve with grated parmesan or pecorino cheese. (I prefer the former over the latter.) 

Measurements: To make enough genovese to dress pasta for 4-6 people, use 1.5 kilos (3 lbs.) of onions. Recipes range in the ratio of meat to onion, from almost 1:1 (usually a bit less meat than onion) to 1:2, with most calling for 1:1.5, so for four-six people, add 1 kilo (2 lbs.) of meat. Use just a bit of the salumi, perhaps 100 grams (3-1/2 oz.)

NOTES: The most common variation of this dish, much used for an everyday version of la genovese, is to omit the beef and simply use the bits of salumi to provide savor to the onions (it's a good use for any spare bits that may be hanging around your fridge) or even no meat at all. Either of these versions can be called la finta genovese or 'mock genovese'. Some recipes call for a bit of tomato purée or paste towards the end, by the original—and my preferred—version is in bianco. Some versions also call for adding a great deal of water, enough to immerse the meat, and letting it reduce over time, rather than adding it bit by bit, using the so called arrosto morto technique. 

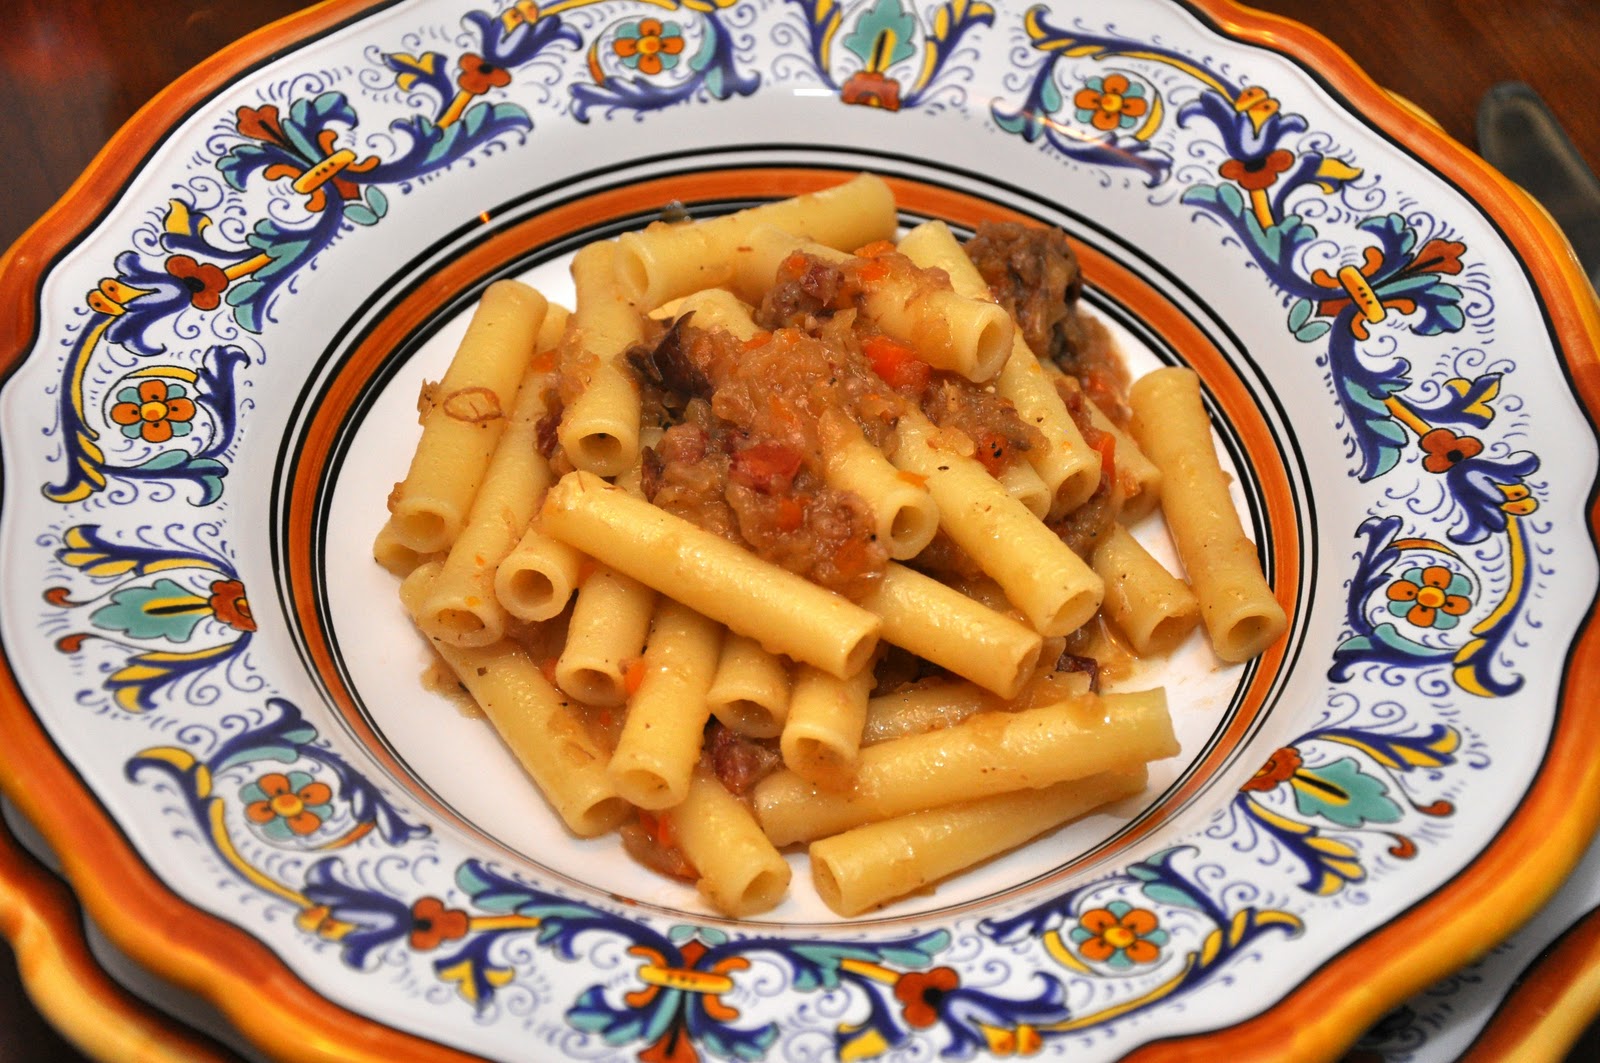
The typical pasta, as mentioned, is ziti, especially the long type that you break into sections by hand (pictured in the post on zitoni al forno) but another stubby pasta like penne would also do. I have seen recipes calling for bucatini, also know as perciatelli, a kind of thick, hollow spaghetti that is popular in both Naples and Rome (and is indispensible to make the Roman classic bucatini all'amatriciana). 

You may have cottoned on to the fact that genovese means 'from Genoa'. So why is this name for a typically Neapolitan dish you may ask? Well, no one really knows for sure, but the most popular story has it that it was invented by Genovese merchants living in Naples in the 16th century. When they left, their chefs stayed behind and started cooking the dish for the natives. The original version, as detailed by the estimed gastronome Ippolito Cavalcanti in the 19th century, was more like a typical French daube, a meat dish braised in a mirepoix. Somewhere along the line, the onions became the star of the show, and the dish was transformed from a secondo to a primo. (This article gives some interesting details, along with another recipe for the dish.)

Tuesday, July 6, 2010

Pasta con la cicoria


Cicoria, or chicory, also known in English as 'curly endive', is a staple of the central and southern Italian diet, or at least so it was traditionally. People from Campania like Angelina were said to be especially fond of leafy green vegetables, so much so that they were sometimes called mangiafoglie, or 'leaf eaters' (just as Tuscans are sometime called mangiafagioli for their love of beans). Leafy greens were affordable and could even be scavenged from the countryside. That frugal tradition continues even today; I can remember when I was living outside Rome it was not unusual to see people out in the fields, leaning down here and there to pick up some wild chicory or other greens for their supper. 

The health effects of eating your greens were unknown in the old days—in fact, if you read some of the classic older texts like Artusi, you will find that greens were considered poor substitutes for more solid sustenance like meat. These days we know that leafy green vegetables are healthy but, unfortunately, they are no longer super-affordable peasant food. One of the ironies of modern life is how the staples of the underprivileged, vegetables like arugula or radicchio (which is a form of chicory, by the way) have become expensive items that 'regular' folks can scarcely afford. But green chicory at least can still be had at a reasonable price and, if you ask me, it is one of the more delicious vegetables. It is crisp and slightly bitter when eaten raw in a salad, while it develops a pleasantly soft texture and almost sweet flavor when cooked.

And it is easy to prepare. You just follow the usual in padella technique that we have featured before: trim the chicory of any wilted external leaves, wash it well (the heart often has sand) and parboil in abundant well salted water until just tender. Remove the chicory from the water, cut it up roughly and sauté it in olive and garlic, seasoned with salt and pepper and, if you like it spicy, a bit of peperoncino. 

Prepared this way, cicoria is a standard contorno or even main dish on central and southern Italian tables. (Angelina practically lived off the stuff!) But it also makes for an excellent condimento for pasta. Just add your pasta, cooked very al dente preferably in the same water in which you have already cooked the chicory, to the skillet with the sautéed chicory. Add a bit more of the pasta-vegetable water and mix well, allowing the pasta to absorb the flavors for a minute or two, by which time most of the liquid should have evaporated and the chicory will have partially 'melted' into a kind of sauce for the pasta. 

Perfect for a quick weekend supper. 

NOTES: Some recipes call for a bit of anchovy, as you might add to broccoletti (broccoli rabe) but, as much as I love anchovies, I find that their saltiness clashes with the sweetness of the chicory. There is also a version in rosso, where you add tomatoes to the olive and garlic to make a quick sugo di pomodoro before adding the chicory. You will also find recipes that call for topping the pasta with grated cheese (usually pecorino) which I don't particular feel the need for, but it is no doubt a valid option. 

As for the pasta, I would recommend a 'stubby' kind like penne (pictured here) but you will also find recipes calling for bucatini (aka perciatelli).

Wednesday, June 9, 2010

Quick Note: Spaghetti con le zucchine


A very quick post since I am quite literally running to catch a plane to Mexico…

As we've seen before, pasta and vegetable dishes are a quick and easy solution for weeknight dinners, when you don't have the time or the energy for anything fussy or fancy. This may be the easiest of them all: spaghetti with fried zucchini. 

You begin, as many of these dishes do, with an aglio e olio base: pour a generous amount of olive oil into a skillet (remember, this is going to be your sauce and you can always leave the excess oil in the pan when you serve) and in it, lightly sauté one or two crushed cloves of garlic over a lively flame. When the garlic is just beginning to color, add thinly sliced disks of zucchini. Season with salt and pepper, and cook over high heat, tossing the zucchini slices from time to time to ensure even cooking, until they have become quite tender and lightly browned, about 5-10 minutes at most. 


Meanwhile, get your pasta on the boil and, when it's al dente, drain it (but not too well) and transfer it to the skillet with the zucchini. Add some minced parsley. Mix well, allowing the pasta to absorb some of the flavored oil. Serve immediately, with a some additional minced parsley as a topping. 

NOTES: Of course, you can dress this dish up a bit more: add some pepperoncino if you want some heat (although I find that it tends to overwhelm the delicate flavor of the zucchini). One variation that I particularly like is to add a dollop of ricotta cheese, some grated parmigiano and a few shredded basil leaves at the very end and mix well. It turns the dish in an entirely different direction. (If you want a richer dish, you can add an egg yolk as well to the ricotta and basil mixture.)

Spaghetti is the classic choice, but you can really use the dry pasta of your choice. Linguine would also be nice, as would rigatoni. The dish is not really apt for fresh egg pasta. 

Some recipes will tell you to fry the zucchini disks in a single layer, and turn them individually so they brown evenly on both sides, etc. etc. If you're like me, you'll be perfectly satisfied with a less pignolo method mentioned above. Just be sure to keep the flame high, use plenty of oil and toss frequently, and even if some zucchini disks will turn out a bit less browned than others, the dish will turn out fine. But by all means, if you have the time and inclination to fry the disks individually, more power to you!

Back on Sunday… Happy eating, or should I say: buen provecho! 

Friday, June 4, 2010

Spaghetti con pomodoro crudo

Summertime is fast approaching, the temperature is climbing, and my culinary imagination is starting to turn to dishes that quick but tasty and require minimal cooking. Here's one of the 'go to' summer pasta dishes in our house: spaghetti with a raw tomato sauce. 

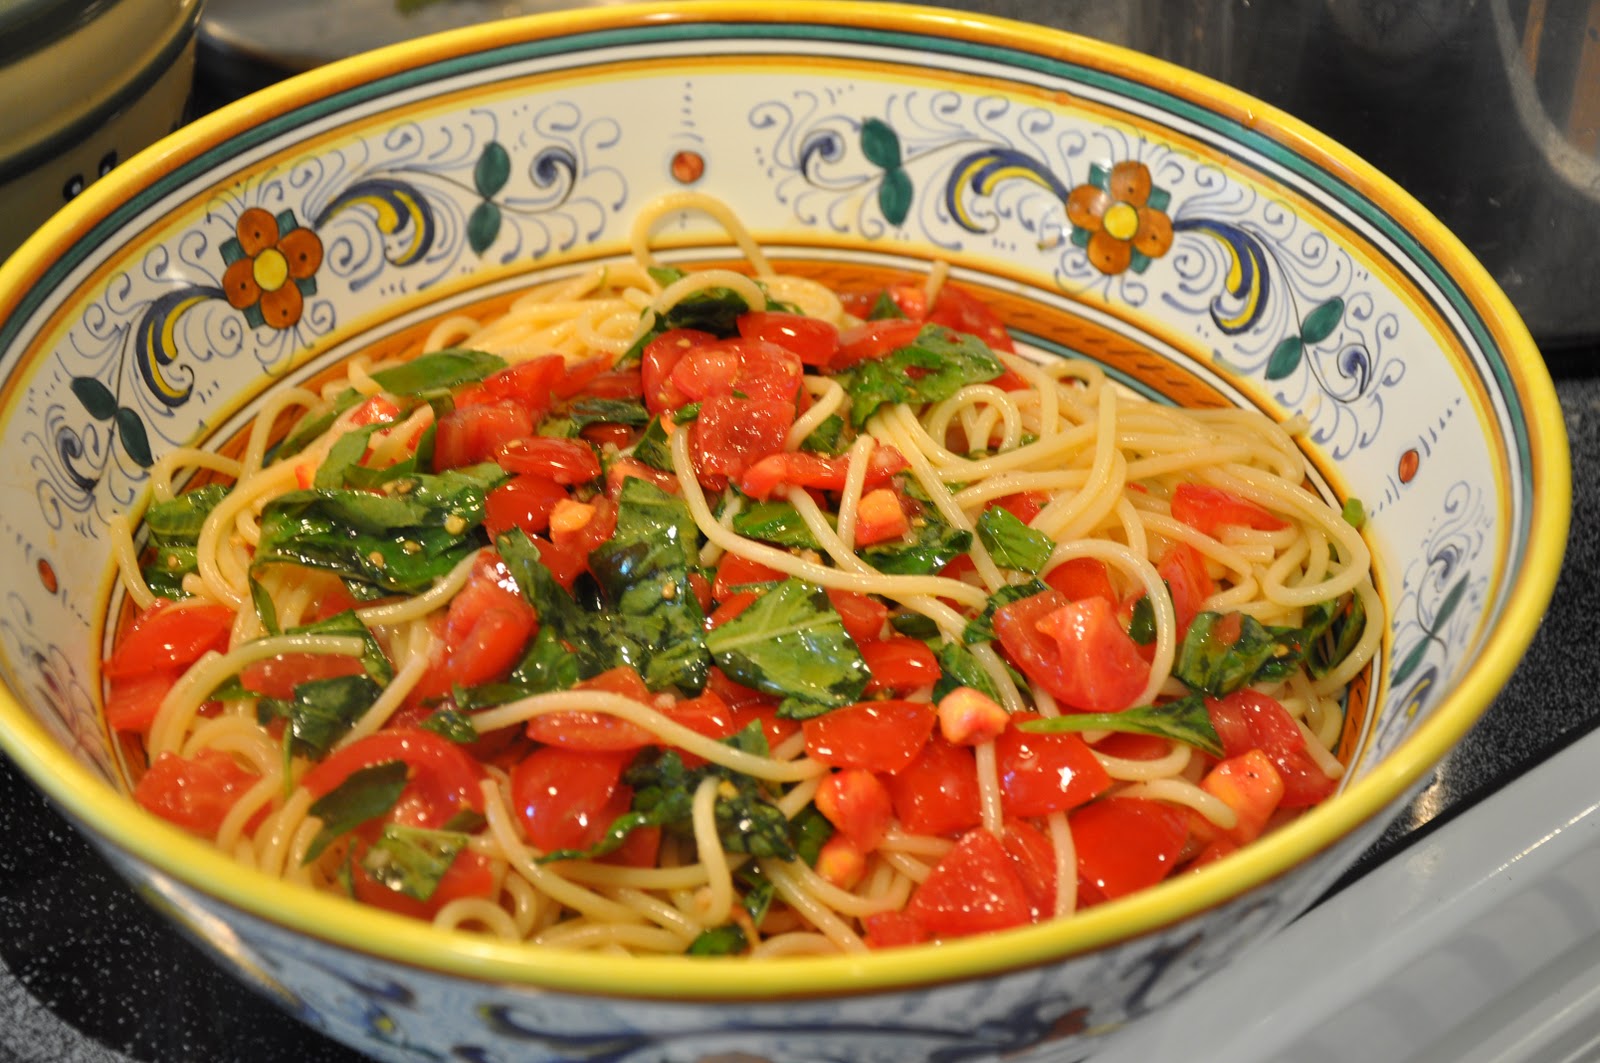
The sauce should be made at least an hour ahead: take some best quality tomatoes (see Notes), cut them in half and scoop out the seeds, then chop them up into small chunks. Throw the tomato chunks into a large bowl, add a few cloves of finely chopped garlic (this is one of the few cases where a garlic press actually comes in handy), a handful of fresh basil, chopped as well, freshly ground pepper and enough olive oil to moisten all the ingredients very well—it should almost cover them. Let this mixture rest for at least an hour and up to three or four hours. This lets the flavors develop and meld. Leave it too long, however, like overnight, and the garlic flavor—which intensifies over time—may become overwhelming.

You need to salt this 'sauce' generously. Most recipes call for you to add the salt together with other ingredients. But if you are planning to leave the sauce to rest for more than an hour and/or if your tomatoes are watery, then hold off salting until about 30-60 minutes before you are ready to eat. 

Once the sauce has rested, boil your spaghetti (or other pasta—see Notes below) al dente and add it, well drained, to the sauce and serve immediately. No grated cheese is needed or wanted for this dish. 

Measurements: The main ratio is that of tomato to pasta. I find that the usual 1:1 ratio of condimento to pasta works fine, but you may even want to up this to as much as 1.5:1. So if you are having four people, say, use 400-600 grams (14-21 oz.) of tomato and 400 grams (14 oz.) of pasta. I usually use about one garlic clove per person (if they're not too big) and enough basil to balance out the tomato—see the picture to see what I mean. As usual, exact measurements are not particularly important. 

NOTES: This being a simple dish based on raw ingredients, the freshness and quality of those ingredients is crucial to the success of the dish. Most importantly, the tomatoes must not be overly watery and should actually taste like something. This dish is at its best when local tomatoes start arriving in the markets. But I have found that very small tomatoes, like cherry or grape tomatoes, or the greenhouse-grown 'Campari' tomatoes have excellent flavor and are not overly watery. If all you can find are those pinkish supermarket tomatoes, you may want to try another dish.

If your tomatoes are young and flavorful, they can be cut up as they are and added to your mixing bowl. But if you have any doubts about them, you can also improve the flavor and texture of your tomatoes by sprinkling the chunks in salt and draining them in a colander for 30 minutes or so before mixing them with the other ingredients. This should purge them of their excess water and concentrate their flavor. If you are dealing with larger tomatoes, you may want to peel their skin, which can be tough. Peeling a raw tomato is almost impossible to do, so you may want to either blanch them very briefly in boiling water or char them over a gas flame, which makes peeling much easier. 

Of course, besides the tomatoes, the basil and garlic should be as fresh as it can be and the olive oil as green and fruity as you can find it. 

Variations of this basic recipe abound: my favorite is to add some red pepper flakes, to taste, to the raw sauce. (NB: Like garlic, the flavor will intensify the longer it rests, so beware.) You can also add other typical summer ingredients like capers, olives, mozzarella, tunafish, anchovies. In addition to or instead of the garlic, some chopped white or red onion is very nice. (Avoid yellow onion, which has too strong a flavor to use raw, but if you have no other choice, soaking it in several changes of cold water will mellow it out.) A nice variation in technique is to place the raw sauce in the fridge, taking it out only just before adding the hot pasta; the combination of hot and cold produces some sort of reaction that gives the dish a very special taste.

In Roman cookery, this dish, made with slightly underripe tomatoes, olives, capers and fennel seeds, and often mozzarella and/or caciotta cheese, goes by the rather impolite name of pasta alla checca. (The word 'checca' being a pejorative Roman slang word for a gay guy, perhaps a reference to the fennel seeds, since the Italian word for fennel, finocchio, is another slang word meaning the same thing.)

You can also use other types of pasta. Linguine, of course, but also those stubby, concave pastas like conchiglie work very well with this sauce—perhaps even better than long pasta, as their nooks and crannies catch bits of tomato or other ingredients.

Sunday, May 23, 2010

Lasagne agli asparagi


A good dish of lasagna is one of the most satisfying meals I can imagine. But, to be honest, a dish of classic lasagne alla bolognese can be a bit on the heavy side, especially as the weather gets warmer. That's the beauty of vegetarian lasagne; if not exactly dietetic, they are lighter than meat-based lasagne and yet totally satisfying. You can make lasagne with almost any vegetable, but perhaps my favorite is made with asparagus, the most elegant and, to my taste, most toothsome of Spring vegetables. 

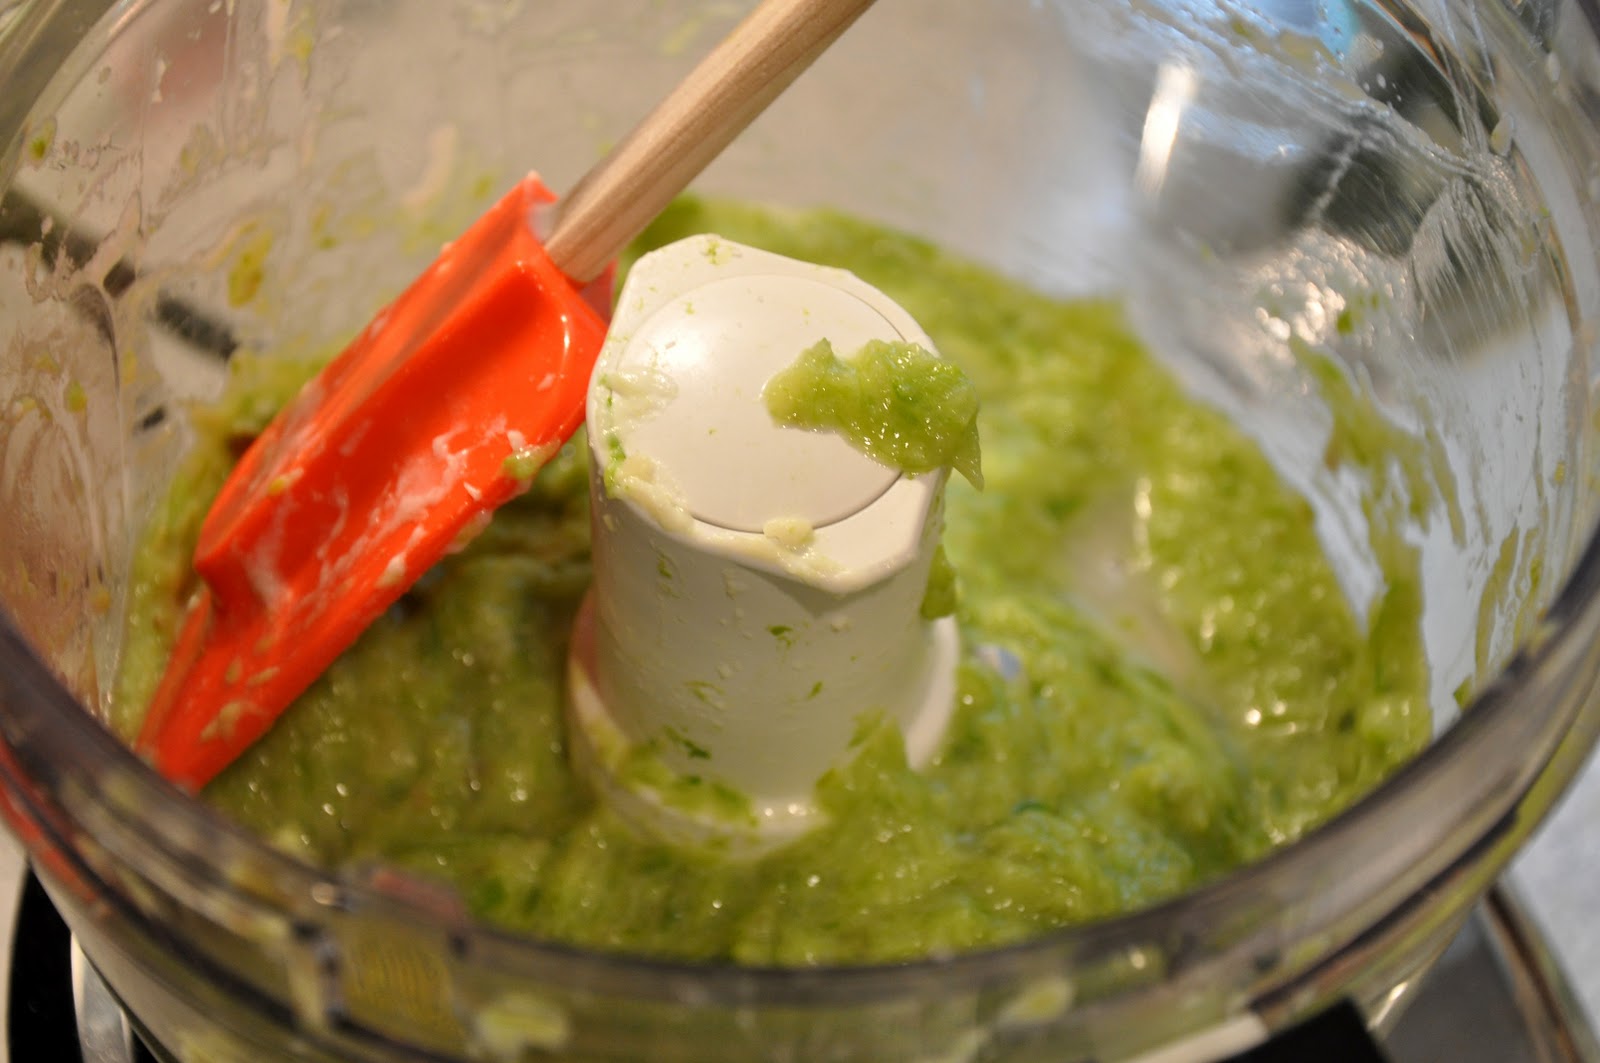
The basic technique is just the same as for lasagne alla bolognese (see this post for the recipe): begin by preparing a batch of fresh pasta, then a good portion of béchamel sauce. But instead of the ragù, you prepare a bunch of asparagus two ways: Take a bunch of asparagus, trim and peel them, then boil, or better, steam them in lightly salted water until tender—not crisp tender or mushy, but fully tender. Cut off the tips and set them aside, and purée the remaining stems in a blender or food processor with a bit of béchamel sauce. Season the purée with salt to taste—it should be quite savory. 


Now assemble your lasagna just as you would classic lasagne: place a layer of pasta in a buttered baking dish, then a thin layer of béchamel, followed by a layer of asparagus purée, then place a few asparagus tips here and there, then sprinkle generously with grated parmesan cheese. 


Keep on layering in this way until you have used up your ingredients—or until you have laid down four or five layers of pasta. (This kind of lasagna should not be too thick.) Cover with a layer of béchamel, sprinkle with more grated parmesan and dot with butter. 


Bake in a hot oven (400F/200C) for about 20 minutes or so, until the top is lightly browned. Allow the dish to settle and cool for 10-15 minutes or more—see below—before serving. 


NOTES: The basic technique for this vegetable lasagna is really quite easy once you get the hang of making the béchamel and fresh pasta. And it can almost be an every-day dish if you use store-bought fresh pasta, although, as I've commented before, finding true fresh egg pasta suitable for this kind of lasagna can be a challenge. If you use no-boil lasagna sheets, make sure to make a rather loose béchamel and slather it abundantly over the pasta, as unboiled pasta absorbs a lot of sauce. I've hit upon another substitution that, however unorthodox, I like better: egg roll wrappers. Yes, egg roll wrappers.  While they lack the rich egg flavor of homemade pasta, they have the same fine, silky texture as very fine homemade egg pasta. And you add them directly to the baking dish, no pre-boiling necessary, saving considerable time and effort. 

If you want a richer dish, you can sauté the asparagus tips in butter before adding them to the dish. And you can also make the dish even more savory if you like by allowing the asparagus purée to insaporire in a soffritto of butter and shallots before folding in a bit of béchamel. In the alternative, instead of asparagus purée, you can sauté both tips and stems in butter, along with a bit of shallot, and layer them over the béchamel. And some versions of this dish really go to town, adding bits of soft cheese like a fontina or bel paese, and/or shredded prosciutto along with the asparagus tips. 

You can make all sorts of vegetable lasagne using the same basic method. For vegetables (like mushrooms) that don't purée too well, you can simply slice them thinly and sauté them in butter or oil, along with a bit of shallot or onion  or garlic (depending on the vegetable and the effect you are after). If fact, almost any  sauteed contorno can do service to stuff lasagne in this way: funghi trifolati, piselli alla romana... You can even make lasagna with a combination of different vegetables, with each layer of pasta dressed with a different vegetable. There is really no end to the variations you can dream up. And with all that lovely bechamel and butter, they are all delicious! 

It is very important to let the dish rest for some time before serving. Not only is the pasta scalding hot when it has just come out of the oven, but as the dish cools it also firms up a bit. If you serve lasagne direct from the oven, it will fall apart when you serve it. And the longer you wait, the firmer the dish will be. A 10-15 minute wait is the minimum, but you can let it rest for up to 30 minutes. And don't worry, it will still be nice and warm.

Nota bene: More tips on lasagna-making are included in the post on lasagne alla bolognese.
 

Saturday, April 24, 2010

Linguine con alici


Here's another quick and easy dish for those days when you don't really feel like cooking but you want to eat something tasty. It's a riff off of the classic ajo e ojo with anchovies.

Start as you would for aglio, olio e peperoncino, by very gently browning a few cloves of garlic—for this variation, I like to chop the garlic rather than using slightly crushed cloves—in fruity olive oil. When the garlic is just beginning to brown, add some red pepper flakes and, almost immediately thereafter, a can of anchovy fillets. Allow to cook gently over low heat, stirring from time to time, until the anchovies have almost entirely 'melted'. Add a pinch of salt (not too much, since the anchovies are already salty) and chopped parsley, stir and turn off the heat.


Meanwhile, cook your linguine (spaghetti are also excellent with this sauce) al dente in well salted water, drain (but not too well) and add to the skillet. Mix well and allow the spaghetti to cook over gentle heat for just 30 seconds or so, long enough so that the pasta absorbs a bit of the sauce and any excess liquid evaporates. Taste for salt and serve immediately. Buon appetito!

NOTES: Like ajo e ojo itself, the key to success lies in the fruitiness of the olive oil and the freshness of the garlic. Go easy on the salt, however, as the anchovies, of course, are themselves quite salty. Of course, if you use anchovies packed in salt—which you need to rinse and fillet yourself under running water—the flavor will be even better, but then you will have departed from 'quick and easy' territory. 

As for measurements, this is another dish where they are not all that important—or rather, they can be varied according to taste. For two people (200g/8 oz. of pasta), I use 2 or 3 garlic cloves, a small can of anchovies and a sprinkling of red pepper. As for oil, I use just enough to cover the bottom of the skillet. Just leave any excess oil in the bottom of the skillet as you serve. But don't skimp: this pasta is supposed to slither on your plate!

Tuesday, April 20, 2010

Caserecce e fagiolini


Weeknight dinners at our house much of the time revolve around pasta and vegetables. They quick and easy, and the combinations are almost endless. For some reason, however, the combination of pasta and green beans is not a particularly common one in Italian cooking, with the notable exception of trennette al pesto, which often includes green beans and potatoes. Perhaps it has something to do with the elongated shape of green beans, which can make them a bit awkward to pair with most pasta shapes

Nevertheless, green beans and pasta can actually get along famously. There is a type of pasta (see photo left) variously called caserecce, gemelli or strozzapreti, which have something of a similar shape to green beans, so they pair nicely. And green beans get along famously with tomatoes, as in the classic fagiolini in umido, so it doesn't take too much of a leap of the imagination to put the three elements—pasta, green beans and tomatoes—together for a tasty treat. 

Make a tomato sauce beginning with a soffritto of chopped onion sweated in olive oil along with a bit of garlic. When the onion is translucent and soft, add some crushed canned tomatoes (or chopped fresh tomatoes in season) along with a good handful of fresh mint leaves (or basil) and, if you like, some red pepper flakes—not too many, just enough to add a hint of spiciness. Allow the tomatoes to simmer until reduced to a saucy consistency, about 10-15 minutes.

Meanwhile, parboil your green beans, trimmed and cut into sections about the same length as the pasta, in salted water until cooked just crisp-tender, and add to the tomato sauce to simmer and insaporire until the beans are quite tender. In the same water in which the beans cooked, cook your pasta al dente and add to the green bean and tomato sauce. Mix well, let it simmer for a minute or two for the flavors to meld and the pasta to absorb a bit of the sauce, then serve. If you like, fold in some pecorino cheese that you will have grated with the large holes of a four-sided grater, so they emerge as long strips, about the same length as the pasta and green beans. 

NOTES: Caserecce are really the perfect pasta shape to go with green beans, and are fairly easy to find, but you can use other 'semi-long' pasta shapes such as trofie, sedani or stringozzi. Also note that, confusingly, the term strozzapreti is used to describe a number of different types of pasta, so check the shape before you buy. 

If you are pressed for time, you can also cook your green beans together with the pasta rather than separately, then add both to the tomato sauce. The result will be slightly less 'beany' (since the green beans will not have time to lend their flavor to both the cooking water and the sauce) but still quite good. 

Measurements for such a homely dish don't matter too much, but the general rule of thumb: a 1:1 ratio by weight between dry pasta and the condimento (ie, the green beans) applies very well to this dish. As for the tomato sauce, it is pretty much up to you. I don't use too much tomato—perhaps half a small can for 200g (1/2 lb.) of pasta, so as not to overwhelm the taste of the green beans.

Saturday, April 10, 2010

Fettuccine al salmone affumicato


I love smoked salmon. It is so incredibly versatile, delicious and good for you, too. And it adds a touch of elegance to any dish in which it appears. Who could ask for more? One of our favorite weeknight dinners at home is this simple pasta with smoked salmon and cream. If using store-bought pasta, it can be whipped up in the time it takes to bring the water to a boil and cook the pasta. But simple as it is, this dish is also elegant enough to serve as the first course of an 'important' dinner. 

For the pasta, I like to make this dish with fettuccine, the typical 'ribbon' pasta of Roman cookery, or tagliatelle, its slightly thinner cousin from Emilia-Romagna. To make your own fettuccine or tagliatelle, make your egg pasta dough and roll it out (see this post for instructions). The pasta sheets should be fairly thin for fettuccine, almost paper thin for tagliatelle. Then cut your pasta sheets into 'ribbons' about 1 cm (0.4 inch) wide. Pasta machines generally come with two cutters; use the wider one for fettuccine and tagliatelle. Like all fresh pasta, cook in well salted, gently boiling water for just a few minutes—fettuccine will take a bit longer than tagliatelle—tasting for doneness after 2 minutes or so. Cooking time will vary according to thickness and how long the pasta has been drying before cooking. 

The sauce is incredibly simple: just melt some butter in a skillet, then add heavy cream and roughly cut up smoked salmon. Simmer until the cream has reduced to a saucy consistency and the salmon has imparted its wonderful flavor to the cream. Add your cooked fettuccine to the sauce and toss. Add a bit more cream if need be, making sure that the pasta still 'flows' rather loosely—fresh pasta tends to absorb its sauce quickly, and creamy ones especially quickly. 

For a slightly more elaborate version, gently sweat a bit of shallot in butter, then add your chopped salmon and sauté until it loses its raw color. Add a splash of vodka, let is evaporate, then add cream. Add chopped parsley along with the pasta and proceed as indicated in the basic recipe. 

As far as measurements go, as usual for this kind of dish, they don't really matter all that much. As a general rule of thumb, I would suggest about half as much salmon by weight as pasta, but if you can use less according to your taste or what you have in your pantry. Even a little bit of salmon will give your dish a lot of flavor. For the cream, use enough to coat the pasta well but not so much as the pasta is 'swimming' in the sauce. 

NOTES: Some recipes call for the additional of grated parmesan cheese, but I find that smoked salmon has plenty of flavor on its own. You can use fresh salmon instead of smoked in either of the variations mentioned above, but then season more aggressively as fresh salmon is not as assertive in taste as smoked. 

While I like ribbon pasta best with this sauce, it lends itself to just about any type of pasta. Tagliolini, which are made just like tagliatelle but cut into very thin strands instead of ribbons, are lovely with this sauce. Short pastas like penne or farfalle would also work well. I would avoid large pasta shapes like rigatoni, which I feel are a bit too clunky for this elegant sauce—but that is really just a matter of personal preference. 

There are other variations on the sauce. One calls for white onion and wine rather than shallot and vodka. And some recipes call for a bit of tomato, which makes a kind of salsa rosa, or pink sauce.

Sunday, February 21, 2010

Pasta a risotto


One of the guilty pleasures that I have never, up to now, revealed to a living soul is my penchant for late-night pasta snacks. But not just any pasta, but pastina of the kind usually used for soups, cooked in just enough liquid (usually a mixture of water and milk) so that by the time the liquid has almost evaporated, the pasta if cooked and a creamy 'sauce' remains. I enrich the dish with a dab of butter and a spoonful of grated cheese just before pouring the concoction into a bowl and eating it greedily with a spoon. 

I have always kept my love of this little mock baby-food to myself. After all, serious foodies do not indulge in such trifles, right? And, worse still, the method violates just about every traditional rule about the proper preparation of pasta. But then, not so long ago, while shopping for some new cookbooks in Rizzoli in New York, I stumbled across a book that a friend from Rome had heartily recommended to me, Cuochi si diventa by Milanese gastronome Allan Bay. As I leafed through the book, I found a chapter entitled "Mania dell'autore: la pasta a risotto" and, lo and behold, I found recipes for something very much like my late-night pastina…

Pasta a risotto means, loosely translated, pasta prepared in the manner of a risotto. And indeed, the method is very similar, if not identical. You begin with a soffritto of minced onion sweated in butter, then add whatever condimento you wish—this time I used swiss chard leaves finely cut into a chiffonade—and allow it to insaporire (absorb the flavor of the soffritto) for a few minutes. Then add your pasta—I used orzo, also known as risoni—and just enough broth or water to cover the pasta. (NB: Unlike a risotto, there is no need to allow the pasta to 'toast' nor to add wine.) As for any risotto, you add successive ladlefuls of liquid as the prior ones evaporate, until the pasta is cooked al dente. Most but not all of the cooking liquid should have evaporated. Add grated cheese, mix well and serve immediately.

NOTES: Bay says that this technique will work with any kind of pasta, but I plan to stick to various forms of pastina: tubetti, orzo, quadretti, broken up fidelini and so on. Orzo is perhaps the best choice, at least if you want to imitate the look and feel of a true risotto. After all, the pasta known as orzo in the US is also called risoni, or 'big rice grains'. As for the liquid, as for risotto you can use any type of broth you like, or just water if the condimento is flavorful enough. 

And as far as the condimento is concerned, as for risotto, the possibilities are practically endless. Bay proposes a cacio e pepe (see this post for the pasta recipe) which eliminates the initial soffritto altogether, and like the pasta, calls for abundant pecorino and freshly ground pepper at the very end. He also proposes zucca (Italian pumpkin, usually substituted by butternut squash in the US, although I prefer baby yams), potato and provola cheese, and mussels with cherry tomatoes. As for risotto, the ratio of condimento to rice can vary, according to your taste and the nature of the condimento, from 1:1 to 1:2.

The term chiffonade, by the way, refers to a particular method of finely shredding leafy vegetables. Here's a useful video from the Rouxbe Online Cooking School demonstrating the technique:


Despite his Anglo-Saxon name, by the way, Allan Bay is 100% Milanese born and bred. He got his name from his English father. He writes a regular column on food for the Corriere della Sera, perhaps Italy's most prestigious newspaper, and is a professor of cuisine at the University of Pavia. He is known as something of an iconoclast and, indeed, Cuochi si diventa is a rather quirky cookbook—definitely not for the traditionalist. Still and all, it is heartening to see my 'secret' technique for pasta endorsed by one of Italy's great gastronomes!

Sunday, February 14, 2010

Angelina’s Lasagna di Carnevale


Among Angelina's generation, each of the female family members had a special dish that she was known for. My great-aunt, Angelina's sister, who we called zi'-zi' (loosely translated, 'auntie'), was the ravioli specialist. Another great-aunt, zi' Annin',  was known as "the little pie-maker" and yet another specialized in calzone pugliese, which we used to call 'onion pie'. Angelina, on the other hand, was known for her lasagna, which was almost always a part of our ritual Sunday dinners at her place. 

It was only later in life that I realized that the lasagna that Angelina made had a name, and was not really her lasagna, but a traditional dish from Campania, the region where she was born. There the dish is called lasagna di carnevale (also called lasagne di carnevale in the plural) since this meaty lasagna is traditionally eaten around Carnevale aka Mardi Gras time, as a last meat 'splurge' before the privations of Lent—a vestige of the days when Catholics were expected to give up meat for the entire 40 days. As I have mentioned before, this lasagna is one of the two 'mother' lasagna dishes in Italian cuisine, the rustic southern cousin to the North's elegant lasagna alla bolognese. Since most Italian immigrants to the US came from the South, it is this lasagna that will be most familiar to Italian-Americans.

Angelina's lasagna did have some subtle differences from the classic recipe, which I will point out later. But here is the way she made her lasagna:

Step 1: Make the ragù: This step should be done the day before, both because the ragù itself takes several hours to cook and because it tastes much better the next day. Angelina always used her signature ragù della domenica or Sunday sauce. Make sure that the ragù is not too thick—it should be quite loose—loose enough to pour easily—to account for evaporation as the dish bakes. Dilute with water if need be.


Step 2: Make the pasta: While lasagna di carnevale can be made with factory-made hard durum wheat lasagna, Angelina usually made her own fresh egg pasta (see this post for instructions). Unlike the pasta for lasagne alla bolognese, however, for this rustic dish you need to roll out your pasta rather thicker than usual; use setting '4' on most pasta machines. And I like to add a heaping spoonful of semolina flour for each 100g/1 cup of "OO" flour, to give the pasta a bit more 'bite'. Cut the pasta into large sheets that will fit into your baking pan. (I usually make mine big enough so that two sheets of lasagna will cover the entire pan.)


 Step 3: Make the polpettine: The lasagna is stuffed with, among other things, polpettine, or little tiny meatballs. You should use the same mixture of beef, pork, cheese, bread and seasonings as you would for polpettone, or Italian meatloaf (see this post for the recipe) but make the meatballs just as small as you possibly can, no more than 2-3cm/1 inch round, at most, smaller if you can manage it, remembering that they will be placed between the lasagna layers. Then shallow fry them in light olive oil until just golden brown. The recipe for zitoni al forno con le polpettine, or baked ziti, gives details on how to make these little meatballs.


 Step 4: Fry the sausage (optional): In a classic lasagna di carnevale, the stuffing also includes long, thin sausages called cervellatine. They don't make them outside Campania, as far as I know. If you don't have them, you can either omit them and just use more meatballs, or cut up some 'sweet' Italian sausages and fry them in olive oil. (Or just slice up some of the sausages from the ragù.) 

 Little meatballs and sausage pieces, fried and ready for the stuffing

Step 5: Make the ricotta cream and cut up the mozzarella: Take ricotta cheese (250g/8 oz.) and mix it well with 2-3 eggs, lots of grated parmesan cheese and a good handful of chopped parsley.to form a kind of 'cream'. Season with salt and pepper. 


 Take a large ball of fiordilatte (mozzarella made from cow's milk) and cut it into cubes. (NB: This is one dish where expensive imported mozzarella di bufala is not really necessary or even ideal.) 


Step 6: Cook the pasta sheets: Cook the lasagna sheets al dente, remembering that they will cook again in the oven. Since these sheets are thicker than the usual pasta and contain a bit of semolina, however, you will need to cook them for longer than other types of fresh pasta, say around 3-5 minutes, depending on how long they have been left to dry. If using factory-made pasta, follow the directions on the box. Do not crowd the lasagna or they may stick together; you may have to cook them in batches. When done, scoop them out with a slotted spoon and pat dry with a towel, taking care not to burn yourself with the hot water that will cling to the pasta sheets. 


Step 7: Assemble the dish: In a large baking or 'lasagna' dish, which you will have greased with lard or olive oil, spread a bit of the ragù over the bottom. Then cover the bottom with a layer of pasta. Since these pasta sheets are rather thick, avoid overlapping them. (You may have to trim the pasta with a knife or a pair of scissors, but that's fine.) Then cover the pasta with a generous layer of ragù. Top the ragù with the polpettine and, if using, the sausage pieces, and then with dabs of the ricotta cream here and there. (You can add more grated cheese if you like, but in Angelina's version, there is ample grated cheese in the ricotta cream.) Then place another layer of pasta and repeat, until you've used up your ingredients. Top with a generous dusting of grated parmesan cheese and a nice layer of ragù. Drizzle with olive oil.


Step 8: Bake the lasagna: Bake your lasagna in a moderately hot oven (180C, 350F) for about 45 minutes, until the top is just beginning to brown. (Some like a nice crusty top, but I don't and neither did Angelina.)


Step 9: Serving the lasagna: When done, remove the lasagna from the oven and allow to settle and cool for at least 30 minutes. In fact, Angelina almost always made her lasagna ahead and reheated it gently, which gave it a rather firm texture and allowed the flavors to meld beautifully. I still like it better that way. 

NOTES: As mentioned above, Angelina's version varies in a few details from the classic lasagna di carnevale as found in the 'old country'. First, she always used fresh pasta made from soft flour, while it more usual to use hard-wheat pasta. In fact, according to J.C. Francesconi, author of the much respected La cucina napoletana, hard wheat pasta is actually preferable. Second, she used her ragù della domenica, made from pork ribs and sausages, while the traditional lasagna di carnevale, according to Francesconi, has a somewhat different ragù, made from a single piece of pork roast and some pancetta. And some folks prefer a lighter ragù, cooked only for a few hours, rather than the dark ragù, cooked for six hours or more, that Angelina used. Third, Angelina used the ricotta cream described above, mixed with parmesan and egg, while the usual traditional recipes call for ricotta only, or sometimes loosened with some water. milk or ragù. 

And one thing that distinguished Angelina's lasagna from most Italian-American lasagna you will find: she was very discreet in her use of cheese. Most Italian-American lasagna comes oozing with ricotta and mozzarella. Angelina's was all about the ragù. And her use of a ricotta cream mixed with egg gave it a different, firmer texture. (There is, by the way, a delicious Neapolitan lasagna dish called lasagna alla ricotta, where cheese is the 'star', but that is a different matter.) 

There are subtle variations also in the way that the lasagna can be assembled. Some recipes (including Francesconi's) call for covering the pasta first with the ricotta, then adding the other cheeses and the meats, and lastly napping the whole with ragù. Other recipes call for mixing equal parts of ricotta and ragù together and layering this mixture on the pasta.

Francesconi also cites an interesting variation from Pozzuoli (a coastal town near Naples) where they add cut up bits of the local salami rather than the traditional cervatelline sausages and include hard-boiled eggs sliced into wedges. This is the version that is set out in another favorite cookbook, Napoli in bocca by Antonella Santolini. And in another delightful Neapolitan cookbook, Cucina napoletana: ricette raccontate, Martinella Penta de Peppo suggests using beef, rather than the more traditional pork, as a 'lighter' alternative for making the ragù. Rather than little meatballs and sausage, she suggests stuffing the lasagna with slices of the meat from the ragù rather than the usual meatballs and sausage, together with ricotta (loosened with a bit of water), ragù, mozzarella and grated parmesan cheese.