Showing posts with label soup. Show all posts

Friday, March 11, 2011

Zuppa dei valdesi


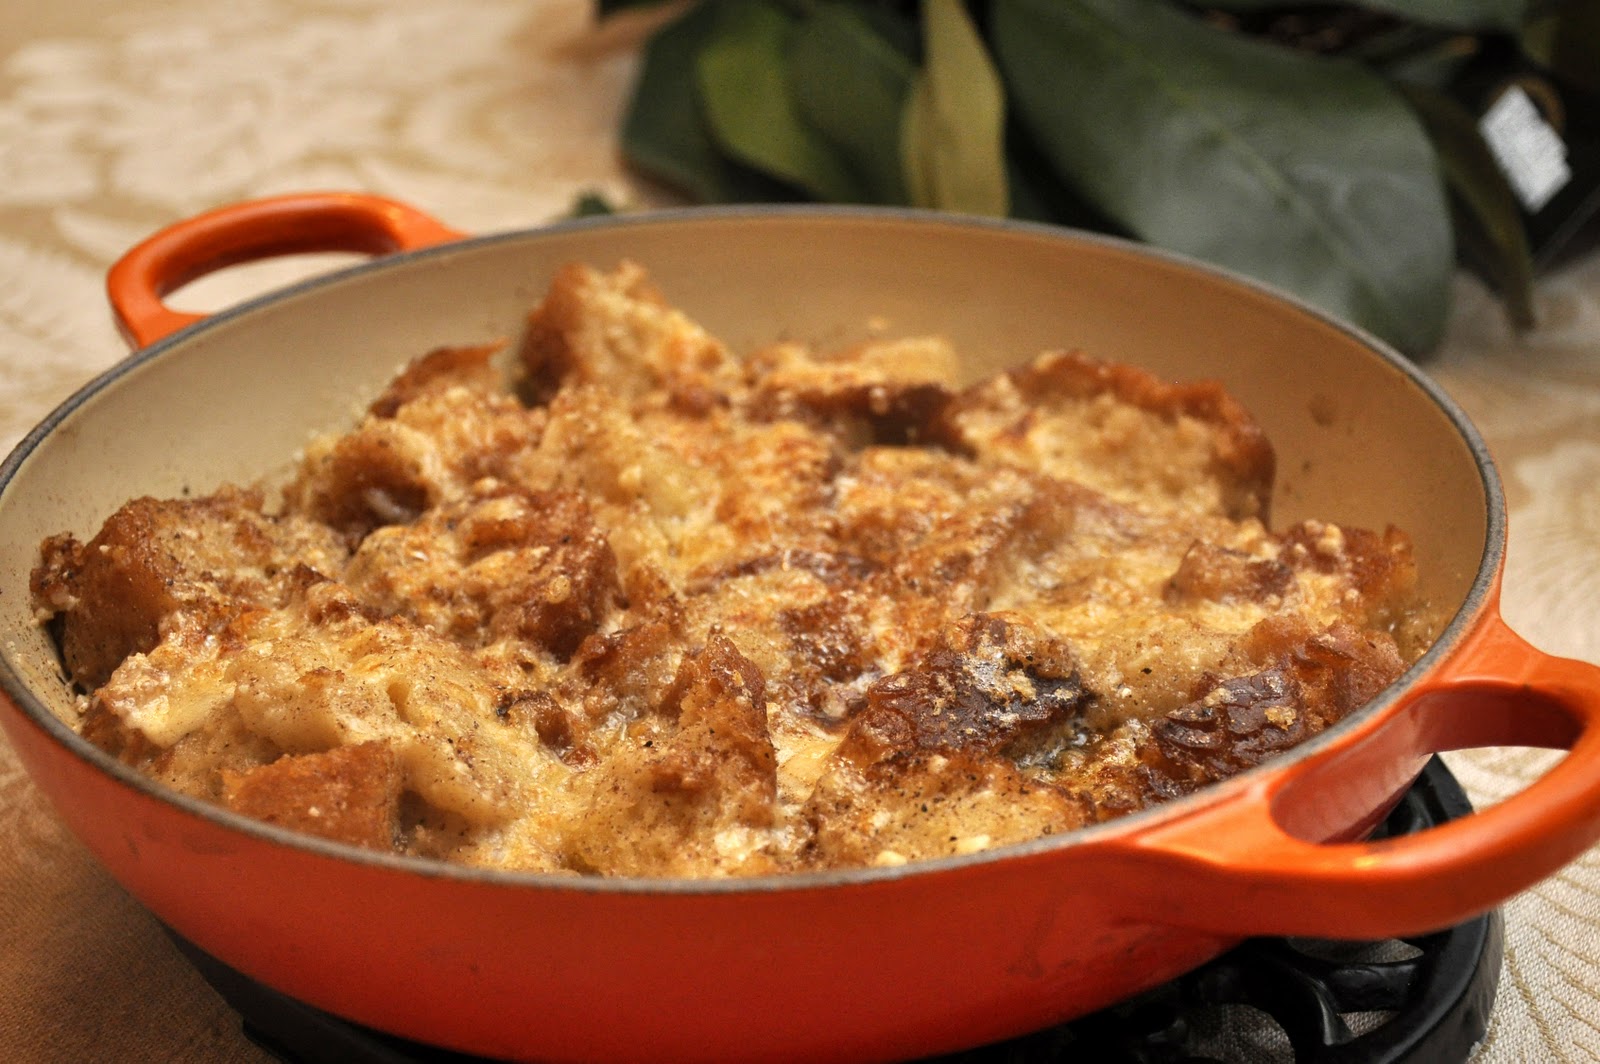
A reader who I'll call "Nancy T." wrote me recently to tell me about a dish called zuppa that her Piedmontese grandmother used to make. The word is one of several in Italian that mean 'soup' (see our Glossary for details). A zuppa is rustic soup, typically the kind that you are meant to have with bread, either dunk into it while you eat like the Neapolitan zuppa di pesce or laid at the bottom of your bowl before the soup is ladled on top like the Tuscan zuppa di porri. Nancy's grandmother's zuppa, on the other hand, is an example of the medieval practice of actually making zuppa out of leftover bread. In her zuppa, the slices of old bread are sautéed in butter and simmered with enough broth to cover and soften the bread while it cooks until it reaches the consistency of a pudding, reminiscent of the Tuscan pappa al pomodoro without the tomato.

Nancy asked if I had ever heard of her grandmother's zuppa. I hadn't but the recipe intrigued me—and it also sounded delicious! After a bit of digging, I found what I think is the traditional Piedmontese recipe for her grandmother's dish. The full name is zuppa dei valdesi,  also known in the local dialect as supa barbetta, and it comes from the valli valdesi, an area consisting of three valleys near Torino. The dish is a typical example of cucina povera, showing how, with a little imagination, the humblest of ingredients can be turned into exquisite eating.

Ingredients (for 4-6 people)

500g (1/2 lb.) stale bread or grissini
100g (3-1/2 oz.) grated cheese (see Notes)
100g (1/2 cup) butter (or more, to taste)
1 liter (4 cups) chicken (or vegetable) broth, or as much as you need.
Nutmeg, cloves and/or cinnamon, to taste
Salt, if needed

Directions

Break up the old bread (or grissini) into pieces. Sauté them gently in half the butter until lightly brown on all sides. Season with one or more of the spices, mixing a few times to ensure that the bread is evenly coated, then add enough broth to cover. Simmer the bread in the broth, covered, for about 15-20 minutes, or until the bread has softened and the broth has been completed absorbed by the bread. (You should add a bit more broth if needed to keep the bread moist.)

When the bread is done simmering, taste it and adjust for seasoning. Top with the grated cheese and the other half of the butter, which you will have melted separately.

You can serve your zuppa just like this, but for extra flavor, put the zuppa in a hot oven (200°C/400°F) for about 10 minutes until golden brown on top. Or just pass it under a broiler for a few minutes.  Serve immediately.

NOTES: Now here is the way that Nancy describes her grandmother's zuppa:
For us, typically after bagna cauda, when we have leftover bread, and it gets a little dry, we make  this dish (unless, of course, we wait too long and the bread is like a  brick).  I slice the loaves into about 1" slices.  Then, in a large pan, add "a nice piece of butter", as my grandmother would say. 3-4  Tablespoons. After the butter melts, the bread gets arranged, and it  browns in the butter.  It's turned over, adding more butter, of course.  Meanwhile, I've got about 6-8 cups of chicken broth heating up in a pot  behind the bread pan.  When the bread's been turned and had a chance to  brown a little, I start adding the broth, gradually. Kind of like  risotto. When about half of the broth is absorbed, the bread gets turned again, and more broth added.  In the end, I usually flip them once  more. 
The recipe today is usually a bit more upscale, made with those ubiquitous bread sticks called grissini, but Nancy T'.'s grandmother's version using stale bread is actually how the soup was originally made. In the old days, they often layered the bread with Savoy cabbage and let it simmer slowly for a few hours by the fire. There are also recipes that call for some sautéed onion. One rather extravagant version calls for cured pork and various herbs (bay leaf, rosemary, sage) interspersed between the layers of cabbage and bread.

The cheese would typically be Toma, a semi-hard cow's milk Piedmontese (and French) cheese, but if you can't find it, parmesan or grana padano would do. Or you could go for an Alpine cheese such as fontina, gruyère or Emmenthal.

Nancy recommends washing down this dish with some good, full-bodied red wine, and I would, too. It may be simple but—especially if you are generous with the cheese and butter—it is quite hearty.

There is little doubt that this dish is quite ancient in its origins. According to Anne del Conte in The Gastronomy of Italy:

Of all foods, zuppa is the most obvious inheritance from the feudal system centered on the castle. The lords and ladies ate what was considered noble food. The servants made use of the leftovers from the high table, which included large slices of bread that had been used instead of plates to hold meat, fish and other food, and to these they added herbs, wild plants and water, the result being cooked at length.  
The zuppe of the 15th and 16th centuries were very thick, made with toasted bread layered with other ingredients, often cheese, sugar and spices, and then placed in the oven. 

The valdesi, by the way, were the followers of a religious movement known as valdismo that began in the 12th century. It preached the virtue of humility and poverty, much like the Franciscans in Umbria who came shortly after them, and I suppose this 'poor' soup reflects those values. Unlike the Franciscans, however, they eventually broke with the Catholic Church. The Chiesa Evangelica Valdese still exists today and have a large place of worship in Rome among other places. They are known for their progressive social views, promoting, among other things, gay and reproductive rights, stem-cell research, the right to die and secular government. William Paca, one of the signers of the US Declaration of Independence, belonged to the movement. The US branch of the movement merged into the Presbyterian Church in the late 19th century.

Wednesday, December 15, 2010

Mushroom Barley Soup


What to do with a spare ham bone if, like me, you don't care too much for split pea soup? Well, what about a barley soup? While barley soup is usually made with beef, it tastes just a delicious with pork and ham in particular.

Ingredients (for 4 servings)
1 onion, finely chopped
1 carrot, finely chopped
1 clove garlic, finely chopped
1 cup barley
A ham bone (or ham hock)
A sprig of rosemary
Salt and pepper
Olive oil
Enough water to cover generously (or a mixture of broth and water)

100g (1 cup) sliced (or chopped) fresh mushrooms
1 handful of parsley, finely chopped

Directions
Sauté the onion and carrot until soft, then add the garlic and stir. Season as you go. Add the barley, allow it sauté gently as well for just a minute or two to absorb the flavor of the aromatics.

Place the ham bone (or ham hock) over the barley, together with a sprig of rosemary. Pour in enough water to cover all the ingredients generously, by at least 5 cm/3 in.

Simmer the barley and other ingredients for at least an hour, until the barley is nice and tender but not mushy. Add water from time to time if you need to—and chances are, you probably will, since barley absorbs a lot of liquid.

About 15 minutes or so before the soup is ready, sauté some thinly sliced mushrooms in a bit more olive oil until nicely browned and reduced, mixing in a bit of minced parsley just before you remove the mushrooms from the heat. Add the sautéed mushrooms to simmer along with the barley until done.

Remove the ham bone from the pot, scrape off any bits of ham meat, chop it up and add the meat back into the pot. Adjust the seasoning to taste.

Serve hot, topped if you like with un filo d'olio and a generous grind of black pepper.

NOTES: This is a wonderfully rustic soup that lends itself to any number of variations. Probably most common is the substitution of dried mushrooms, reconstituted in warm water but not sautéed, for the fresh mushrooms, which gives the soup a much more assertive mushroomy flavor. You can also vary the aromatics by, for example, adding some leek and/or celery. You can also vary the herbs—instead of rosemary, a bay leaf and/or some fresh thyme is a nice change of pace. Some recipes also make this soup 'creamy' with the addition of buttermilk, milk or cream.

The soup can be made ahead, but if you do, you'll need to add more water or broth, as the barley will just keep absorbing the liquid until none is left. Perhaps there is a limit to the liquid that barley can absorb, but if there is, I haven't encountered it yet.


Sunday, November 28, 2010

Zuppa di porri


'Tis the season for soups! When the temperatures dive, there is simply nothing that takes the chill off like soup. The wonderful thing about soups is their enormous variety: they can be thick and stick-to-the-ribs, whole meals in themselves, or they can be light, even austere, just enough to whet the palate as the start of a formal meal or as a light supper.


Here is a lovely example of a medium-bodied soup, none too heavy but very satisfying at the same time. It's particularly nice during the holiday season, when you may feel like something warming but not too filling, a nice respite between those humongous holiday meals. The starring role is played by the leek, an often overlooked member of the onion family. Or, at least, I tend to overlook it, which is too bad because it has an incomparably savory yet mellow taste that makes any dish that contains it truly special.


Ingredients (for 4-6 servings)


5 leeks
100g (4 Tbs.) butter, or a combination of equal parts butter and olive oil, or just olive oil
20g (2 Tbs.) flour

Salt and pepper to taste

1 liter (4 cups) broth

4-6 slices of good-quality crusty bread

Grated parmesan or gruyère cheese


Directions


Rinse the leeks if necessary (see below) and trim off the root end and green tops. Cut the stalks into thin slices.


Sauté the leek slices in the butter, butter and oil mixture or the oil over gentle heat until they are well reduced and quite tender, without browning, about 15-20 minutes. Season the leeks with salt and pepper just after you add them to the skillet.


Sprinkle the flour and mix it in well, letting it sauté as well for a minute or two. Then add the broth, mix it well to fully incorporate the flour into the liquid, and let simmer, semi-covered, for another 15-20 minutes.


Meanwhile, toast your slices of bread and place each slice in the bottom of a soup bowl for each diner. Sprinkle the slices with some grated cheese. When the soup is done simmering, ladle over a nice serving into the soup bowls. Sprinkle over some more cheese and top with a nice grinding of black pepper and—if you like—a drizzle of best quality olive oil.


You can serve this soup immediately, but it is best after a few minutes' rest, which allows the soup to soak into the bread.


NOTES: These days leeks are often sold pre-washed, and can be used without fuss. But if you see that your leeks are gritty, make sure to wash them well before using. You will need to split them down the middle to make sure you remove all the grit. And, by the way, don't throw away the green tops—they are a great addition when making homemade broth, either instead of or in addition to the onion.


Speaking of which, for a simple soup like this one, where success or failure will depend on the quality of the ingredients, the broth should really be homemade. (See this post for the master recipe.) You can make your broth with beef (the usual choice) or chicken or a mixture of the two—the so-called brodo classico—and, this time of year, you can also use a turkey carcass if you happen to have one around the house…If you want to go vegetarian, then vegetable broth will, of course, do the job.


The choice of sautéing medium will subtly influence the dish. The traditional recipe calls for all butter, which gives the recipe a pleasant sweetness. But, personally, I prefer to use olive oil or a mixture of butter and olive oil, which provides a more 'rustic' taste. Some recipes add potato to the soup, which gives it more body. You can pass the soup through a food mill for a smoother texture. And instead of the toasted bread, you can fry up some croutons in olive oil, which again makes the soup a bit richer.


If you want to get fancy, you can gratinée this soup in terracotta soup bowls as you would a French onion soup, placing the bread on top of the soup, then sprinkling over all the cheese (use gruyere for this variation), drizzle with some olive oil (or melted butter) and run the soup under the broiler or in a very hot oven for a few minutes, until the top is nicely browned.

Sunday, November 21, 2010

La ribollita


We've already gone over the basic recipe for minestrone on this blog. Once you've mastered that, it is a lot of fun to explore the many varieties of minestrone from all over Lo Stivale (meaning 'the boot' one of the many nicknames Italians give to their country).

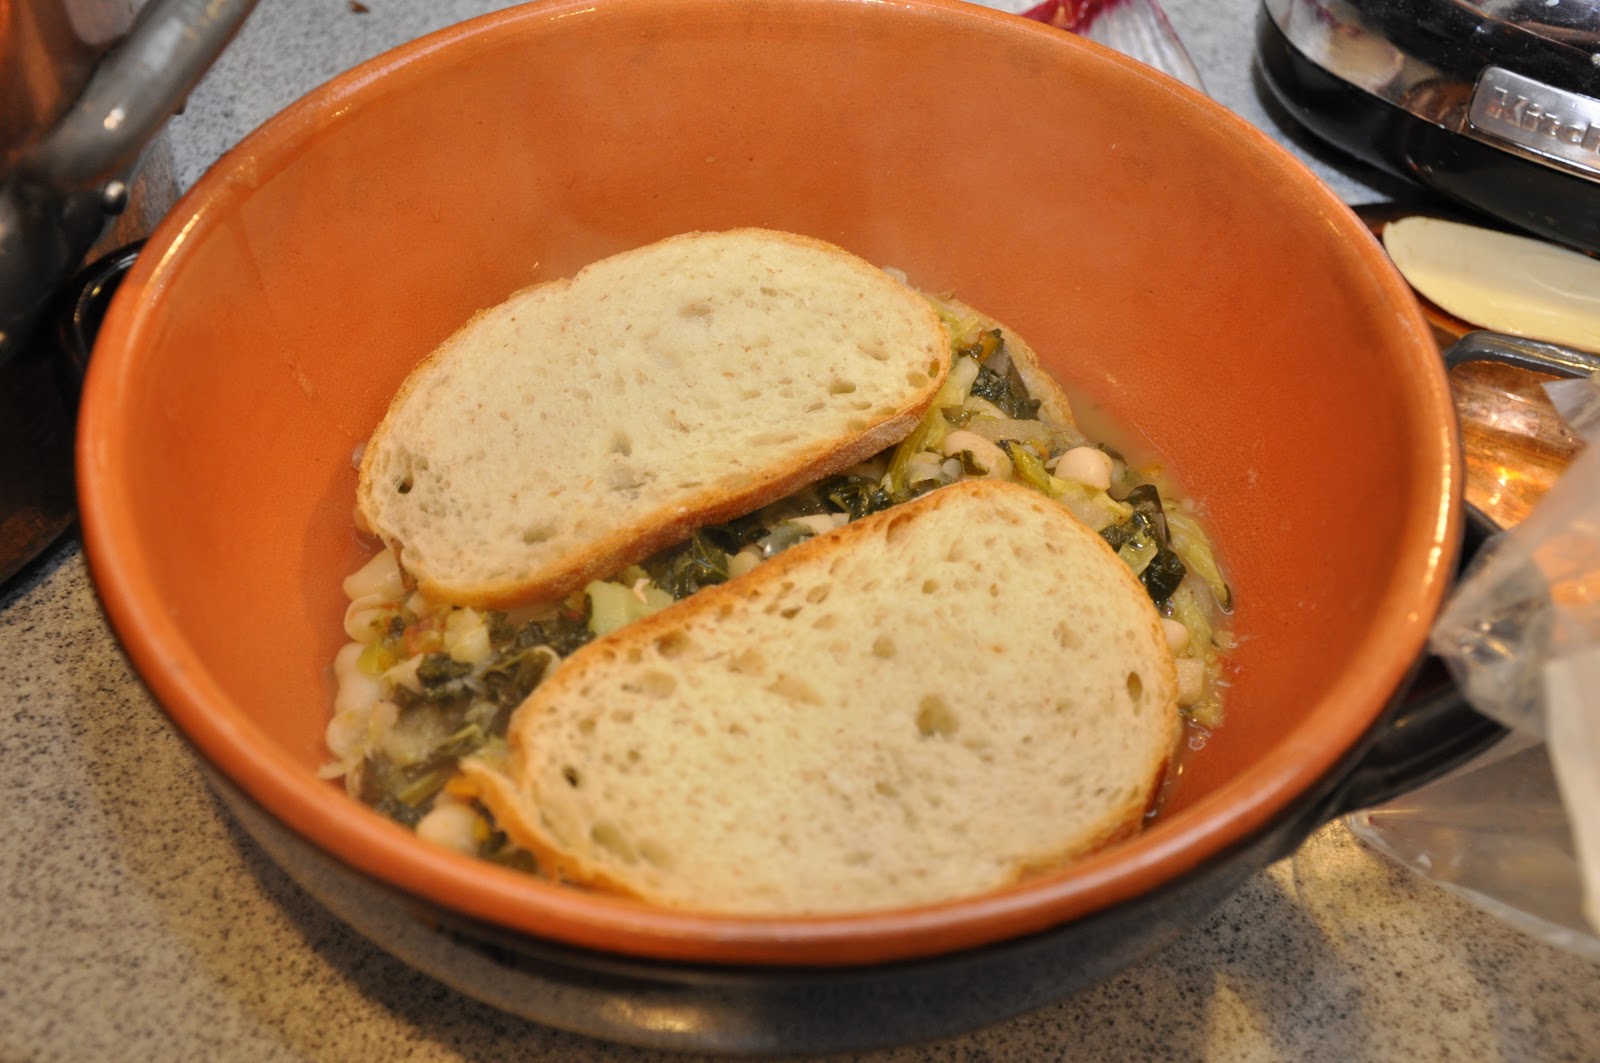
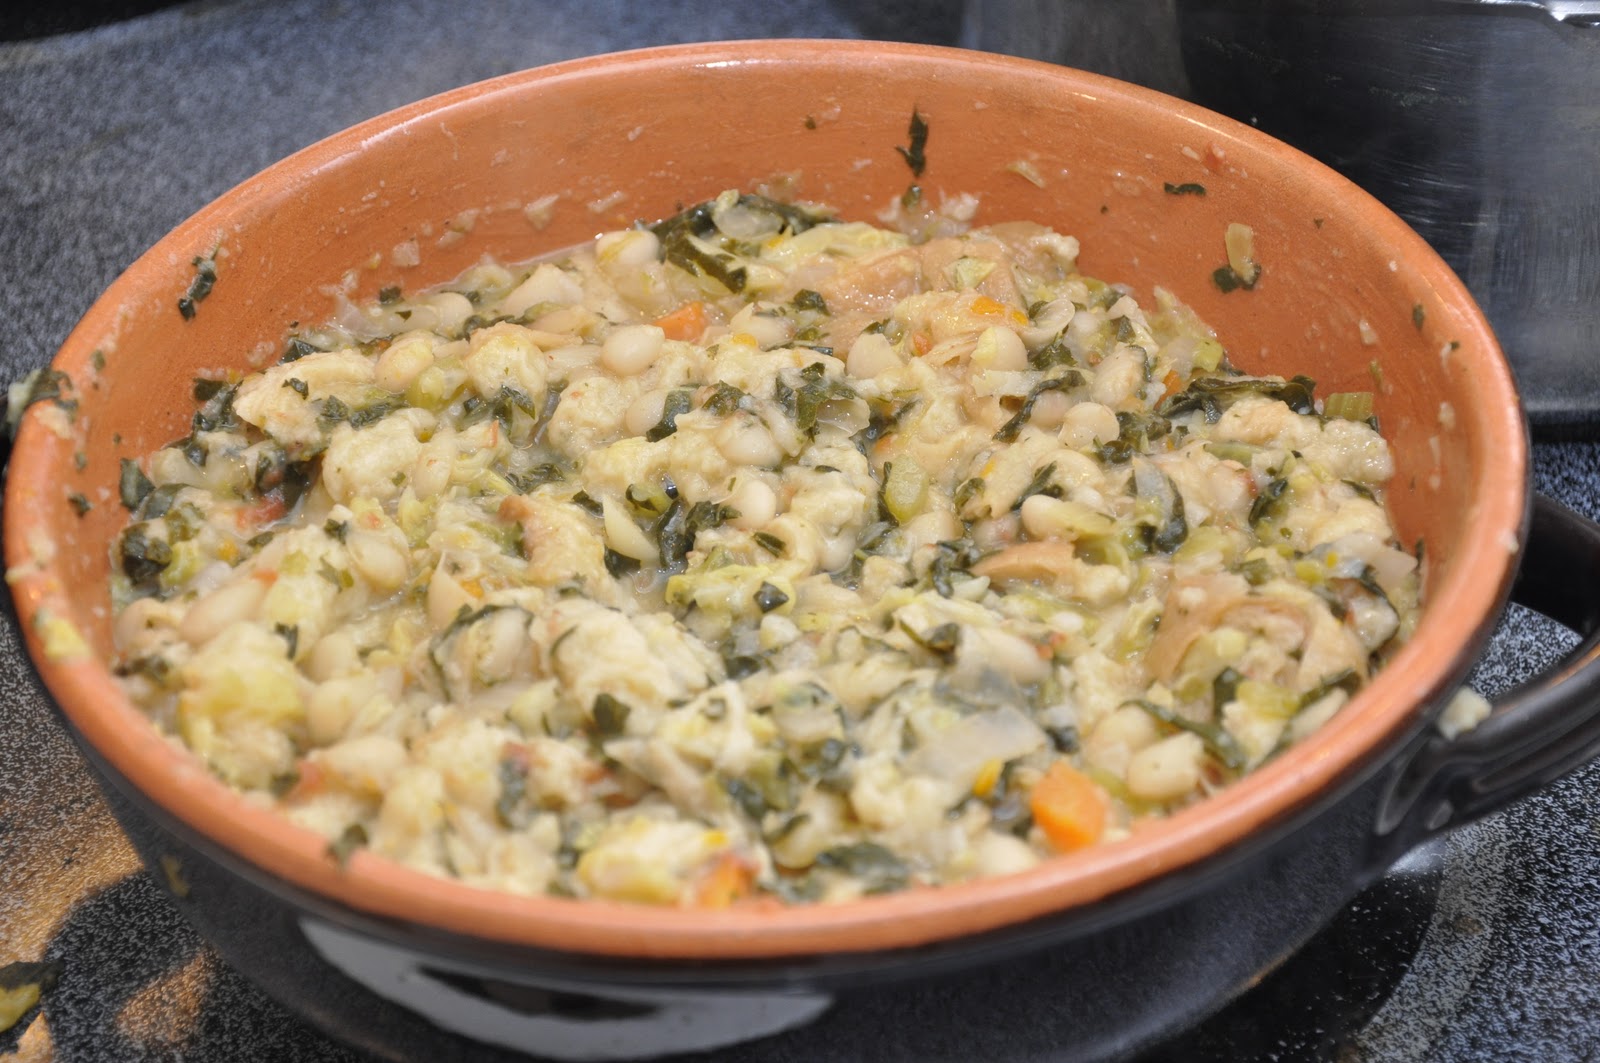
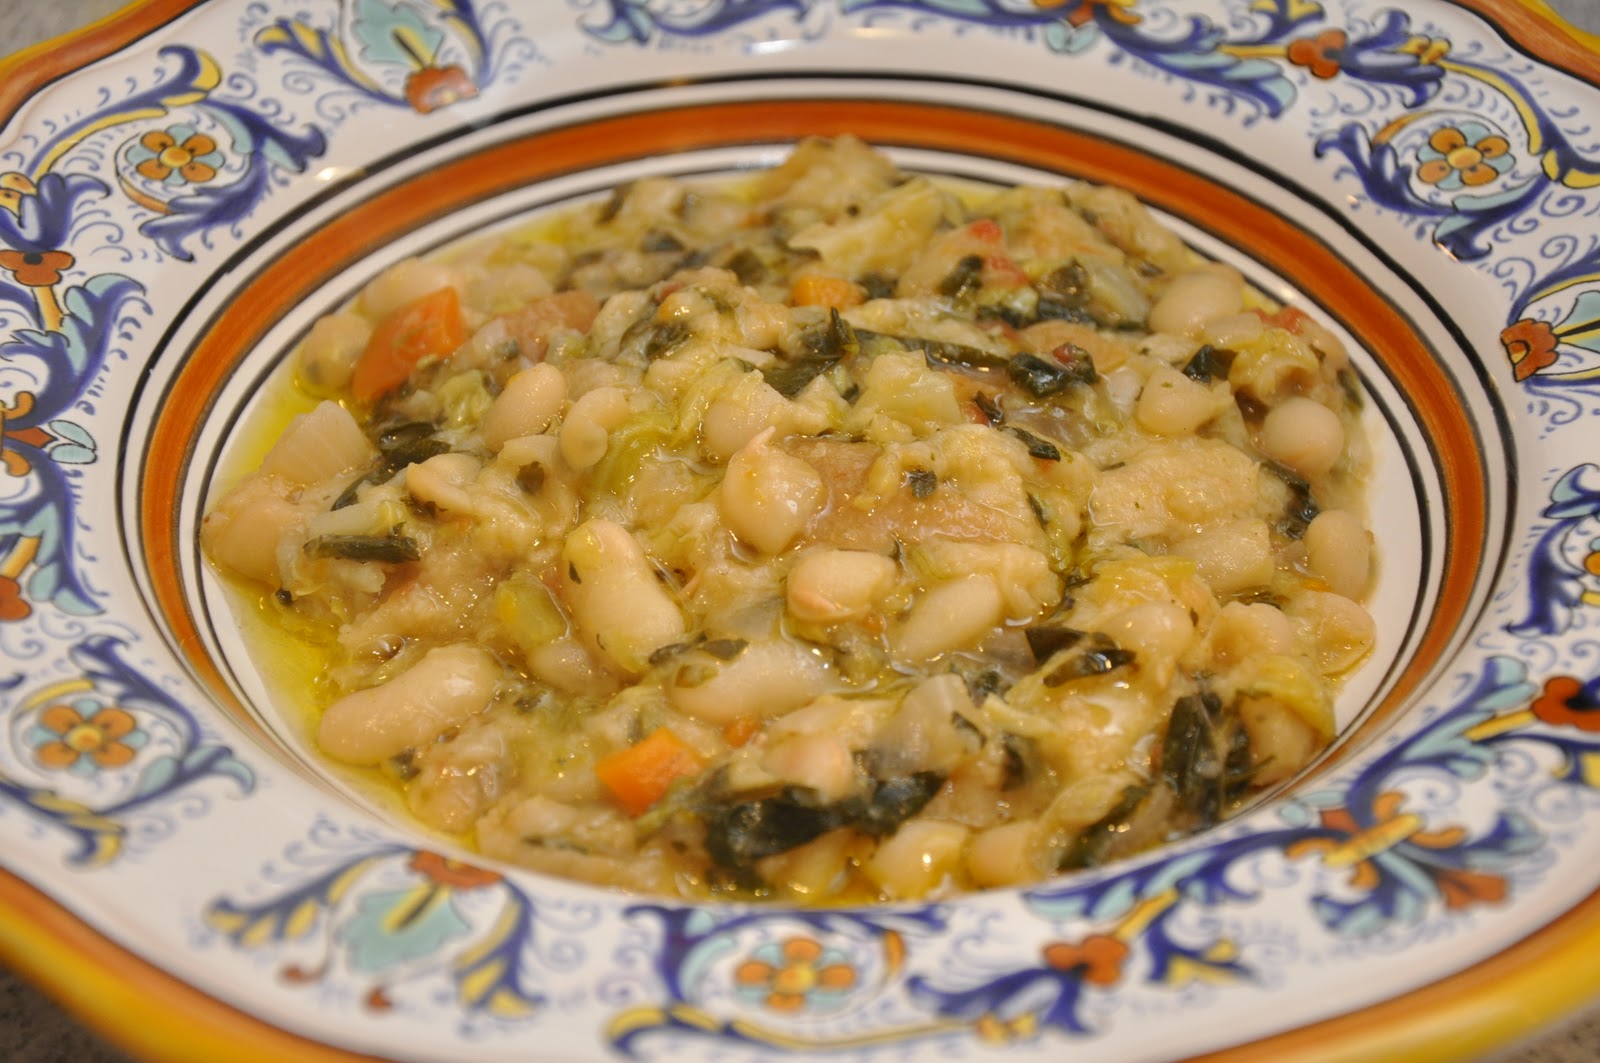
Perhaps the most delicious version of all is the Tuscan classic called la ribollita, or 're-boiled' because it is made ahead, layered with bread in a pot (preferably made of terracotta) and reheated before serving. Like any minestrone, it tastes so much better the day after—or even after a few hours—and the bread gives it a special flavor.

Ingredients (for 4-6 servings)

For the flavor base:
Olive oil
1 large red onion, cut into cubes
1-2 carrots, cut into cubes
1-2 stalks celery, cut into cubes
A handful of finely chopped parsley
1 leek (optional)
1 thick slice of pancetta, cut into cubes (optional)

More vegetables:
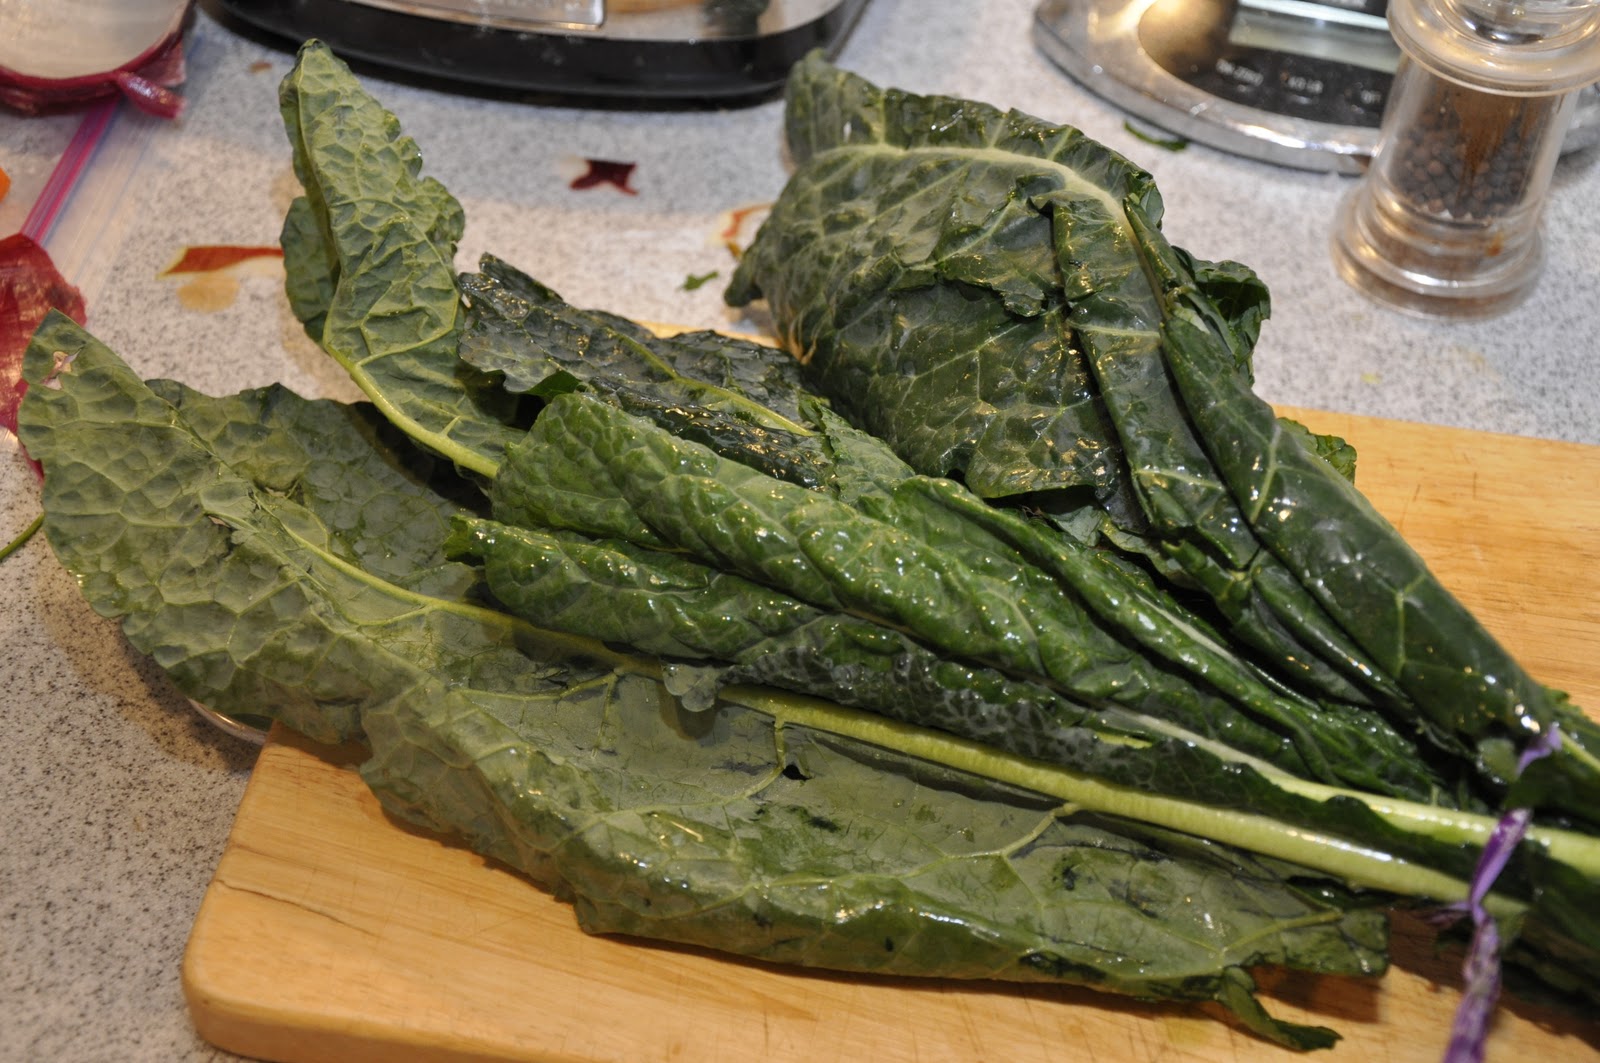
1 bunch black kale (aka lucinato kale), stemmed and shredded
½ head of Savoy cabbage, shredded
1 bunch Swiss chard (optional)
A few canned tomatoes, cut up (or some tomato paste)
250g (1/2 lb.) potato
250g (1/2 lb.) or more boiled or canned cannellini beans, drained

For the final assembly:
Slices of well-structured bread (preferably saltless Tuscan bread)

To finish:
Best-quality, fruity olive oil
Freshly ground black pepper (optional)

Directions

Make your minestrone, using the above ingredients, following the master recipe.

When the soup is done, place some slices of bread in the bottom of a good-sized terracotta casserole or soup pot (if you don't have a terracotta cooking vessel, the enameled cast iron or, in a pinch, a regular soup pot will do). Then ladle over a good portion of the soup.


Add another layer of bread, then another layer of soup, and so on, until you have filled the pot or used up your ingredients. End with a layer of soup.

Let the soup rest for several hours or overnight.

When you are read to eat, gently re-heat the soup. As the soup heats up, mix it up with a wooden spoon, which will break up the bread and mix it in with the rest of the ingredients. The result will be very thick, almost more a stew than a proper soup.


Serve when nice and warm, drizzled on top with un filo d'olio and, if you like, some freshly ground black pepper.


NOTES: The number or types of vegetables vary quite a bit from recipe to recipe, but the two essential ingredients—typically Tuscan—are the cannellini beans and the cavolo nero, or black kale, also marketed as lucinato kale or Tuscan kale. I have even seen a recipe that called it 'dinosaur' kale—not sure where that came from! Once impossible to find, I am happy to report that I now find black kale pretty regularly at my local supermarket here in the US. Similar in flavor to other sorts of kale, it has long, rather slender dark-green (not literally black!) leaves.


Black kale is much more tender and has a more subtle taste. To use it in the soup, you need only to remove the central stem, which can be very tough, then roll it up and shred it with a sharp knife. Other leafy greens, like Savoy cabbage or Swiss chard (or even beet greens) add a nice variety but can be omitted if you don't have them on hand, as can the leek, another vegetable used more frequently in Tuscany than in most other parts of Italy. Another typically Tuscan touch is the use of red onion, which Tuscans seem to prefer, but of course yellow or white onions will do if you don't have red onions on hand.

The choice of bread is of utmost importance. If you have Tuscan bread around, that is, of course, the best choice. Failing that, any well-structured bread that will stand up to cooking will do, although I would avoid sour-dough just because it has too strong a taste. Above all, avoid sandwich breads, which will turn to mush and give your ribollita an uncharacteristic texture.

Ribollita is best when made the day before, but you can make it in the morning for dinner or even an hour or two before—although the longer it sits, the better. The texture is thick and hearty but not heavy, and the bread gives a flavor that is really something very special.

Wednesday, November 10, 2010

Quick Note: Crema di cannellini


Here's a quick and easy weeknight supper for you: a purée of cannellini beans, seasoned with garlic and rosemary, and thinned out with water or broth to create a soup. Nothing could be simpler or more satisfying. And if you are using canned beans—which you can, why not?—the soup can be done in five minutes. There is no cream in this soup, by the way, the Italian word crema does not mean cream, as in the dairy product, but simply refers to any smooth, creamy textured purée.

Ingredients

Olive oil
1-2 garlic cloves (or more if you like), whole but lightly crushed
A sprig of fresh rosemary
Boiled or canned cannellini beans
Broth or water (or the cooking liquid if using boiled beans)
Salt and pepper
A handful of parsley, finely chopped

NB: No exact measurements for this one; use as much or as little of each ingredient as you need or feel like using. This recipe is pretty much ad lib.   

Directions

Begin by lightly sautéing your garlic and rosemary in abundant olive oil over moderately low heat. Once the garlic takes on some color, remove both the garlic and the olive oil from the pan. Then pass your cannellini beans through a food mill into the seasoned oil. Allow the beans to insaporire for a few minutes, then add enough water, broth or cooking liquid to thin out the bean purée to the consistency of a soup. Simmer the mixture for a few minutes to let the flavors meld. About a minute before its' done, stir in the chopped parsley. Drizzle with raw, best-quality olive oil just before serving.

NOTES: This basic recipe is incredible flexible and versatile. Usually, it can be served with some crusty bread on the side, or top of a piece of toasted bread laid at the bottom of the plate, or topped with croutons fried in olive oil, and—as picture above—with boiled rice mixed in. Or some soup pasta instead of the rice.

The same method lends itself to just about any other bean or legume: borlotti, lentils, fagioli all'occhio (black eyed peas), chickpeas… you name it. For a more 'refined' taste, you substitute a soffritto of onion, or onion, carrot and celery, for the garlic, in which case don't remove them from the pan as you would the garlic. For a bit more substance, you can also fry some cubed pancetta in the seasoned oil. Or top your crema with some sautéed shrimp or scallops, which makes for an elegant presentation fit for company.

Boiling dried beans takes some time but is very easy. If you have the time, soak the beans in water to cover them amply, either overnight or save yourself some time by bringing them to a boil and let them soak in the hot water for an hour. Pre-soaking is not strictly necessary, but it does save time and helps the beans to retain their taste and texture—although that's not too important if you're going to use them in a purée, of course. Then simmer them in water to cover generously, along with a drizzle of olive oil and a sprig of fresh sage (if you have some on hand) until tender. Season with salt a few minutes before the beans are done. The simmering liquid has lots of flavor and can be used to thin out the crema.

If using canned beans, on the other hand, make sure to rinse them off and drain in a colander. The canning liquid has stuff you don't want to ingest and, besides, it gives a funny 'canned' taste to the dish. When using canned beans, it is best to use broth to give the crema some extra flavor.

Crema di cannellini, when it is kept quite thick, makes for a nice topping for crostini.

Tuesday, February 9, 2010

Zuppa di orzo


Italian cuisine is known for pasta and risotto and polenta and, to a lesser extent, for farro. But did you know that Italians also enjoy barley? Here is a simple, basic barley soup that is both healthy, appetizing and, if made in a pressure cooker, can be prepared in under 30 minutes.

Begin by sautéing a soffritto of onion, carrot, celery and, if you like, a little pancetta in olive oil, taking care not to let them brown. When the vegetables have softened, add your barley (50g /2 oz. per person is a good portion as a first course). Allow the barley to insaporire as you would for a risotto, then add water or broth to cover generously, at least 1 liter (4 cups) of liquid per 100g (4 oz.) of barley. (NB: Barley absorbs a lot of liquid as it cooks.) Simmer covered for 45 minutes or until tender, stirring from time to time and adding water or broth as needed. The result should be a very thick soup, almost a porridge, but not entirely dry. Serve immediately, topped with un filo d'olio. Have some grated cheese on the side for those who like it.

If using a pressure cooker, bring up to pressure, lower the heat to a minimum and cook for 15 minutes, then release the pressure. When you open the cooker, check for liquid: if it has been entirely absorbed, add more water or broth and let simmer for a few minutes more. If there is too much liquid (less likely, given barley's aborptive qualities) then just let is simmer until you have reached the proper consistency.

NOTES: This is the very basic 'mother' recipe for barley soup. There are lots of variations you can try, including the use of fresh herbs of your choice in the soffritto—parsley, rosemary and sage are particularly nice. Some recipes call for the addition of other vegetables, perhaps most commonly potato or pumpkin but also with leafy winter vegetables like kale or cabbage. Beans of all kinds—cannellini, borlotti, ceci, lentils, even peas—are also a very common addition, and turn this primo into a perfectly rounded piatto unico.
Beef broth, of course, is probably the best choice for making this soup, but it is perfectly lovely with vegetable broth or even just water. Chicken broth, on the other hand, while a possible choice, in my opinion does not really pair very well with barley. Some recipes call for soaking barley for a few hours before cooking to soften it. I find this step entirely unnecessary, at least with the barley that is sold commercially here in the US.

For this particular soup, instead of pancetta, I used a ham bone that I had left over (believe it or not!) from Christmas dinner. It gave a wonderful porky flavor to the soup. If using a ham bone, fish it out of the soup before serving and scrape off any meat. But the meat up into small pieces and add it to the soup.
Besides this stick-to-the-ribs winter soup, orzo also appears on Italian tables in the warmer months as a salad. It's quite a versatile grains!

Orzo, by the way, is also the name of a popular soup pasta, so be careful if Googling for recipes.


Sunday, February 7, 2010

Pasta e fagioli


Pasta e fagioli, or pasta and beans, which goes by the amusing nickname 'pasta fazool' in Italian-American slang, is one of the most internationally famous dishes in the entire Italian repertoire.  It is, however, a victim of its own success, and is too often made badly, very badly, which is why I would never order this dish in a restaurant outside Italy. The real thing, however, is not at all hard to make at home. In fact, it is a great standby for weeknights where you don't have much time and need to whip up something quickly. And the results are really wonderful on a cold winter night. 

There are lots of authentic variations on the dish, but here is the way I like to make it:

Fry some pancetta, cut up into cubes or lardons, in olive oil until just beginning to brown, then add a few lightly crushed garlic cloves and a spring of fresh rosemary. (You can also add a peperoncino at this point if you like some spice.) Just when you start to smell the garlic and rosemary, add some crushed tomatoes (I just add one or two plus a little juice, just enough to lightly color the soup and add a little flavor) and simmer until the tomatoes have separated from the oil. Then add your drained cooked (or canned) cannellini beans, allow them to simmer for a minute or two to insaporire (absorb the flavors of the tomato and other ingredients) and then add water (or broth) and partially cooked pasta (see below). Continue simmering, squashing some of the beans against the side of the pot so that they 'melt' into the liquid and thicken it, until the pasta is fully cooked. I like to mix in a bit of grated pecorino cheese to enrich the soup before serving . Serve topped with you choice of additional grated cheese, freshly ground pepper and/or un filo d'olio.

NOTES: There are, as always, quite a few variations to this dish. First of all, if you prefer a vegetarian dish, you can omit the pancetta, which I often do. And if you wish to 'veganize' it, don't use cheese either. Or you can use crumbed sausage meat instead of the pancetta, if you want some meat flavor but can't find pancetta. Salt pork also works well, as does something called 'country ham'. Regular cooked ham, however, does not give you the right flavor for this dish, IMHO. You can make the soup even meatier by using broth, but I find that with all the other flavors going on, water is not only acceptable but preferable. If you've made the beans yourself, do use the cooking water from the beans, which have wonderful flavor.

You can also use other kinds of beans. In fact, just about any legume could do, although most typical would be a bean like pinto or cranberry beans. Chickpeas are wonderful in this dish, in which case you will have made a pasta e ceci. In our family pasta and lentils are typically made a different way, as a pasta asciutta rather than a soup, but you might want to try it made this way and see what it's like. By the way, canned beans are perfectly acceptable, but do remember to drain and wash them well. The canning liquid would otherwise give the dish an 'off', artificial taste. One legume that I would not try this way are peas; their flavor is too delicate to stand up to such a robust, rustic treatment. Try instead this delicate pasta e piselli dish with just onions, parsley and broth.

And, of course, the choice of pasta can vary, although small, stubby pastas work best. I personally like ditali (as shown above) but small shells or 'elbows' would work well. In Italy, it is very common to use the odds and ends of different pastas you have around, called pasta mista--it's a great way to use up those last few pieces of pasta that inevitably wind up at the bottom of the box. Collect them in a towel or bag, then smash them with meat pounder or the back of a skillet to reduce them all to about the same small size. Some recipes call for adding the pasta directly to the soup pot without pre-cooking them. If you do that, however, be careful; I find that the pasta inevitably sticks to the bottom of the pot and can burn. And be sure to add quite a bit extra water as the pasta will absorb it readily as it cooks. 

As I mentioned, this soup is all too often subject to culinary abuse. If you want to be authentic, by the way, the soup should not be brothy, as you will often see when this and other pasta and legume dishes (including minestrone) are made outside Italy. Rather, you should end up with a thick soup that is almost a stew. And ignore recipes that use this soup as a dumping ground for all sorts of extraneous dried herbs or overwhelm the other flavors with too much tomato. And this recipe, supposedly from the Olive Garden restaurant chain, is a true monstrosity, more of a bad chili than an Italian soup.

You can also make a milder, more 'refined' dish by making a different kind of flavoring base or soffritto of onion, carrot and celery rather than garlic, rosemary and red pepper, in which case you can substitute parmesan for the pecorino. Personally, I prefer this heartier, earthier version.

Saturday, December 26, 2009

Crema di zucca


Who doesn't love winter squash soup? It is savory yet sweet, warming yet light. It makes a wonderful first course, to be followed by a roast, or a light supper after too many hearty holiday meals...

My version of this soup is extremely easy. You take the winter squash of your choice, cut  into wedges and seeded, and roast the wedges on a baking sheet in a hot oven for about 30-45 minutes, until perfectly tender. (You can check them the same way you check potatoes: by sticking a paring knife into the flesh; if you can remove the knife and the squash stays put, then it is done.) Don't worry if the edges are a bit browned—that adds flavor and character. Remove from the oven and allow to cool off a bit.

Meanwhile, in a saucepan, make a soffritto by sautéing a finely chopped onion in butter (or butter and a bit of oil) until translucent and quite tender. (Adding a pinch or salt and a spoonful of water helps things along and prevents browning.) Scoop out the squash flesh with a spoon and add to the soffritto. Allow the squash to simmer gently for several minutes to absorb the flavors of the butter and onions, stirring often. The squash should become even softer and basically 'melt' in the pan into a kind of mush. Then add broth to cover and simmer for about 10 minutes or so.

Pass the squash and broth through a food mill, using the finest mesh disk, into a mixing bowl. Leave behind any fibers and bits of skin. You should have a perfectly smooth and even purée. Add that back into the saucepan and bring to a gentle simmer. Add heavy cream (or milk if you're counting calories or cholesterol), enough to thin out the purée into a beautiful, velvety consistency. Simmer for a minute or two more, so that the cream 'melds' with the squash purée, and serve.

You can top your crema with croutons, some finely chopped herbs, grated parmesan cheese and/or a drizzle of olive oil.

NOTES: This method will work with just about any winter squash including, of course, butternut squash. For this dish, I used a winter squash I found at a local Asian market labeled as 'calabaza', which is Spanish for squash but obviously was some rather specific varietal that I had not come across before. It made for lovely eating, I must say.

While the initial roasting of the squash is not absolutely necessary, I find that it concentrates and accents the flavor of the squash. Winter squashes, as I have mentioned before, can be a bit bland and often need a little 'help'.

There are lots of variations you can try here, mostly involving various herbs and spices that one can add to the soup. One variation I especially like is to add a spoonful or so of curry powder to the soffritto. It lends savoriness and just the vaguest hint of spiciness to the dish. Some recipes call for a potato, which is surely meant to smooth out the texture, but I find this unnecessary. Instead of onion, you can substitute leek or shallot.

By the way, the word crema in Italian means a soup of pureed vegetable. It refers to the texture of the soup and not to the presence of cream. (The word for cream in Italian is panna.) In fact, many creme are made without any cream at all, just broth; this one can, too, and can be 'veganized' simply by using vegetable broth. But I find that cream just naturally goes with winter squashes—it adds to their sweetness and lightens their color and smooths out their texture—so I can never resist adding it.

Friday, December 18, 2009

Stracciatella alla romana


One usually associates Roman cooking with hearty and robustly flavored dishes and, by and large, the image holds true. But there are some exceptions like today's offering: stracciatella, a light 'egg drop soup', perfect for a light first course or supper. It's a great choice for those occasions when you may not be very hungry—perhaps you've had a big lunch or midday dinner—but don't feel like actually skipping a meal. If you have broth on hand, it is also very quick and can be made quite literally on the spur of the moment.

To make stracciatella, bring some broth to a fairly brisk simmer (but not a rolling boil). While the broth is coming up to heat, in a mixing bowl scramble (per serving) an egg together with a spoonful each of semolina and grated parmesan cheese, a pinch of salt, a good grind of pepper and, if you like, a bit of nutmeg. Mix well to make a perfectly homogenous mixture. When the broth is at the simmer, slowly pour the egg mixture into the broth, all the time whisking (or stirring vigorously with a wooden spoon) in a single direction. The egg mixture will form little curds that are said to look like 'little rags' (hence the name stracciatella is derived from stracetti, which means little rags). Allow to simmer for just a couple of minutes more and serve, with additional grated cheese on the side for those who care for it.

NOTES: As usual, even with a soup this simple, variations abound. The semolina is original and is featured in all the most traditional recipes, including the one in the authoritative Talismano della Felicità. But modern recipes often omit it, which makes for an even lighter dish, or substitute bread crumbs, which make the 'lilttle rags' taste rather like passatelli from Emilia-Romagna. The recipe proposed by the Accademia della Cucina Italiana in La cucina del Bel Paese calls for a bit of grated lemon zest. Some recipes call for a bit of chopped parsley for color and add a bit of finely chopped carrot and celery.

The choice of broth is yours—chicken, beef or a brodo classico all go well. Chicken is my personal favorite. The important thing is that the broth be homemade and flavorful.

This dish is not to be confused, of course, with the gelato of the same name. Another Roman dish called straccetti, is made with thinly sliced and shredded beef sautéed with arugula, but that is a recipe for another post.

Italian Egg Drop Soup on Foodista

Wednesday, November 25, 2009

How to make broth


Making broth is so easy to do, and the results are so wonderful and so almost infinitely useful, I really don't understand why it's almost disappeared from home cooking. Well, actually, I can guess: fewer and fewer people cook anything at all, let along things like homemade broth, which has an undeserved reputation for being difficult to make. Add to that the undeniable fact that broth takes time, something people seem to have less and less of. But, except for the first few minutes, broth can be left virtually unattended until it's done. I usually start the broth on a lazy Sunday afternoon and just let it simmer while I read a good book, watch a movie or do whatever else I feel like around the house. When it's done, just turn off the stove and leave it until you're ready to eat, then reheat.

Making Broth

Anyway, the essence of making broth is as simple as it gets: you boil meat--usually beef and/or chicken, but veal also makes a nice stock--with vegetables that, in Italian, they call odori because they are meant to provide flavor: onion, carrot and celery. (As I've mentioned often before, these are the same that are used for soffritto, the base for countless sauces, stews and soups.) To these basic flavorings, I often add a spring of parsley and/or a bay leaf, as well as a few whole black peppercorns and a clove or two.

Step 1: If your main objective is some flavorful broth, you add whatever meat(s) you're using to a large pot of cold, well-salted water. Tonight, I used a lovely free-range chicken and a beef shank:


Step 2: You bring the meats just to the boil, skimming off the scum that inevitably rises to the top as it comes to the boiling point:

NB: If your objective is nice boiled meat and the broth is secondary, then bring the water to the boil first and add your meat(s) to the boiling water, and then proceed.

Step 3: While the water is coming to a boil, prep your vegetables:

NB: See notes below for details.

Step 4: Immediately lower the heat to a very gentle simmer, skim off any residual scum and then add the vegetables:

Step 5: Let the meat and vegetables simmer until the meat is quite tender and the broth has a rich flavor. The total simmering time depends on the meat being used: chicken will take an hour or two, depending on the type of chicken, while beef will take about three hours. If you're using both and plan to eat the boiled meats, then you may want to remove the chicken so it does not completely overcook. The water should totally cover all the ingredients, so add more if the water reduces too much, as it will tend to do. Test for seasoning, and don't be shy about adding generous amounts of salt. Broth should not be bland.

NB: You can considerably reduce the time it takes for this step by using a pressure cooker. See notes below for details.

Step 6: Once the meats are cooked and the broth has developed good flavor, switch off the heat and let the broth cool a bit. You can even let it rest on the stove (uncovered) overnight.


You can also use the broth immediately if you like, but it has a deeper, richer flavor after this 'rest'.

Step 7 (optional): If you want a clear broth --important when making a clear soup--strain the broth through the fine sieve or cheesecloth to remove the particles. (If you want a really clear broth, see note below.) If you wish to de-fat your broth, leave it in the fridge overnight; any fat will form a solid white layer on the top, which can then be easily removed.

NOTES:

On the meat
: If making a beef broth, use the same cuts of meat that you would for stewing or other long cooking. I love short ribs, but shank, brisket or chuck would all do fine. Adding a few marrow bones will add both flavor and a bit of body to the broth. Chicken is a bit tricky, especially in the States, as most of the chickens sold in US supermarkets are too young and bland to make a good broth from. However corny it might sound, a free-range, organic bird makes the best broth. A roaster is better than a fryer. Even better would be a stewing hen, if you can find one--if so, you'll need to cook it much longer, up to three hours or perhaps longer. I have found a nice chicken, grown from Italian stock, that goes by the rather odd name of "Pollo Buono" or "Good Chicken". Even though it appears to be a young chicken, it has rather firm but very flavorful flesh, which is great for making broth. When dealing with a regular supermarket chicken, however, truth be told, I sometimes cheat and add a bit of bouillon to boost the flavor. (I like the brand with the obnoxious name of "Better than Bouillon".) My favorite broth is made from both beef and chicken, sometimes called
brodo classico, or 'classic broth', in Italian .

On the vegetables: To make broth I don't cut the veggies fine, but rather leave them in large chunks or even whole. I usually peel the carrot and cut them and the celery into long segments (about 2 in/5cm long), trimming off the ends. The onion I usually leave whole, including the skin, which provides some pleasant color to the broth, but slit it about halfway down the middle (from the top, not the root, of course) and nestle one or two cloves (chiodi di garofano) inside. You can add some additional vegetables, if you like, including most commonly tomato, garlic and, occasionally an unskinned firm-fleshed potato. (A mealy potato would fall apart and cloud the broth.)

On using a pressure cooker: You can considerably reduce the cooking time by using a pressure cooker. Bring the broth up to pressure and let it cook for about an hour (for beef or 'classic' broth) or 30 minutes for chicken broth. Once you're done, it will take some time to de-pressure on its own, so you can run the cooker under cold water to speed up the process. Since pressure cooking involved little or no evaporation, the broth will tend to be a little 'thin' unless you use less water than you would ordinarily do or (and I would recommend this in any event) you simmer the broth for another 20-30 minutes off pressure to concentrate the flavor.

On clarifying the broth: If you want a really, really clear broth, after straining and de-fatting the broth, bring it slowly to a simmer while you add in the whites of several eggs (perhaps one per liter/quart) stirring all the while. The egg whites will eventually coagulate. By some process that remains mysterious to me, any impurities in the broth will cling to the egg whites, and you will be left with a perfectly clear broth, good enough for consomme or gelatin.

Uses for homemade broth
: Broth has an infinite number of uses. Really good broth is wonderful on its own, with some rice or small pasta like quadrucci or fine pasta like capelli d'angelo broken up into small lengths. It is also lovely with passatelli, a kind of string dumpling made with egg, cheese and bread crumbs. Broth with beaten egg mixed in until it coagulates is called stracciatella, or 'torn apart' soup (after the appearance of the eggs) and is a classic Roman dish. It is best to cook the pasta separately to avoid clouding the broth, then add it to the broth to simmer for just a few moments before serving.

Broth is also a crucial ingredient in making risotto, in all kinds of soups, in sauces, in stews... you name it. And don't throw out the meat. It makes wonderful eating, as a bollito (boiled dinner) either on its own with some salsa verde or rifatto in various ways.


Broth vs. stock: Stock is made in same way as broth, except that you use only beef bones or the carcass of a chicken (or rabbit, duck or turkey) instead of pieces of meat. The bones or carcass are sometimes roasted in the oven before using to bolster their flavor.  You can also the scraps from a leftover roast to make stock as well. Making stock is a great option if you have roasted a bird (say, a Thanksgiving Day turkey) and want to make the most out of your leftovers. But, of course, you will not wind up with any lesso to eat afterwards, and I find the taste not quite as rich as a broth. Use stock in the same way you use broth.


Tuesday, November 3, 2009

Zuppa di scarola e fagioli


Here's a quick and easy dish, typical of the Campania region of Italy, that is a cold weather weeknight staple at our house: escarole and bean soup.

You begin, as always, with a soffritto by sweating a thinly sliced onion in olive oil until translucent, then add a small head of escarole, sliced into very fine ribbons. Cover and allow the escarole to reduce, mixing from time to time so they absorb the flavor of the soffritto. Then add boiled or canned cannellini or borlotti bean along with enough water or broth to cover the ingredients. Cover and allow to simmer until the escarole and beans are quite soft, about 15-20 minutes. If, like me, you like a thick soup, then along the way crush some of the beans with a wooden spoon against the side of the pot. Place slices of day old bread, either toasted or fried in olive oil if you like, in the bottom of your soup bowls, then pour the soup over. Drizzle with un filo d'olio, top with a generous grinding of black pepper and serve. That's all there is to it.

NOTES: If you like a little heat, you can add some red pepper flakes to the soffritto. For a bit more assertive taste, make the soffritto with garlic, either instead of or along with the onion. And for a meatier dish, you can add some pancetta and/or cook the soffritto in lard instead of olive oil. And if you would like your soup in rosso, add a bit of tomato purée after the soffritto is done, allowing it to reduce before you add your escarole. Some recipes call for blanching and squeezing the escarole dry before adding it to the pot, but I find this unnecessary.

Saturday, September 26, 2009

Minestrone: A Primer


Many people think of minestrone as the kind of hearty fare best eaten in the cold weather months. Minestrone is wonderful in fall and winter, of course, but it can actually be enjoyed year-round, its component ingredients changing with the seasons, served hot in the winter, warm in the spring or autumn, and even 'cold' (ie, room temperature) in the summer.

Like so many other classic dishes, there are practically as many minestroni as they are minestrone cooks. But almost all minestrone recipes begin with three 'base' vegetables: onion, carrot and celery. You will notice that these are the same three vegetables, referred to as odori in Italian, that go into the most common type of soffrito, or flavor base, for countless sauces, stews and soups. But while for most dishes you want a soffritto to dissolve into whatever it is you are making to provide maximum background flavor, and therefore you chop the vegetables very fine, here you want each component vegetable to retain its own identity, so chop the vegetables into smallish cubes.

Step 1: You begin the minestrone with oil and/or butter in the bottom of a pot big enough to hold all your ingredients with room to spare. (Better too big than too small.) You want a generous amount of fat, for reasons that will become evident as you read on. Add onions first, allow them to rosolare (saute) without browning while you chop the carrots, then add the chopped carrots while you chop the celery, then add the celery. If you like, you can also add some chopped pancetta to this base--it adds a lovely flavor. Add a healthy pinch of salt, which will keep the vegetables from browning and bring out their flavor. You will keep doing this until all your odori have had a chance to cook and absorb the flavors of the oil and preceding vegetables.


Step 2: After these base ingredients are all added to the pot, you add 'hard' vegetables in season. All kinds of squash, including pumpkin or butternut in the colder months, or zucchine in the warmer months, would go in at this point. Potatoes, tomatoes and string beans are also common additions. Once again, cut them into small (but not tiny) pieces and add, one by one, to the pot, allowing each ingredient to be well coated with the oil and absorb the flavor of all the vegetables that have preceded it.This time around, I used butternut squash, zucchini, potatoes and green beans:


Step 3: Now add any leafy vegetables that you want to, cut up into strips. Most common, especially in the cold weather months, is savoy cabbage, but kale, spinach, swiss chard, escarole and chicory are also great additions. (In Tuscany, the favorite leafy vegetable for soups is cavolo nero, or black kale.) This time I used cavolo nero and leeks:


Step 4: Now add water (or broth) to cover, bring to a gentle simmer and allow to continue simmering for a good hour or more (most traditional recipes call for two hours of cooking), until all the vegetables are almost meltingly soft and the soup is getting quite thick. (This step can be sped up if you use a pressure cooker, in which case cook under pressure for about 20 minutes.)


Step 5: Now you add one or more legumes: cannellini beans, borlotti beans, cranberry beans, peas, baby lima beans, fava beans, (occasionally) chick peas, etc. Here I am assuming that you are using canned, frozen or pre-cooked legumes. (If you are using fresh beans, then add them before you add the water.) Cook for another 20-30 minutes, adding more water if the soup is getting too thick--but the soup should actually be quite thick, more of a stew than a soup. In fact, I like t crush some of the vegetables against the side of the pot; the crushed veggies melt into the soup, giving it a thick and 'smooth' quality.


Ecco fatto! You can serve the soup immediately, but it is much better made ahead and served the next day, or at least after a few hours' rest.

NOTES: You can use of variety of 'toppings' to provide an extra flavor flourish to your minestrone: You can stir in grated parmesan before serving if you like, sprinkle it on top or serve it on the side. Pesto sauce is wonderful, too--a typical summer addition to minestrone--either stir it in before serving, or add a dollop on top of each soup plate, and let each diner mix it in to taste. Or, in a typical Tuscan style, just pour over un filo d'olio and a generous grating of black pepper over each soup plate before serving. As mentioned, you can serve it hot, warm or room temperature.

You can also add pasta, rice and even chunks of bread (see ribollita below). Of course, pasta is more typically southern, rice more typically northern and bread is typically Tuscan. I usually cook the rice or pasta separately before adding it to the pot at the very last, letting it simmer a bit longer, but not too long, just before serving. If you are making it ahead, don't add the rice or pasta (or bread) until you re-heat and serve, or it will become impossibly mushy.

As mentioned, the choice of vegetables is almost infinite, according to your taste, what looks best at the market and the season. But there are some vegetables to avoid, in particular those that have a very strong flavor that would overwhelm the others: peppers, for example, or most hard cruciferous vegetables like broccoli or cauliflower. And, with one notable exception (see below), eggplant is not usually part of minestrone, either.

Finally, while minestrone can be made totally vegetarian or vegan, it is often made with bits of pork, either cut up pancetta, prosciutto or pre-cooked pork rind (cotenne) for deeper flavor. In a pinch you can use crumbled sausage meat. Add the pancetta or sausage meat first to the oil, let it saute and then begin with the onion and proceed from there. Add the pork rind just before adding the water or broth. Broth gives it an even deeper meatier flavor, although personally I find this makes the soup too 'heavy'.

VARIATIONS: As I mentioned, there is an endless variety of minestroni, based on region of origin, the season, and/or the cook's personal preferences. Here are a few examples of the better known regional versions (NB: Unless otherwise noted, always begin with onions, carrots and celery, then add the ingredients listed):

Minestrone alla milanese: pancetta, potatoes, tomatoes, spinach, savoy cabbage, peas, borlotti or cannellini beans. (Some recipes call for green beans.) Typically includes rice.

Minestrone alla genovese: One version calls for pumpkin (or butternut squash), beans, dried peas, savoy cabbage, potatoes, green beans, erbette (substitute baby spinach outside Italy), tomatoes. Another calls for potatoes, borlotti, zucchine, bietole (swiss chard), savoy cabbage, spinach and (very unusually) eggplant. Serve with pesto, of course!

Minestrone alla livornese: fresh beans, spinach, prosciutto, savoy cabbage, a few swiss chard leaves, potato, zucchine, tomato sauce, pork rind (added just before the broth--not water).

Minestrone alla napoletana: garlic, zucchine, fresh beans, peas, generous amount of parsley and a lot tomato--the soup should have a definite red tinge. Neapolitan minestrone is soupier than other kinds of minestrone, so add much more water. (This is the kind of minestrone that non-Italians will probably be most familiar with.)

Minestrone alla pugliese: cabbage, green chicory, green beans, tomatoes, pork rind. Serve with short pasta (eg, ditali).

In Tuscany, they make a very special kind of minestrone called la ribollita: You make a 'regular' minestrone with cannellini beans, cavolo nero, savoy cabbage, potatoes, tomatoes, leek, swiss chard and pork skin (or substitute pancetta). You let that rest. Then when you are ready to eat (the next day) you reheat the soup (hence the name, which means 're-boiled' in Italian), adding some water if too thick, and then chunks of Tuscan bread. Mix and allow to rest a few minutes before serving. This may be my personal favorite version, although the genovese gives it quite a run for its money.

Minestrone on Foodista


Quadrucci in brodo


The simplest, and perhaps the best, way to use your skills for making fresh pasta and broth at home is to serve a warming bowl of pastina in brodo. It makes a wonderfully light but savory primo piatto, especially apt when you plan on a substantial (but not too assertive) second course. The term pastina refers to various sorts of tiny pasta shapes used for soups. You can, of course, buy soup pasta in the store, but making your own fresh egg pasta brings this simple dish to another level. There are any number of fresh pastas that will do nicely for soup--Angelina made her own tagliolini cut into short lengths--but I particularly like the pasta called quadrucci.

Quadrucci are basically tagliatelle cut crosswise into little squares (hence the name...) You use the larger cutting blades on your mixer or pasta 'machine', the ones that look like this:


Roll out the pasta very thin, until it is practically translucent. It will look like this as it falls from the pasta maker:


You now have some fine tagliatelle (and why not make some extra for another time?) Line them up and cut them with a knife into little squares:


Keep going until you have as many as you like (remembering the rule of thumb: usual one egg per 100g/1 cup of pasta per person), separate them by tossing them gently, flouring them lightly so they don't stick to each other or to your working surface, and allow them to dry:


You are now ready to cook your quadrucci. Being so thin, they will cook very quickly, so you can simply drop them directly into your simmering broth. (Make sure to shake off any excess flour that might cling to them so as not to cloud the broth.) The quadrucci should take anywhere from 30 seconds (if they are very fresh) up to a minute or two, but no more. Add some chopped parsley if you like (it adds some color and subtle flavor) and serve immediately, with grated cheese on the side if those who want it.

NOTE: The term quadrucci is also used to describe a different egg pasta, also served in broth. It is a very rather square piece of pasta, with a parsley leaf in the middle that has been pressed between two thin sheets of pasta. It produces a beautiful effect for a special occasion. A fellow Foodbuzz members has blogged about it here. The kind of quadrucci described in this post, on the other hand, is for everyday eating.

While I associate this dish in my mind with the Emilia-Romagna region, I can't say for a fact that quadrucci originated there. And these days you can find dishes with quadrucci, not just in soup but also in various forms of pastasciutta, in a number of regions. It is available commercially in Italy but I have not seen them elsewhere. But being fairly easy to make, that should be no problem at all.

Thursday, September 17, 2009

Pasta e ceci


There's nothing so satisfying yet so quick and simple than the combination of pasta and some sort of legume--beans, peas or, in this case, ceci (chickpeas). And, as you probably know, the combination makes for a complete protein with plenty of fiber and no cholesterol. This kind of thing is a stand by weekday dinner in our house, especially in the cooler months.

Saute a slightly rushed garlic clove in olive oil, a sprig of rosemary--and if you want, a bit of chopped pancetta, red pepper and/or parsley. (Each of these adds another layer of flavor.) When the aroma of the garlic and rosemary begins wafting about, add some crushed tomato (the amount will depend on how 'red' you want the dish) and simmer for a few minutes. Add a can of ceci, well drained and rinsed, and allow them to insaporire (absorb the flavors of the tomato and aromatics) for 5 minutes or so. Then add water or broth to cover the ceci, simmer for another 5 minutes. To thicken the soup, either crush some of the chickpeas against the side of the pot or, for a more refined effect, scoop up about a third of them and pass them through a food mill back into the pot. They
will 'melt' into the liquid and thicken the soup. Then add slightly underdone pasta. I usually use ditalini (also known as tubetti) but other small 'soup' pastas will also do fine (see below). Simmer for a minute or two more. When the pasta is cooked al dente, turn off the heat (adding a bit more water if needed) and cover the pot and allow it to 'rest' for 3-5 minutes. Serve with a drizzle of olive oil or a good grinding of black pepper--or both. Some folks like to add grated cheese on top.

NOTES: You can use any type of pasta that suits your own taste, but to my mind short, stubby (but not tiny) pasta shapes work best. Ditalini or conchiglette (small shells) come to mind. Typical with all kinds of pasta and bean combinations is to use bits and pieces of different leftover pastas that have been broken up to a more or less uniform size. (I put the pasta in a bag and bang it with a meat pounder or the back of a heavy skillet.) Broken pieces of linguine or spaghetti will also do fine. For a more elegant dish, a pasta all'uovo like maltagliati would be nice. How much pasta should you use? I would suggest using either a 1:2 or 1:1 pasta to chickpeas ratio by weight, depending on the effect you want.

Of course, the dish will be even better if you cooked the ceci yourself. This will require quite a bit more time, however, as they need to soak for a long time--a full 24 hours--and then require a simmering of several hours. To be honest, I rarely bother as I find the somewhat subtle difference in taste does not justify the extra time and effort.

Pasta e ceci can be served very thick, more a pasta dish than a soup, or as a true soup. Just adjust the amount of water you use and, as mentioned, the ratio of pasta to chickpeas. Remember that the pasta will continue to absorb water as it cooks and even during the final resting, so calculate accordingly. But no need to worry too much, you can always just add a bit more water just before serving to 'loosen' the dish if it's thickened too much--in which case it is best to reheat it quickly before serving.
But even as a soup, the dish should not have a thin or brothy quality--the pureed ceci should provide a nice liaison.

For a more 'refined' version of this dish, use only a bit of tomato and omit the red pepper altogether, and after you've let the chickpeas simmer a bit to insaporire, remove about half and process or blend them with water to form a cream. Add that back into the pot, then add water to thin the whole to a smooth creamy soupy consistency. Boil broken up pappardelle, maltagliati, tagliatelle or, popular in Campanian cooking, laganelle, separately, then add to the soup for a few minutes for the flavors to meld. Add more water if need be to produce a smooth creamy result.

The dish can also be made entirely in bianco--without any tomato--and it is also very good that way. There is a closely related Neapolitan version of this dish called lampo e tuono (thunder and lightning--a humorous reference to the effect of the chickpeas) that I will blog about some day soon.

Pasta E Ceci on Foodista

Saturday, September 5, 2009

Quick Note: Gazpacho «mejicano»


Gazpacho is such a wonderful invention: salad in liquid form! I love it, but I have an aversion to the taste of raw peppers, in particular raw green peppers, which is one of the standard ingredients in gazpacho andaluz. So I decided to invent my own variation of gazpacho.

There are tons of recipes on the web, but the one I like best is one that was contributed by a member of the Gnocchi ai funghi Recipe Exchange Club: it calls for 5 very ripe tomatoes, 1 peeled cucumber, a garlic clove, 70 g of white bread (crusts removed), 15ml of sherry vinegar, 50ml of olive oil and 125ml of cold water (add more water to thin out the gazpacho to your taste) and salt to taste. You cut up the vegetables and add them, along with the other ingredients, to a blender and blend until perfectly smooth. Taste it to see if it needs more salt, or a bit more vinegar or (if the vinegar is too strong for your taste) some more oil. Chill for 2-3 hours and serve. In Andalucía, they garnish their gazpacho with finely chopped hard boiled egg and croutons. Here's a photo of the classic version (sans garnish):


That's the classic recipe. My "Mexican" variation is easy: instead of the green pepper, use a whole jalapeño, and, instead of egg and bread croutons, garnish with avocado slices and, if you like, some cilantro leaves and some chopped white onion. Voilà!

NOTE: The original recipe calls for peeling and seeding the tomatoes before they go into the blender. But if your blender is powerful enough, I find that this bit of work is not necessary. If you want a less picante version, you can seed the jalapeño before adding it to the blender.

Sunday, June 28, 2009

Minestra di riso e cicoria

Chicory (cicoria) is one of my very favorite greens. It brings back memories of Angelina for whom cicoria and escarole were almost daily staples. Maybe that's why she lived well into her 90s...

The recipe is very fast, very simple and very healthy. (If you omit the cheese at the end, it's entirely vegan.) You cut up the chicory (or just the green parts--see below) into one inch pieces, thrown it into some well salted boiling water and cook for about 5 minutes or so. You then transfer the chicory (use a slotted spoon, as you'll need the "broth") into a pan in which you will have sauteed some garlic in olive oil. Let the chicory insaporire--absorb the flavors of the seasoned oil--for a minute or two, then add some of the chicory 'broth' until you have the quantity of soup you like. Add rice and allow to simmer until the rice and chicory are tender. (If you have some cooked rice on hand, just add it at the very end, as when I made this soup, using some leftover white rice from a Chinese restaurant). Serve in deep soup plates and top with pecorino cheese, freshly ground pepper and un filo d'olio--a drizzle of olive oil.

Variations: You can add potatoes in addition to, or instead of, the rice. You can also substitute soup pasta for the rice. For a softer taste, use chopped onion instead of (or in addition to) the garlic. You can add hot red pepper in addition to garlic to the oil as well if you want a little 'heat'. And you can use butter instead of (or in addition to) the olive oil. For a richer dish, use chicken broth instead of the chicory broth. If you omit the rice, etc. altogether, and instead add some beaten egg mixed pecorino, you'll have another favorite soup, cicoria cacio e uova.

Other ways to make chicory: Chicory is a versatile vegetable. Without the addition of broth, the recipe above becomes a great side dish. It goes very well with beans, as well. The white 'heart' of the cicoria is also a wonderful salad green, either as part of a mixed salad or--my favorite--as a substitute for punterelle, a special kind of chicory grown around Rome that is dressed with a very particular salsina made as follows: in a mortar and pestle, crush garlic, anchovy fillets and a bit of salt together until they make a paste, then add olive oil, a bit of vinegar and lots of freshly ground pepper. (NB: This is the only instance that I know of in Italian cooking that a salad dressing is made separately from the salad--the exception that proves the rule, I guess.) Served with some crusty bread and cold white wine, this salad is so satisfying, it's a meal in itself!