Saturday, October 30, 2010

Chicons au gratin


There's something about chilly weather that demands a nice gratin—that piping-hot, cheesy, gooey goodness is just the thing to warm your body and soul on a mid-Autumn evening. And here is one that is sure to satisfy: another Belgian classic, chicons au gratin, also known in France as endives au gratin. It consists of Belgian endives, braised in butter, wrapped in ham slices and covered with a rich mornay sauce before getting browned in the oven. (I get hungry all over again thinking about it!)

Ingredients (for 4 servings)

4 medium-sized Belgian endives
30g (2-3 tablespoons) butter (plus a bit more to butter the baking pan)
Salt and pepper
500ml (2 cups) of béchamel sauce (see recipe here)
200g gruyère (or other good, meltable Swiss cheese), shredded
4 slices of best-quality cooked ham 

Directions

Begin by removing any discolored leaves from the endive and trimming the root end. Place the endives in a sauté pan with the butter and a glassful of water. Season with salt and pepper.


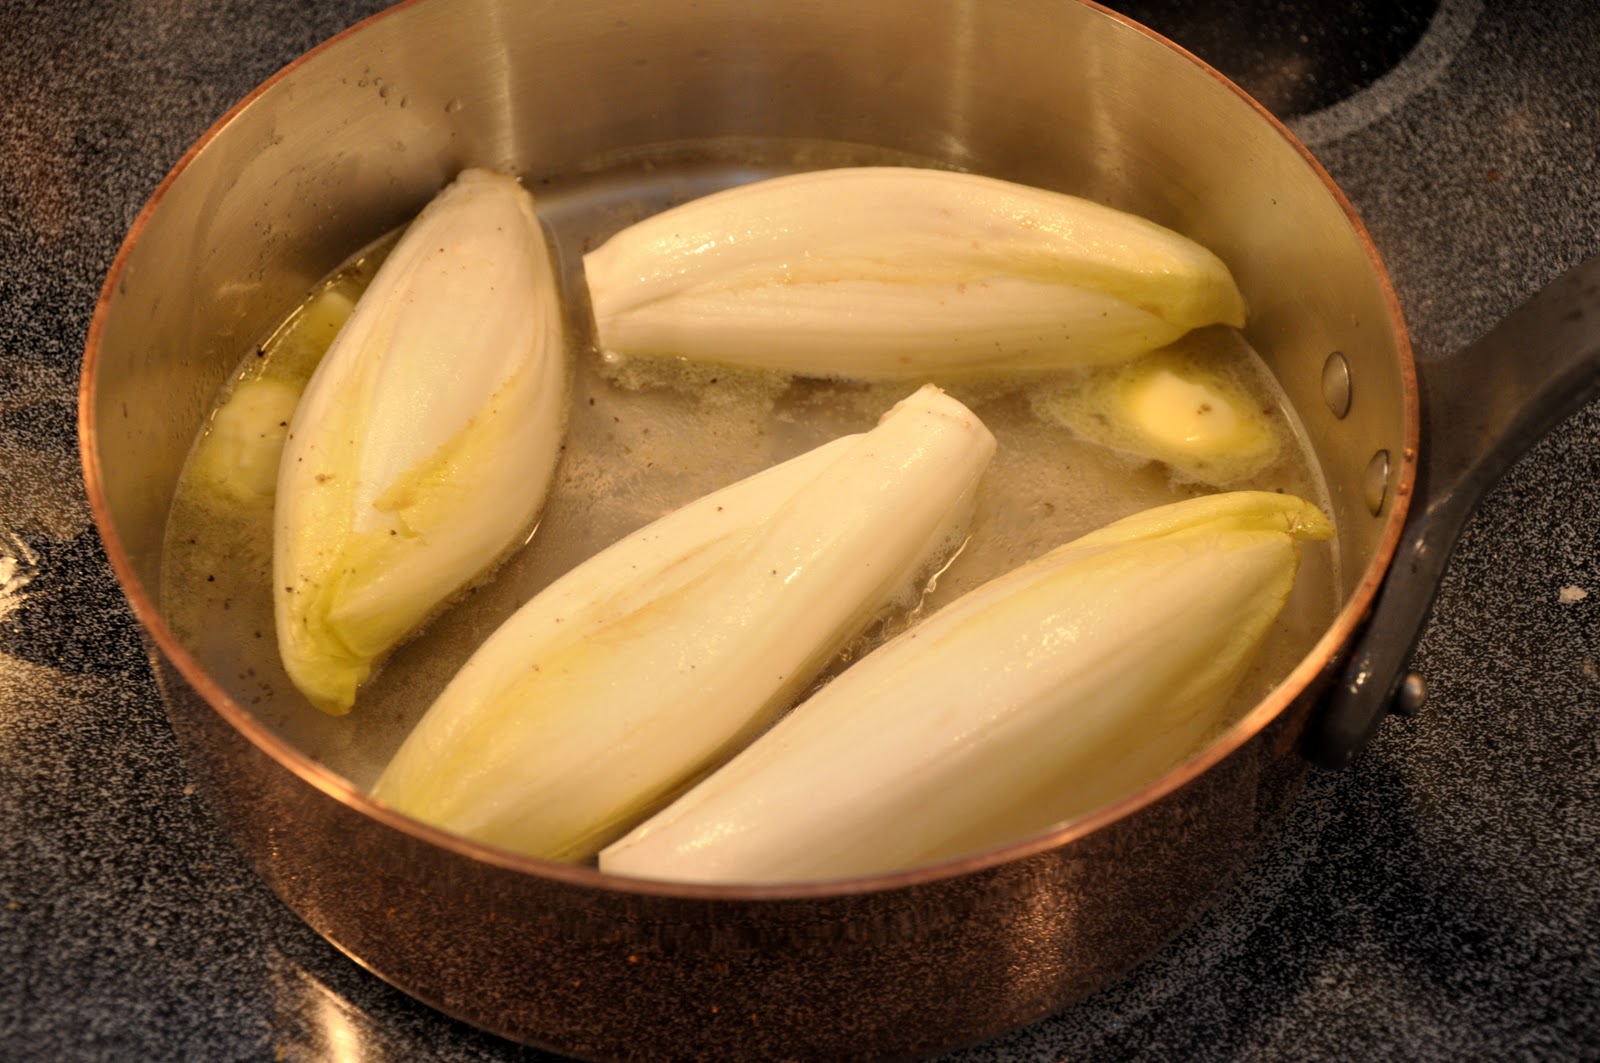
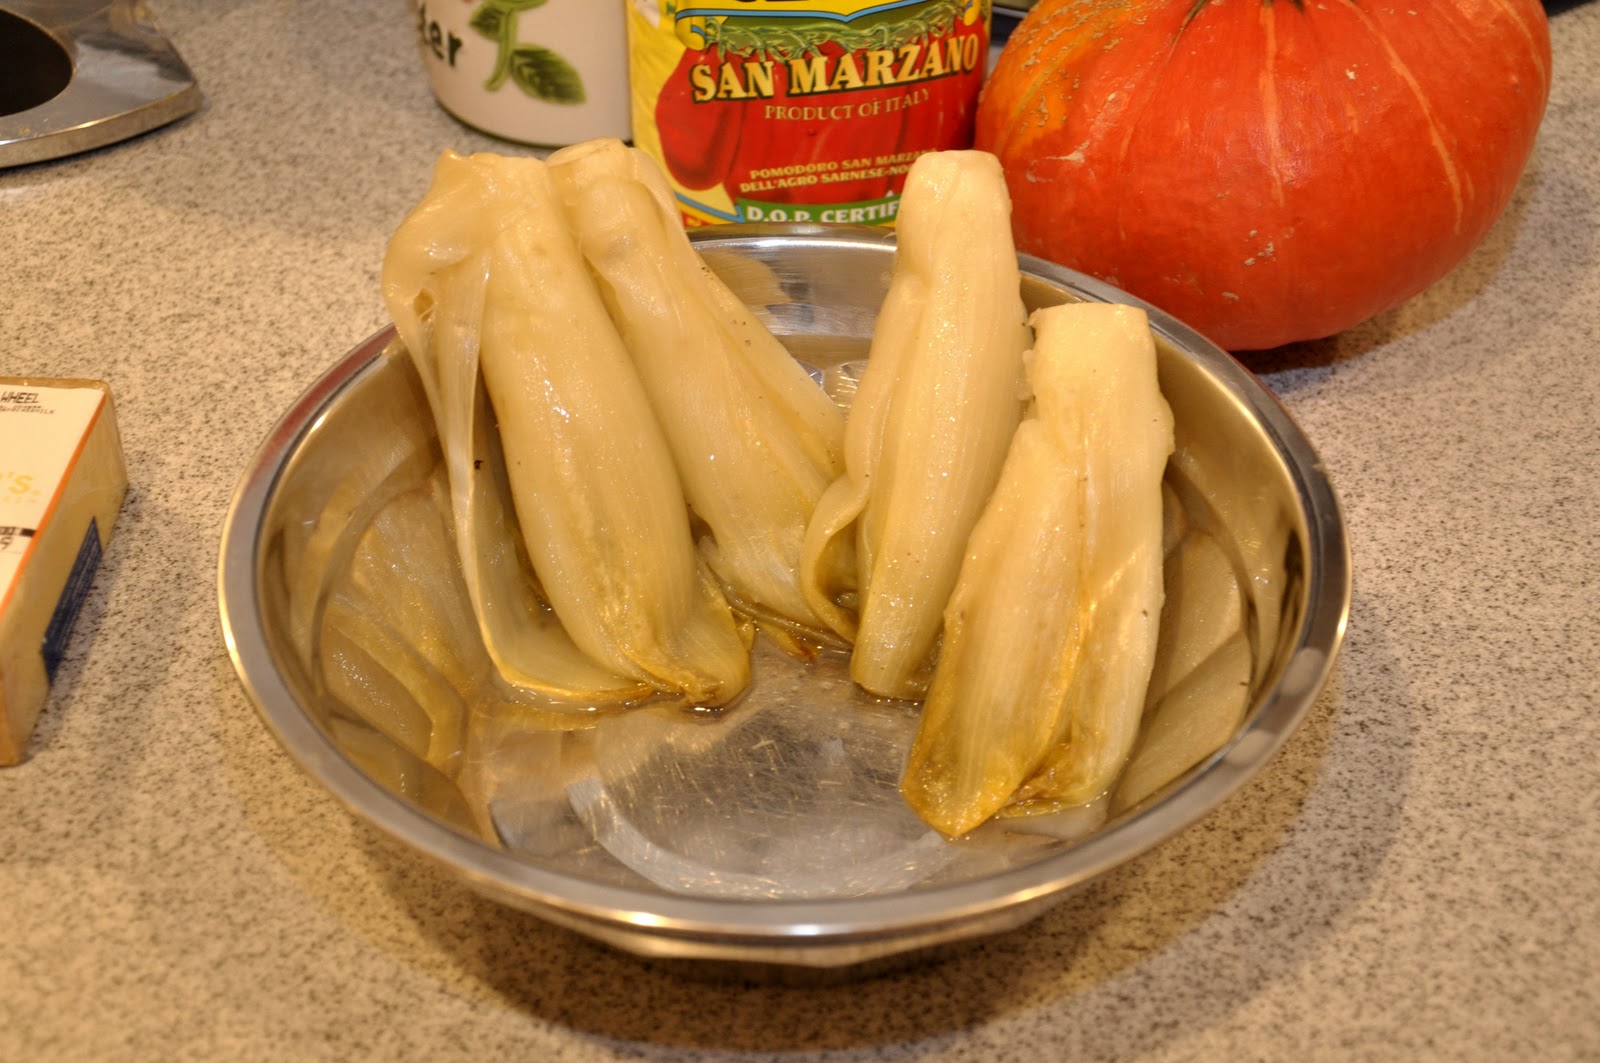
Allow the endives to simmer, covered, until they are quite soft, about 20-30 minutes. If you like, you can let them go longer, allowing them to turn a nice golden brown. Either way, drain the endives, root ends up, so that any excess water will drain off. (You may be tempted to skip this step, but don't—otherwise, you may wind up with soggy vegetables and a runny sauce!)


While your endives are braising, make your béchamel sauce in the usual way, and when it is done, add the gruyère, holding back about a third, however, for later. For extra flavor,  you can add some of any cooking liquid left over from the braising or draining of the endives. (This sort of béchamel with cheese is called a sauce mornay.)

When your endives are well drained, take them one by one, and place them on one of the ham slices, then roll the slice around the endive, covering it completely.


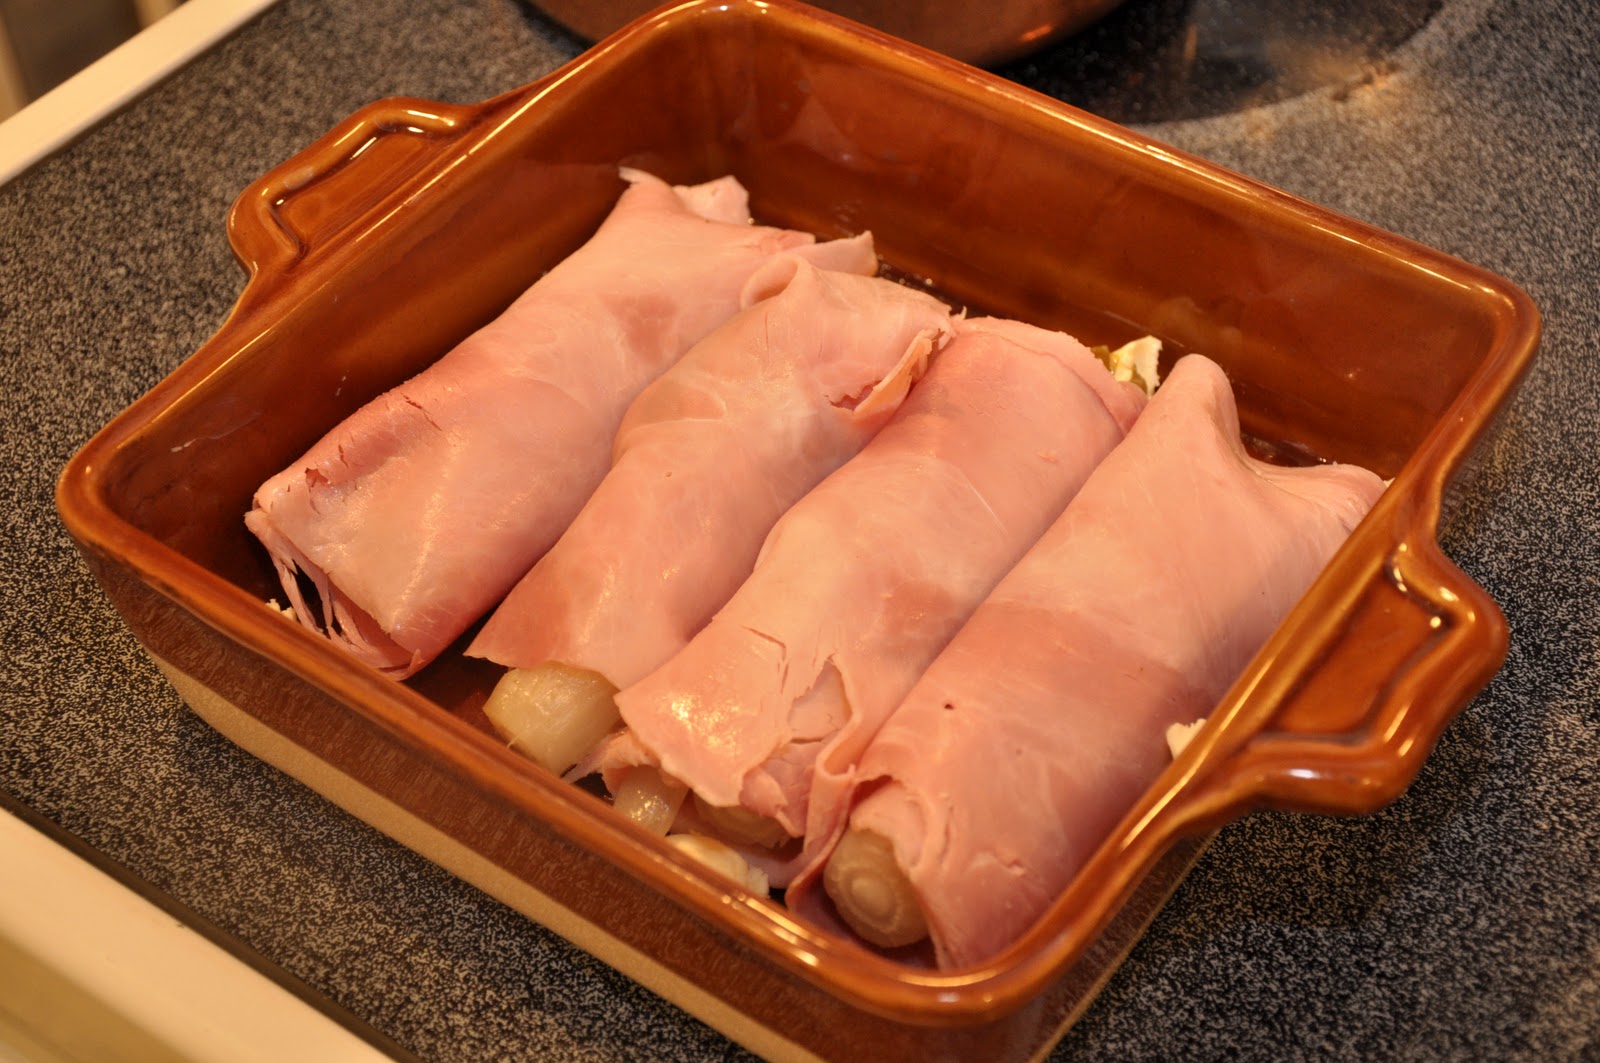
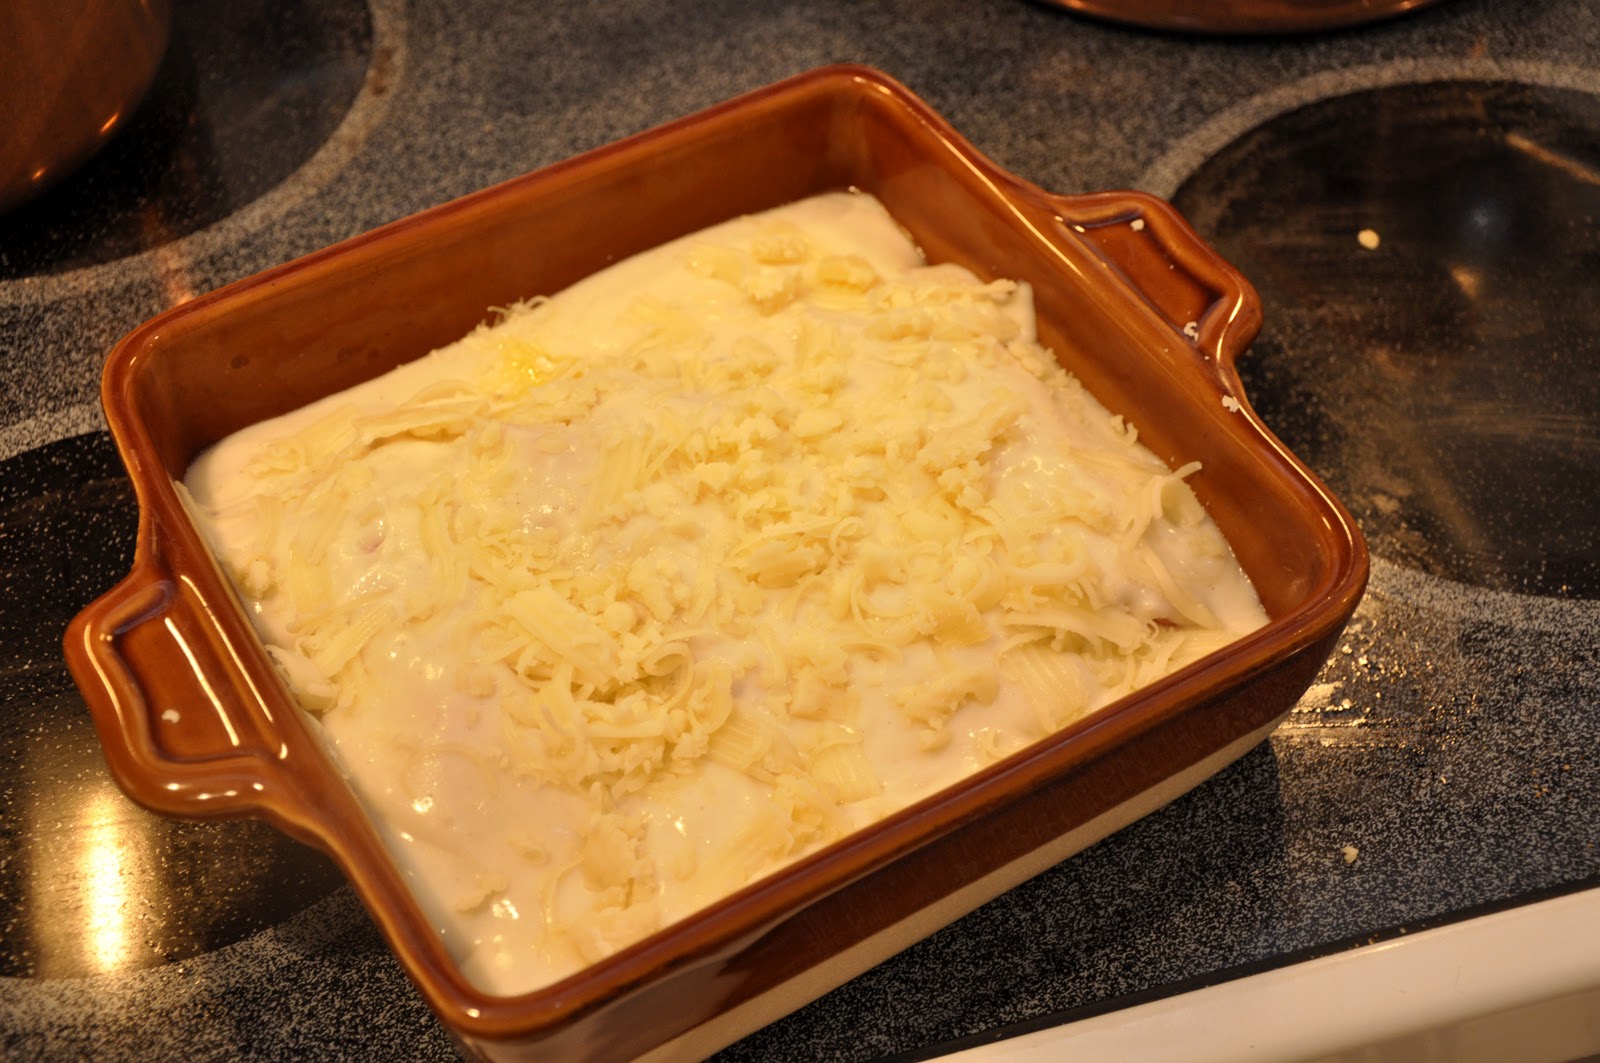
Butter a baking dish just large enough to contain your endives. Arrange them neatly in the dish, then pour over the mornay sauce. Cover the dish with the remaining cheese. Dot the top with some additional bits of butter.


Bake the dish in a hot oven (200C/400F) for about 30 minutes, or until the top is nicely browned and the sauce is bubbling hot. Let the dish cool off for a few minutes before serving.

NOTES: The success of this simple dish will rely heavily on the quality of its ingredients. Besides the endives themselves, which should be fresh, of course, and ideally free of any green leaves, you want to use the best quality ham and cheese you can afford. If you use packaged ham slices and supermarket 'Swiss cheese', you will wind up with something tasty enough but pretty pedestrian. Use real, good ham and true gruyère and you will have something very special indeed.

You can save some time by simply parboiling or, better yet, steaming the endives in lieu of braising. Many if  not most recipes call for it, in fact, and it takes only about 10-15 minutes. But I find that braising in butter makes a subtle but significant difference in taste and texture. And, not to nag, but  let me repeat: draining the endives any excess liquid is perhaps the single most important 'trick' to success, so don't forget!

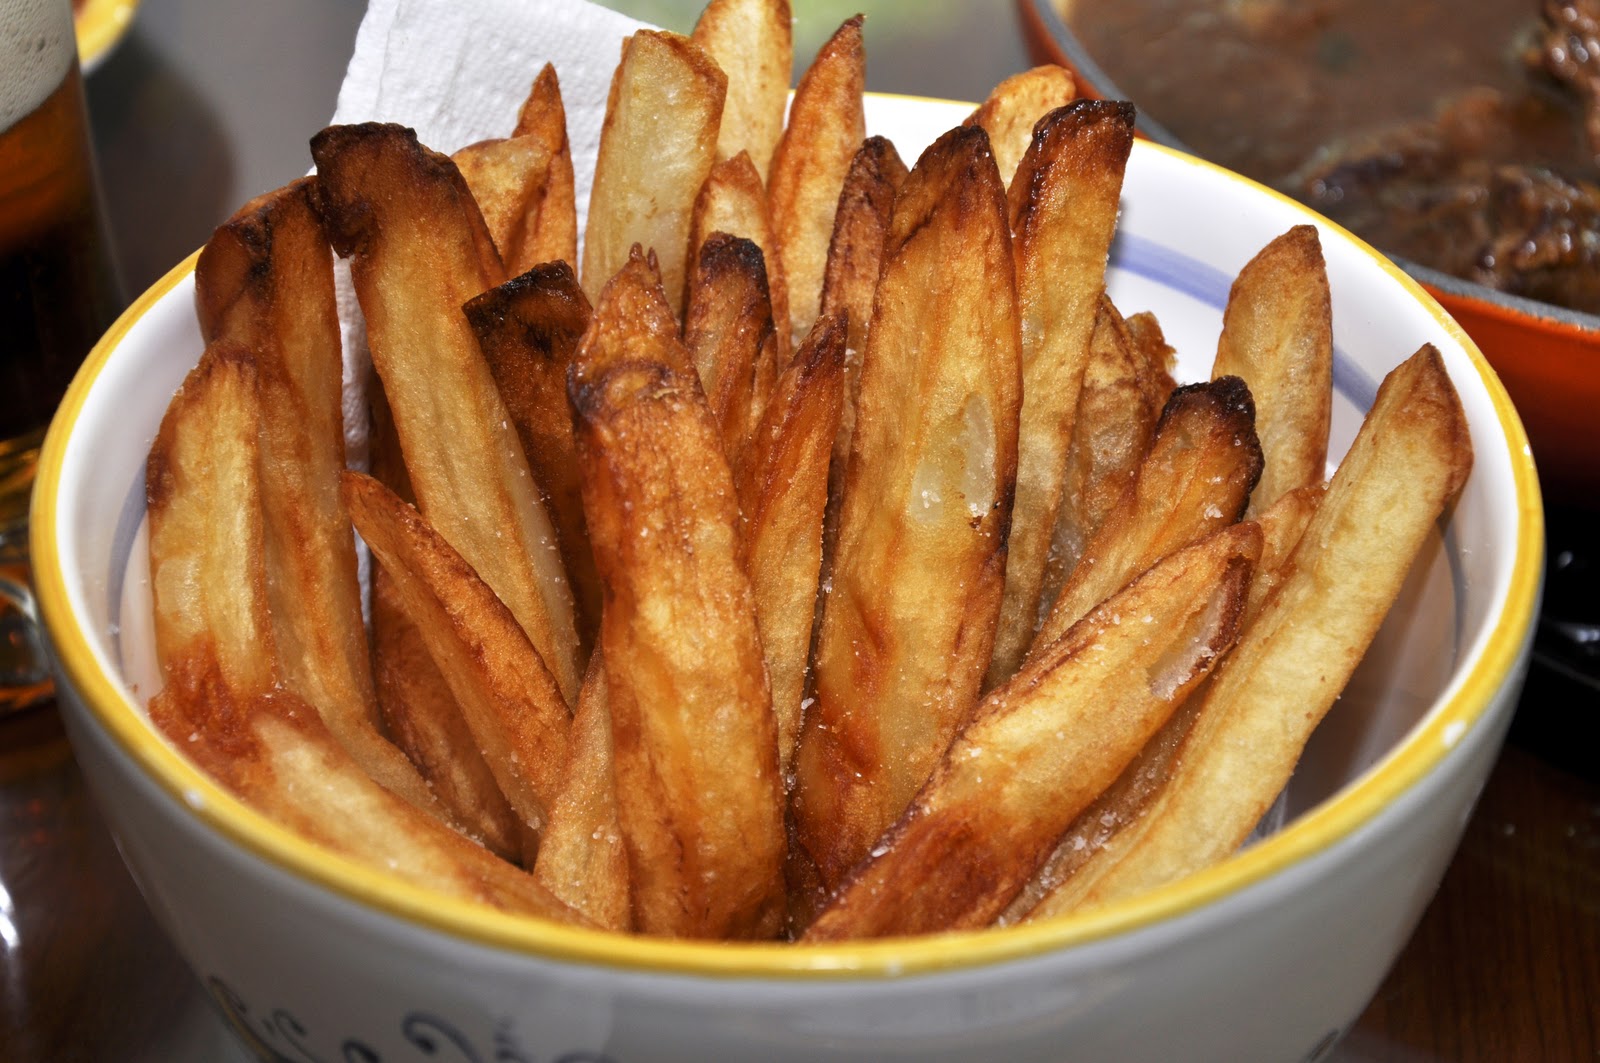
This dish can be served on its own as a hefty starter. As a main course, it is often accompanied by potatoes, being Belgian, some pommes frites would be an obvious choice, although I find they go very nicely with either mashed or even just plain steamed potatoes which are delicious dipped in that mornay sauce....

Friday, October 29, 2010

Maloreddus alla campidanese


Maloreddus are a kind of pasta typical of the island region of Sardinia. Also called gnocchetti sardi or 'little Sardinian gnocchi' after their dumpling-like shape, maloreddus are made from durum wheat flour, water, salt and—a very Sardinian touch—a pinch of ground saffron. They lend themselves to a variety of sauces but perhaps my personal favorite way to make them is alla campidanese—with an utterly simple but delicious sausage and tomato sauce that is vaguely reminiscent both of the Roman amatricana and the Neapolitan ragù.

Ingredients (for 4-6 servings)

400g (14 oz.) maloreddus

For the sauce:
200g (7 oz.) mild Italian sausage meat
Olive oil
1 garlic clove
400g (14 oz.) best-quality canned tomatoes
1 tablespoon tomato paste
1 large or 2 small bay leaves
A few fresh basil leaves (optional)
A pinch of saffron threads, ground in a mortar 
Salt and pepper to taste

To finish:
100g (3-1/2 oz.) of freshly grated pecorino cheese (preferably Sardinian)

Directions 


Remove the sausage meat from its casings and crumble the meat into a skillet with a healthy drizzle of olive oil. Allow the meat to brown lightly, breaking up the sausage meat into even smaller bits with a wooden spoon as it browns. Remove the sausage meat with a slotted spoon. 

In the fat remaining in the skillet, sauté the garlic clove, which you will have slightly crushed with the side of a knife, just until it begins to give off its aroma. Immediately add the canned tomatoes, with your hands, crushing them between your fingers as they go in. Add the rest of the sauce ingredients and let the sauce simmer until it thickens nicely, about 15-20 minutes. 

Meanwhile, boil the maloreddus in abundant, well-salted water until al dente, usually about 12 minutes. Drain and add your pasta directly into the skillet and toss it all together. Add the grated pecorino and serve immediately, with more pecorino on the side for those who want some.
 
NOTES: Maloreddus are actually fairly easy to make, certainly no harder than, say regular gnocchi. You mix your dough in the usual way, using a glassful of teipd water for 400g of flour, a pinch of salt and a pinch of ground saffron. Taking a handful of the dough at a time, roll it out as you would for potato gnocchi into 'cords' but rather thinner, about the circumference of a pencil. Cut the rope at 2cm (1/2-inch) intervals and then roll the pieces using the back of your thumb, against the prongs of a fork or a gnocchi board, to create a small, ridge-backed shell-like gnocco. If you use ground saffron, your maloreddus will have a lovely golden color almost like egg pasta. But you can omit the saffron if you prefer, which is how most factory maloreddus is made.

If you can't find maloreddus in the store and don't have the time or inclination to make your own, the same sauce is perfectly delicious with more conventional stubby pastas like pennette.
 

Sunday, October 24, 2010

Tortelli di zucca


One of the nicest parts of this, my favorite season, is the arrival of wonderful Fall produce: mushrooms, endive, chestnuts, cabbage, radicchio… but for me no other vegetable is as typical of the season as hard squashes. They are sometimes called 'winter squashes' but they start appearing in the early Autumn and are a fixture of our October table.

Italy does not have the variety of winter squashes that we have here in North America—squashes are a New World plant, after all—but Italy may have the most delicious of them all, the wonderful zucca barucca. As I've mentioned before, the zucca looks for all the world like your average pumpkin, but its flesh is much less stringy and has a much more intense, sweet flavor than any pumpkin I've had on this side of the pond. Most stateside recipes call for butternut squash as a substitute, but that, too, lacks the intensity of zucca. For risotto, I usually find that baby sweet potatoes have a remarkably similar taste to zucca, even if their texture is a bit grainier. And today I tried another gambit—those smaller 'pie' pumpkins—for making one of the most popular stuffed pastas, tortelli di zucca, or 'pumpkin ravioli'.

You make tortelli di zucca just like ravioli (although they can vary in shape—see below) but the stuffing changes the whole character of the dish. Here is how you make the stuffing:


Ingredients (for 4 servings):


One 'pie' pumpkin or butternut squash, about 500g (or 1 lb.)
 
50-100g (2-4 oz.) amaretti cookies, finely crumbled 
50-100g (2-4 oz.) grated parmesan cheese 
50-100g (2-4 oz.)  mostarda (pears and apples only) 
Nutmeg, salt and pepper, q.b. 
Breadcrumbs (if needed)

Directions:


Cut open your pie pumpkin, cut it into large wedges and clean out the seeds and fibers with a spoon. Roast your pumpkin wedges in a moderate oven (180C, 350F) for about 45 minutes, or until the flesh is quite tender when pricked with a fork. (It's fine if the pumpkin browns a bit around the edges but you do not want a lot of caramelization.) Let the pumpkin cool, turning it over to allow any excess liquid to drain out. (If the pumpkin pieces seem watery still, you can wrap them in cheesecloth and squeeze them dry.) Scrape out the cooked flesh, leaving the skin behind, into a food processor.


Now add the amaretti, parmesan and mostarda, and process them until you have a perfectly smooth, stiff paste. You will note that the measurements are left pretty loose, and you will find that kind of variety among the many recipes for this dish. If you don't have real Italian zucca on hand, I would tend to go for more rather than less to make up for the blander taste of the vegetable. Do make sure each of these three main flavoring ingredients are added in balanced amounts. The thing that makes this filling unique is its harmonious combination of contrasting flavors: the sweet-bitterness of the amaretti, the savoriness of the cheese and spiciness of the mostarda, which marry so well with the natural sweetness of the squash. Season the mixture generously with freshly grated nutmeg, fresh ground pepper and salt.


Taste and adjust for seasoning. If the stuffing mixture is a bit soft or wet, mix in some breadcrumbs, a bit at a time, until the stuffing is stiff and rather dry.


*                *                 *

Now it's time to make your egg pasta, in the usual manner. (See this post on making fresh pasta.) Roll the pasta out rather thinly (setting 6—or even thinner if you want—on a pasta roller) since you will be folding the pasta into a double thickness, into long, rather slender sheets.  
Place heaping teaspoonfuls of the stuffing about 5 cm (2 in.) apart along the length of your pasta sheet, just off center down the middle of the sheet.


Fold the longer half of the sheet over the stuffing, pressing down with your fingers all around the stuffing to seal the top and bottom layers of pasta together. With a serrated pasta cutter (if you have one, otherwise it's fine to simply use a knife) cut out your tortelli along the three unfolded sides:


For the final touch, you can ensure a tight seal while making your tortelli ever so pretty by pressing down the edges with the prongs of a fork like so:

 
You should cook your tortelli for a good 5-7 minutes, depending on the thickeness of the dough. They take a bit longer than fresh pasta usually does, because of the double thickness of the pasta and the filling. While the tortelli are cooking, gently melt lots of butter in a small saucepan, adding a sprig of fresh sage if you like to steep along with the butter. (I have read that the sage is not original to the dish, but I like it.) Serve immediately, topped with the melted butter and—if you like—more grated parmesan on top.


NOTES: This dish comes from the region of Emilia-Romagna, and more specifically from  the city of Mantova, often called "Mantua" in English. For this reason, they are also sometimes called tortelli mantovani. But similar versions are made in the near-by towns of Parma, Reggio-Emilia, Piacenza and Cremona. In Ferrara they also make this stuffing but without the amaretti cookies. Speaking of which, it can be hard to find amaretti, which are a kind of almond macaroon—not the ubiquitous almond biscotti. If you can't find amaretti, then substitute an equal amount by weight of unflavored breadcrumbs, with a few drops of almond extract if you like.


And then there is the mostarda. Don't let the name fool you: it is not mustard at all, but a chutney-like relish typical of the cuisine of Emilia-Romagna. It is perhaps best known as an accompaniment to bollito misto, but it makes its appearance here as a flavoring. Mostarda has a unique flavor, both sweet and spicy. It is basically fruits that are candied in sugar syrup spiced with (hence the name) mustard seeds. There are various types of mostarda made in the region, but the most famous, by far, is mostarda di Cremona. If you're feeling ambitious, you can actually make it at home. (Here's the recipe.) You can also buy it in many of the finer Italian specialty shops—if they don't have it, give them a proper scolding for having neglected one of the most typical products in Italian cookery. Or you can buy it online. Mostarda di cremona contains a variety of fruits—pears, quinces, cherries, apricots, peaches, figs, but for this dish you really want another mostarda—the one from Mantova, which is made with pears or apples only. So if not making your own mostarda, just pick out the pears from the jar and use them.


Now if you can't find mostarda and don't feel up to making it yourself, you can omit it, as  you will find in most recipes for 'pumpkin ravioli'. But I would urge you to try to find it—it lends a very special, unusual taste to the dish.


You can also dress your tortelli di zucca, if you like, with a more elaborate sauce. Personally I don't think that the pumpkin stuffing goes particularly well with tomato-based sauces, but some wild mushrooms sautéed in butter with pancetta, for example, would be delightful.


The term 'tortelli' is one of the most confusing in the lexicon of pasta shapes. It can be another word for ravioli, but can also be rounded, or rounded and twisted as for a larger version of tortellini. And you will sometimes find tortelli di zucca in these shapes as well. And in Ferrara, they make cappellacci di zucca, made with a very similar stuffing (without the amaretti, as mentioned above). The pasta is cut into squares but then the two corners are joined to form a little 'hat' (hence the name, which comes from cappello, Italian for hat, since the shape was said to resemble the straw hats that local peasants used to wear.


The pie pumpkins, by the way, worked very well for this dish. True, they did not have the intensity of zucca, but their texture was perfect and, with all the added flavorings, the stuffing was perfectly delicious.  And if you have some leftover stuffing but don't feel like making another batch of pasta, you can use the stuffing to make a fine version of risotto alla zucca


By the way, don't throw away those pumpkin seeds! They are wonderful roasted in a slow oven with just a few drops of oil or melted butter until lightly brown (about 30-45 minutes) and seasoned with some sea salt. Or, for something a bit fancier, try out these two wonderful recipes by my fellow foodie, "Cookin' Canuck".

Rouxbe Cooking School


 Dear readers,


Recipes are great things, but without the right cooking skills you won't get the most out of even the best recipes. That's why I try to spend time in the posts here on Memorie di Angelina describing technique to you in some considerable detail—to try to recreate for you the actual experience of cooking the dish.

But words can only take you so far, and those descriptions will be that much more meaningful if you already have a good technical grounding.And that's where the Rouxbe Cooking School comes in. You may have noticed from time to time an embedded video on this blog from the Rouxbe Cooking School, because there is nothing like a (moving) picture to illustrate a cooking technique. 


Today I wanted to take a moment to mention Rouxbe specifically. As regular readers will know, I generally don't do promotions of any kind on this site, but once in a great while something truly unique comes along. And Rouxbe truly is unique. As far as I know, it is the only place you can go online to access a complete culinary school curriculum, available to you any time you want.

I've agreed to participate in Rouxbe's associate program because—being a long-time Rouxbe member myself—I know that this is an incredibly useful resource for anyone who is serious about cooking. There's a lot to learn here—everything from basic knife skills, to how to make pasta from scratch, to how to cook pasta properly, to the basics of salad making, to how to sauté, braise, deep fry, poach... just about every basic cooking skill is here, clearly and carefully explained in beautifully filmed videos. I have to admit, even after many years of cooking, I still learn something myself whenever I stop in and check out a lesson. And each lesson is linked to an online quiz to test your knowledge, as well as a variety of video recipes so you can practice your skills right away.


As an associate, I can offer embedded instructional videos here on Memorie di Angelina—but more than that, as a reader of this blog, you can access a 14-day free pass which gives you full access to the entire Rouxbe site so you can tour around and see if you want to join up. Just go to their site by clicking on the images above or below and you can redeem your gift membership.


Cheers,

Frank

PS: For some more background, here's an introduction to the school from Rouxbe's founder, Joe Girard:


Saturday, October 16, 2010

Catfish «en meurette»


The term «en meurette» refers to a dish that has been braised in a particularly delicious red wine sauce from the Burgundy region of France. Probably the best known of these dishes is oeufs en meurette, made from poached eggs. But even tastier, in my opinion, is fish made this way. The firm-fleshed monkfish (lotte in French) lends itself to braising and is wonderful en meurette. Carp and other firm-fleshed river fish are typical, so in the US a natural choice would be the humble catfish. It may be suprising to pair catfish with a 'classy' French sauce but I assure you, gentle reader, that the pairing results in some fine eating.


Begin by pouring a bottle of red wine into a saucepan and adding a sliced carrot, a sliced onion, a crushed garlic clove, a chopped shallot and some fresh herbs—some parsley, a spring of thyme and a bay leaf—then season with a pinch of salt and some whole peppercorns. Simmer briskly until the wine is reduced by half. Strain the reduction through a sieve into another saucepan, then thin out the sauce with some good stock. Bring back to a simmer and then thicken the sauce with some beurre manié, about two tablespoons of flour and butter rubbed together to make a paste. You can add some more if you feel the sauce is too thin, but remember that the sauce will reduce further during the next step and you only want to give the sauce to be nice and silky, not at all stodgy.


While your wine is reducing, make the garnish for the fish by sautéing in butter or oil a goodly chunk of slab bacon or pancetta, cut into lardons, until well browned but not crisp. Set aside and, in the same skillet, sauté some button mushrooms that you have cut into quarters until they, too, are nicely softened and browned.


Now assemble your dish: butter a braiser just large enough to hold all the ingredients and lay out your catfish fillets—one large fillet is enough for two people—cut into serving pieces. Then arrange the mushrooms and lardons on top and around the fish pieces. Pour over your red wine sauce, enough to just cover them. Then bring the dish to a simmer and let it cook gently until the fish is done, about 10-15 minutes depending on the size of the pieces (and the fish—monkfish should braise for much longer). If you like, just before serving you can sprinkle the fish with some chopped parsley or, even better, a persillade—parsley and garlic finely chopped together.


NOTES: As usual, I've been vague about the measurements, and they really don't matter all that much. You can really use as much or as little garnish as you like—many recipes omit the garnish altogether, but I find that it makes the dish more interesting and tasty. The same goes for the sauce itself, but most recipes for 4-6 people will, as indicated above, call for an entire bottle of red wine.


The choice of wine will, of course, strongly influence the character of the dish. This being a dish from Burgundy, the logical choice would be a red from that region, but last night I used a Spanish tempranillo with lovely results. Some recipes (including those given in the Larousse Gastronomique) also call for adding a splash of Burgundy marc.


Not all recipes have you make the wine reduction separately as indicated in this recipe—you can also add the wine and aromatics to the main ingredient and let it reduce as they simmer together, thickening the dish at the very end. With this method, the aromatics are left in the dish. But I find that making the sauce separately gives you more control over the result and, since I like to use a bacon and mushroom garnish, I like to take out the aromatics after they've given up their flavor into the dish.


As mentioned at the start, you can use the same red wine sauce to nap poached eggs or, for a more rustic effect, poach eggs directly in the sauce. Other ingredients can be made en meurette, including mild meats like calf's brains, chicken, rabbit or veal, in which case you usually lightly brown the meat before simmering it with the sauce and any garnish you might like.


Dishes en meurette are often served with fried croutons. I find that they also go well with steamed baby potatoes or buttered noodles.

Monday, October 11, 2010

Carbonnade à la flamande


Today is Columbus Day so, of course, I decided I would make a Belgian meal… ;) One of my favorite Belgian dishes is carbonnade, a wonderfully deep-flavored dish of beef braised in onions and beer. It is simple but satisfying, just the kind of cooking and eating that I like best, especially as the temperatures cool.

Start by cutting up some good stewing beef—I prefer chuck—into serving pieces, either cubes or (as the older recipes call for) small, thick slices. Brown each piece well in lard (or butter) and set aside. In the same skillet, sauté lots of onions, about half as much as you have beef by weight (or even more if you like onions) until they have softened.


Now layer a Dutch oven or braiser with half the beef, then half the onions. Season well with salt and pepper. Repeat with the rest of the beef and onions. Then take a ladleful of good, strong beef stock and deglaze the skillet in which you browned the beef and onions, and pour it into the pot. Top off with some good beer or ale—preferably Belgian ale, of course—enough to cover the beef completely. Nestle a bouquet garni, made with a bay leaf, a spring of fresh thyme and a sprig of parsley, among the beef pieces. Most recipes also call for adding a pinch of brown sugar at this point, just enough to balance some of the bitterness of the beer but not enough to add any actual sweetness to the dish.


Bring the pot to a simmer on top of the stove, cover, and place in a moderate oven (180°C, 350°F) to braise for 2-1/2 or 3 hours, until the beef is fork tender. (The dish can be made ahead up to this point.)


A few minutes before serving, remove the pot from the oven and, keeping at a slow simmer on top of the stove, thicken the sauce with a slurry of corn starch and water, together with just a few drops of vinegar, if you like. (Again, not too much—just enough to add a tiny bit of 'zip' but not so much that you can actually taste any sourness.) Let the dish simmer for a few minutes and serve hot, accompanied by pommes frites, mashed or steamed potatoes or buttered noodles.


NOTES: As with many classic dishes, you will find many variations of carbonnade à la flamande. Not all recipes calls for the final fillip of vinegar, some call for a dollop of mustard. Some versions will have you add some lardons at the start, some add mushrooms—at which point the dish begins to resemble a boeuf bourguignon made with beer rather than red wine. The herbs and spices that go into the bouquet garni can vary; personally, I like adding a few cloves, while some recipes call for some allspice or nutmeg. And some recipes thicken the dish not with cornstarch but a beurre manié or—believe it or not—with some gingerbread (pain d'épices) that is either crumbled or placed on top of the beef to braise along with it. Of course, as the dish cooks the gingerbread breaks up and melts into the braising liquid, providing a nice liaison and an old-fashioned flavor.


One crucial choice will be, of course, the beer or ale, which can really transform the character of the dish. Needless to say, a good Belgian ale, perhaps of the Lambic or Trappist variety, would really be the best choice. But any beer or ale with good character, particularly amber ales, will work. (So will your average lager in a pinch, but the dish will inevitably lack some 'oomph'.) If you want a really interesting taste, you can do what the Irish do and use stout, I which case (if you add some carrots along with the onions) you will be making a typical Irish dish called Beef in Guinness.


I am not sure of the origins of carbonnadethe word actually refers to cooking over coals—but it is surely very, very old. Some of the older variations that call for spices like nutmeg, the use of bread as a thickener and the sweet-and-sour flavoring (I suspect the vinegar was probably originally verjuice) are all quite typical of Medieval European cuisine.

Pommes frites


Deep fried potatoes, which in the US usually go by the misnomer "French fries", have suffered from association with fast food and the modern aversion to deep fried foods in general, but a well-made batch of pommes frites is one of the tastiest ways to prepare potatoes. And while they will never qualify as health food, if made properly and eaten in moderation, they fit perfectly well in a well-balanced diet.


Fried potatoes are, quite simply, just that: potatoes deep fried in fat. But as simple as the recipe is, there are a few 'tricks' to ensure that they come out at their best. Begin by peeling and cutting your potatoes into sticks. At home, it is easier to cut them fairly thick (as pictured) but if you have the patience, pencil-thin fries are quite delicious. As you go, immerse the pieces in bowl of cold water so they won't discolor.


I have already discussed the most important tips for successful frying, and the same rules go for fried potatoes. But there are a few extra tips to keep in mind when frying potatoes. You see, potatoes are both hard and starchy, two qualities that you will need to account for as you fry them. Since they are hard, they need to cook for some time to soften, but because they are starchy, they brown rapidly in hot oil. What's the solution? Frying the potato in two goes, or 'double frying': first in moderately hot oil (350°F or 180°C), for 3-5 minutes (depending on their thickness) until just tender, then for another 3-4 minutes in really hot oil (375°F, 190°C) to brown them up nicely. If done right, this technique results in fries that are nice and soft on the inside and brown and crispy on the outside.


The other 'tricks' aim to avoid greasiness. Make sure to fry your potato pieces in small batches, with plenty of room for the oil to encase each piece and seal it. This also helps maintains a more constant temperature—as with any deep frying, you want to avoid allowing the temperature of the oil to drop too much or the oil will be absorbed more readily into the food you are frying. After each round of frying, pat the potato pieces dry of any excess oil, gingerly so you don't crush them—or burn your fingers on the hot oil—and keep them on a grate in a warm oven while you continue frying the other batches. (The grate lets air circulate around the top and bottom, which helps keep them crisp.)


Once all your potato pieces are nicely fried to a golden brown, sprinkle them generously with salt and serve immediately. If you need to, you can hold them on a grate in a warm oven for a few minutes—but not too long—but if you do, only salt them just before serving or they may go soggy.


NOTES: Even though they are very much in vogue these days, better not to use those young yellow-fleshed, thin-skinned potatoes that you would use for a sauté, potato salad or gratin, but rather use the larger, starchy kind that you would use for mashed potatoes. The starch helps the fries to brown as they should while getting soft and creamy inside. In North America, Idaho or Russet potatoes work well, as do so called 'all purpose' potatoes. I read that Yukon Golds also have a following, although I have not tried them made this way.


You can cut potatoes either thinly or thickly. In France, thick-cut fries are called "pommes Pont-Neuf"[or simply "pommes frites", about 10 millimeters (3/8 inch), while "pommes allumettes" (matchstick potatoes) are cut about 7 millimeters (1/4 inch) thick and "pommes pailles" (potato straws) only about 3–4 millimeters (⅛ inch). The very thinnest French fries do not need the double fry technique, but cutting them that finely can be very fussy for home cooks.


The other crucial choice for this dish is the fat in which you fry the potato. Most people will use a light vegetable oil. Peanut oil works well, given its high smoking point. Lard is wonderful for deep frying—it ensures crispiness and adds flavor—and personally I like to use a combination of canola or peanut oil mixed with a bit of lard. But just make sure to use good-quality, true lard made from rendered fat back. Supermarket lard is generally hydrogenated and contains those harmful trans fats. One oil you should not use is olive oil, as it has a low smoking point, as well as rather strong flavor that is not characteristic of this dish.


And now, since a (moving) picture is worth a thousand words, you may want to check out this instructional video from our friends at the Rouxbe Online Cooking School:


As many readers will know, "French fries" are not actually French but Belgian. It seems that this misnomer began with American soldiers fighting in Belgium in the First World War. They tasted Belgian pommes frites and called them "French" since that was the official language of their Belgian army colleagues. Or perhaps they didn't realize that they weren't in France… In any event, today fried potatoes are, of course, popular all over the Western world. Made in slices rather than sticks, they become 'chips' in Britain and many other English speaking countries. In French speaking Canada they are doused with gravy and cheese curds to make the Québecois classic called poutine. And, of course, in the US they are ubiquitous, accounting for fully a quarter of the total vegetable consumption in the country, most of them, unfortunately, consumed in fast food outlets, although there has recently been a movement by fast food chains to make them healthier by using fats like canola oil that are free of trans fat. But no matter what, making and eating them at home has to be better for you and your loved ones.

Saturday, October 9, 2010

Cappelle di funghi alla griglia


Grilling need not come to an end just because the summer is over, especially if the weather is still fine, as it is this weekend where we live. Beautiful cloudless skies and mild temperatures are perfect for grilling—even better, if you ask me, than the sultry days of August and early September. And many seasonable vegetables are wonderful grilled, none more so than mushrooms. Grilled mushroom caps are a special early autumn treat. Their meaty texture and smoky flavor resembles nothing so much as a nice, juicy steak. And they're just as simple to make.


Just make a quick marinade from abundant olive oil seasoned with a finely minced garlic clove, finely chopped parsley, salt, pepper and a pinch of oregano or—if you have some—that special herb called nepitella which goes perfectly with mushrooms. Take some large mushroom caps and brush them generously with the seasoned oil, top and bottom. Then grill them over a hot fire, about 3 minutes per side, and serve on a bed of greens or—for that special Fall feeling—some radicchio leaves dressed with oil, salt and pepper. Drizzle some olive oil over the top, season generously with salt and pepper and sprinkle them with some finely chopped parsley. Ecco fatto!


NOTES: The finest mushrooms for grilling, and the most typical in Italy, are fresh porcini. But if you can't find them or just don't want to pay through the nose, then other firm-fleshed mushrooms like portobellos will do. Large whole caps really do make for great eating, but smaller mushrooms also grill up fine—just reduce the grilling time according to size. Some people like to slice the mushrooms before grilling, in which case make sure you use a fine grate or grilling basket so they don't fall on to the coals.


Mushrooms absorb a lot of condiment, so do be generous with the marinade and make sure to dress them well before serving. In fact, I like to have some extra olive oil, salt and pepper on the table so your dinner companions can add more seasoning to the mushrooms if they want.


Radicchio really marries well with mushrooms, but you can also serve your grilled mushrooms, like a fine tagliata di manzo, with arugula, or just on their own. They make for a nice antipasto or a vegetarian (vegan, if fact) second course. They can also serve as a topping for an actual steak if you feel like meat.

Friday, October 8, 2010

Coniglio alla ligure


Rabbit is another one of those foods that many people seem to feel squeamish about. Perhaps because the live animal is so cute and furry, the thought of eating them strikes people, particularly North Americans, as strange or even disgusting. That's too bad, because rabbit is actually one of the most delicious of meats, much like chicken but a bit firmer fleshed and more flavorful than most chicken you will find these days.


Rabbit can be used to make just about any chicken dish (and vice versa) but there are any number of recipes specifically for rabbit (and its wild cousin the hare) in Italian cookery. We have already featured coniglio alla cacciatora, or hunter's rabbit, the original Tuscan dish that morphed into 'Chicken Cacciatore' when it crossed the Atlantic, and here is an equally tasty spezzatino from Liguria, the region of Italy that encompasses the 'Italian Riviera':


Make a soffritto of onion and a bit of garlic, gently sautéed in olive oil. Add your rabbit, cut it up into serving pieces. (See this post for instructions.) Allow the rabbit pieces to brown lightly in the soffritto and absorb the flavors of the onion and garlic. Season well with salt and pepper. Then pour in a good splash of red wine, and turn the pieces around so they are all covered well. Add a bay leaf, a sprig of fresh rosemary and a sprig of fresh marjoram (or thyme) and cover the dish, turning down and regulating the heat so that the dish simmers gently. Allow the rabbit to braise in the wine for 45 minutes to an hour, turning from time to time and adding some water or broth as needed to keep things moist but not soupy, making sure that there is enough liquid at the end to make a nice sauce. About halfway through, add a handful of black olives and another handful of pinoli nuts. Serve immediately, napping the rabbit pieces with the exquisite sauce. I find that this dish goes particularly well with steamed or mashed potatoes.


NOTES: You may surprised at the rather long simmering process. The rabbit will often be 'done' in as little as 20-30 minutes, but if you cook it longer, you will find that the meat will be much tastier, having fully absorbed the flavorings, and more tender. The typical olives are small, blacks ones called olive taggiasche in Italian, grown along the Ligurian Riviera and used to make the fine, light Ligurian olive oil. They are very similar to the niçoise olives, which can used as a substitute, as can any similar black olive like the Gaeta variety. The wine should ideally also be Ligurian but any medium to light bodied red will do fine. If your rabbit comes with liver and kidneys, as they often do, you can cut them up and add them about halfway through the cooking process, along with the olives and pinoli nuts. Some recipes add celery to the soffritto.

And if you cannot bring yourself to eat rabbit, a cut-up whole chicken can be prepared in just the same way and is almost as delicious.


 The dish is also called coniglio alla sanremese, after San Remo, of course, site of the famous music festival, on the coast very close to the French border. Started in 1951, it is still an annual ritual that is almost mandatory TV viewing in Italy. Perhaps the closest thing in the US would be the Superbowl, except it appeals equally to both women and men. The festival launched the careers of several famous Italian singers, including Andrea Bocelli, Laura Pausini and Eros Ramazzoti, but it is meant as a composition for composers, not singers, and features original songs. The festival has attracted the participation of some well known non-Italian singers, including Stevie Wonder, José Feliciano, Roberto Carlos, Dionne Warwick, Petula Clark and Connie Francis.

Sunday, October 3, 2010

Sformato di finocchi


The sformato (a term literally meaning 'unmolded') is something like a savory flan or perhaps a soufflé without the puff. At its most basic, it is actually a rather simple dish, a mixture of puréed or finely diced vegetables with béchamel and eggs, baked or steamed in a mold until set.

A sformato can be made with practically any vegetable which can vary according to the season, so you can serve a sformato all year round: peas or asparagus in the spring, zucchini or green beans in the summer, and so on. Now that the weather is rapidly cooling off here in the northern hemisphere, I turned to one of my favorite cool weather vegetables, fennel. Now fennel is delicious raw, served in a salad or even on its own, after dinner, as a kind of palate-cleansing 'fruit'. When cooked, its anise flavor mellows considerably and becomes, for lack of a better word, 'buttery' in flavor, and marries very well with butter, cream, cheese and other dairy products. That makes it a perfect candidate for a sformato.

Begin by boiling, or even better, steaming fennel bulbs, trimmed of their stalks and cut into halves or quarters, according to their size. For a family-sized sformato, about 500g or a pound of fennel, two large bulbs, should do well. When they are tender—a knife should slide easily in and out of them—drain them well. Let them cool a bit and, when they are cool enough to handle, either cut them into small dice or purée them, as you prefer. (I also like to add some of the fronds from the stalks for extra flavor.) A food processor works well for the purpose. Then melt a good amount of butter in a skillet and add your fennel, allowing it to absorb the flavor of the butter and to evaporate any residual liquid.

Now make some béchamel in a separate saucepan, in the usual way (see this post), using 2 cups of milk for every 500g (or pound) of fennel. Add the béchamel to the sautéed fennel, and season to taste with salt, pepper and a handful of grated parmesan cheese. Allow the mixture to cool off and  then add four eggs. Mix everything up well and pour into a well-greased loaf pan or other mold (see Notes below). Place your mold into a larger baking pan and pour water around the sides, to make what the Italians call a bagnomaria or 'bain-marie' in French and English:

 
Place the baking dish into a moderately slow oven (about 325F, 170C) and bake until the mixture has fully set. To test doneness, insert a paring knife or skewer inserted into the mold; it should come out completely clean. Baking time varies according to the size and shape of your mold, but for the loaf pan shown in the picture, it took about an hour. Individual molds will, of course, take much less time, as little as 15-20 minutes.


 Let the sformato cool for about 15 minutes or so. Loosen the sformato from its mold by running a knife along the edges of the pan. Then unmold itonto a serving platter. This can be done by placing the platter over the loaf pan or other mold, then holding pan and platter together with both hands, flipping it over. Gently remove the pan, revealing your sformato in all its glory. Serve warm or at room temperature.


 NOTES: As I mentioned, you can use the above basic recipes with just about any vegetable, using the same technique and the same proportions. I find that 'solid' vegetables like green beans, carrots, mushrooms and the like work best with the above basic recipe. Softer vegetables that tend to 'melt' when cooked, like pumpkin can also be used but you should reduce or even eliminate the béchamel and up the number of eggs to maintain the proper texture. You can also make sformati with other ingredients, including pasta, but the recipe is sufficiently different that it deserves a separate post.

The number of eggs varies from recipe to recipe. For 500g or a pound of vegetable, some recipes call for as few as a single egg, or as many as the four indicated in this recipe. Obviously, the more eggs, the firmer the texture of the final dish. Some recipes call for yolks only, which I imagine also produces a firmer result. You can also vary the texture by making the béchamel thicker or thinner, according to the amount of flour you use. (Too thin, though, and the sformato may not hold together.)

One important point: make sure that your vegetables are not 'water logged' when you mix them with the rest of the ingredients. That will tend to result in a rather flaccid texture. This is why steaming is better then boiling, and why it is important to sauté the vegetable in butter until quite dry. (The sautéing also gives it a wonderful flavor.)

As mentioned, you can use any number of different types of molds: a simple loaf pan works very well, but you can make a sformato in a round mold, or a ring mold, or a square mold, as you like. And rather than making a single 'family style' sformato, for more formal occasions you can use individual ramekins (or even a muffin pan!) to make individual sformati, which make for an impressive 'gourmet' presentation on the plate. For an even more elegant presentation, serve your sformato with a sauce—a creamy cheese sauce or a light tomato sauce or a coulis made from a vegetable with a complementary flavor. You can also garnish the sformato with sautéed vegetables, either the same vegetable as you used to make the dish, or some other vegetable that would go well with it.

At its most basic, though, this is actually a very simple, light yet rich, dish very suitable for home cooking. The only really tricky part is the unmolding. If you're lucky, the mold will come off perfectly cleanly, leaving a perfectly formed sformato. But if not, no worries—the taste will be just as good. You can just use garnish or sauce to hide the imperfection. To increase your chances of success, be generous when greasing your mold. And to be doubly sure, you can use a piece of wax paper, cut to size, to line the bottom of your mold. You then just gently remove the paper from the unmolded sformato before serving. Or, for a very informal meal, you forget all about it and just serve the sformato directly from the pan at table, with a spoon or metal spatula. Of course, technically you will not have a 'sformato' at that point, but I'm sure no one will mind.

The sformato is a usually vegetable dish, but it is too elaborate, really, to serve as a side. Traditionally, it served as an intermezzo, the course that came after the primo and before the secondo in very formal dinners. If you want to impress your guests, you can use it that way. For everyday eating, a sformato is very versatile. It can be an antipasto, a first course or even a vegetarian second course, as you prefer. There are even sweet sformati for dessert… but that's a subject for another post.

Saturday, October 2, 2010

Risotto al nero di seppia


Here's another installment from the colorful world of risotto. Last week we featured green risotto, this week it's black risotto, made with cuttlefish and its ink.

The technique for this risotto recipe is a bit different from the more usual one, in that you don't begin by toasting the rice but rather braising the cuttlefish (or, squid, if you can't find cuttlefish).  But before you start cooking, if your mollusk is not pre-cleaned,  you will need to clean it, making sure to carefully remove and reserve the ink sacs (see below). 
 
Now, make a soffritto of finely chopped onion and garlic, sautéed in olive oil. When the onion is soft and translucent, add your cuttlefish or squid (one small one or half a large one per person), which you will have chopped into little squares or sliced into thin strips, as you prefer. When the fish has turned opaque, add enough white wine to almost cover the fish and, if you like, a spoonful or two of passata di pomodoro (tomato purée) and/or a bit of peperoncino and/or some finely chopped parsley. Let the whole thing simmer until the fish is just about tender, which should take about 30-45 minutes depending on the type and age of the mollusk you are using. Then add the ink—if you've cleaned the cuttlefish or squid yourself, use the ink from the reserved ink sacs or, if using cleaned squid, about a sachet  of store-bought ink per serving—and stir so that it is fully incorporated into the liquid, forming a smooth sort of black ragù.

Add rice, stir to mix well, and simmer until the rice has absorbed the black liquid. Now proceed as you would for any risotto, adding ladlefuls of broth, one at a time, adding more broth only as the previous ladle has been absorbed. Fish or vegetable broth do best, but you can use chicken broth in a pinch, or even water. When the rice is done, remove it from the heat, add some more parsley if you like, and stir it vigorously as you would to mantecare any risotto. Add a dab of butter if you must but do not add grated cheese. Serve hot, topped with a bit of parsley if you like.

NOTES: This risotto is traditionally made with seppia, or cuttlefish, and the ink from the ink sacs that you carefully reserve when you clean it. Cuttlefish can be hard to find, and squid is a perfectly acceptable substitute. You clean both mollusks in the same basic way. Here's an excellent instructions video from the Rouxbe Online Cooking School:
 
 
In the US and perhaps elsewhere, most squid is sold pre-cleaned (which is to say, with the skin, internal cartilage and viscera (including the ink sac) removed. But nero di seppia (cuttlefish ink) is sold in small sachets in some specialty stores. They are also available online, sometimes under its Spanish name, tinta de calamar. Be careful handling the ink, as it really stains—which is perhaps why it was used as a dye and also as actual ink for writing in classical times. And, as you may have guessed by now, the English word 'sepia' comes from the Italian word for this same reason.
 
The dish takes rather longer than your usual risotto because of the initial braising, but the dish lends itself very well to pressure cooking. The cuttlefish or squid will take about 15 minutes under pressure. Then release it, add ink, then the rice and broth, and bring up to pressure again for another 5 minutes.
 
For tips on the best types of rice to use, see my post on the ABCs of Making Risotto. This dish being of Venetian origin, a vialone nano would probably be the best choice, but tonight I used carnaroli and it was very good indeed.

There are a few, but rather limited, variations on this dish. The most important being when you add the ink. Personally, I prefer to add it at the beginning, to ensure that it fully penetrates the rice, but some recipes call for adding it towards the end of cooking. One interesting variant recipe calls for making your squid or cuttlefish 'black ragù', then proceeding to make a risotto in bianco in the usual manner, in a separate pot, and adding the ragù to the risotto only towards the end of cooking.

The black ragù, by the way, makes a fine dressing for linguine, spaghetti or, for a Venetian treat, bigoli