Wednesday, December 29, 2010

Fagiolini alla panna


When most people (myself included) think of Italian style green beans, fagiolini in umido (green beans in tomato sauce) is likely to come to mind or perhaps fagiolini all'agro, a simple green bean salad. Here is a less well known but perfectly delicious dish from Lombardia that I recent came across while  perusing a little cookbook called La cucina lombarda by Alessandro Molinari Pradelli: green beans simmered in cream. I can almost guarantee that once you try this, it will become a regular part of your repertoire!

Ingredients (for 4-6 servings)

1 kg (2 lbs.) green beans
A shallot, fine chopped
50g (3 Tbs) butter (or more if you're feeling indulgent)
2 dl (3/4 cup) cream (or as much as you need)
Nutmeg
Salt and pepper
A handful of parsley, finely chopped

Directions

Trim off the ends of your green beans, then plunge them into a big pot of well-salted boiling water. Cook them until they are quite al dente, remembering that they will cook some more later. This should take no more than 5 minutes or so, depending on the size and quality of the beans.

While the green beans are boiling away, gently sweat your chopped shallot in the butter in an ample skillet or sauté pan until soft but not browned.

Transfer the green beans from the boiling water right into the skillet and mix them well with the butter and shallot soffritto. [NB: If you like, you can 'refresh' the green beans in cold water before adding them to the skillet, which will help them retain their color, but being a bit lazy I often skip this step.] Raise the flame just a bit and let the green beans braise for a few minutes, stirring frequently, so they can absorb the flavors of the soffritto.

Now add your cream, enough to just about cover the beans. Season with salt, pepper and nice scrape of nutmeg. Raise the flame a bit more so that the cream bubbles fairly vigorously. Continue stirring from time to time, and simmer until the cream has thickened into a saucy consistency. Taste and adjust for seasoning if need be.

Mix in the chopped parsley and serve immediately.

NOTES: The great thing about this dish, as for any braised vegetable dish, is that you can use green beans that may have been around for a while without much trouble. That is, in fact, what I did this time and I can tell you the results were more than satisfactory. 

This makes for a fine contorno for grilled meats, in particular. I would not serve it, on the other hand, with a braised meat dish. And I actually had it as a vegetarian lunch one day, with a nice chunk of crusty bread.


Sunday, December 26, 2010

Viennese Goulash


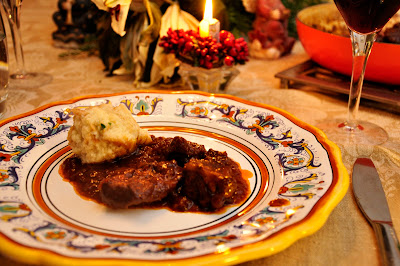
For some reason, I must be feeling nostalgic for my Vienna days as I keep coming back to the dishes I made during those years. Perhaps it's the cold weather that calls out for the hearty cooking of Mitteleuropa. In any event, here's another favorite from that time and place: Viennese Fiakergulasch.

Goulash is a simple beef stew that follows the usual dry followed by moist heat method, but with two twists: the use of lots of onion—half as much by weight as the meat—and, of course, Hungarian paprika. The cooking fat can be oil, lard or even rendered beef fat.

Ingredients (for 4-6 servings)

1 kilo (2 lbs.) stewing beef, cut into cubes
500g (1 lb.) onions, chopped
Oil, lard or rendered beef fat
Salt and pepper
Hungarian paprika, to taste
Beef broth, enough to cover the meat
1-2 Tbs. tomato paste
A pinch of caraway seeds
A sprig of fresh marjoram (or thyme)

A spoonful of flour mixed with some water

Directions

Add enough cooking fat to cover the bottom of a Dutch oven or braiser. Brown the beef cubes nicely in the fat on all sides and set aside.

Now add the onions and gently sweat them in the same pan until they are nicely soft and browned, but not burnt. Season with salt and pepper as you go. Add back the browned meat and mix well. Allow the meat and onions to simmer together for a few minutes, then sprinkle over the paprika. Most recipes call for 1-2 tablespoons, but I just 'eyeball' it, and I'm pretty sure I add more than just a spoonful, as I love the taste of paprika. You then allow the paprika to simmer in the fat to release its full aroma, again for just a minute or two. Paprika can burn if heated too much, so moderate your heat as needed.

Add enough beef broth to just cover the meat, along with the tomato paste, caraway and marjoram. Cover and simmer it all gently until the meat is quite tender, usually about two hours. This can be done over the stove or, if you prefer, in a moderate (180C/350F) oven.

Just before serving, add your flour and water slurry to the pan, a spoonful or two at a time, to give the sauce a nice liaison. If, on the other hand, you find that your sauce is too thick or there is simply not enough of it, add some water.

Serve warm, with buttered noodles, spätle or Knödel.

NOTES: There is a certain linguistic confusion over the name of this dish as it is used in its homeland of Hungary. This article explains, as I had heard before, that gulyás, from which we get our word goulash, actually refers to a soup, which back in Vienna was called Gulaschsuppe. What we call goulash is called pörkölt in Hungarian (but please don't ask me how that's pronounced...)

Many recipes call for you to sauté the onions first, and then brown the beef with onions, which is more straightforward than the procedures outlined above (which is more typical of a French daube). But I like to use the Frenchified method, as you can caramelize the meat nicely without any worried about burning the onion.

There are lots of different kinds of goulash, with or without meat, and with or without vegetables. The Viennese version, in my humble opinion, is by far the best of the lot, although admittedly I am biased. After all, we all tend to like what we know best.

Wednesday, December 22, 2010

Struffoli!


Struffoli, small balls of dough fried and then covered in honey, is the quintessential Christmas sweet of Naples and its region of Campania. Although I don't have much of a sweet tooth, it is very dear to my heart; it was one of nonna Angelina's signature dishes, and it never failed to make an appearance each year around the holidays. In our family they were known as 'Nana's honey balls'. As a child I took the name literally, and until I moved to Italy, I thought that they were my grandmother's invention. You can imagine my surprise then, when, on vacation on the Amalfi coast one year, I peered into the window of a pasticceria and saw... Nana's honey balls! Where on earth, I thought to myself, had they gotten the recipe? Well, I soon enough learned that Nana's secret recipe was actually no secret at all. In fact, the recipe is ancient, dating all the way back to the Greeks who settled southern Italy, founding, among other things the city of Naples or Neapolis, meaning 'new city' in Greek.

In any event, these little babies are actually quite simple to make, but, like many old-fashioned dishes, they require a bit of time and tender loving care:

Ingredients (for a small plateful of stuffoli)

300g (3 cups) flour
3 eggs
Butter, a walnut-sized chunk or 3 Tbs. oil
Rum,  or other spirit (optional)
Zest of one lemon
Salt, a pinch

Vegetable (or olive) oil for frying

300g (1 jar) honey
Candied fruits (optional)
Confettini or candied 'sprinkles'

Directions

You begin by making dough with the first six ingredients. This was traditionally done by making what the Italians call a fontana, or fountain of flour, in the middle of which you make a well for other ingredients, then slowly incorporating the flour into the well by hand as you beat the eggs and other liquid ingredients with a fork. These days, however, a stand mixer makes short work of this. Just put in your flour, then the other ingredients, and mix until you get a nice dough, just as if you were making pasta.

Once the ingredients have formed a smooth dough, form it into a ball and wrap it in plastic wrap. Let the dough rest for a good 30 minutes or so.

After the dough has rested, take a handful of it at a time and roll them out into 'cords' as if you were making gnocchi, about the thickness of your little finger (if you can manage it, otherwise as close to that as you can get). Then cut the cords into short lengths, again just like you are making gnocchi.


 Take each little piece of dough, one by one, and quickly rub them between your palms in a circular motion to form little balls, the smaller the better. Place the little balls on a floured towel as you work, making sure that they are all in a single layer so they don't stick. Just before proceeding to the next step, you grab the ends of the towel and swish the balls around to lightly flour them.


Heat the oil in a large pan. You want lots of oil so the little balls can deep fry in it. When the oil is nice and hot, but not boiling, plunge the dough balls into the oil a handful at a time. The oil will immediately bubble up vigorously. Not to worry, it's supposed to be that way.


Fry the dough balls until they are lightly browned. Drain on paper towels while you proceed to the next step.


 Now, in an ample sauté pan or saucier large enough to hold all of the dough balls, gently heat the honey until it liquifies. Add the dough balls, stir them gently to coat. Allow the balls to soak up the honey for just a minute or two. (They should not get soggy at all.) If using candied fruit (see Notes below) you will want to add some at this point.


Remove your struffoli from the pan with a slotted spoon and arrange them on a plate. It is common to arrange struffoli in a ciambella or ring, but you can also simply pile them high. I like to form them into a little 'Mount Vesuvius' as picture above. Then sprinkle your pile with confettini  (or candy sprinkles). It is also customary to decorate and flavor struffoli with candied fruits, in particular little bits of candied oranges and cherries, in addition to the spinkles. You can do this if you like, although—as far as I can remember—Angelina never did, so I follow suit. They can be eaten immediately, but improve with age.

NOTES: Although it takes a few steps, the recipe is really pretty much foolproof. The only trick, the extent there is one, is to make your struffoli as small as you can manage, as that will mean more honey flavor and less chance of an undercooked middle.

There are a few variations on the dish, although none that change its essential character. Like many traditional recipes, the original fat for both making and frying the dough was strutto or lard, not oil. Today, it is more usual to use butter for the dough and vegetable or even olive oil for frying. Not all recipes call for the liquor. And some recipes call for orange rather than lemon zest. And the ratio of egg to flour varies from recipe to recipe. Here I have indicated the same 'golden rule' as for pasta dough: 1 egg per 100g (1 cup) of flour. But recipes may call for more or less egg, some for an extra yolk for color and richness. Some recipes omit the fat from the dough—be it butter, oil or lard—altogether, while others call for significantly more fat than indicated here. And, finally, some modern recipes, especially Italian-American ones, call for a pinch of baking powder, which lightens the honey balls considerably but is obviously a modern permutation.

To tell you the truth, struffoli were not all that popular among the younger generation of my family. I like them well enough, but one of my sisters actively despised them. Being a natural born politician, however, that didn't stop her from complimenting our grandmother profusely one Christmas. Well, our ever thoughtful grandmother took note and the following Christmas  brought a double batch of her 'honey balls', one for the family as usual, and another just for my sister, since she loved them so much! You should have seen the look on my sister's face as Angelina handed her that enormous second bag full of struffoli...
Sunday, December 19, 2010

Canederli


Canederli is the Italian name given to the bread dumplings so popular in Austria and other parts of central Europe, known in German as Semmelknödl or just knödel. During my years in Vienna it was one of my favorite things to eat, so when I re-discovered them in Italy, on a visit to an old friend from Paris who had wound up living in Bolzano, a city in the German-speaking region of Alto Adige (aka Südtirol) in northwestern Italy, I was delighted. Not only did they bring back fond memories—they were probably the best I had ever eaten! (No offense to my Austrian friends...)

In any event, you don't need to travel to Austria or northwestern Italy to enjoy these dumplings. They are quite easy to make at home. The technique is a bit like making potato dumpling or gnocchi, but actually easier. These bread dumplings are much less prone to becoming stodgy as gnocchi can be if not made right. And it's a great way to use old bread, a nice change when you're not in the mood for a bread soup like ribollita or pappa al pomodoro.

Ingredients (for 4-6 servings)

300g (3/4 lb.) stale bread, cut into cubes
100g (1/4 lb.) speck or other cured pork product (see Notes), finely minced (optional)
2 eggs
A glass of milk
1 medium onion, finely minced
2 Tbs. flour (or more)
Parsley, finely minced
Salt and pepper

Directions

Toss together in a large bowl the bread and speck (if using), then add the eggs and milk and parsley. Mix together. Let the mixture rest for a good 20 minutes or so. The bread should be rather moist at this point, but not soaking wet. If you find the mixture a bit dry, then add more milk.

Mix in the flour, along with the onion and parsley. (NB: For added flavor, you can sauté the onions in a bit of butter before adding them to the mix.) Season well with salt and pepper.


Now form the resulting 'dough' into balls about the size of golf balls.


By the way, if the mixture does not hold together, or if you notice that it is exceedingly wet, then add more flour, a bit at a time, until you find that the mixture has reached a nice dough-like consistency that will hold together well.

Now bring a pot of well-salted water (or, for a richer taste, broth) to a gentle simmer. Add the canederli, one at a time, with a slotted spoon—or just use your hands like I usually do...  If you are not experienced with making these dumplings, just form one ball to begin with, and try simmering it. If it falls apart, then you know you need to add some more flour to your mixture. Then try again with another. If all goes well, then add all the rest.


Simmer the canederli for about 15 minutes. They should have come to the surface of your simmering liquid, much as gnocchi do.


NOTES: There are various ways to serve canederli. The simplest is the way I had them at that wonderful meal in Bolzano: in a rich, homemade broth—a kind of Italo-Austrian matzo ball soup. My personal favorite way to enjoy canederli is to accompany them with a creamy mushroom sauce as pictured above, the same kind of sauce that goes so well with potato gnocchi. Also very good, and very popular in Vienna, is to serve them with beef goulash, which I hope to blog on some time quite soon.

Unlike pasta or gnocchi, however, you do not generally pour the sauce over or mix it with these dumplings, but rather lay down a 'bed' of your sauce and lay the dumplings on top. They are big enough that you will need to cut them into bite-sized pieces with a knife and fork, using your fork to fare la scarpetta as they say in Italian: dip each piece of dumpling in the sauce.


You can also make one big dumpling of the bread mixture, by forming a loaf and wrapping it in cheesecloth before simmering it. Of course, this big dumpling will take a bit longer, say 20-30 minutes, to cook. You serve it sliced like a meatloaf.

Speck is a smoked pork product that is common to Austria and this part of the Italy. It is quite delicious but can be hard to find. Feel free to substitute prosciutto or even slab bacon if you like, or omit the meat altogether, as I often do anyway.


By the way, Alto Adige, or Südtirol, is one of the most beautiful areas of Italy. It has an Alpine landscape reminiscent of nearby western Austria. In fact, it was once a part of Austria, ceded to Italy after Austria's defeat in the First World War. (It was nearby that my grandfather fought and won his posthumous medal and picked up his taste for polenta—which is why we ate that northern dish in our southern Italian family.)

In any event, the region today still retains much of its Austrian heritage, notwithstanding the best efforts of Mussolini, who 'shipped' in many Italians, especially from southern Italy, to colonize and, to his mind, 'civilize' the place. There is, in fact, a triumphal arch built by Mussolini in downtown Bolzano, the capital of the area, to celebrate the Italianization of the area. It is still the object of the occasional sabotage attempt, or so I was told when I visited, although the region was granted considerable autonomy after the Second World War. And when I was there in the late 90s the place seemed as tranquil as any I've ever been to. Besides beautiful scenery and great food, they make wonderful wines, including the popular pinot grigio, but also some excellent Chardonnays, Riesling, Sylvaner, Gewurztraminer, and Kerner. It's well worth a visit.

Beautiful Alto Adige-Südtirol


Wednesday, December 15, 2010

Mushroom Barley Soup


What to do with a spare ham bone if, like me, you don't care too much for split pea soup? Well, what about a barley soup? While barley soup is usually made with beef, it tastes just a delicious with pork and ham in particular.

Ingredients (for 4 servings)
1 onion, finely chopped
1 carrot, finely chopped
1 clove garlic, finely chopped
1 cup barley
A ham bone (or ham hock)
A sprig of rosemary
Salt and pepper
Olive oil
Enough water to cover generously (or a mixture of broth and water)

100g (1 cup) sliced (or chopped) fresh mushrooms
1 handful of parsley, finely chopped

Directions
Sauté the onion and carrot until soft, then add the garlic and stir. Season as you go. Add the barley, allow it sauté gently as well for just a minute or two to absorb the flavor of the aromatics.

Place the ham bone (or ham hock) over the barley, together with a sprig of rosemary. Pour in enough water to cover all the ingredients generously, by at least 5 cm/3 in.

Simmer the barley and other ingredients for at least an hour, until the barley is nice and tender but not mushy. Add water from time to time if you need to—and chances are, you probably will, since barley absorbs a lot of liquid.

About 15 minutes or so before the soup is ready, sauté some thinly sliced mushrooms in a bit more olive oil until nicely browned and reduced, mixing in a bit of minced parsley just before you remove the mushrooms from the heat. Add the sautéed mushrooms to simmer along with the barley until done.

Remove the ham bone from the pot, scrape off any bits of ham meat, chop it up and add the meat back into the pot. Adjust the seasoning to taste.

Serve hot, topped if you like with un filo d'olio and a generous grind of black pepper.

NOTES: This is a wonderfully rustic soup that lends itself to any number of variations. Probably most common is the substitution of dried mushrooms, reconstituted in warm water but not sautéed, for the fresh mushrooms, which gives the soup a much more assertive mushroomy flavor. You can also vary the aromatics by, for example, adding some leek and/or celery. You can also vary the herbs—instead of rosemary, a bay leaf and/or some fresh thyme is a nice change of pace. Some recipes also make this soup 'creamy' with the addition of buttermilk, milk or cream.

The soup can be made ahead, but if you do, you'll need to add more water or broth, as the barley will just keep absorbing the liquid until none is left. Perhaps there is a limit to the liquid that barley can absorb, but if there is, I haven't encountered it yet.


Sunday, December 12, 2010

Tiramisù


Here's an elegant dessert 'cake' that even non-bakers like myself can make easily. The truth is, the 'cake' part of this dessert consists of those elegant elongated cookies called 'ladyfingers' in English and savoiardi in Italian. The ladyfingers are lightly dipped in espresso, then layered with mascarpone creamed with egg, sugar and marsala, then 'baked' in the fridge for a few hours (or even days) and finally dusted with cocao before serving. There is really nothing to it and yet serving a homemade tiramisù, with its reputation as a fancy dessert, will ensure that your guests will be mightily impressed.

Ingredients

500g (1 lb) store-bought ladyfingers
3 freshly made single espressos
Simple sugar syrup (or some sugar) to taste
500g (1 lb.) 4 oz. mascarpone
5 eggs, separated
About 250g (1/2 lb.) sugar
Marsala
Powdered cocoa

Directions

Begin by making some strong shots of espresso coffee: 


If you don't have an espresso maker, a potful of espresso made in a  stovetop pot will do quite fine. Then mix your espresso with some of the simple syrup, if you have some on hand, or just a few spoonfuls of  sugar, to taste. You can also use the coffee without sugar, as the  mascarpone cream will add sweetness.

To make the mascarpone mixture, separate the yolks from the whites. Set the whites aside for the moment. Then whisk the yolks together with the sugar briskly until they form a kind of cream; you should be able to see 'ribbons' in the mixture as you whisk it. A stand mixer makes short work of this job.


 Then add the mascarpone and a dash of marsala, and continue whisking until you have a homogeneous cream mixture. 


Now, in a separate bowl, beat the egg whites until they form soft peaks. 


 Fold the egg whites gently into the mascarpone mixture:


 Now that you have your coffee and mascarpone mixture ready, it is time to assemble the dish: take a ladyfinger, dip it on both sides in the espresso, very briefly, just to barely coat the outside. (Don't linger or your ladyfingers will soften to mush!) As you dip the ladyfingers, arrange them in a rectangular or square baking dish. Continue until you have covered the bottom of the dish with them. (NB: Depending on the size of your dish, you may need to lay them in different directions and/or break some of the ladyfingers into shorter lengths.)

Once you have your first layer of ladyfingers, spread some of the mascarpone mixture over them, enough to cover them entirely. Then lay another layer of ladyfingers on top of that:


 Finally, lay over another layer of the mascapone mixture:


Put the dish into the fridge for at least an hour, better several hours or even overnight. The longer you let it sit, the more the mascarpone mixture will penetrate the ladyfingers and soften them up. It will also help the elements to form a more solid mass. A freshly made tiramisù will be very creamy and rather loose when served,  as pictured above, while a well-rested one will be more cake-like. Each version has its charms.

In any event, right before you're ready to serve, dust the top of your tiramisù with unsweetened cocoa powder (the kind you would bake with). Use as much or as little as you like. Personally, I prefer just a light dusting.


NOTES: The two main ingredients for this dish, ladyfingers and mascarpone cheese, can be surprisingly hard to find. They are also both rather expensive to buy. You can make the ladyfingers yourself--they are not at all hard to make. I have seen suggestions for using spongecake or pound cake, which should (more or less) work as well, but since these are already quite soft, your tiramisù will not need as long as rest in the fridge. As for the mascarpone, you can substitute regular cream cheese ('Philadelphia' style) loosened with some cream. (I have also heard of substituting ricotta, whipped until perfectly smooth, but that would give you a rather different flavor.)

A common variation for tiramisù is to use zabaglione in place of the mascarpone mixture. Zabaglione is simply marsala wine thickened with egg yolks heated over a double-boiler, usually in a round-bottomed copper pot which is made expressly for the purpose. I will blog on zabaglione one day, as it is delicious and wonderful just on its own as a dessert or snack. Also common is the substitution of rum or other liqueur of your choose instead of the marsala.

The main thing to remember when making tiramisù is that the success depends largely on balancing the sweetness of the sugar with the bitter flavors of the coffee and cocoa. Neither should predominate. Be careful, then, when adding sugar. And if, as sometimes happens, you find ladyfingers sprinkled with sugar, reduce the sugar you add to the coffee and/or cream to compensate.

Otherwise, as I said, this dish is simplicity itself and a real crowd-pleaser. No need to tell anyone how easy it is to make... Enjoy!