Showing posts with label French. Show all posts

Tuesday, January 18, 2011

Quick Note: Brandade Pancakes


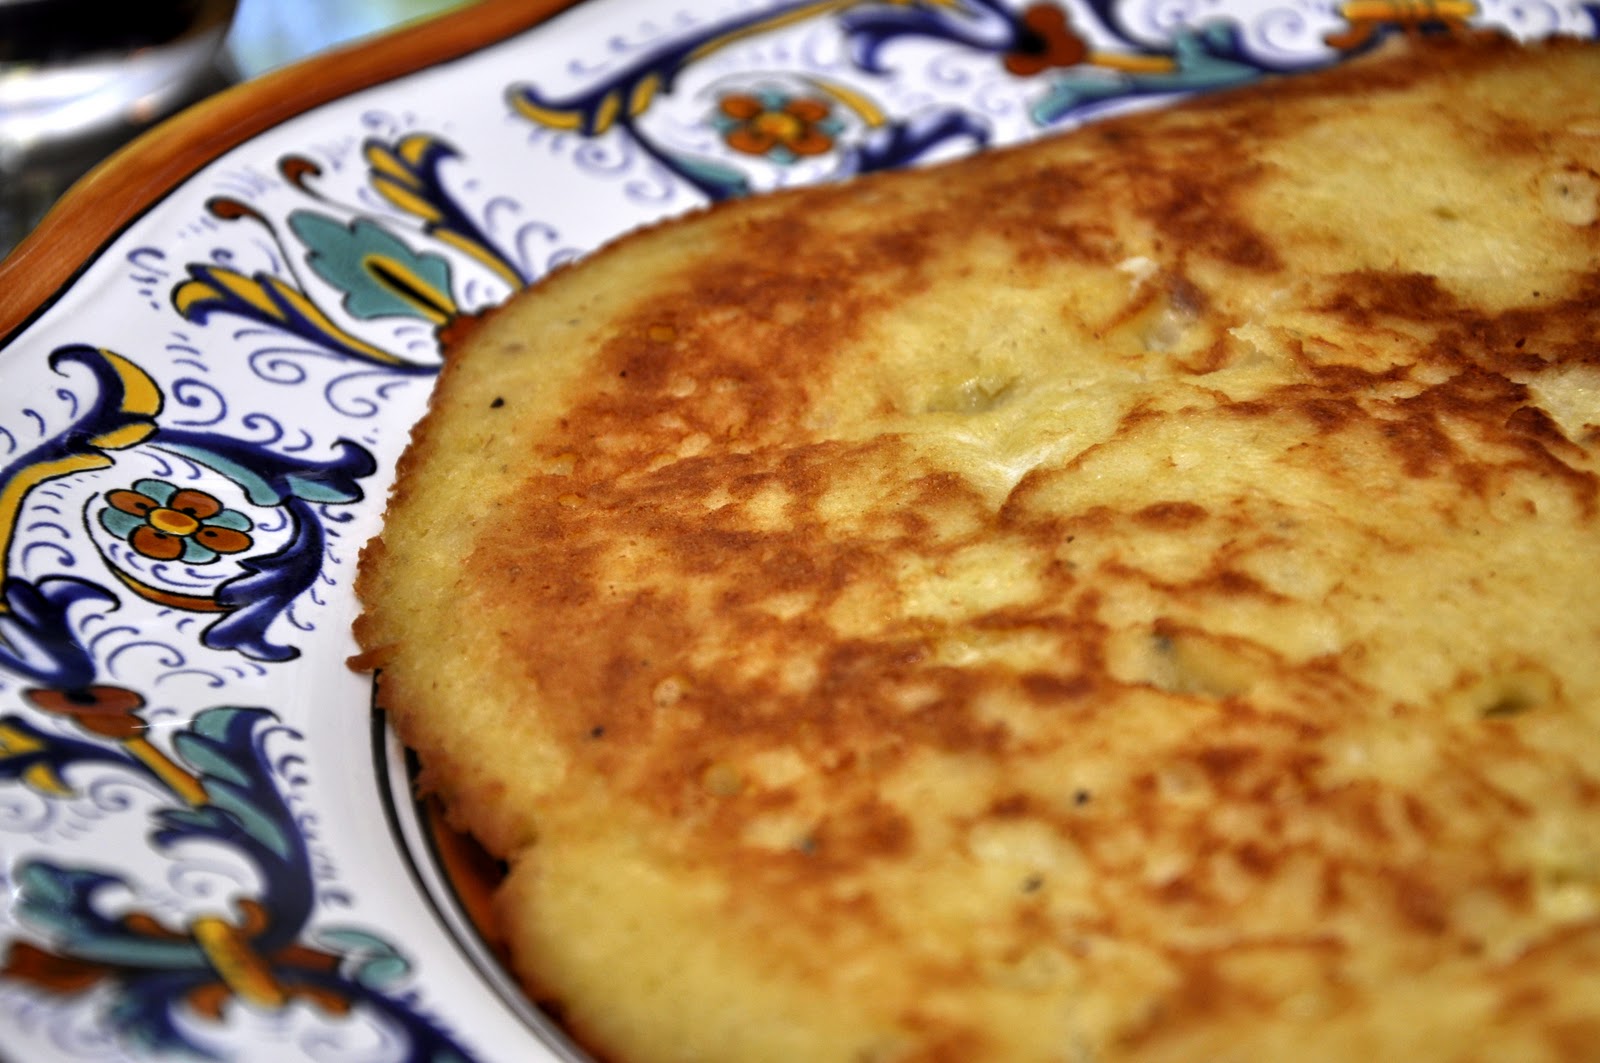
The new year brought a rush of activity that had made it hard to keep up with my blogging 'duties', but here is quick note on a nice idea for 'recycling' leftover brandade: just mix it up with an egg or two, give it a grind or two of black pepper and perhaps a bit of chopped parsley. (There should be no need for salt, as brandade is salty by nature, but taste it and see.) Fry the resulting batter in a bit of olive oil, browning it nicely on both sides.

Served with a green salad and washed down with a crisp white wine, this brandade pancake makes for a quick and tasty lunch or light weekend supper!

NB: A traditional brandade is made with soaked and poached baccalà, but you can make an easy version with smoked whitefish, as illustrated in one of my earlier posts. The taste is different from the traditional version, of course, but for me, at least, equally delicious.

Post scriptum: I recently broke down and bought a slow cooker. Never imagined that I would own one—the awful crock pot cookery of the 70's is still etched in my memory—but after reading some excellent chefs recommend it for, among other things, beans, broth and polenta, I decided to give it a go. Will be experimenting with various recipes and reporting back to you, dear readers, shortly.

Friday, November 19, 2010

Crostata di mele


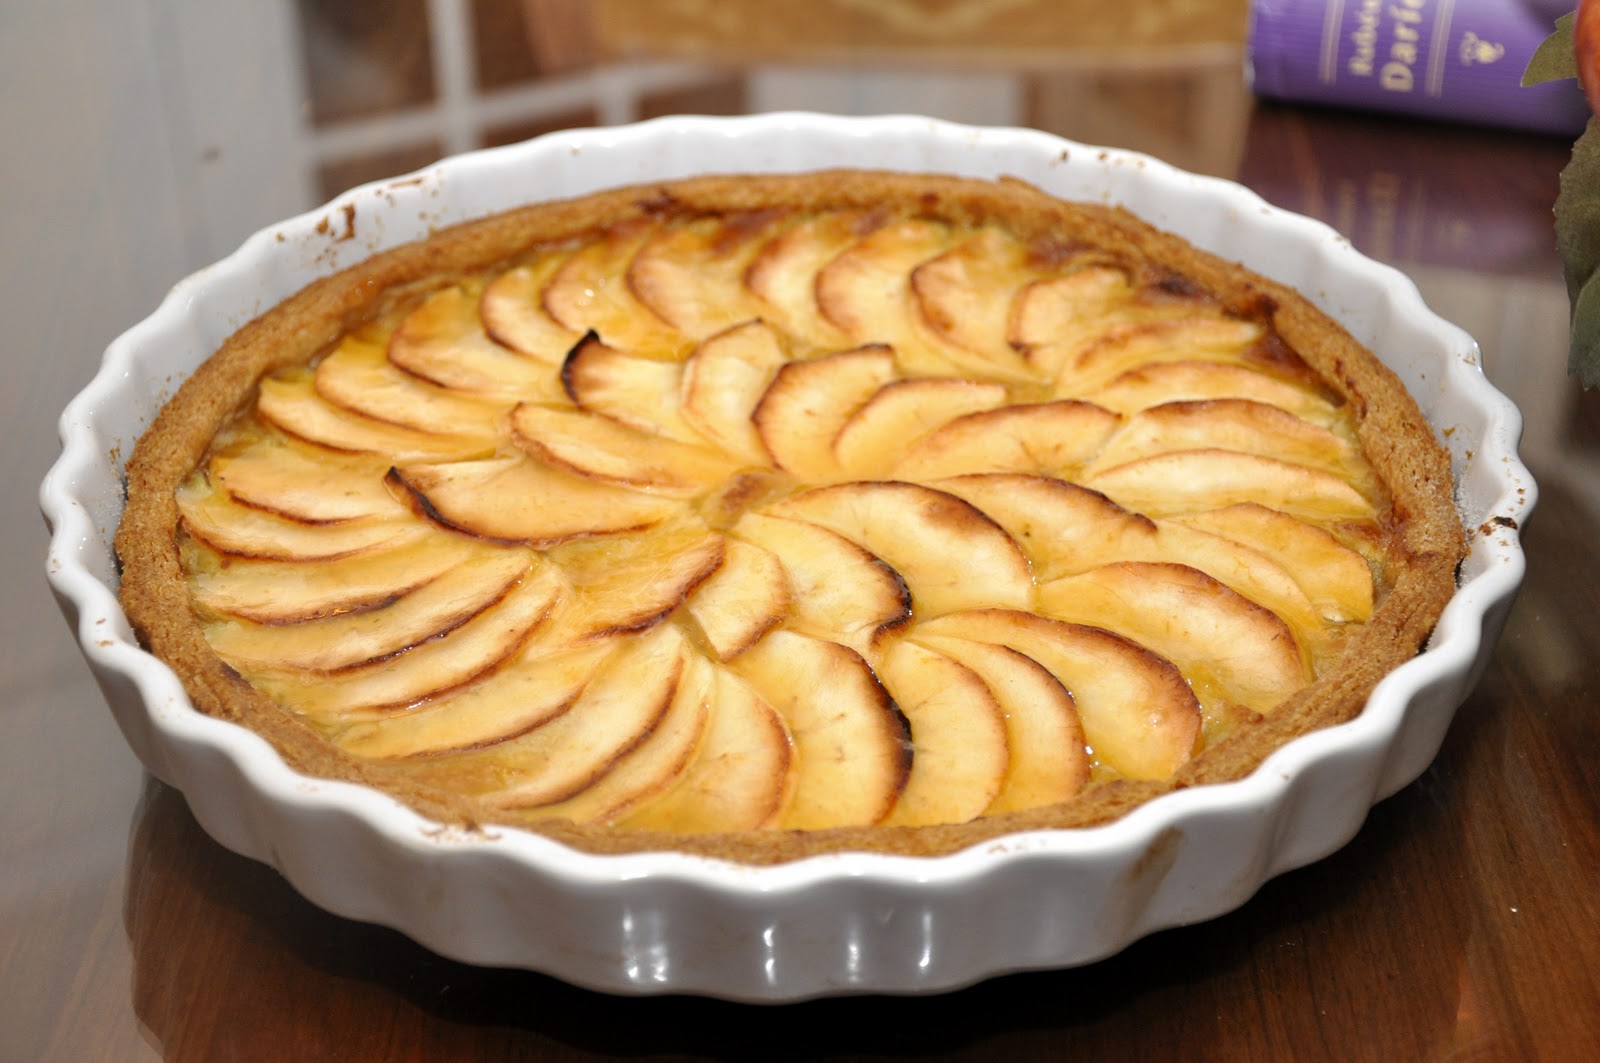
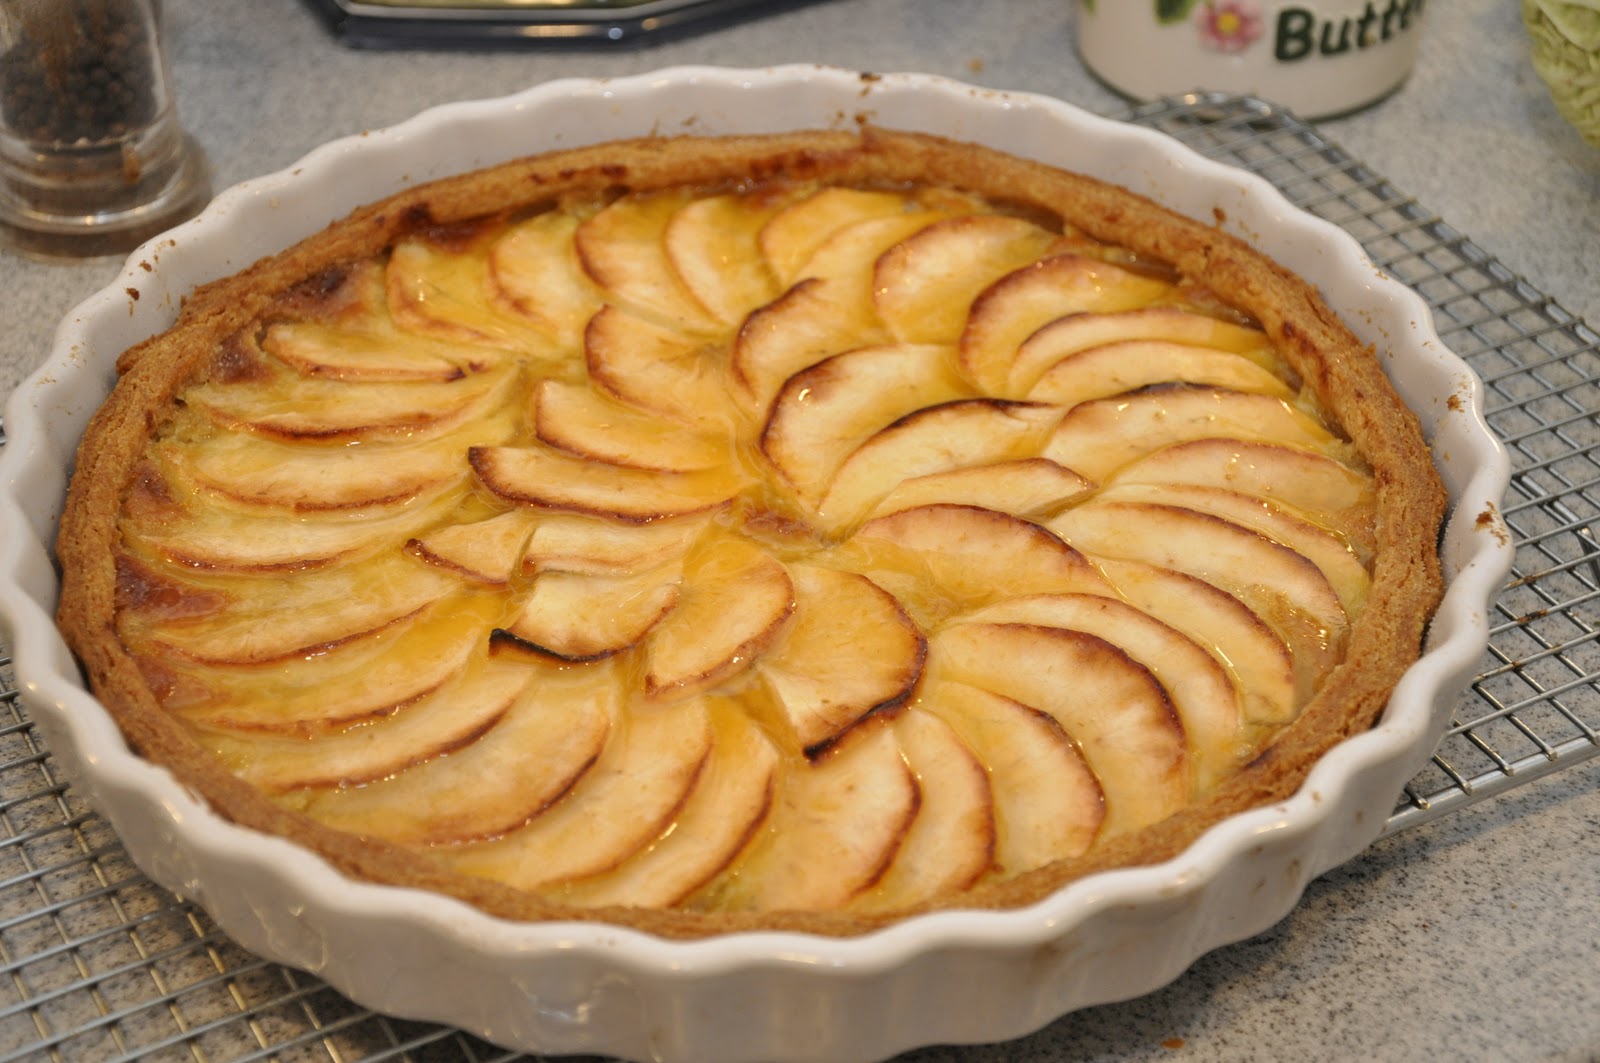
As regular readers of this blog will know, I am not much of a baker. Nor do I have much of a sweet tooth. But, for some reason, I felt inspired the other day to make a baked dessert for some dinner guests. Foolish, perhaps, to start my baking career by 'experimenting' on guests, but all's well that ends well. I actually liked the way this turned out, and so did the guests.

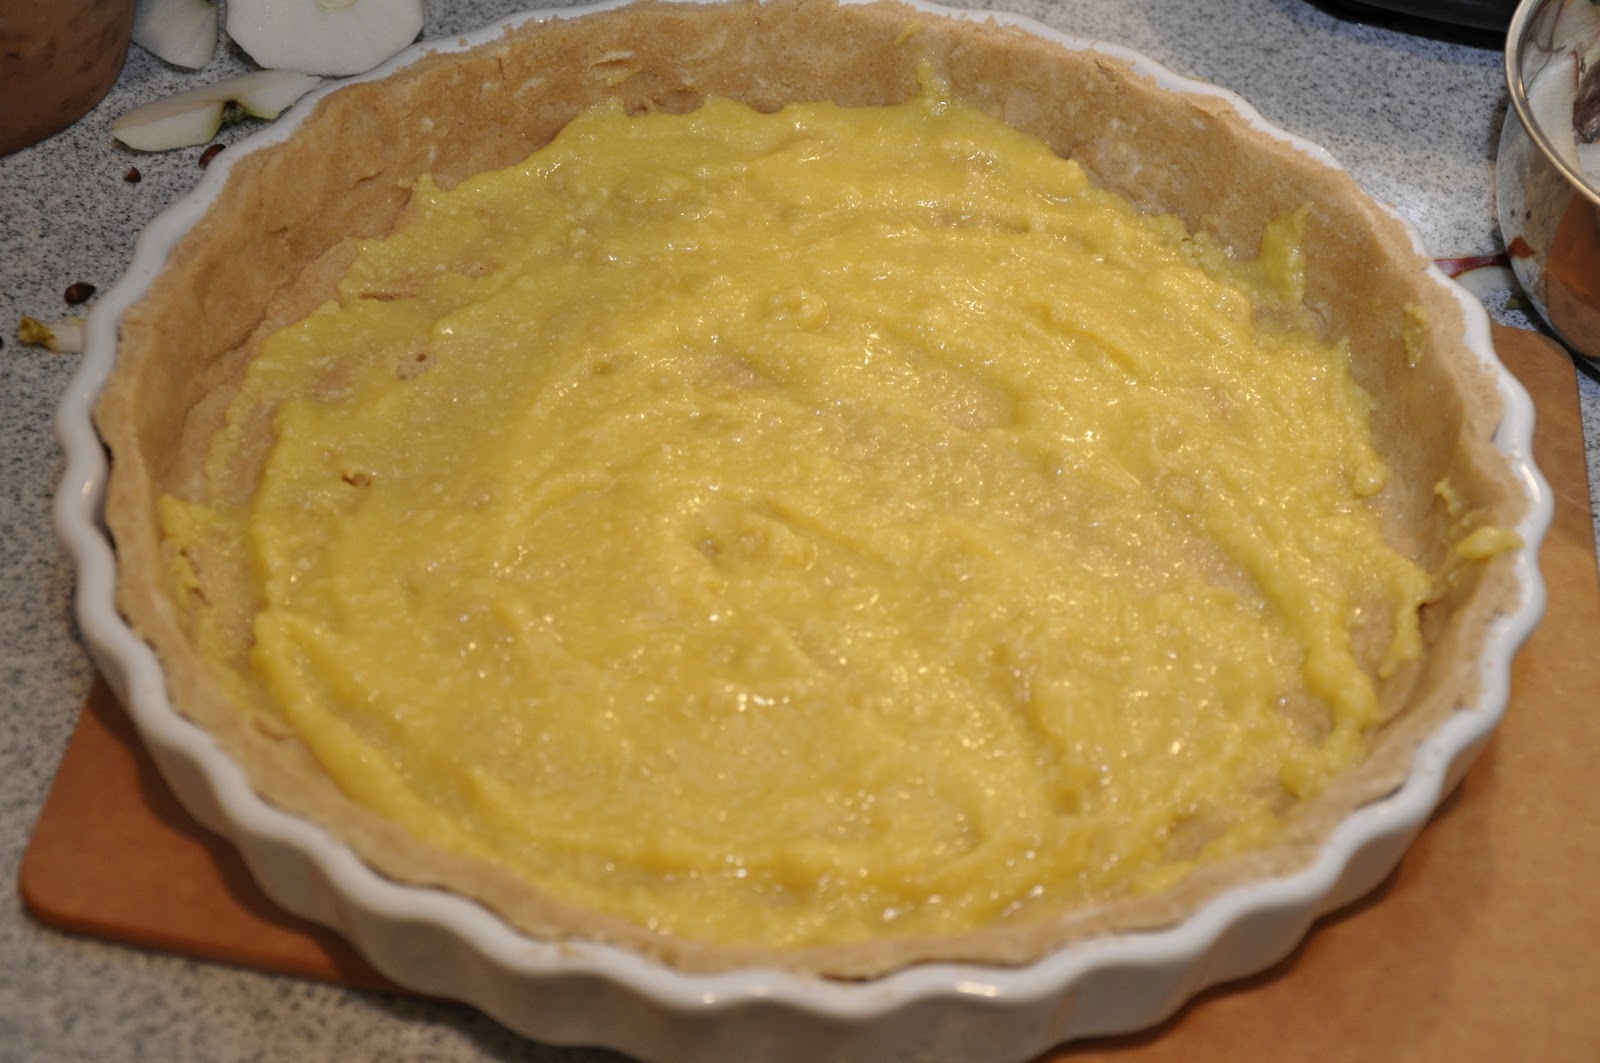
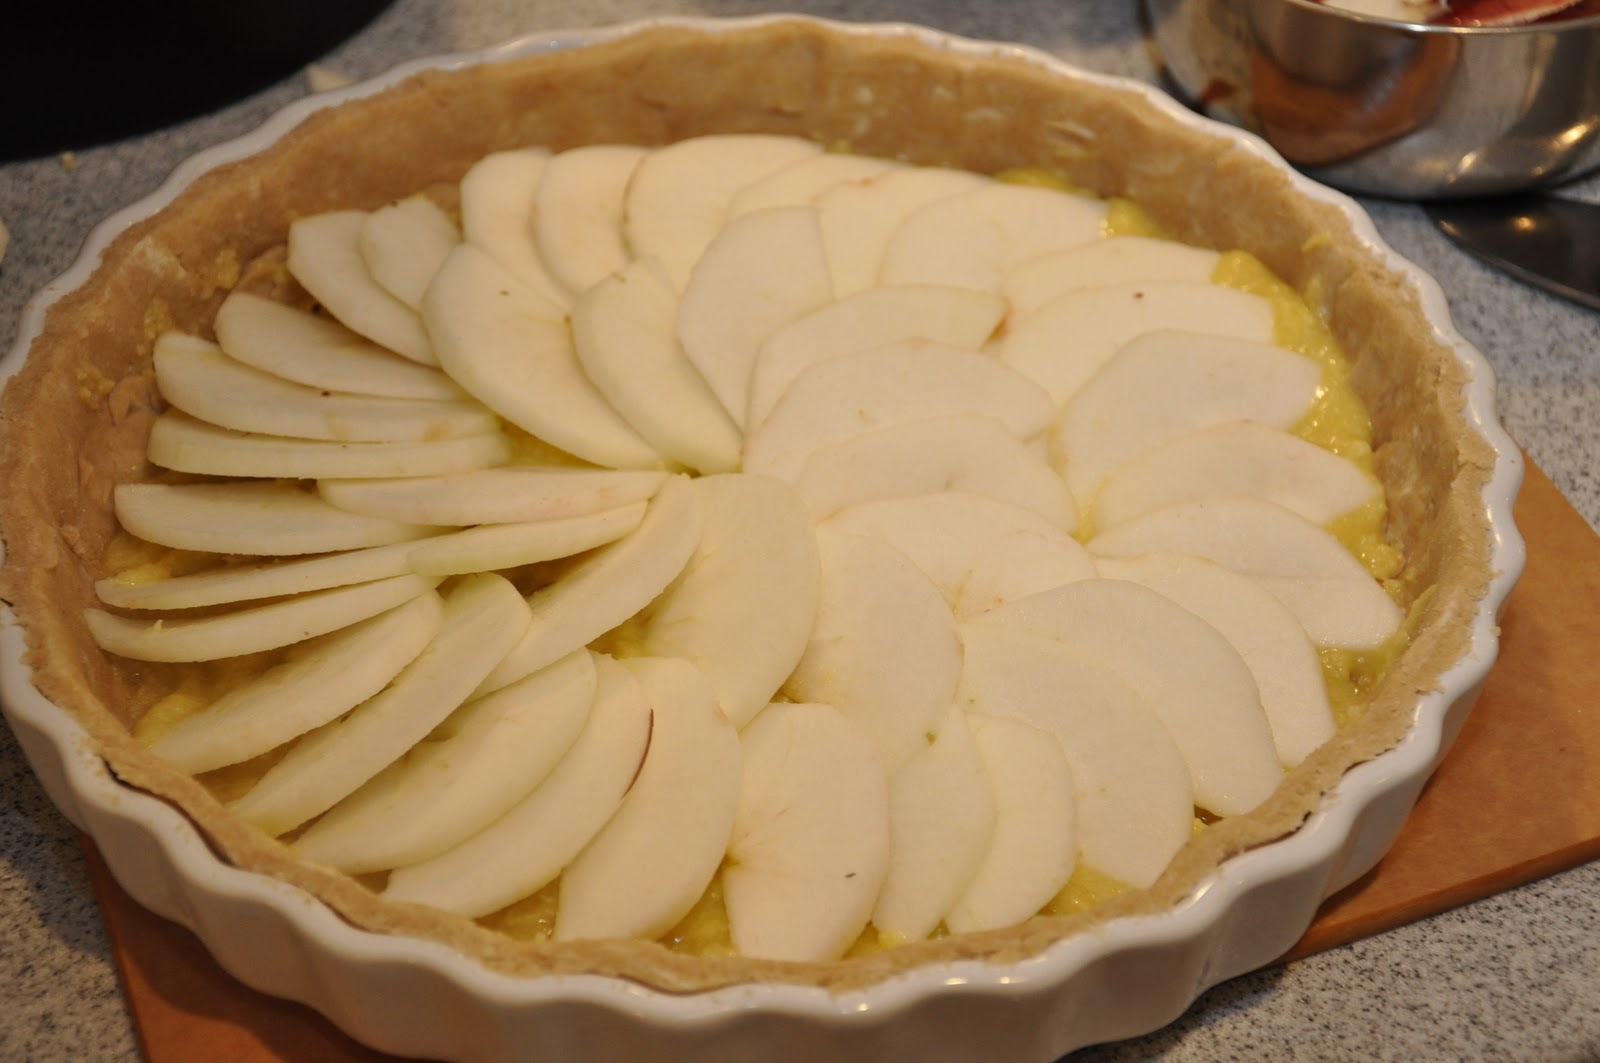
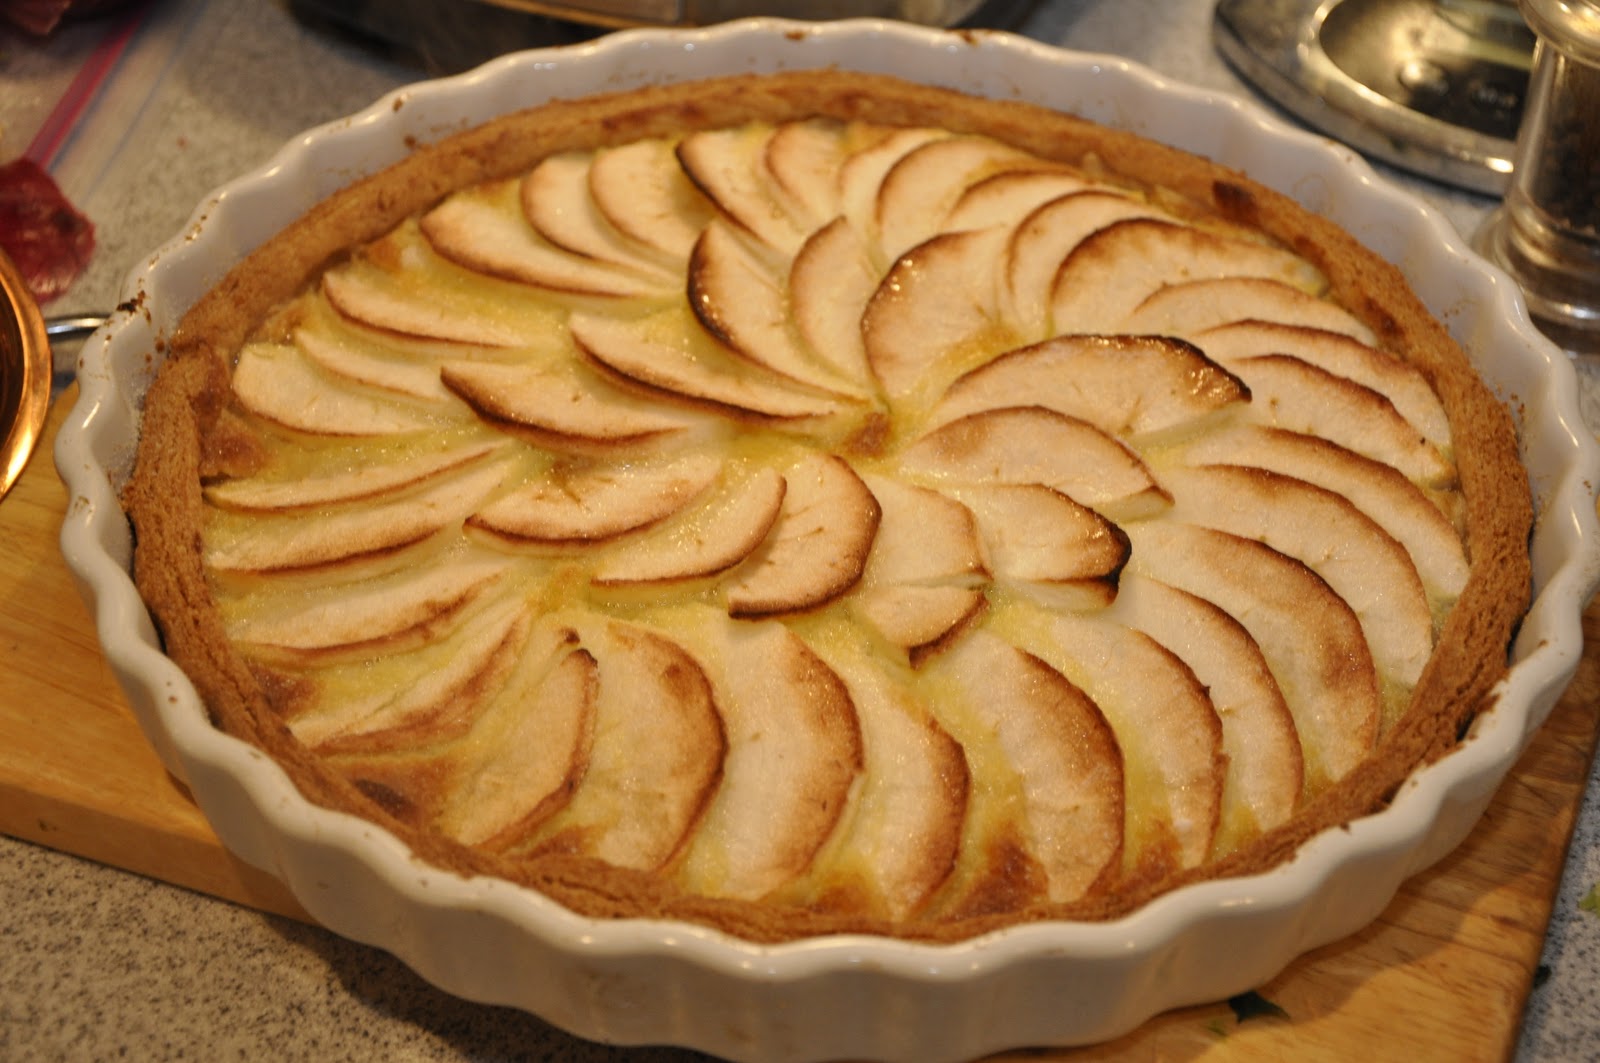
Of course, I wasn't totally rash: a crostata di mele, or apple tart, is really very simple to make. If you break it down into its component parts, it is really quite manageable: a base of pastry, called pasta frolla in Italian and pate brisée in French, on which you lay a bed of frangipane, almond paste mixed with butter, sugar, eggs and a bit of liqueur if you like, then sliced apples, arranged in concentric circles. Once baked, you can top this off with an apricot glaze, which gives your tart a lovely sheen and extra layer of flavor. The whole process does not take much more than an hour, and you can make it ahead.

Ingredients (enough for 4-6 servings)

For the pastry shell: 
200g (2 cups) pastry or all-purpose flour
150g (1-1/2 sticks) butter
1 Tbs. sugar
A pinch of salt
1 egg yolk (optional)
Cold water (about ½ cup)

For the frangipane base: 
50g (½ cup) butter
50g (½ cup) sugar
75g (2/3 cup) of almond paste
1 egg plus 1 egg yolk
2 Tbs. flour
Calvados (optional)

For the filling: 
3-4 baking apples (see Notes below)
Sugar, q.b

For the apricot glaze: 
A small jar of apricot preserves (or jelly)
Sugar, q.b.
Water, q.b.

Directions:

To make the pastry shell:

1. In a bowl (or stand mixer) mix together the flour, sugar and a pinch of salt. Then mix in the butter, using your hands or the paddle of your stand mixer, until well incorporated. The resulting mixture will look a bit like little pebbles. Then the egg yolk (if using) and enough cold water so that the mixture just forms a solid dough. Do not knead or overmix, which will make the dough tough. And you should do this all quite quickly, so that the butter does not start to soften too much.

2. Wrap the dough in plastic wrap and put it in the fridge for 30 minutes or more, to let the dough rest and stiffen up again.

(NB: While the dough is resting, you can make the frangipane base and slice your apples.)

3. Take the dough out of the fridge, remove the plastic wrap, and roll it out with a rolling pin into a round that is at least an inch wider than the tart pan in which you intend to bake your crostata.

4. Using your rolling pin, roll up the dough and then unroll it over the tart pan, trying as best you can to center it well. Gently push the pastry into the bottom of the pan with your fingers. (If, as sometimes happens, your pastry doesn't quite reach the edge of the pan, you can always 'nudge' the pastry outwards to cover the edges of the pan.) Prick the pastry with a fork all over to prevent puffing while it bakes. Then trim off any excess pastry, using the edge of the tart pan as your guide. (NB: If you prefer, you can leave the excess on and fold them inward over the filling when the time comes.)


To make the frangipane:

5. In a large bowl, cream together butter and sugar in a mixing bowl. Add the rest of the ingredients and mix them well until you have a smooth paste. You can use a wooden spoon to start and then, once the ingredients are mixed, switch to a whisk to smooth the mixture out. But you can do with in one go, in a fraction of the time and with little effort, using a KitchenAid or other stand mixer, with the whisk attachment.

6. When your pastry shell is ready, take the frangipane and slather it out evenly over the bottom of the shell with a rubber spatula. This will act as a 'bed' for your apples and help anchor them in place.


To make the filling and bake the tart:

7. Peel, core and slice the apples into thin half-rounds. Then arrange them attractively in the tart pan. Push one side gently into the frangipane bed, then lay it on its side. Proceed with the next piece, slightly overlapping the proceeding one like roof tiles, continuing around in concentric circles until the entire shell is filled with a single layer of apples slices. Trim off any excess pastry—or, if you prefer, you can fold the edges over the outside of the apples.


8. Now you are ready to bake your tart: If you have one large enough, place the tart pan on a cookie sheet (this will catch any spillage from the tart, but is not 100% necessary.) Place the tart pan in the hot oven (200C, 400F) for about 15 minutes, then lower the temperature to a moderate oven (180C, 350F) and bake for another 10 minutes, then sprinkle the apples with ample sugar, and bake for another 10 minutes or more, or until the apples have nicely browned along their edges and are perfectly soft when pierced with a knife.

9. Remove the tart from the oven, place it on a cooling rack and let it cool off in its pan.


To finish off the tart (optional):

10. If you like, you can finish off the tart with an apricot glaze. To make the glaze, take apricot preserves and force them through a fine sieve with a wooden spoon or rubber spatula—this will smooth out the consistency, as preserves usually have little bits of fruit in them. Then take this purée and heat it gently in a small saucepan with a spoonful or two of sugar to taste, depending on how sweet the preserves are in the first place. Thin out the purée with some water, until you have reached a brushable consistency.

11. Once the tart has cooled, brush over the warm glaze evenly over the entire surface of the apples, but avoiding the pastry.


Now you're done! Enjoy your crostata di mele either by itself—it is perfectly delicious—or, if you want to gild the lily, with some whipped cream or vanilla ice cream.

NOTES: First of all, I have a confession to make… the foregoing recipe really should be called tarte aux pommes à la normande. Probably some of you might have guessed it from the Calvados… but although torta di mele (apple pie) is probably more popular, Italians also make costata di mele in basically the same way. The most important difference is that the Italian version will more often have a different 'bed' for the apple filling—rather than frangipane, crema pasticcera (egg yolks emulsified in hot milk, sugar and flour), marmalade or homemade apple sauce. And crostata di mele is less likely to have an apricot glaze.

For this recipe to succeed, you need to choose the right kind of apples. The best apples for tart-making are not too sweet and crisp, so keep their shape in cooking. Others will break down and turn to mush if exposed to heat—which is fine if you want to make apple sauce (or even an apple pie) but not a tart. For this first try, I used Cortlands and they were fantastic: they have a nice, crisp texture, pristine white flesh which was not too sweet and—and at least the ones I used—didn't even need to be cored. Other favorite baking apples include Galas, Golden Delicious, Braeburns (one of my favorites for eating, too), Rome Beauties, Honeycrisps and, if you like a rather tarter tart, Granny Smiths. These, at least, are some of the options here in the US. Varieties to avoid for a tart include McIntosh and Red Delicious (which, in my humble opinion, are definitely not delicious!)

Pastry dough has a reputation for being tricky to make, but—perhaps it was beginner's luck—I found it remarkably easy, and it came out just as it should—friabile (flaky) and nice and buttery. They say the most important point is not to overwork it, so that the gluten does not develop too much—gluten will bind the dough together, which is what you do not want—and to keep the dough well chilled. Neither of these tips are at all difficult, but you do need to work quickly. Note this dough is quite fragile compared, say to pasta dough. Once rolled out, if you try to pick it up, it will fall apart in your hands, so use a rolling pin.

There are various types of tart pans you can use. I personally like my ceramic tart pan with fluted edges, from which you can bring to the table for serving, as pictured in this post. But the more elegant and classic solution is the metal tart pan with a removable bottom, for serving the tart out of its pan and on a platter. And even a regular old pie dish will do, of course, in a pinch.

Saturday, October 16, 2010

Catfish «en meurette»


The term «en meurette» refers to a dish that has been braised in a particularly delicious red wine sauce from the Burgundy region of France. Probably the best known of these dishes is oeufs en meurette, made from poached eggs. But even tastier, in my opinion, is fish made this way. The firm-fleshed monkfish (lotte in French) lends itself to braising and is wonderful en meurette. Carp and other firm-fleshed river fish are typical, so in the US a natural choice would be the humble catfish. It may be suprising to pair catfish with a 'classy' French sauce but I assure you, gentle reader, that the pairing results in some fine eating.


Begin by pouring a bottle of red wine into a saucepan and adding a sliced carrot, a sliced onion, a crushed garlic clove, a chopped shallot and some fresh herbs—some parsley, a spring of thyme and a bay leaf—then season with a pinch of salt and some whole peppercorns. Simmer briskly until the wine is reduced by half. Strain the reduction through a sieve into another saucepan, then thin out the sauce with some good stock. Bring back to a simmer and then thicken the sauce with some beurre manié, about two tablespoons of flour and butter rubbed together to make a paste. You can add some more if you feel the sauce is too thin, but remember that the sauce will reduce further during the next step and you only want to give the sauce to be nice and silky, not at all stodgy.


While your wine is reducing, make the garnish for the fish by sautéing in butter or oil a goodly chunk of slab bacon or pancetta, cut into lardons, until well browned but not crisp. Set aside and, in the same skillet, sauté some button mushrooms that you have cut into quarters until they, too, are nicely softened and browned.


Now assemble your dish: butter a braiser just large enough to hold all the ingredients and lay out your catfish fillets—one large fillet is enough for two people—cut into serving pieces. Then arrange the mushrooms and lardons on top and around the fish pieces. Pour over your red wine sauce, enough to just cover them. Then bring the dish to a simmer and let it cook gently until the fish is done, about 10-15 minutes depending on the size of the pieces (and the fish—monkfish should braise for much longer). If you like, just before serving you can sprinkle the fish with some chopped parsley or, even better, a persillade—parsley and garlic finely chopped together.


NOTES: As usual, I've been vague about the measurements, and they really don't matter all that much. You can really use as much or as little garnish as you like—many recipes omit the garnish altogether, but I find that it makes the dish more interesting and tasty. The same goes for the sauce itself, but most recipes for 4-6 people will, as indicated above, call for an entire bottle of red wine.


The choice of wine will, of course, strongly influence the character of the dish. This being a dish from Burgundy, the logical choice would be a red from that region, but last night I used a Spanish tempranillo with lovely results. Some recipes (including those given in the Larousse Gastronomique) also call for adding a splash of Burgundy marc.


Not all recipes have you make the wine reduction separately as indicated in this recipe—you can also add the wine and aromatics to the main ingredient and let it reduce as they simmer together, thickening the dish at the very end. With this method, the aromatics are left in the dish. But I find that making the sauce separately gives you more control over the result and, since I like to use a bacon and mushroom garnish, I like to take out the aromatics after they've given up their flavor into the dish.


As mentioned at the start, you can use the same red wine sauce to nap poached eggs or, for a more rustic effect, poach eggs directly in the sauce. Other ingredients can be made en meurette, including mild meats like calf's brains, chicken, rabbit or veal, in which case you usually lightly brown the meat before simmering it with the sauce and any garnish you might like.


Dishes en meurette are often served with fried croutons. I find that they also go well with steamed baby potatoes or buttered noodles.

Sunday, September 12, 2010

Rillettes de porc


One of my favorite ways to while away a rainy Sunday afternoon is to browse through my old cookbooks. I have a fairly extensive collection, scattered in different places around the house, and there is nothing so pleasant than finding one of those old tomes that I had forgotten I even have and diving back into its old recipes, a little like happening on an old lost friend on the street and striking up a conversation.

So it was this afternoon. I thumbing through some of my older cookbooks that I keep down in the den and came across an old, yellowed paperback, copyright 1968, entitled Everyday French Cooking. In fact, that plain-jane title is a bit deceiving, as it this little book is, in reality, a translation and adaption of the Nouveau Guide Culinaire by Henri-Paul Pellaprat, one of the most influential French chefs of the last century. I leafed through the book and found a recipe for one of my favorite appetizers of all time, rillettes de porc, or 'potted pork'. I hadn't had rillettes quite literally for years, since I lived in Paris in the early 1990s in fact. Seems like yesterday but, I suddenly realize as I write this, it was something close to twenty years now… Can it really have been that long ago? Anyway…

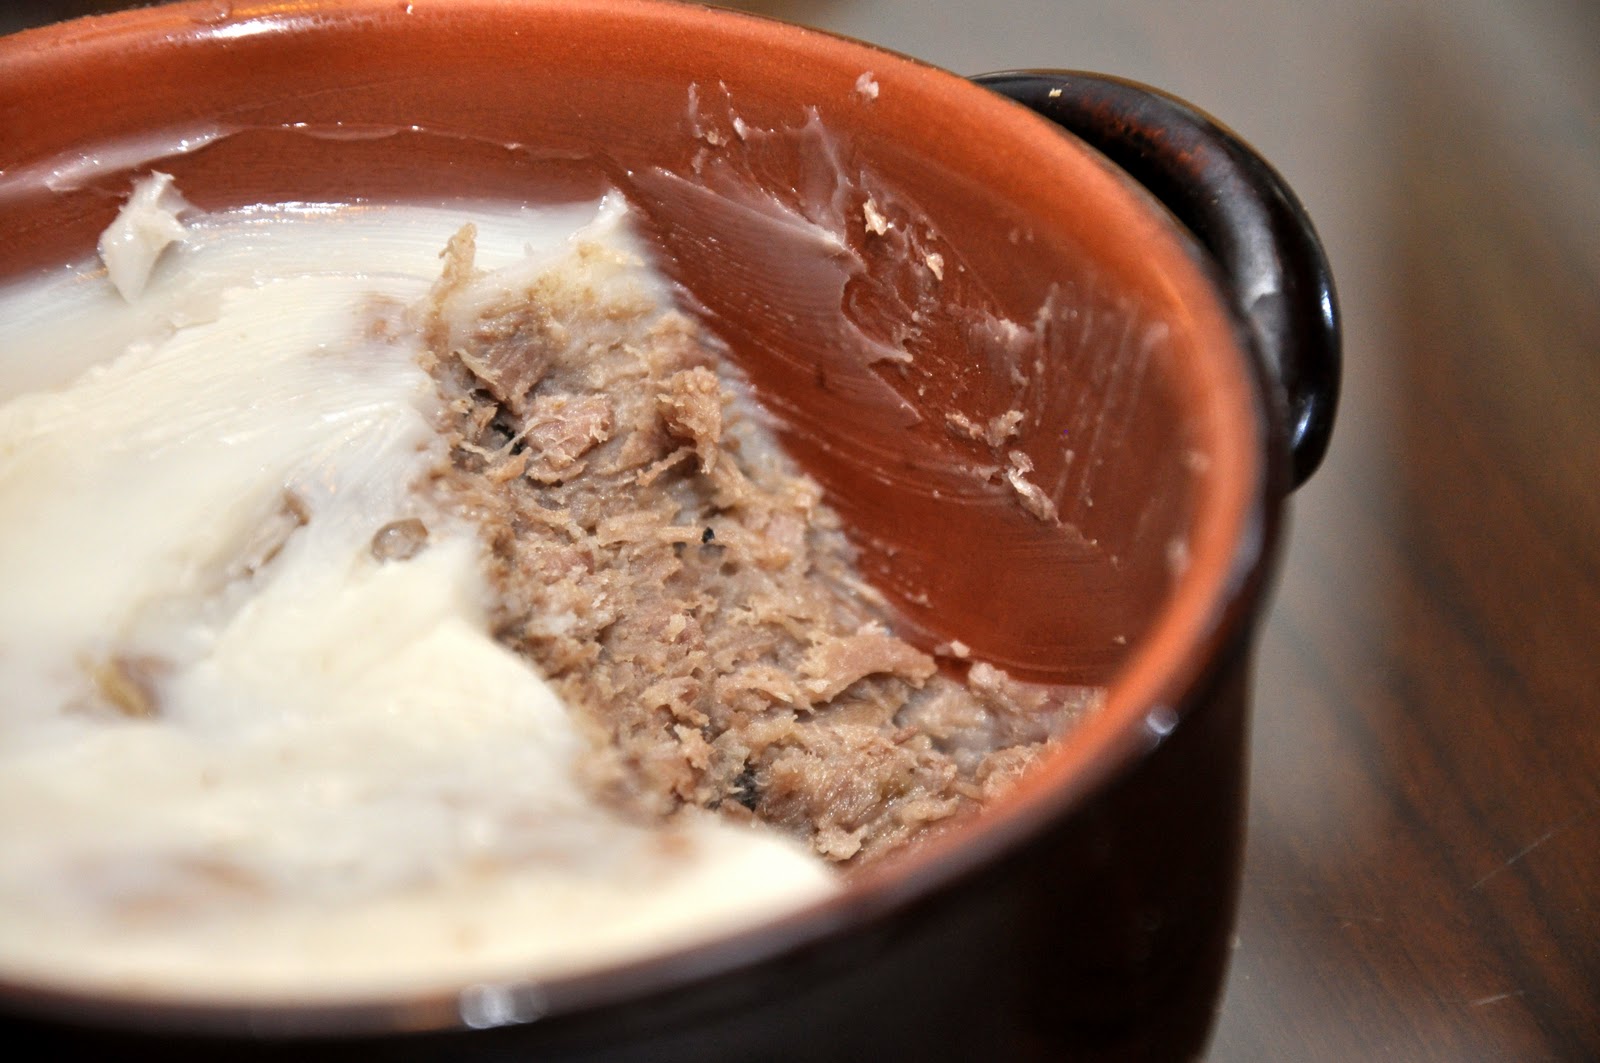
I quickly made note of the recipe in my head—rillettes are actually surprisingly simple to make—and whipped it up at my leisure this afternoon. It takes a long time but practically cooks itself. When it was done, I sat down to munch on a few pieces of toasted bread slathered with the stuff. Taste memories last a long, long time, I guess, because the unmistakable taste and texture was just as I had remembered it: wonderfully and deeply savory, with a creaminess that quite literally melts in your mouth. Served with a nice medium-bodied red wine, I almost felt like I had traveled back in time.

In any event, here's the recipe: Take a good 750g (1-1/2 lbs.) of pork shoulder, cut up into cubes, and mix it with an equal amount by weight of fat back or best-quality lard. (The authentic recipe calls for the actual fat, which renders in the cooking process, but since I had some very good quality lard around, I used that and it worked just fine.) Season generously with salt, freshly ground pepper, a bay leaf, thyme and—here's where I parted ways with M. Pellaprat—a few cloves. Place it all in a heavy pot (enameled cast iron works well) and add a good glassful of water. Bring to a simmer on top of the stove. Now you can continue cooking over gentle heat on top of the stove or, as I prefer, placing the pot in a slow oven (325°F, 160°C. Let the pot simmer for a good 3 hours or so, or until all the water has evaporated and the pork is fork-tender and lightly browned. If the meat hasn't browned, you can raise the heat so it does for a few minutes at the end.

Let the pot cool down a bit, then strain the meat from the melted fat by turning the pot's contents into a colander placed inside a large bowl. Remove the bay leaf and transfer the meat into a food processor, together with a ladleful of the rendered fat. Process, using the pulse function, until the meat is nicely minced but still has some texture to it—not yet a purée. Pack the mixture into jars, ramekins or other small containers and top off with the remaining rendered fat.

Let the containers cool completely, then place them in the fridge until ready to use. The fat will congeal and turn a creamy white color, forming protective layer on top of the meat. Use as you would any spread, slathered over toasted bread.

 
NOTES: The seasonings and cuts of meat used in rillettes can vary from recipe to recipe. Pellaprat calls for minced parsley, which I omitted. Some recipes I've seen call for cinnamon, nutmeg and/or mace. A few call for garlic or onion. I've even seen an intriguing recipe calling for five-spice powder, which sounds delicious. My 'secret' ingredient is actually not so secret, as perhaps the best known version of rillettes, from the city of Tours, calls for whole peppercorns and cloves. The traditional recipe calls for some bone-in cuts, from which the meat is stripped at the end of the cooking process. Some recipes call for pork belly, which has 'built in' striations of meat and fat, so you can reduce or even eliminate additional fat from the recipe.

Rillettes can be made from any number of ingredients. Goose rillettes are fabulous as are rabbit rillettes. For something a bit lighter, rillettes can be made from fatty fish, such as tuna or sardines. One particularly lovely example of the latter variety are rillettes made from fish are these smoked mackerel rillettes from fellow food blogger and professional chef, Sylvia of Citron et Vanille.

Friday, May 28, 2010

Céléri rémoulade


I normally like my salads with a simple oil and vinegar dressing in the typical Italian manner, but once and a while I get the urge for one of those rich and creamy salads like cole slaw or Russian salad … or this French classic: céléri rémoulade, shredded celery root dressed with a mustardy mayonnaise.

With the help of a food processor, the dish is quite simple to make—even simpler, actually, than cole slaw. First, you peel the celery root with a knife (the skin is too tough and irregular for a peeler), cut  it into chunks, and then shred a celery root in a processor. Immediately fold in a good cup of mayonnaise, enough to dress the celery root well—along with a generous dollop of Dijon mustard, a splash of vinegar (or some freshly squeezed lemon juice), salt and pepper. If you like, you can some chopped parsley for extra flavor and color. Refrigerate for a good hour or more before serving. 

To this basic rémoulade dressing, you can add some extra flavorings if you like, such as capers or chopped cornichons or some other herbs like tarragon, chives and/or chervil. The Larousse Gastronomique suggests finishing the sauce with a bit of 'anchovy essence'—whatever that is (anchovy paste?). Some recipes call for adding the yolk of a hard boiled egg to a raw egg yolk to make the mayonnaise, assuming you are making it by hand. As an unorthodox variation, you can lower the caloric content a bit by folding in some sour cream in lieu of some of the mayo, in which case best to go light on the vinegar or lemon juice.

Sauce rémoulade is quite versatile. It is lovely served with all sorts of cooked vegetables, as an accompaniment to poached or roasted fish or even with a nicely grilled steak.

Saturday, April 17, 2010

Aïoli with Spring Vegetables


While versions of it are made around the rim of the western Mediterranean, from Spain all the way to Sicily, this garlic sauce is best known in its Provençale incarnation known as aïoli. It is a commonplace to refer to aioli in English as garlic mayonnaise, but it is really something rather different.

You begin with a mortar and pestle. Add several whole cloves of garlic and a pinch of salt. (Besides seasoning the sauce, the salt helps to soften the garlic.) Begin by crushing the garlic cloves against the side of the mortar with your pestle, then starting turn the pestle around in the mortar, always in a single direction, until the garlic has been reduced to a rough paste. This can be slow work, so be patient… 

Then add an egg yolk, mixing it into the garlic as you turn your pestle, and, drop by drop, begin to add olive oil, as you continue to turn the pestle. Don't add more oil until the last bit has completely emulsified into the sauce. Again, be patient… after a while, you will be able to add more oil at a time. Continue thus, turning always in the same direction, until the sauce is thick enough that your pestle will stand up on its own, like this:

 
Now, if you like—and I do like—you can temper the sauce with a few drops of freshly squeezed lemon juice. Adjust for seasoning and you're done! 

At this time of year, I like to serve aioli with steamed seasonal vegetables: asparagus, artichokes, green beans, together with baby carrots and new potatoes still in their jackets. If you are perfectionist, you should steam them separately so that each will be done to just the right degree, having lost their rawness but still brightly colored and offering some slightly resistance to the bite. Lazy cooks like me, however, add all the vegetables at once on a steamer placed over simmering water in a large covered sauté pan and let them all steam together until the potatoes are done. (You will know when they are done when you can prick them with a paring knife and then remove the knife without picking up the potato.) 

I like to serve this dish 'family style, by placing a small bowl with the aioli in the middle of a platter, then arranging the steamed vegetables around the platter. Each diner can spear a vegetable of their choice, dip into the sauce and eat. It's a lovely, convivial way to share a meal. But you can also serve the sauce separately, to be passed around to each diner to serve themselves—perhaps a better plan if you're not on intimate terms with your dining companions. 

NOTES: Purists will tell you that the original aioli was made only with garlic, salt and olive oil—no egg yolk. But all the contemporary recipes I have seen, including the one in the Larousse Gastronomique, call for the egg yolk which, of course, greatly helps the emulsification process. (Some versions call for adding a bit of boiled potato or soaked bread instead of egg yolk, but they are a distinct minority.) And while the same purists will tell you that aioli is definitely not a kind of mayonnaise, you can make a rather close ersatz version by adding a few cloves of garlic to mayonnaise made in a blender or food processor. It's a practical, but not very romantic, solution. And the original mortar and pestle method, once you get the hang of it, is really quite easy. It only requires a modicum of skill and, most of all, a sense of patience. They say that making aioli while you're nervous is a surefire way for it to 'curdle'. 

The best of olive oil to use for this dish is, of course, from Provence, where the olive oil is fruity but lighter than most Italian olive oils, especially the ones from Puglia and Sicily. But I've made the sauce from fruity Italian olive oil that suited me just fine. The most important point, perhaps, is to make sure that the garlic is as fresh as it can be. As for measurements, the Larousse calls for 4 cloves of garlic, one egg yolk and about 2.5 dl (1 cup) of olive oil. But being a garlic fiend, I sometimes add a clove or two more, depending on the size of the cloves. 

For a true Provençale treat, the classic Grand Aïoli is made with desalinated and poached salt cod, boiled snails (actually, a special kind of snail called bulots), hard-boiled eggs and boiled vegetables, typically green beans, new potatoes, baby carrots, cauliflower, fennel, chickpeas, zucchini, beets... It makes for a sumptuous but healthy spring or summertime meal. At the opposite end of the spectrum, aioli is perfectly delicious as a starter with a single vegetable; to my taste, asparagus and artichokes are especially lovely covered with an unctuous dressing of aioli. 

Post-scriptum: Contrary to what you may have read recently, the word aïoli is not Italian for mayonnaise, which is, quite simply, maionese. The word comes from ail (French for garlic) and oli, the Provencale dialect word for oil (huile in standard French). Because the word sounds Italian to many non-Italian speakers--Provencale dialect has a lot in common with Italian-it seems to create some confusion.
Saturday, December 19, 2009

Côtes d’agneau Champvallon


This dish brings me back to my Paris days, when I took a couple of years off from the law to teach English.  Hearty but easy on the pocketbook, it was just the ticket for a temporary bohemian. These days my pocket are a bit deeper, but I still enjoy it from time to time, when in the mood for something filling and savory. 

You fry some lamb chops (one per person) in olive oil in a skillet until golden brown on each side, and season well with salt and pepper. Remove the chops from the skillet and place in a gratin dish which you will have rubbed well with a garlic clove.

In the same skillet, sauté some finely chopped or thinly sliced onion until translucent, then add peeled and thinly sliced waxy potatoes (one or two per chop should do, depending on the size and your appetite). When the potato slices are just beginning to brown, add to the gratin dish and arrange the slices around and over the lamb chops.

Deglaze the skillet with a bit of white wine and pour over the lamb and potatoes. Add enough broth or water to come up, say, halfway up the potatoes. Nestle a sprig or two of fresh thyme and a couple of bay leaves among the lamb and potatoes. Bring the broth to a simmer on top of the stove (if your gratin dish is flameproof) and then place in a hot oven (200C, 400F) and bake for about 45 minutes or so, until the broth has nearly evaporated and the potatoes are tender and have nicely browned on top.


NOTES: For this dish, I like to use shoulder lamb chops, which are very economical and stand up well to the long cooking. For the potatoes, you want firm, waxy, yellow-fleshed ones like Yukon gold, not too large or too small. And for the broth, the light taste of chicken is best but a light beef broth would do as well.

The cooking times varies considerably among recipes. Some call for a much longer cooking period (an hour to an hour and a half) at a somewhat lower temperature (180C, 350F), most of which tell you to cover the dish with aluminum foil to avoid the broth evaporating too quickly and the potatoes from over-browning. For these recipes, I'd add a bit more broth as well. These recipes generally have you add the potatoes raw into the gratin dish, as the extra cooking time is more than sufficient to cook them without the initial browning.

But I like to save time, which you can accomplish by two 'tricks' mentioned in the above recipe: sautéing the potatoes before adding them to the gratin pan and bringing the broth in the gratin dish to a simmer on top of the stove before putting it in the oven. Just make sure you have a gratin dish that will not crack when exposed to heat in this way—like the ones made of enameled cast iron, stainless steel or copper.

The dish makes a lovely piatto unico. Last night we followed it with a green salad, a  delicious creamy cheese named Chaource and nice ripe pear. All washed down, of course, with a few glasses of red wine.

According to the Larousse Gastronomique, this classic dish dates from the reign of Louis XIV. It was supposedly invented by one of his mistresses, who supplanted the Maquise de Maintenon for a time in his affections by indulging the gluttony of the king. But why the name? Perhaps this dish was named after the archbishop of Paris during Louis XIV's time, François de Harlay de Champvallon? It seems like the most logical explanation but, if so, it is rather ironic, since the good prelate witnessed Louis' secret marriage to the marquise. Or did the mistress herself carry the name? Not impossible—it is said that the archbishop's life was filled with scandal. Champvallon is also the name of a town (pop. under 500) in the region of Bourgogne, but why this tiny town should have given its name to this way of making lamb chops, I have no idea. Perhaps some gentle reader could enlighten us...

Lamb Chops Champvallon on Foodista

Sunday, November 8, 2009

Moules au curry


Here's a wonderfully rich but yet light supper dish—steamed mussels in a curry cream sauce—from Belgium, the world capital of mussel dishes. With a crusty baguette to sop up the delicious sauce, you have a one-way ticket to culinary nirvana.

Begin by lightly sautéing chopped shallot and parsley in butter (or butter mixed with some olive oil), sprinkle this soffritto with a bit of cayenne pepper (not too much, just enough to give the dish a little 'kick') then pour over a cup or so of white wine. Allow to simmer for a few minutes, then add your mussels, in their shells. Cover and allow the mussels to steam until they open, then transfer the mussels with a slotted spoon to a heated serving vessel (I find that an enameled cast-iron soup pot is ideal) and keep warm while you make the sauce.

Allow the juices in the pot to reduce for a minute or two over high heat, then add a good pour heavy cream and sweet curry powder (or curry paste if you have it) to taste. Allow to reduce to a saucy consistency and pour over the mussels. Sprinkle with a bit more chopped parsley and serve immediately.

As for measurements, I find that 500g or a pound of unshelled mussels is about right for someone with a healthy appetite, if you are serving this as the main course of a light supper. As a starter, count on half of that. For each serving of mussels, use one small shallot and a sprig of parsley for the soffritto, and a small glassful each of wine and cream. The amounts of cayenne and curry are a matter of taste, but I'd add a small spoonful or the cayenne and several good shakes of curry. But exact measures here, as for so many dishes, are not that important. Your judgment and experience are your best guides.


NOTES: Try to find smallish mussels, which have more delicate taste and texture. These days mussels are raised in 'mussel parks' rather than collected on the shore so that they carry very little (if any) sand, but if you have any doubts about it, you can soak them in water for about an hour before cooking. Check the juices after you have removed the steamed mussels from the pot; if you see any sand, then strain the juices through cheese cloth before proceeding. Mussels also used to come with 'beards'—those threads that the mussel used to attach itself to whatever it was growing on. These days mussels are also sold de-bearded but if not, the beard needs to be removed.

The dish is not really meant to be 'hot' but simply savory. The curry should be of the 'sweet' variety and the cayenne used with discretion. But there is something about the combination of sweet—from the cream and shallots—and savory from the curry that is just exquisite. Do try it some time.

If you omit the cream and curry, this dish becomes the classic moules marinières. Mussels steamed this way is the departure point for an incredible variety of variations, with tomatoes, saffron, fennel... and many other variations on the theme. In Belgium, steamed mussels are often paired with French fries (which are really Belgian, not French, in origin, by the way) and washed down with a good beer. Italians also make steamed mussels; if you want to try one example, see my recipe for a sauté di cozze.


Saturday, October 10, 2009

Quick Note: Salade frisée à l'anchoiade

One of my favorite cold weather salads back in Rome were puntarelle, a kind of chicory typically dressed with a kind of garlic and anchovy vinaigrette. Fond memories...! This salad is a more refined French cousin, fit for elegant dinners but rustic enough for an everyday dinner. It makes a fine light entrée, a bed for fish or even a contorno for a seafood dish.

There are various ways to make anchoiade. For this vinaigrette-like version, melt some anchovy fillets in just a little bit of olive oil (you can also just melt them in a dry pan) over very low heat, taking care not to actually cook them. Then blend the fillets with a small spoonful of white wine vinegar, salt, freshly ground black pepper and a good pour of olive oil. Taste for balance and adjust the ingredients to your liking. Pour into a bowl or container and add a whole clove of garlic. Let the garlic steep for about an hour or so, remove it before spooning the anchoiade over the frisée. Serve with crusty bread and a crisp white wine.

NOTES: As always, whole anchovies packed in salt will give the best flavor, but fillets packed in olive oil will do fine. If you want a really assertive garlic flavor, you could add the garlic clove to the blender, but this would tend to overwhelm the frisée, which has a fairly delicate taste. I will post some time soon my more rustic mock 'puntarelle', which I use to console myself when I'm feeling nostalgic for that Roman classic.

Salade Frisée à L'anchoiade (Frisee Salad With Anchovy Vinaigrette) on Foodista

Friday, October 9, 2009

Gratinéed Ox Tongue in Mushroom Cream Sauce


As mentioned recently, veal tongue is a common part of a bollito misto, but tongue is also a wonderful dish all on its own. Although classified as an organ meat, tongue doesn't taste 'organ-y' at all. Rather it tastes like a richest, most unctuous cut of beef you have ever had. If you haven't tried tongue, you owe it to yourself to do so, at least once.

Ox tongue (also known as beef tongue) is actually tastier than veal tongue, so when made on its own, you might prefer it--provided you have a healthy appetite, since ox tongues are quite large, generally weighing 1.5-2 kilos (3-4 lbs.) or even more. They also take quite a bit longer to cook, 3 hours or more, as opposed to 1-1/2 to 2 hours for the typical veal tongue. You need to pre-boil tongue with the usual odori for that length of time. You then let it cool a bit (you can run it under cold water) and peel off the skin.After boiling, it should come off rather easily. Some recipes tell you to peel the tongue after 20-30 minutes of cooking, which (I suppose) allows the tongue to better absorb the aromatics and possibly cook a bit faster. Allow the tongue to cool completely and then slice horizontally as much as of it as you plan to use for your dish. (Unless you're having dinner for 8, you probably won't be eating the whole thing in one sitting!)

Once pre-boiled, the tongue can be eaten as is--it is marvellous with salsa verde--or simmered in a variety of sauces. In Italian cooking, tomato sauce is an obvious and common choice. But this being Fall and all, I was in the mood for something warming and woodsy, so I made my favorite mushroom cream sauce: thinly slice mushrooms (I used 'baby bellas' but, of course, chanterelles or some other wild mushrooms would make it even better) and saute them quickly in a mixture of olive and butter, season with a bit of salt to encourage them to render their juices. When the liquid has evaporated and the mushrooms have much reduced and are just beginning to brown (as wet heat turns to dry, you will hear the mushrooms start to sizzle) add a buttuto of shallots and parsley, mix well, and sauté for just a minute or two more. (The mushroom cooked this way are wonderful as a side dish, by the way.) Add a ladleful of rich beef broth (or stock) and let it reduce until quite syrupy, then pour in an ample amount of cream (a good cupful, at least) and allow that to reduce as well, but only until it reaches a sauce-like consistency--and a fairly thin one, too, as the sauce will reduce a bit more in the oven. Taste and adjust for seasoning.

Assemble your dish by lay out the tongue slices in a greased gratin dish, overlapping them slightly like so many roof tiles. Spoon over the mushroom cream sauce, making sure that the mushrooms are well distributed, then top with lots of grated parmesan cheese and dot with butter. Bake in a hot oven (200C, 400F) for about 15 minutes, until the sauce is bubbling and a nice golden crust has formed on top. You can help the crust along by browning the dish under a broiler for a few minutes at the end. (Make sure you don't reduce the sauce too much--if you're like me, you'll want enough to sop up with bread later on...!)


Allow the gratin to 'settle down' for a few minutes (while you're enjoying your entrée) and serve in its gratin dish. And make sure you have plenty of crusty bread to sop up that exquisite sauce.

NOTE: I use the mushroom cream sauce described above for all sorts of things: as a topping for ham steaks (which can be made in exactly the same way as this tongue dish), to dress egg pasta or potato gnocchi--it's my favorite sauce for gnocchi ai funghi--or, in the Austrian manner, served with the wonderful bread dumplings called knoedel or, in Italian, canederli.

Beef Tongue on Foodista


Saturday, October 3, 2009

Buttery Mashed Potatoes


While it's true that we mostly eat Italian at home, there are some dishes that even I have to admit the French do better. (I hope Angelina isn't listening....) One of them is potato puree, also known as mashed potatoes, and, more specifically, the incredibly buttery version made famous by Joel Robuchon at Jamin, his Paris restaurant.

You begin by either steaming or boiling mealy potatoes in their jackets (russets or Yukon golds would do well here) until perfectly tender. Drain them and run some cold water over them to cool them off slightly. Peel them as soon as they are cool enough to handle and cut them into chunks into a food mill.

Mill the potatoes into a dry pan over medium heat. With a wooden spoon, stir them and allow any water to evaporate. The potato puree will be rather stiff and hard to stir, but persist. And don't worry if some of the potato begins to stick to the bottom of the pan, as  this is a sign that the potatoes are drying as they should and will anyway soon rectify itself.

Now that the potato flesh is perfectly dry, it is ready to absorb lots and lots of butter, which you will add to the potatoes a bit at a time. When I say a lot, I mean at least a stick or more (100 g) for 1 kilo (2 lbs.) of potatoes. Season liberally with salt. As you add successive bits of butter, the puree will soften and form a kind of a ball. Taste them--they should be well seasoned and have a wonderfully buttery flavor. If not, add more butter and/or salt. Finally, thin out the puree with some hot milk (whole milk, obviously!) or, if you are feeling particularly decadent, with some cream, until you reach the consistency you prefer. I like mashed potatoes rather soft, just thick enough to hold their shape.

Serve immediately. I like to place a dab of butter on top of the mashed potatoes, just for show.

NOTES: This recipe is from a wonderful cookbook co-authored by Robuchon and Patricia Wells called Simply French (William Morris & Co. 1991). Robuchon calls for a full 12 tablespoons (1-1/2 sticks or 150g) of butter and says that the amount may be doubled for a richer version! He also calls for passing the puree through a fine sieve, which produces a velvety texture. But for this 'home-style' version the food mill is enough. Unlike most mashed potatoes, these will keep for up to a hour before serving.

Sunday, September 6, 2009

Fricassée de poulet à l'ancienne


I grew up on Julia Child. Other than nonna Angelina herself, no one inspired my love affair with cooking more. While other kids were eating milk and cookies and watching cartoons, I ran home to make rice and cheese and sit down to the latest instalment of The French Chef. And I practically memorized my Mom's original 1963 edition of Mastering the Art of French Cooking while I was still a teenager living at home. So when I saw Julie and Julia with my folks, I broke out my own well-worn, dog-eared, nearly-falling-apart-at-the-seams 1986 edition, purchased when I was living in New York after law school, and starting reacquainting myself with an old friend. But the dish I was yearning for was not boeuf bourguignon. As much as I love that dish, my favorite dishes from Mastering were the chicken fricassées. And this is one is perhaps the most sumptuous of all—fit for a lovely Sunday dinner: fricassée de volaille à l'ancienne, or "Old Fashioned Chicken Fricassee with Wine-Flavored Cream Sauce, Onions and Mushrooms", on page 258.


As Julia says, this is not a difficult dish to execute. But it does involve a fair number of steps, so plan on spending a good hour and a half or even two hours, depending on how fast you work in the kitchen. The good part is, it can be made entirely ahead of time and finished off just before serving. Here is my (somewhat abridged) version of Julia's recipe:

Cooking the chicken:
Step 1: To begin, sauté a sliced onion, carrot and celery stalk in 4 tablespoons of butter (I substituted 2 Tbs. of butter and 2 Tbs. of canola oil) over medium-low heat for about 5 minutes, until almost soft but not browned, in a large braiser:


Step 2: Push the vegetables to the sides of the dish and add a frying chicken that has been cut up into pieces. Raise the heat to medium and turn the chicken pieces often until they have stiffened slightly without coloring more than a light golden yellow—about 3-4 minutes. Lower the heat and cover the braiser and cook the chicken very slowly for 10 minutes, turning the pieces once. The chicken should swell slightly and stiffen a bit further, but it should not brown:


Step 3: Sprinkle the chicken pieces with salt and white pepper, then with 3 Tbs. of flour. Turn so that the flour is coated with the cooking butter. Allow to cook slowly for 4 minutes, turning once.

Step 4: Then add enough hot chicken stock to almost cover the chicken pieces, then enough white wine to just cover the pieces. Insert an herb bouquet of parsley, fresh thyme and half a bay leaf inside a small cheesecloth 'bag'. Cover and simmer for 25-30 minutes:


Preparing the garnish:
Step 5: While the chicken is simmering, make some white-braised pearl onions and stewed baby button mushrooms (see below):


Making the sauce:
Step 6: When the chicken is done, remove the pieces along with the herb bouquet from the braising pan. As the liquid continues to simmer, skim off the fat from the surface. Then raise the heat and allow the liquid to reduce until it is thick enough to coat a spoon nicely. Correct the seasoning.


Step 7: In a bowl, whisk together two egg yolks and 1/2 cup of heavy cream. As you continue whisking, add the hot cooking liquid to the bowl by spoonfuls until you have added about a cup. Then add the rest of the liquid in a thin stream (or by ladlefuls) and mix as you go. Pour the liquid—now a sauce—back into the pan and bring it to a boil for about a minute, adding the cooking juices from the onions and mushrooms. Pass the sauce through a fine sieve, to eliminate the vegetables and sundry small particles, back into the bowl. (By the way, don't throw out the vegetables left in the sieve; it's the cook's privilege the eat the vegetables, which are absolutely delicious!) Grate in a bit of nutmeg. (Here Julia calls for a few drops of lemon juice—presumably to mimic the taste of crème fraîche—but I found that the wine had already given the dish enough acidity, so I omitted it. And since I did not seem to have quite enough sauce, I thinned it a bit with more cream.)


Step 8: Arrange the chicken pieces, onions and mushrooms in a clean casserole (or, as I did, you can clean out the braising pan). Spoon over the sauce to coat the contents evenly. If you are making this ahead, Julia suggests spooning over more cream or milk to prevent a film from forming.)


Step 9: Just before you are ready to serve, bring the dish back to a simmer and allow to simmer, covered, for about 5 minutes, until the dish is fully reheated. Off heat, add a tablespoon or two of butter to enrich the sauce (!) and baste the chicken pieces wth the sauce until the butter has completely melted into the sauce. Serve the fricassée in its casserole, sprinkled with some finely chopped parsley.


Bon appétit !

NOTES: The vegetable garnishes for this dish are made as follows: The pearl onions are simmered in butter and chicken stock until they are quite soft, but have not lost their shape. Most of the liquid should have evaporated but the onions should not brown. In Mastering, Julia says that this will take around 50 minutes, but I find that 30 is more like it. You can save yourself a great deal of time and trouble by using frozen, peeled pearl onions. The mushrooms are simmered in water, lemon juice and a pinch of salt for about 5 minutes. (Here I find 10 minutes is better.)

Julia suggests serving fricassée de poulet à l'ancienne with buttered noodles or steamed rice. We had it with some steamed baby potatoes, which was lovely. We preceded this rich dish with a salade frisée aux lardons and followed it with a bowl of fresh fruit. A lovely Sunday dinner.

Julia explains that a fricassée a hybrid cooking method combining both dry and wet heat. A chicken dish that is cooked entirely by dry heat (eg, in butter or oil) is properly called a sauté, while a dish cooked entirely by wet heat is properly called a stew. The more observant readers will have noticed that this fricassée is actually a close cousin to coq au vin and a distant cousin of boeuf bouguignon. The cooking methods are, in fact, quite similar, and the two dishes share the same garnishes. The main difference lies, of course, in that this dish is 'white' and the others 'brown'. In 'white' dishes, the cook studiously avoids browning the ingredients, the wet ingredients include white wine, and the sauce is finished off with egg yolks and cream. In 'brown' dishes, the meat and other ingredients are browned, the wet ingredients include red wine and the sauce is thickened with a beurre manié. But, in the end, they are all manifestations of the same basic techniques.

Chicken And Cream Sauce on Foodista

Salade frisée aux lardons


This rustic salad was one of my favorite starters when I lived in Paris. It is sheer simplicity to make: just brown some lardons slowly in a bit of oil (I like olive oil) until they have rendered their fat and are lightly crisp. While the lardons are browning, rub a salad bowl with garlic, then add frisée that has been cut up into bite-sized pieces. Salt and pepper lightly (remembering that the lardons will be salty). When the lardons are nicely browned, add a tablespoon of white wine vinegar to the pan, swirl around to mix well, and then pour the still-hot mixture over the frisée in the salad bowl. Mix well and serve on individual plates, topped with the lardons and a generous grinding of black pepper.

NOTES: Lardons are bits of cured pork belly cut into smallish cubes or strips. In France, you can buy them already cut up in the store. Elsewhere, get yourself some pancetta or ventreche (which is the French version of pancetta) and cut it into thick slices, then unroll each slice, cut off the fattiest parts and cut each strip into small cubes. You can also use slab bacon, but bacon imparts a smokey taste to the salad which is not characteristic of the original, so you may want to parboil the bacon lardons for a few minutes to remove some of the excess smoke flavor before you brown them.

This is the simplest version of the dish—and the one you will find in the Larousse Gastronomique—is my personal favorite. (The rubbing of garlic is my personal touch.) But there are many other versions. Perhaps the most common variation is to add an egg—either poached or hard boiled and sliced in two, or even chopped up, on top of each serving. Some versions call for a bit of garlic or shallot to be sautéed along with the lardons. Other versions call for adding crème fraîche to the lardons instead of vinegar. And other versions call for dressing the frisée with vinaigrette and topping the salad with the lardons. And, finally, a few recipes I've seen call for topping with croutons or boiled potatoes as well as the lardons.

This is typically a winter salad but frisee can be found most of the year, so I like to make it as soon as the weather turns a bit cool. If you can't find frisee, then substitute the white heart of chickory, which has a similar taste and texture. (Frisee is, in fact, a kind of chickory.)

Salade frisée aux lardons is a wonderful entrée to a home-style meal, but in particular if you serve it with egg, it is satisfying enough as a light meal in and of itself.

Odd as it might seem, this salad reminds me strongly of another favorite cold weather salad: puntarelle, one of the signature dishes of Roman cuisine. Will blog about that soon.

Frisee Aux Lardons on Foodista

Saturday, August 22, 2009

Whitefish brandade


Salt cod can be hard to find. It takes some considerable time to prepare and, plus, codfish stocks are dangerously depleted. So what is a brandade maven like myself to do? Well, I recently "invented" a new dish by using smoked whitefish--something you can fish in almost any grocery or supermarket here in the States--to make brandade. The result was different but, to my taste, equally delicious.

It's also very quick and easy to make. Just plop skinned and boned smoked whitefish into a food processor, add some sliced potato and garlic cloves that you will have previously simmered in equal parts milk and water, process, adding equal parts olive oil and cream (or milk) bit by bit until have a smooth puree. Serve with slices of baguette, toasted or browned in a bit of olive oil. (Today I brushed them with oil and browned them in a dry non-stick skillet.)

NOTES: Purists disdain the addition of potato to brandade, but whitefish has a very strong taste, so I'd recommend that particular bit of heresy in this case.

PS: After feeling proud of myself for this discovery, I did a Google search and found out, alas, that any number of people have beat me to it... oh well, it's still very good!

Brandade De Morue on Foodista