Thursday, April 29, 2010

La vignarola


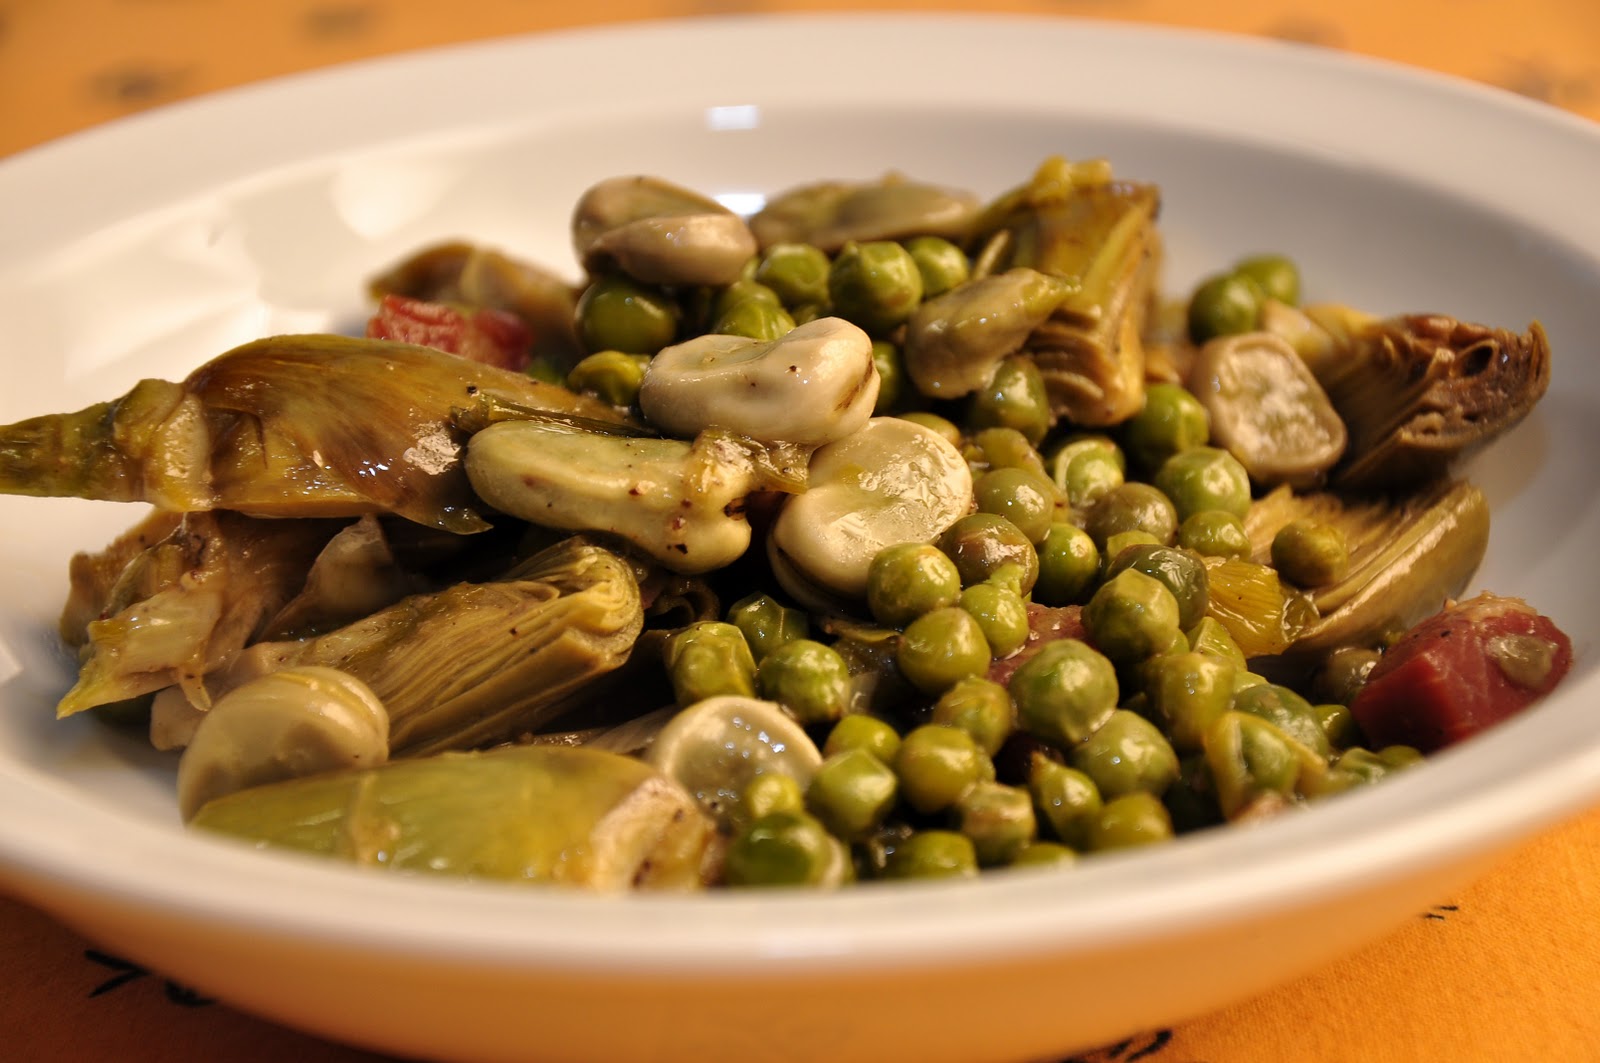
A Springtime Roman treat, la vignarola is a vegetable 'medley' made from spring onions, fava beans, artichokes, peas and tender lettuce. It comes in an entirely vegan/vegetarian version and one that uses a bit of guanciale or pancetta to lend flavor. 

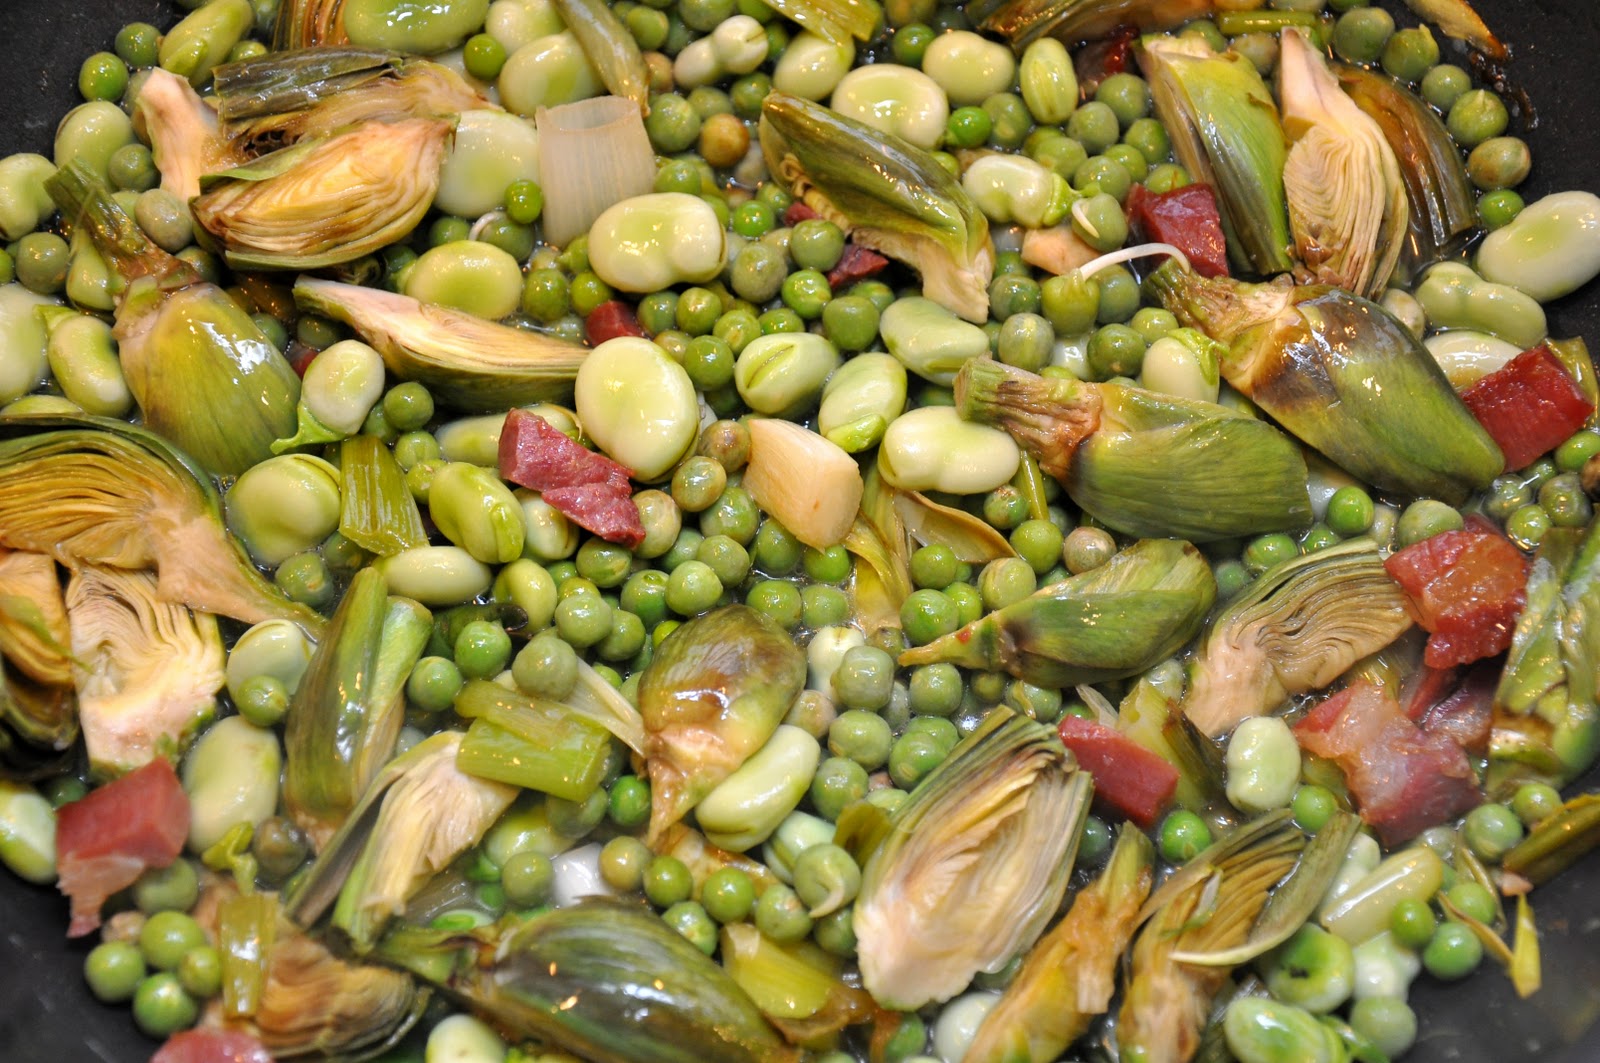
You begin by lightly sautéing a bit of your cured pork meat in olive oil, just until translucent. Then add sliced fresh spring onions (scallions will do nicely as well), sauté for a minute or two, then add your artichoke, trimmed in the usual Italian manner and then sliced into wedges. Mix and continue to sauté for a minute or two longer. Then add fresh shelled fava beans and peas, season with salt and pepper, mix, and add some water to the pan. Cover and simmer gently until all your vegetables are nearly tender. Then add some tender lettuce (Boston or baby Romaine), finely shredded, and continue cooking until the lettuce has wilted and the vegetables are perfectly tender but not 'mushy'. As you prefer, you can cook off the liquid entirely or leave the dish rather 'brothy'. The exact cooking time varies according to the size and freshness of the vegetables but should take no more than 20-30 minutes at most. Serve either hot or, even better, at room temperature. 

Once again, exact measurements are hardly that important, but try to balance the ratio of the main vegetable ingredients—artichokes, peas and fava beans—so they balance each other, so roughly equal amounts by weight of each should work well. 


NOTES: While the above recipe is probably the most typical, as for so many traditional dishes, there are some variations on the theme. Some modern recipes get fancy and add that other typical, but more 'noble', springtime vegetable, asparagus. Some recipes call for the typical large Roman artichokes called mammole, similar to globe artichokes, but personally I like to use tender baby artichokes. Some recipes call for a bit of garlic in addition to the onion. I've seen one recipe that calls for a bit of peperoncino, it seems to me that would utterly overwhelm the delicate, sweet flavors of the spring vegetables. Some call for adding a bit of Roman mint called mentuccia or a few drops of lemon juice to 'brighten' the flavors. The amount of water varies from recipe to recipe. Some call for just a few drops of water—if necessary—to keep the vegetables moist. Personally, I like to add a fair amount of water to the pan and allow it to evaporate. I find that this melds the flavors more effectively and saves on the cooking time. Some recipes substitute broth or wine for the water, but I prefer the pure vegetable flavor you get from adding only water. As mentioned above, in some recipes, you serve your vignarola as a zuppa, still quite brothy, which makes for fine dipping with some crusty bread. Otherwise, you can let the liquid cook off and serve it perfectly 'dry'. 

The dish is typically an antipasto, but it can serve as a light second course or, in its vegetarian version, even as a side dish. 

La vignarola has a very short 'season' of only a few weeks while all the requisite vegetables are simultaneously in season. The dish is still good even if you're missing one of the ingredients (in fact, when I made it this time I didn't have the lettuce on hand.) But you can successfully use substitutes when one or more of the ingredients are out of season. Frozen peas are perfectly fine in lieu of fresh peas (just add them rather later in the cooking) and—believe it or not—edamame, even frozen edamame, are a fine substitute for fava beans, which can be hard to find in the US. And, in a pinch, you can use frozen artichokes. So, in fact, you can enjoy la vignarola more or less any time of year. But, of course, this dish is at its very best when you use all fresh, tender, young spring vegetables that the Italians call le primizie di primavera

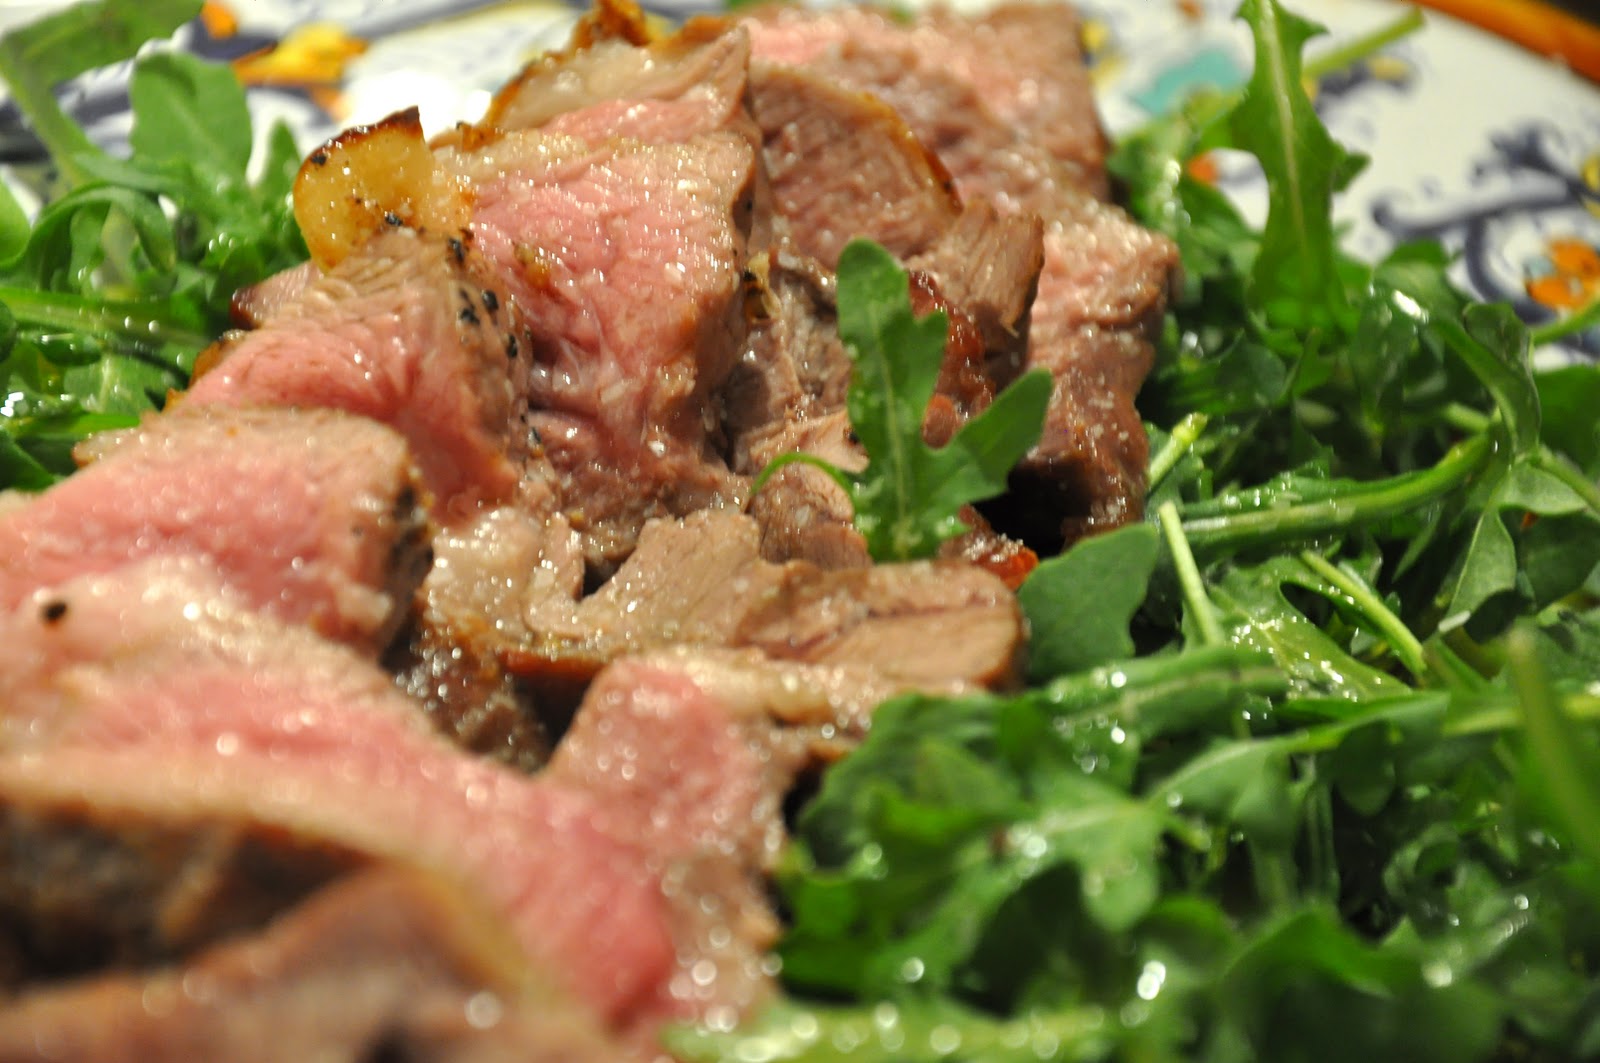
By the way, vignarola is also apparently the name of a kind of bruschetta topped with a lamb and cicoria mixture, an unusual antipasto that I found in a book called Le specialità della cucina romana: ricette tratte dalla tradizionale cucina casalinga. But by far the more common use of the word is for the recipe described above. 

The word vigarola derives from 'vigna', or vine, since it is said that the vegetables that go into it were typically grown in between rows of grapevines.

Sunday, April 25, 2010

Agnello brodettato


In Italy, as elsewhere, lamb—especially the milk-fed baby lamb called abbacchio—is strongly associated with the Springtime. Roman cookery has some wonderful lamb dishes, such as the grilled rib chops known as scottadito (see this post) and lamb roasted with potatoes known as abbacchio al forno con le patate (see this post for something very similar) as well as lamb braised with rosemary, vinegar and finished with a touch of mashed anchovy called abbacchio alla cacciatora (this one is still to come). 

Slightly less usual but equally good is this dish of braised lamb with lemon and egg sauce. The term 'brodettato', literally 'in a little broth', is more or less synonymous with the term 'fricassea'; they both refer to braises that are thickened just before serving with a lemon and egg finish. The technique is wonderful with lamb, but it is widely used with vegetables, too (as in this post on green beans in fricassea). 

This dish is traditionally eaten at Easter, lamb and egg being symbols of the crucifixion and resurrection, but in my book it is too good to reserve for a single day of the year. The truly authentic version, by the way, is capretto brodettato, made with baby goat (aka kid) but since neither baby goat nor baby lamb is very common these days, at least here in the US, I have prepared the dish with good old fashioned lamb stew meat. 

The recipe is simple but a bit tricky at the end. You begin with a soffritto of an onion and 50g (2 oz.) of rather fatty prosciutto (or pancetta), chopped together finely and gently sautéed in olive oil or, if you want to be truly authentic, lard. Then add 1 kilo (2 lbs.) of lightly floured cubes of lamb meat and turn up the heat a bit. Allow the meat to brown lightly—taking care not to burn the onion—and season with salt and pepper. Then add a splash of dry white wine and allow it to evaporate completely. Add enough water to almost cover the meat, lower the flame and cover. Let the lamb braise until tender, normally about an hour but the time will vary depending on how young your lamb is and how big your cubes of meat are. 

Shortly before the meat is done, beat two egg yolks in a bowl and mix with the juice of a freshly squeezed lemon and finely chopped parsley. When the meat is fork tender, remove from the heat. Add a spoonful of the cooking liquid to the egg and lemon mixture to temper it, then pour the mixture immediately over the lamb and stir, until well incorporated. Return to the burner over very low heat and keep stirring gently, until the egg has thickened the cooking liquid into a smooth, silky consistency. Serve immediately.


NOTES: The trickiest part of the dish is the final addition of the lemon and egg mixture. If you let it cook too long or get too hot, the egg may curdle and the sauce will 'break', so let it just thicken to the point where the sauce will coat a spoon and remove it immediately from the heat. (NB: The residual heat from the pot will continue to cook the egg and thicken the sauce, so allow for that.) If things seem to be getting out of hand, add a few more drops of lemon juice, which should cool the sauce enough to prevent it from separating. If you are using a terracotta or enameled cast iron cooking vessel, you may well find that the pot retains enough residual heat that you need not put it back on the heat at all. 

The cut of lamb is usually the shoulder or some other tough stewing cut, but this time I used some leg of lamb that I had left over from the tagliata d'agnello from the other day. 

Some recipes for this dish, including the one in La cucina romana e del Lazio by Livio Jannattoni, from Newton & Compton's wonderful Quest'Italia series, call for braising the lamb meat until only a minimal amount of liquid is left in the pot—but I prefer 'brothier' version, so I add a bit more water if need be during braising, which gives you lots of delicious sauce to fare la scarpetta.

Post scriptum: The slaughtering and eating of baby lamb for Easter is an age-old tradition in Italy and one that the first generation of immigrants to America maintained—or at least they did in my family. According to family legend, in the old days, my great aunt would buy a live baby lamb in the market, still baaing, bring it home and keep it in the bathtub. Then, the day before Easter, she would take a sharp knife and…. well, you can imagine the rest of the story.

Saturday, April 24, 2010

Linguine con alici


Here's another quick and easy dish for those days when you don't really feel like cooking but you want to eat something tasty. It's a riff off of the classic ajo e ojo with anchovies.

Start as you would for aglio, olio e peperoncino, by very gently browning a few cloves of garlic—for this variation, I like to chop the garlic rather than using slightly crushed cloves—in fruity olive oil. When the garlic is just beginning to brown, add some red pepper flakes and, almost immediately thereafter, a can of anchovy fillets. Allow to cook gently over low heat, stirring from time to time, until the anchovies have almost entirely 'melted'. Add a pinch of salt (not too much, since the anchovies are already salty) and chopped parsley, stir and turn off the heat.


Meanwhile, cook your linguine (spaghetti are also excellent with this sauce) al dente in well salted water, drain (but not too well) and add to the skillet. Mix well and allow the spaghetti to cook over gentle heat for just 30 seconds or so, long enough so that the pasta absorbs a bit of the sauce and any excess liquid evaporates. Taste for salt and serve immediately. Buon appetito!

NOTES: Like ajo e ojo itself, the key to success lies in the fruitiness of the olive oil and the freshness of the garlic. Go easy on the salt, however, as the anchovies, of course, are themselves quite salty. Of course, if you use anchovies packed in salt—which you need to rinse and fillet yourself under running water—the flavor will be even better, but then you will have departed from 'quick and easy' territory. 

As for measurements, this is another dish where they are not all that important—or rather, they can be varied according to taste. For two people (200g/8 oz. of pasta), I use 2 or 3 garlic cloves, a small can of anchovies and a sprinkling of red pepper. As for oil, I use just enough to cover the bottom of the skillet. Just leave any excess oil in the bottom of the skillet as you serve. But don't skimp: this pasta is supposed to slither on your plate!

Thursday, April 22, 2010

Insalata di sardine e ceci


One of the most delicious and satisfying antipasti in the Italian repertoire is also one of the simplest: tonno e fagioli, or tuna and beans. Well, the other day I was rummaging through my pantry, not really feeling like cooking—yes, it happens even to me sometimes—and found a can of ceci (chickpeas) and a can of sardines packed in olive oil. And the thought occurred to me: would these go together as well? I tried it and found it wonderfully satisfying.

You make this simple salad in the same way you make tonno e fagioli: combine a can of sardine fillets and a can of chickpeas (rinsed and drained) in a large bowl, then add some chopped red onion and chopped parsley, a generous pour of fruity olive oil and a few drops of freshly squeezed lemon juice. Season generously with salt and pepper and mix together well. Taste, adjust the seasoning if need be, and serve, over a bed of greens if you like. 


To my taste, the result was just as delicious as the classic antipasto—if anything, it's even more sumptuous. It exemplifies how taking a tried-and-true idea and making a few tweaks can produce something familiar, yet new. It's the kind of creativity that like best.

Insalata di sardine e ceci makes a great antipasto or, with some crusty bread, a light lunch or supper.

Tuesday, April 20, 2010

Caserecce e fagiolini


Weeknight dinners at our house much of the time revolve around pasta and vegetables. They quick and easy, and the combinations are almost endless. For some reason, however, the combination of pasta and green beans is not a particularly common one in Italian cooking, with the notable exception of trennette al pesto, which often includes green beans and potatoes. Perhaps it has something to do with the elongated shape of green beans, which can make them a bit awkward to pair with most pasta shapes

Nevertheless, green beans and pasta can actually get along famously. There is a type of pasta (see photo left) variously called caserecce, gemelli or strozzapreti, which have something of a similar shape to green beans, so they pair nicely. And green beans get along famously with tomatoes, as in the classic fagiolini in umido, so it doesn't take too much of a leap of the imagination to put the three elements—pasta, green beans and tomatoes—together for a tasty treat. 

Make a tomato sauce beginning with a soffritto of chopped onion sweated in olive oil along with a bit of garlic. When the onion is translucent and soft, add some crushed canned tomatoes (or chopped fresh tomatoes in season) along with a good handful of fresh mint leaves (or basil) and, if you like, some red pepper flakes—not too many, just enough to add a hint of spiciness. Allow the tomatoes to simmer until reduced to a saucy consistency, about 10-15 minutes.

Meanwhile, parboil your green beans, trimmed and cut into sections about the same length as the pasta, in salted water until cooked just crisp-tender, and add to the tomato sauce to simmer and insaporire until the beans are quite tender. In the same water in which the beans cooked, cook your pasta al dente and add to the green bean and tomato sauce. Mix well, let it simmer for a minute or two for the flavors to meld and the pasta to absorb a bit of the sauce, then serve. If you like, fold in some pecorino cheese that you will have grated with the large holes of a four-sided grater, so they emerge as long strips, about the same length as the pasta and green beans. 

NOTES: Caserecce are really the perfect pasta shape to go with green beans, and are fairly easy to find, but you can use other 'semi-long' pasta shapes such as trofie, sedani or stringozzi. Also note that, confusingly, the term strozzapreti is used to describe a number of different types of pasta, so check the shape before you buy. 

If you are pressed for time, you can also cook your green beans together with the pasta rather than separately, then add both to the tomato sauce. The result will be slightly less 'beany' (since the green beans will not have time to lend their flavor to both the cooking water and the sauce) but still quite good. 

Measurements for such a homely dish don't matter too much, but the general rule of thumb: a 1:1 ratio by weight between dry pasta and the condimento (ie, the green beans) applies very well to this dish. As for the tomato sauce, it is pretty much up to you. I don't use too much tomato—perhaps half a small can for 200g (1/2 lb.) of pasta, so as not to overwhelm the taste of the green beans.

Sunday, April 18, 2010

Carciofi alla giudia


Carciofi alla giudia, or Jewish-style artichokes, are one of the signature dishes of Roman Jewish cooking and a very popular dish in Rome. I have rarely seen this dish in Italian restaurants in the US, perhaps because it is a bit tricky to make, or because it can't be made ahead, or because of the quality of artichokes here--it is a dish that relies almost entirely on the taste of the actual artichoke--there's no way to dress it up with other ingredients to make it taste better. Anyway, you trim an artichoke in the typical Italian way, cutting off all the inedible bits (including most of the leaves), peel the stem and scoop out the choke. Then you spread the artichoke out as much as you can by hand—to do this successfully, you will need fresh and rather young artichokes that are 'flexible'. You then fry the artichoke gently in extra-virgin olive oil, starting on the sides:

As the artichoke softens, place it 'face down' in the oil, little by little pressing it down until it spreads out almost flat and the artichoke is tender. To check for tenderness, pierce the artichoke at its thickest point with a paring knife. If you can remove the knife from the artichoke without picking it up, it should be done.

Now, just before serving, comes the tricky part: dip you hang in lukewarm water and sprinkle it into the frying pan to provoke a splattering, covering the frying pan very quickly to prevent the oil from splattering all over the stovetop (and the cook!) When things have died down, you're done. The result is a lovely open "flower" whose taste is indescribable and whose texture is an amazing mixture of crispy and soft.

A view from the Ghetto in Rome
NOTES: If you are ever in Rome, the place to eat carciofi alla giudia is an area referred to as the "Ghetto", which had traditionally been the Jewish section of town. (I lived right next to the Ghetto for the first six years or so of our time in Rome, in a small square named piazza San Paolo alla Regola.) There are a number of places that specialize in Roman Jewish cooking, which has a long history—Jews have lived in Rome for over 2000 years, since the days of the Empire. It is an interesting cuisine.

The ghetto itself has an interesting history. Starting in the year 1500 Jewish Romans had to live in a particular walled in area of town, which was called the 'ghetto' (hence our word). They had to be back by sundown, at which time the gates were shut. And on Sundays, they were forced to go to Mass in a local church and hear about how they were responsible for killing Christ and were sure to go to hell if they did not convert to Christianity. (But I guess there were worse places to live if you were Jewish.) Anyway, thankfully all that came to an end in the mid-19th century. The wall was torn down long ago and today the ghetto is actually a rather tony area, located as it is right in the center of town. An enormous (and rather pompous) synagogue was built around the turn of the century and today serves as the center of the Roman Jewish community. The church is still there, by the way, and it is located among some of the most interesting and accessible ruins in Rome, the remains of the Portico d'Ottavia (see photo above). Right next to the Portico is the most famous of the Roman Jewish restaurants, called Giggetto. It's very touristy but the food is actually quite good. Down the same street a bit is the Taverna del Ghetto, which is the place the locals go (or at least they used to; a friend to whom I recommended the place came back telling me that it is now overrun with American tourists...)

It can be hard to get good artichokes in the US. Try to find ones that have leaves still tightly bound together. If the artichoke leaves are open and spottled, then don't buy it, it's too old. Unfortunately, that describes about 90% of the artichokes you'll find in the supermarkets here, at least outside California.

There are other great ways to enjoy Italian-style artichokes, like carciofi alla romana, the other signature Roman artichoke dish, or cut into wedges and deep fried, the way Angelina used to make them. If you are lucky enough to find really fresh, baby artichokes, they are lovely cut into thin slices and eaten raw in pinzimonio—dipped in olive oil seasoned with salt and pepper.

Saturday, April 17, 2010

Aïoli with Spring Vegetables


While versions of it are made around the rim of the western Mediterranean, from Spain all the way to Sicily, this garlic sauce is best known in its Provençale incarnation known as aïoli. It is a commonplace to refer to aioli in English as garlic mayonnaise, but it is really something rather different.

You begin with a mortar and pestle. Add several whole cloves of garlic and a pinch of salt. (Besides seasoning the sauce, the salt helps to soften the garlic.) Begin by crushing the garlic cloves against the side of the mortar with your pestle, then starting turn the pestle around in the mortar, always in a single direction, until the garlic has been reduced to a rough paste. This can be slow work, so be patient… 

Then add an egg yolk, mixing it into the garlic as you turn your pestle, and, drop by drop, begin to add olive oil, as you continue to turn the pestle. Don't add more oil until the last bit has completely emulsified into the sauce. Again, be patient… after a while, you will be able to add more oil at a time. Continue thus, turning always in the same direction, until the sauce is thick enough that your pestle will stand up on its own, like this:

 
Now, if you like—and I do like—you can temper the sauce with a few drops of freshly squeezed lemon juice. Adjust for seasoning and you're done! 

At this time of year, I like to serve aioli with steamed seasonal vegetables: asparagus, artichokes, green beans, together with baby carrots and new potatoes still in their jackets. If you are perfectionist, you should steam them separately so that each will be done to just the right degree, having lost their rawness but still brightly colored and offering some slightly resistance to the bite. Lazy cooks like me, however, add all the vegetables at once on a steamer placed over simmering water in a large covered sauté pan and let them all steam together until the potatoes are done. (You will know when they are done when you can prick them with a paring knife and then remove the knife without picking up the potato.) 

I like to serve this dish 'family style, by placing a small bowl with the aioli in the middle of a platter, then arranging the steamed vegetables around the platter. Each diner can spear a vegetable of their choice, dip into the sauce and eat. It's a lovely, convivial way to share a meal. But you can also serve the sauce separately, to be passed around to each diner to serve themselves—perhaps a better plan if you're not on intimate terms with your dining companions. 

NOTES: Purists will tell you that the original aioli was made only with garlic, salt and olive oil—no egg yolk. But all the contemporary recipes I have seen, including the one in the Larousse Gastronomique, call for the egg yolk which, of course, greatly helps the emulsification process. (Some versions call for adding a bit of boiled potato or soaked bread instead of egg yolk, but they are a distinct minority.) And while the same purists will tell you that aioli is definitely not a kind of mayonnaise, you can make a rather close ersatz version by adding a few cloves of garlic to mayonnaise made in a blender or food processor. It's a practical, but not very romantic, solution. And the original mortar and pestle method, once you get the hang of it, is really quite easy. It only requires a modicum of skill and, most of all, a sense of patience. They say that making aioli while you're nervous is a surefire way for it to 'curdle'. 

The best of olive oil to use for this dish is, of course, from Provence, where the olive oil is fruity but lighter than most Italian olive oils, especially the ones from Puglia and Sicily. But I've made the sauce from fruity Italian olive oil that suited me just fine. The most important point, perhaps, is to make sure that the garlic is as fresh as it can be. As for measurements, the Larousse calls for 4 cloves of garlic, one egg yolk and about 2.5 dl (1 cup) of olive oil. But being a garlic fiend, I sometimes add a clove or two more, depending on the size of the cloves. 

For a true Provençale treat, the classic Grand Aïoli is made with desalinated and poached salt cod, boiled snails (actually, a special kind of snail called bulots), hard-boiled eggs and boiled vegetables, typically green beans, new potatoes, baby carrots, cauliflower, fennel, chickpeas, zucchini, beets... It makes for a sumptuous but healthy spring or summertime meal. At the opposite end of the spectrum, aioli is perfectly delicious as a starter with a single vegetable; to my taste, asparagus and artichokes are especially lovely covered with an unctuous dressing of aioli

Post-scriptum: Contrary to what you may have read recently, the word aïoli is not Italian for mayonnaise, which is, quite simply, maionese. The word comes from ail (French for garlic) and oli, the Provencale dialect word for oil (huile in standard French). Because the word sounds Italian to many non-Italian speakers--Provencale dialect has a lot in common with Italian-it seems to create some confusion.

Sunday, April 11, 2010

Tagliata d’agnello


One of my favorite ways to make steak is called tagliata or, to be more precise, tagliata di manzo. The word 'tagliato' means simply 'cut' or 'sliced', and manzo means beef. The dish is, quite simply, sliced steak, grilled rare, arranged over a bed of arugula and dressed with olive oil, salt and pepper and, if you like, garnished with parmesan shavings. (See this post for the recipe.) Well, the other day I saw a nice piece of butterflied leg of lamb at the market, perfect for an early Spring cookout, and the thought occurred to me: why not make a tagliata of lamb instead of beef? An unorthodox idea— in Italian cuisine leg of lamb is usually either cut up for stew or pot-roasted—but that is what I did, and I actually rather liked the result. 

Here's what you do: Marinate a nice butterflied leg of lamb in a mixture of olive oil, salt and pepper to taste, two crushed garlic cloves and a sprig or two of rosemary. You can either whizz these together in a food processor or simply sprinkle them directly on the meat, as you prefer. Obviously, the first method will result in a more assertive flavor. For best results, let the lamb marinate overnight in the fridge, wrapped in plastic (a plastic freezer bag also works nicely). If you don't have that much time or haven't planned ahead, no worries; even an hour or two will lend flavor. If you've refrigerated the meat, take it out of the fridge and allow it to come to room temperature (this should take about a half hour or so). 

Grill the lamb directly over a hot fire, about 10-15 minutes per side, depending on the thickness of your meat, until nicely crusted on the outside and pink, or medium-rare, on the inside. Allow the meat to rest for a good 10-15 minutes, then slice it against the grain and place the slices over a bed of baby arugula. Season the whole liberally with salt and pepper, then drizzle with olive oil and, if you like, a few drops of lemon juice. If you like, some parmesan shavings would not hurt. 

NOTES: The degree of doneness is, of course, a matter of taste, but I find that grilled leg of lamb tastes best 'pink', or medium-rare, in the French manner. (If you want to be sure, check for an internal temperature of 130F/55C with a meat thermometer.) A classic tagliata di manzo is usually serve very rare—red, not pink inside—but lamb does not really lend itself to serving truly rare. On the other hand, while lamb is usually cooked well-done in Italian cuisine, I can't imagine a well-done tagliata, so I opt for the French way, however unorthodox it may be. 

Once ready to go, it is best to serve your tagliata immediately, as otherwise the arugula will wilt and the meat will get cold.

Saturday, April 10, 2010

Fettuccine al salmone affumicato


I love smoked salmon. It is so incredibly versatile, delicious and good for you, too. And it adds a touch of elegance to any dish in which it appears. Who could ask for more? One of our favorite weeknight dinners at home is this simple pasta with smoked salmon and cream. If using store-bought pasta, it can be whipped up in the time it takes to bring the water to a boil and cook the pasta. But simple as it is, this dish is also elegant enough to serve as the first course of an 'important' dinner. 

For the pasta, I like to make this dish with fettuccine, the typical 'ribbon' pasta of Roman cookery, or tagliatelle, its slightly thinner cousin from Emilia-Romagna. To make your own fettuccine or tagliatelle, make your egg pasta dough and roll it out (see this post for instructions). The pasta sheets should be fairly thin for fettuccine, almost paper thin for tagliatelle. Then cut your pasta sheets into 'ribbons' about 1 cm (0.4 inch) wide. Pasta machines generally come with two cutters; use the wider one for fettuccine and tagliatelle. Like all fresh pasta, cook in well salted, gently boiling water for just a few minutes—fettuccine will take a bit longer than tagliatelle—tasting for doneness after 2 minutes or so. Cooking time will vary according to thickness and how long the pasta has been drying before cooking. 

The sauce is incredibly simple: just melt some butter in a skillet, then add heavy cream and roughly cut up smoked salmon. Simmer until the cream has reduced to a saucy consistency and the salmon has imparted its wonderful flavor to the cream. Add your cooked fettuccine to the sauce and toss. Add a bit more cream if need be, making sure that the pasta still 'flows' rather loosely—fresh pasta tends to absorb its sauce quickly, and creamy ones especially quickly. 

For a slightly more elaborate version, gently sweat a bit of shallot in butter, then add your chopped salmon and sauté until it loses its raw color. Add a splash of vodka, let is evaporate, then add cream. Add chopped parsley along with the pasta and proceed as indicated in the basic recipe. 

As far as measurements go, as usual for this kind of dish, they don't really matter all that much. As a general rule of thumb, I would suggest about half as much salmon by weight as pasta, but if you can use less according to your taste or what you have in your pantry. Even a little bit of salmon will give your dish a lot of flavor. For the cream, use enough to coat the pasta well but not so much as the pasta is 'swimming' in the sauce. 

NOTES: Some recipes call for the additional of grated parmesan cheese, but I find that smoked salmon has plenty of flavor on its own. You can use fresh salmon instead of smoked in either of the variations mentioned above, but then season more aggressively as fresh salmon is not as assertive in taste as smoked. 

While I like ribbon pasta best with this sauce, it lends itself to just about any type of pasta. Tagliolini, which are made just like tagliatelle but cut into very thin strands instead of ribbons, are lovely with this sauce. Short pastas like penne or farfalle would also work well. I would avoid large pasta shapes like rigatoni, which I feel are a bit too clunky for this elegant sauce—but that is really just a matter of personal preference. 

There are other variations on the sauce. One calls for white onion and wine rather than shallot and vodka. And some recipes call for a bit of tomato, which makes a kind of salsa rosa, or pink sauce.

Friday, April 2, 2010

Spargel mit Sauce Hollandaise und Kartoffeln


This dish brings me back to my Vienna days: white asparagus and potatoes with hollandaise sauce. The appearance of asparagus in the markets of Vienna--as elsewhere--is a harbinger of Spring. Austrians (and Germans) have a thing for white asparagus. They prefer it to the green kind that is more familiar in most other places. In fact, ask for Spargel and they will assume you mean white asparagus, you should say Gruener Spargel, or "green asparagus" if you want the kind we're most familiar with. White asparagus are grown by keeping dirt mounded around the emerging stalk, depriving it of light. The plant cannot produce chlorophyll without light, thus there is no green color to the stalks. The flavor is more delicate, and the flesh more tender, than regular asparagus. (The same light deprivation technique is used to keep Belgian endive white as well.)

Anyway, this is another dish of utter simplicity to make, but quite beautiful to behold. Start by steaming some baby potatoes. While the potatoes are steaming, cut the bottom ends off the asparagus, peel them (but avoid the tender tips) and boil them, either in a skillet or in a asparagus cooker filled to an inch or two with water, for 5-10 minutes, depending on how thick they are and how crisp you like them. (Come to think of it, I suppose you could boil the potatoes in the same skillet where you are boiling the asparagus, in which case add the potatoes about 5-10 minutes before as they take longer to cook.)

In any event, when both the asparagus and potatoes are just about the way you like them, make the hollandaise sauce by placing two or three egg yolks in a bowl that is sitting above a pot of simmering water (in French this is called a bain marie), add the juice of half a lemon and a bit of salt and whisk briskly until the eggs are quite frothy. As they heat up, they will begin to thicken. As this happens, quickly begin to add a 1/2 cup of butter, which you will have melted separately, bit by bit, as you continue to whisk. As each bit of melted butter is absorbed by the egg, add a bit more butter, whisking all the time, until you have a nice creamy sauce. Add hot water to thin out the sauce if need be and remove from the heat. (TIP: Make sure to regular the heat so that it is at the simmer. If it gets too hot, the eggs will scramble rather than thicken. If you see this beginning to happen, you can take it off the heat immediately and add a drop of lukewarm water to cool things off, then continue.)

Transfer the asparagus and potatoes to a serving dish (making sure they are well drained--you don't want water on the dish!) and pour over the hollandaise sauce. (You will need to move quickly here, as the residual heat of the bowl will continue to thicken the sauce. If it becomes too thick, whisk in a bit more hot water.) Sprinkle some finely chopped parsley over the dish and serve immediately. Wash down with white wine. Mahlzeit!

NOTES: Those of you who have ever made mayonnaise at home will immediately see the similarities between the two sauces, the main difference being that mayo is made with oil while hollandaise is made with melted butter. In the latter case, to allow the egg yolk and butter to emulsify properly, you need to keep things warm but not hot. The need for temperature control makes hollandaise a bit more challenging to make than mayo.

Obviously, the egg yolks do not fully cook when you make hollandaise from scratch, so if you have qualms about uncooked eggs (salmonella and all that) I suppose you can use hollandaise sauce from a jar, although I have no idea if it's any good. There are also some recipes for mock hollandaise around. I haven't tried them so can't say much about them.

I won't try to sell this dish as healthful, as the hollandaise sauce, made from egg yolks and butter, is something of a cholesterol bomb. But I must say, it looks and tastes wonderful--so why not splurge once in a while?