Showing posts with label piatti unici. Show all posts

Saturday, March 5, 2011

Fagioli con le cotiche


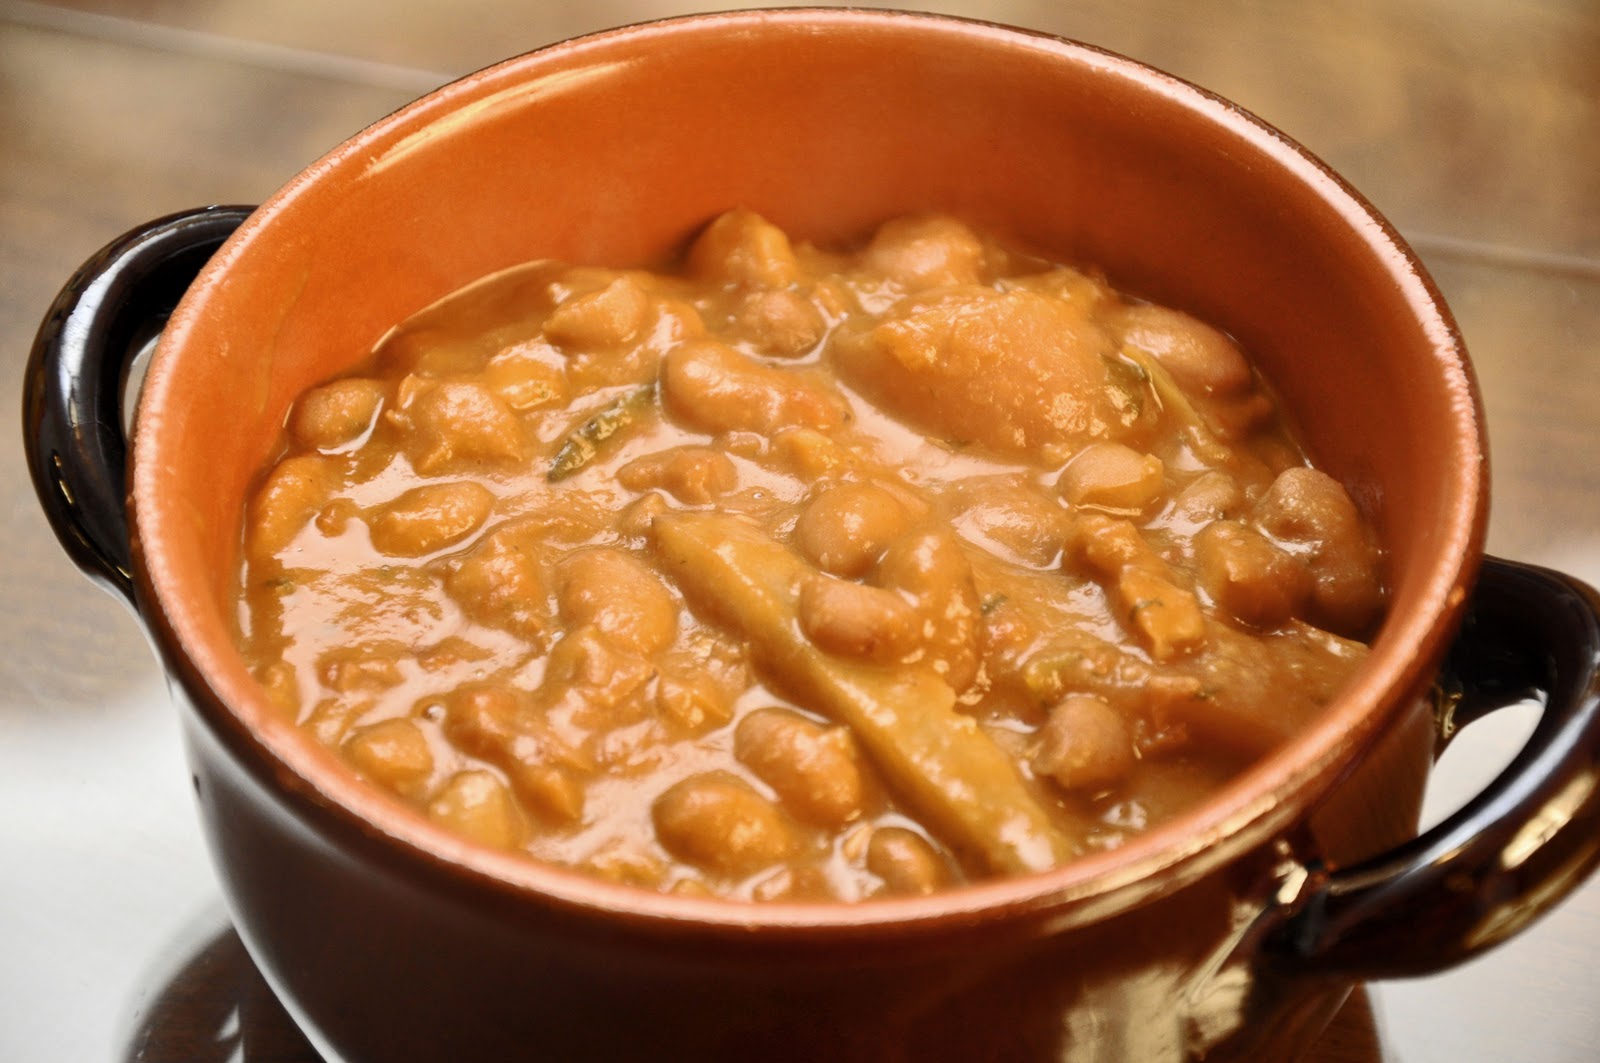
Tuscans are known for being the biggest bean-eaters in Italy, so much so that they are sometimes called mangiafagioli in Italian. But Romans are no slouches in the legume department, either. They love fava beans, of course, and they make a mean pasta e lenticchie, for example, even if the Roman version is actually quite different than the one Angelina used to make. But the ne plus ultra of Roman bean cookery has got to be fagioli con le cotiche, a kind of Roman-style pork and beans, made with cannellini or (even better, in my book) borlotti beans simmered in tomato sauce with strips of pork rind. A classic example of how Roman frugality can produces hearty and delicious results.

Ingredients (for 4-6)

For simmering the beans:
500g (1 lb.) dried cannellini or borlotti beans
A garlic clove
A sprig of fresh parsley
Salt

For simmering the pork rind:
250g-500g (1/2-1 lb.) pork rind, depending (see Notes)
A stick of celery
1/2 medium onion, in one piece
Salt and pepper

For the tomato sauce:
250-500g (1/2- 1 lb.) canned tomatoes, depending (see Notes)
1/2 medium onion, finely chopped
1-2 cloves of garlic, finely chopped
A handful of parsley, finely chopped
Lard or olive Oil
Salt and pepper

Directions

Soak the beans overnight. Simmer the beans in fresh water to cover, along with a garlic clove and parsley (if using—see Notes) until quite tender, about 1-1/2 to 2 hours.

Meanwhile, prepare the pork rind: 

Raw pork rind
Pre-boil the rind for about 15 minutes. Remove the rind and let it cool for a few minutes. When it is cool enough to handle, cut it into thin strips. (Some recipes will tell you to trim of the fatty underside with a knife, but this is a bit too fussy for my taste and, anyway, I like the fattiness!) Then simmer the strips in water to cover, lightly salted, with the celery and onion. They will be done when they are tender but still have some bite to them, which will take, say 45-60 minutes.
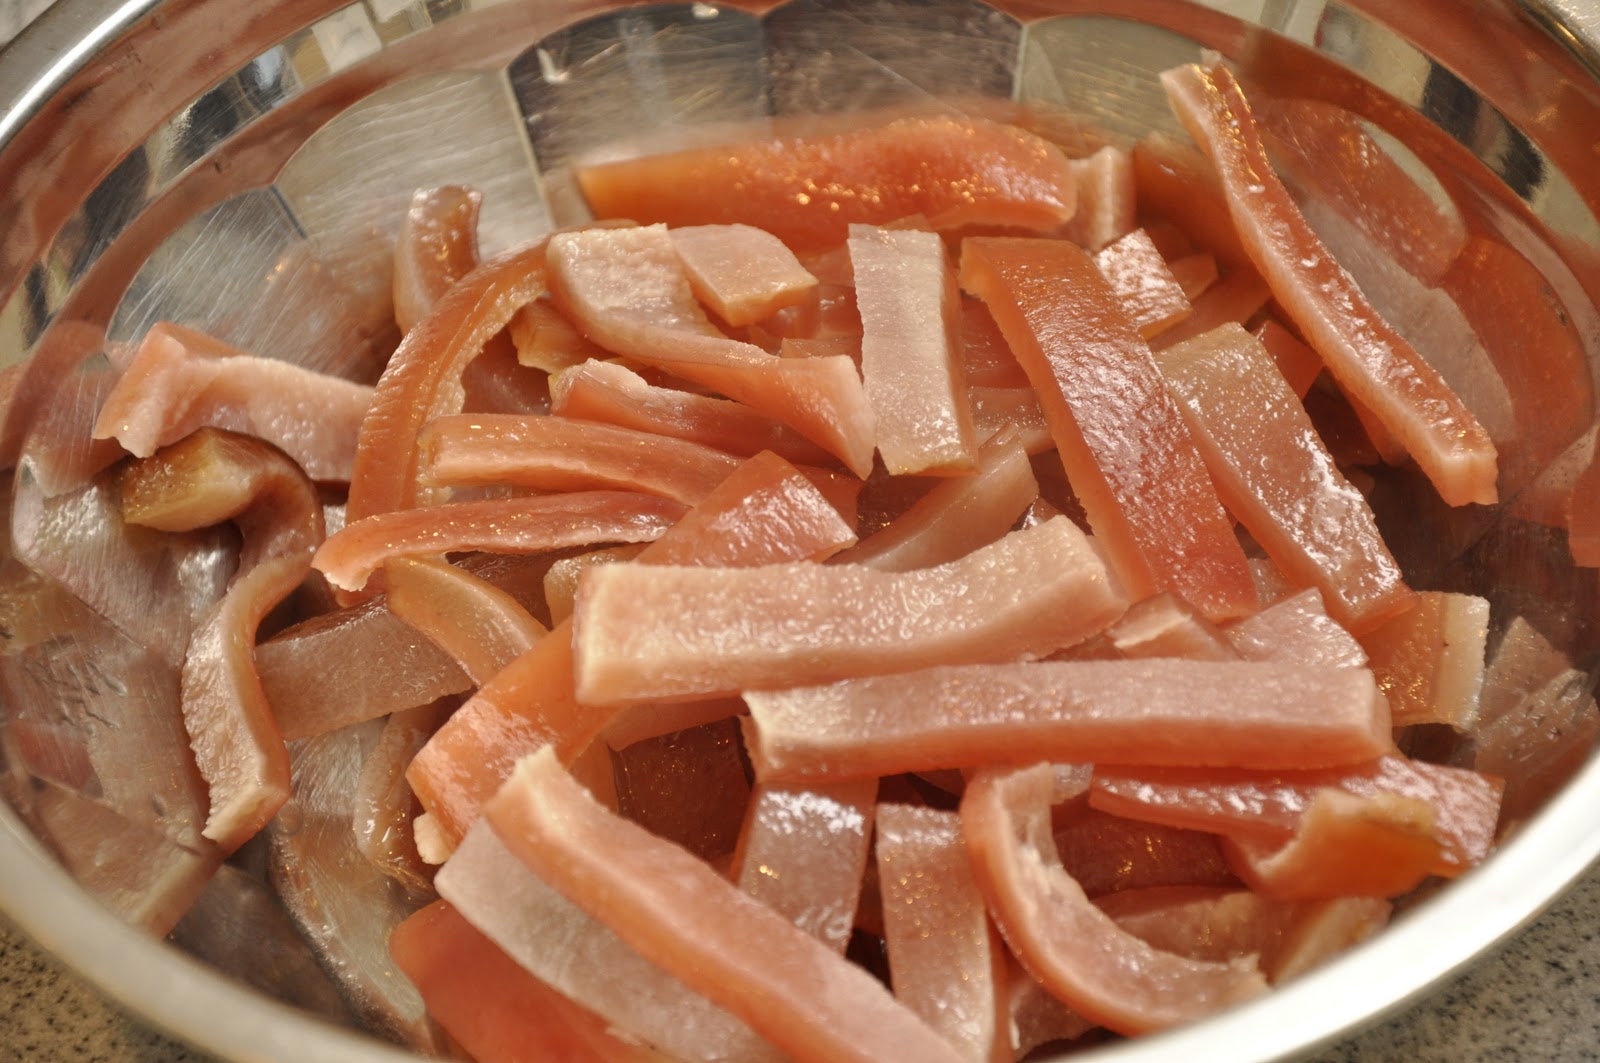
Prep'd and ready to go...

Prepare the tomato sauce in a large casserole large enough to contain all the ingredients. A terracotta or enameled cast iron pot would be ideal. Make a soffritto by sautéing the onion, garlic and parsley gently in lard (the traditional choice) or olive oil, seasoning while the odori are cooking. Add your canned tomatoes, puréeing them by passing them through a food mill into the pot. Let the tomatoes simmer until they have reduced into a sauce, about 15-20 minutes.

Now it's time to put it all together: Add the pork rind to the tomato sauce and let them insaporire (see Glossary) for a minute or two, then add the cooked beans. Mix everything together well. Add a bit of the pork rind water and/or bean water if you find that the mixture is a bit dry. Simmer it all for about 30 minutes to allow the flavors to get to know each other.

Serve hot. Like many long-simmered bean dishes, fagioli con le cotiche are even better if allowed to rest overnight and reheated the next day.

NOTES: Raw pork rind can be hard to find in the States. I am fortunate enough to have a farm supplier close by that has it, but where I live, in any event, you will rarely (if ever) find it in a supermarket. I suppose that butchers will also carry it or take an order. Unfortunately, there is no real substitute for it in this dish. After all the name of the dish is 'beans and pork rind' in Italian! But if you were to substitute pork belly or some other fatty cut of pork, I would venture you'd wind up with something quite tasty. 

The basic building blocks of this recipe—simmer the beans, simmer the pork rind, make the sauce and mix it all together and simmer for a bit more—is common to all the recipes you'll see for this dish. But like so many classics, there are variations on the basic theme, and they revolve mostly around three factors:

First, the ratio of bean to pork rind. In some recipes, the ratio is 2:1, or even greater, so that the pork is really only there as a flavoring agent. In these versions, the dish can serve as a a contorno. In other recipes, the ratio can increase to as much as 1:1, so that the pork is there as an equal partner, so to speak. In these heartier versions, the dish graduates to a full contorno or even a piatto unico or one-dish meal, accompanied by nice crusty bread and followed by a green salad and perhaps a piece of fruit.  I just use as much of each as I have on hand, since it will be delicious no matter what! (By the way, if you have any left over, these beans go great with pasta.)

Second, the dish can be more or less in rosso, by adding more or less tomato, depending on your preference. And you can use canned tomatoes passed through a food mill (my preference) or a passata di pomodoro.

Third, the aromatic vegetables (aka odori) that make up the soffritto for the tomato sauce and are thrown in to simmer with the pork and beans vary from recipe to recipe. The above options are the ones I like, but for example, many recipes will tell you to make the tomato sauce with a classic soffritto italiano of onion, celery and carrots. Personally, I don't care for the sweetness that carrots lend to beans, and prefer to stick to the allium family. Some recipes will have you simmer your beans with no aromatics at all, since they will be absorbing the flavors of the tomato sauce and pork in the final stage anyway. And the pork rind, too, can simply be simmered in lightly salted water.

Some recipes also call for adding a bit of prosciutto fat to the soffritto, but personally I'd call that gilding the lily, especially if, as I like to do, you are cooking with lard. Even I have limits to my pork fetishism.

Sunday, January 30, 2011

Slow Cooker Polenta with Sausage Ragù


Some of you will have read in a recent post that I finally broke down and bought a slow cooker, a kitchen device also known in the States—to those of you who are old enough—as a 'Crock Pot'. The thought of owning one had never really occurred to me before. The Crock Pot craze of the '70s, which brought us some pretty awful cooking (a can of this, a can of that...) was still seared into my memory banks.

But I started hearing about 'slow cookers' from cooks that I liked and admired. Then came Michele Scicolone's Italian Slow Cooker cookbook and my resolve began to waiver. And then I started reading Ad Hoc At Home, by perhaps American's most respected chef, Thomas Keller, in which he mentions the slow cooker as one of his prized kitchen tools, in particular for beans. Well, that did it. I had to see what everyone was talking about. (By the way, if you don't have these books, I would heartily recommend both of them!)

I have promised you, dear readers, to share with you my impressions, so here goes.

I realize now that a slow cooker, though marketed as a convenience tool—usually the kiss of death in my book—is really just another way to achieve the kind of gentle most cooking that most cooks will do in a Dutch oven or, in Italy, a terracotta pot. All kinds of dishes that you would want to simmer for hours on end: rich sauces, broths and, yes, beans—all come out wonderfully in a slow cooker. And, yes, it is also convenient: it frees up your stove for other uses, can be left on all day if you like, and will keep your food warm indefinitely. What it is not, as the name implies, is quick. But once you're down with the initial steps (in the Italian context, that mean making a soffritto and the rosolatura of the main ingredient) you can leave whatever you're making unattended until it's done.

So far, I've had excellent results with broth, beans (look out for coming posts!) and, as I will get to in a moment, polenta and ragù. Not everything I've made so far has been a smashing success, however. Stews and pot roasts, for example, have not turned out as I would have liked. I tried to make a brasato al vino rosso, for example—the very first dish I tried in my new slow cooker—and found the meat rather stringy and the sauce thin and bland.

That brings me to an important point when it comes to slow cooking: as when cooking in a pressure cooker, there is very little evaporation and therefore very little concentration of flavors. So you need to use much less liquid than you ordinarily would. And those dishes that requires evaporation to work will not work very well in a slow cooker. I tried making a spezzatino di pollo, for example, with vinegar. Made in the conventional way, the vinegar evaporates and its flavor mellows to the point where you would probably not know it was even there (unless you're the cook, that is!) In a slow cooker, the vinegar flavor is as strong when the dish is done as when you started, and that's not a good thing. So it's back to the drawing board for me on stews and pot roasts. I'll report back to you, kind readers, when I've figured out the best way to handle them.

In any event, on to our recipes!

SLOW COOKER POLENTA

Makingn real polenta is a laborious job, as we all know, involving a lot of stirring over a good 45 minutes or more to reach the right, creamy consistency. Italians have developed any number of tricks to make the job a bit easier, as I have outlined in my post on How to Make Polenta. The slow cooker provides yet another easy (if not very quick) way to make polenta.
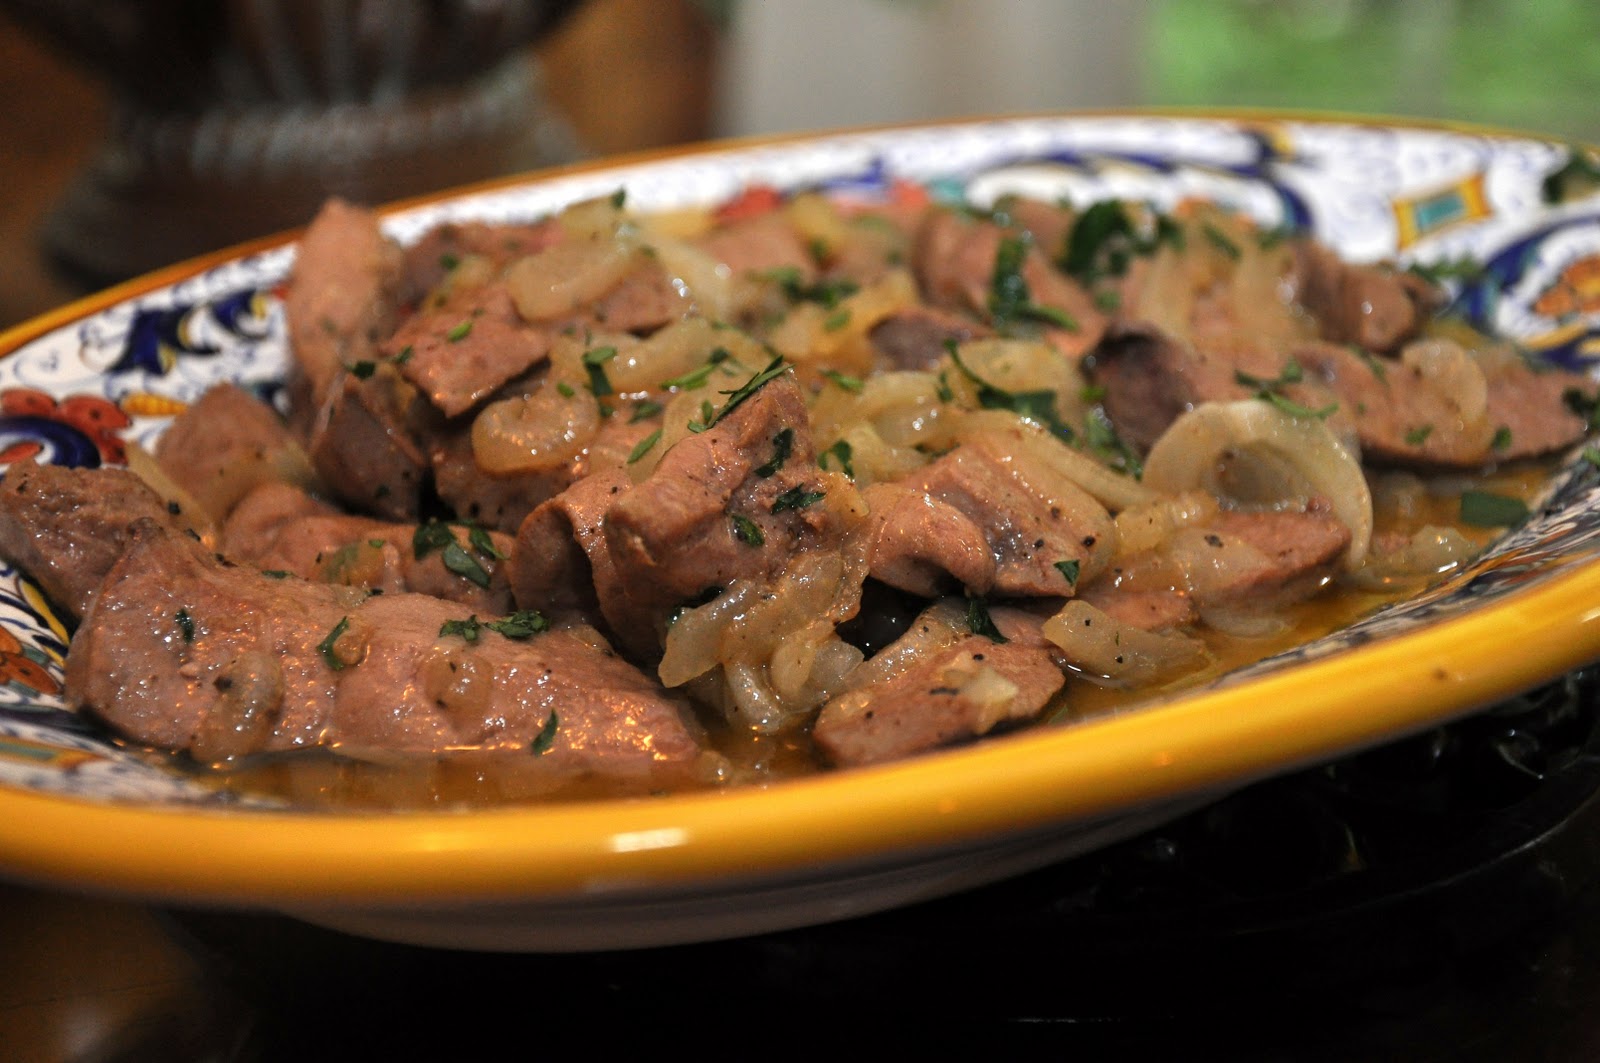
Ingredients

1 part polenta (by volume)
5 parts water (by volume)
A pinch of salt

(NB: I made a batch from 1 cup of polenta mixed with 5 cups of water.)

Directions

You mix the polenta and cold water together in your slow cooker with a whisk or wooden spoon. Then spinkle the mixture with a pinch of salt. Turn on your slow cooker to high and let it go at it for 3 hours. Stir after two hours or, if you prefer, every hour. (Recipes vary.) If the polenta is getting too thick, you can add some water, but not too much—remember, you can't count on evaporation to thicken the polenta by more than a very marginal amount.

The polenta will stay smooth and soft for several hours if left on 'warm'.

NOTES: Made this way, the polenta turned out fine. Was the texture quite a fine as the hand-stirred variety made in a traditional paiolo? No, not really. But it was certainly acceptable—more than acceptable, in fact. The difference was subtle, not one that would be obvious to anyone other than the true cognoscenti

Three hours is a sort of awkward time. Too long to be 'quick', but not long enough, say, to make in the morning before work and have it ready by the time you get home. For that, you can cook your polenta over low heat for double the time (6 hours). I have not tried this variation but it would seem to work.

(NB: There is a general rule for slow cooking, which says that you can cook must about anything for x hours on high or 2x hours on low. I have yet to find an explanation of what difference, if any, it makes to the final outcome.)


SLOW COOKER SAUSAGE RAGÙ

You would think that a slow cooker would be the ideal implement for making a Sunday Sauce and, indeed, it would seem to be ideal for all sorts of long simmering sauces. To accompany this polenta, I made a variation on the classic Roman dish, polenta con salsiccia e spuntature (polenta with sausages and spareribs), which we've featured on this blog. I just left out the spareribs, since I couldn't find any in my freezer and there was just too much snow outside to make a dash to the market. The result was still delicious.

You simply proceed as you would normally do, using the classic recipe. Brown your sausages (or both sausages and spareribs) in olive oil (or lard) a skillet, transferring them to the slow cooker when they are nicely browned. Then sauté your onions and garlic in the grease left in the skillet until you have a nice soffritto. Deglaze the skillet with red wine and add it all to the slow cooker. making sure to scrape out all that goodness at the bottom with a spatula. Then pour over enough puréed canned tomato to cover the meats well. Season with salt and pepper, and let your ragù simmer on low for at least six hours, more if you like. Serve the meat and a bit of sauce over your polenta as pictured above.

NOTES: Obviously, unless you have two slow cookers, you will need to make the ragù the day before—which is fine, since like most slow-cooked foods, a ragù benefits from a day's rest.

*              *                *

Post scriptum
: You can use any leftover polenta and ragù to make a heart-warming polenta pasticciata:


Slather your leftover polenta on a baking sheet and let it cool. It will harden into a sliceable mass. (You can also just pour it into a glass or other container if you prefer, which is my usual method.)

The next day, or whenever you want to use your leftovers, take some terracotta bowls (or a single casserole if you prefer) and grease the bottoms well with a bit of olive oil. Lay over some slices of polenta, then some of the meats from the ragù, which you will have sliced or chopped into bite-sized pieces. Then spoon over a bit of your leftover ragù, and then some béchamel sauce. (If you like, you can melt some grated or sliced cheese into the béchamel for extra flavor. This time, instead of the usual parmigiano, I used slices of young asiago). Repeat until you have used up your ingredients or filled up your baking vessels. Finish with the béchamel, into which you can swirl some more ragù for color. Sprinkle over some cheese if you like (I didn't) and drizzle with some olive oil.

Bake in a hot oven (200°C, 400°F) for about 25 minutes or so, until the mixture is bubbly and nicely browned on top. Let it cool off for a few minutes before serving.

Sunday, January 23, 2011

Risotto alla milanese


Risotto is one of the staples of northern Italian cooking, nowhere more so than in Lombardy. Here is the risotto that typifies the cooking of Milan, the capital of Lombardy region and the economic and financial capital of Italy.

This risotto follows the classic method for making risotto, which we have gone over before, but it has two defining ingredients that give it its special flavor and character. As many of you will already know, it is flavored with saffron—which gives it a beautiful gold color—but perhaps fewer people know that in a true risotto alla milanese, the soffritto must include beef marrow. The marrow lends a beefy background flavor to the dish, as well as a subtle richness and unctuousness. The ingredient is so characteristic of the dish that I have seen this risotto listed on menus in Milan as risotto al midollo, the word 'midollo' being Italian for bone marrow.

Ingredients (for 4-6 people)

400g (7 oz.) rice for risotto (arborio, vialone nano or carnaroli)
40-50g (1-1/2 or 2 oz.) bone marrow, removed from the bone (see Notes) and finely chopped
1/2 onion, finely chopped
40-50g (3 Tbs.) butter (plus a bit more for the mantecatura)
A splash of white wine
1 liter (1 qt.) broth, or q.b.
A pinch of saffron
50-60g (2 oz) grated parmesan cheese, plus some more to serve at table

Instructions

Make a soffritto by sautéing the onion and marrow in the butter. When the marrow has melted and the onion is well wilted, add the rice and let it 'toast' in the soffritto without browning. Add a splash of white wine and let it evaporate.

Proceed with the risotto in the usual way—with one little catch: While the rice is simmering, take your saffron and simmer it very gently with a ladleful of broth so it releases its flavor and color into the broth. Then, either about halfway through the cooking process, or if you prefer a more assertive flavor, about 5 minutes before the rice is done, add the saffron and its broth into the risotto. Continue to cook as usual.

Risotto alla milanese is usually served all'onda, which is to say, rather more loose than firm, so begin the final enrichment, called the mantecatura in Italian, while the rice is stlll fairly brothy. Add the cheese and, if you like, a dab of butter for extra richness (never cream!) to the rice, then stir to toss the rice around vigorously for about two minutes. (Skilled risotto chefs are a marvel to watch as they work the rice, they toss the rice into the air while they stir—not something I've tried at home., though.) If you like your risotto a bit firmer, let it sit, covered, for a minute or two before serving.

NOTES: All bones have marrow, of course, but there are particular good marrow bones (also often called soup bones) that you can buy sawed in half to expose the marrow, like these:


To prepare bone marrow for use in risotto, I like to simmer the marrow bones for just a minute or two to loosen the marrow a bit. Then, using a small spoon or knife, scrape out the marrow from the bone. Depending on how long you've simmered the bone, the marrow may also just slip out on its own.


Now for those of you who may be a bit squeamish about bone marrow, it can be left out of the dish, adding perhaps some additional butter during the mantecatura to make up for it. What you will have made is more properly called risotto allo zafferano rather than a true risotto alla milanese—but it will still be delicious! 

Saffron, as we all know, it very expensive, but a little goes a long way. It is sold in threads (the stigma of the crocus flower) and also ground into powder. Avoid the powder if you can. It melts more easily but it tends to have a rather faded flavor. A powder also allows for extraneous 'filler' or substitute ingredients. With the threads, you can be sure you are getting the real thing.

As for the rice, we've covered the three main varieties before: arborio, the most common and usually least expensive of the three, will work fine, but for this dish I would prefer Carnaroli, although many recipes call for vialone nano, which is an excellent risotto rice from the Veneto. For details, check out my post on the Italian Pantry.

There are some subtle variations to this dish you can try as you like: The broth is usually a rich beef broth, but you can equally try a mixed meat broth, a chicken broth or a vegetable broth. Some cooks use shallots rather than onion, a variation that I find particularly nice. And some avoid making a soffritto, putting the shallot or onion into the simmering rice and removing it before serving, which they claim make the risotto lighter. The famed Milanese chef Gualtiero Marchesi calls for making the onion soffritto separately, adding white wine to it, and allowing the onion to simmer until creamy. The onion cream is added at the very end of cooking to add 'acidity and aroma'. An intriguing idea, but one that I have not yet tried.

Risotto alla milanese is an ancient dish, with its origins going back to the Middle Ages, although the modern recipe apparently only goes back to the early 19th century. (See this article for a brief history.)

Risotto alla milanese is perhaps most commonly served together with ossobuco, as a piatto unico—one of the very few examples of rice being a 'side dish' in traditional Italian cookery. But it is equally good as a primo, followed, say, by a cotoletta alla milanese or perhaps a brasato.

Tuesday, January 18, 2011

Quick Note: Brandade Pancakes


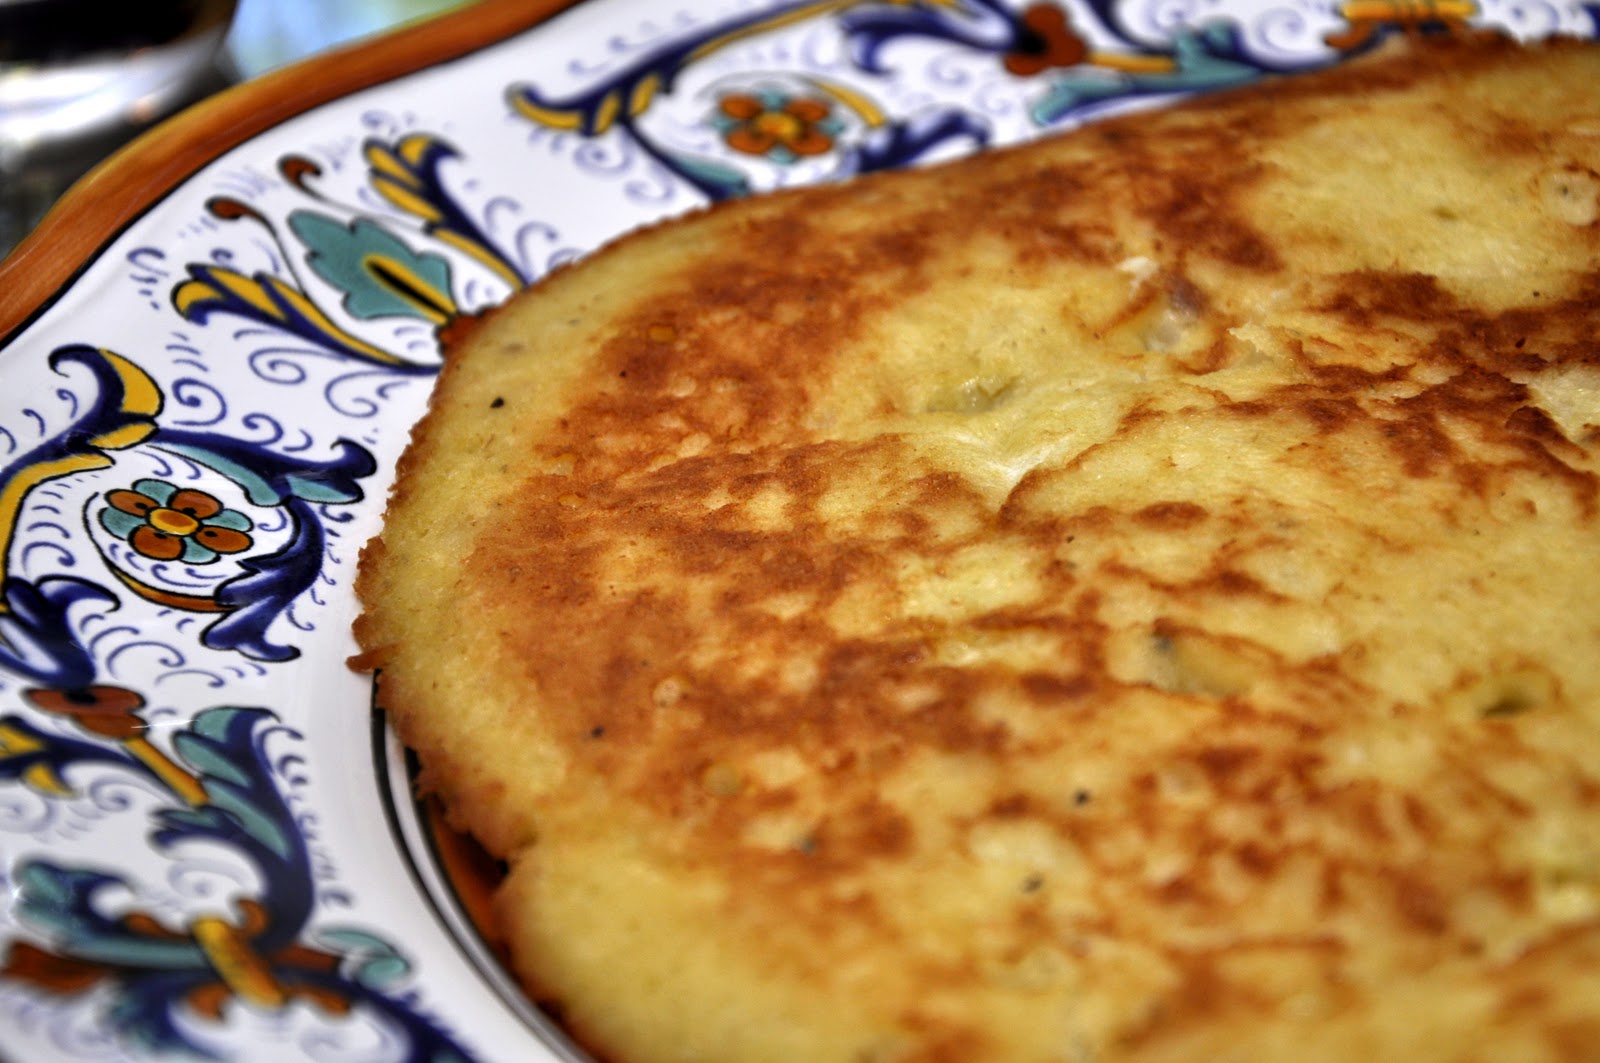
The new year brought a rush of activity that had made it hard to keep up with my blogging 'duties', but here is quick note on a nice idea for 'recycling' leftover brandade: just mix it up with an egg or two, give it a grind or two of black pepper and perhaps a bit of chopped parsley. (There should be no need for salt, as brandade is salty by nature, but taste it and see.) Fry the resulting batter in a bit of olive oil, browning it nicely on both sides.

Served with a green salad and washed down with a crisp white wine, this brandade pancake makes for a quick and tasty lunch or light weekend supper!

NB: A traditional brandade is made with soaked and poached baccalà, but you can make an easy version with smoked whitefish, as illustrated in one of my earlier posts. The taste is different from the traditional version, of course, but for me, at least, equally delicious.

Post scriptum: I recently broke down and bought a slow cooker. Never imagined that I would own one—the awful crock pot cookery of the 70's is still etched in my memory—but after reading some excellent chefs recommend it for, among other things, beans, broth and polenta, I decided to give it a go. Will be experimenting with various recipes and reporting back to you, dear readers, shortly.

Sunday, December 26, 2010

Viennese Goulash


For some reason, I must be feeling nostalgic for my Vienna days as I keep coming back to the dishes I made during those years. Perhaps it's the cold weather that calls out for the hearty cooking of Mitteleuropa. In any event, here's another favorite from that time and place: Viennese Fiakergulasch.

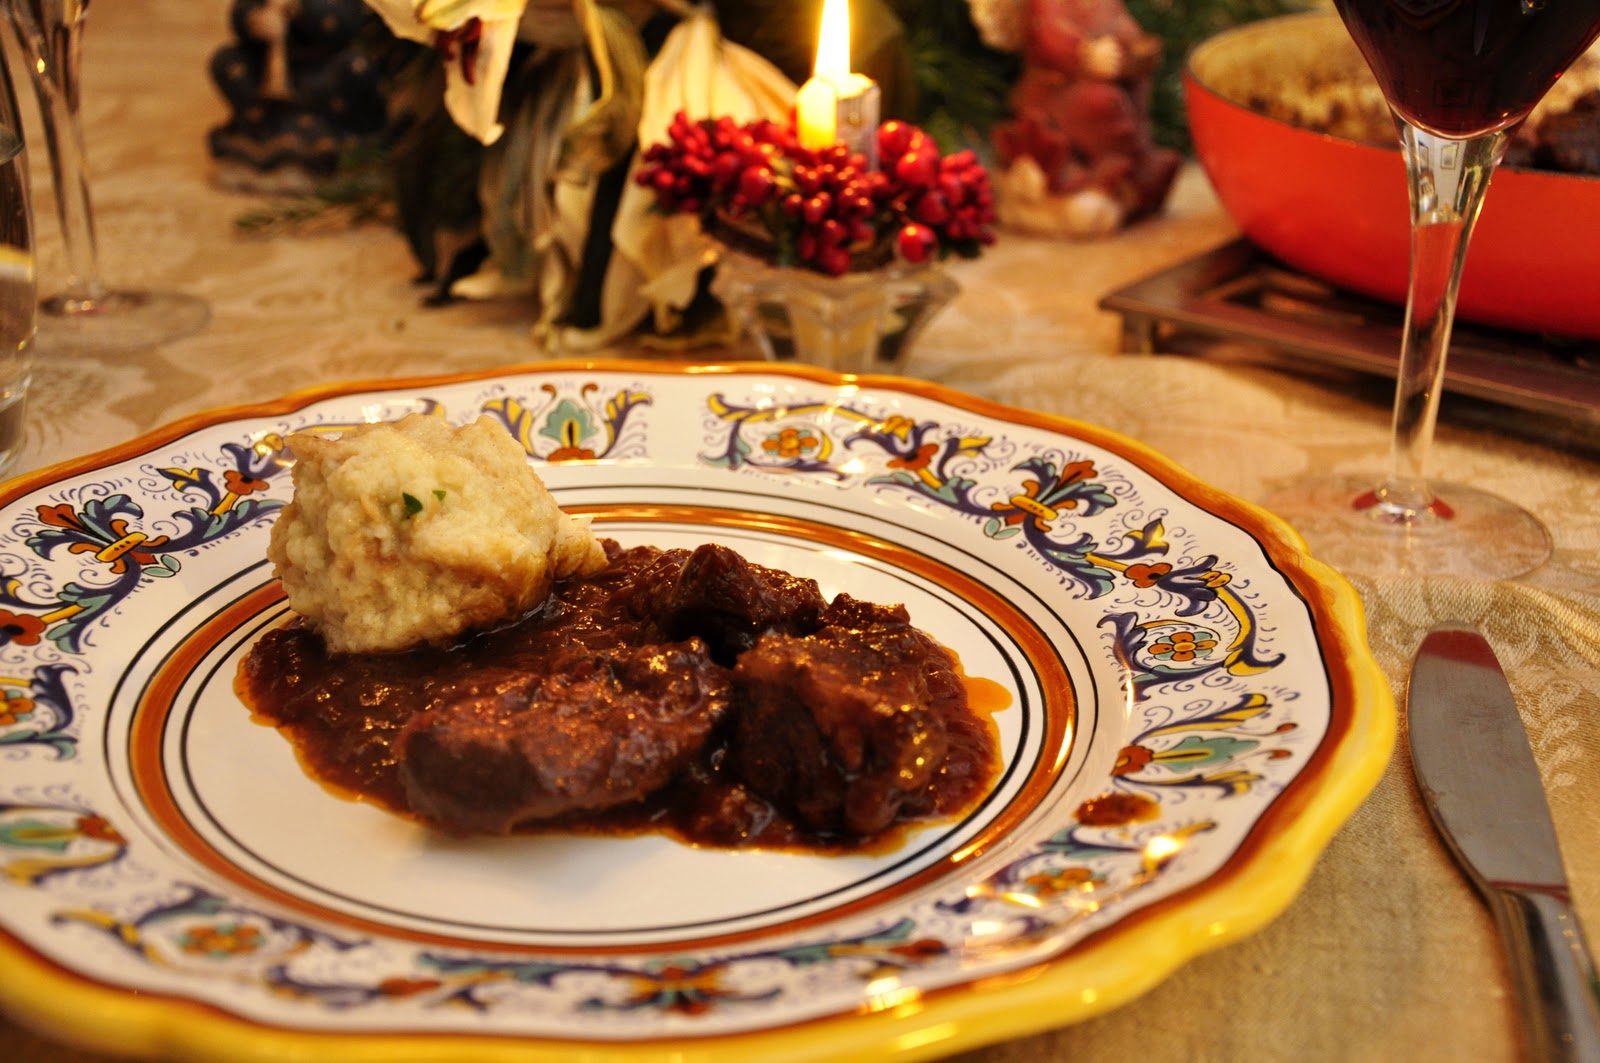
Goulash is a simple beef stew that follows the usual dry followed by moist heat method, but with two twists: the use of lots of onion—half as much by weight as the meat—and, of course, Hungarian paprika. The cooking fat can be oil, lard or even rendered beef fat.

Ingredients (for 4-6 servings)

1 kilo (2 lbs.) stewing beef, cut into cubes
500g (1 lb.) onions, chopped
Oil, lard or rendered beef fat
Salt and pepper
Hungarian paprika, to taste
Beef broth, enough to cover the meat
1-2 Tbs. tomato paste
A pinch of caraway seeds
A sprig of fresh marjoram (or thyme)

A spoonful of flour mixed with some water

Directions

Add enough cooking fat to cover the bottom of a Dutch oven or braiser. Brown the beef cubes nicely in the fat on all sides and set aside.

Now add the onions and gently sweat them in the same pan until they are nicely soft and browned, but not burnt. Season with salt and pepper as you go. Add back the browned meat and mix well. Allow the meat and onions to simmer together for a few minutes, then sprinkle over the paprika. Most recipes call for 1-2 tablespoons, but I just 'eyeball' it, and I'm pretty sure I add more than just a spoonful, as I love the taste of paprika. You then allow the paprika to simmer in the fat to release its full aroma, again for just a minute or two. Paprika can burn if heated too much, so moderate your heat as needed.

Add enough beef broth to just cover the meat, along with the tomato paste, caraway and marjoram. Cover and simmer it all gently until the meat is quite tender, usually about two hours. This can be done over the stove or, if you prefer, in a moderate (180C/350F) oven.

Just before serving, add your flour and water slurry to the pan, a spoonful or two at a time, to give the sauce a nice liaison. If, on the other hand, you find that your sauce is too thick or there is simply not enough of it, add some water.

Serve warm, with buttered noodles, spätle or Knödel.

NOTES: There is a certain linguistic confusion over the name of this dish as it is used in its homeland of Hungary. This article explains, as I had heard before, that gulyás, from which we get our word goulash, actually refers to a soup, which back in Vienna was called Gulaschsuppe. What we call goulash is called pörkölt in Hungarian (but please don't ask me how that's pronounced...)

Many recipes call for you to sauté the onions first, and then brown the beef with onions, which is more straightforward than the procedures outlined above (which is more typical of a French daube). But I like to use the Frenchified method, as you can caramelize the meat nicely without any worried about burning the onion.

There are lots of different kinds of goulash, with or without meat, and with or without vegetables. The Viennese version, in my humble opinion, is by far the best of the lot, although admittedly I am biased. After all, we all tend to like what we know best.

Sunday, October 3, 2010

Sformato di finocchi


The sformato (a term literally meaning 'unmolded') is something like a savory flan or perhaps a soufflé without the puff. At its most basic, it is actually a rather simple dish, a mixture of puréed or finely diced vegetables with béchamel and eggs, baked or steamed in a mold until set.

A sformato can be made with practically any vegetable which can vary according to the season, so you can serve a sformato all year round: peas or asparagus in the spring, zucchini or green beans in the summer, and so on. Now that the weather is rapidly cooling off here in the northern hemisphere, I turned to one of my favorite cool weather vegetables, fennel. Now fennel is delicious raw, served in a salad or even on its own, after dinner, as a kind of palate-cleansing 'fruit'. When cooked, its anise flavor mellows considerably and becomes, for lack of a better word, 'buttery' in flavor, and marries very well with butter, cream, cheese and other dairy products. That makes it a perfect candidate for a sformato.

Begin by boiling, or even better, steaming fennel bulbs, trimmed of their stalks and cut into halves or quarters, according to their size. For a family-sized sformato, about 500g or a pound of fennel, two large bulbs, should do well. When they are tender—a knife should slide easily in and out of them—drain them well. Let them cool a bit and, when they are cool enough to handle, either cut them into small dice or purée them, as you prefer. (I also like to add some of the fronds from the stalks for extra flavor.) A food processor works well for the purpose. Then melt a good amount of butter in a skillet and add your fennel, allowing it to absorb the flavor of the butter and to evaporate any residual liquid.

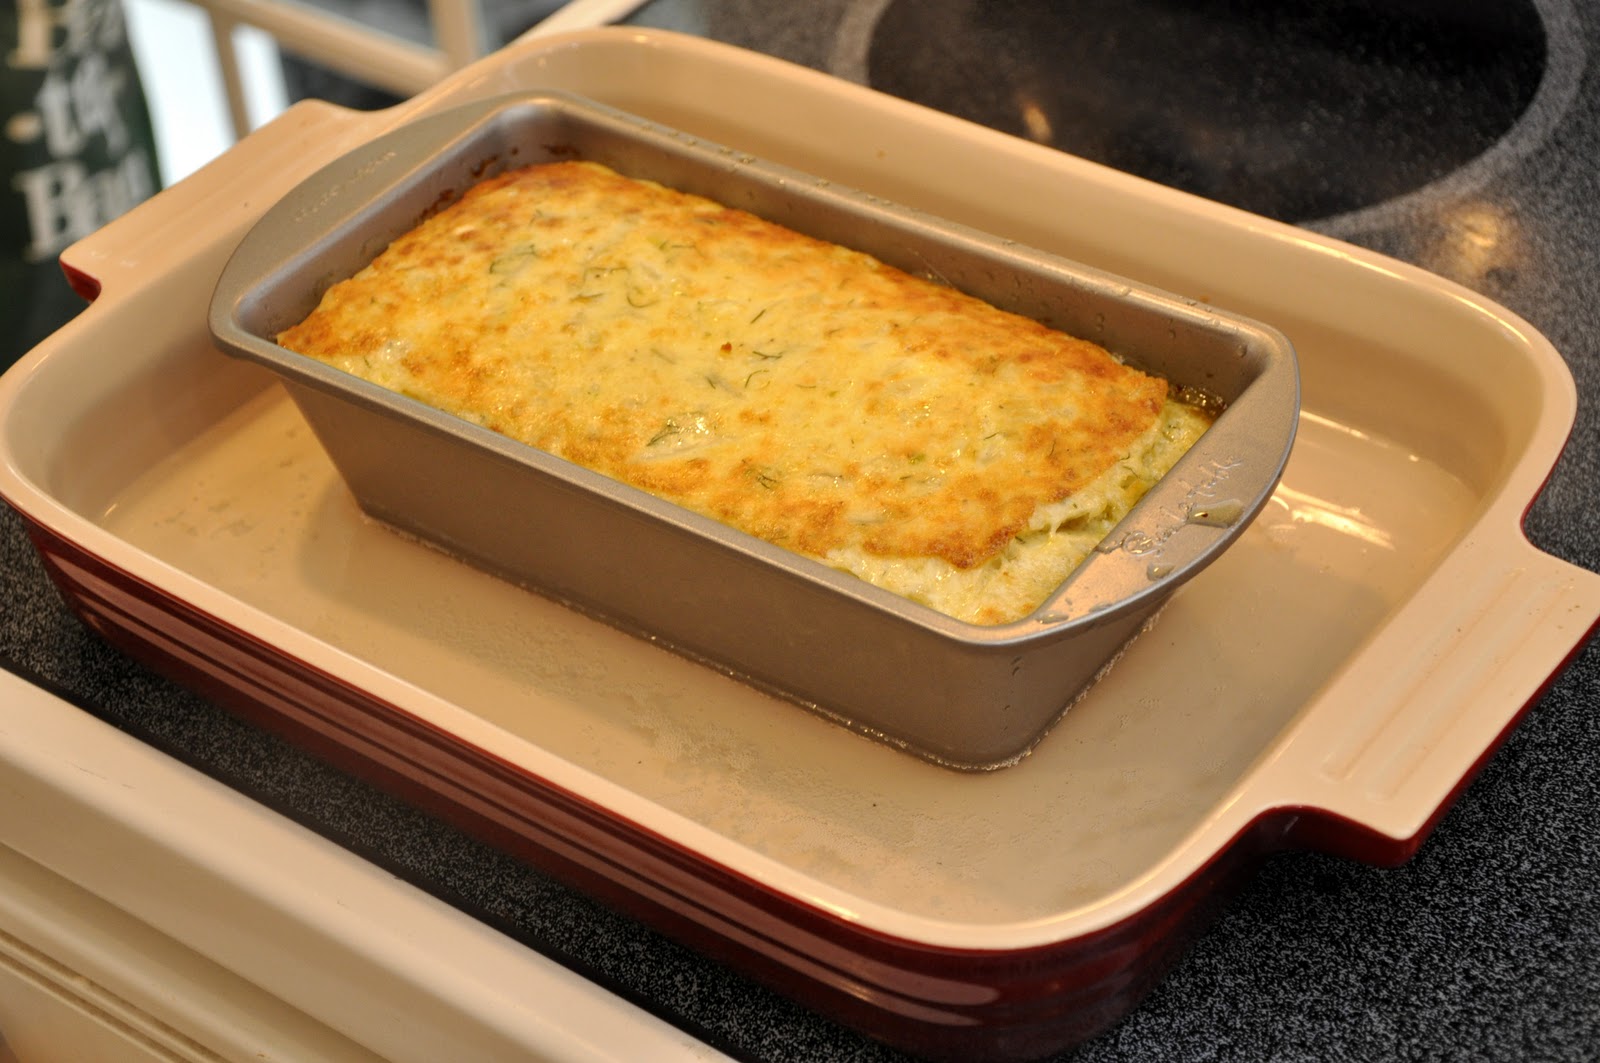
Now make some béchamel in a separate saucepan, in the usual way (see this post), using 2 cups of milk for every 500g (or pound) of fennel. Add the béchamel to the sautéed fennel, and season to taste with salt, pepper and a handful of grated parmesan cheese. Allow the mixture to cool off and  then add four eggs. Mix everything up well and pour into a well-greased loaf pan or other mold (see Notes below). Place your mold into a larger baking pan and pour water around the sides, to make what the Italians call a bagnomaria or 'bain-marie' in French and English:

 
Place the baking dish into a moderately slow oven (about 325F, 170C) and bake until the mixture has fully set. To test doneness, insert a paring knife or skewer inserted into the mold; it should come out completely clean. Baking time varies according to the size and shape of your mold, but for the loaf pan shown in the picture, it took about an hour. Individual molds will, of course, take much less time, as little as 15-20 minutes.


 Let the sformato cool for about 15 minutes or so. Loosen the sformato from its mold by running a knife along the edges of the pan. Then unmold itonto a serving platter. This can be done by placing the platter over the loaf pan or other mold, then holding pan and platter together with both hands, flipping it over. Gently remove the pan, revealing your sformato in all its glory. Serve warm or at room temperature.


 NOTES: As I mentioned, you can use the above basic recipes with just about any vegetable, using the same technique and the same proportions. I find that 'solid' vegetables like green beans, carrots, mushrooms and the like work best with the above basic recipe. Softer vegetables that tend to 'melt' when cooked, like pumpkin can also be used but you should reduce or even eliminate the béchamel and up the number of eggs to maintain the proper texture. You can also make sformati with other ingredients, including pasta, but the recipe is sufficiently different that it deserves a separate post.

The number of eggs varies from recipe to recipe. For 500g or a pound of vegetable, some recipes call for as few as a single egg, or as many as the four indicated in this recipe. Obviously, the more eggs, the firmer the texture of the final dish. Some recipes call for yolks only, which I imagine also produces a firmer result. You can also vary the texture by making the béchamel thicker or thinner, according to the amount of flour you use. (Too thin, though, and the sformato may not hold together.)

One important point: make sure that your vegetables are not 'water logged' when you mix them with the rest of the ingredients. That will tend to result in a rather flaccid texture. This is why steaming is better then boiling, and why it is important to sauté the vegetable in butter until quite dry. (The sautéing also gives it a wonderful flavor.)

As mentioned, you can use any number of different types of molds: a simple loaf pan works very well, but you can make a sformato in a round mold, or a ring mold, or a square mold, as you like. And rather than making a single 'family style' sformato, for more formal occasions you can use individual ramekins (or even a muffin pan!) to make individual sformati, which make for an impressive 'gourmet' presentation on the plate. For an even more elegant presentation, serve your sformato with a sauce—a creamy cheese sauce or a light tomato sauce or a coulis made from a vegetable with a complementary flavor. You can also garnish the sformato with sautéed vegetables, either the same vegetable as you used to make the dish, or some other vegetable that would go well with it.

At its most basic, though, this is actually a very simple, light yet rich, dish very suitable for home cooking. The only really tricky part is the unmolding. If you're lucky, the mold will come off perfectly cleanly, leaving a perfectly formed sformato. But if not, no worries—the taste will be just as good. You can just use garnish or sauce to hide the imperfection. To increase your chances of success, be generous when greasing your mold. And to be doubly sure, you can use a piece of wax paper, cut to size, to line the bottom of your mold. You then just gently remove the paper from the unmolded sformato before serving. Or, for a very informal meal, you forget all about it and just serve the sformato directly from the pan at table, with a spoon or metal spatula. Of course, technically you will not have a 'sformato' at that point, but I'm sure no one will mind.

The sformato is a usually vegetable dish, but it is too elaborate, really, to serve as a side. Traditionally, it served as an intermezzo, the course that came after the primo and before the secondo in very formal dinners. If you want to impress your guests, you can use it that way. For everyday eating, a sformato is very versatile. It can be an antipasto, a first course or even a vegetarian second course, as you prefer. There are even sweet sformati for dessert… but that's a subject for another post.

Friday, August 27, 2010

Panzanella


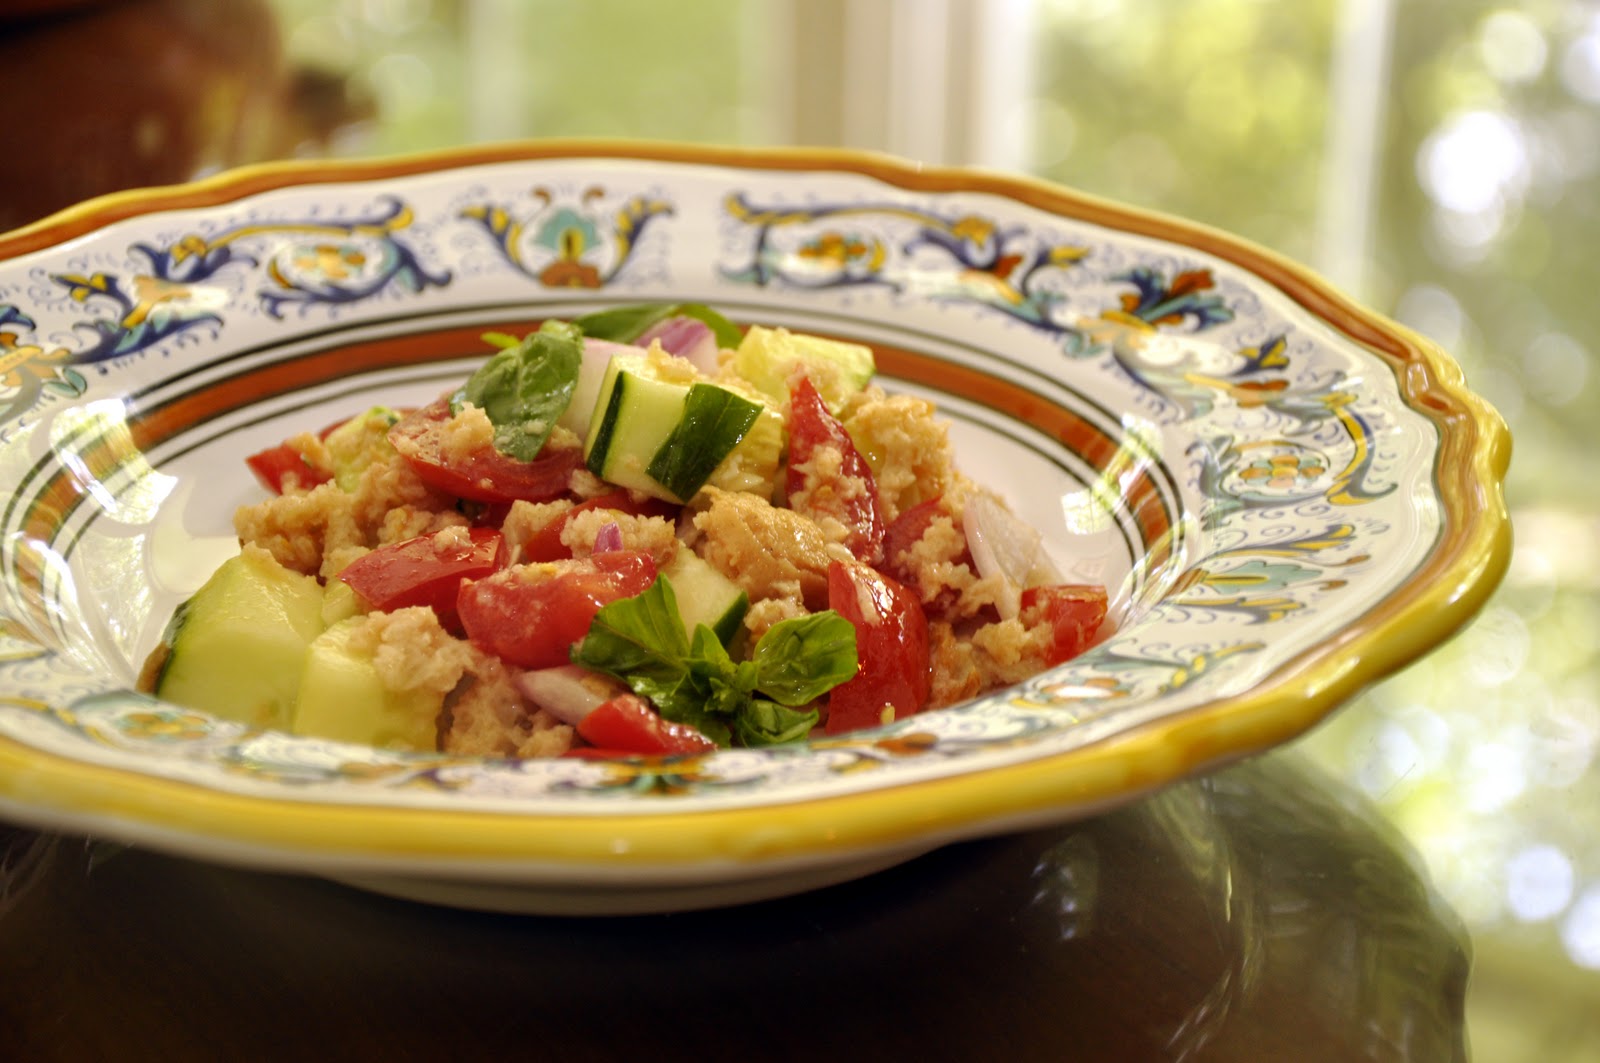
Panzanella, a Tuscan bread salad, is a great way to use old bread and avoid cooking in hot weather at the same time. And it is so simple to make, too. Take some slices or chunks of stale bread and dunk them in water until they begin to soften. This should not take long. Remove them and squeeze out the water, then shred the bread with your hands into a salad bowl. Throw in some chopped ripe tomatoes, sliced or chopped red onion and a few basil leaves. Dress your salad in the usual manner, with abundant olive oil, some wine vinegar, salt and pepper. You can serve panzanella immediately if you like, but it doesn't mind a wait. In fact, it develops flavor if let it rest for a while, say an hour or two. It can even be made well ahead, in which case you may want to hold off on the vinegar, which can become overpowering, until you are ready to serve.

NOTES: It is quite common to add some chopped cucumber to the above basic recipe, which I do whenever I have it on hand. It lends a certain brightness to the recipe. Chopped celery can also be a nice addition. In fact, I sometimes like to experiment with panzanella—with apologies to my Tuscan friends—with all sorts of additional ingredients (see my post on panzanella «con un po' di tutto»).
 

Red wine vinegar is usual for panzanella—remembering that Tuscany is the home of Chianti wines—but personally I prefer to use white wine vinegar which doesn't 'stain' the salad and, to my taste anyway, has a less assertive flavor. A few drops of lemon juice would not be amiss, either. There are also recipes that omit any acid altogether. Some recipes call for you to add the vinegar to the water in which the bread is soaked, rather than as part of the dressing.

Whether you chop your vegetables large or small is also a matter of taste. I vary according to my mood, although I tend to like moderation in all things, so I usually use a 'medium' chop. So those of you who like to get fancy, you can use a very fine chop and form the panzanella in a ring mold in individual portions as an antipasto for an elegant summer meal.

The ideal bread would, of course, be Tuscan bread, traditionally the darker pane scuro. But if you don't happen to live in Tuscany, any good quality, well-structured bread will do the trick. Just make sure it is the kind of bread that will stand up to being soaked, squeezed and shredded without turning into mush. Sandwich bread won't do—you need the kind of bread that you buy in a whole, unsliced loaf. One good test to see if the bread has adequate structure is to squeeze the loaf when you buy it: if it collapses easily (like Wonder bread) then it won't work for this dish. The more resistance it gives, the better—well, to a point, of course…

The measurements are really totally up to your taste. I've seen the dish made with mostly bread, or with mostly vegetables. This being an old peasant dish, surely the proportions depended entirely on what was on hand at the time you made the dish, and that is what I do, too. A good rule of thumb, however, is that bread should make up about half the volume of the salad.

Saturday, August 21, 2010

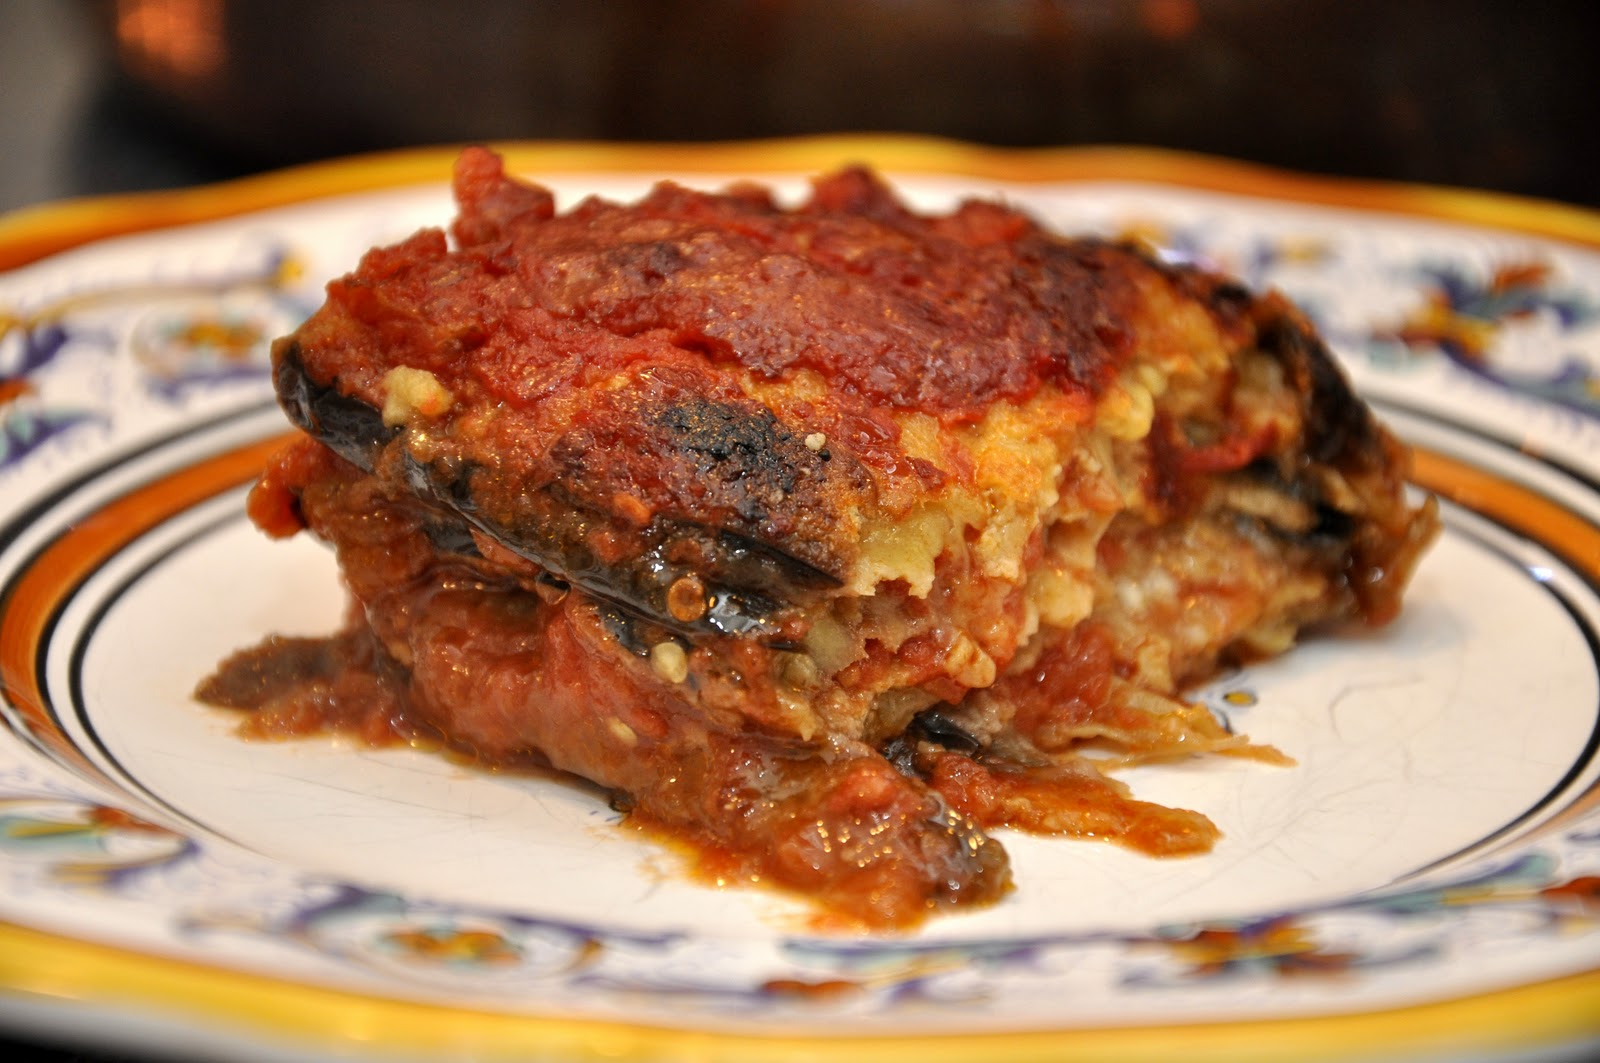
Parmigiana di melanzane


Being a lover of good food, I find it almost impossible to answer the question 'what's your favorite dish?' But if I had to, my answer would probably be eggplant parmesan--parmigiana di melanzane--the way Angelina used to make it.

This is a simple dish to make, but it involves several steps. Allow yourself a good two hours to prepare this dish. It tastes much better made ahead, so if you have the time, make it in the morning and have it for dinner or, even better, make it at your leisure the day before.

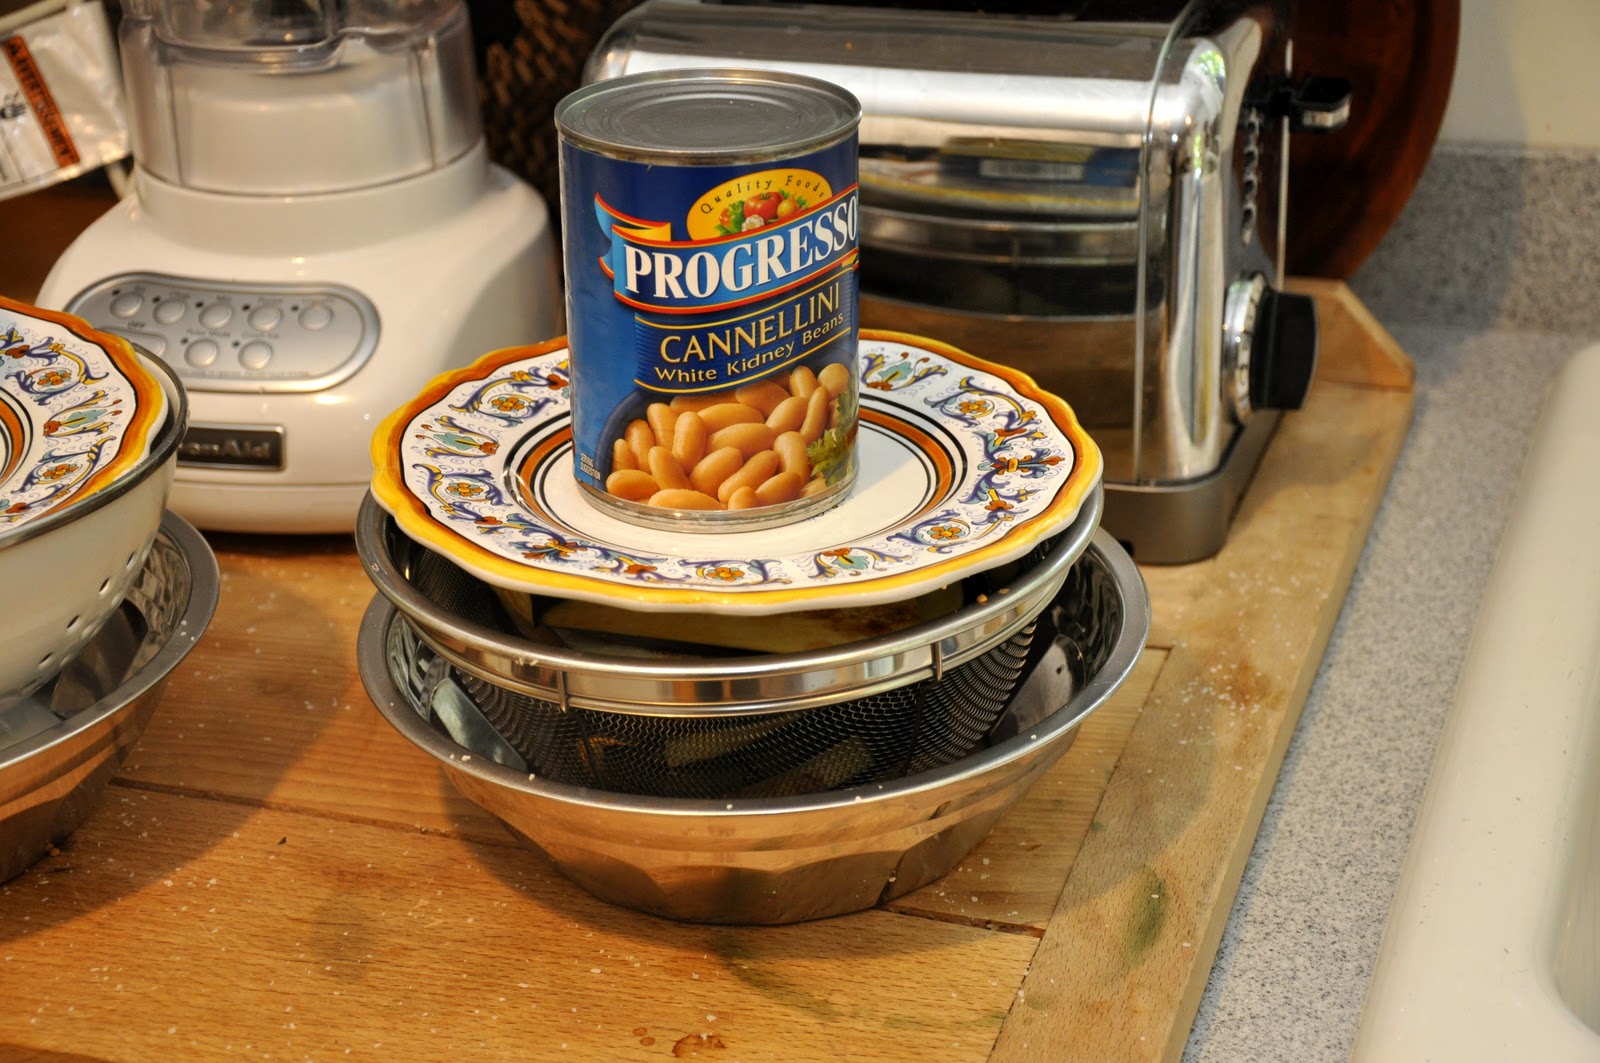
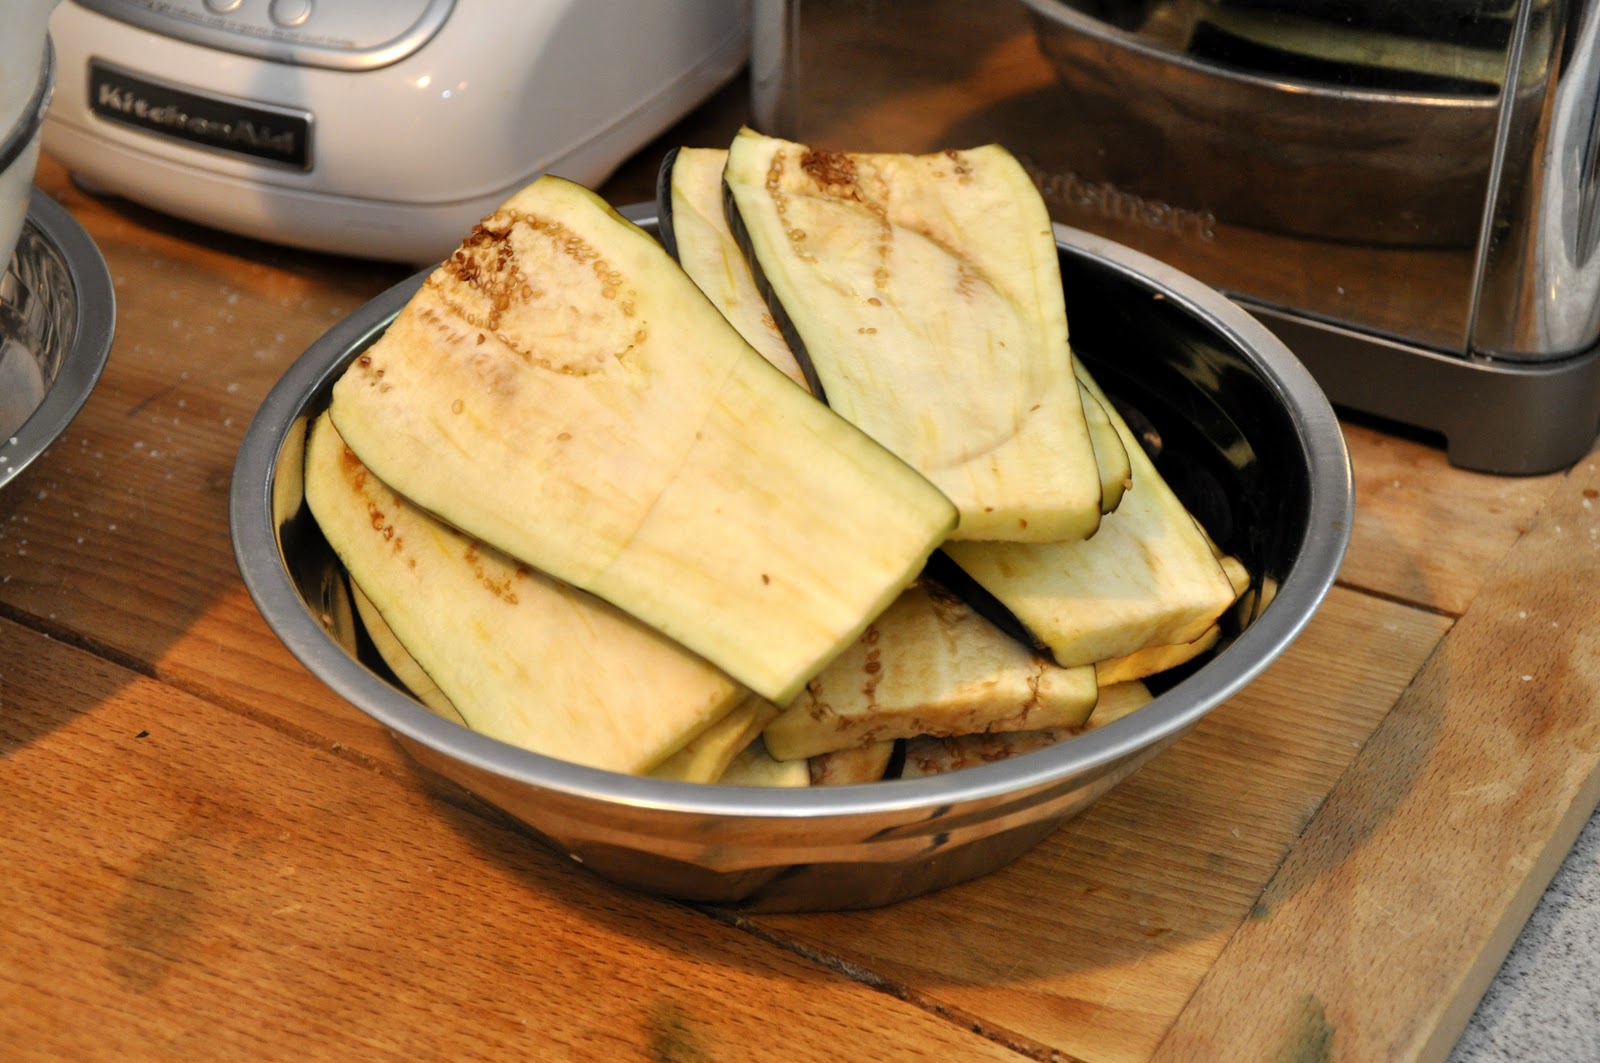
Step 1: Prepare the eggplant. You begin with eggplant, of course. For this dish, the large, purple variety is preferable; about two should do you for a good sized baking dish. You cut the eggplants into fairly thin slices. Now you should 'purge' them of their excess liquid, which can be bitter. Sprinkle the eggplant slices with salt, and then lay them in a colander laid on top of a plate. Cover the slices with a small plate on which you should place something a bit heavy like a can of beans or tomatoes. This will help press the liquid out of the eggplant. Leave them for about an hour.


You should notice a small puddle of brownish water below the colander, which you should discard, of course. Remove the slices from the colander and pat them dry.


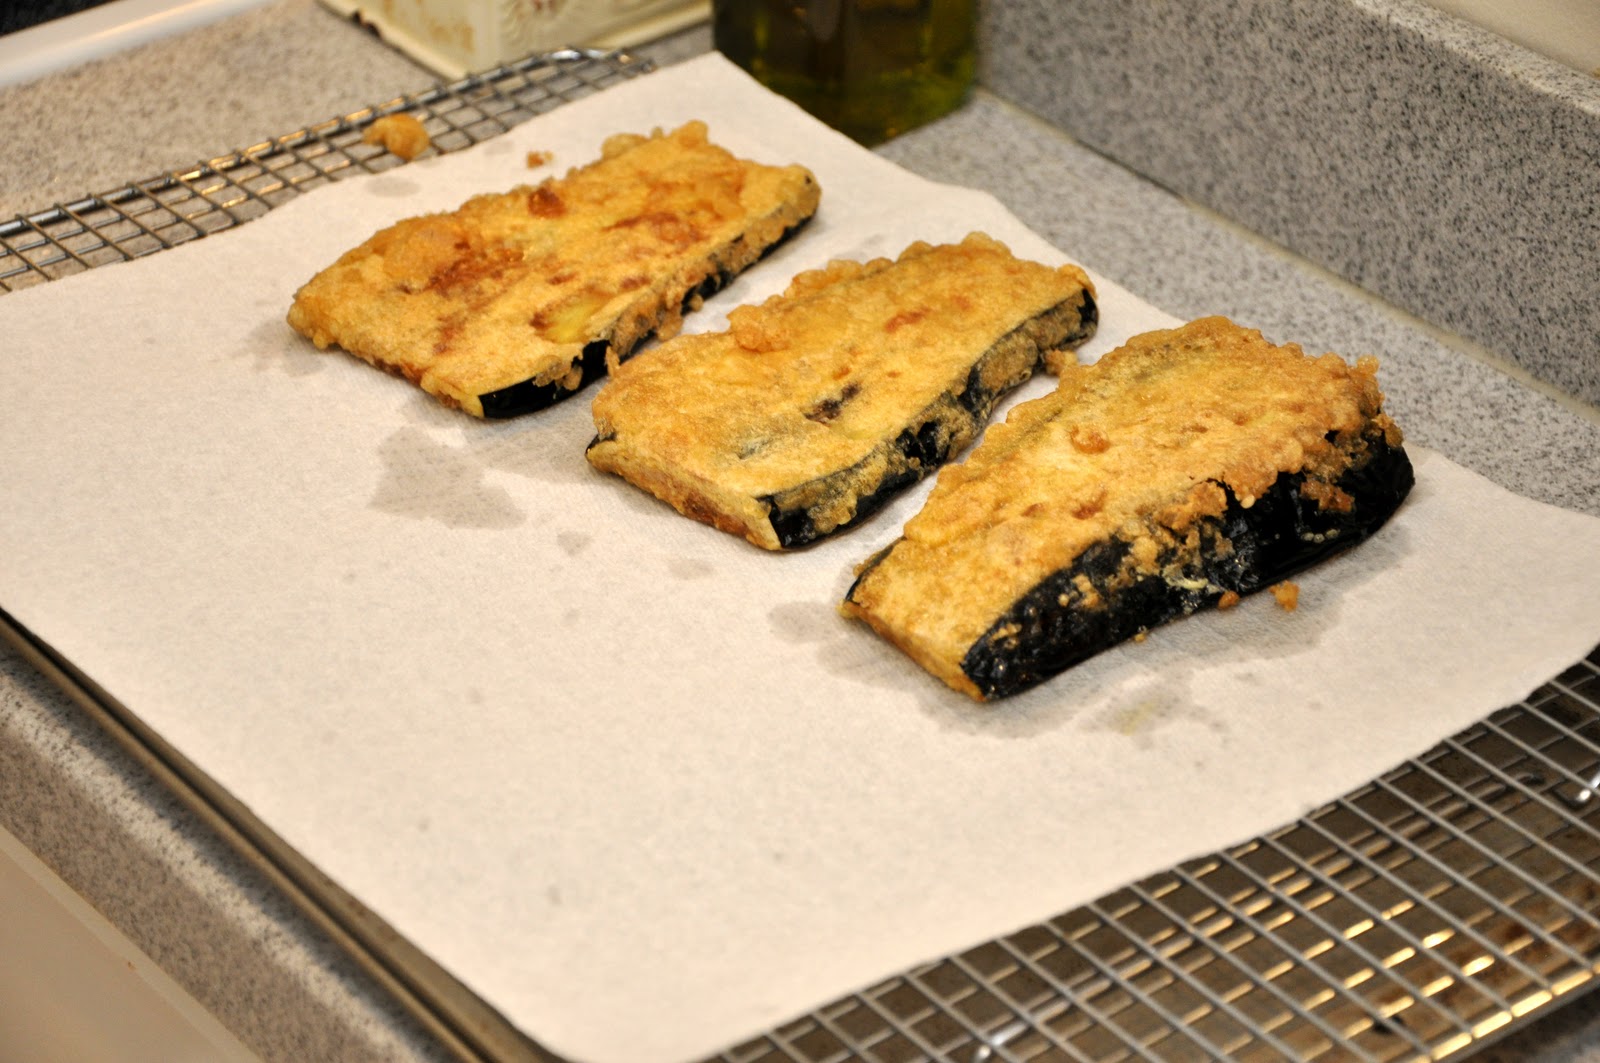
Step 2: Fry the eggplant. Now you dip the eggplant slices in flour, followed by an egg and cheese 'bath' made from beaten eggs, grated pecorino cheese, finely chopped parsley, salt and pepper. Shallow fry the eggplant slices over moderate heat until they are golden brown on the outside and tender inside.


You will need to fry the eggplant slices in batches. As each batch is done, drain and set on paper towels to absorb the excess oil as you continue with the next batch. Repeat until you're done.


Step 3: Prepare the tomato sauce. While this is going on, prepare a very light tomato sauce by combining chopped tomatoes (fresh if in season, but canned tomatoes are fine), a few leaves of fresh basil, salt, chopped garlic and just a few drops of olive oil. (Some people omit the olive oil altogether since the eggplant, even after draining, can be a bit oily.) Simmer for about 15 minutes, until the tomatoes have melted into a sauce If using canned tomatoes, add a bit of water to loosen the sauce before simmering. You will want a good amount of sauce, so be sure to make a potful--you can always any extra to dress pasta.

Step 4: Prepare the cheeses. Take a large mozzarella, preferably fresh, and slice it. Grate lots of parmesan cheese, at least a cupful (you can grate it as you assemble the dish).

First layer down...
Step 5: Assemble the dish. You are now ready to assemble the dish. In a bake-and-serve pan, place a layer of the fried eggplant slices, then a bit of the tomato sauce, then a few mozzarella slices, a bit of shredded basil (optional) and grated parmesan cheese. Season. Then add another layer of eggplant and continue until you've used up your ingredients. End with tomato sauce and parmesan. (Don't put mozzarella on top, it will brown too quickly in the oven and burn.)

Ready for the oven...


Step 6: Baking. Bake in a hot oven (400 F, 200 C) for about 30 minutes, or until the dish is bubbling hot and the top a bit brown. Don't worry if it even looks a bit 'burnt' around the edges--that's normal and, to some tastes, the best part! Let the dish cool a bit before eating, at least 15 minutes. In fact, it tastes best made ahead and reheated (just a bit) before eating. It can also be eaten at room temperature. Just don't eat it piping hot, because you will miss the full, wonderful flavors!

NOTES: A friend from Naples once told me that this version of parmigiana--made with eggplant slices dipped in egg--is typical of the interior of Campania, the region where Naples is located and of which it is the capital. In fact, that's where Angelina was from, a small mountain town near Benevento. In Naples proper, this dish is made with eggplant slices that are simply lightly floured and fried. Most modern recipes you will find follow the Neapolitan method. I've tried it that way and it makes for a lighter dish. But I still like Angelina's version best! For an even lighter dish, you can brush the eggplants with olive oil and grill them instead of frying. The result is actually very nice, but you are getting pretty far from the original flavor and texture of the classic dish. They also make this dish in Sicily (in fact, the Sicilians claim the dish is theirs-see below) but without the mozzarella cheese.

If you are pressed for time, you can skip the initial 'purging' of the eggplants. As long as the eggplants are reasonably fresh, it should not make that much difference. I sometimes skip this step myself. But be aware, there is a chance that the dish will have a bitter aftertaste. And if you want an even quicker dish, instead of a tomato sauce, you can use passata di pomodoro or crushed canned tomatoes--it will cook in the oven--a drizzle un filo d'olio over each layer.

Some recipes calls for baking the dish in a moderately slow oven and for a longer period, from 45 minutes up to an hour, raising the temperature at the very end if necessary to brown the top. The advantage of this method is that you are less likely to burn the top.

This dish can play many roles in an Italian meal. It can serve as an antipasto, as part of a buffet, as a light secondo or as a piatto unico: a single-dish meal in itself. And, to be honest, I even eat it, the morning after I make it, for breakfast!

By the way, as is typical for a popular dish with many variations, there are a good number of different stories about the origins of this dish. some of them place it in or around Naples, while say the dish originated in Sicily. Despite the name, however, it is very doubtful that this dish comes from Parma. The name may refer simply to the generous use of parmgiano cheese in the dish. Some early sources say that the parmigiani were known for making layered vegetable casseroles. The Sicilians say that the name comes from  parmiciana, which the dialect word the slots in window shutters (persiane in proper Italian) since the eggplant slices lined up in the baking dish were said to resemble said shutters.

This interesting article discusses the various claims and their relative merits. If you can read Italian, Wikipedia also has an article on the dish. Both place the probable origin to Campania and to the 18th century chef and writer Vincenzo Corrado.

My sous-chef....


Eggplant Parmesan on Foodista

Tuesday, August 3, 2010

Pomodori ripieni di riso

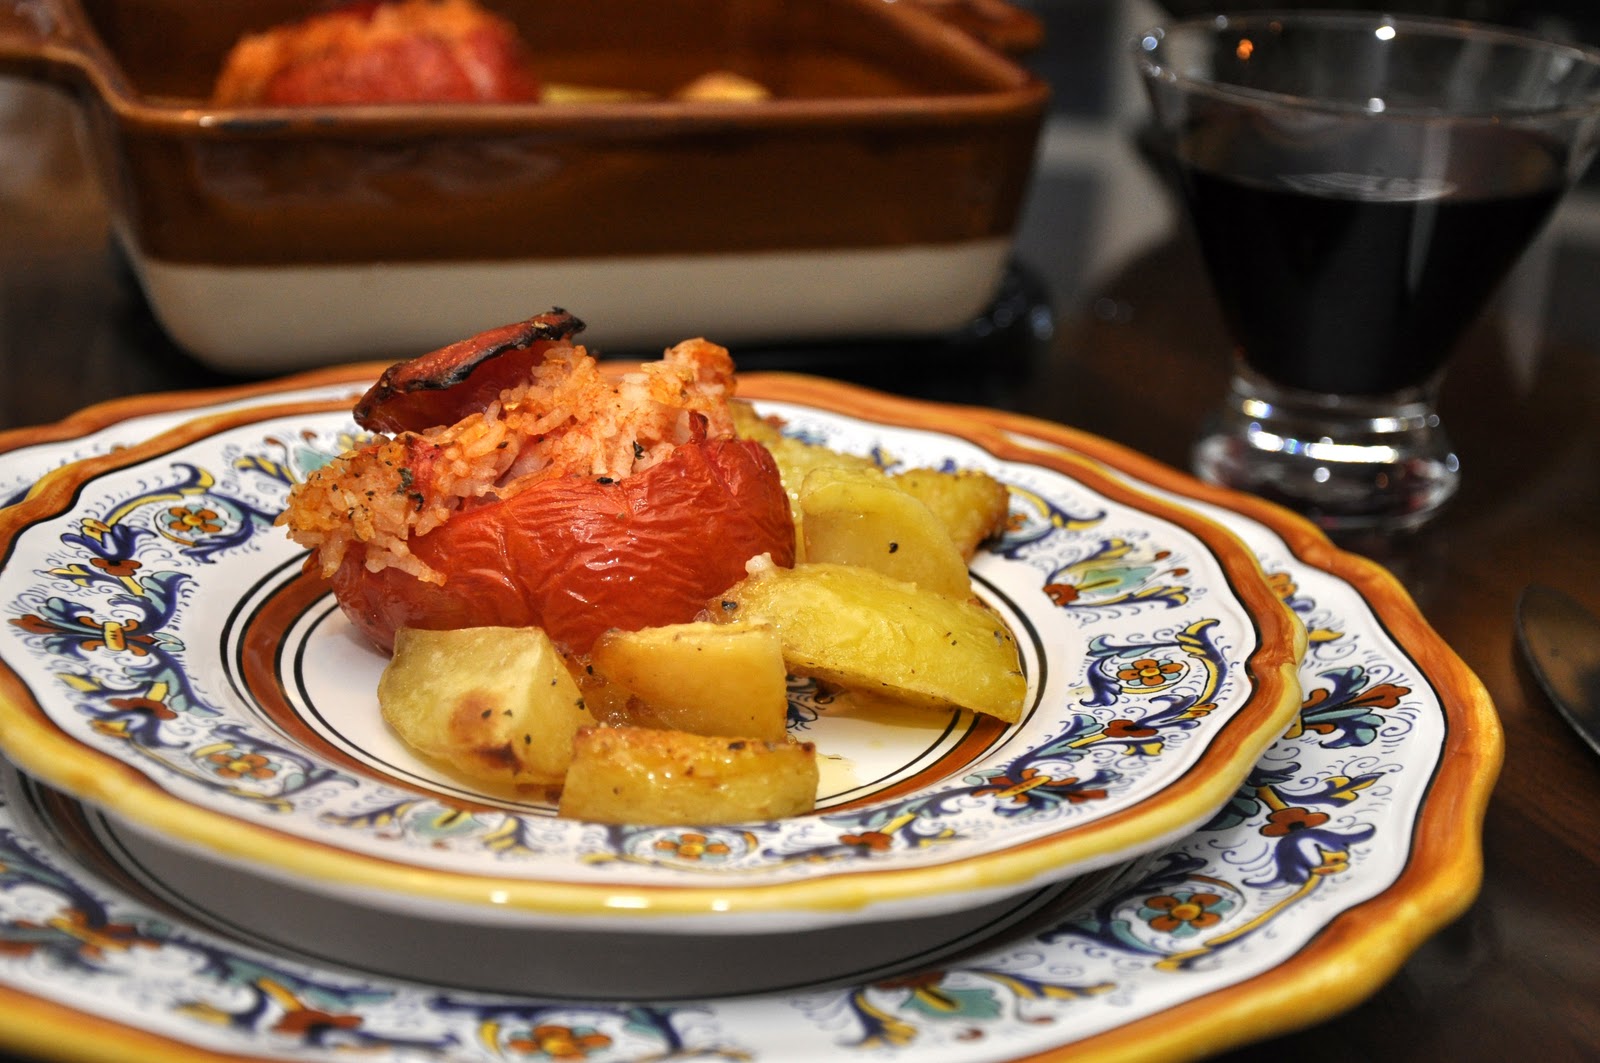
A staple of summer picnics and tavole calde, pomodori ripieni di riso, tomatoes stuffed with rice and oven roasted, make for a simple and relatively quick weekend dinner, part of a buffet or a tasty antipasto for a summer dinner for guests. Here's the recipe:

Take as many tomatoes as you have dining companions, cut off (but don't discard) the tops. Scoop out the insides of the tomatoes and chop them up, making sure you don't lose the juices. Mix the chopped up insides with some rice, which you will have parboiled until they are about half-tender. Season the rice mixture with salt, pepper, a drizzle of olive oil, just a bit of finely minced garlic and some minced herbs, typically oregano, basil and/or parsley.

Spoon the seasoned rice mixture into the insides of the tomatoes, taking care not to pack them too tightly, and place their tops back on top of the rice stuffing. Place them in a well-oiled baking pan and scatter some wedges of potato around the tomatoes. Season the dish with salt and pepper and, if you like, a sprinkling of oregano. Drizzle everything with some more olive oil. Roast in a hot oven (200C, 400F) for about 45 minutes, or until the rice and potatoes are fully cooked, the tomatoes nicely roasted—they will crinkle up and their edges will char a bit. Check on the dish from time to time while it is roasting. If it seems dry, drizzle over a bit more oil. You can also move the potatoes around so they cook evenly and are well coated with the oil.

Pomodori ripieni di riso are usually left to cool and eaten at room temperature or just slightly warm.
 

NOTES: In Rome at least, these tomatoes are invariably served with potatoes but if this is too much carb for your taste, you can omit them. Some recipes call for reserving a bit of the tomato pulp and mixing it with the potatoes so they too get some tomato flavor and a bit of color.

You can also play with the rice stuffing. As indicated, the herbs can vary with your taste. Some recipes omit the garlic, others call for some grated pecorino or parmigiano. Some add capers, olives and/or chopped anchovy, although these ingredients would change the character of the dish pretty radically and, in my humble opinion, upset the balance of flavors.
Needless to say, the success of this simple dish will depend on the quality of its ingredients, especially the tomatoes. This is really something you should save for the best, tastiest summer tomatoes you can find. The tomatoes themselves should be large enough to stuff, of course, but should not be gigantic, either, or you will wind up with too much stuffing, making for a rather stodgy dish. The tomatoes should be fully ripe, but not at all mushy, or they will disintegrate in the roasting process.

As far as the rice is concerned, the typical rice would be short-grained, but this is a forgiving recipe. You can even use leftover Chinese take-away, which is what I used tonight! Some recipes calls for adding raw rice, but in my experience this inevitably leads to a dry, chalky filling. As mentioned, it is important not to pack the stuffing too tightly or to overstuff the tomatoes; they will otherwise expand and rip open the tomatoes—not the end of the world by any means, and the tomatoes will still taste good, but you may fare una brutta figura (make a bad impression) if company is coming…

Sunday, July 4, 2010

Paella mexicana


It's the 4th of July here in the US and the national holiday naturally makes me yearn for… paella! Well, not just any paella, but a Mexican-style version inspired by my fellow blogger Non Chef Nick's latest post on "In the Kitchen with Nick". I absolutely love paella. Having not prepared it for quite some time and being on something of a Mexican 'kick' lately, when I saw his mouth-watering recipe for Mexican paella, I knew I had to try it. Sorry, Nick for being such a copycat, but you know what they say: imitation is the sincerest form of flattery! 

Being a man of simple tastes, I have reduced the number of ingredients quite a bit and simplified the technique here and there. Here's my take: 

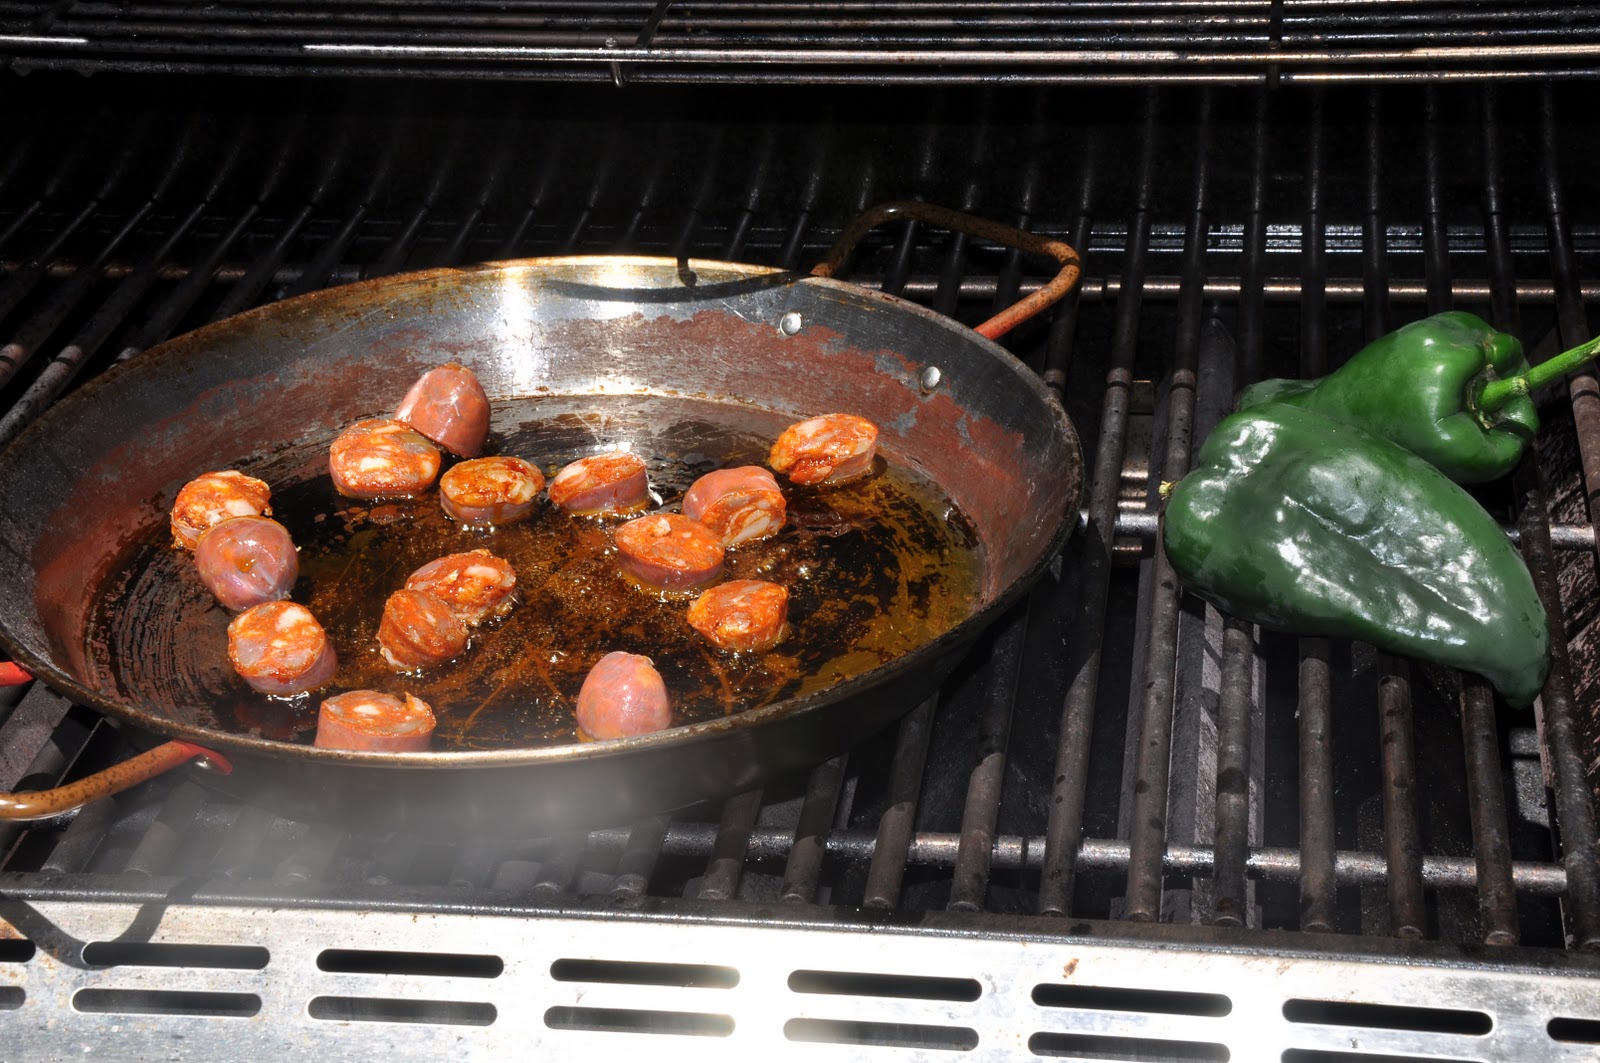
Heat a well-seasoned paella pan over high heat, preferably on a barbecue or, even better, a paella burner. (If you don't' have either, you can make paella perfectly well over the stove, but it will lack that characteristic lightly smoky flavor.) When hot but not burning, add enough olive oil to cover the bottom of the pan and sauté some Mexican chorizo. Meanwhile, char a couple of chiles poblanos over the flame and, when nicely charred on all sides, remove them and let them cool a bit, covered with a cloth or in a paper bag.


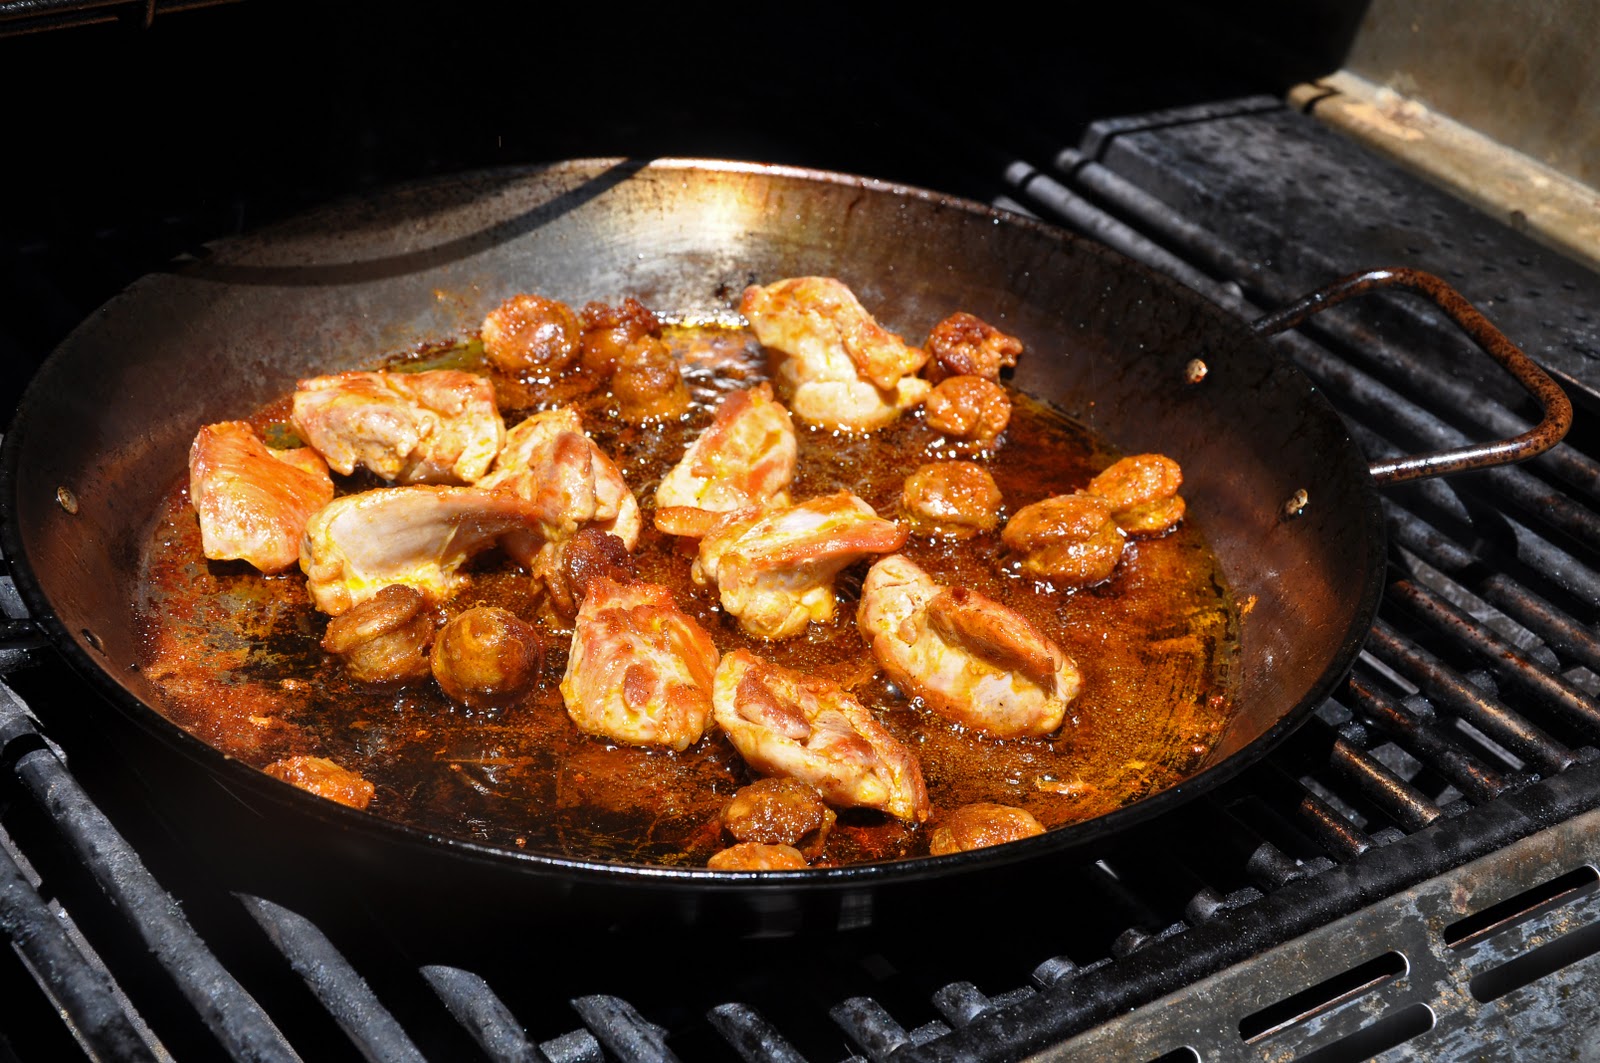
Add some chicken thighs to the pan and brown them very well. You want both the chorizo and the chicken to be very nicely golden brown, which will give your paella deep flavor. 


 While the chicken and chorizo are browning, skin your chiles poblanos with your hands, remove the seeds and cut them into rajas (or strips). When the chicken are chorizo are done, add a chopped white onion and the rajas to the pan. 


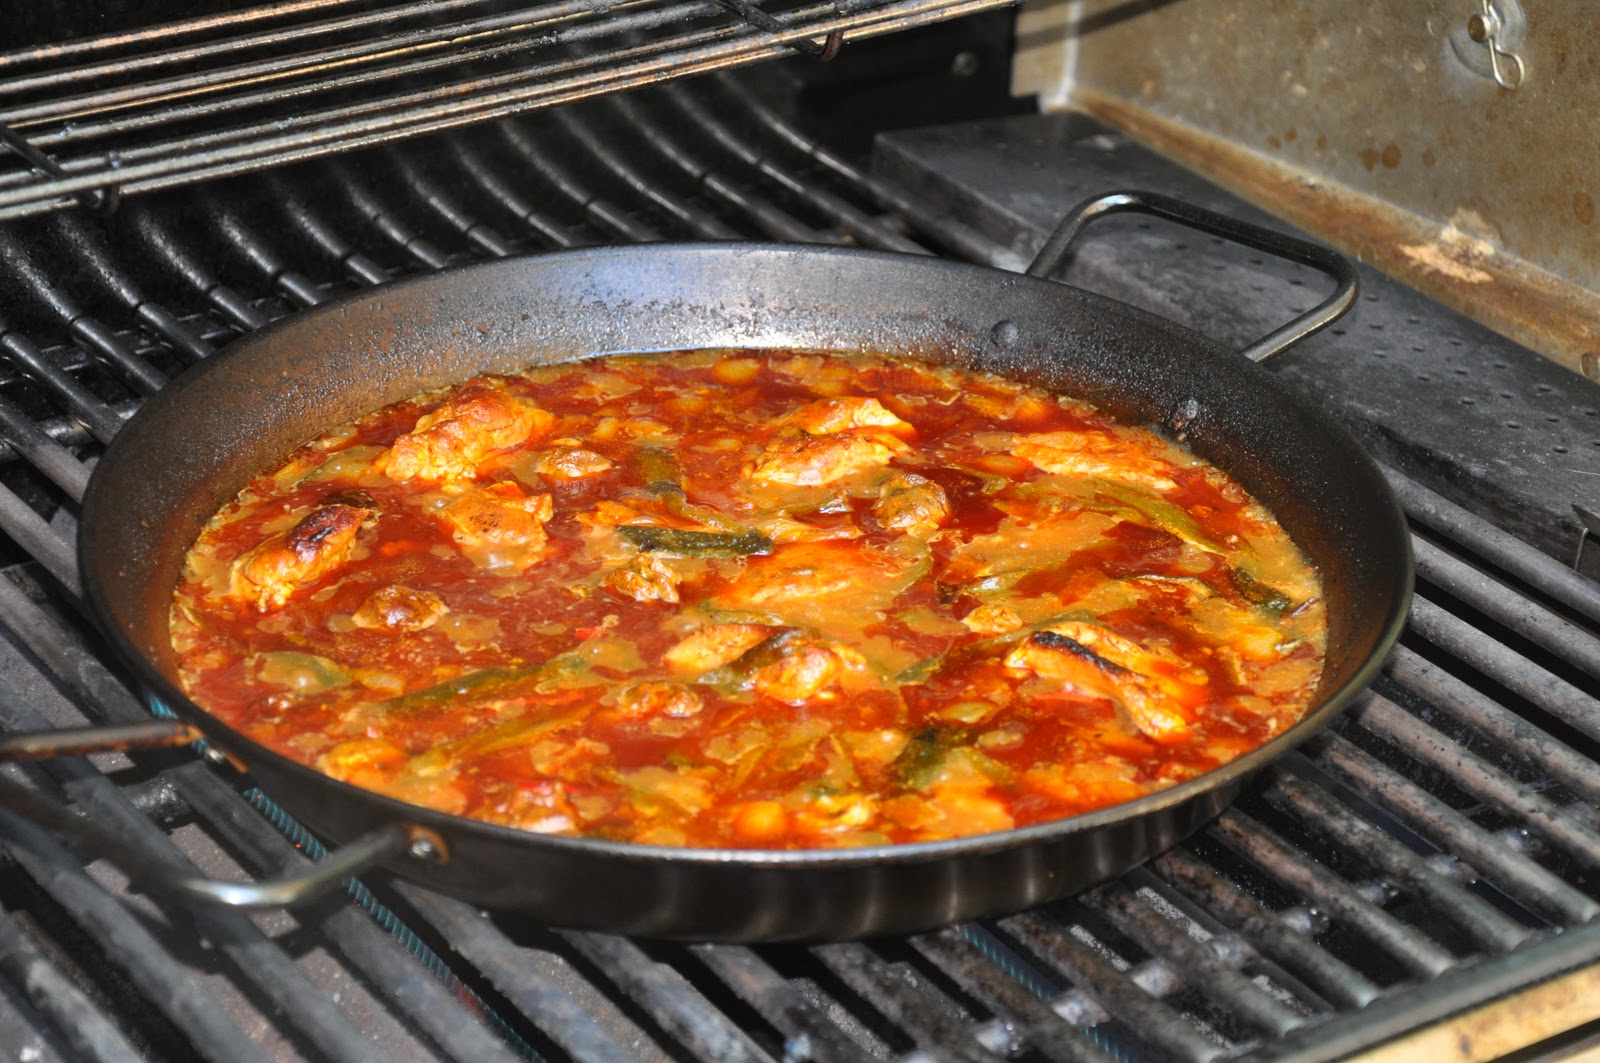
When the onion has softened, shove all the ingredients in the pan to the sides, making a 'well' in the middle. Into this well, place a spoonful of cumin (not too much, as cumin has a very strong flavor) and a heaping spoonful or two of pimentón (smoked paprika). Allow the spices to fry in the oil for a moment, until they become nicely fragrant:

As the sun sinks slowly in the West...

Then add two tomatoes, which you will have puréed in a blender. (For extra flavor, you can char and peel the tomatoes along with the chiles before puréeing them.) Mix the ingredients all together and let them simmer until the resulting 'sauce' thickens nicely.


Add enough water to almost fill the pan. (If using a traditional paella pan, you can use the rivets for the handles as a guide.) Season with salt and add a few threads of saffron—again, not too much as saffron too has a strong flavor and is very expensive to boot!


Allow this broth to simmer for a good 10 minutes or more, until it reduces by about half and develops a rich flavor. Taste the broth at this point to see if it sufficiently savory. Adjust for salt if need be and, if it tastes a bit 'thin', let it simmer some more. 

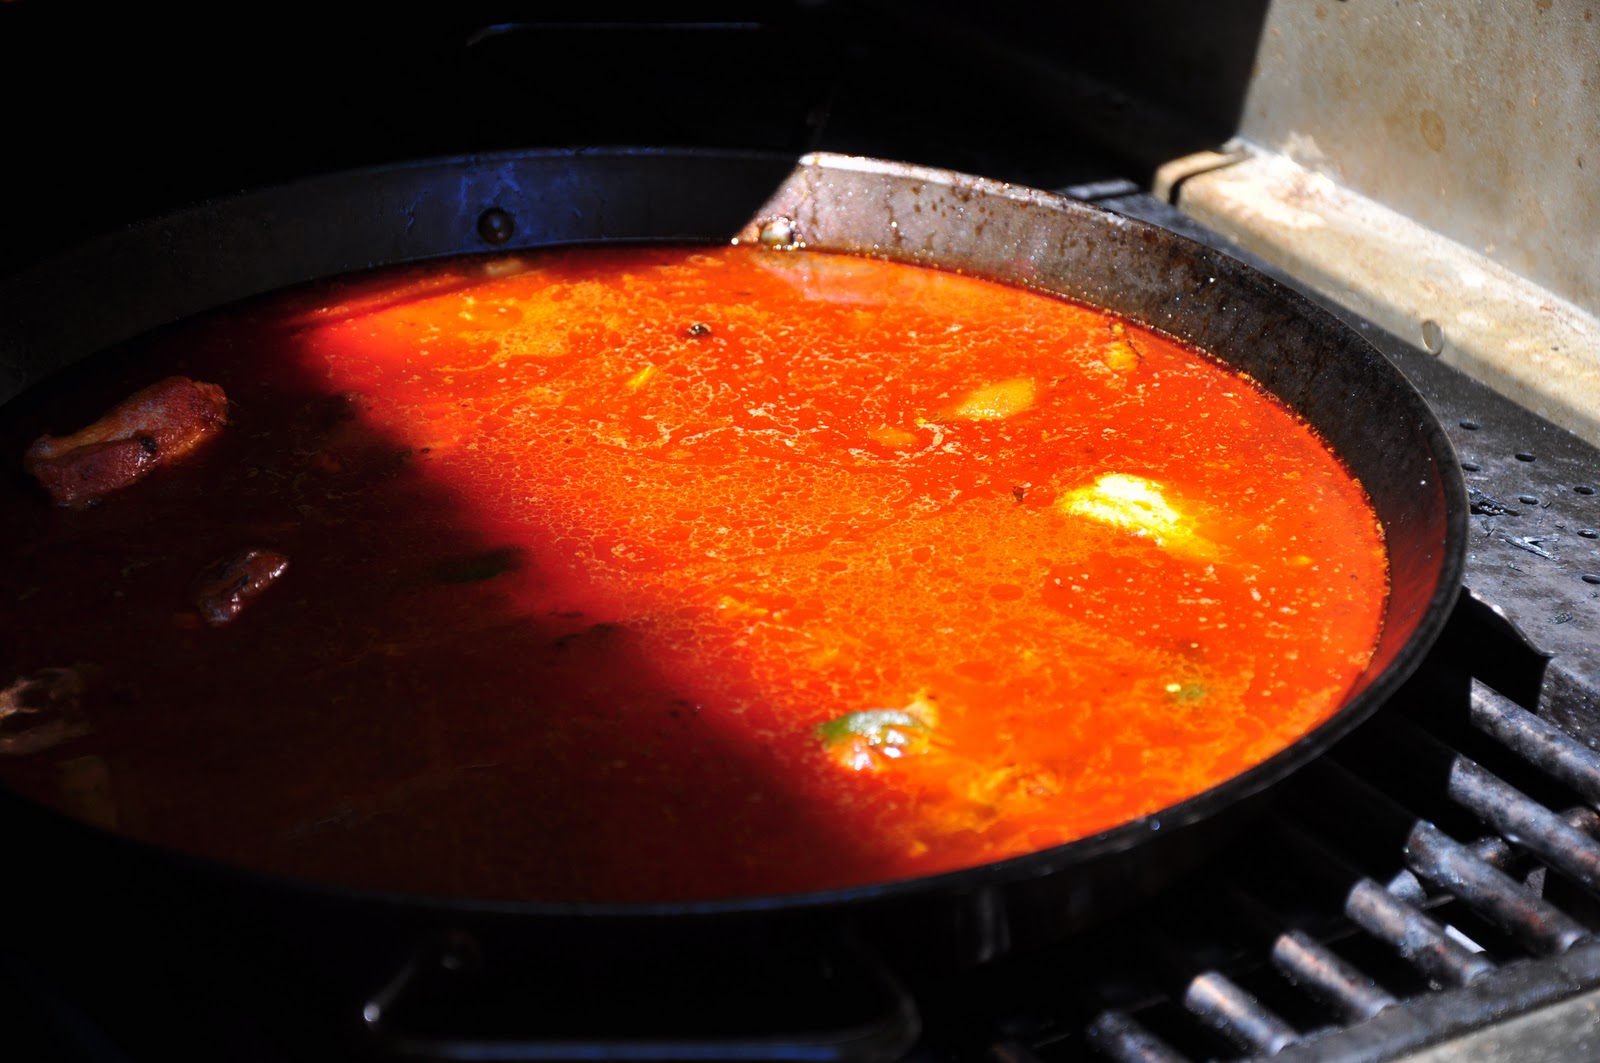
When your broth is ready, add your rice. The traditional Spanish way of adding the rice is by pour a line of rice from top to bottom and then from left to right to form a 'cross' in the pan that just barely rises about the top of the broth. Then you spread it out evenly. I usually simply sprinkle the rice around the pan as evenly as I can manage, enough so that it is just visible under the surface of the broth. 


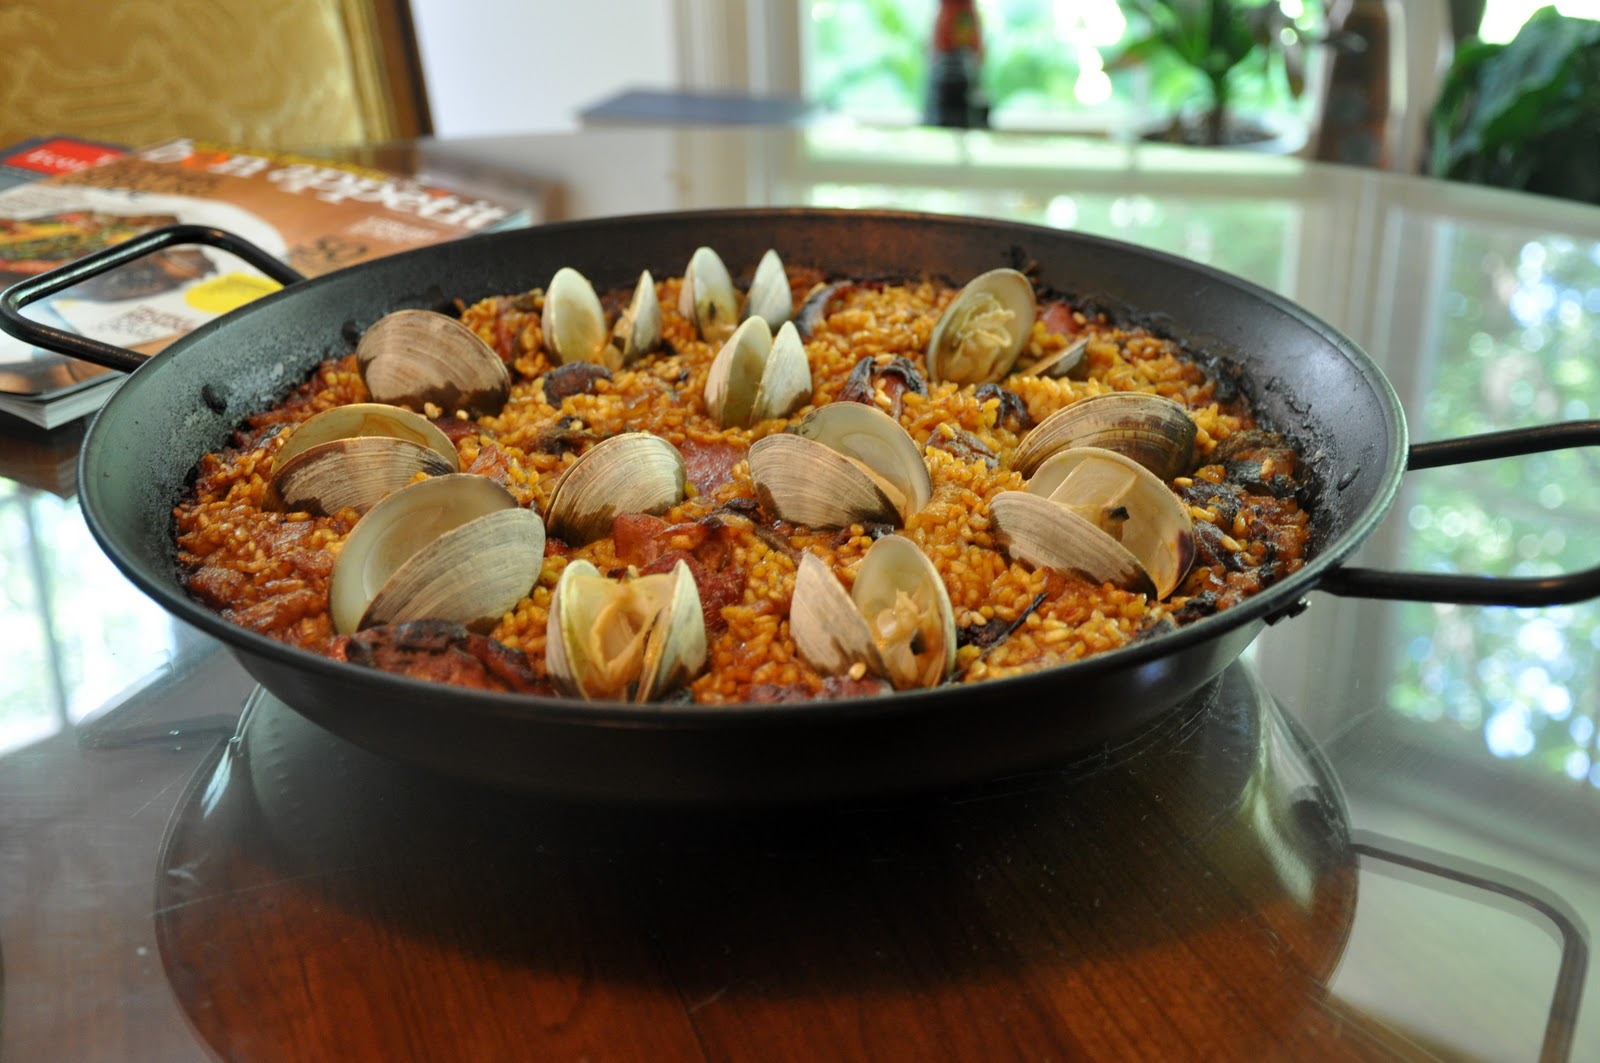
Either way, let the rice simmer undisturbed for a good 15 minutes or so, until the broth has almost but not quite entirely been absorbed. Taste a bit of the rice—if it is still quite hard, add a bit more water. Then add some clams here and there, as many as you like without overwhelming the dish:


Let the rice continue to cook until the clams have opened and the broth entirely absorbed. (NB: You may need to raise the heat a bit at this point so the clams open.) The rice should 'crackle' a bit, meaning that it is forming that delicious crust called socarrat. Remove the paella from the heat, sprinkle it with a shot or two of tequila and let it rest for 10 minute or so before serving. 

¡Buen provecho!

NOTES: The paella turned out to be truly delicious, if I do say so myself! If I had one thing to change, though, I would have held back about half of the rajas and placed them on top of the paella along with the clams toward the end of the cooking time. While the poblanos had lent their wonderful flavor to the dish, they had essentially disappeared as a separate ingredient when all was said and done. Reserving some for the end would have also added a bit of contrast and color to the final dish. 

Nick's version is a bit more elaborate than this, with shrimp, tomatillos, green beans, shallots, chicken stock, peas in addition to the ingredients used here. And he uses chicken wings instead of thighs, chili powder instead of cumin. He also 'toasts' the rice in the oil before adding his stock. It looks perfectly delicious, too. 

For detailed tips on making paella, including the right type of rice, the proper pan to use, more details on cooking technique and some online resources, see my post on paella valenciana


 Post scriptum: We had some fun trying to think up a name for this dish made for the 4th of July. Paella cuatro de julio was an obvious choice, but didn't seem right. Then why not paella Pancho Villa? Paella Benito Juárez? Paella Frida Kahlo? Then I suggested paella Emperatriz Carlota, at which point we realized we should quit while we were ahead and settled for plain old paella mexicana… ;)


Sunday, June 13, 2010

Fegato alla veneziana


A good many people have an aversion to organ meats. Perhaps that's because they are often not very well prepared—overcooking, which tends to accentuate the 'mineral' taste of organ meats and toughen their texture, is all too common. Or perhaps it's just the idea of eating an organ, although why someone would happily eat certain parts of an animal but not others never made much sense to me. 

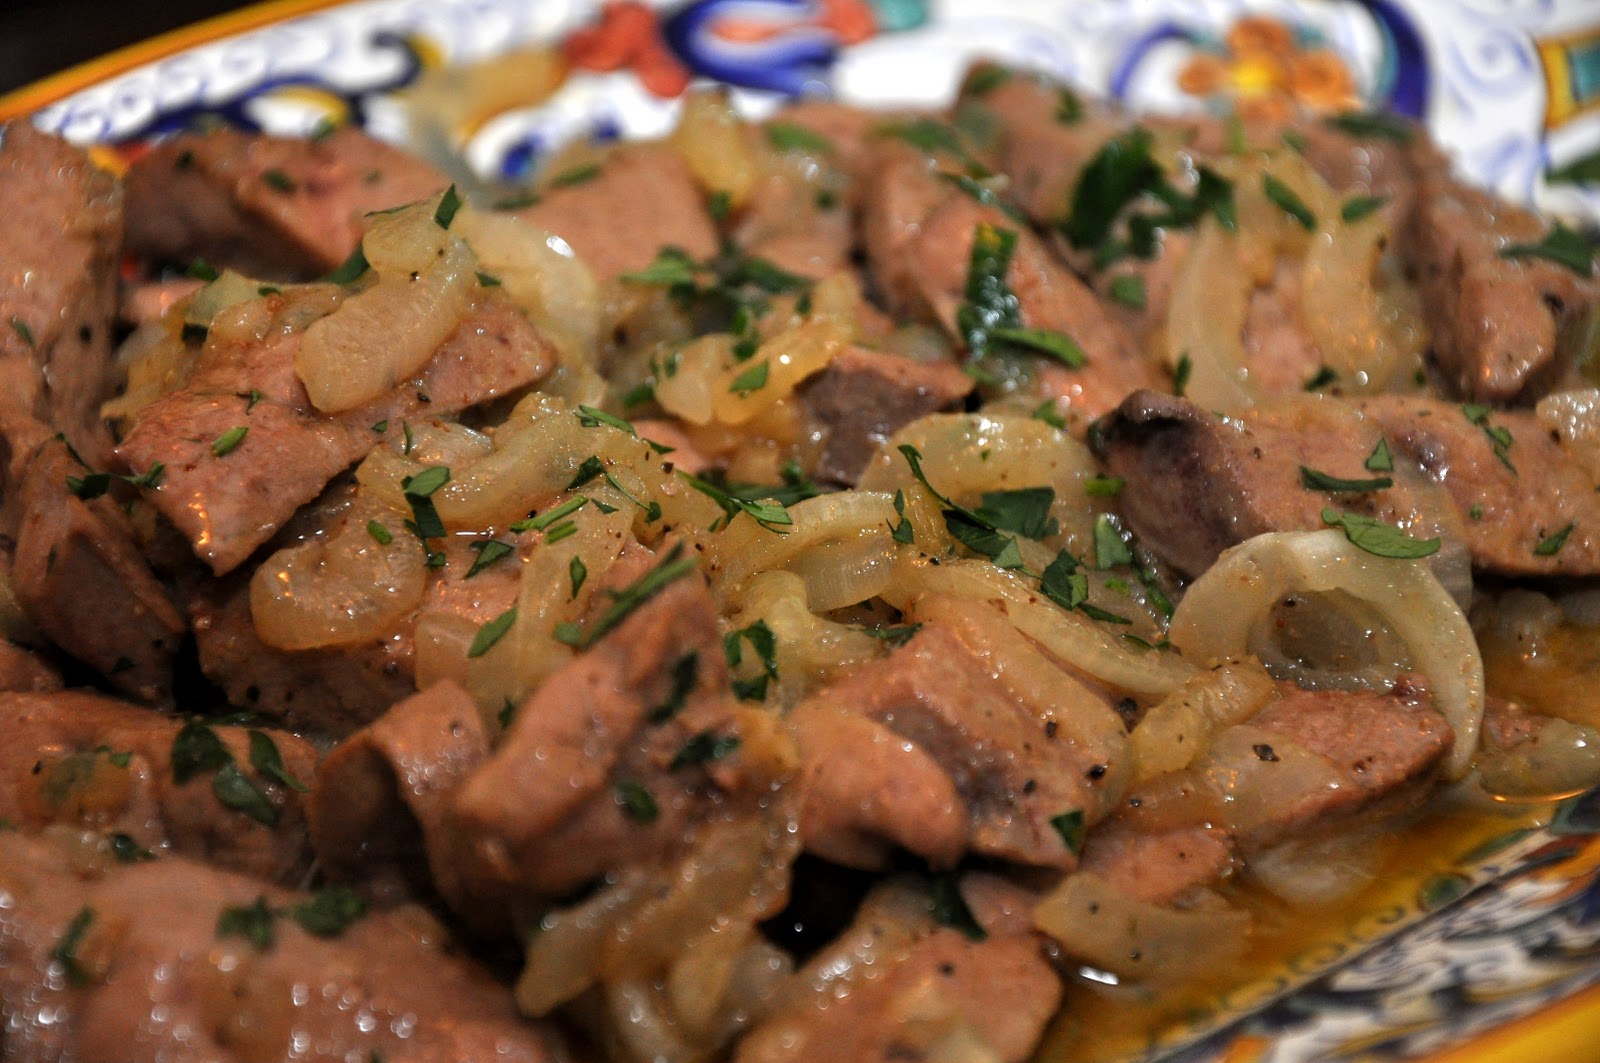
If you fall into the latter category, you might want to just skip this post. But if you belong the first group, or have an open mind on the subject, you might want to try this dish, Venetian-style Calf's Liver,  which is probably the best known way to prepare calf's liver in the Italian repertoire. It couples thinly sliced liver with lots of well-caramelized onion, which adds sweetness to balance out the liver's earthy flavor, and a splash of vinegar, white wine or even lemon juice to balance out the sweetness of the onion. The combination, I think you will agree, is one that was meant to be. 

Begin by sautéing thinly sliced onion in a combination of butter and olive oil (or just butter) over medium to medium-low heat in a wide skillet until the onion is well-wilted and very soft. The onion should not color—regulating the heat carefully and add a bit of water or wine and salt will help the wilting process along and prevent browning. 

When the onion is ready, push it to the edges of the skillet. Add a bit more olive oil if need be, raise the heat, and add sliced calf's liver, trimmed and sliced into thin strips, to the skillet. Sauté over lively heat, just until the liver has lost its raw color. Then mix the onions and liver well, adding a handful of finely chopped parsley to the mix and seasoning well with salt and pepper. After a minute or so, remove the liver and onions to a warm serving plate. 

Add a good slash of white wine to the skillet and deglaze, scraping up the sucs that will have formed with a wooden spoon or spatula. When the wine has reduced to a syrupy consistency, pour it over liver, sprinkle with some additional chopped parsley and serve immediately.

As for measurement, the main point is to use an approximately 1:1 ratio of onion and liver by weight. The flavor of the onion must balance that of the liver, but not to overwhelm it. The rest is entirely a matter of taste. 


NOTES: The best onion to use for this dish, to my taste, is the white onion, which is mild and sweet. If you are in the US and have access to those sweet Vidalia onions. they work extremely well—and that's what I used this time. In a pinch, regular old yellow onion will also do fine, just make doubly sure that they are well reduced, which will intensify their natural sweetness. 

The original recipe for Venetian-style liver used vinegar rather than white wine. Personally I find that this adds a bit too much astringency to the dish, but no doubt in the old days it was a good way to use wine that had turned and the bolder flavor of vinegar may have been a way to disguise the flavor of less than immaculately fresh liver in the days before refrigeration. (Organ meats are extremely perishable.) In any event, I would suggest you use the freshest liver you can find. A few recipes call for lemon juice, rather than wine or vinegar, something I have yet to try. 

Some recipes, by the way, call for liver than has been cut into small pieces rather than strips. But I find the strips give the dish a more delicate flavor—the liver melds more completely with the other ingredients—and makes the liver cook more quickly, which keeps it tender. Liver slices bought at the store often need to be well trimmed of any 'skin' left around the edges, If you leave the skin on, the liver will tend to curl up, although cutting it into strips will also help avoid this. You can also make lamb's liver this way, and it will be very good. Beef liver, however, is a bit too strong for this treatment.

The final deglazing of the skillet after having removed the liver and onions is actually my personal take on the dish. The original recipe calls for adding the liquid—be it vinegar, wine, lemon juice, plus, in some recipes, a bit of broth—to the skillet with the liver and onions and allowing the whole to simmer together for a few minutes. But I like my liver still pink inside, so I remove it as soon as it is cooked to my taste. 

Some recipes call for you to remove the onions from the skillet before you add the liver, then add it back when the liver is almost done. This avoids any risk of the onion burning, but if you slice the liver into strips, it cooks so quickly there is little risk of that. 

The most typical way to serve fegato alla veneziana is with polenta, either warm and soft or cooled, cut into squares and grilled.  In the Veneto, by the way, the usual polenta is made with white polenta flour. Served this way, the dish can be a piatto unico. But if you want to precede your liver with a primo, it is perfectly delicious accompanied by some steamed potatoes or simply by itself, along with some crusty bread to sop up those wonderful juices.


The original name of the dish, in Venetian dialect, is figà àea Venessiana.  The dish has a longer history, with antecedents going back to ancient Roman days, when they would combine liver with figs, with the same intention of balancing the flavor of the liver with something sweet.

Saturday, May 29, 2010

Zuppa di pesce alla napoletana


Italy, being a rather slender peninsula, is a country where the sea is rarely too far away. And, of course, the products of the sea play a major role in its cuisine. And so it is not suprising that zuppa di pesce, or fish soup, is a dish that you will find almost everywhere in many guises. In Tuscany they call their version of it cacciucco, and on the Adriatic coast, they call it brodetto, or 'little broth', and you will find variations of it from Venice all the way down to Abruzzo. (Further down the coast in Puglia, the name reverts to zuppa di pesce.) Although called a soup, it is actually more like a stew.

Zuppa di pesce is said that have been invented by fisherfolk, who in the days before refrigeration needed a convenient way to prepare all the unsold bits and pieces of their daily catch. So why not throw them all together in a pot to simmer with some aromatics and water or, if you could afford, white wine? When the tomato became a central part of Italian cooking, especially in the south, many local variations of fish soup turned various shades of red. 

The Neapolitan zuppa di pesce is perhaps the simplest and purest of all the fish soups in Italian cookery: you begin by sautéing a few slightly crushed garlic cloves in abundant olive oil. If you like, you can add a bit of peperoncino to sauté in the olive oil along with the garlic. When the garlic begins to give off its aroma and is just barely beginning to brown, you add tomato—ideally, the pulp of fresh, perfectly ripe San Marzano tomatoes, but otherwise use best quality canned tomatoes that you have run through the largest holes of a food mill. Season with salt and pepper (going light on the salt since the shellfish will be salty) and finely chopped parsley, then allow the tomatoes to simmer for about 10 minutes or so, or until they begin to reduce and reach a saucy consistency. Then add a splash of white wine. 

It is now time to add your seafood, starting with the varieties that take the longest to cook, then progressively adding those that take less time. The origins of the fish soup being what they are, the choice of seafood is pretty loose. But the Neapolitan version will almost always include one or more kinds of mollusks such as squid, baby cuttlefish or octopus, clams or mussels or both, and a variety fish with fins. The fish was, as mentioned, the local catch, so many local varieties of fish, most of them small and some quite bony but flavorful, can be thrown into the pot. Larger fish can be cut into serving or even bite-sized pieces. The most typical fish of all is scorfano, called 'scorpion fish' in English. (Scorfano is also typical of the Tuscan cacciucco and some of the Adriatic brodetti.) Triglie—red mullet—is also a common addition. But any firm-fleshed fish that lends itself to simmering will do: monkfish, snapper, catfish, sole. Last night I added some cut up halibut, and it was very nice. Although less typical of this kind of fish soup, sea scallops and shellfish are make nice additions. The more variety, the better the soup they say. 

You always begin with the mollusks, since they will take some time to cook. With very young calamaretti (baby cuttlefish) let them simmer about 10 minutes before you add any other fish. Octopus or mature squid (which you should cut up into bite-sized pieces) will take much longer, usually about 30 minutes, although you can sometimes find pre-cooked octopus that only needs heating up. Then add you fish and let that cook for another five to ten minutes, depending on the size. Then, finally, add the clams and mussels and simmer them until they open—if, that is, you are confident that they are free of sand. If not, steam them separately and add them at the very last moment, along with their liquid, strained to eliminate any sediment, just long enough for them to heat through. Sprinkle with a bit more finely chopped parsley and serve immediately.

Measurements are not particularly important in this rustic dish. The amount of tomato will greatly influence the end taste. Some recipes call for a lot of tomato—equal in weight to the seafood—but most call for about half as much by weight. The ratio among the various kinds of seafood is pretty free as well, but I find a good rule of them is to use about as much fish as other sorts of seafood. Or you can eliminate the fish altogether, and just use the mollusks and some shellfish like shrimp or crab, in which case you will have zuppa di pesce senza spine, or 'boneless' fish soup.

Zuppa di pesce is usually served with toasted bread, rubbed with garlic and sometimes drizzled with a bit of olive oil. The bread is also wonderful fried in olive oil—but that can be a bit heavy for modern tastes. I often just use bread to sop up the wonderful juices, an act that Italians call fare la scarpetta, meaning 'to make the little shoe' (see Glossary for details). 


NOTES: There are some minor variations among the recipes, mostly concerning when to add what. Some recipes call for adding the squid and/or octopus directly to the garlic soffritto, before the tomatoes. Some call for adding the wine either before the tomato or at the same time. And the parsley can be added at almost any time, along with the garlic at the very beginning, or at very end. And, depending how pervasive you want the garlic to be, you can use it slightly crushed (my favorite) or chopped or sliced. A few recipes call for onion instead of, or in addition to, the garlic—but onion is more typical of the northern types of fish soup.

It probably goes without saying, but any leftovers make a lovely sauce for spaghetti or linguine, not unlike the well-known dish spaghetti or linguine allo scoglio.

As mentioned, there are many varieties of fish soup to be found all over the country. You could write a book (or a blog) just about all the different versions. I plan to blog at least on the most famous of these, like cacciucco alla livornese and the broèto from Venice, in the future. 

And fish soups are not just limited to Italy. There are versions from all over the Mediterranean and beyond. The most famous one of all, without a doubt, is the wonderful Provençal bouillabaisse. The Greeks have their kakavia and the Spanish their sopa de pescado y marisco, and various fish soups can be found all over Latin America. And, of course, let's not forget the cioppino from San Francisco.

Saturday, April 17, 2010

Aïoli with Spring Vegetables


While versions of it are made around the rim of the western Mediterranean, from Spain all the way to Sicily, this garlic sauce is best known in its Provençale incarnation known as aïoli. It is a commonplace to refer to aioli in English as garlic mayonnaise, but it is really something rather different.

You begin with a mortar and pestle. Add several whole cloves of garlic and a pinch of salt. (Besides seasoning the sauce, the salt helps to soften the garlic.) Begin by crushing the garlic cloves against the side of the mortar with your pestle, then starting turn the pestle around in the mortar, always in a single direction, until the garlic has been reduced to a rough paste. This can be slow work, so be patient… 

Then add an egg yolk, mixing it into the garlic as you turn your pestle, and, drop by drop, begin to add olive oil, as you continue to turn the pestle. Don't add more oil until the last bit has completely emulsified into the sauce. Again, be patient… after a while, you will be able to add more oil at a time. Continue thus, turning always in the same direction, until the sauce is thick enough that your pestle will stand up on its own, like this:

 
Now, if you like—and I do like—you can temper the sauce with a few drops of freshly squeezed lemon juice. Adjust for seasoning and you're done! 

At this time of year, I like to serve aioli with steamed seasonal vegetables: asparagus, artichokes, green beans, together with baby carrots and new potatoes still in their jackets. If you are perfectionist, you should steam them separately so that each will be done to just the right degree, having lost their rawness but still brightly colored and offering some slightly resistance to the bite. Lazy cooks like me, however, add all the vegetables at once on a steamer placed over simmering water in a large covered sauté pan and let them all steam together until the potatoes are done. (You will know when they are done when you can prick them with a paring knife and then remove the knife without picking up the potato.) 

I like to serve this dish 'family style, by placing a small bowl with the aioli in the middle of a platter, then arranging the steamed vegetables around the platter. Each diner can spear a vegetable of their choice, dip into the sauce and eat. It's a lovely, convivial way to share a meal. But you can also serve the sauce separately, to be passed around to each diner to serve themselves—perhaps a better plan if you're not on intimate terms with your dining companions. 

NOTES: Purists will tell you that the original aioli was made only with garlic, salt and olive oil—no egg yolk. But all the contemporary recipes I have seen, including the one in the Larousse Gastronomique, call for the egg yolk which, of course, greatly helps the emulsification process. (Some versions call for adding a bit of boiled potato or soaked bread instead of egg yolk, but they are a distinct minority.) And while the same purists will tell you that aioli is definitely not a kind of mayonnaise, you can make a rather close ersatz version by adding a few cloves of garlic to mayonnaise made in a blender or food processor. It's a practical, but not very romantic, solution. And the original mortar and pestle method, once you get the hang of it, is really quite easy. It only requires a modicum of skill and, most of all, a sense of patience. They say that making aioli while you're nervous is a surefire way for it to 'curdle'. 

The best of olive oil to use for this dish is, of course, from Provence, where the olive oil is fruity but lighter than most Italian olive oils, especially the ones from Puglia and Sicily. But I've made the sauce from fruity Italian olive oil that suited me just fine. The most important point, perhaps, is to make sure that the garlic is as fresh as it can be. As for measurements, the Larousse calls for 4 cloves of garlic, one egg yolk and about 2.5 dl (1 cup) of olive oil. But being a garlic fiend, I sometimes add a clove or two more, depending on the size of the cloves. 

For a true Provençale treat, the classic Grand Aïoli is made with desalinated and poached salt cod, boiled snails (actually, a special kind of snail called bulots), hard-boiled eggs and boiled vegetables, typically green beans, new potatoes, baby carrots, cauliflower, fennel, chickpeas, zucchini, beets... It makes for a sumptuous but healthy spring or summertime meal. At the opposite end of the spectrum, aioli is perfectly delicious as a starter with a single vegetable; to my taste, asparagus and artichokes are especially lovely covered with an unctuous dressing of aioli

Post-scriptum: Contrary to what you may have read recently, the word aïoli is not Italian for mayonnaise, which is, quite simply, maionese. The word comes from ail (French for garlic) and oli, the Provencale dialect word for oil (huile in standard French). Because the word sounds Italian to many non-Italian speakers--Provencale dialect has a lot in common with Italian-it seems to create some confusion.