Showing posts with label beef. Show all posts

Sunday, December 26, 2010

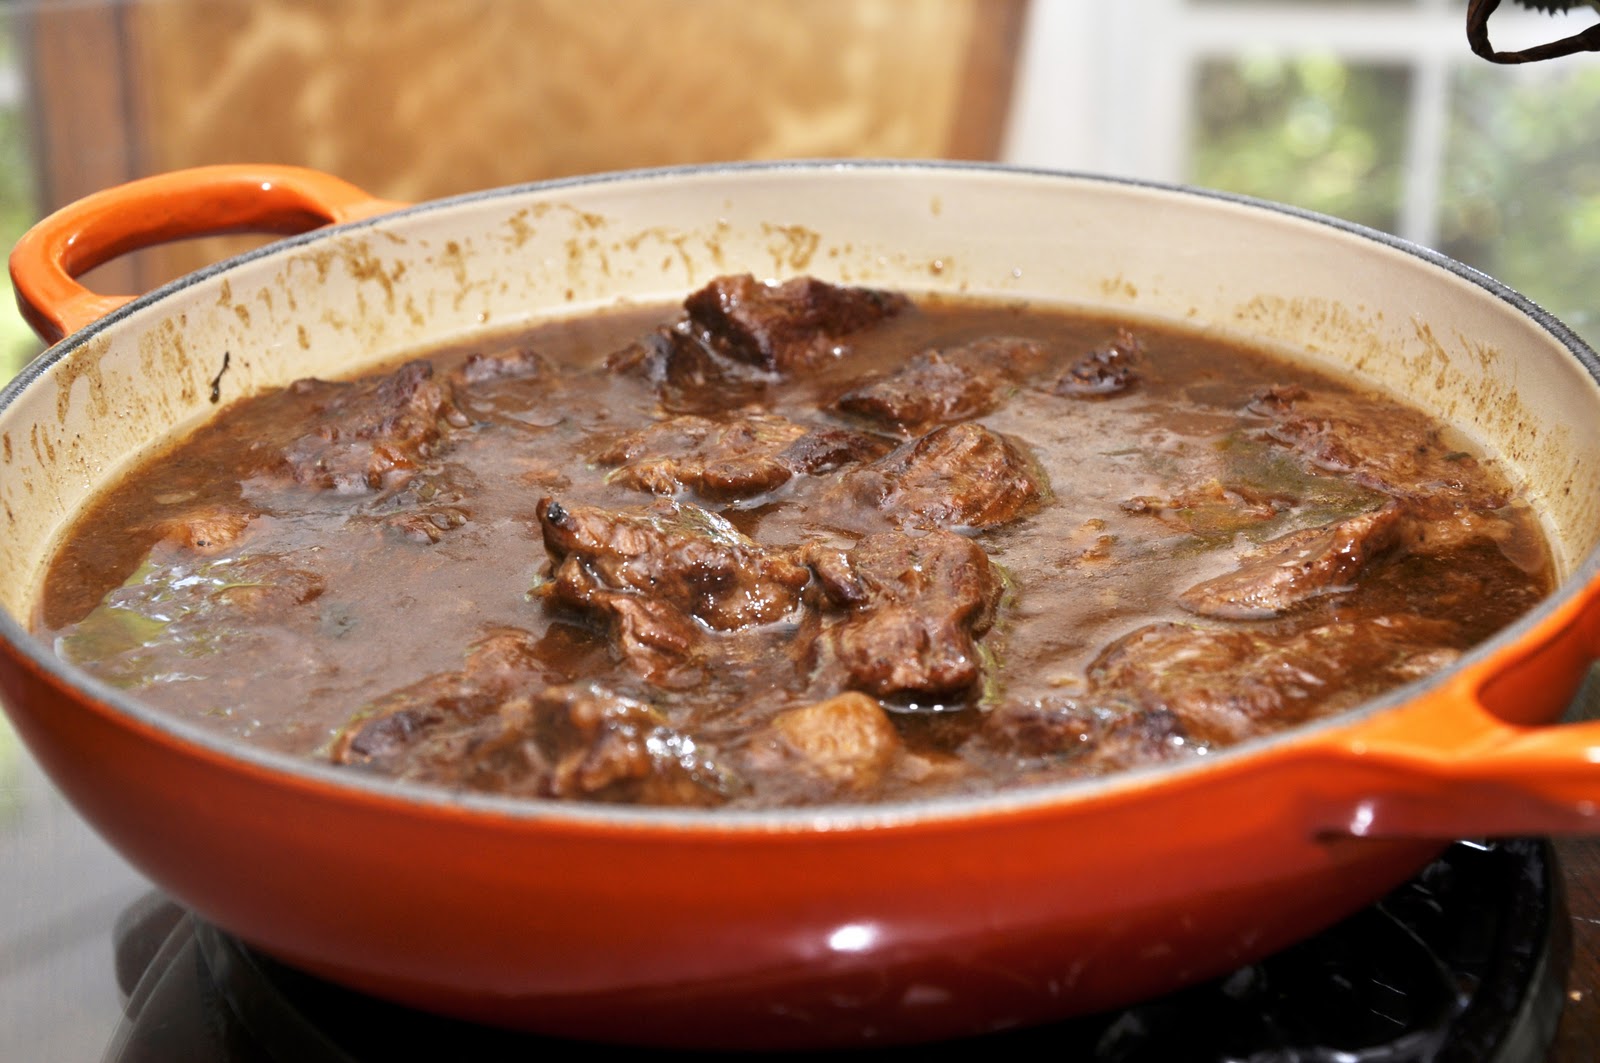
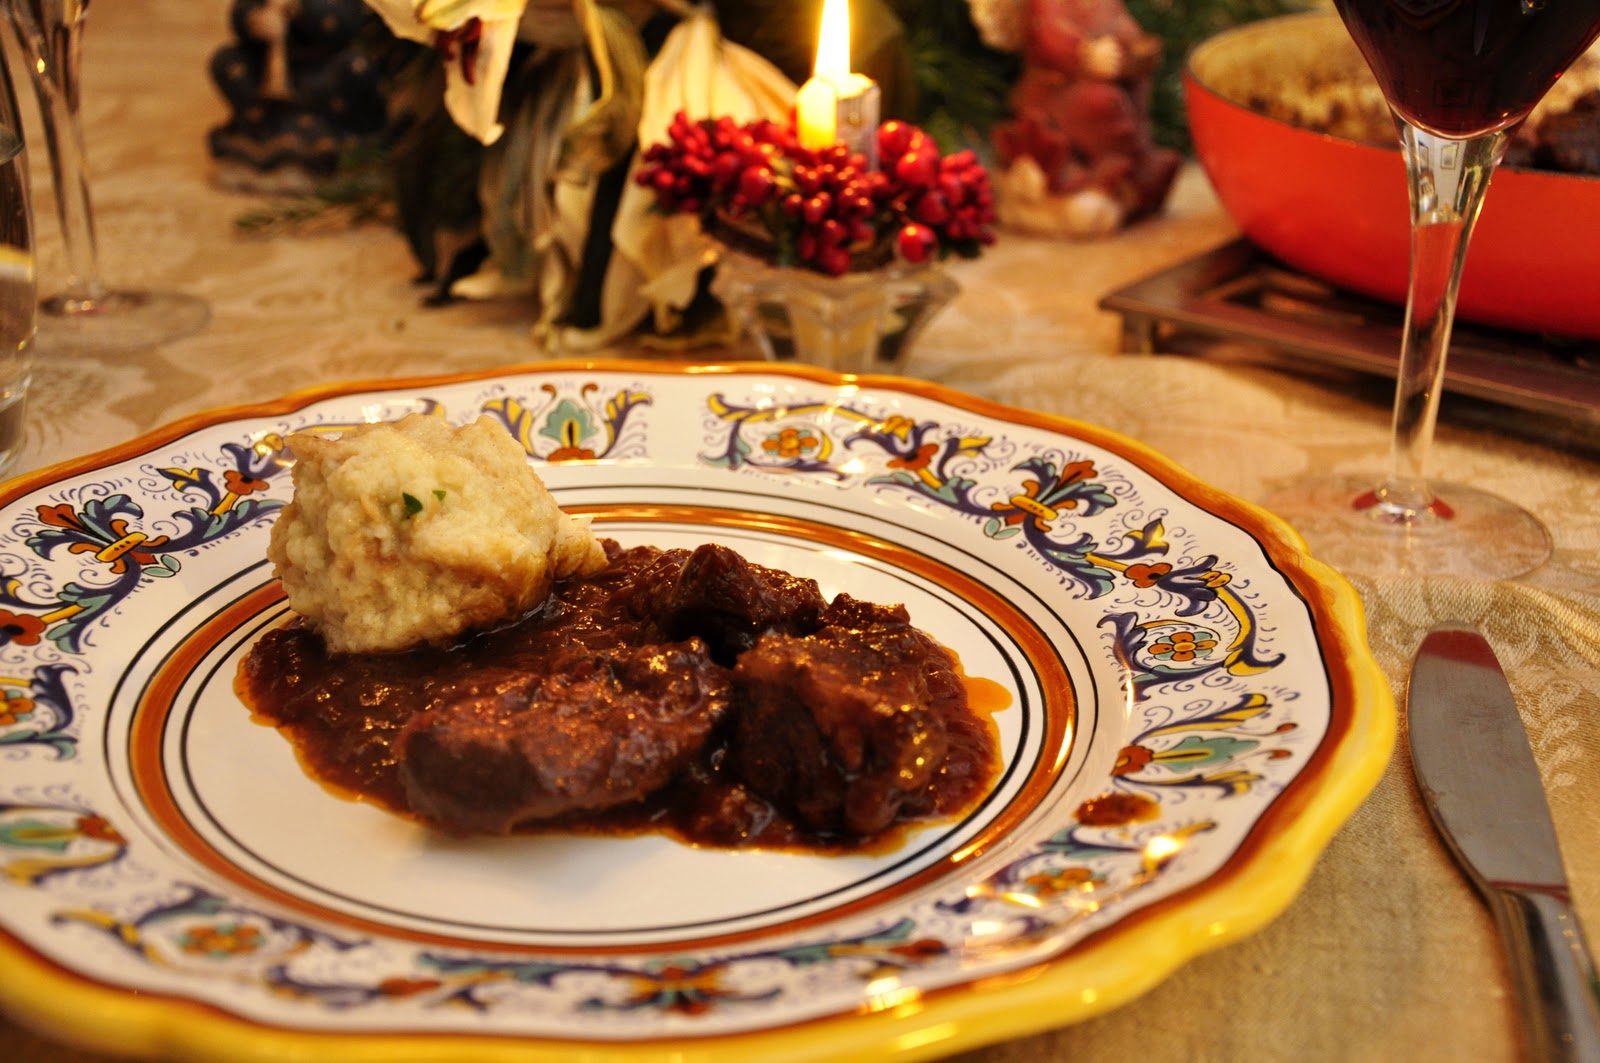
Viennese Goulash


For some reason, I must be feeling nostalgic for my Vienna days as I keep coming back to the dishes I made during those years. Perhaps it's the cold weather that calls out for the hearty cooking of Mitteleuropa. In any event, here's another favorite from that time and place: Viennese Fiakergulasch.

Goulash is a simple beef stew that follows the usual dry followed by moist heat method, but with two twists: the use of lots of onion—half as much by weight as the meat—and, of course, Hungarian paprika. The cooking fat can be oil, lard or even rendered beef fat.

Ingredients (for 4-6 servings)

1 kilo (2 lbs.) stewing beef, cut into cubes
500g (1 lb.) onions, chopped
Oil, lard or rendered beef fat
Salt and pepper
Hungarian paprika, to taste
Beef broth, enough to cover the meat
1-2 Tbs. tomato paste
A pinch of caraway seeds
A sprig of fresh marjoram (or thyme)

A spoonful of flour mixed with some water

Directions

Add enough cooking fat to cover the bottom of a Dutch oven or braiser. Brown the beef cubes nicely in the fat on all sides and set aside.

Now add the onions and gently sweat them in the same pan until they are nicely soft and browned, but not burnt. Season with salt and pepper as you go. Add back the browned meat and mix well. Allow the meat and onions to simmer together for a few minutes, then sprinkle over the paprika. Most recipes call for 1-2 tablespoons, but I just 'eyeball' it, and I'm pretty sure I add more than just a spoonful, as I love the taste of paprika. You then allow the paprika to simmer in the fat to release its full aroma, again for just a minute or two. Paprika can burn if heated too much, so moderate your heat as needed.

Add enough beef broth to just cover the meat, along with the tomato paste, caraway and marjoram. Cover and simmer it all gently until the meat is quite tender, usually about two hours. This can be done over the stove or, if you prefer, in a moderate (180C/350F) oven.

Just before serving, add your flour and water slurry to the pan, a spoonful or two at a time, to give the sauce a nice liaison. If, on the other hand, you find that your sauce is too thick or there is simply not enough of it, add some water.

Serve warm, with buttered noodles, spätle or Knödel.

NOTES: There is a certain linguistic confusion over the name of this dish as it is used in its homeland of Hungary. This article explains, as I had heard before, that gulyás, from which we get our word goulash, actually refers to a soup, which back in Vienna was called Gulaschsuppe. What we call goulash is called pörkölt in Hungarian (but please don't ask me how that's pronounced...)

Many recipes call for you to sauté the onions first, and then brown the beef with onions, which is more straightforward than the procedures outlined above (which is more typical of a French daube). But I like to use the Frenchified method, as you can caramelize the meat nicely without any worried about burning the onion.

There are lots of different kinds of goulash, with or without meat, and with or without vegetables. The Viennese version, in my humble opinion, is by far the best of the lot, although admittedly I am biased. After all, we all tend to like what we know best.

Saturday, November 13, 2010

Stracotto alla fiorentina


Some readers may remember last winter's post on brasato al vino rosso, the wonderful red wine pot roast from northern Italy, in particular Lombardia and Piemonte—where it is often made with Barolo, the local big red, and called brasato al Barolo. Well, here is another typical pot roast, this time from central Italy: Florentine-style 'stracotto', which literally means 'overcooked', made with tomato sauce.

Ingredients (for 4 servings)

One eye round roast (about 1-1.5 kilos/2-3 lbs.)
A carrot (young and thin if possible)
A small chunk of pancetta (cut into four thin strips)
Olive oil
1 medium onion, chopped
1 carrot, chopped
1 stick of celery, chopped
Salt and pepper, q.b.
Red wine
1 large can of tomatoes (500g or 1 lb.)
A spoonful of tomato paste (optional)
Water or broth

Directions

Eye round is a nice cut for company since it keeps its shape, but it can be a bit dry and tasteless as compared with chuck, so it needs a little help. This comes in the form of 'larding' the roast with a carrot and some strips of pancetta. If you have a larding needle, that's the best tool for the task, but if not, you can simply take a paring knife and force it through the middle of the roast like so, creating a small 'tunnel' for your carrot:


As you can see, the knife should come out the other side. It should then be a fairly simple matter of shoving the carrot through the roast, trimming off any part of the carrot that sticks out on either side.


You do the same now with the strips of pancetta, making a tunnel on each side of the carrot, except that, being soft, you cannot simply push the pancetta through the meat. (Here's where a larding needle would really come in handy!)


Use your finger to open the 'tunnel' up a bit, then guide the pancetta through, again with your finger playing the part of the larding needle. Rather than trying to pass a two long strips of pancetta all the way through the roast, I take four shorter pieces and guide them halfway through from each side.

Now tie the roast up with kitchen string to help it keep its shape. (These days, roasts often come pre-tied in the store, in which case you simply need to be careful not to break the strings as you lard the roast.) Salt and pepper the roast generously.

Now that this chore is done, you're on Easy Street for the rest of the recipe: Make a soffritto by sautéing onion, carrot and celery in some olive oil in a Dutch oven (preferably oval) and when they have wilted, raise the heat a bit and add the roast, browning it lightly all over.

Pour over a bit of red wine and turn the roast so it is covered all over with the wine. Let the wine evaporate completely, as you scrape any brown bits from the bottom of the pot.


Now pass the tomatoes through a food mill into the pot. Turn the roast again. Add the tomato paste, if using, and enough water or broth to come up at least 2/3 of the way up the roast, if need be.


Allow the pot to come to a simmer, lower the heat and cover the pot. Let the roast braise until it is quite tender, turning every 15 minutes or so and adjusting the heat so that the tomato sauce simmers very gently (what the French call 'mijoter'). Most recipes call for a cooking time of 2 hours, but it may well take longer, up to 3 hours, depending on the meat and the size of the roast. Add water or broth if the sauce gets too thick, and adjust for seasoning at the end of cooking.

Serve, sliced, on a warmed platter with boiled potatoes. Pour some of the tomato sauce over the roast slices and serve the rest in a gravy boat for guest to add more, which they are very likely to do.

NOTES: Usually I like chuck (shoulder or spalla) for pot roast, as it is very juicy and turns very tender after a slow braise like this. Exquisite eating, but not the prettiest cut—it has an irregular shape and tends to fall apart when cooked. So when cooking for company, a bottom or eye round, from the hind quarter is probably a better choice. They are also roughly equivalent the cuts that most Italians would use for a brasato or stracotto: the scamone, girello or noce, although in Italy, too, the shoulder cuts like girello di spalla are popular for slow cooking These cuts are leaner than chuck and tend to have less flavor, however, hence the larding, which takes a bit of work. Of course, larding is not strictly necessary, but it makes an incredible difference in the final flavor. The carrot sweetens the meat and the fat from the pancetta keeps it nice and juicy.

If you like, you can add some herbs to the sauce as it cooks for an extra layer of flavor: bay leaves, a sprig of fresh rosemary or fresh thyme, or a bouquet garni of all three, would all be nice. Some recipes call for adding a clove of garlic to the soffritto.

You will probably have extra tomato sauce, which is delicious over pasta—perhaps better than the meat itself! The taste, if I may say so, is very reminiscent of a good Neapolitan ragù.

Monday, October 11, 2010

Carbonnade à la flamande


Today is Columbus Day so, of course, I decided I would make a Belgian meal… ;) One of my favorite Belgian dishes is carbonnade, a wonderfully deep-flavored dish of beef braised in onions and beer. It is simple but satisfying, just the kind of cooking and eating that I like best, especially as the temperatures cool.

Start by cutting up some good stewing beef—I prefer chuck—into serving pieces, either cubes or (as the older recipes call for) small, thick slices. Brown each piece well in lard (or butter) and set aside. In the same skillet, sauté lots of onions, about half as much as you have beef by weight (or even more if you like onions) until they have softened.


Now layer a Dutch oven or braiser with half the beef, then half the onions. Season well with salt and pepper. Repeat with the rest of the beef and onions. Then take a ladleful of good, strong beef stock and deglaze the skillet in which you browned the beef and onions, and pour it into the pot. Top off with some good beer or ale—preferably Belgian ale, of course—enough to cover the beef completely. Nestle a bouquet garni, made with a bay leaf, a spring of fresh thyme and a sprig of parsley, among the beef pieces. Most recipes also call for adding a pinch of brown sugar at this point, just enough to balance some of the bitterness of the beer but not enough to add any actual sweetness to the dish.


Bring the pot to a simmer on top of the stove, cover, and place in a moderate oven (180°C, 350°F) to braise for 2-1/2 or 3 hours, until the beef is fork tender. (The dish can be made ahead up to this point.)


A few minutes before serving, remove the pot from the oven and, keeping at a slow simmer on top of the stove, thicken the sauce with a slurry of corn starch and water, together with just a few drops of vinegar, if you like. (Again, not too much—just enough to add a tiny bit of 'zip' but not so much that you can actually taste any sourness.) Let the dish simmer for a few minutes and serve hot, accompanied by pommes frites, mashed or steamed potatoes or buttered noodles.


NOTES: As with many classic dishes, you will find many variations of carbonnade à la flamande. Not all recipes calls for the final fillip of vinegar, some call for a dollop of mustard. Some versions will have you add some lardons at the start, some add mushrooms—at which point the dish begins to resemble a boeuf bourguignon made with beer rather than red wine. The herbs and spices that go into the bouquet garni can vary; personally, I like adding a few cloves, while some recipes call for some allspice or nutmeg. And some recipes thicken the dish not with cornstarch but a beurre manié or—believe it or not—with some gingerbread (pain d'épices) that is either crumbled or placed on top of the beef to braise along with it. Of course, as the dish cooks the gingerbread breaks up and melts into the braising liquid, providing a nice liaison and an old-fashioned flavor.


One crucial choice will be, of course, the beer or ale, which can really transform the character of the dish. Needless to say, a good Belgian ale, perhaps of the Lambic or Trappist variety, would really be the best choice. But any beer or ale with good character, particularly amber ales, will work. (So will your average lager in a pinch, but the dish will inevitably lack some 'oomph'.) If you want a really interesting taste, you can do what the Irish do and use stout, I which case (if you add some carrots along with the onions) you will be making a typical Irish dish called Beef in Guinness.


I am not sure of the origins of carbonnadethe word actually refers to cooking over coals—but it is surely very, very old. Some of the older variations that call for spices like nutmeg, the use of bread as a thickener and the sweet-and-sour flavoring (I suspect the vinegar was probably originally verjuice) are all quite typical of Medieval European cuisine.

Sunday, August 29, 2010

Carne alla pizzaiola


One of the pillars of everyday Neapolitan cuisine, this simple dish is a great solution for those times when you feel like a bit of solid sustenance but don't feel much like cooking something elaborate. A bit like slapping a piece of meat on the grill only a bit tastier. The name of the dish translates loosely as 'pizza-style meat' because of the sauce of tomato and oregano, a combination not nearly as ubiquitous as non-Italians often imagine but commonly associated with pizza. It goes by various names—manzo alla pizzaiola, fettine alla pizzaiola, bistecca alla pizzaiola—but, more often than not, it is simply called 'la pizzaiola'.

There are two primary ways of making pizzaiola, quick or slow, depending on the kind of meat you are using:

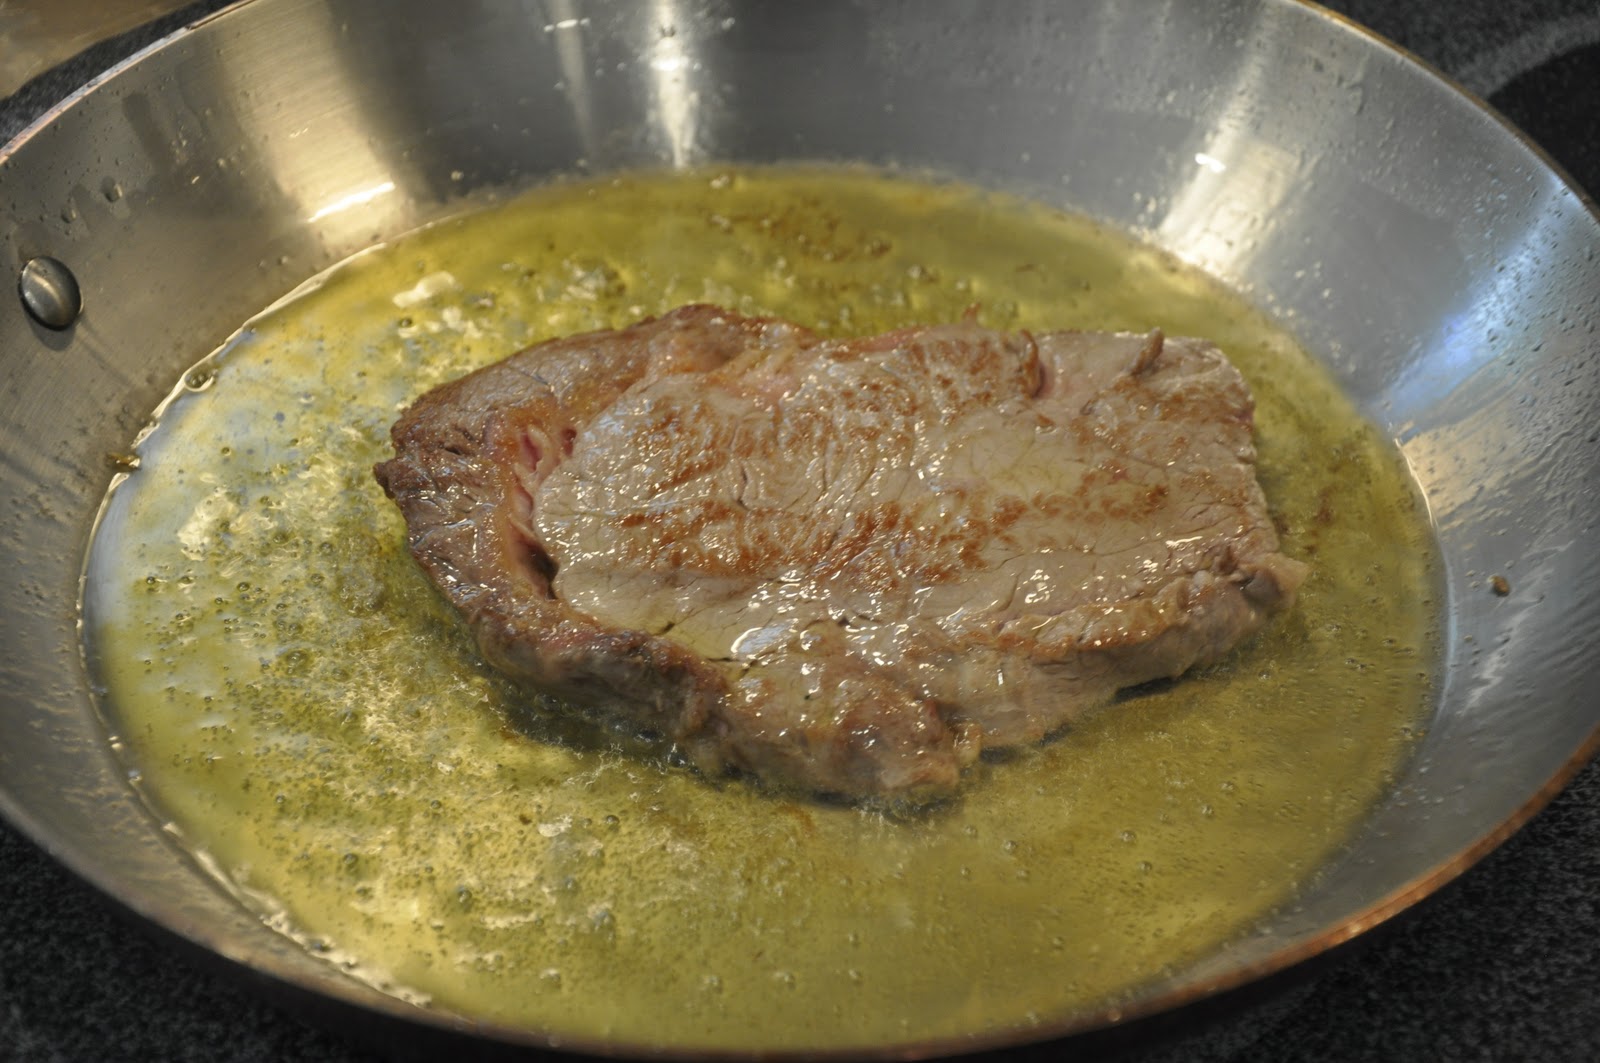
The Quick Method: If you are using tender, lean beef, then you want to opt for the quick version. In Italy, they sell thinnish (but not paper thin) slices of beef called fettine di manzo or just fettine. If you can't find anything like that, you can use boneless steaks (as pictured). If they are any thicken than say, 2 cm (1/2 inch) then I would suggest that you cut them into half thicknesses. In either case, pound your slices with a meat pounder or the back of a heavy skillet. Pat each slice dry to ensure good browning.

Add enough olive oil to nicely coat the bottom of a heavy skillet. Turn the heat to high and when the oil is very hot, quickly brown a clove or two of garlic (taking care that it does not burn) then add the beef slices and sear them quickly on each side. They should be just lightly caramelized. Don't crowd the slices which, as you probably know, would impede proper browning—you can do them in batches if need be. Remove the slices as they brown. 

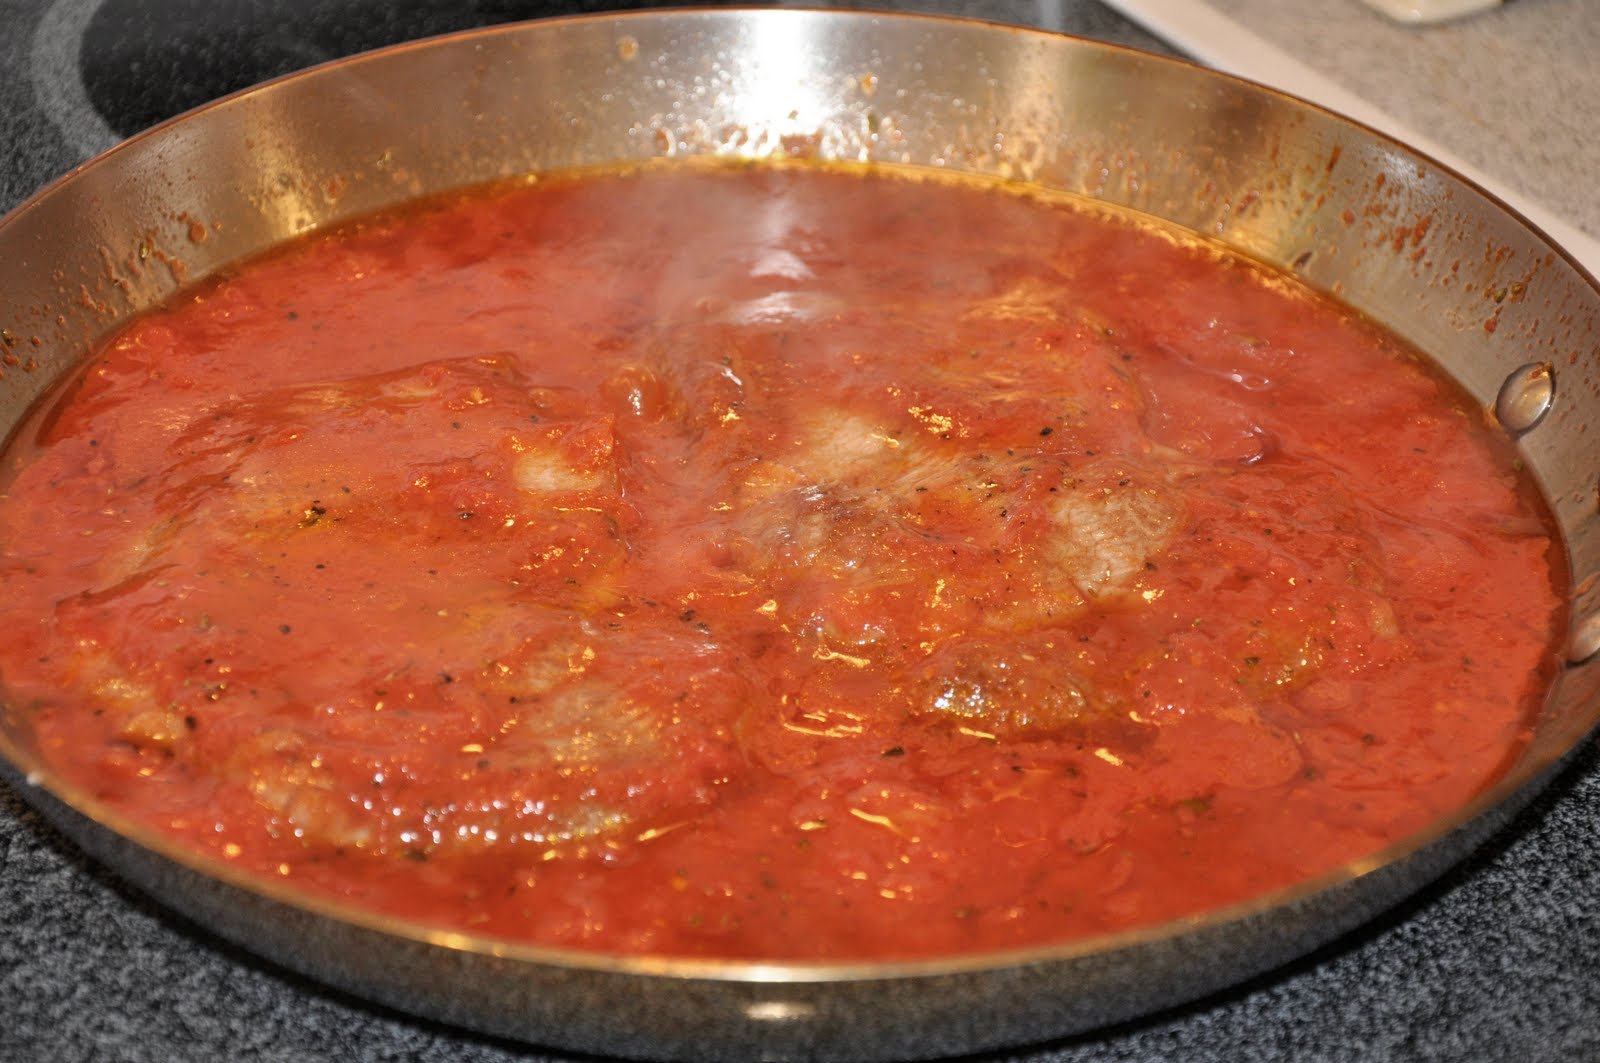
Add an ample amount of best-quality canned tomatoes, which you can simply crush with your hands, to the oil. (In the summer, if you have really good ripe fresh tomatoes, you can chop them up roughly and use them instead.) Lower the heat, season with salt, pepper and a nice sprinkling of dried oregano. Now, a word of advice: even if the oregano gives this dish its characteristic 'pizza' flavor, don't go wild with it. A little dried oregano goes a long way and you want its aroma to complement but not to overwhelm the taste of the meat.

After the pizzaiola sauce has simmered for a minute or two, add back your beef slices and continue to simmer away for about 10 minutes, until the sauce has reduced nicely and the meat is fully cooked through. You want to keep your sauce simmering at a moderate pace—not too slowly or the sauce will not reduce, but not too quickly either, which would tend to toughen the meat. Although I usually love my beef 'barking' rare, this is one dish where the meat really has to be well done, both so that the beef has time to absorb the flavor of the sauce and because, for whatever reason, tomato sauce and rare beef do not really pair very well.

The Slow Method: Although the above method is perhaps the most common way of making pizzaiola these days, the original recipe used a rather tougher cut of beef, cooked slowly. According to the authoritative JC Francesconi, author of La cucina napoletana, the typical cut in Campania is called the colarda, taken from the rear leg of the steer, a cut that is not often found even in other parts of Italy. Other places, the costata (rib) or noce, a fillet taken from the inner thigh, are used. In the US, I'd use the kind of cut you'd use for a pot roast, sliced, like a bottom round perhaps. All the ingredients are placed together in a Dutch oven, covered, and simmered over low heat for about an hour, adding a bit of water or white wine if the sauce gets too thick. This method results in a wonderfully savory version of the dish, but it does not lend itself to a 'spur of the moment' approach.

NOTES: The measurements are really pretty loose in this dish, but you may want to make ample sauce, which is wonderful with pasta, either as a first course to the meat or saved for another occasion. The sauce from the slow method is, of course, much more savory.

Variations abound, in particular for the quick method: for a lustier sauce, you may want to add olives, capers, anchovies and/or a bit of red pepper flakes. Some recipes, including Francesconi's, recommend adding a bit of white wine as well which gives the sauce a little 'zip'. Some recipes head in the opposite direction, so to speak, and omit the oregano and other flavorings in favor of a pure tomato sauce, although frankly that sounds a bit dull to me. Some modern recipes will substitute a soffritto of onion, carrot and celery for the garlic, which provides a more 'refined' but less characteristic flavor. Not all recipes call for the initial searing of the meat slices, but I find that it lends a nice depth of flavor. 

And if you are feeling particularly extravagant, you can place the cooked slices in a baking pan, nap with the sauce and lay over slices of mozzarella. Then pass under a broiler just long enough to melt the cheese and serve.

The basic method is very versatile. Other sorts of meat or even fish can be made using the same method: older veal, for example, or chicken or turkey breast. As for fish, choose one with nice, firm texture that will stand up to the assertive sauce, say some swordfish, tuna or mackerel, cut into 'steaks'. And you can even make hamburger patties this way!

Monday, May 31, 2010

Bistecca alla fiorentina


One does not always associate steak with Italian cooking, but one of the glories of Tuscan cuisine is, indeed, a simply prepared Porterhouse steak, grilled rare, over a wood fire: bistecca alla fiorentina, or literally 'Steak Florentine'. The dish is so typical that if you ask for a fiorentina in a restaurant, without saying more, this is what you will be served. 

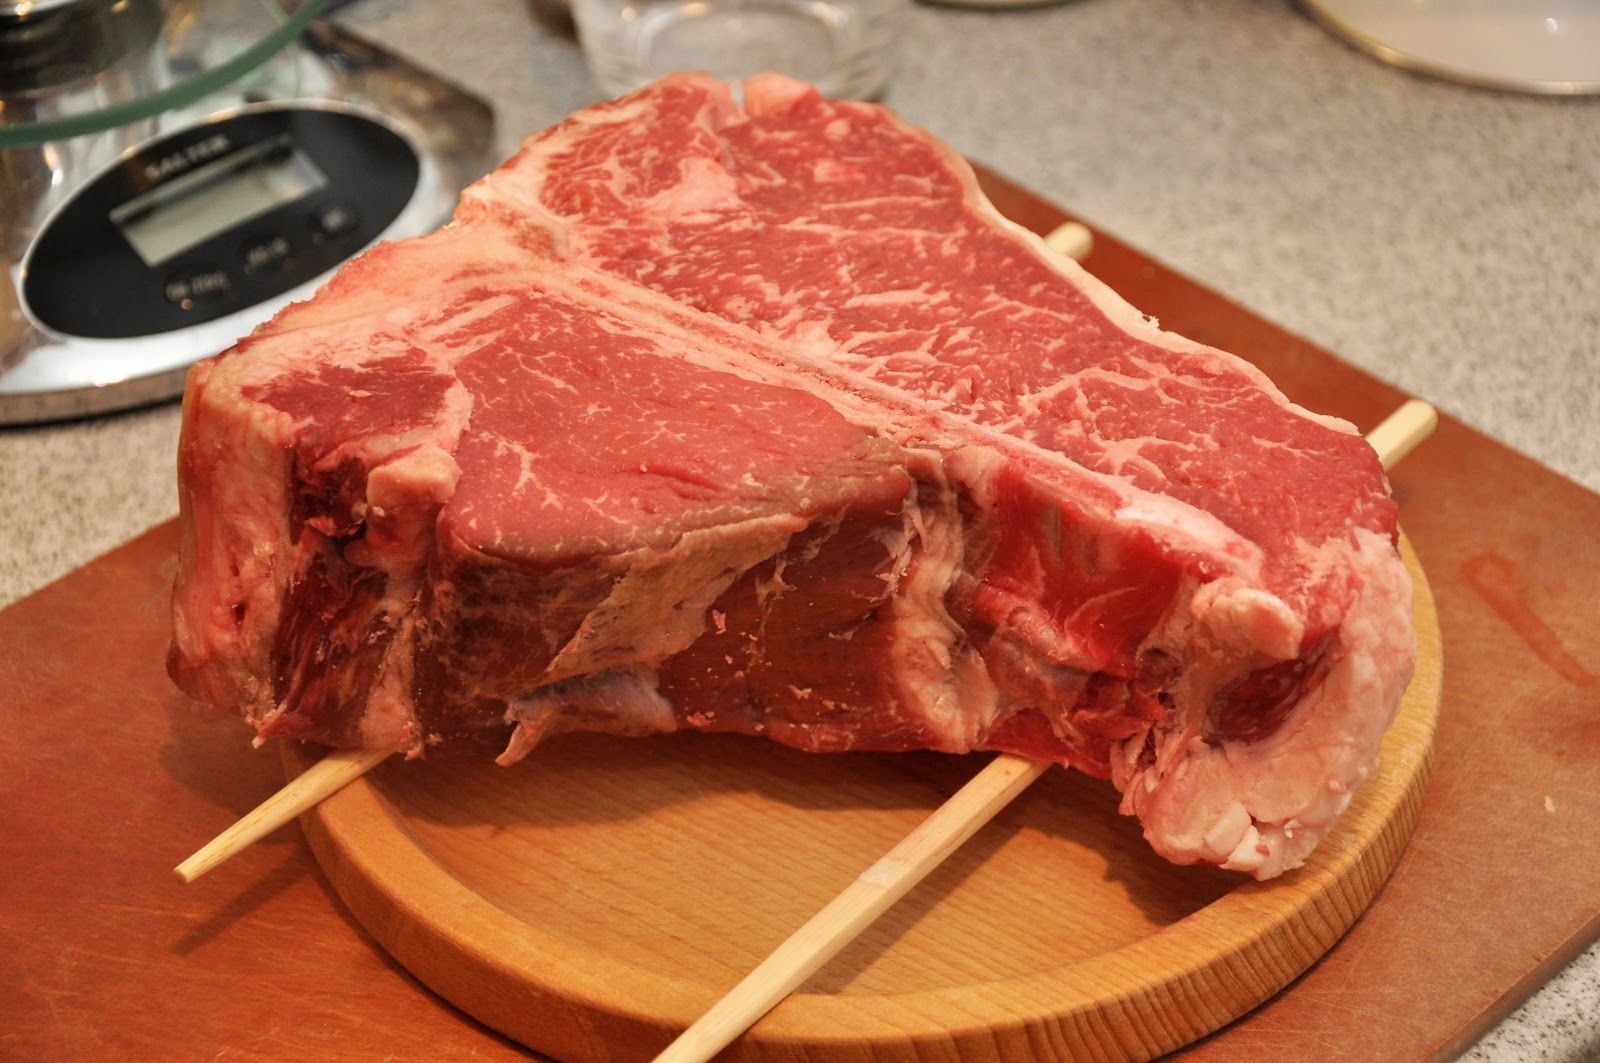
The recipe is exquisitely simple, but as for any other kind of steak, there are some  key points that you need to bear in mind, starting with the quality of the meat. In Italy, a true bistecca alla fiorentina is made with Chianina beef, raised in the Chiana Valley. Chianina beef is apparently now being raised in the US, although I have yet to find it in any market. You can make a beautiful steak with good quality beef of any origin. In the US, look for choice or, better, prime  grade meat. For this holiday meal, I found a beautiful side of prime Porterfhouse displayed at the local butcher, which could be cut to order—which brings me to another key point: a bistecca alla fiorentina must be cut thick, at least 1-1/2-2 inches (3-5 cm) but even better at 3 inches (7.5 cm) thick. This allows a nice crust to form on the outside of the steak while the inside remains rare. A fiorentina is never, ever served well done (nor, in my opinion, is any good steak). 

Preparing your steak for grilling. There are also certain preparatory steps that are critical to ensure the best results. If you get your steak from a good butcher, it should already be aged and rather dry to the touch—as it should be. But if you buy your steak in a supermarket, it is likely to be rather wet, in which case it helps to air dry it in the fridge for a few hours or even overnight. Place the steak on a rack or—if you don't have a rack—you can prop it up with two chopsticks, over a plate to catch any blood that may drip out. This will allow air to circulate around the steak, top and bottom, so it dries evenly. Even so, turn the steak every so often to ensure even drying on the outside and circulation of the blood inside the steak. If you air dry your steak for more than a few hours, cover it loosely with a towel to prevent the meat from drying out too much.
 

Even more important than air drying is tempering the meat: making sure that the meat is room temperature before you cook it. If you plan to eat the meat the same day you buy it, just leave it out until you plan to cook it (unless you live in a tropical or sub-tropical climate). But if you have refrigerated the meat, take it out of the fridge an hour or so before you plan to grill it, so that it come back to room temperature. This operation will ensure more even cooking. 

Grilling. Now get your grill nice and hot. (Some sources will warn against excessive heat, which supposedly can toughen the meat, but I have not found this to be true in practice, at least not with good quality meat.) Wood is the fuel of choice here—oak is traditional—or charcoal. If you must, a gas grill will do, although the final product will lack the characteristic smokey flavor of a true fiorentina. But don't sweat this too much; I make do with a gas grill myself. If you have a smoker box, pre-soaked chips of oak or another a mild wood will add character to your dish. 

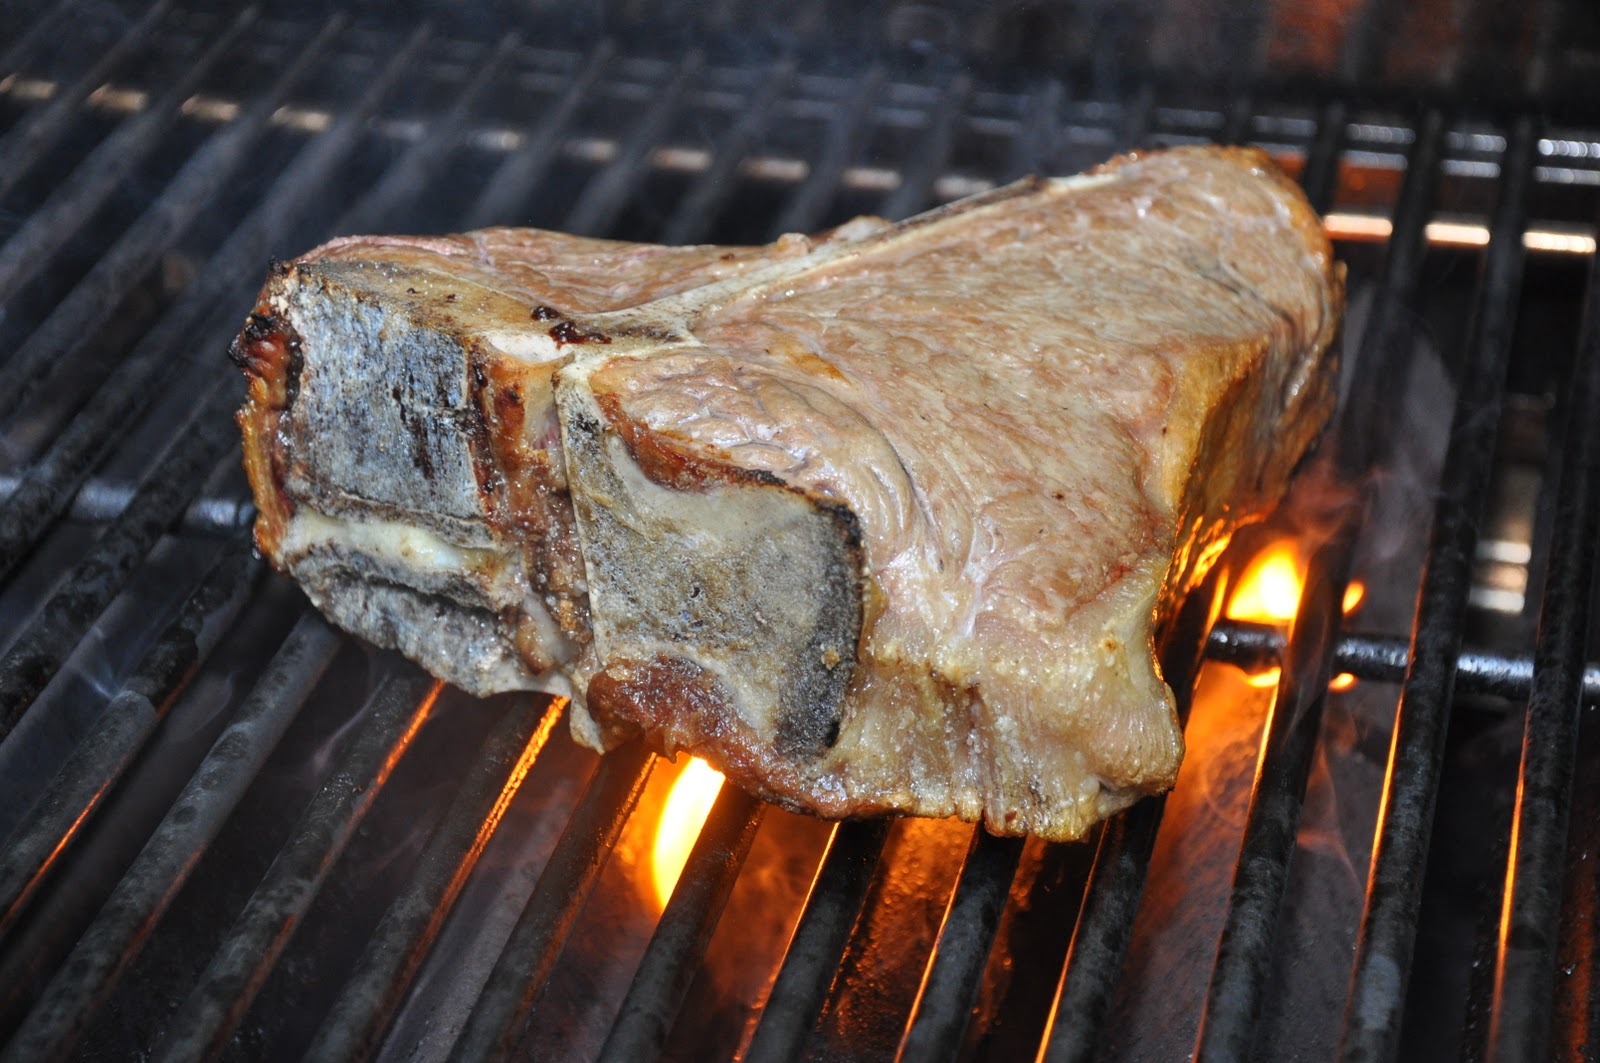
Place the steak on the grill. If your meat is cut thick as it should be, lower the heat a bit, to 'medium-high', and grill it for five to ten minutes on each side, depending on the thickness of the steak (See notes below). If you like cross-hatched grill marks, place the steak across the grates diagonally, starting at 'ten o'clock':

 
Then, halfway through the cooking time for this side, turn the steak to 'two o'clock':


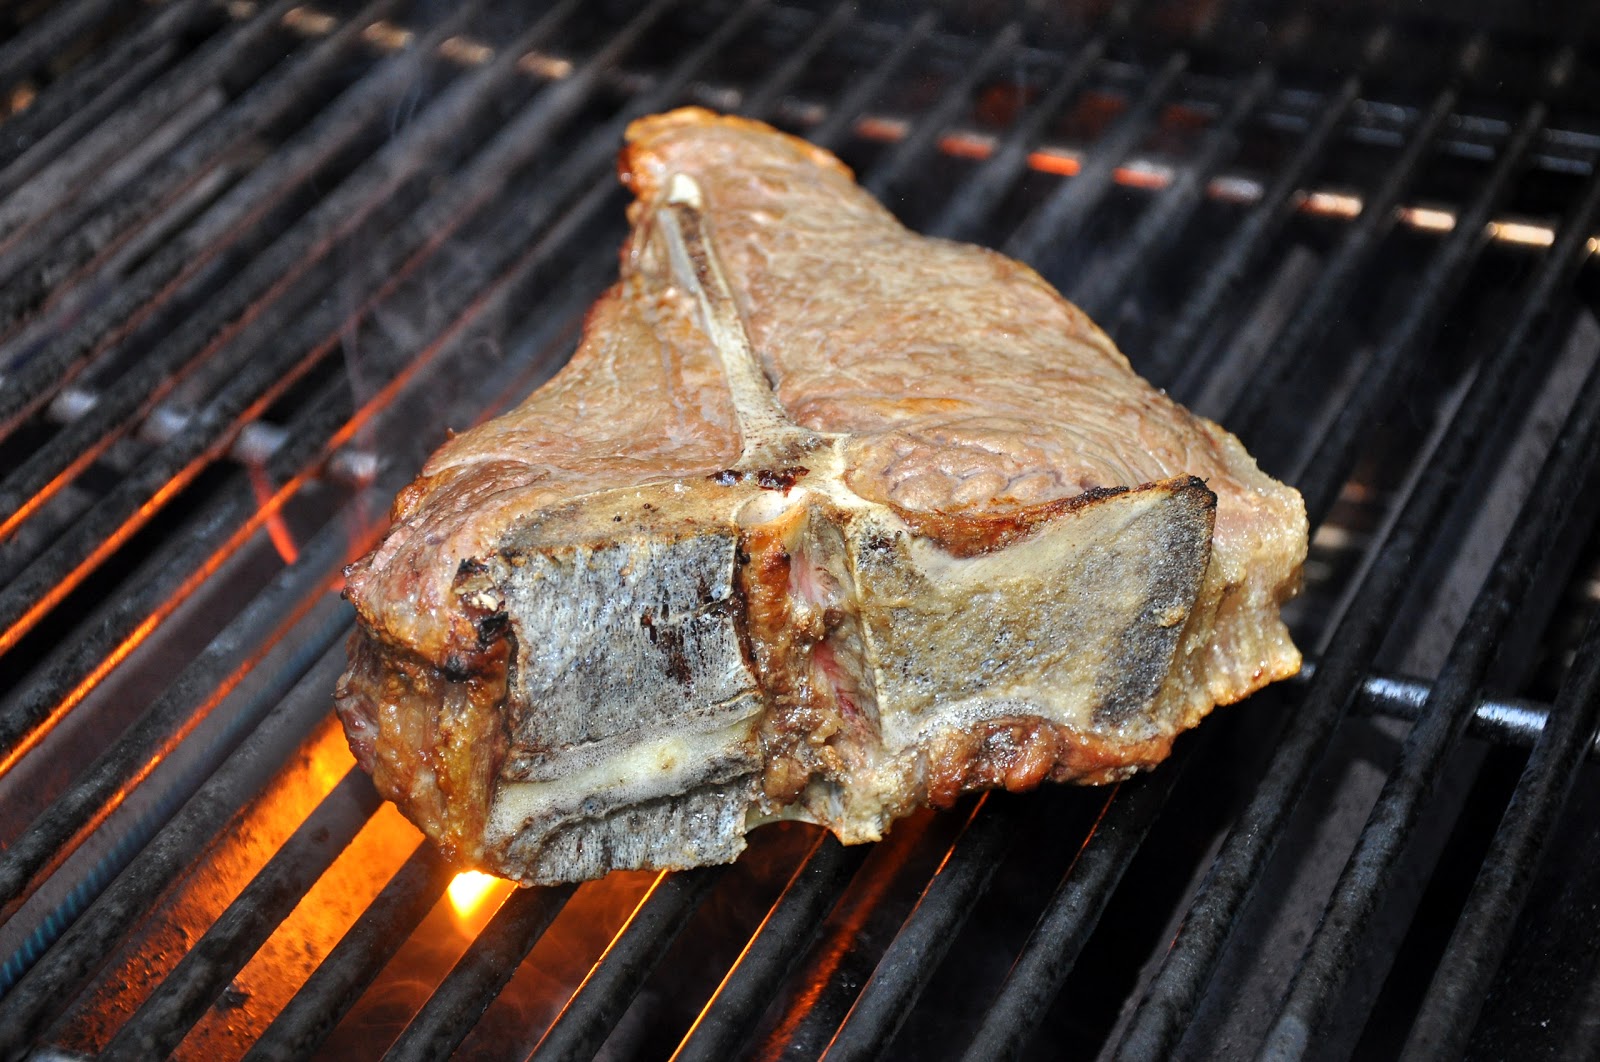
When you turn the steak over to cook on its other side, you will see the lovely cross-hatched grill marks that are the pride of so many 'grillmeisters' (see first photograph above). Now season the steak liberally with salt as the steak cooks on the other side, repeating the two and ten o'clock positions if you like. Turn the steak over and season it again on its just-cooked side. Finally, for a 3-inch monster, you can and should grill the steak on its flank for another five minutes or so, using the bone to prop the steak up. This will drive the blood away from the bone for more even cooking.
 

The total grilling time for a 3-inch monster fiorentina will be about 25 minutes (see Notes below for details on cooking times and testing for doneness.

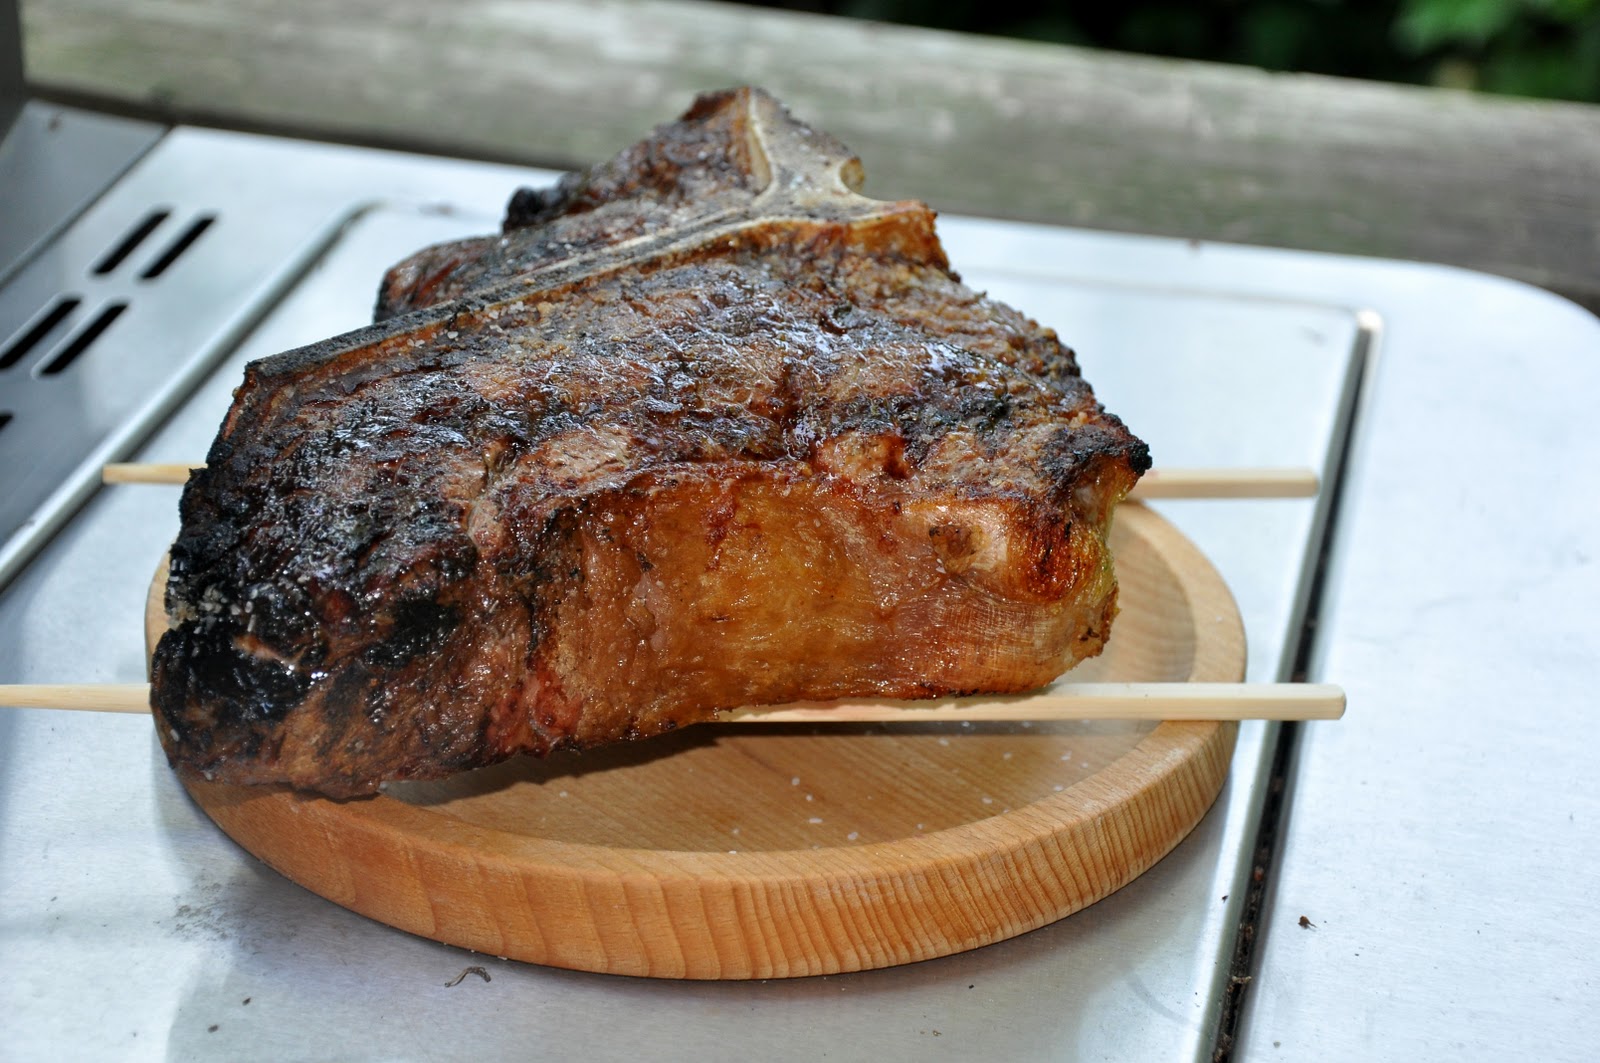
Resting. After your steak is done, remove it from the grill and let it 'rest' for about ten minutes. This resting is another crucial step (perhaps the most crucial of all) that ensures that the meat will remain juicy when you carve it. Use a rack or chopsticks, just as you did for the air-drying, to ensure circulation all around the steak; this avoids the crust getting soggy underneath.


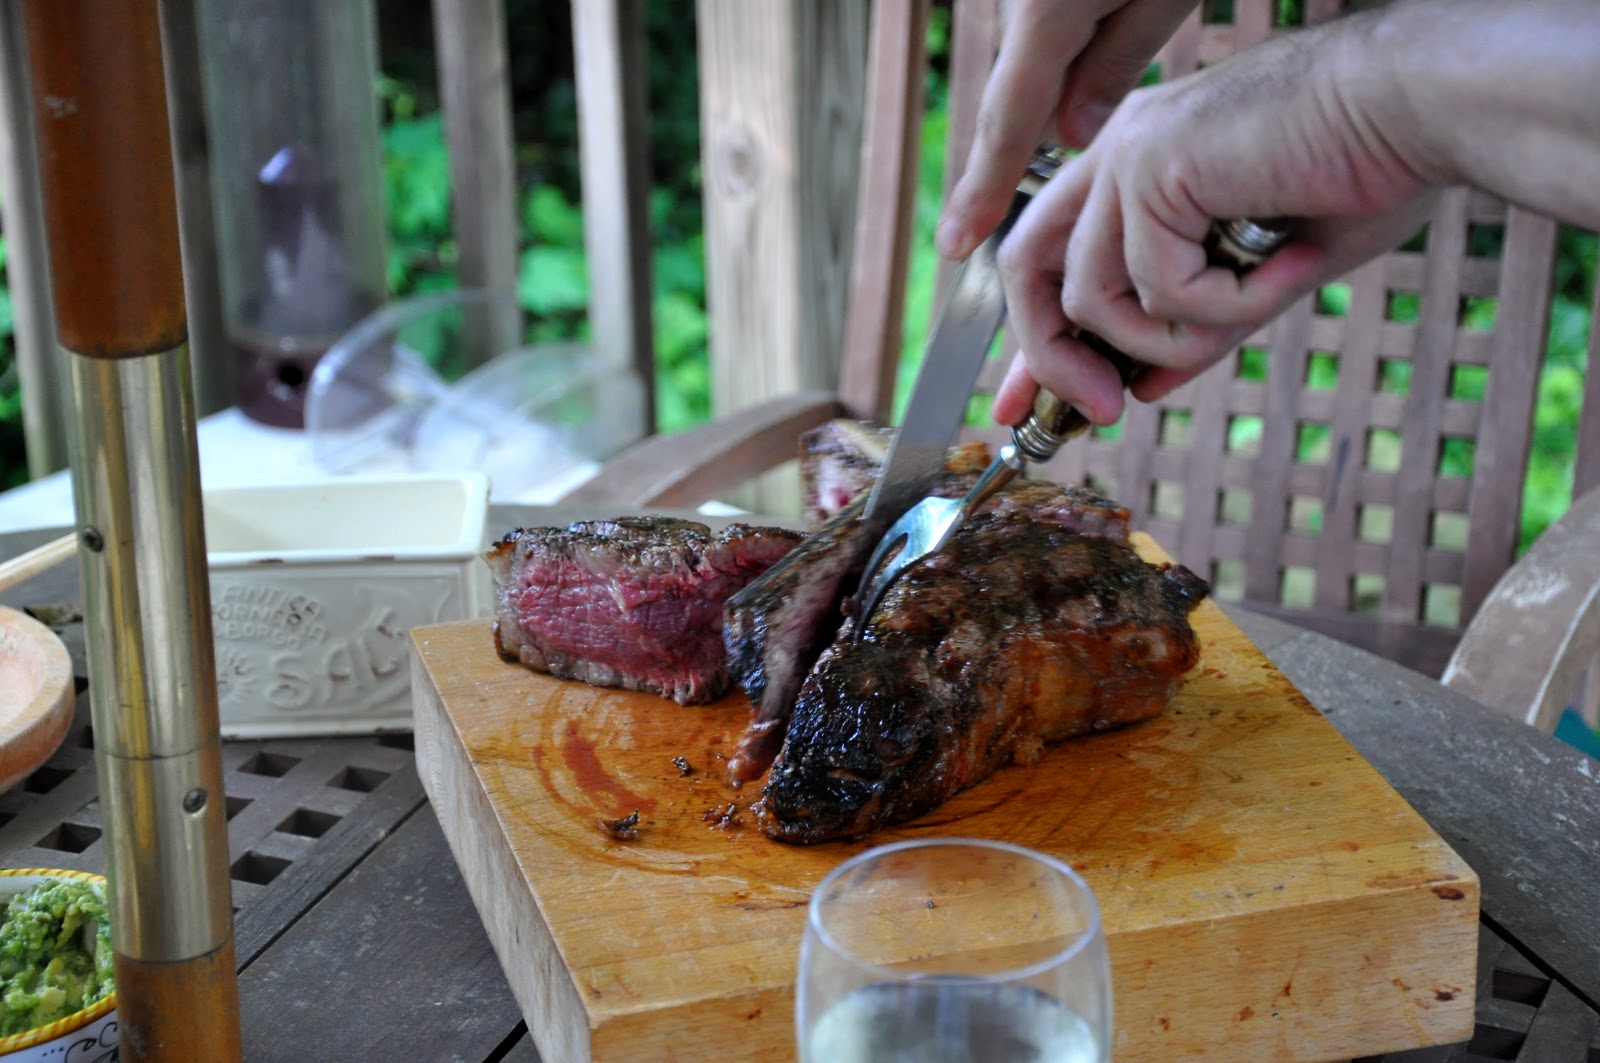
Carving and Serving. A fiorentina is too big to serve individually. It is typically carved up, first by removing the filet and then the contrefilet from the T-bone, then each against the grain:

Removing the filet (aka tenderloin)
 
Removing the contrefilet (aka strip steak)
Each diner helps themselves to as much steak as they want. Many people serve the meat with lemon wedges, but as far as I'm concerned a sprinkling of salt—and maybe pepper—is all this steak needs!
 

NOTES

Cuts of beef: While a top quality, thick cut Porterhouse steak like the one shown in this post is what you need to make a true fiorentina, this kind of eating does not come cheap. (The 'monster' shown here set me back a cool $90.) In our house, a steak like this is a treat for special occasions, so I don't mind the expense. Still, if you are looking to spend less, the same technique can be used for just about any cut you prefer. T-bone would be the next closest thing, followed by a strip steak (which is nothing more than the contrefilet served on the bone.) And my personal favorite cut for steak, a bone-in ribeye, also called a 'cowboy steak', is wonderful made this way. Of course, if you can't afford—or can't find—aged prime beef, 'choice' grade (which is what you are likely to find in a supermarket) will also be delicious. I would not use this technique on lower grades of meat like 'select', which really need some help—like a marinade—to make for good eating.

There is much debate among steak connoisseurs about the precise best way to prepare a fiorentina or, for that matter, any other steak. Here are some brief explanations of the major 'issues':

Seasoning. Some sources, including the august Artusi, solemnly warn against seasoning the steak at all before it is entirely cooked, on the theory that salt will draw out the juices. More modern sources allow seasoning the seared side of the meat, as suggested in this post. Other sources even recommend seasoning the meat before cooking—something that had been thought to be anathema but actually works well if you season the meat an hour or so before grilling, which allows enough time for the salt to penetrate the meat, which draws the juices back in. 

Turning while grilling. Then there is the traditional school of thought that the steak should only be turned over once. But more modern sources call for turning the steak several times, which is said to ensure more even cooking. I have tried both and, quite frankly, can't tell much difference in the taste or texture of the final product. Turning often does allow you to season the steak more thoroughly but you sacrifice those nice, neat grill marks. 

Dressing. Some of the earliest sources, including Artusi, call for dressing the cooked steak with a dab of butter. This touch, so uncharacteristic of Tuscan cooking, is said to have been invented for ex pats—specifically, the English—who played such a prominent role in the life of 19th century Florence (as portrayed in the film Room with a View). More common these days—and more consonant with Italian culinary tradition—is a drizzle of olive oil. 

Rubbing and Marinating. It is also common to rub the steak with some olive oil before grilling, which helps it brown and form a nice crust. Some sources (including Artusi, again) condemn the practice and says that it gives the steak a terrible 'off' flavor, but I have not found this to be the case. A nice rub of olive oil can help when you are using a less-thickly cut steak. When you are using a thick steak, you will have enough time for the steak to brown nicely on its own. You will even find some recipes for a 'fiorentina' that call for marinating the steak with rosemary, garlic and other aromatics. These variations can be delicious—and for lesser grades of beef, almost obligatory—but they are definitely not authentic. 

Cooking Times. As mentioned at the outset, a true fiorentina is served rare—very rare. For those who cannot stand the idea of a blood red steak—if you really must—you can serve it medium-rare. However, a well-done fiorentina is heresy. Most traditional recipes call for cooking the steak about 5 minutes per side, for a 1-1/2 to 2 inch (3-5 cm) steak, which makes for a very rare piece of meat. You can increase this to as much as 10 minutes per side for a thick cut steak. (This article contains a convenient chart on steak grilling times by thickness.) A 3 inch (7.5 cm) 'monster' Porterhouse will take a total of 25 minutes, including 5 minutes on its bone side, for a rare steak as pictured in this post. 

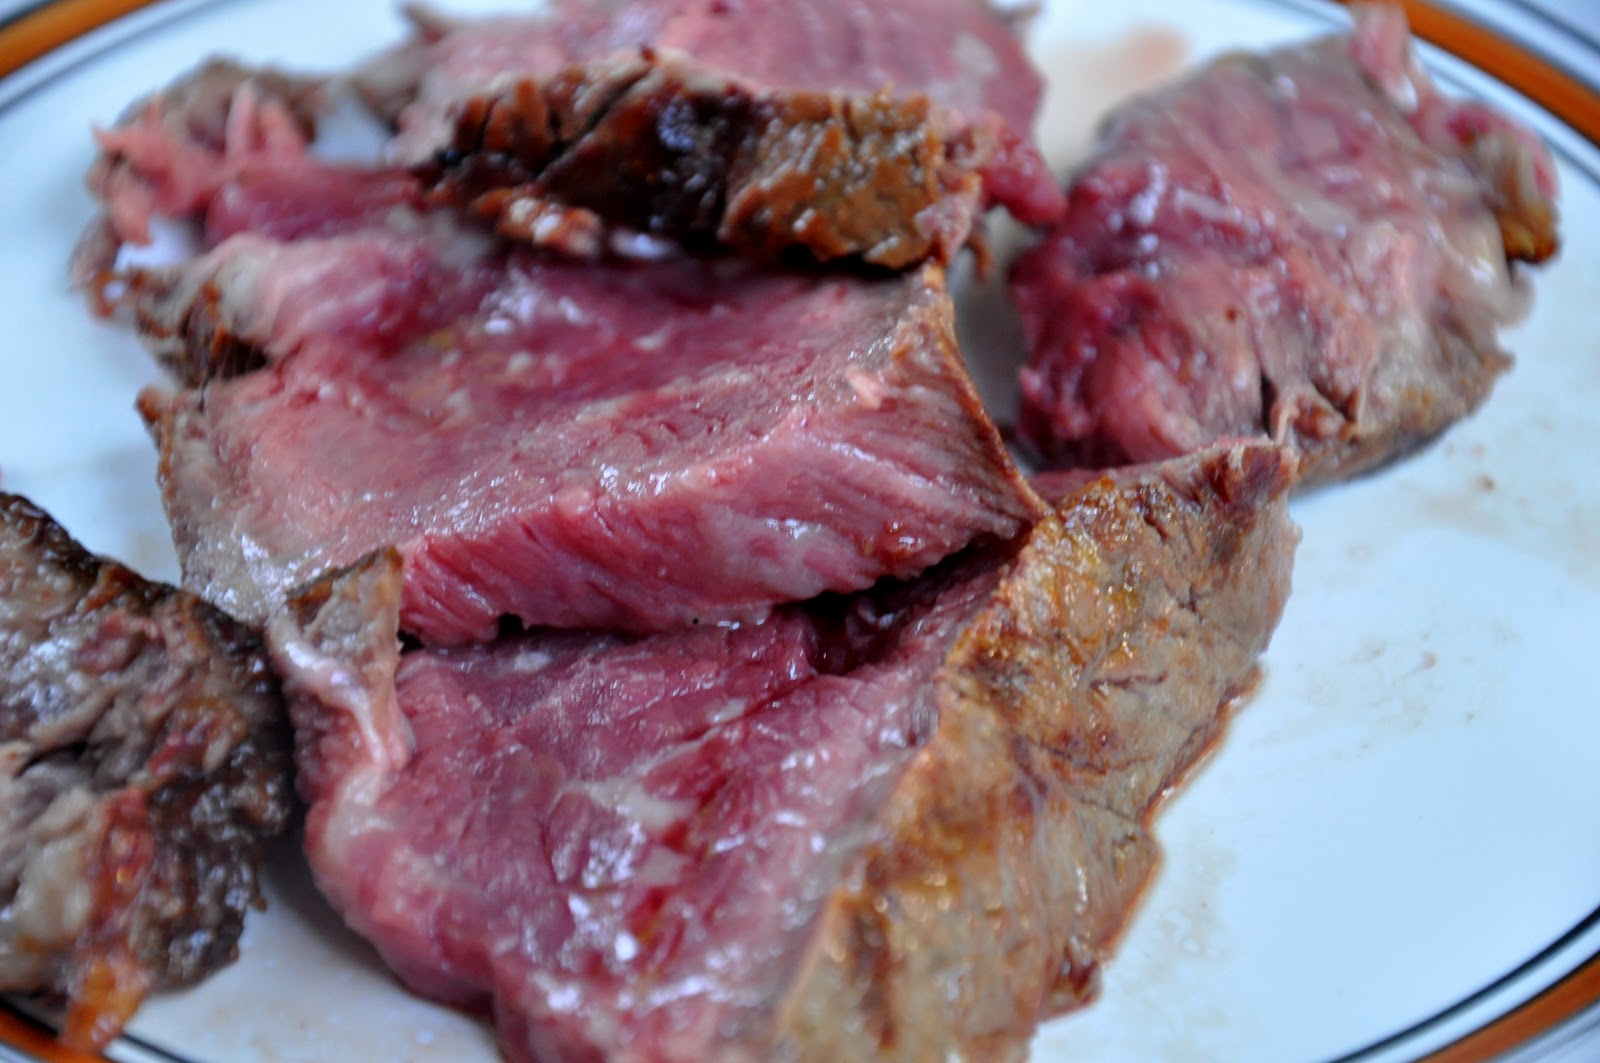
A properly cooked fiorentina is served very rare...
Testing for doneness. The most exact way of testing a steak for doneness is to use an instant-read meat thermometer. Steak is rare at 125 degree Farenheit (52 C), medium at 140F (60C) and well done at 170F (77 C). But using a thermometer will puncture the crust and allow juices to flow out of the meat, so most grillmeisters prefer the touch method, using the so-called 'rule of thumb': raw meat feels like the muscle just below your thumb (sometime called the 'mound of Venus', particularly in palmistry) when your hand is open or slightly cupped. If you if touch you index finger with your thumb, this muscle will contract a bit, becoming a bit firmer—the same firmness as a rare piece of beef. when you press it gently with your index finger Touch your middle-finger for medium-rare, and so on.  The following diagram illustrates this 'rule' well: 


And a final note on Tuscany's most famous butcher...I always associate bistecca alla fiorentina with Dario Cecchini, who may be the first—and only—celebrity butcher in the world. And here is short guide to the way Dario prepares this dish. Dario has his own website and blog. He has been featured on any number of 'foodie' TV shows, including Gourmet magazine's Diary of a Foodie and Anthony Bourdain's No Reservations. It's well worth catching one of these episodes if you can: Dario is quite a character—the only butcher I know who regularly quotes Dante!
 
The remains of the day... 

Notice that a properly prepared steak, even when served very rare, exudes only a minimal amount of blood. Those delicious juices are still inside the meat....
 

Sunday, March 28, 2010

Straccetti di manzo con la rughetta


One of the iconic dishes of Roman cookery, stracetti con la rughetta, or 'little rags' with arugula, is also one of the simplest of all to prepare:

Take beef, sliced as thinly as possible and cut into short strips, and sauté it over a very high flame with a clove or two or slightly crushed garlic until it has just lost its raw color. Season liberally with salt and pepper, mix and remove from the heat. Throw is a few handfuls of raw arugula, toss until they have wilted, and serve immediately with a nice piece of crusty bread to sop up the delicious juices.

NOTES: The dish is best made with 'baby' arugula, which will wilt on contact with the hot beef and residual pan heat. If you have more 'mature' arugula, you may want to keep the skillet on the heat while you toss the beef 'rags' and greens together until they wilt. If you don't have arugula on hand or prefer a less assertive taste, baby spinach leaves (or a mixture of spinach and arugula leaves) would also work nicely. 

Depending on the cut of beef (see below) and the thickness of your slices, as well as the intensity of your heat source, the meat may give off liquid when you add it to the skillet. Not to worry, this is just fine, even desirable, as the cooking juices make a wonderful sauce for dipping bread into. Personally, however, I like to slice my beef paper-thin and keep the heat high for a 'dry' version of the dish. It is perhaps the closest think in Italian cooking to a 'stir fry'. 

One of the most common cuts of beef you'll find in an Italian supermarket or butcher are fettine di manzo, or sliced beef, which to make straccetti you beat a bit to flatten and then cut into 'rags'. In Rome, they also sell straccetti pre-flattened and cut up. Elsewhere, you may need to slice and pound the beef yourself. The cut will depend on your taste, but I find that ribeye combines great flavor with tenderness. Skirt steak is another good choice. The genius of straccetti, however, is that you can also use humble cuts like chuck that would otherwise be too tough for this sort of 'flash' cooking. If you have access to a Korean supermarket like H Mart, by the way, they often sell beef slices for Korean 'barbecue' that are excellent for making stracetti

Measurements are really pretty useless in this dish. The main point is to balance the amount of arugula against the amount of beef. Most recipes will call for roughly half as much arugula as beef by weight, but where the proper balance between the two main ingredients may lie is really up to you. Just be aware that when the leaves wilt they will reduce dramatically in volume, so if in doubt, add more than you think you need. 

There are a good number of variations on this dish, mostly riffs on the arugula. As mentioned, spinach provides a less assertive alternative to arugula. In Roman Jewish cooking, straccetti are paired with thin wedges of sautéed artichoke, which is also a lovely combination. Sautéed mushrooms are another possible combination, either instead of or in addition to arugula or spinach. Some recipes call for little cubes of raw tomato. Some recipes call for shallot or onion instead of garlic. And some recipes eschew the veg altogether and call for the 'rags' to be flash-fried in a garlic and rosemary soffritto. And for a slightly 'fancier' dish, you can top the dish with shavings of parmesan cheese and/or a few drops of balsamic vinegar—but for me, straccetti are typical cucina povera and the idea of dressing them up does not really compute. But if you like fancy, straccetti can be also made from veal. 

Arugula, by the way, is called rughetta in Roman dialect, hence the name of the dish. But you will also find it called straccetti if manzo con la rucola, since rucola is the standard Italian word for arugula. In Italy it grows wild all over the place and has always been considered a poor man's green. Funny to think that in some circles in the US it is seen as an 'elitist' vegetable! Arugula has a nature affinity with beef, and can also be found in one of my favorite ways of grilling steak called tagliata. (See my early post on an Italian cookout).

Sunday, December 20, 2009

Brasato al vino rosso


There's nothing like a good pot roast on a cold winter's day! Though it may come as a surprise to some, Italians also make pot roast, which is known variously as brasato or stracotto, but with a 'continental' twist: the favorite cooking medium for Italian pot roast is red wine.

Although it is not absolutely necessary, I find that the roast has extra depth of flavor if it is allowed to marinate. You place a beef roast into a ceramic bowl or pot into which it will fit snugly, then add the 'holy trinity' of onion, carrots and celery, each cut up into wedges or large chunks, a whole garlic clove or two, some whole peppercorns, a few cloves and a bay leaf or two. Pour over ample robust red wine—usually you'll need a whole bottle. Leave the roast to marinate in its red wine bath overnight or even longer in the fridge. If the liquid does not entirely cover the roast, turn it every so often to ensure even marination. Let the roast come back to room temperature before cooking. (NB: Even if you don't have 24 hours to spare, you can marinate the meat for a few hours, or from the morning to the evening, in which case I'd leave it out of the fridge.

Remove the roast from the marinade and pat dry. Then, in a round or oval Dutch oven, melt about two spoonfuls of lard, add a sprig of rosemary and a garlic clove and brown the roast well on all sides., seasoning well with salt and pepper as you go. (Remove the garlic if it browns too much.) Then straining the marinade liquid through a sieve, pour it slowly over the roast. The liquid should come about 2/3 of the way up the roast. Lower the heat, cover the pot and allow it to simmer slowly until tender, about 2 or 3 hours (depending on the size of the roast), turning the roast every half hour or so to ensure even cooking. (Add some broth or water if it dried out too much, but normally there should be ample liquid without adding more.)

When the roast is done, remove it from the pot to a carving board to cool off a bit. (This will make it easier to slice.) While it is cooling, bind the remaining liquid a bit in the pot either with some beurre manié or with a cornstarch slurry (see below). The resulting sauce should have a nice liaison without actually being thick. Slice the roast on a serving platter and pour over a bit of the sauce. Serve with the remaining sauce in a sauceboat.


NOTES: The cut of beef I like best for pot roast is chuck, but rump roast or the bottom round are also good cuts. Avoid lean cuts, including top or center round, which are 'prettier' but tend to dry out. What you want is a good, rather tough piece of meat with plenty of fat and sinew that will break down during the long simmering, enriching the meat as it cooks. (I have seen some recipes that call for a sirloin pot roast to be served medium rare, but I have never tried it.) The roast should be tied so it does not fall apart during the braising.
The red wine, as mentioned, should be full-bodied. In Piemonte, the traditional choice is Barolo, but at today's prices you may want to opt for something a bit more modest...

Of course, there are numerous variations, mostly having to do with the aromatics or herbs to be included in the marinade or braising liquid. The addition of pancetta to the braising pot along with the garlic and rosemary is a common addition (and one I usually follow, but not today—as we were snowed in!) Some recipes (including many of the most traditional ones) call for larding the roast with pancetta. Some recipes call for chopping up the marinade vegetables and sautéing them as a soffritto. And some also call adding a bit of chopped tomato to the braising liquid. In some versions, you add just a bit of braising liquid at a time, in the manner of an arrosto morto, rather than all at once at the beginning of the braising. Another variation mentioned In Alessandro Molinari Pradelli's La cucina lombarda is the addition of lots of thinly sliced onion to melt into the braising liquid, a variation called brasato alle cipolle.

Brasato is the usual word for pot roast in Lombardy and Piemonte. I understand that stracotto is the more common name in Tuscany. This recipe is more typical of a brasato. A stracotto alla fiorentina usually includes only a cup or so of red wine, which is allowed to evaporate in the usual Italian way, after which a goodly amount of tomato purée is added in which the roast braises, making it somewhat similar to the southern Italian ragù.

By the way, if you don't use the marinade vegetables as a soffritto, you might want to try glazing them and serving with as a rustic contorno, which is what I did: pick out as many of the cloves and peppercorns as you can find. No need to be too fussy about—it does no harm to leave a few behind.) Then place them in a skillet with water enough to come about halfway up their height, along with a few spoonfuls of sugar, a pinch of salt and a nice clump of butter. Turn the heat up to medium-high and let the water boil down until it has completely evaporated. As the water evaporates, the vegetables will begin to caramelize in the butter and melted sugar. Allow them to take on a nice golden color, without burning of course, and you're done. Serving the glazed vegetables around the sliced roast makes for an attractive presentation.

The braising liquid can be served as is, especially if it's already reduced enough to have reached a 'sauce' consistency. Otherwise, as mentioned you can bind the liquid either with a beurre manié, which is simply flour blended with softened butter, or with a cornstarch blended with cold water to make a slurry. The beurre manié will lighten the color of the liquid and render it opaque, while the cornstarch slurry will thicken it without changing its color or transparency. If you've used the marinade vegetables as a soffritto, then you can simply blend the liquid and vegetables together, or pass them through the finest mesh of a food mill, which will emulsify and thicken it 'naturally'.

Lard is not a necessity—you can use olive oil, of course, or a combination of oil and butter if you prefer. But there is nothing like lard for browing meat and, since we were out of pancetta, I thought that it would add a bit more depth of flavor.

Brasato aka stracotto is often served with mashed potatoes, which make a wonderful foil for that rich, unctuous sauce. If so, I would go a bit more lightly on the butter content of the mashed potatoes, as the sauce is already quite rich. Polenta is also a popular choice. Cipolline all'agrodolce or glazed carrots are also great accompaniments, especially if you want to precede the roast with pasta as a first course.

For the fans of French cooking out there, you will no doubt have noticed how similar this recipe for brasato is the beouf à la mode (see also the Larousse Gastronomique, under "Beef" and Escoffier, Le Guide Culinaire, under Piece de Beouf à la Mode, dite aussi à la Bourgeoise"). I am not sure of the exact relationships, but seeing as Piemonte borders on France and Lombardy borders on Piemonte, the resemblance should not surprise us.

Leftover brasato is wonderful as a stuffing for pasta, known as either agnolotti or ravioli al brasato. (Since I have leftovers, I may blog on that dish soon.) And, finally, you can prepare beef cut into large cubes in exactly the same way, in which case your brasato becomes a stufato (similar to a daube in French cuisine).

Pot Roast on Foodista