Showing posts with label Winter. Show all posts

Friday, February 25, 2011

Costolette di maiale ai funghi


You could probably devote a small cookbook just to Italian veal chop recipes, but with the price of veal being what it is, I usually do what many Italians do and turn to pork. The taste of pork is different, of course, but most veal recipes translate quite well into oinkier versions. I was reminded of one of my favorites the other day reading fellow blogger Paula of bell'alimento: who recently featured a lovely recipes for pork chops in mushroom cream sauce. Well, as any regular reader of this blog will know, I am practically addicted to mushroom cream sauce. I love it on ox tongue, with egg pasta, gnocchi or canederli and, indeed, it goes particularly well with pork chops.

In any event, here's my version of the dish:

Ingredients (for 4 people)

4 thin-cut rib pork chops (bone in)
250g (1/2 lb.) of fresh mushrooms (oyster mushrooms are particularly nice), roughly chopped
1-2 shallots, finely chopped
250ml (1 cup) cream, or as much as you need to make ample sauce
Olive oil
Butter
Flour
A handful of fresh parsley, finely chopped
Salt and pepper

Directions

Dry your chops  well with paper towles, dust them with flour and brown them in olive oil over  a moderate flame until nice and golden brown on both sides. Remove them from the skillet and set aside til later.


Add the mushrooms to the skillet and sauté them in the remaining oil. Season the mushrooms with a bit of salt and pepper as soon as you've added them to encourage the mushrooms to exude their liquid. Depending of the type of mushroom you are using, they may exude quite a bit of liquid. Let all of that liquid evaporate, then continue sautéing until the mushrooms start to brown nicely.


Add a dab of butter and the chopped shallot to the mushrooms. Allow the shallot to sauté lightly, literally for just 30 seconds or so.

Now for my little 'trick': add a ladleful of homemade broth to the mushrooms, and let that evaporate completely as well. This gives an extra layer of savory flavor to the dish, and is especially nice if you're using the kind of mild cultivated  mushrooms you are likely to find in most supermarkets. If, on the other hand, you are using wild chanterelles or cèpes (porcini) you can skip this step if you like to maintain that pure mushroom flavor.


Now add your cream and let it reduce down over fairly high heat until you see that the fat has separated out as pictured below:


At this point, you can leave the dish if you want until you are ready. A few minutes before you want to serve the dish, turn back on the heat to a moderate flame and add the chops back into the skillet on top of the cream sauce,along with any juices that may have accumulated—those juices have a lot of flavor, so don't throw them out. You will want to loosen the sauce with a bit of milk or water; then turn the chops in the sauce until they are well coated.


Continue cooking for a few minutes, just long enough to warm the chops through and thicken the sauce yet again, this time to a consistency just thick enough to coat the back of a spoon, adding a bit of finely chopped parsley as they cook. Serve immediately, topped with some more finely chopped parsley.


NOTES: This recipe is a bit modified from the traditional one that calls for braising the chops in the sauce. Most modern pork, as we all know, is raised lean, and rib/loin chops are simply too lean for braising. So I just brown them nicely and put them back in the pan just long enough to warm through and absorb a bit of the flavor of the sauce. In this way, the pork is nice and flavorful but does not dry out, as they would if you tried to braise them.

For this recipe, you need thin-cut chops that will cook in the short period of time called for. And, in any event, thin cut chops are more typically Italian, as they allow for a nice balance of flavors between the meat and its condiment.

As for the mushrooms, just about any variety will do, even those cultivate button mushrooms that can be a bit boring. Of course, wild mushrooms will give the dish all the more character. This time, I used a mixture of oyster mushrooms and the ones that Italians call chiodini, meaning 'little nails' or pioppini. I think the name in English is black polar mushrooms. Their scientific name is Lyophyllum shimeji, and I believe that they are Japanese in origin. You can also used dried mushroom, which will give the dish a more intense mushroom flavor or, using an old trick I learned from Marcella Hazan, mix some dried porcini and their liquid with cultivate mushrooms to mimic the flavor of the real deal.

The original recipe that inspired this dish was a veal chop recipes that I found long ago in Giuliano Bugialli's Foods of Italy. The original, if I remember correctly, called for browining the veal chops in butter rather than oil and using, of course, fresh porcini mushrooms. The dish comes from Emilia-Romagna, which may be obvious from the generous use of butter and cream. Unfortunately, I seem to have misplaced that book somewhere, but this recipe—for reasons you may well imagine—stuck in mind...

Sunday, January 2, 2011

How to Roast Chestnuts


Chestnuts roasting on an open fire, Jack Frost nipping at your nose...

Toasted chestnuts evoke wistful holidays images of days gone by. But how many of us have actually roasted chestnuts on an open fire? Too few, I imagine. And a shame, too, since anyone with a fireplace can do it easily. All you need are chestnuts, a good knife and a roasting pan.

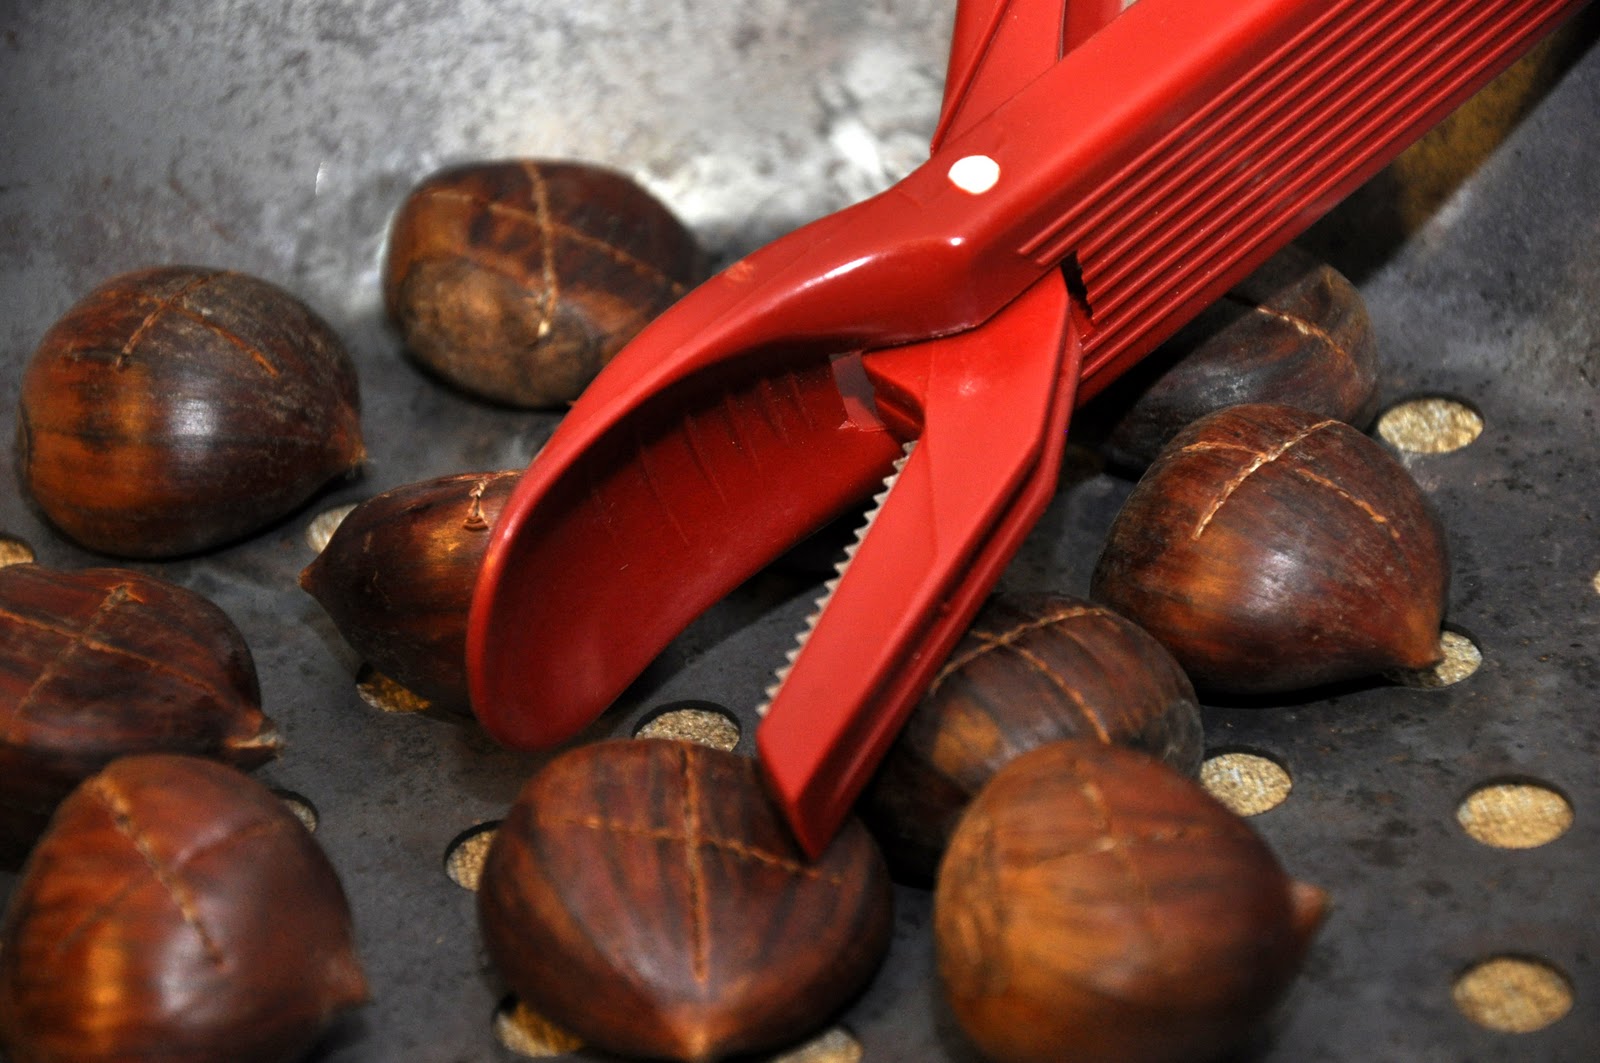
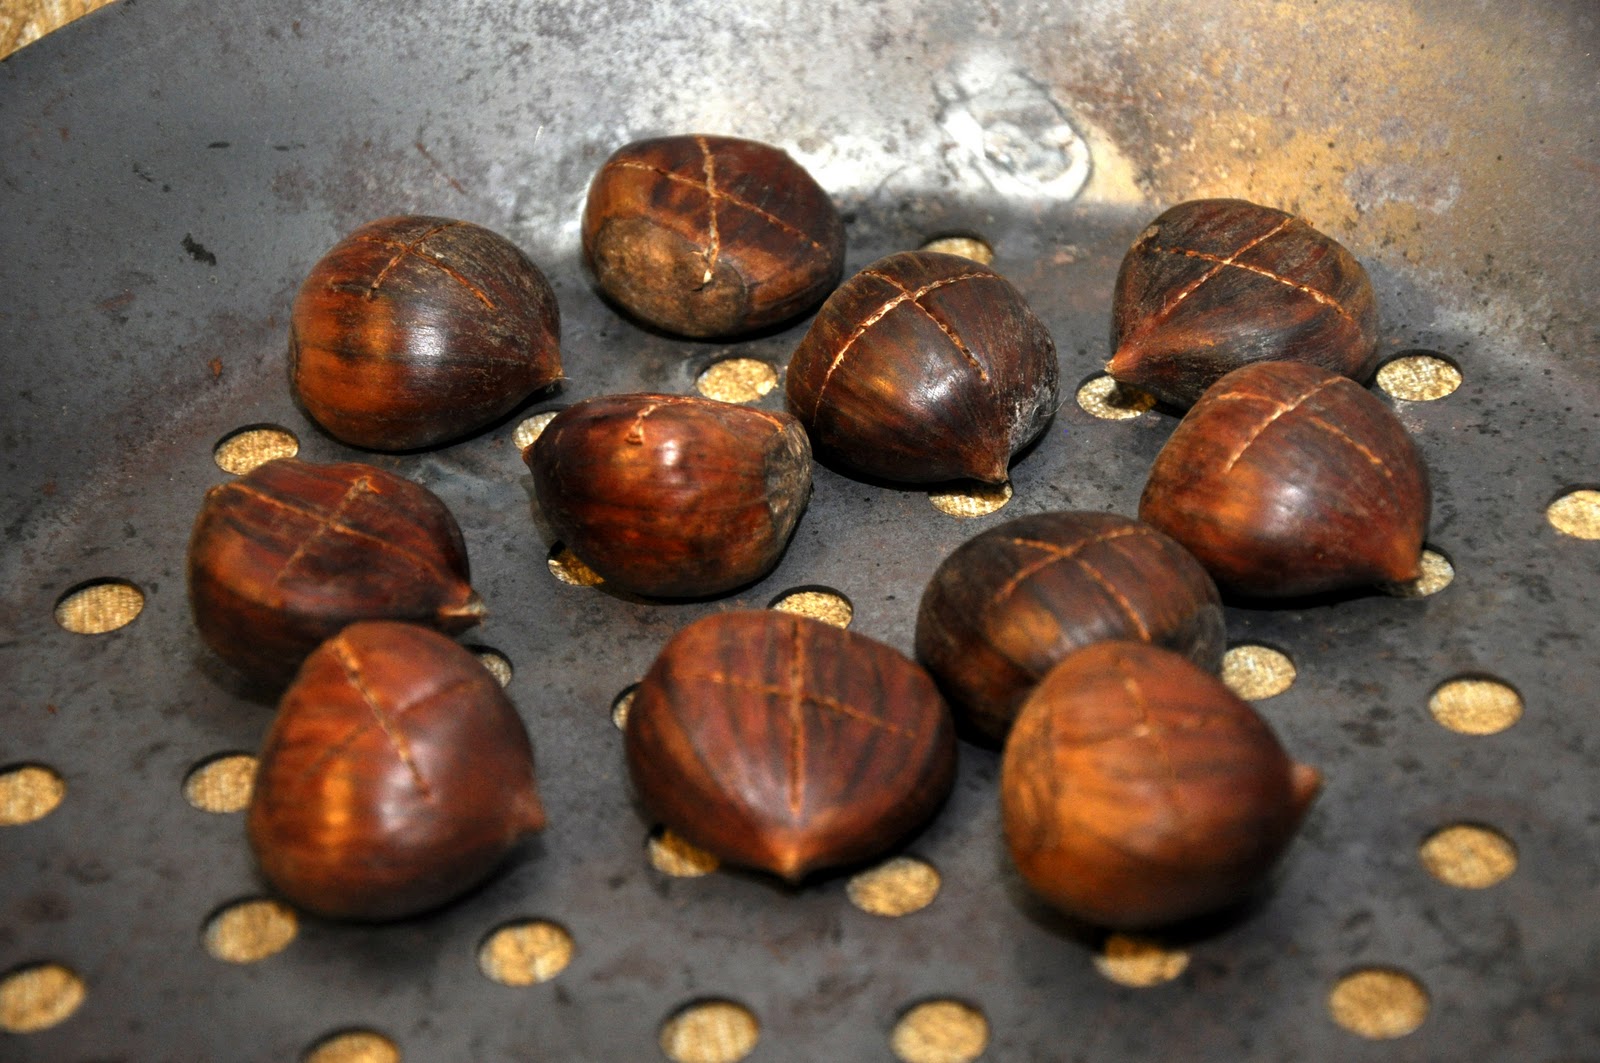
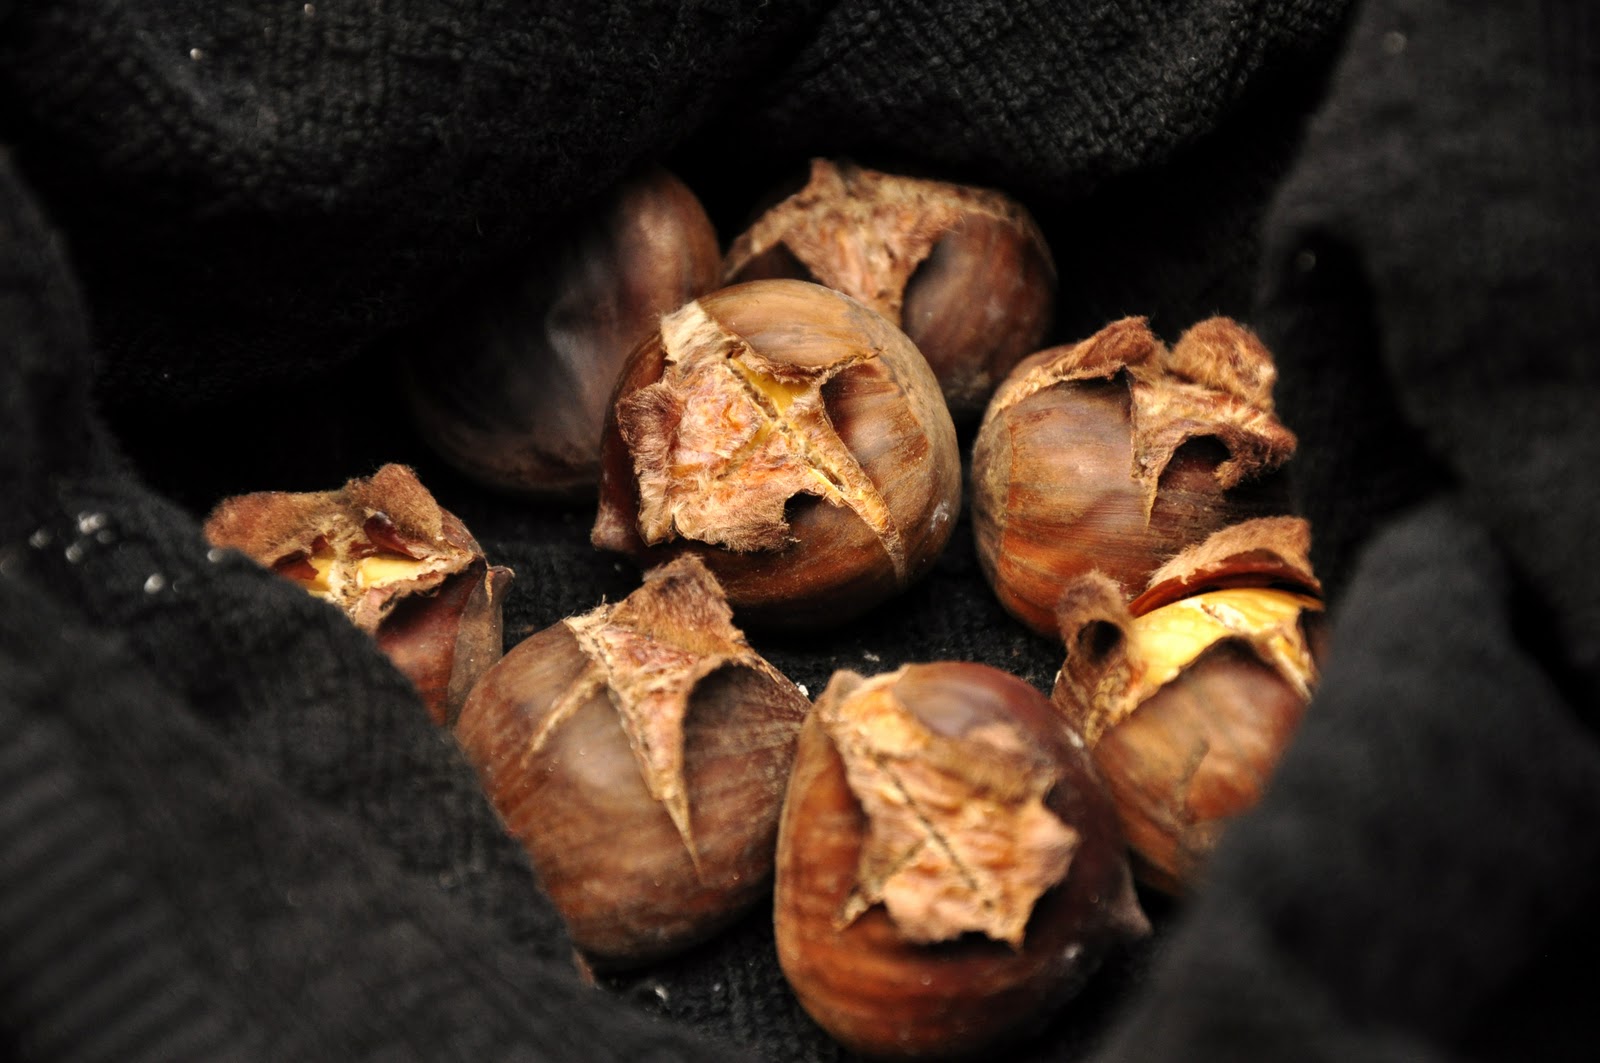
Just take as many chestnuts you and your dining companions want to eat and cut a cross in their sides as picture. This will prevent them from 'exploding' while they roast. You can do with this a good, sharp knife. They also make chestnut knives as well as a special instrument for the job (pictured below), which you can find at specialty stores or online; it makes the job a lot easier.


The typical pan for roasting chestnuts is made of carbon steel and has large holes in its bottom to let the heat of the fire through. They are sometimes available in specialty cookware shops and online. You can also use a popcorn popper, the kind they make for fireplaces, with long handles.


Now take the pan and lay it over some hot embers. If your fireplace is big enough you can just clear out a space and pull some embers into place below your pan. You pan should lay a few centimeters/inches above the embers, which should be glowing red hot, but not actually on fire. An actual flame  would  char the outsides of the chestnuts before they are done inside.


Tossing them from time to time, let the chestnuts roast for about 20 minutes or so. As they roast, the slits you have made in their sides will begin to open. This is fine. The chestnuts will char a bit on the outside, which is perfectly normal and, in fact, desirable, as it gives them a nice smokey flavor. Some recipes tell you to sprinkle some red wine or other liquor over them as they roast, which you can certainly do if that appeals to you.


Once they're done, remove them gingerly from the pan into a cloth towel.  (They will be very hot at this point, as will your pan, so be careful.) Wrap the chestnuts up for a few minutes to let them cool off a bit and soften further. Then open up the towel and eat them, preferably with your hands. They have both shells and a rather woody skin. You can eat the latter if you like, but they are much nicer without. The skins should, in any event, come off quite easily if they chestnuts are still warm.

NOTES: If you don't have a fireplace or an appropriate pan, the same basic technique can be used to roast chestnuts on a baking sheet, in a hot oven.

Chestnuts make for a wonderful 'dessert', made after dinner, say while watching a film and sipping some whiskey or grappa on a cold winter's night. Or while singing yuletide carols, perhaps... 

Sunday, December 26, 2010

Viennese Goulash


For some reason, I must be feeling nostalgic for my Vienna days as I keep coming back to the dishes I made during those years. Perhaps it's the cold weather that calls out for the hearty cooking of Mitteleuropa. In any event, here's another favorite from that time and place: Viennese Fiakergulasch.

Goulash is a simple beef stew that follows the usual dry followed by moist heat method, but with two twists: the use of lots of onion—half as much by weight as the meat—and, of course, Hungarian paprika. The cooking fat can be oil, lard or even rendered beef fat.

Ingredients (for 4-6 servings)

1 kilo (2 lbs.) stewing beef, cut into cubes
500g (1 lb.) onions, chopped
Oil, lard or rendered beef fat
Salt and pepper
Hungarian paprika, to taste
Beef broth, enough to cover the meat
1-2 Tbs. tomato paste
A pinch of caraway seeds
A sprig of fresh marjoram (or thyme)

A spoonful of flour mixed with some water

Directions

Add enough cooking fat to cover the bottom of a Dutch oven or braiser. Brown the beef cubes nicely in the fat on all sides and set aside.

Now add the onions and gently sweat them in the same pan until they are nicely soft and browned, but not burnt. Season with salt and pepper as you go. Add back the browned meat and mix well. Allow the meat and onions to simmer together for a few minutes, then sprinkle over the paprika. Most recipes call for 1-2 tablespoons, but I just 'eyeball' it, and I'm pretty sure I add more than just a spoonful, as I love the taste of paprika. You then allow the paprika to simmer in the fat to release its full aroma, again for just a minute or two. Paprika can burn if heated too much, so moderate your heat as needed.

Add enough beef broth to just cover the meat, along with the tomato paste, caraway and marjoram. Cover and simmer it all gently until the meat is quite tender, usually about two hours. This can be done over the stove or, if you prefer, in a moderate (180C/350F) oven.

Just before serving, add your flour and water slurry to the pan, a spoonful or two at a time, to give the sauce a nice liaison. If, on the other hand, you find that your sauce is too thick or there is simply not enough of it, add some water.

Serve warm, with buttered noodles, spätle or Knödel.

NOTES: There is a certain linguistic confusion over the name of this dish as it is used in its homeland of Hungary. This article explains, as I had heard before, that gulyás, from which we get our word goulash, actually refers to a soup, which back in Vienna was called Gulaschsuppe. What we call goulash is called pörkölt in Hungarian (but please don't ask me how that's pronounced...)

Many recipes call for you to sauté the onions first, and then brown the beef with onions, which is more straightforward than the procedures outlined above (which is more typical of a French daube). But I like to use the Frenchified method, as you can caramelize the meat nicely without any worried about burning the onion.

There are lots of different kinds of goulash, with or without meat, and with or without vegetables. The Viennese version, in my humble opinion, is by far the best of the lot, although admittedly I am biased. After all, we all tend to like what we know best.

Sunday, December 19, 2010

Canederli


Canederli is the Italian name given to the bread dumplings so popular in Austria and other parts of central Europe, known in German as Semmelknödl or just knödel. During my years in Vienna it was one of my favorite things to eat, so when I re-discovered them in Italy, on a visit to an old friend from Paris who had wound up living in Bolzano, a city in the German-speaking region of Alto Adige (aka Südtirol) in northwestern Italy, I was delighted. Not only did they bring back fond memories—they were probably the best I had ever eaten! (No offense to my Austrian friends...)

In any event, you don't need to travel to Austria or northwestern Italy to enjoy these dumplings. They are quite easy to make at home. The technique is a bit like making potato dumpling or gnocchi, but actually easier. These bread dumplings are much less prone to becoming stodgy as gnocchi can be if not made right. And it's a great way to use old bread, a nice change when you're not in the mood for a bread soup like ribollita or pappa al pomodoro.

Ingredients (for 4-6 servings)

300g (3/4 lb.) stale bread, cut into cubes
100g (1/4 lb.) speck or other cured pork product (see Notes), finely minced (optional)
2 eggs
A glass of milk
1 medium onion, finely minced
2 Tbs. flour (or more)
Parsley, finely minced
Salt and pepper

Directions

Toss together in a large bowl the bread and speck (if using), then add the eggs and milk and parsley. Mix together. Let the mixture rest for a good 20 minutes or so. The bread should be rather moist at this point, but not soaking wet. If you find the mixture a bit dry, then add more milk.

Mix in the flour, along with the onion and parsley. (NB: For added flavor, you can sauté the onions in a bit of butter before adding them to the mix.) Season well with salt and pepper.


Now form the resulting 'dough' into balls about the size of golf balls.


By the way, if the mixture does not hold together, or if you notice that it is exceedingly wet, then add more flour, a bit at a time, until you find that the mixture has reached a nice dough-like consistency that will hold together well.

Now bring a pot of well-salted water (or, for a richer taste, broth) to a gentle simmer. Add the canederli, one at a time, with a slotted spoon—or just use your hands like I usually do...  If you are not experienced with making these dumplings, just form one ball to begin with, and try simmering it. If it falls apart, then you know you need to add some more flour to your mixture. Then try again with another. If all goes well, then add all the rest.


Simmer the canederli for about 15 minutes. They should have come to the surface of your simmering liquid, much as gnocchi do.


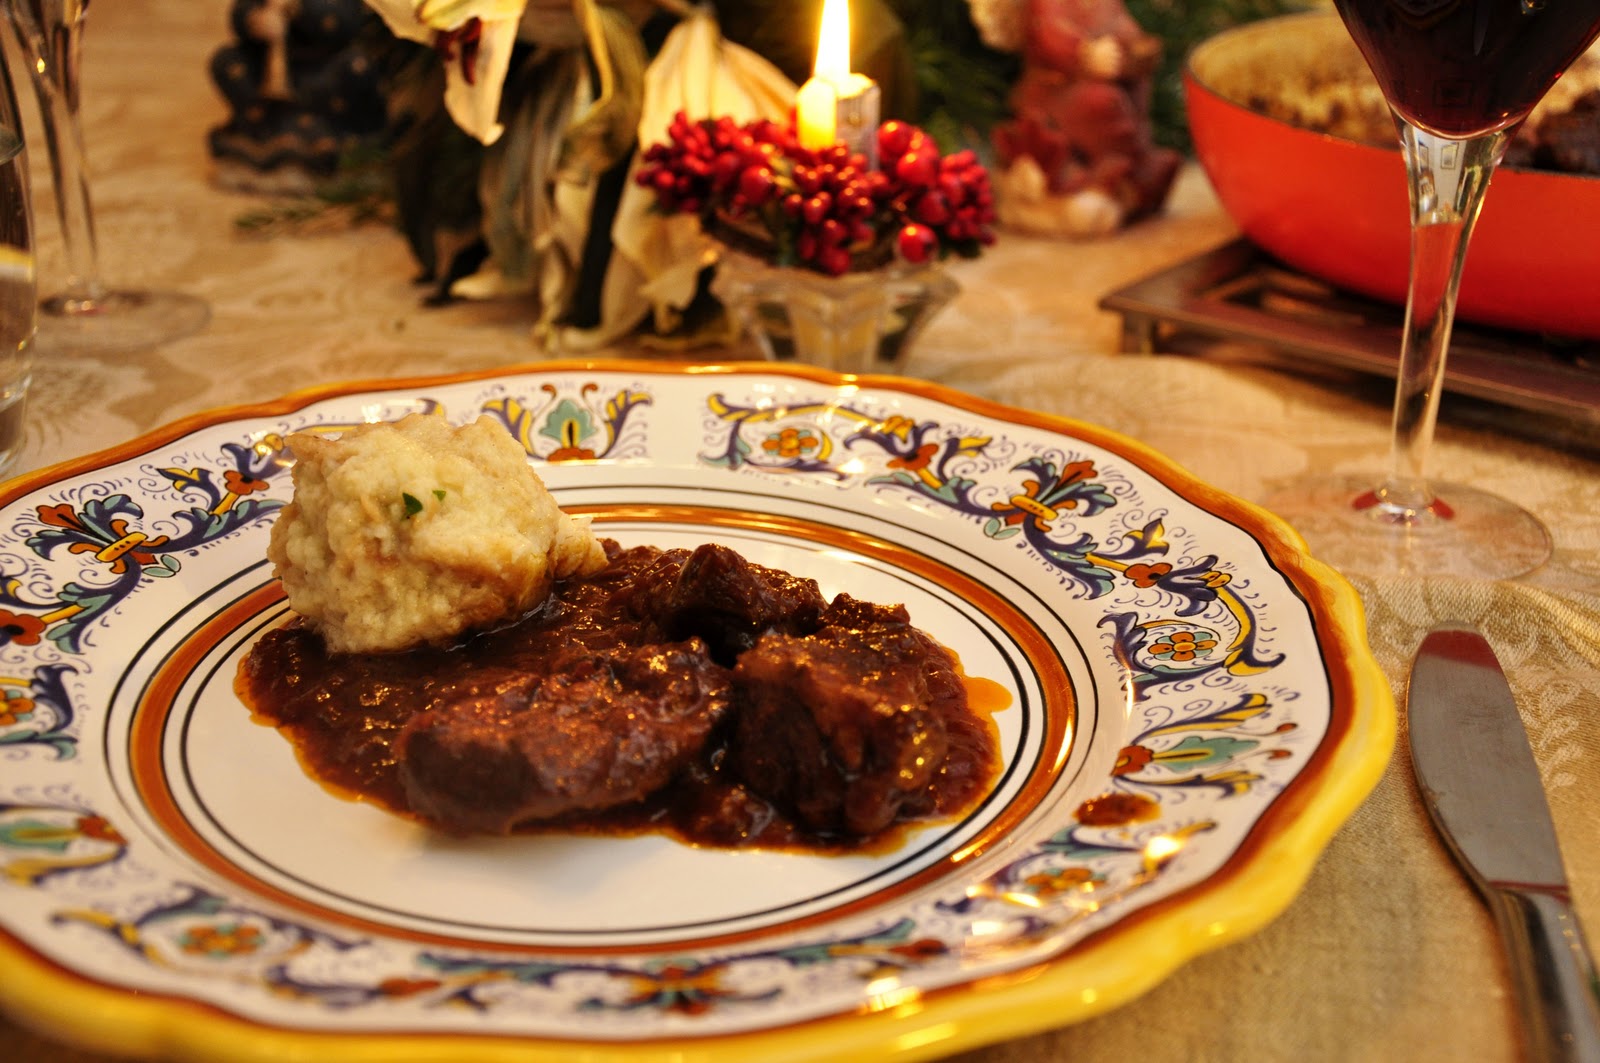
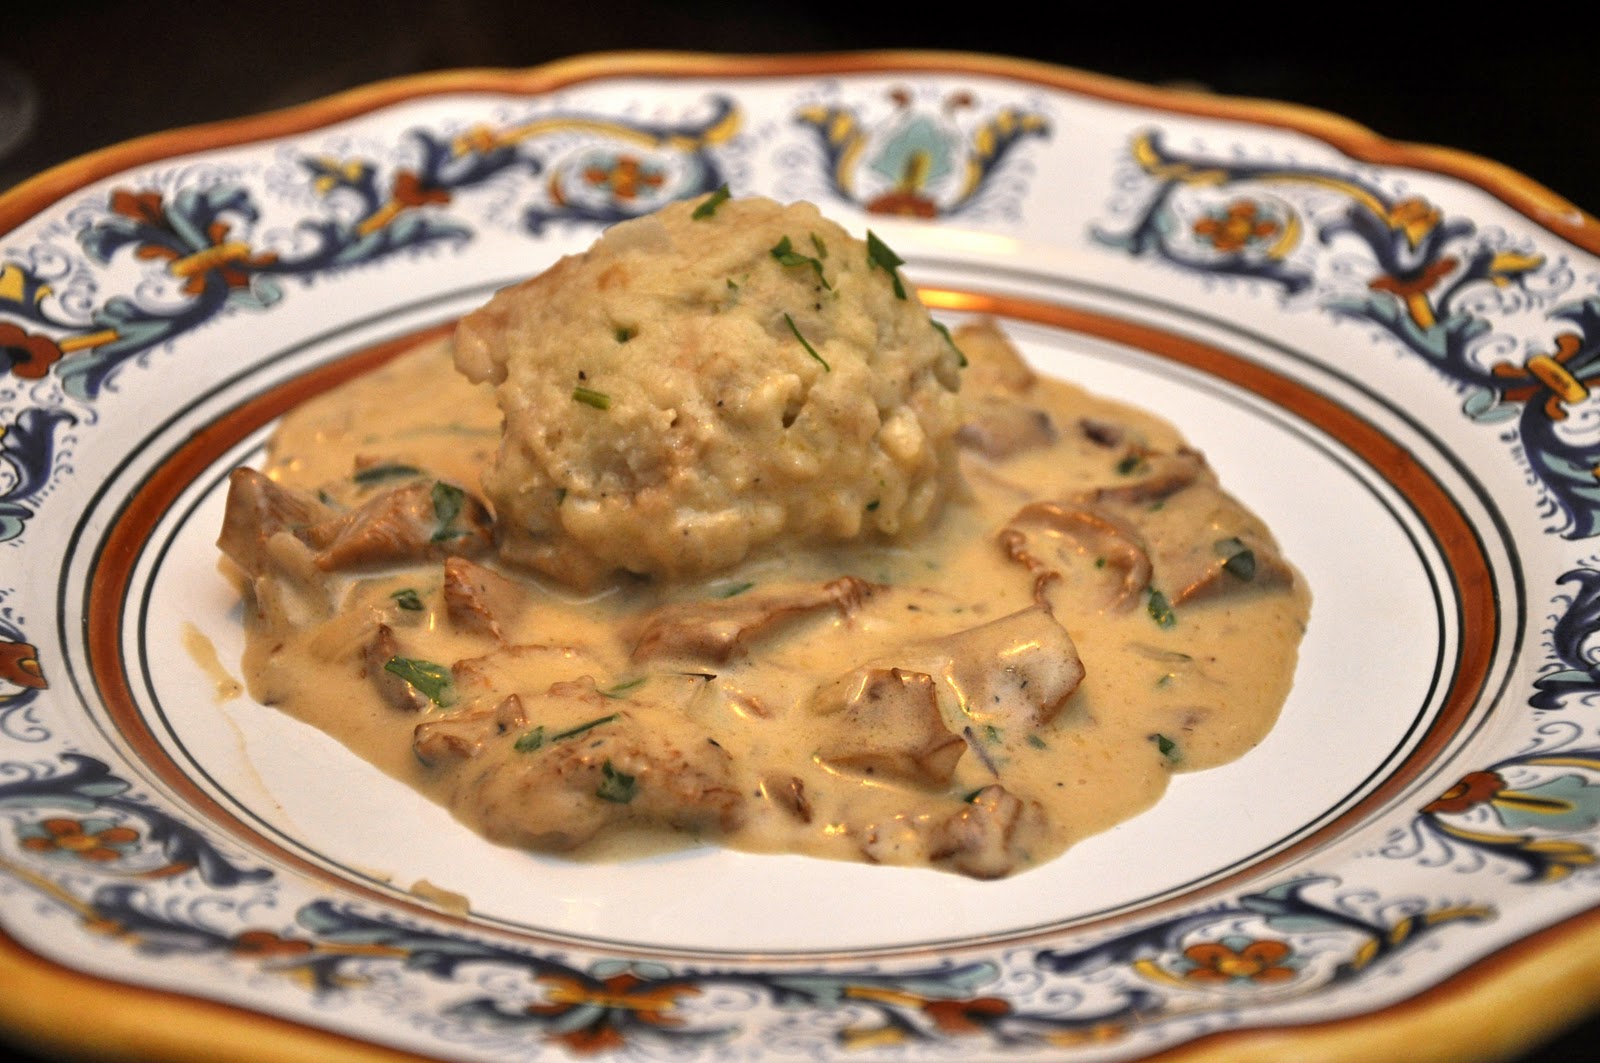
NOTES: There are various ways to serve canederli. The simplest is the way I had them at that wonderful meal in Bolzano: in a rich, homemade broth—a kind of Italo-Austrian matzo ball soup. My personal favorite way to enjoy canederli is to accompany them with a creamy mushroom sauce as pictured above, the same kind of sauce that goes so well with potato gnocchi. Also very good, and very popular in Vienna, is to serve them with beef goulash, which I hope to blog on some time quite soon.

Unlike pasta or gnocchi, however, you do not generally pour the sauce over or mix it with these dumplings, but rather lay down a 'bed' of your sauce and lay the dumplings on top. They are big enough that you will need to cut them into bite-sized pieces with a knife and fork, using your fork to fare la scarpetta as they say in Italian: dip each piece of dumpling in the sauce.


You can also make one big dumpling of the bread mixture, by forming a loaf and wrapping it in cheesecloth before simmering it. Of course, this big dumpling will take a bit longer, say 20-30 minutes, to cook. You serve it sliced like a meatloaf.

Speck is a smoked pork product that is common to Austria and this part of the Italy. It is quite delicious but can be hard to find. Feel free to substitute prosciutto or even slab bacon if you like, or omit the meat altogether, as I often do anyway.


By the way, Alto Adige, or Südtirol, is one of the most beautiful areas of Italy. It has an Alpine landscape reminiscent of nearby western Austria. In fact, it was once a part of Austria, ceded to Italy after Austria's defeat in the First World War. (It was nearby that my grandfather fought and won his posthumous medal and picked up his taste for polenta—which is why we ate that northern dish in our southern Italian family.)

In any event, the region today still retains much of its Austrian heritage, notwithstanding the best efforts of Mussolini, who 'shipped' in many Italians, especially from southern Italy, to colonize and, to his mind, 'civilize' the place. There is, in fact, a triumphal arch built by Mussolini in downtown Bolzano, the capital of the area, to celebrate the Italianization of the area. It is still the object of the occasional sabotage attempt, or so I was told when I visited, although the region was granted considerable autonomy after the Second World War. And when I was there in the late 90s the place seemed as tranquil as any I've ever been to. Besides beautiful scenery and great food, they make wonderful wines, including the popular pinot grigio, but also some excellent Chardonnays, Riesling, Sylvaner, Gewurztraminer, and Kerner. It's well worth a visit.

Beautiful Alto Adige-Südtirol


Sunday, November 28, 2010

Zuppa di porri


'Tis the season for soups! When the temperatures dive, there is simply nothing that takes the chill off like soup. The wonderful thing about soups is their enormous variety: they can be thick and stick-to-the-ribs, whole meals in themselves, or they can be light, even austere, just enough to whet the palate as the start of a formal meal or as a light supper.


Here is a lovely example of a medium-bodied soup, none too heavy but very satisfying at the same time. It's particularly nice during the holiday season, when you may feel like something warming but not too filling, a nice respite between those humongous holiday meals. The starring role is played by the leek, an often overlooked member of the onion family. Or, at least, I tend to overlook it, which is too bad because it has an incomparably savory yet mellow taste that makes any dish that contains it truly special.


Ingredients (for 4-6 servings)


5 leeks
100g (4 Tbs.) butter, or a combination of equal parts butter and olive oil, or just olive oil
20g (2 Tbs.) flour

Salt and pepper to taste

1 liter (4 cups) broth

4-6 slices of good-quality crusty bread

Grated parmesan or gruyère cheese


Directions


Rinse the leeks if necessary (see below) and trim off the root end and green tops. Cut the stalks into thin slices.


Sauté the leek slices in the butter, butter and oil mixture or the oil over gentle heat until they are well reduced and quite tender, without browning, about 15-20 minutes. Season the leeks with salt and pepper just after you add them to the skillet.


Sprinkle the flour and mix it in well, letting it sauté as well for a minute or two. Then add the broth, mix it well to fully incorporate the flour into the liquid, and let simmer, semi-covered, for another 15-20 minutes.


Meanwhile, toast your slices of bread and place each slice in the bottom of a soup bowl for each diner. Sprinkle the slices with some grated cheese. When the soup is done simmering, ladle over a nice serving into the soup bowls. Sprinkle over some more cheese and top with a nice grinding of black pepper and—if you like—a drizzle of best quality olive oil.


You can serve this soup immediately, but it is best after a few minutes' rest, which allows the soup to soak into the bread.


NOTES: These days leeks are often sold pre-washed, and can be used without fuss. But if you see that your leeks are gritty, make sure to wash them well before using. You will need to split them down the middle to make sure you remove all the grit. And, by the way, don't throw away the green tops—they are a great addition when making homemade broth, either instead of or in addition to the onion.


Speaking of which, for a simple soup like this one, where success or failure will depend on the quality of the ingredients, the broth should really be homemade. (See this post for the master recipe.) You can make your broth with beef (the usual choice) or chicken or a mixture of the two—the so-called brodo classico—and, this time of year, you can also use a turkey carcass if you happen to have one around the house…If you want to go vegetarian, then vegetable broth will, of course, do the job.


The choice of sautéing medium will subtly influence the dish. The traditional recipe calls for all butter, which gives the recipe a pleasant sweetness. But, personally, I prefer to use olive oil or a mixture of butter and olive oil, which provides a more 'rustic' taste. Some recipes add potato to the soup, which gives it more body. You can pass the soup through a food mill for a smoother texture. And instead of the toasted bread, you can fry up some croutons in olive oil, which again makes the soup a bit richer.


If you want to get fancy, you can gratinée this soup in terracotta soup bowls as you would a French onion soup, placing the bread on top of the soup, then sprinkling over all the cheese (use gruyere for this variation), drizzle with some olive oil (or melted butter) and run the soup under the broiler or in a very hot oven for a few minutes, until the top is nicely browned.

Wednesday, November 10, 2010

Quick Note: Crema di cannellini


Here's a quick and easy weeknight supper for you: a purée of cannellini beans, seasoned with garlic and rosemary, and thinned out with water or broth to create a soup. Nothing could be simpler or more satisfying. And if you are using canned beans—which you can, why not?—the soup can be done in five minutes. There is no cream in this soup, by the way, the Italian word crema does not mean cream, as in the dairy product, but simply refers to any smooth, creamy textured purée.

Ingredients

Olive oil
1-2 garlic cloves (or more if you like), whole but lightly crushed
A sprig of fresh rosemary
Boiled or canned cannellini beans
Broth or water (or the cooking liquid if using boiled beans)
Salt and pepper
A handful of parsley, finely chopped

NB: No exact measurements for this one; use as much or as little of each ingredient as you need or feel like using. This recipe is pretty much ad lib.   

Directions

Begin by lightly sautéing your garlic and rosemary in abundant olive oil over moderately low heat. Once the garlic takes on some color, remove both the garlic and the olive oil from the pan. Then pass your cannellini beans through a food mill into the seasoned oil. Allow the beans to insaporire for a few minutes, then add enough water, broth or cooking liquid to thin out the bean purée to the consistency of a soup. Simmer the mixture for a few minutes to let the flavors meld. About a minute before its' done, stir in the chopped parsley. Drizzle with raw, best-quality olive oil just before serving.

NOTES: This basic recipe is incredible flexible and versatile. Usually, it can be served with some crusty bread on the side, or top of a piece of toasted bread laid at the bottom of the plate, or topped with croutons fried in olive oil, and—as picture above—with boiled rice mixed in. Or some soup pasta instead of the rice.

The same method lends itself to just about any other bean or legume: borlotti, lentils, fagioli all'occhio (black eyed peas), chickpeas… you name it. For a more 'refined' taste, you substitute a soffritto of onion, or onion, carrot and celery, for the garlic, in which case don't remove them from the pan as you would the garlic. For a bit more substance, you can also fry some cubed pancetta in the seasoned oil. Or top your crema with some sautéed shrimp or scallops, which makes for an elegant presentation fit for company.

Boiling dried beans takes some time but is very easy. If you have the time, soak the beans in water to cover them amply, either overnight or save yourself some time by bringing them to a boil and let them soak in the hot water for an hour. Pre-soaking is not strictly necessary, but it does save time and helps the beans to retain their taste and texture—although that's not too important if you're going to use them in a purée, of course. Then simmer them in water to cover generously, along with a drizzle of olive oil and a sprig of fresh sage (if you have some on hand) until tender. Season with salt a few minutes before the beans are done. The simmering liquid has lots of flavor and can be used to thin out the crema.

If using canned beans, on the other hand, make sure to rinse them off and drain in a colander. The canning liquid has stuff you don't want to ingest and, besides, it gives a funny 'canned' taste to the dish. When using canned beans, it is best to use broth to give the crema some extra flavor.

Crema di cannellini, when it is kept quite thick, makes for a nice topping for crostini.

Sunday, November 7, 2010

Verza e salsiccia


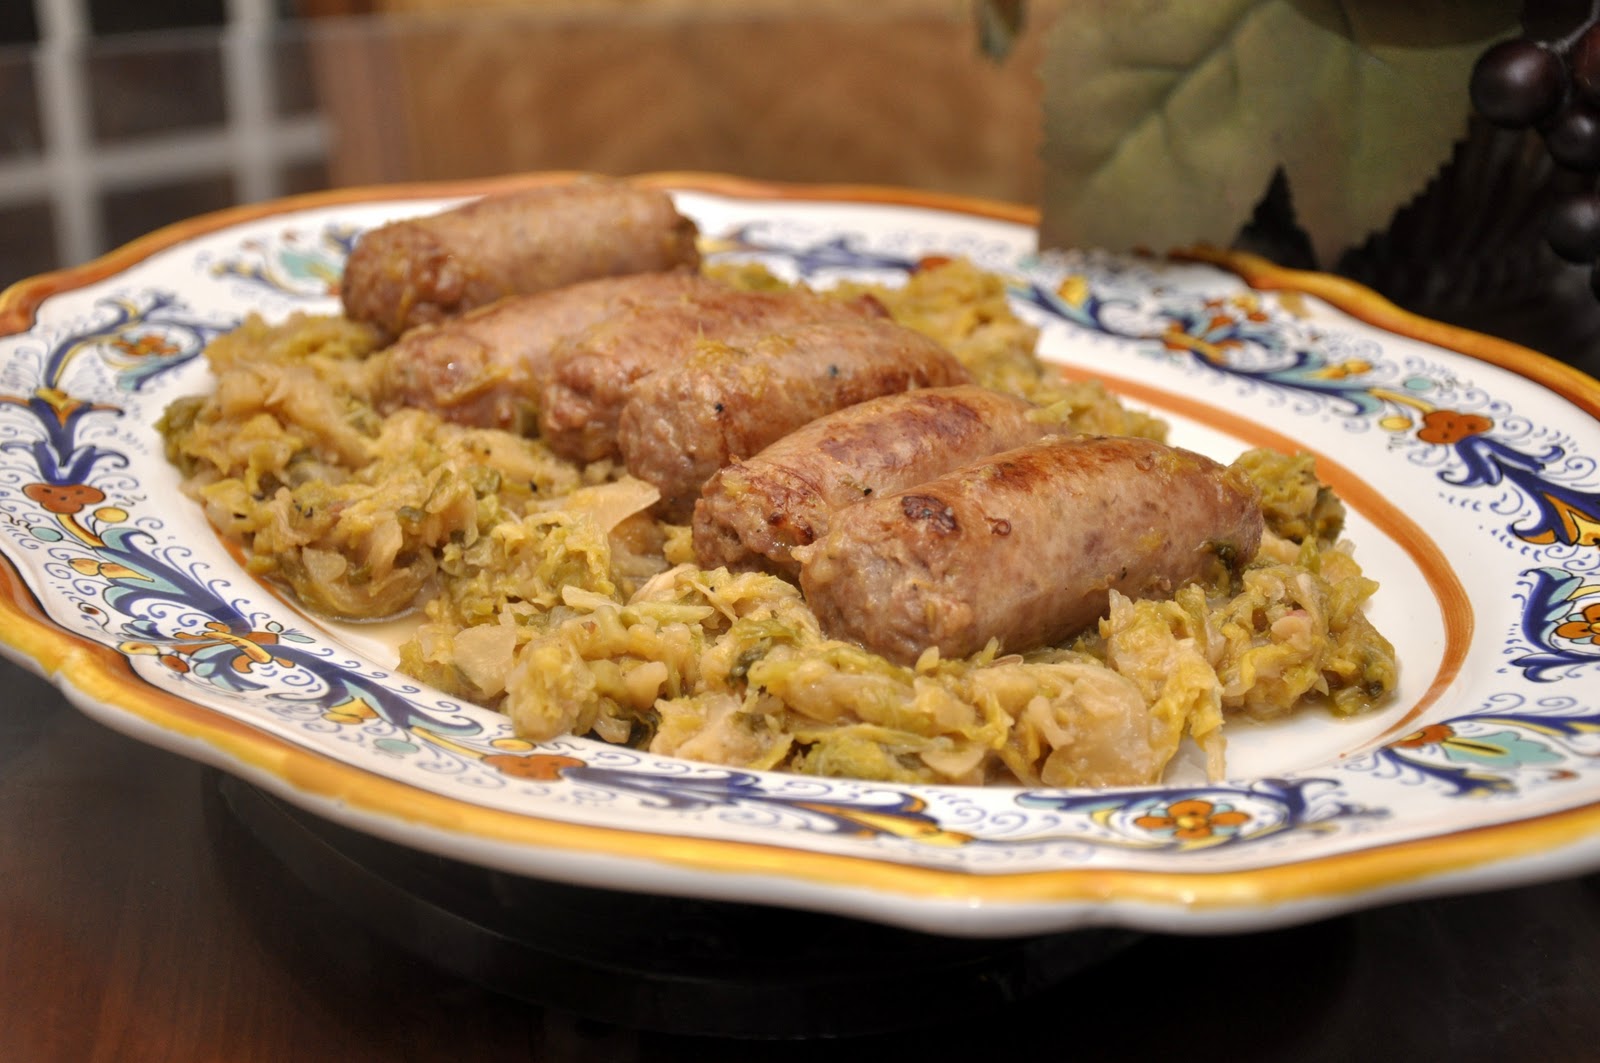
Not sure about you, but the weather here has crossed the line from pleasantly crisp to downright cold at night. That's as good an excuse as any for some good, stick to the ribs eating. It may sound eastern European, but Italians, too, like their cabbage, especially in colder weather, and like to combine it with pork. The typical Italian cabbage is verza, the kind with fairly loose, crinkly, finely threaded leaves known in English (at least in the US) as "savoy" cabbage, which develops a delicate, sweet taste when cooked. Like other types of cabbage, it marries perfectly with sausage. The dish is not the prettiest thing to look at, but it tastes wonderful, and it warms the body and soul on a cold night.

Ingredients (for 4-6 servings)

4-6 (or more) mild Italian sausages
Olive oil
1 medium onion, thinly sliced
1 head of Savoy cabbage, finely shredded
1 apple, peeled, cored and diced (optional)
Fennel seeds (optional)
Salt and pepper
Broth or water

Directions

Prick the sausages and sauté them over medium heat in a bit of olive oil until lightly browned in a sauté pan or braiser. Remove them from the pan and set aside.

Add the sliced onion and let the onion sauté for a few minutes, lowering the heat if need be to prevent it from browning. (A few drops of water will help things along.) Then add your shredded cabbage and mix it well with the onion. Season well with salt and pepper. Continue cooking, stirring often, until the cabbage has reduced down quite a bit. (You can cover it between stirs, which allows it to steam in its own liquid, which quickens the process.)

When the cabbage has reduced in volume by about half, you can add some diced apple if you like, which gives the dish a slight sweetness. Stir again to mix the apple evenly into the cabbage. You can also add a few fennel seeds, which adds another layer of flavor.

Then add the sausages back into the pan, nestling them into the cabbage at even intervals, and pour in enough broth (or water) to almost cover the cabbage. Lower the heat, then cover the pan, and let the dish simmer for a good 45 minutes to an hour, until the cabbage is literally melting and the sausages are quite soft, too. If there is a lot of liquid left in the pan, raise the heat to high and boil it (almost completely) off. Adjust for seasoning and serve immediately on a warmed platter or straight from the pan.

NOTES: You can use just about any sausage for this dish, although personally I would not choose a spicy variety. The thin, rope-like luganega sausage would be a great (and very typical) choice if you can find it. Otherwise, I usually just use the kind labeled as 'sweet' or 'mild' Italian sausage in stores. You can, of course, use 'regular' cabbage, which would give a different but also very nice result. You could even use red cabbage if you like—not a typical Italian vegetable but tasty nonetheless. The flavorings can also vary—caraway seeds are nice eastern European touch, for example. And if you like, some recipes calls for a dash of white wine vinegar at the very end, which 'brightens' the dish and gives it a sweet-and-sour taste. (Others use vinegar in substitution for the water/broth). A number of recipes call for adding some cubed pancetta to the onion soffritto at the beginning, but I usually don't as I find that the sausage provides enough 'porkiness' on its own. And you can use lard instead of olive oil, if you really want to 'pig out'.

This dish is sometimes served as a hearty soup, by adding much more broth and cutting the sausages into little pieces. The dish can also be used as a condimento for pasta or risotto (again, cutting up the sausage into bite-sized pieces).

Saturday, October 30, 2010

Chicons au gratin


There's something about chilly weather that demands a nice gratin—that piping-hot, cheesy, gooey goodness is just the thing to warm your body and soul on a mid-Autumn evening. And here is one that is sure to satisfy: another Belgian classic, chicons au gratin, also known in France as endives au gratin. It consists of Belgian endives, braised in butter, wrapped in ham slices and covered with a rich mornay sauce before getting browned in the oven. (I get hungry all over again thinking about it!)

Ingredients (for 4 servings)

4 medium-sized Belgian endives
30g (2-3 tablespoons) butter (plus a bit more to butter the baking pan)
Salt and pepper
500ml (2 cups) of béchamel sauce (see recipe here)
200g gruyère (or other good, meltable Swiss cheese), shredded
4 slices of best-quality cooked ham 

Directions

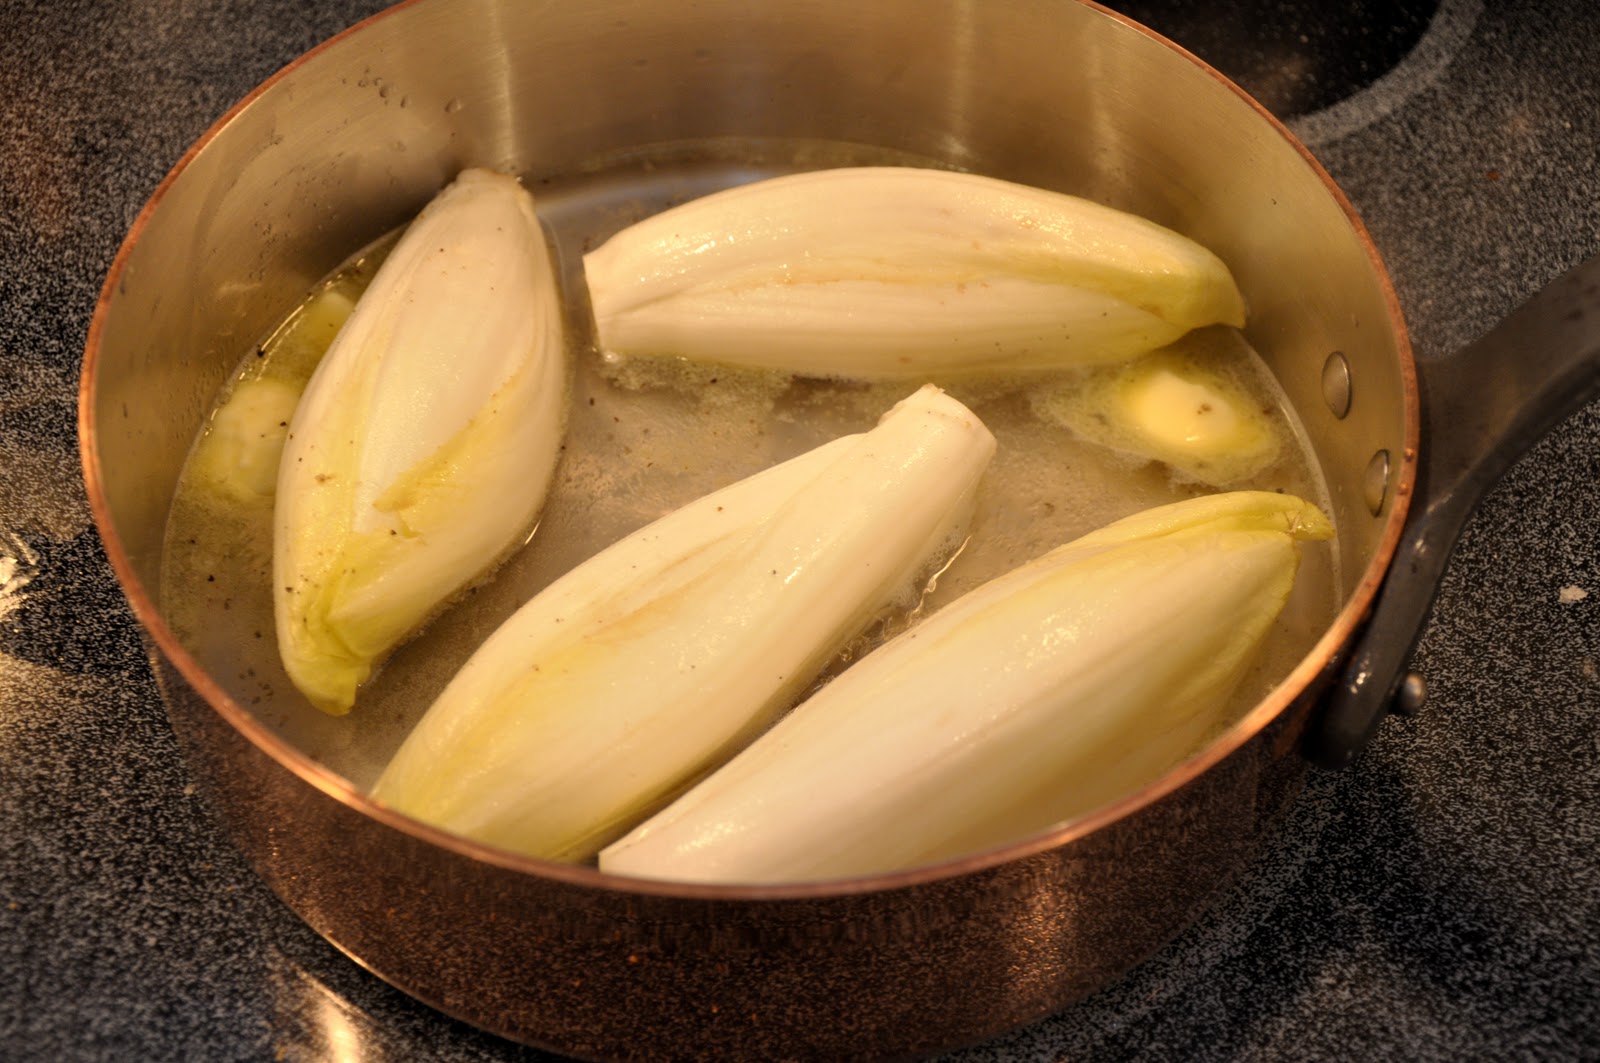
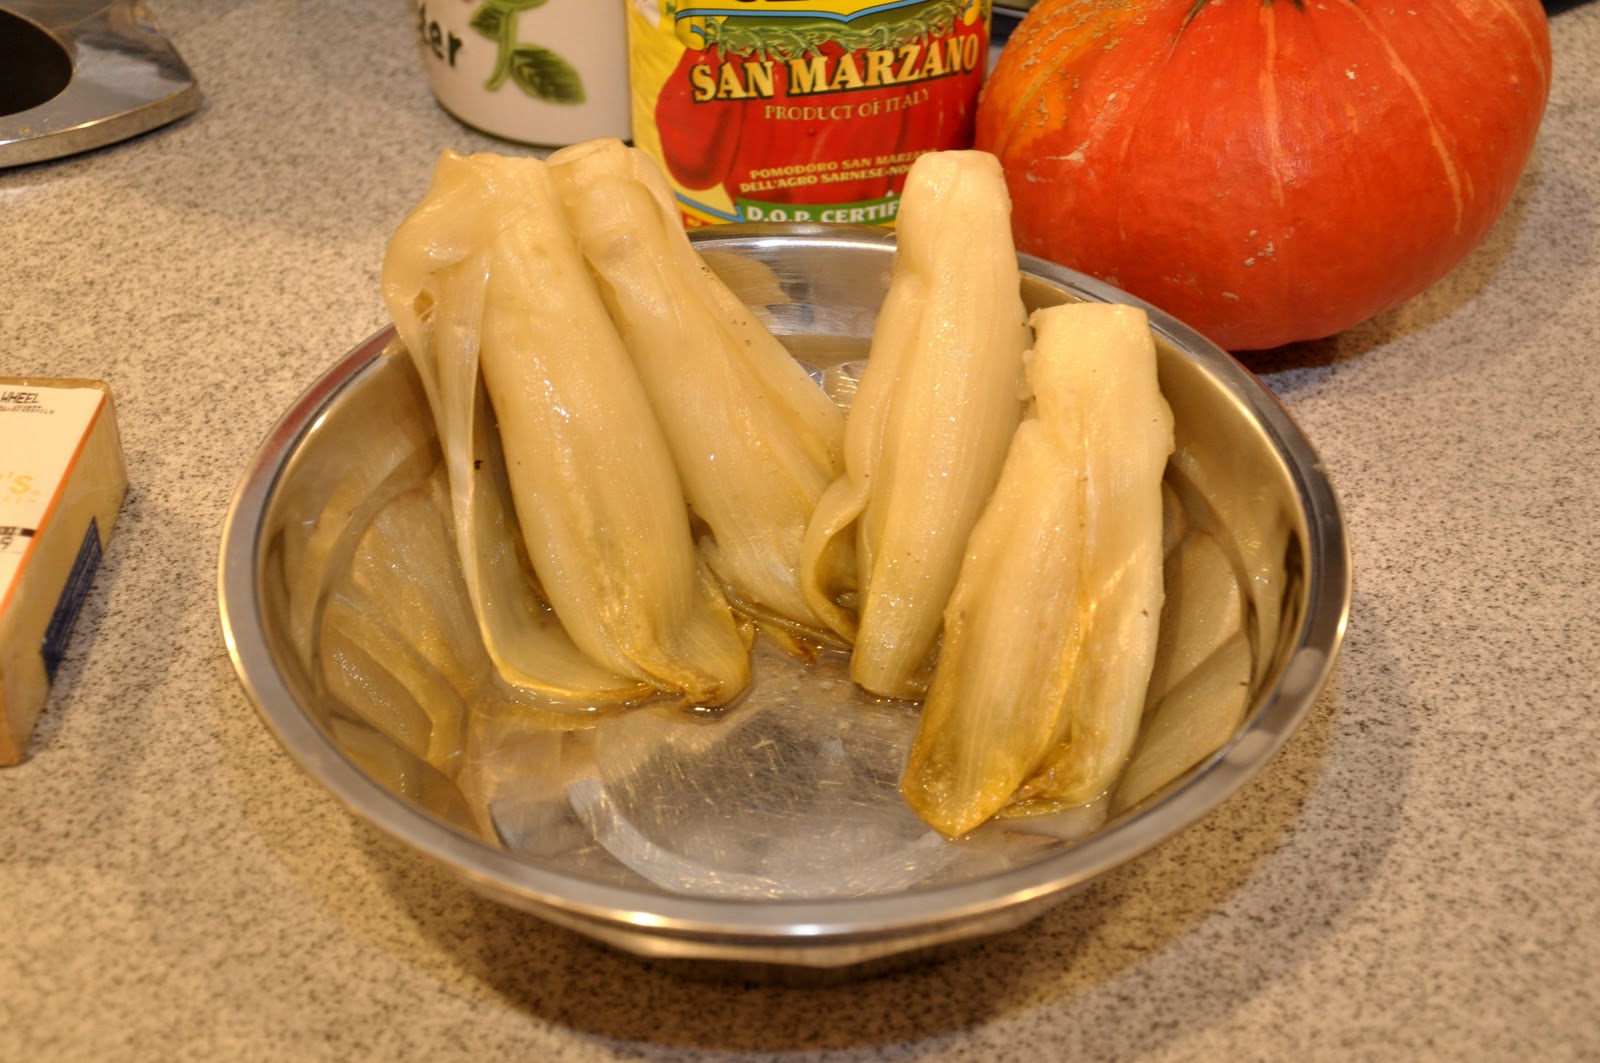
Begin by removing any discolored leaves from the endive and trimming the root end. Place the endives in a sauté pan with the butter and a glassful of water. Season with salt and pepper.


Allow the endives to simmer, covered, until they are quite soft, about 20-30 minutes. If you like, you can let them go longer, allowing them to turn a nice golden brown. Either way, drain the endives, root ends up, so that any excess water will drain off. (You may be tempted to skip this step, but don't—otherwise, you may wind up with soggy vegetables and a runny sauce!)


While your endives are braising, make your béchamel sauce in the usual way, and when it is done, add the gruyère, holding back about a third, however, for later. For extra flavor,  you can add some of any cooking liquid left over from the braising or draining of the endives. (This sort of béchamel with cheese is called a sauce mornay.)

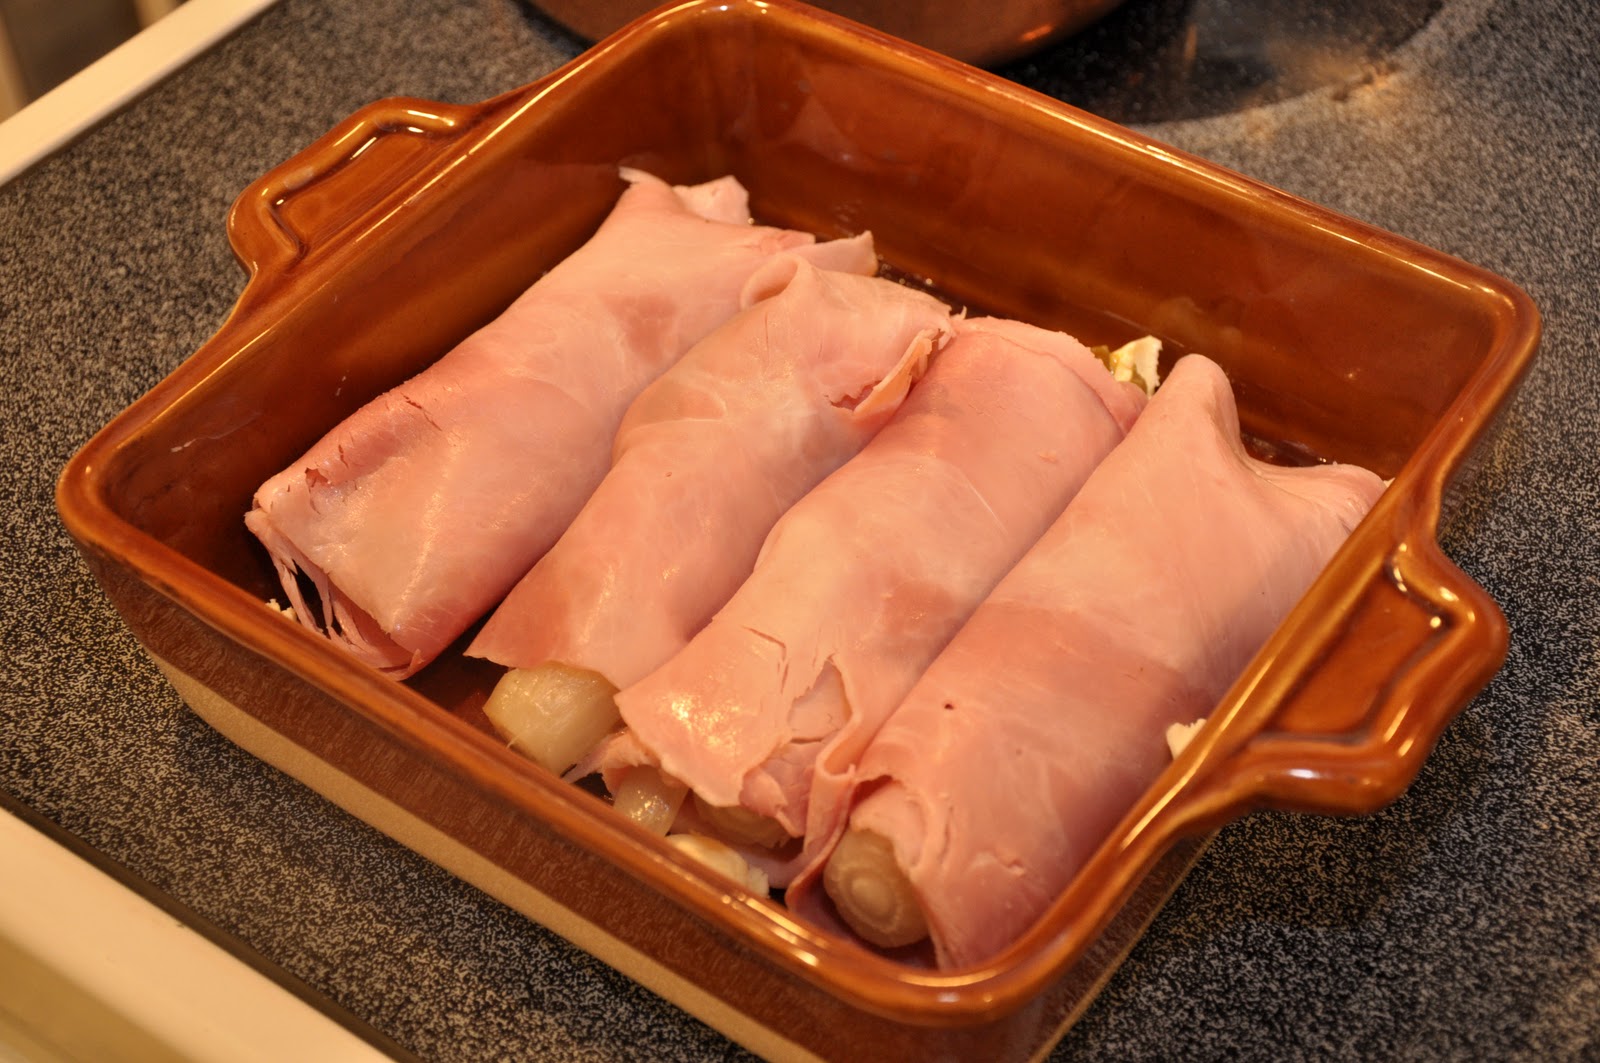
When your endives are well drained, take them one by one, and place them on one of the ham slices, then roll the slice around the endive, covering it completely.


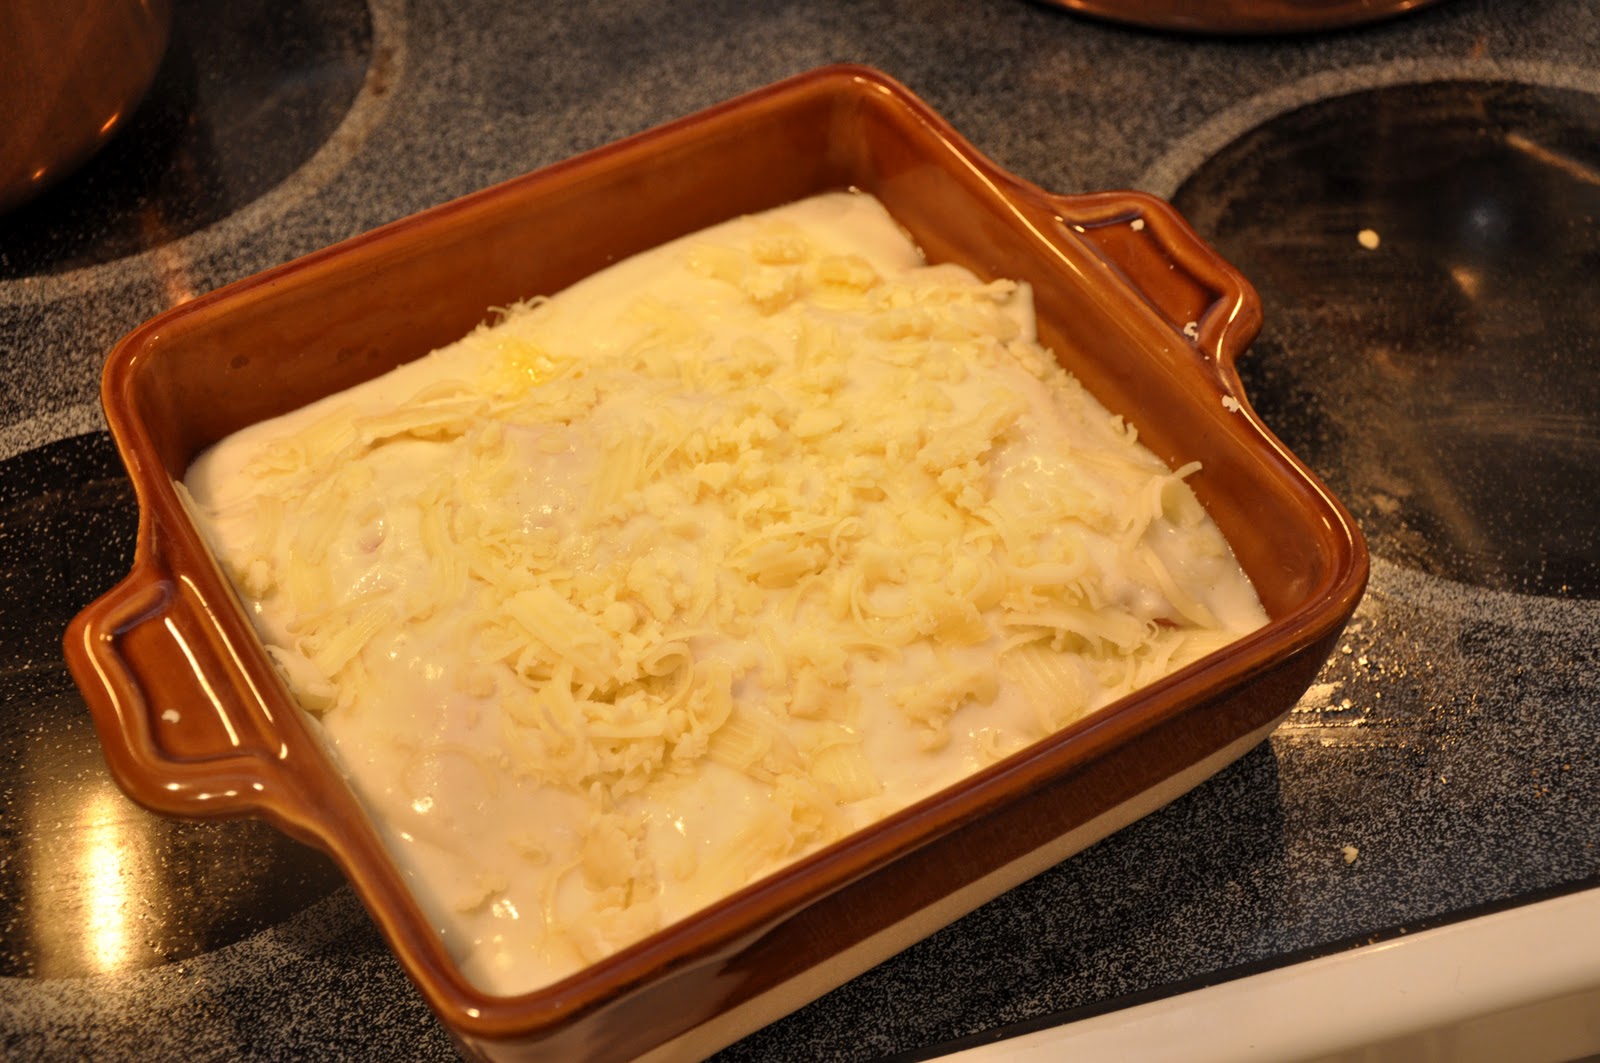
Butter a baking dish just large enough to contain your endives. Arrange them neatly in the dish, then pour over the mornay sauce. Cover the dish with the remaining cheese. Dot the top with some additional bits of butter.


Bake the dish in a hot oven (200C/400F) for about 30 minutes, or until the top is nicely browned and the sauce is bubbling hot. Let the dish cool off for a few minutes before serving.

NOTES: The success of this simple dish will rely heavily on the quality of its ingredients. Besides the endives themselves, which should be fresh, of course, and ideally free of any green leaves, you want to use the best quality ham and cheese you can afford. If you use packaged ham slices and supermarket 'Swiss cheese', you will wind up with something tasty enough but pretty pedestrian. Use real, good ham and true gruyère and you will have something very special indeed.

You can save some time by simply parboiling or, better yet, steaming the endives in lieu of braising. Many if  not most recipes call for it, in fact, and it takes only about 10-15 minutes. But I find that braising in butter makes a subtle but significant difference in taste and texture. And, not to nag, but  let me repeat: draining the endives any excess liquid is perhaps the single most important 'trick' to success, so don't forget!

This dish can be served on its own as a hefty starter. As a main course, it is often accompanied by potatoes, being Belgian, some pommes frites would be an obvious choice, although I find they go very nicely with either mashed or even just plain steamed potatoes which are delicious dipped in that mornay sauce....

Sunday, October 24, 2010

Tortelli di zucca


One of the nicest parts of this, my favorite season, is the arrival of wonderful Fall produce: mushrooms, endive, chestnuts, cabbage, radicchio… but for me no other vegetable is as typical of the season as hard squashes. They are sometimes called 'winter squashes' but they start appearing in the early Autumn and are a fixture of our October table.

Italy does not have the variety of winter squashes that we have here in North America—squashes are a New World plant, after all—but Italy may have the most delicious of them all, the wonderful zucca barucca. As I've mentioned before, the zucca looks for all the world like your average pumpkin, but its flesh is much less stringy and has a much more intense, sweet flavor than any pumpkin I've had on this side of the pond. Most stateside recipes call for butternut squash as a substitute, but that, too, lacks the intensity of zucca. For risotto, I usually find that baby sweet potatoes have a remarkably similar taste to zucca, even if their texture is a bit grainier. And today I tried another gambit—those smaller 'pie' pumpkins—for making one of the most popular stuffed pastas, tortelli di zucca, or 'pumpkin ravioli'.

You make tortelli di zucca just like ravioli (although they can vary in shape—see below) but the stuffing changes the whole character of the dish. Here is how you make the stuffing:


Ingredients (for 4 servings):


One 'pie' pumpkin or butternut squash, about 500g (or 1 lb.)
 
50-100g (2-4 oz.) amaretti cookies, finely crumbled 
50-100g (2-4 oz.) grated parmesan cheese 
50-100g (2-4 oz.)  mostarda (pears and apples only) 
Nutmeg, salt and pepper, q.b. 
Breadcrumbs (if needed)

Directions:


Cut open your pie pumpkin, cut it into large wedges and clean out the seeds and fibers with a spoon. Roast your pumpkin wedges in a moderate oven (180C, 350F) for about 45 minutes, or until the flesh is quite tender when pricked with a fork. (It's fine if the pumpkin browns a bit around the edges but you do not want a lot of caramelization.) Let the pumpkin cool, turning it over to allow any excess liquid to drain out. (If the pumpkin pieces seem watery still, you can wrap them in cheesecloth and squeeze them dry.) Scrape out the cooked flesh, leaving the skin behind, into a food processor.


Now add the amaretti, parmesan and mostarda, and process them until you have a perfectly smooth, stiff paste. You will note that the measurements are left pretty loose, and you will find that kind of variety among the many recipes for this dish. If you don't have real Italian zucca on hand, I would tend to go for more rather than less to make up for the blander taste of the vegetable. Do make sure each of these three main flavoring ingredients are added in balanced amounts. The thing that makes this filling unique is its harmonious combination of contrasting flavors: the sweet-bitterness of the amaretti, the savoriness of the cheese and spiciness of the mostarda, which marry so well with the natural sweetness of the squash. Season the mixture generously with freshly grated nutmeg, fresh ground pepper and salt.


Taste and adjust for seasoning. If the stuffing mixture is a bit soft or wet, mix in some breadcrumbs, a bit at a time, until the stuffing is stiff and rather dry.


*                *                 *

Now it's time to make your egg pasta, in the usual manner. (See this post on making fresh pasta.) Roll the pasta out rather thinly (setting 6—or even thinner if you want—on a pasta roller) since you will be folding the pasta into a double thickness, into long, rather slender sheets.  
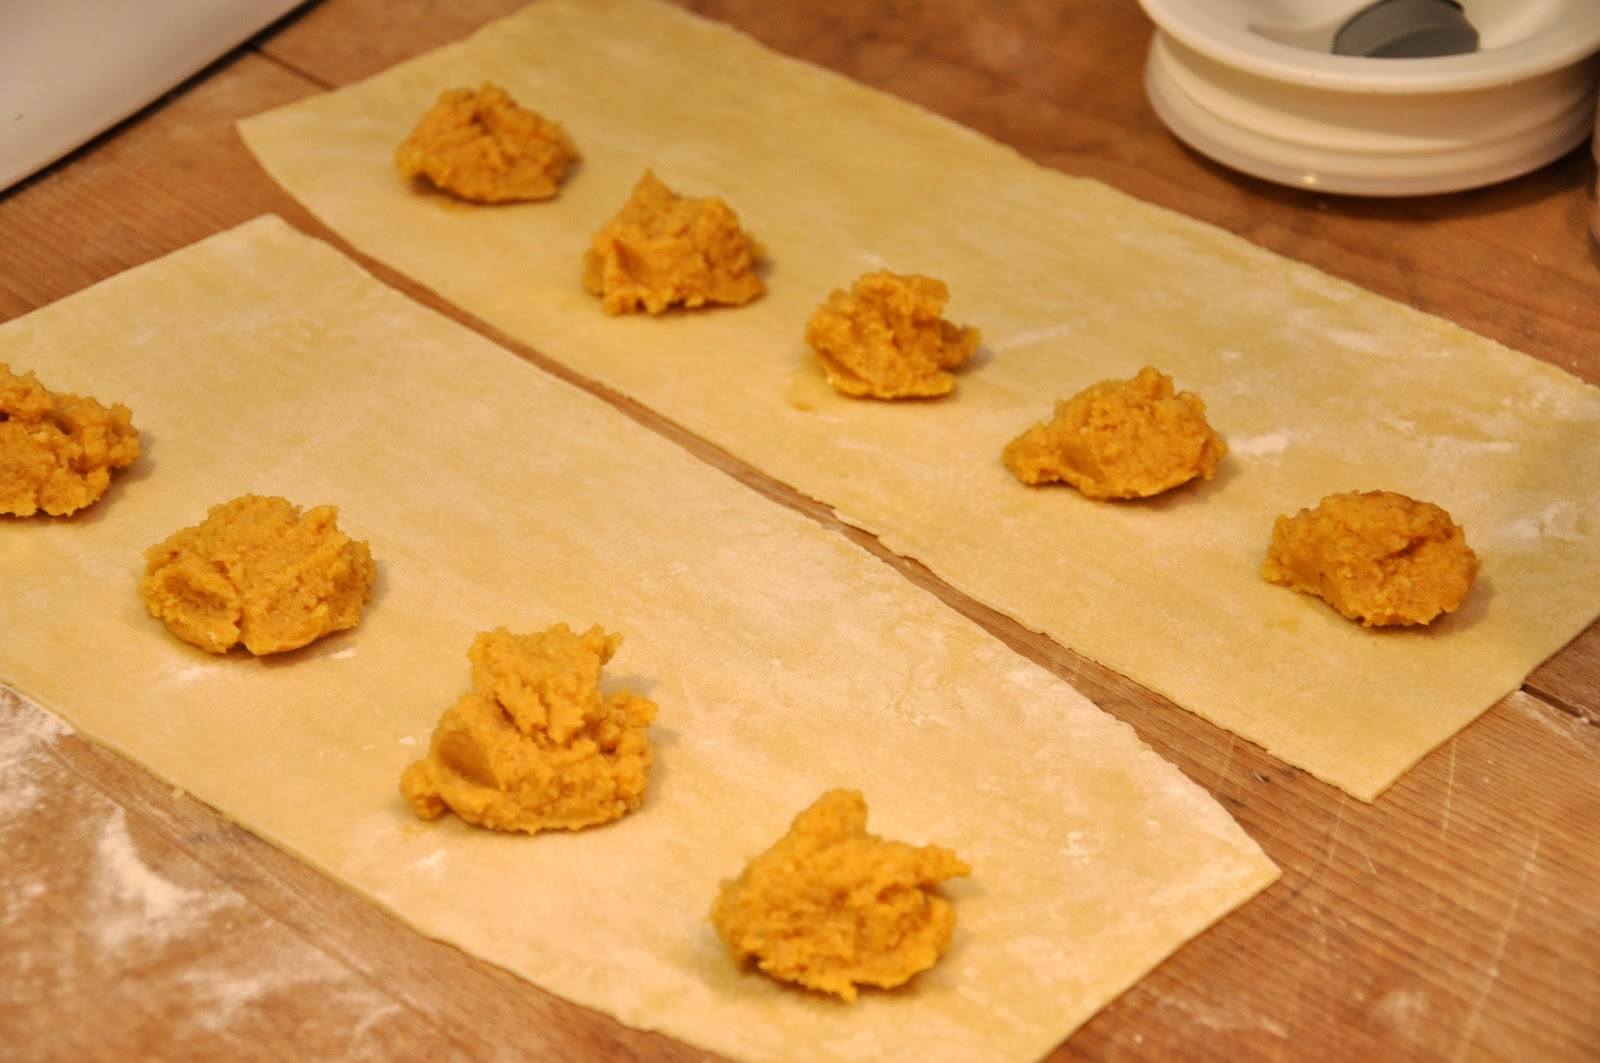
Place heaping teaspoonfuls of the stuffing about 5 cm (2 in.) apart along the length of your pasta sheet, just off center down the middle of the sheet.


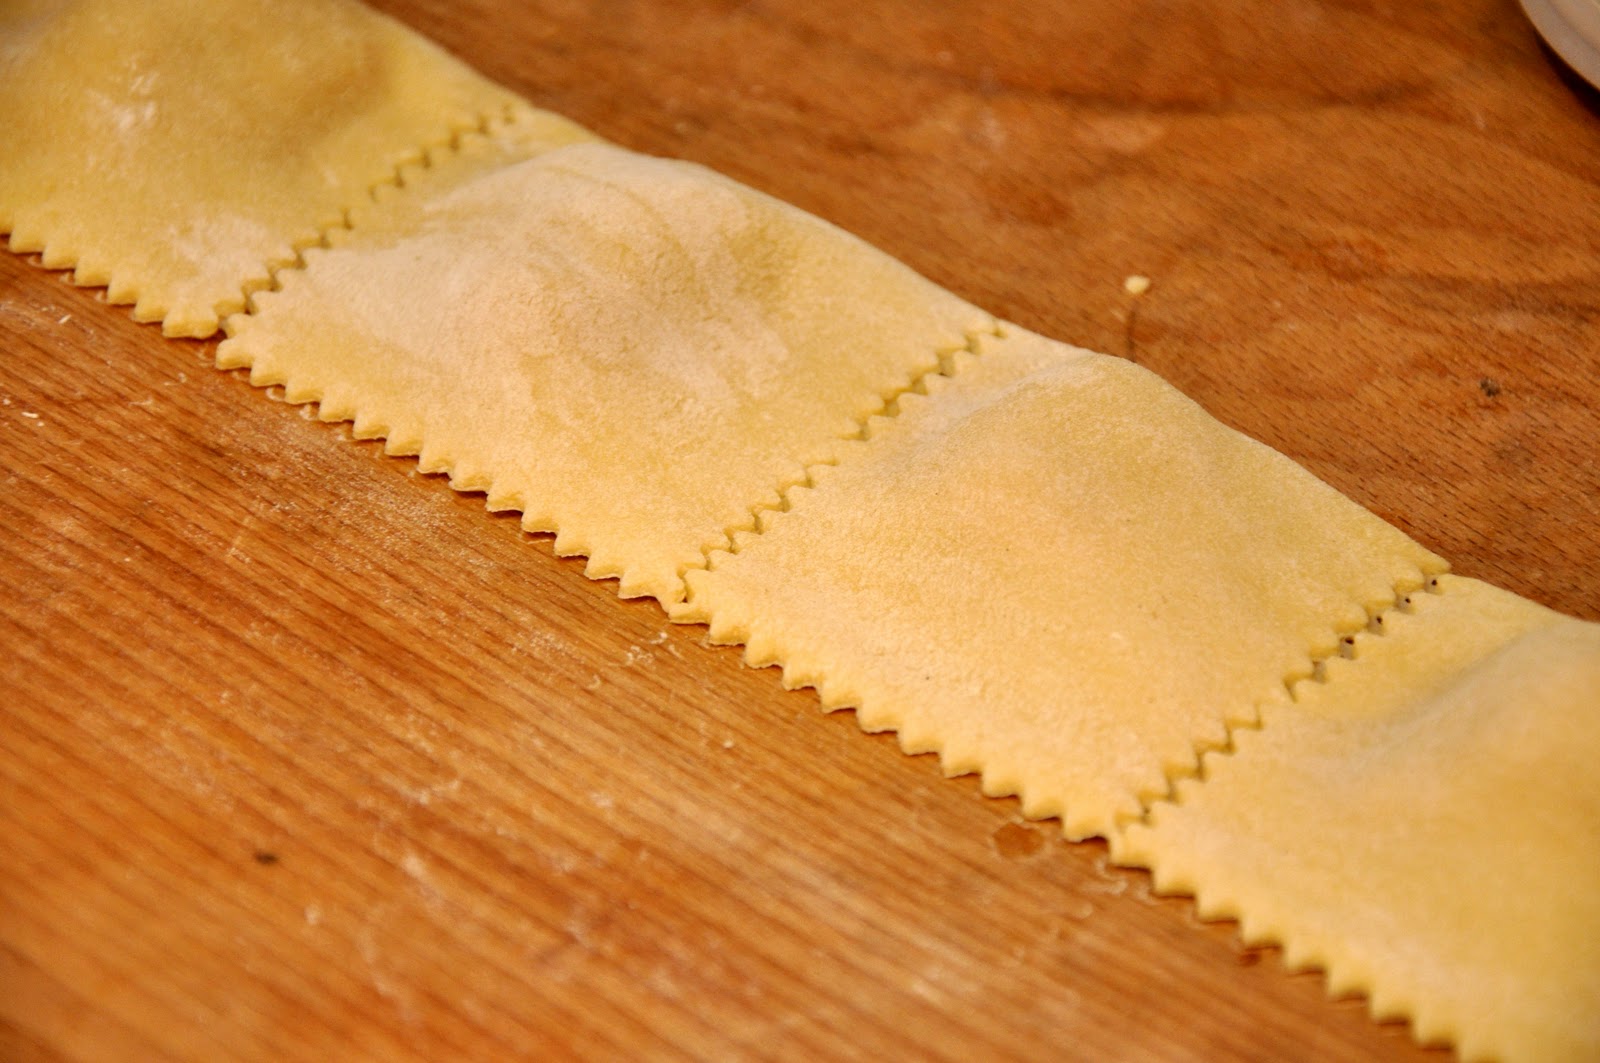
Fold the longer half of the sheet over the stuffing, pressing down with your fingers all around the stuffing to seal the top and bottom layers of pasta together. With a serrated pasta cutter (if you have one, otherwise it's fine to simply use a knife) cut out your tortelli along the three unfolded sides:


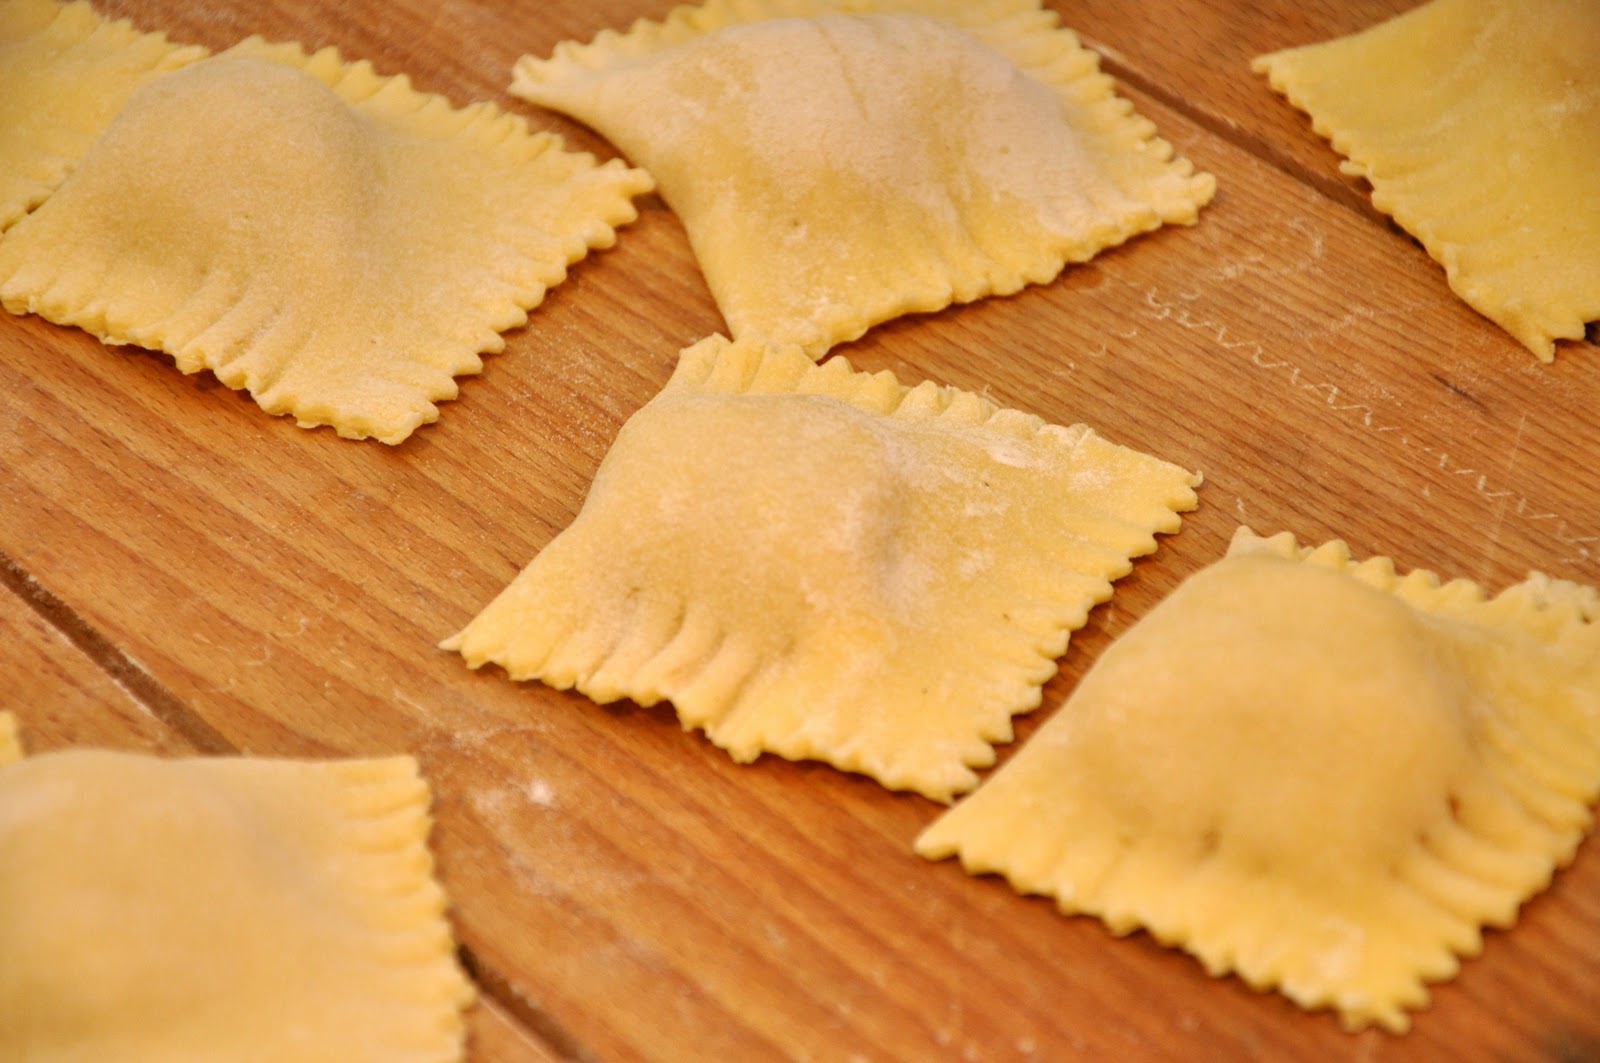
For the final touch, you can ensure a tight seal while making your tortelli ever so pretty by pressing down the edges with the prongs of a fork like so:

 
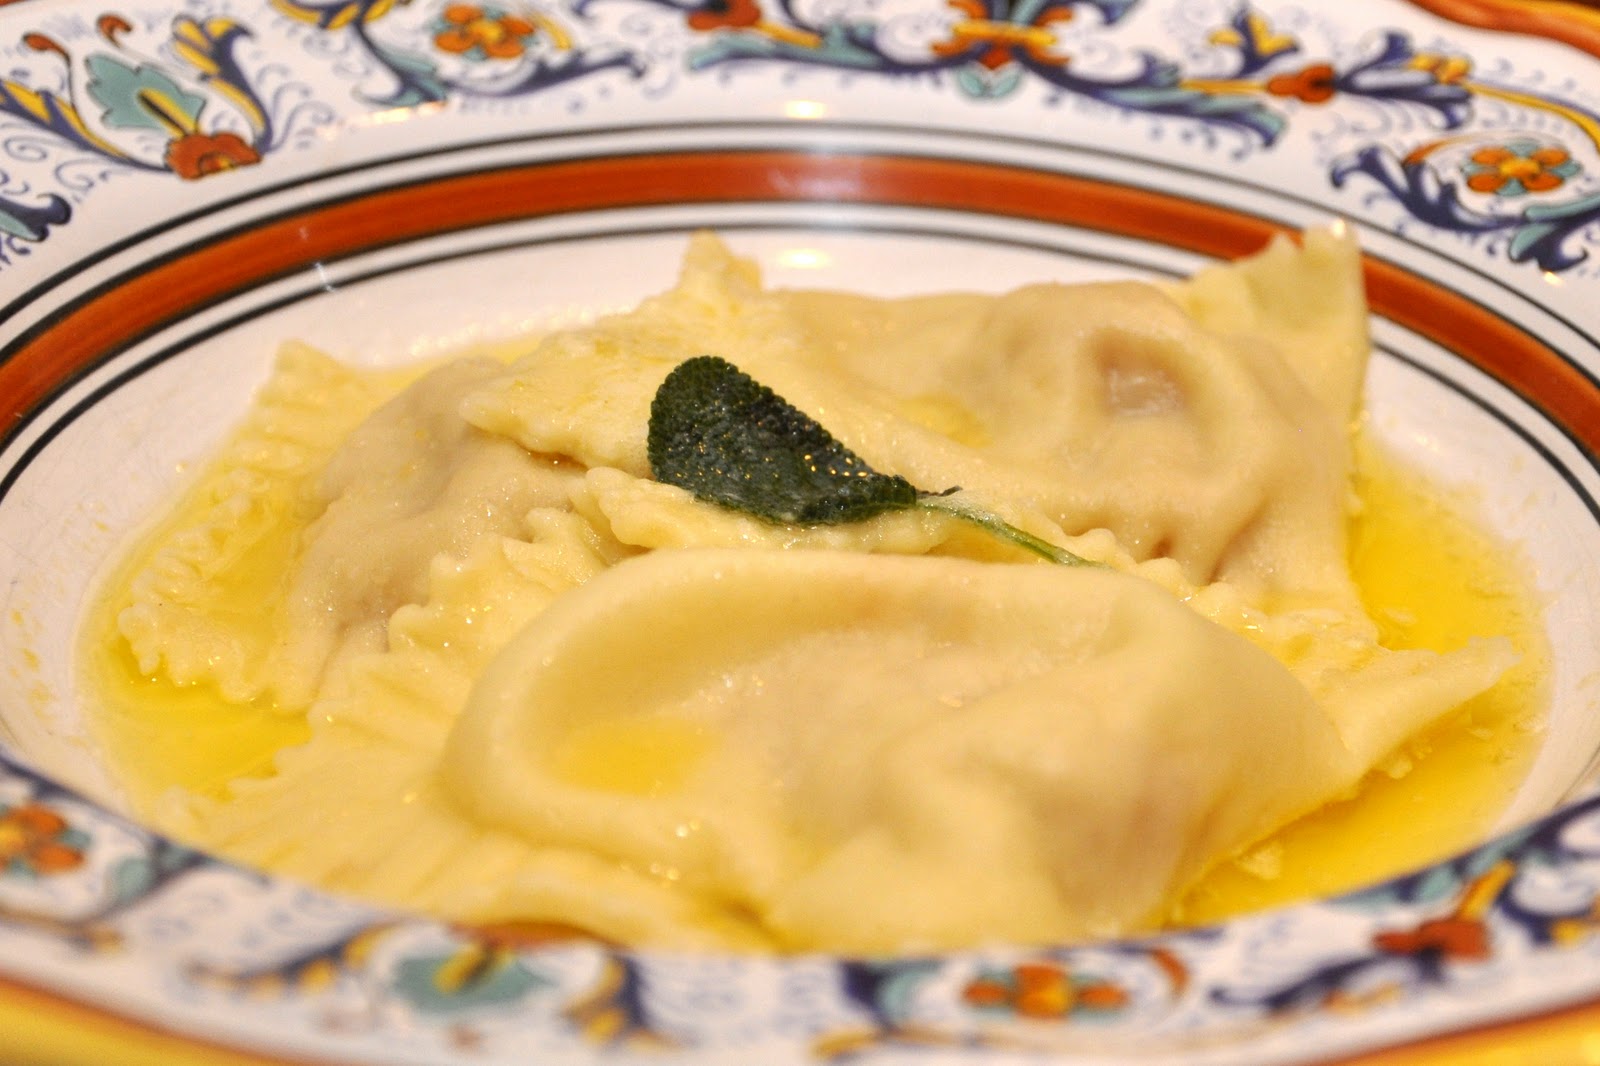
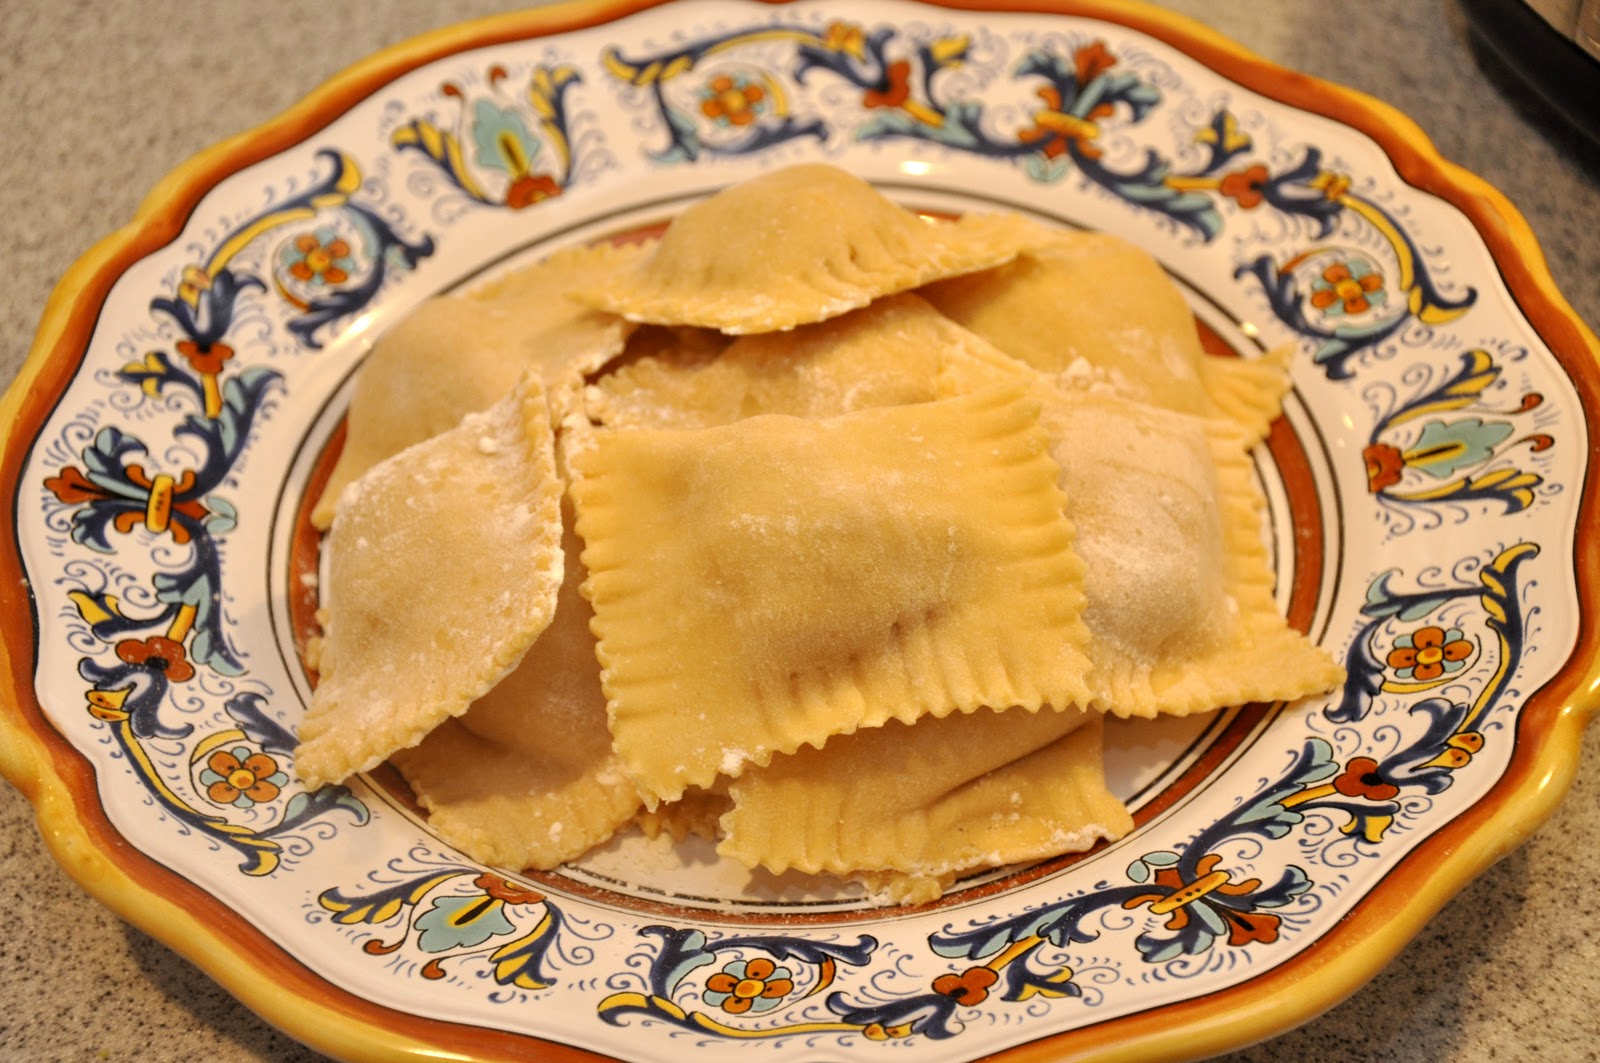
You should cook your tortelli for a good 5-7 minutes, depending on the thickeness of the dough. They take a bit longer than fresh pasta usually does, because of the double thickness of the pasta and the filling. While the tortelli are cooking, gently melt lots of butter in a small saucepan, adding a sprig of fresh sage if you like to steep along with the butter. (I have read that the sage is not original to the dish, but I like it.) Serve immediately, topped with the melted butter and—if you like—more grated parmesan on top.


NOTES: This dish comes from the region of Emilia-Romagna, and more specifically from  the city of Mantova, often called "Mantua" in English. For this reason, they are also sometimes called tortelli mantovani. But similar versions are made in the near-by towns of Parma, Reggio-Emilia, Piacenza and Cremona. In Ferrara they also make this stuffing but without the amaretti cookies. Speaking of which, it can be hard to find amaretti, which are a kind of almond macaroon—not the ubiquitous almond biscotti. If you can't find amaretti, then substitute an equal amount by weight of unflavored breadcrumbs, with a few drops of almond extract if you like.


And then there is the mostarda. Don't let the name fool you: it is not mustard at all, but a chutney-like relish typical of the cuisine of Emilia-Romagna. It is perhaps best known as an accompaniment to bollito misto, but it makes its appearance here as a flavoring. Mostarda has a unique flavor, both sweet and spicy. It is basically fruits that are candied in sugar syrup spiced with (hence the name) mustard seeds. There are various types of mostarda made in the region, but the most famous, by far, is mostarda di Cremona. If you're feeling ambitious, you can actually make it at home. (Here's the recipe.) You can also buy it in many of the finer Italian specialty shops—if they don't have it, give them a proper scolding for having neglected one of the most typical products in Italian cookery. Or you can buy it online. Mostarda di cremona contains a variety of fruits—pears, quinces, cherries, apricots, peaches, figs, but for this dish you really want another mostarda—the one from Mantova, which is made with pears or apples only. So if not making your own mostarda, just pick out the pears from the jar and use them.


Now if you can't find mostarda and don't feel up to making it yourself, you can omit it, as  you will find in most recipes for 'pumpkin ravioli'. But I would urge you to try to find it—it lends a very special, unusual taste to the dish.


You can also dress your tortelli di zucca, if you like, with a more elaborate sauce. Personally I don't think that the pumpkin stuffing goes particularly well with tomato-based sauces, but some wild mushrooms sautéed in butter with pancetta, for example, would be delightful.


The term 'tortelli' is one of the most confusing in the lexicon of pasta shapes. It can be another word for ravioli, but can also be rounded, or rounded and twisted as for a larger version of tortellini. And you will sometimes find tortelli di zucca in these shapes as well. And in Ferrara, they make cappellacci di zucca, made with a very similar stuffing (without the amaretti, as mentioned above). The pasta is cut into squares but then the two corners are joined to form a little 'hat' (hence the name, which comes from cappello, Italian for hat, since the shape was said to resemble the straw hats that local peasants used to wear.


The pie pumpkins, by the way, worked very well for this dish. True, they did not have the intensity of zucca, but their texture was perfect and, with all the added flavorings, the stuffing was perfectly delicious.  And if you have some leftover stuffing but don't feel like making another batch of pasta, you can use the stuffing to make a fine version of risotto alla zucca. 


By the way, don't throw away those pumpkin seeds! They are wonderful roasted in a slow oven with just a few drops of oil or melted butter until lightly brown (about 30-45 minutes) and seasoned with some sea salt. Or, for something a bit fancier, try out these two wonderful recipes by my fellow foodie, "Cookin' Canuck".

Saturday, October 16, 2010

Catfish «en meurette»


The term «en meurette» refers to a dish that has been braised in a particularly delicious red wine sauce from the Burgundy region of France. Probably the best known of these dishes is oeufs en meurette, made from poached eggs. But even tastier, in my opinion, is fish made this way. The firm-fleshed monkfish (lotte in French) lends itself to braising and is wonderful en meurette. Carp and other firm-fleshed river fish are typical, so in the US a natural choice would be the humble catfish. It may be suprising to pair catfish with a 'classy' French sauce but I assure you, gentle reader, that the pairing results in some fine eating.


Begin by pouring a bottle of red wine into a saucepan and adding a sliced carrot, a sliced onion, a crushed garlic clove, a chopped shallot and some fresh herbs—some parsley, a spring of thyme and a bay leaf—then season with a pinch of salt and some whole peppercorns. Simmer briskly until the wine is reduced by half. Strain the reduction through a sieve into another saucepan, then thin out the sauce with some good stock. Bring back to a simmer and then thicken the sauce with some beurre manié, about two tablespoons of flour and butter rubbed together to make a paste. You can add some more if you feel the sauce is too thin, but remember that the sauce will reduce further during the next step and you only want to give the sauce to be nice and silky, not at all stodgy.


While your wine is reducing, make the garnish for the fish by sautéing in butter or oil a goodly chunk of slab bacon or pancetta, cut into lardons, until well browned but not crisp. Set aside and, in the same skillet, sauté some button mushrooms that you have cut into quarters until they, too, are nicely softened and browned.


Now assemble your dish: butter a braiser just large enough to hold all the ingredients and lay out your catfish fillets—one large fillet is enough for two people—cut into serving pieces. Then arrange the mushrooms and lardons on top and around the fish pieces. Pour over your red wine sauce, enough to just cover them. Then bring the dish to a simmer and let it cook gently until the fish is done, about 10-15 minutes depending on the size of the pieces (and the fish—monkfish should braise for much longer). If you like, just before serving you can sprinkle the fish with some chopped parsley or, even better, a persillade—parsley and garlic finely chopped together.


NOTES: As usual, I've been vague about the measurements, and they really don't matter all that much. You can really use as much or as little garnish as you like—many recipes omit the garnish altogether, but I find that it makes the dish more interesting and tasty. The same goes for the sauce itself, but most recipes for 4-6 people will, as indicated above, call for an entire bottle of red wine.


The choice of wine will, of course, strongly influence the character of the dish. This being a dish from Burgundy, the logical choice would be a red from that region, but last night I used a Spanish tempranillo with lovely results. Some recipes (including those given in the Larousse Gastronomique) also call for adding a splash of Burgundy marc.


Not all recipes have you make the wine reduction separately as indicated in this recipe—you can also add the wine and aromatics to the main ingredient and let it reduce as they simmer together, thickening the dish at the very end. With this method, the aromatics are left in the dish. But I find that making the sauce separately gives you more control over the result and, since I like to use a bacon and mushroom garnish, I like to take out the aromatics after they've given up their flavor into the dish.


As mentioned at the start, you can use the same red wine sauce to nap poached eggs or, for a more rustic effect, poach eggs directly in the sauce. Other ingredients can be made en meurette, including mild meats like calf's brains, chicken, rabbit or veal, in which case you usually lightly brown the meat before simmering it with the sauce and any garnish you might like.


Dishes en meurette are often served with fried croutons. I find that they also go well with steamed baby potatoes or buttered noodles.

Friday, October 8, 2010

Coniglio alla ligure


Rabbit is another one of those foods that many people seem to feel squeamish about. Perhaps because the live animal is so cute and furry, the thought of eating them strikes people, particularly North Americans, as strange or even disgusting. That's too bad, because rabbit is actually one of the most delicious of meats, much like chicken but a bit firmer fleshed and more flavorful than most chicken you will find these days.


Rabbit can be used to make just about any chicken dish (and vice versa) but there are any number of recipes specifically for rabbit (and its wild cousin the hare) in Italian cookery. We have already featured coniglio alla cacciatora, or hunter's rabbit, the original Tuscan dish that morphed into 'Chicken Cacciatore' when it crossed the Atlantic, and here is an equally tasty spezzatino from Liguria, the region of Italy that encompasses the 'Italian Riviera':


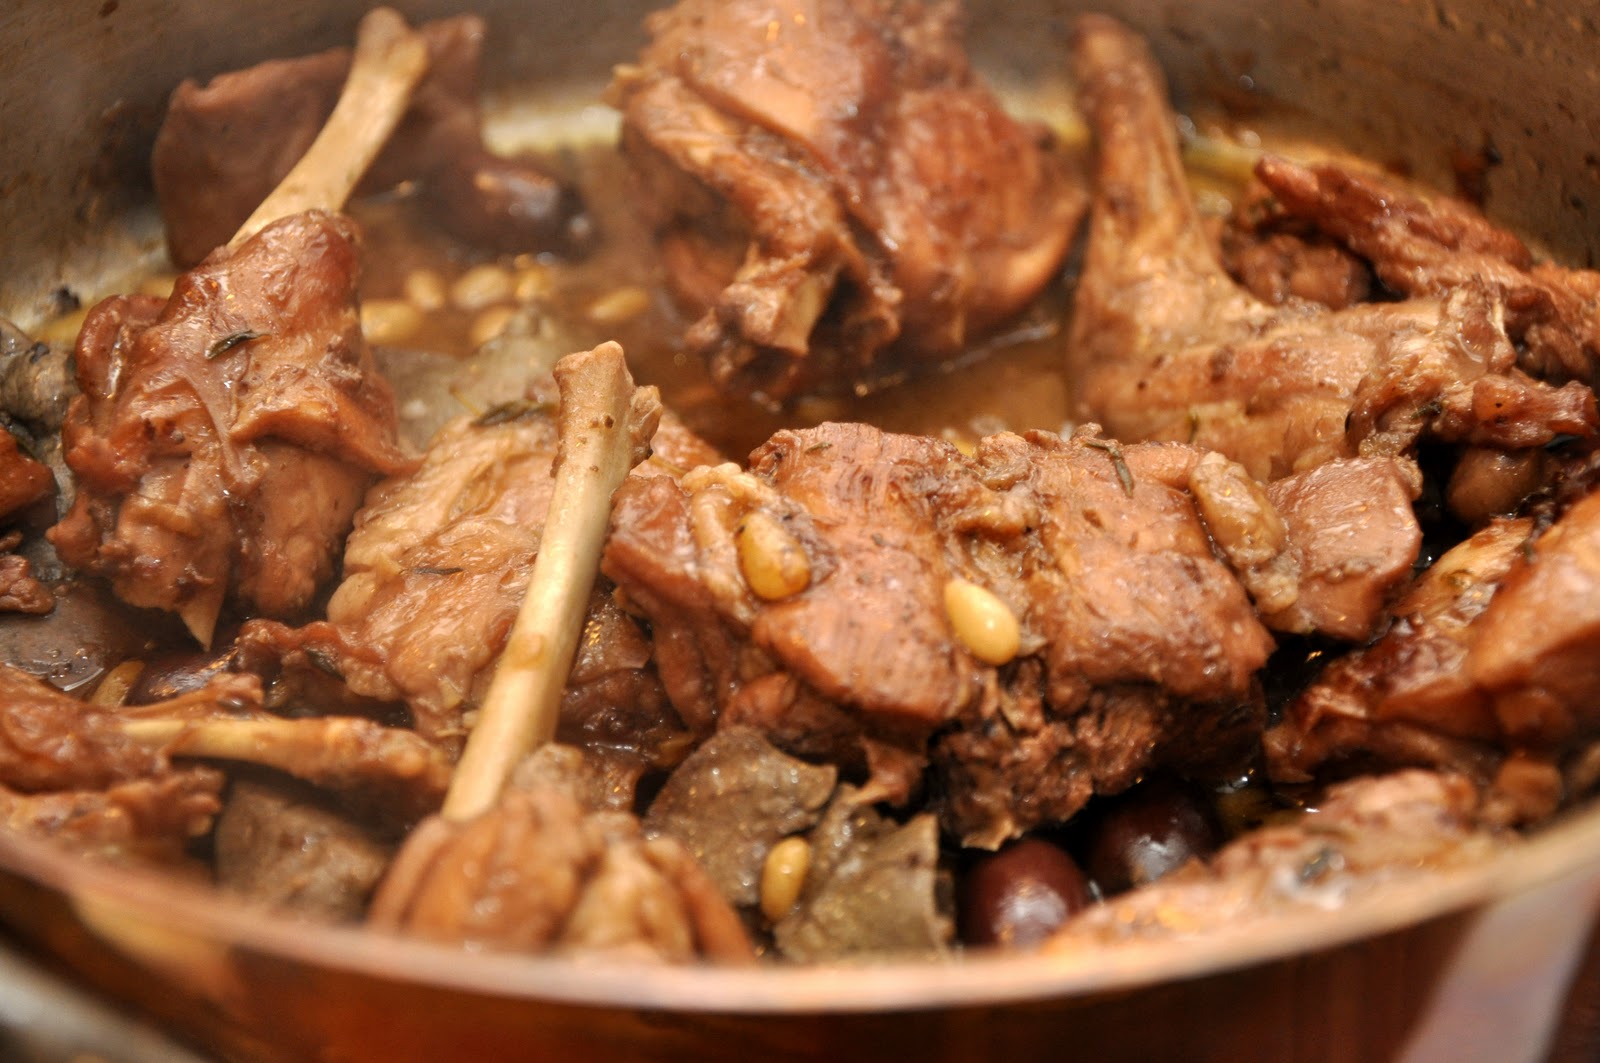
Make a soffritto of onion and a bit of garlic, gently sautéed in olive oil. Add your rabbit, cut it up into serving pieces. (See this post for instructions.) Allow the rabbit pieces to brown lightly in the soffritto and absorb the flavors of the onion and garlic. Season well with salt and pepper. Then pour in a good splash of red wine, and turn the pieces around so they are all covered well. Add a bay leaf, a sprig of fresh rosemary and a sprig of fresh marjoram (or thyme) and cover the dish, turning down and regulating the heat so that the dish simmers gently. Allow the rabbit to braise in the wine for 45 minutes to an hour, turning from time to time and adding some water or broth as needed to keep things moist but not soupy, making sure that there is enough liquid at the end to make a nice sauce. About halfway through, add a handful of black olives and another handful of pinoli nuts. Serve immediately, napping the rabbit pieces with the exquisite sauce. I find that this dish goes particularly well with steamed or mashed potatoes.


NOTES: You may surprised at the rather long simmering process. The rabbit will often be 'done' in as little as 20-30 minutes, but if you cook it longer, you will find that the meat will be much tastier, having fully absorbed the flavorings, and more tender. The typical olives are small, blacks ones called olive taggiasche in Italian, grown along the Ligurian Riviera and used to make the fine, light Ligurian olive oil. They are very similar to the niçoise olives, which can used as a substitute, as can any similar black olive like the Gaeta variety. The wine should ideally also be Ligurian but any medium to light bodied red will do fine. If your rabbit comes with liver and kidneys, as they often do, you can cut them up and add them about halfway through the cooking process, along with the olives and pinoli nuts. Some recipes add celery to the soffritto.

And if you cannot bring yourself to eat rabbit, a cut-up whole chicken can be prepared in just the same way and is almost as delicious.


 The dish is also called coniglio alla sanremese, after San Remo, of course, site of the famous music festival, on the coast very close to the French border. Started in 1951, it is still an annual ritual that is almost mandatory TV viewing in Italy. Perhaps the closest thing in the US would be the Superbowl, except it appeals equally to both women and men. The festival launched the careers of several famous Italian singers, including Andrea Bocelli, Laura Pausini and Eros Ramazzoti, but it is meant as a composition for composers, not singers, and features original songs. The festival has attracted the participation of some well known non-Italian singers, including Stevie Wonder, José Feliciano, Roberto Carlos, Dionne Warwick, Petula Clark and Connie Francis.

Wednesday, February 24, 2010

Funghi trifolati


This is one of the easiest and most versatile vegetable dishes in the Italian repertoire: funghi trifolati, or 'truffled' mushooms, so called because the thinly sliced and sautéed mushrooms are said to resemble that other, more highly prized tuber. I use two methods to make funghi trifolati, and both are equally easy:

Using the traditional recipe (pictured above), you thinly slice your mushrooms, then sauté them over a lively flame in olive oil and a clove of garlic. (If you want a little heat, you can add a peperoncino or some red pepper flakes.) Sprinkle the mushroom slices with a pinch of salt right away—this will cause the mushroom to exude its juices. In just a few minutes, the juices will evaporate and you will begin to hear the mushrooms start to sizzle and lightly brown. Once that happens, add some finely chopped parsley and, if you like, freshly ground pepper, and serve. 

I also like to use a more 'refined' variation: you sauté the mushroom slices in a mixture of olive oil and butter (omitting the garlic) and when you get to the sizzling stage, add finely chopped shallot and parsley. Sauté a minute or two further to cook the shallot and serve. 

NOTES: In Italy, the typical mushroom for this dish would be porcini. But I find these methods work with every kind of mushroom I've tried. Even the rather wan 'button' mushrooms seems to develop some lovely flavor when made this way. If using garlic, you can add it slightly crushed, chopped or still in its jacket, depending on the result you are looking for: chopping will give you the most assertive garlic flavor (but be careful to avoid burning the garlic); leaving the jacket, of course, produces the most subtle effect (just remember to remove the garlic before serving); personally, I like the 'middle way' of using a peeled and slightly crushed garlic clove (which, by the way, I don't remove unless company is coming).

Some recipes call for covering the pan and braising the mushrooms in some liquid (eg, white wine) for 15 minutes or more after an initial sauté over gentle rather than lively heat, but I prefer the methods mentioned here. The mushrooms are perfectly tender after an initial sauté over high heat, and indeed tend to become mushy if you let them cook too long. 

Funghi trifolati, in either version, makes for a great Fall or Winter contorno with just about any meat dish. It can also be added to stews, fricasées and sautés. (It's particularly nice with sautéed chicken.) 

 
With a little additional oil or butter, funghi trifolati make a wonderful sauce for pasta or gnocchi or even polenta, just by itself (see this post on strozzapreti ai funghi and the photo of linguine ai funghi above) or in combination with tomatoes (see this post on penne ai funghi) or, particularly in the 'refined' version, with the addition of broth and/or cream that you then reduce down to a nice saucy consistency (see this post on gnocchi ai funghi). The latter mushroom cream sauce is wonderful with meat also, as in this post on gratinéed ox tongue. 

It's really up to you—this dish is a starting point for all sorts of creativity in the kitchen.

Thursday, February 11, 2010

Gnocchi al gorgonzola

 
It's Thursday, and the Romans out there will know that Thursdays in Rome (and perhaps in the rest of Italy, I'm not entirely sure…) is gnocchi day: giovedi' gnocchi as the saying goes. Today's offering is gnocchi with gorgonzola sauce. This incredibly rich and unctuous dish is made by melting butter with cream and letting it reduce until it gets to a saucy consistency. You then lower the heat and add a good hunk of crumbled gorgonzola cheese, allow it to melt, then add your just-cooked gnocchi (for home-made gnocchi, see recipe here) and let them simmer a bit to absorb a bit of the flavor, add a generous amount of grated parmesan cheese, mix and serve immediately. It's that simple--if using store-bought gnocchi, the dish takes about 10 minutes to make.

For me, creaminess is the essence of gnocchi al gorgonzola, so when I make it, I like to 'drown' the gnocchi in lots of sauce. It's a personal preference, not one that is necessary 'doc'. The resulting dish, needless to say, is very rich, so a little bit goes a long way. It is so substantial, in fact, that it can serve as a piatto unico followed by a green salad and a piece of fruit.
 
NOTES: Although the recipe is simplicity itself, there are a few pointers to bear in mind. Gorgonzola comes in two varieties: gorgonzola piccante, which is aged longer, resulting in a firmer texture and sharper taste, and gorgonzola dolce which is young, creamy and quite mild in flavor. You want the dolce version for this dish if you can find it. (For some reason, it is much easier to find the piccante here in the US, just the opposite of the case in Italy.) For tonight's dinner, however, I couldn't find the 'right' kind so I settled for piccante--not quite as unctuous but it the taste was perfectly acceptable. You could experiment with other kinds of blue cheeses as well; I've never tried it myself but I suspect that a semi-soft cheese like morbier (removing the rind, of course) would be quite nice.

In Italy, there are two kinds of cream sold: panna per cucinare (meaning 'cooking cream') and panna da montare ('whipping cream'). The former is used, as the name suggests, in cooked dished that call for cream. It is quite thick and if you're using it for this dish, there's no need for the initial reduction mentioned above. Heavy cream sold in the States has the same texture as panna da montare. I have never seen 'cooking cream' here.
 
As with many well-known dishes, there are lots of variations on the basic recipe. For a bit of color, try adding chopped parsley or chives along with the parmesan at the very end. Gorgonzola goes very well with both walnuts and radicchio, so you can add either (or both, I suppose) to the sauce. The radicchio you would shred and saute in the butter at the outset before adding the cream. The walnuts you would chop finely and along with the gorgonzola after the cream has reduced. And a good grinding of freshly ground pepper, at the very end, makes for an 'earthier' dish. I have seen more 'creative' variations, like adding pears (another classic pairing with gorgonzola) or--believe it or not--saffron. I haven't tried either of these, nor frankly am I particularly tempted to do so.

You can also use this sauce with pasta, preferably a 'stubby' pasta like rigatoni or penne. (I suspect that long pasta like spaghetti would tend to stick together and make for something rather gluey rather than creamy.) And, if you like, you can dot the finished dish with butter and run it under the broiler until lightly browned on top. In this case, you can substitute béchamel for the cream if you like. (This treatment works with pasta. I've never seen gnocchi made this way, but I suppose you could try it.)


One final thought: Italian cooking, as you may know, is very seasonal. You could make this dish any time of year, but I associate this kind of thing with cooler weather, when you crave its rich, stick-to-the-ribs quality. It would be overwhelming in warm or hot weather.For those who are in summer right now, you'd probably prefer to have something a bit lighter like gnocchi with pesto instead.

Tuesday, February 9, 2010

Zuppa di orzo


Italian cuisine is known for pasta and risotto and polenta and, to a lesser extent, for farro. But did you know that Italians also enjoy barley? Here is a simple, basic barley soup that is both healthy, appetizing and, if made in a pressure cooker, can be prepared in under 30 minutes.

Begin by sautéing a soffritto of onion, carrot, celery and, if you like, a little pancetta in olive oil, taking care not to let them brown. When the vegetables have softened, add your barley (50g /2 oz. per person is a good portion as a first course). Allow the barley to insaporire as you would for a risotto, then add water or broth to cover generously, at least 1 liter (4 cups) of liquid per 100g (4 oz.) of barley. (NB: Barley absorbs a lot of liquid as it cooks.) Simmer covered for 45 minutes or until tender, stirring from time to time and adding water or broth as needed. The result should be a very thick soup, almost a porridge, but not entirely dry. Serve immediately, topped with un filo d'olio. Have some grated cheese on the side for those who like it.

If using a pressure cooker, bring up to pressure, lower the heat to a minimum and cook for 15 minutes, then release the pressure. When you open the cooker, check for liquid: if it has been entirely absorbed, add more water or broth and let simmer for a few minutes more. If there is too much liquid (less likely, given barley's aborptive qualities) then just let is simmer until you have reached the proper consistency.

NOTES: This is the very basic 'mother' recipe for barley soup. There are lots of variations you can try, including the use of fresh herbs of your choice in the soffritto—parsley, rosemary and sage are particularly nice. Some recipes call for the addition of other vegetables, perhaps most commonly potato or pumpkin but also with leafy winter vegetables like kale or cabbage. Beans of all kinds—cannellini, borlotti, ceci, lentils, even peas—are also a very common addition, and turn this primo into a perfectly rounded piatto unico.
Beef broth, of course, is probably the best choice for making this soup, but it is perfectly lovely with vegetable broth or even just water. Chicken broth, on the other hand, while a possible choice, in my opinion does not really pair very well with barley. Some recipes call for soaking barley for a few hours before cooking to soften it. I find this step entirely unnecessary, at least with the barley that is sold commercially here in the US.

For this particular soup, instead of pancetta, I used a ham bone that I had left over (believe it or not!) from Christmas dinner. It gave a wonderful porky flavor to the soup. If using a ham bone, fish it out of the soup before serving and scrape off any meat. But the meat up into small pieces and add it to the soup.
Besides this stick-to-the-ribs winter soup, orzo also appears on Italian tables in the warmer months as a salad. It's quite a versatile grains!

Orzo, by the way, is also the name of a popular soup pasta, so be careful if Googling for recipes.


Saturday, February 6, 2010

Coniglio alla cacciatora


Rabbit is a wonderful meat, leaner but yet tastier than most chicken you'll find in these days of industrial agriculture. Many people (at least in the US) have an aversion to eating rabbit, but it is quite popular in Italy, Spain, France and elsewhere in Europe. And why not? Those furry creatures make great eating. 

One of my favorite ways of making rabbit is alla cacciatora, or 'hunter's style'. The term, one of the most widely used in Italian cuisine (and is often associated with Tuscany) encompasses many variations. The original meaning referred to a way of making game, of course. Dishes made alla cacciatora are generally some sort of spezzatino, which is to say, unboned meat cut into smallish pieces that are subjected to dry heat and then moist heat cooking. Vinegar is often used either as part of a marinade or as a braising liquid, as its acidity helps to 'cut' the strong flavor of the game meat. These days, dishes alla cacciatora are, more often than not, made in rosso—with tomato, either puréed or in concentrate, but tomato being a relatively recent addition to Italian cuisine (a fact that astonishes many) the original recipe, lost in the mists of time, surely did not include it. This version does not include vinegar but the smoother taste of red wine, and it contains just a little bit of tomato concentrate. 

You start by cutting up your rabbit. It is done very much like you cut up a chicken, as the bone structure of a rabbit is quite similar. Like a chicken, you start by separating thighs and legs (two sets rather than one) from the carcass. But you will quickly notice a few differences. First of all, rabbit bones, though quite thin, are much harder than chicken bones, so you'll need to strong knife or cleaver to cut through them. And the body of the rabbit is quite a bit longer; it has a mid-section called the 'saddle' rather than a breast, running along its backbone than needs to be cut into sections. For a detailed description of how to cut up a rabbit, see this useful article.

Begin cooking by sautéing a soffritto of finely chopped garlic, rosemary and sage in olive oil, over gentle heat in a large sauté or braising pan or casserole, preferably of terracotta or enameled cast iron. When the soffritto is just lightly golden, raise the heat to medium high, add the rabbit pieces and turn them so that they are even coated with the aromatics. Sauté the rabbit until it, too, is lightly golden on all sides. Then season with salt, black pepper and red pepper flakes. Pour over some red wine and allow the wine to evaporate completely.

Add about 2 tablespoons of best-quality tomato paste in about a cup of water, along with a bay leaf, to the pan. Mix well, lower the heat again to a very gentle simmer, cover the pan and let the rabbit braise for about 20-30 minutes. Add a bit more water if the pot dried out. When the dish is done, the rabbit should be quite tender and the sauce, being quite reduced, should coat the rabbit pieces. Serve hot. 

NOTES: Like most spezzatini, this dish can be made ahead and, in fact, tastes even better when it is. 

As mentioned above, there are many different methods that go by the name alla cacciatora. Perhaps the most common involves chicken and begins with a classic soffritto italiano—made of onion, carrot and celery like a French mirepoix—rather than garlic and herbs and then simmered in tomato sauce. (Here's a typical version demonstrated in a video. Pancetta is sometimes added to the soffritto for extra depth of flavor, a good idea with today's bland chickens. It can be excellent eating if you don't drown the dish in tomato, as if all too often the case. Artusi's version calls for a soffritto of onion only, sautéed in lard and simmered in red wine and just a half cup of tomato. There is a wonderful baby lamb dish made with a paste made out of garlic, rosemary and anchovies diluted with a bit of vinegar. 

Rabbit is a great meat. Besides making it alla cacciatora, it is also lovely simply roasted or grilled with garlic and herbs, boned and stuffed, as part of a bollito misto, or in any number of spezzatini. In fact, just about any chicken recipe can be used for rabbit. Rabbit can be hard to find, but if you have access to an Italian butcher, ask for it. I have also seen rabbit in some Asian supermarkets here in the States.

This recipe is an adaption of the recipe for pollo alla cacciatora in The Fine Art of Italian Cooking by G. Bugialli.

Friday, January 1, 2010

Cotechino con lenticchie


No Italian New Year's celebration would be complete without this dish of a delicious pork sausage served with lentils. New Year's Eve for Italians—like so many other holidays—is marked by a large, festive meal, often an elegant seafood dinner, called the cenone di San Silvestro or cenone di Capodanno, the word 'cenone' being Italian for 'big supper'. Midnight, however, is the time to break out this hearty dish, as Italian custom has it that if you start the New Year by eating coin-shaped lentils, it will bring you prosperity. And the more lentils you eat, the richer you will be—or, at least, that is the theory...

Most people (and I do the same) buy pre-cooked cotechino that is sold in a large vacuum-packed pouch. You just simmer the cotechino, still in its pouch, in enough water to cover for a minimum of about 20-30 minutes to reheat it. The sausage is quite fatty and it needs to be hot enough to start melting that fat, which gives it a wonderfully unctuous texture and flavor. For a large cotechino, I find that a fish poacher is ideal; an oval Dutch oven also works for smaller ones. You can keep the cotechino warm almost indefinitely until you are ready to eat. (For notes on preparing an uncooked cotechino or an American cotechino, see the Notes below.)

In the meanwhile, prepare the lentils. There are various ways to do this, but my personal favorite is the simplest: simmer the lentils in water with a sprig of thyme or sage or another aromatic herb and a clove of garlic until just barely tender, even a bit underdone. In a separate pot, make a simple soffritto of onion (and if you like, some finely minced prosciutto or pancetta) in olive oil and butter until quite tender. Strain and add your just cooked lentils to the soffritto, allowing them to insaporire for a few minutes, then add a ladleful or two of rich broth or the lentil cooking liquid or, best of all, the juice from the cotechino (see next paragraph). Simmer long enough for the flavors to meld and the lentils to become entirely tender. Do not overcook the lentils, however, or they will become rather stodgy.

When the lentils are just about done, carefully remove the cotechino from its pouch by cutting open up one side and allowing its contents—the cotechino itself and a fair amount of fatty juice—into a deep serving dish, preferably oval in shape to accommodate the cotechino comfortably. That juice has wonderful flavor: I like to add a ladleful or so to the lentils and let them absorb that flavor.

To serve, remove the cotechino to a cutting board and slice it thickly. Then lay out of 'bed' of the lentils in a large serving platter, then the cotechino slices in a pleasant arrangement on top of the lentils. You can, if you like—and I do—add a bit more of the juice on top of the lentils for even more lovely flavor and unctuousness.


NOTES: The cotechino is originally from Emilia-Romagna, specifically from the city of Modena. It is made from pork, fatback and pork rind, along with various spices. Some producers add wine as well as other flavorings and preservatives. Cotechino has TGI status, so one made outside its designated area is not a real cotechino. Although originally a local specialty, thanks to modern industrial production and marketing, in modern times cotechino (like panettone, originally from Milan) has become a national holiday tradition.

Preparing an uncooked cotechino (which are available, or used to be back in the day, in Italian areas of New York) is a bit more elaborate: you prick the sausage all over with a pin. (Don't use a fork as it creates holes that are too big; the skin may rupture and the stuffing, which is rather soft, may start to ooze out.) You then wrap the cotechino up in cheesecloth and tie it up with some cooking twine. The cotechino is then simmered in water for 2 hours for a big cotechino, 45 minutes for a small one. The resulting 'broth' can be added to the lentils as indicated above. (By the way, some recipes will tell you to degrease the broth before adding it to the lentils—but why throw away all that lusciousness? After all, it's the holidays.)

In the US, Beretta markets a domestic pre-cooked cotechino that is not half bad. It is a rather leaner rather smaller than a real cotechino, and comes 'dry' wrapped in clear plastic. You remove the plastic and simmer it for only 10-20 minutes. You will not have that luscious juice, however, to use. They can be found in Italian delis and are available online.

Of course, if you don't have a cotechino on hand, you can always use 'regular' Italian sausages, sautéed gently in some olive oil until golden brown and well cooked. When they are done, deglaze the pan with broth, some wine or just water, and add the sucs to the lentils.

As mentioned, there are various ways to make the lentils. In particular, some people prefer to use the classic soffritto italiano of onion, celery and carrot rather than just onion. But I personally find that the addition of carrot and celery for some reason gives the lentils an 'off' taste. Some recipes call for adding tomato which, to my mind, denatures the taste even more. For some recommendations on choosing and cooking lentils, see the post on Ham and Lentil Casserole. Obviously, this is not an everyday dish, but both cotechino and zampone can be eaten on occasions other than New Year's Eve. In fact, I actually prefer to eat this dish for lunch on New Year's Day. For one thing, after a large cenone, there is not much room for yet another dish—and a very rich one at that—and, an added plus, all the fat in the dish is great if you happen to have been' over-served' the night before...

While lentils are obligatory on New Years, cotechino is also very nice served with mashed potatoes or other kinds of legumes such as cannellini beans.

New Year's Eve is known in Italian as San Silvestro, after Pope Sylvester I (reign 314-335) who was buried on December 31. After Sylvester was canonized, the date became the liturgical feast of Saint Sylvester. Like others, Italians like to drink sparkling wine on New Years and enjoy firework displays. One old tradition, especially in Naples, was to throw out something old from your window at midnight to say 'goodbye' to the ending year. And it is also said that wearing red underwear will bring good luck in the coming year, although this is one tradition I have never followed!

By the way, cotechino is not the only kind of sausage eaten on New Years. Personally, I rather prefer the zampone, which is a pig's trotter stuffed with the same mixture. The presentation is much more dramatic and the pig's skin adds even more lusciousness to the final dish.

Though not associated with New Years as far as I am aware, there is a similar sausage from Ferrara called the salama da sugo. It has a more accentuated flavor, being more heavily spiced (usually with nutmeg but sometimes also with cloves or cinnamon) and personally I find it even more delicious than the other two. The salama is typically eaten with mashed potatoes or a purée of zucca (Italian pumpkin)—the flavor is just too intense to eat on its own. (See this article for a description in English.) Unfortunately, it is little known outside Italy and, as far as I know, unavailable in the US. I have found this online source for those in the UK.

Post-scriptum: Just in time for the New Year, Memorie di Angelina has reached yet another milestone, its 100,000th visit! A staggering number, at least to me, and a wonderful way to begin 2010. Happy New Years to all you gentle readers out there!