Showing posts with label Spring. Show all posts

Sunday, May 23, 2010

Lasagne agli asparagi


A good dish of lasagna is one of the most satisfying meals I can imagine. But, to be honest, a dish of classic lasagne alla bolognese can be a bit on the heavy side, especially as the weather gets warmer. That's the beauty of vegetarian lasagne; if not exactly dietetic, they are lighter than meat-based lasagne and yet totally satisfying. You can make lasagne with almost any vegetable, but perhaps my favorite is made with asparagus, the most elegant and, to my taste, most toothsome of Spring vegetables. 

The basic technique is just the same as for lasagne alla bolognese (see this post for the recipe): begin by preparing a batch of fresh pasta, then a good portion of béchamel sauce. But instead of the ragù, you prepare a bunch of asparagus two ways: Take a bunch of asparagus, trim and peel them, then boil, or better, steam them in lightly salted water until tender—not crisp tender or mushy, but fully tender. Cut off the tips and set them aside, and purée the remaining stems in a blender or food processor with a bit of béchamel sauce. Season the purée with salt to taste—it should be quite savory. 
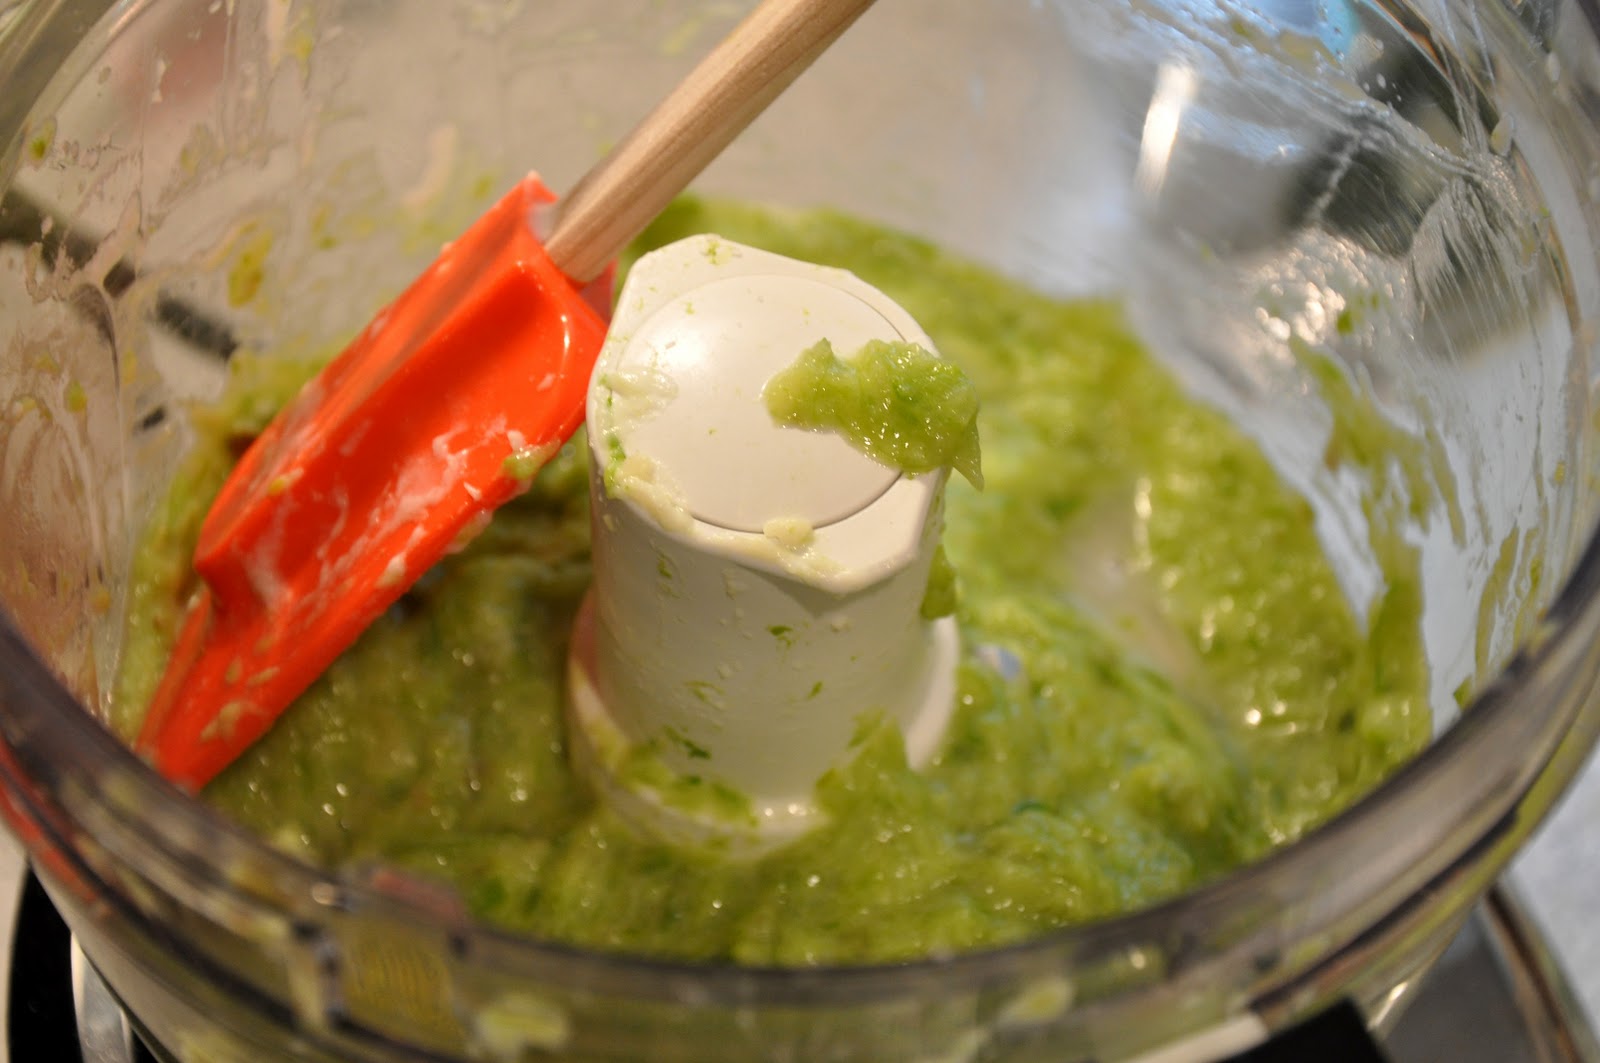

Now assemble your lasagna just as you would classic lasagne: place a layer of pasta in a buttered baking dish, then a thin layer of béchamel, followed by a layer of asparagus purée, then place a few asparagus tips here and there, then sprinkle generously with grated parmesan cheese. 


Keep on layering in this way until you have used up your ingredients—or until you have laid down four or five layers of pasta. (This kind of lasagna should not be too thick.) Cover with a layer of béchamel, sprinkle with more grated parmesan and dot with butter. 
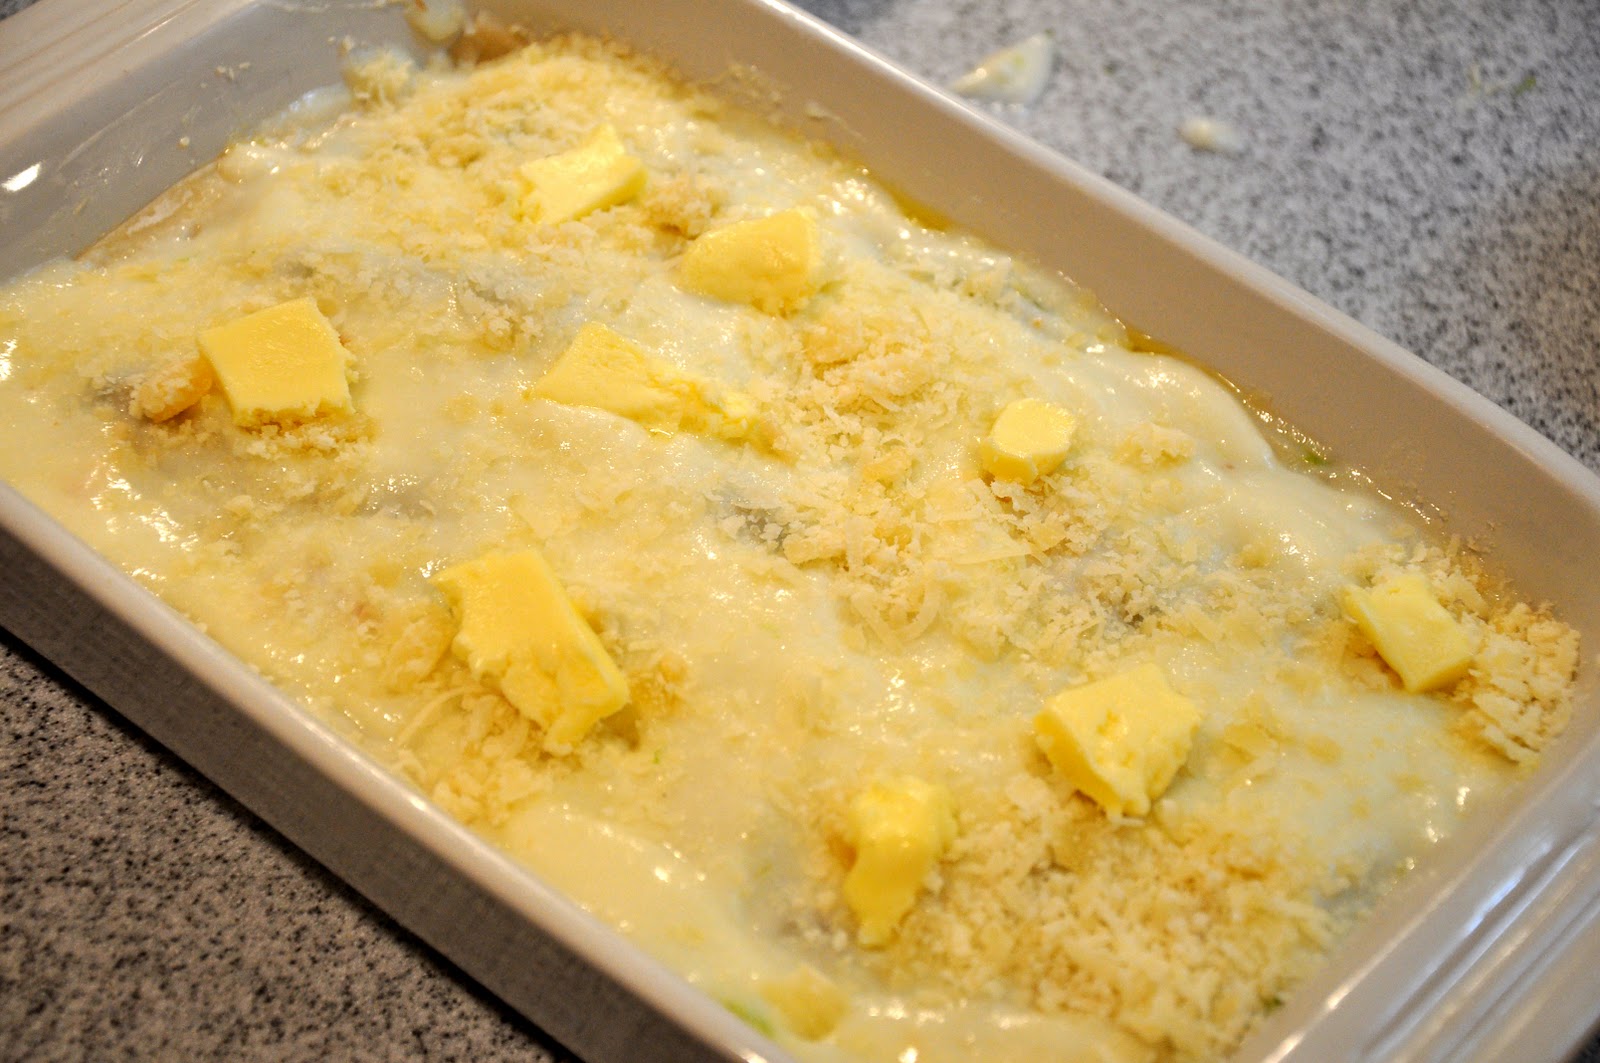

Bake in a hot oven (400F/200C) for about 20 minutes or so, until the top is lightly browned. Allow the dish to settle and cool for 10-15 minutes or more—see below—before serving. 


NOTES: The basic technique for this vegetable lasagna is really quite easy once you get the hang of making the béchamel and fresh pasta. And it can almost be an every-day dish if you use store-bought fresh pasta, although, as I've commented before, finding true fresh egg pasta suitable for this kind of lasagna can be a challenge. If you use no-boil lasagna sheets, make sure to make a rather loose béchamel and slather it abundantly over the pasta, as unboiled pasta absorbs a lot of sauce. I've hit upon another substitution that, however unorthodox, I like better: egg roll wrappers. Yes, egg roll wrappers.  While they lack the rich egg flavor of homemade pasta, they have the same fine, silky texture as very fine homemade egg pasta. And you add them directly to the baking dish, no pre-boiling necessary, saving considerable time and effort. 

If you want a richer dish, you can sauté the asparagus tips in butter before adding them to the dish. And you can also make the dish even more savory if you like by allowing the asparagus purée to insaporire in a soffritto of butter and shallots before folding in a bit of béchamel. In the alternative, instead of asparagus purée, you can sauté both tips and stems in butter, along with a bit of shallot, and layer them over the béchamel. And some versions of this dish really go to town, adding bits of soft cheese like a fontina or bel paese, and/or shredded prosciutto along with the asparagus tips. 

You can make all sorts of vegetable lasagne using the same basic method. For vegetables (like mushrooms) that don't purée too well, you can simply slice them thinly and sauté them in butter or oil, along with a bit of shallot or onion  or garlic (depending on the vegetable and the effect you are after). If fact, almost any  sauteed contorno can do service to stuff lasagne in this way: funghi trifolati, piselli alla romana... You can even make lasagna with a combination of different vegetables, with each layer of pasta dressed with a different vegetable. There is really no end to the variations you can dream up. And with all that lovely bechamel and butter, they are all delicious! 

It is very important to let the dish rest for some time before serving. Not only is the pasta scalding hot when it has just come out of the oven, but as the dish cools it also firms up a bit. If you serve lasagne direct from the oven, it will fall apart when you serve it. And the longer you wait, the firmer the dish will be. A 10-15 minute wait is the minimum, but you can let it rest for up to 30 minutes. And don't worry, it will still be nice and warm.

Nota bene: More tips on lasagna-making are included in the post on lasagne alla bolognese.
 

Saturday, May 22, 2010

Costolette alla milanese


One of the pillars of Milanese cuisine, costoletta alla milanese (locally also called cotolette alla milanese) are nothing more than a breaded veal chop browned in butter. It's so typical, in fact, of the cooking of Milan that if you just ask for 'una milanese' in a restaurant in Italy, this is what you'll be served. Simple but really, really good! 

You take a veal chop, bone in, and flatten it slightly with a meat pounder or the back of a skillet—not too much, because you want the chop to cook evenly, which it won't do if the meat is much thinner than the bone. Remove any silverskin you may find around the edges of the chop. (This prevents them from curling up as they cook.) Then pass each chop in some beaten egg, seasoned with salt and pepper, and then in bread crumbs, pressing the bread crumbs into the chops to make sure they adhere well. 

Heat a generous amount of butter—a whole stick—in a skillet, over moderately high heat, allowing the butter to foam up. When the foaming subsides, add the chops. Don't crowd them, but at the same time, if you leave too much empty space in the skillet, the butter may burn. Regulate the heat so that the chops brown nicely with the butter darkening too much or burning. (Adding a bit of vegetable oil helps prevent the butter from burning.) When the chops are nicely browned on both sides, serve immediately, sprinkled with some sea salt and, if you like, lemon wedges on the side. 

NOTES: Like any dish of few ingredients and a straightforward cooking method, the key to success is the quality of your raw materials. The veal, of course, is key. The best veal for this dish is milk-fed veal, which has a lovely light pink flesh and an exquisitely delicate flavor. This young veal produces a thin chop that cooks rather quickly. But they are hard to find. 

Most veal sold in the US is older, closer to baby beef (vitellone in Italian) whose meat is darker and more strongly flavored. And since the animal is older, the rib bones will be quite large, making for a thick chop, usually surrounded  by a layer of fat, looking very much like a ribeye steak. These big chops are fine for grilling, less fine for this treatment. Still, you can approximate the taste of a true milanese by prepping it like this: first, trim the chop well of it outer layer of fat, then flatten it, then soak it in milk seasoned with a bit of salt a good 30 minutes to an hour. You'll need to brown a thick chop at a lower temperature to make sure it cooks through; the chop should be juicy but well done. And if the chops are really thick, brown them on the stovetop and then transfer them to a moderate oven (350F/180C) for 15 minutes or so. Test the meat by feeling it with your finger: the meat should be firm to the touch. If you're not up for so this much complication, you can opt for making cotoletta rather than a costoletta (see below).

The breadcrumbs are also important. The main thing to avoid is using so-called 'Italian' breadcrumbs sold with various 'seasonings' in them. Use plain breadcrumbs or 'Panko' if you like. Even better, make your own fresh breadcrumbs from some day-old bread in the food processor. It's a great way not to waste good leftover bread that's too hard to eat. 

There are a few minor variations on this dish, the most common being the addition of grated parmesan cheese to the egg wash or the breadcrumbs. Some folks like to add a bit of grated nutmeg to the egg, which is nice if used discretely. Some recipes omit both the salt and pepper from the egg, and call only for adding salt when serving. Artusi includes an unusual version (at least these days) with a prosciutto, parsley and cheese stuffing. And one variation that I heartily recommend: Some friends from Milan once recommended a nice Summery way to serve a milanese: with tomato salad, made without lemon or vinegar, on top of the just-cooked chop. Although it doesn't sound particularly special, the taste combination is really quite unexpected.

The milanese is often served with fried potatoes as a contorno, but personally I prefer a simple green salad, some peas stewed in butter or some greens in padella.

Veal is expensive, of course. The same technique can be used on all kinds of less expensive meats, including pork chops. And of course, you can use the same technique to cook scallops of veal, pork, turkey or chicken without the bone, in which case you have breaded cutlets, or cotolette without the 's' in  standard Italian, although apparently in Milan they call the bone-in version cotolette as well. A bit confusing, I know...

You may have noticed a similarity between cotolette alla milanese and Wiener Schnitzel. That should not be surprising since, Milan (most of northern Italy, in fact) was under Austrian rule for most of the 18th and 19th century, after the Treaty of Utrecht (1713), which ended the War of the Spanish Succession, assigned Spain's Italian possession to Austria. In any event, there was (and is) much Austrian influence in Milan and, at least in things culinary, vice versa. The Italian gastronome Giuliano Bugialli maintains that the Wiener Schnitzel is the Viennese version of the milanese, not the other way around.

Thursday, May 20, 2010

Pinzimonio


When things are really hectic at work, as they are now, even a hardcore food fanatic like myself doesn't always feel like cooking. Or perhaps you've had a heavy lunch or midday dinner and feel like a light dinner. Or you're looking for something to serve an easy and convivial antipasto to start a warm weather meal or a light something to serve with drinks? Well, for times like these, may I recommend the classic Tuscan pinzimonio

Pinzimonio is, quite simply, olive oil, seasoned with salt and pepper in which various crudités of your choice can be dipped. It's healthy, it's easy and it's almost infinitely variable. If you have decent knife skills, you can make enough to serve four in five minutes or under. 

The choice of vegetables is yours, but a typical pinzimonio will include carrots, peeled and cut into matchsticks, celery and/or fennel, also cut up into dippable pieces, and radishes. From there, you can add any other vegetables that you enjoy eating raw: tomatoes, cut into wedges, green onions, ramps, very tender asparagus… Other common vegetables include bell peppers and cauliflower, although personally, I don't care for these vegetables eaten raw. And although really tender raw baby artichokes are a favorite served in pinzimonio, I've yet to find any State-side that aren't unpleasantly bitter when eaten raw. 

To the dipping oil, you can add additional ingredients if you like to spice things up—freshly squeezed lemon juice or wine vinegar, a bit of mustard or some minced garlic, for example—but I prefer the simplicity of olive oil, salt and pepper. Of course, use the best possible quality ingredients that you can find: impeccably fresh, young Spring vegetables that the Italians call primizie dipped in fruity, cold-pressed extra-virgin Tuscan olive oil, sea salt from Trapani and freshly ground Tellicherry black pepper would give you the ne plus ultra version. 

The name 'pinzimonio' is a combination of the word pinze, or tweezers, and matrimonio, or marriage, referring to how you pinch the vegetables between two fingers (the tweezers part) and marry it to the seasoned oil. Poetic, no? The term is sometimes used, in error, as a catch-all for any dish of crudités served with a dipping sauce. 

And speaking of knife skills, a great place to learn them online is by watching the excellent instructional videos at the Rouxbe Online Cooking School.

Monday, May 17, 2010

Pollo alla diavola


Pollo alla diavola, or Devil's Chicken, is a simple and delicious way to grill chicken. 

Begin by butterflying a young chicken: cut away the chicken's back bone with kitchen shears and spread the chicken flat, skin side up. Cover the chicken with a sheet of waxed paper and, with the bottom of a frying pan, give the chicken a few good whacks to flatten it even more, but without breaking it up. 

Place the chicken on a platter and season it generously on both sides with olive oil, salt and red pepper flakes. To this, I often add the juice of half a lemon. Let the chicken marinate for about an hour or so. 

Heat up your grill and grill the chicken on both sides, over a moderate flame, until nice and golden brown all over, about 15-20 minutes per side. A little charring on the edges is perfectly fine—and even desirable. I find that a grilling basket makes the job very easy and helps keep the chicken flat, but you can simply place the chicken directly on the grill if you prefer, placing a brick or other heavy weight on top to keep the chicken flat.

NOTES: The better the chicken, of course, the better the flavor will be, so an organic, free-range chicken will really make a difference. But the beauty of the marinade is that it will lend flavor even to those bland 'industrial' chickens—just up the seasoning to make up for the flavor deficit. 

The marinade can include other elements if you like: fresh rosemary leaves, freshly ground black pepper, either in addition to or instead of the red pepper, even Tabasco sauce. The proportions are entirely to taste. I like to add enough pepper to make the dish spicy—that is the defining characteristic of the dish—but not so spicy that it overwhelms the taste of the chicken itself. The longer you marinate, of course, the more intense the flavors will become. I find an hour is quite enough, but you can prepare it several hours ahead and put it in the fridge. You can even skip the marination stage; just dress the chicken and place it on the grill immediately.

If you don't have a grill or prefer to cook indoors, the chicken can be made al mattone, either in a terracotta cooking vessel specially made for the purpose, or on a griddle or in a heavy skillet or sauté pan, weighed down on top with another skillet or—as the name suggests—with a brick. Why all this trouble to keep the chicken flat, you ask? It ensures that the chicken cooks quickly and evenly, and gets nice and crusty all over.

The name "Devil's Chicken", as you may have guessed, is a tongue-in-cheek reference to the 'hot as Hades' nature of the dish and, I surmise, the well-charred exterior of the bird.

Saturday, May 15, 2010

Risi e bisi


Sweet, fresh peas in their pods can be hard to find, but when I spotted some in a local market I grabbed them up to make a delicious Springtime dish from the Veneto: risi e bisi, or rice and peas in Venetian dialect. Although it resembles a risotto, the technique is quite different. 

Shell your peas but don't throw the pods away. Rinse them and put them in a stockpot with a sliced onion and two sliced carrots, a pinch of salt and just enough water to cover. Simmer for a good half hour or more until you have a flavorsome broth.

Now make a soffritto with very finely chopped onion, pancetta and parsley (a food processor makes short work of the task) gently sautéed in butter and a bit of olive oil. (Some recipes call for a bit of garlic) When the onion is soft and translucent, add your shelled peas and a ladleful of the pea broth. Cover and gently simmer the peas over low heat until they are almost tender. 

Now add the rest of the broth and the rice—preferably Vialone nano but Arborio will do in a pinch—and continue simmering until the rice is tender, stirring from time to time. Add more broth or water if the rice dries out—but this is not a risotto where you should be adding liquid little by little. Remove from the heat and stir in a nice portion of freshly grated parmesan cheese and another nut of butter, continuing the stir until the cheese is entirely incorporated and the rice has taken on a nice, creamy consistency. Serve immediately. The dish should be rather liquid and flow easily, all'onda or 'like a wave' as they say in Italian, the typical of the rice dishes of the Veneto. Some versions are even wetter, almost a soup.

The key measurement is the ratio of pea to rice. Most recipes calls for a ratio of roughly 3:1 by weight, counting the weight of the unshelled peas vs. uncooked rice. I usually follow the rule of about 75g (2.5 oz.) of rice per person, which makes for 200g (7.5 oz.) of peas, rounding off. 

NOTES: I am usually a fan of frozen peas, but for this dish only fresh peas will do, not only because you won't have the pea pods for making the broth—which gives the dish its characteristically deep pea flavor—but also because frozen peas cook much too fast, so they will be entirely done long before the rice is.

There are some variations on the theme, as is usually the case with these mythic dishes, but the recipes you will find are remarkably consistent. The cookbook of the Italian Academy of Cuisine gives a second recipe for risi e piselli—not called risi e bisi—which has you adding the broth ladleful by ladleful, like you would for a risotto. The book explains that risi e bisi is typical of the Lumignano, a mountainous area in the province of Vincenza, while the latter variation was much in use in Venice during the Doge's festivities, although Padova claims to have invented the dish. 

Other variations include adding the peas only after the rice has cooked for about 10 minutes or so, for which you will need very tender, young peas, since they will only cook about 10 minutes total. You can also use some of the peas or the pods and purée them, as in this lovely rendition by my foodie friend and professional chef Carmelita of the Bologna-based Cook Italy cooking school, a technique which lends a lovely green color to the dish and gives it an even more intense pea flavor. Some recipes call for adding the chopped parsley at the end, as part of the final mantecatura, rather than as part of the soffritto. Some recipes call for prosciutto rather than pancetta. And, if you like, you can use meat broth in which you simmer your pea pods rather than water, which will produce a richer dish but less purely pea flavored. 

And if you really must use frozen peas, I would opt for puréeing some of the peas for extra flavor, and using meat or vegetable broth. Use a ratio of peas to rice of about 1.5:1. 

The dish is easily made vegetarian simply by omitting the pancetta, and can be 'veganized' by using oil instead of butter and omitting the cheese—although at that point you are getting rather far afield from the original.
As noted, the rice to use with this dish is Vialone nano, a variety that is native to the Veneto, more specifically to the area known as the bassa veronese, the plains that extend south from Verona. I've raved about this rice before, and it's excellent for all kinds of risotto, but it is practically essential for this dish. 

A vialone nano rice paddy in the bassa veronese

Friday, May 7, 2010

Seppioline alla griglia


Grilled seafood is extremely popular in Italy, especially in the warm weather months. One of my favorite restaurants in Rome, a place called "La Torricella" (The Little Tower) in the Testaccio section of town, served wonderful seafood. And perhaps my very favorite dish to eat there was seppioline alla griglia, or grilled baby cuttlefish. But you don't need to take a trip to Rome to enjoy it—it's simplicity itself to make.

Begin by marinating cleaned baby cuttlefish or squid (see Notes below) in some olive oil, lemon juice, salt, pepper and parsley. If you like, you can add some red pepper flakes or a bit of chopped garlic to 'kick it up a notch' as the famous TV chef like to say. Let it sit in this marinade for an hour or two. 

Now get your grilled nice and hot. Depending on the size of the fish, you can either lay it directly on the grill, use a grilling basket or a flat grilling plate. Grease your grilling surface to prevent sticking and lay your fish on the grill. Personally, I like to flip the fish fairly often to ensure even cooking, but if you're a fan of neat grill marks, then you will need to leave the fish to cook on one side until it browns nicely. Although the fish will cook in no time, it actually takes a surprisingly long time to brown, so be patient. Once the fish is browned to your liking, transfer it to a serving dish, pour over the remaining marinade and, if you like, top with a bit of chopped parsley and serve with lemon wedges. 

NOTES: Baby cuttlefish are best for this dish, as they remain tender even after grilling. For this dish, as pictured above, I had found some incredibly small baby cuttlefish, pre-cleaned and frozen, in a local Asian supermarket. In Italy, seppioline are small but not tiny, but no matter—the flavor was incredibly good. In a 'regular' supermarket, you are more likely to find squid rather than cuttlefish. Buy it whole—not cut into rings—and, if it has not been cleaned, you'll need to do it yourself by cutting it in half just at the 'joint' between the body and the legs, then remove the cartilage 'pen' inside the body. Cut the legs into pieces, then proceed. 

Try to find smallish squid, as the large ones don't really lend themselves to this kind of treatment, as dry cooking methods like grilling tend to toughen them if left to cook more than just a minute or two. Like tough meat cuts like shoulder, they are better cooked using moist heat like a braise. 

Post-scriptum: A reader from South Africa tells me that, for those who don't have access to baby squid , larger squid can be tenderized by soaking for 5-10 minutes in warm water to which a spoonful of bicarbonate of soda has been added. Thanks for the tip!

For a great demonstration of how to clean squid, see this video from the Rouxbe Online Cooking School:

Sunday, May 2, 2010

Risotto agli asparagi


These days you can find asparagus in the market all year round but, for me, they signify Spring. This most noble of Spring vegetables can be made in an infinite variety of ways but perhaps my favorite is as a risotto.
I like the flavor of asparagus so much that my preferred way to make asparagus risotto is entirely vegetarian, using the asparagus itself to make the broth. Just make a kind of vegetarian broth (see this post) beginning with the usual aromatics—onion, carrot, celery and parsley—and after say 15 minutes of cooking, adding your asparagus—skipping the other vegetables. Cook for only 5 minutes or so and fish the asparagus out of the simmering broth. Cut the asparagus into three parts: the fibrous bottom third goes back into the pot, to continue cooking and lending its flavor to the broth. The middle third gets chopped up, and the tips are held back as a garnish.
Then you make the risotto in the usual way (see this post) beginning with your onion soffritto sweated in butter (or butter and oil) then add the chopped asparagus and allow it to insaporire for a few minutes. Then proceed as usual, using your asparagus broth instead of meat broth. When serving, I like to top each serving with a few asparagus tips which, if you like, you can sauté in butter beforehand.
And that’s it—simple but very elegant. 
NOTES: Measurements you ask? Follow the usual rule of thumb: a 1:1 ratio by weight of asparagus to rice, both uncooked. I find that 75g (2.5 oz.) of each is enough for a single serving, but you can up this a bit if you don’t intend to serve a second course.
You can make this dish with either thick or thin asparagus. The thick variety needs to be peeled; the thin kind can be used as is. And, as noted above, don’t trim off the bottom as you would normally do for other dishes—use it for the broth! I have not tried white asparagus for risotto, but I’m sure it’s also very good.
Of course, you can—and people usually do—make this risotto with ‘normal’ broth (see this post), in which case I still like to simmer the asparagus in the broth for a few minutes before beginning the risotto itself. But to save time, you can add just the fibrous base of the asparagus to the broth and add the rest raw to the risotto itself. The result will still be quite good, but with a less intense asparagus flavor.
Some recipes call for cooking the asparagus until fully tender, then puréeing it before adding to the risotto—a few minutes before it’s done. I’ve not tried this technique, but it does sound good.
Although unorthodox and perhaps not very Italian, I sometimes add a bit of cream along with the parmesan cheese during the final mantecatura.


Saturday, May 1, 2010

For a May Day Picnic: Fave e pecorino


Fave e pecorino is not really a "dish" at all, you just set out the fava beans, in their pods, and a hunk of pecorino cheese. Each diner opens the pods for themselves and eats the raw fava beans they find inside with a bit of pecorino, washed down with a well-chilled dry white wine. Odd as it may sound, it is a combination that was just meant to be. 

Romans traditionally eat fave e pecorino on May 1, preferably while they picnic fuori porta, or literally 'outside the gate' meaning outside town. Romans will pick up and find any green spot (even city parks if they can't get out of the town) to set out their picnic lunch. When we were living in downtown Rome close to the Campo dei fiori, we'd often go up the Gianicolo, a high hill just across the river, for our May Day picnics. When we moved to a country setting on the outskirts of town, we could just sit outside on the terrace; and we would often come across strangers picnicking down the hill from our house!

If you want to get fancy, you can de-pod and shell the fava beans, cube the cheese and combine the two with a bit of oil, salt and pepper to make a salad. That is how I had this once in a tony restaurant in Florence. But personally I like the rustic informality of eating the raw ingredients.

Fava Beans on Foodista

Thursday, April 29, 2010

La vignarola


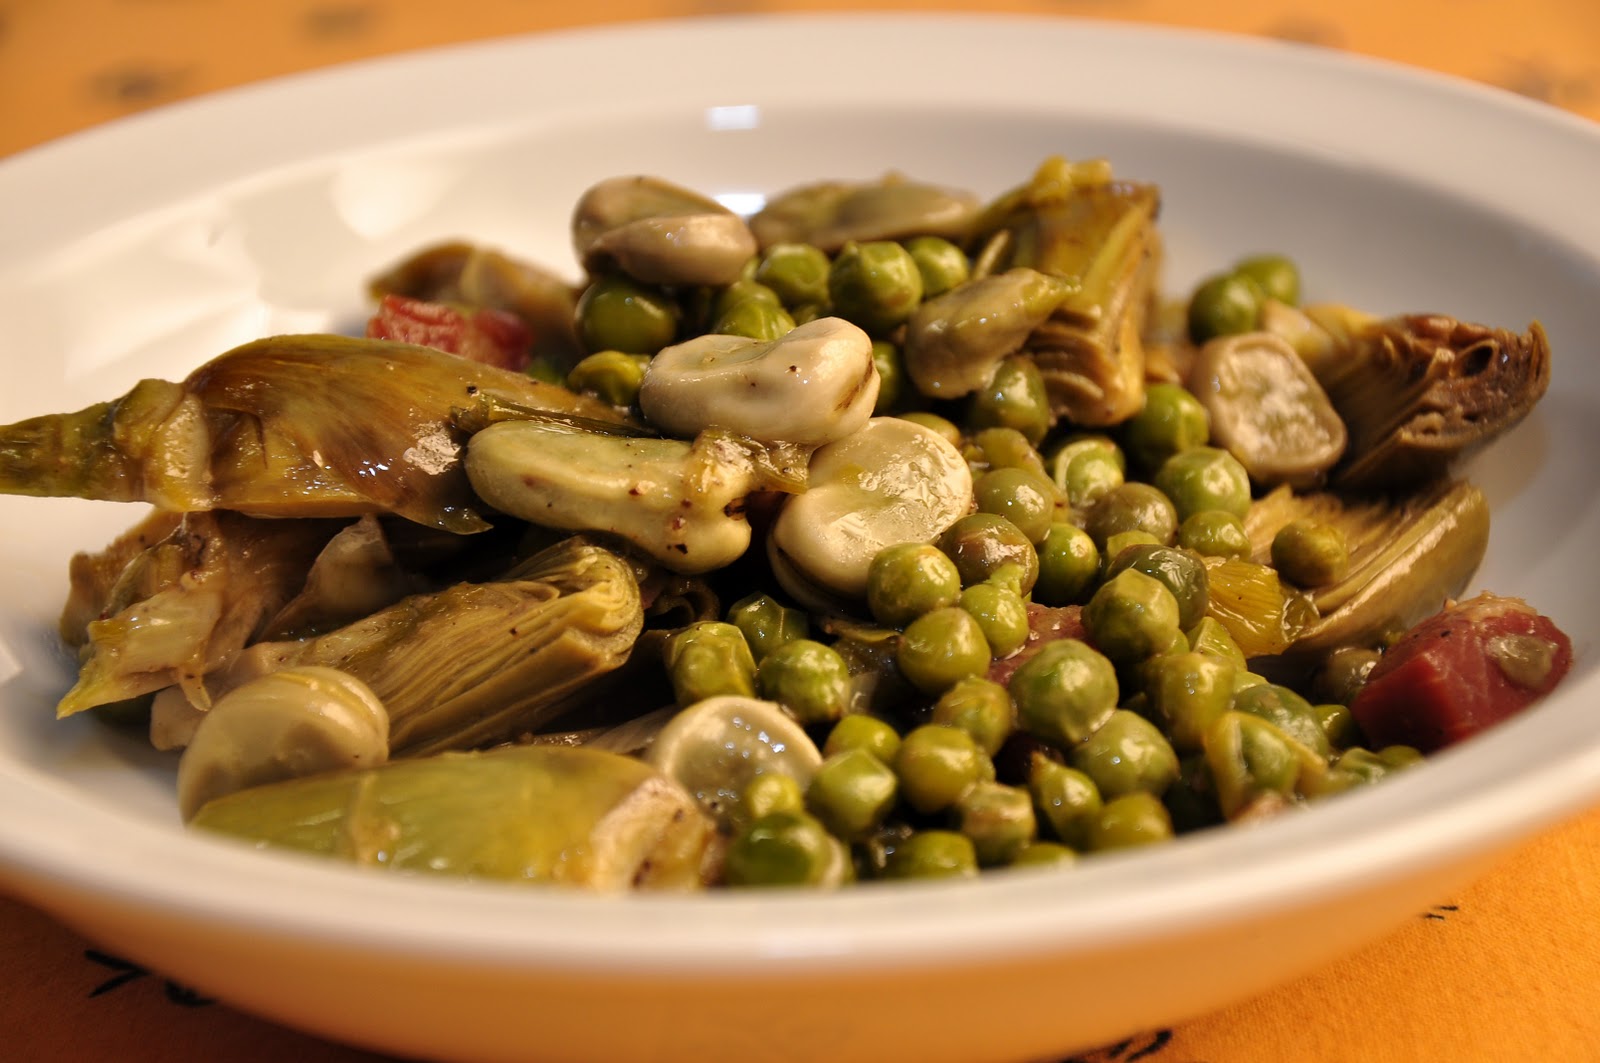
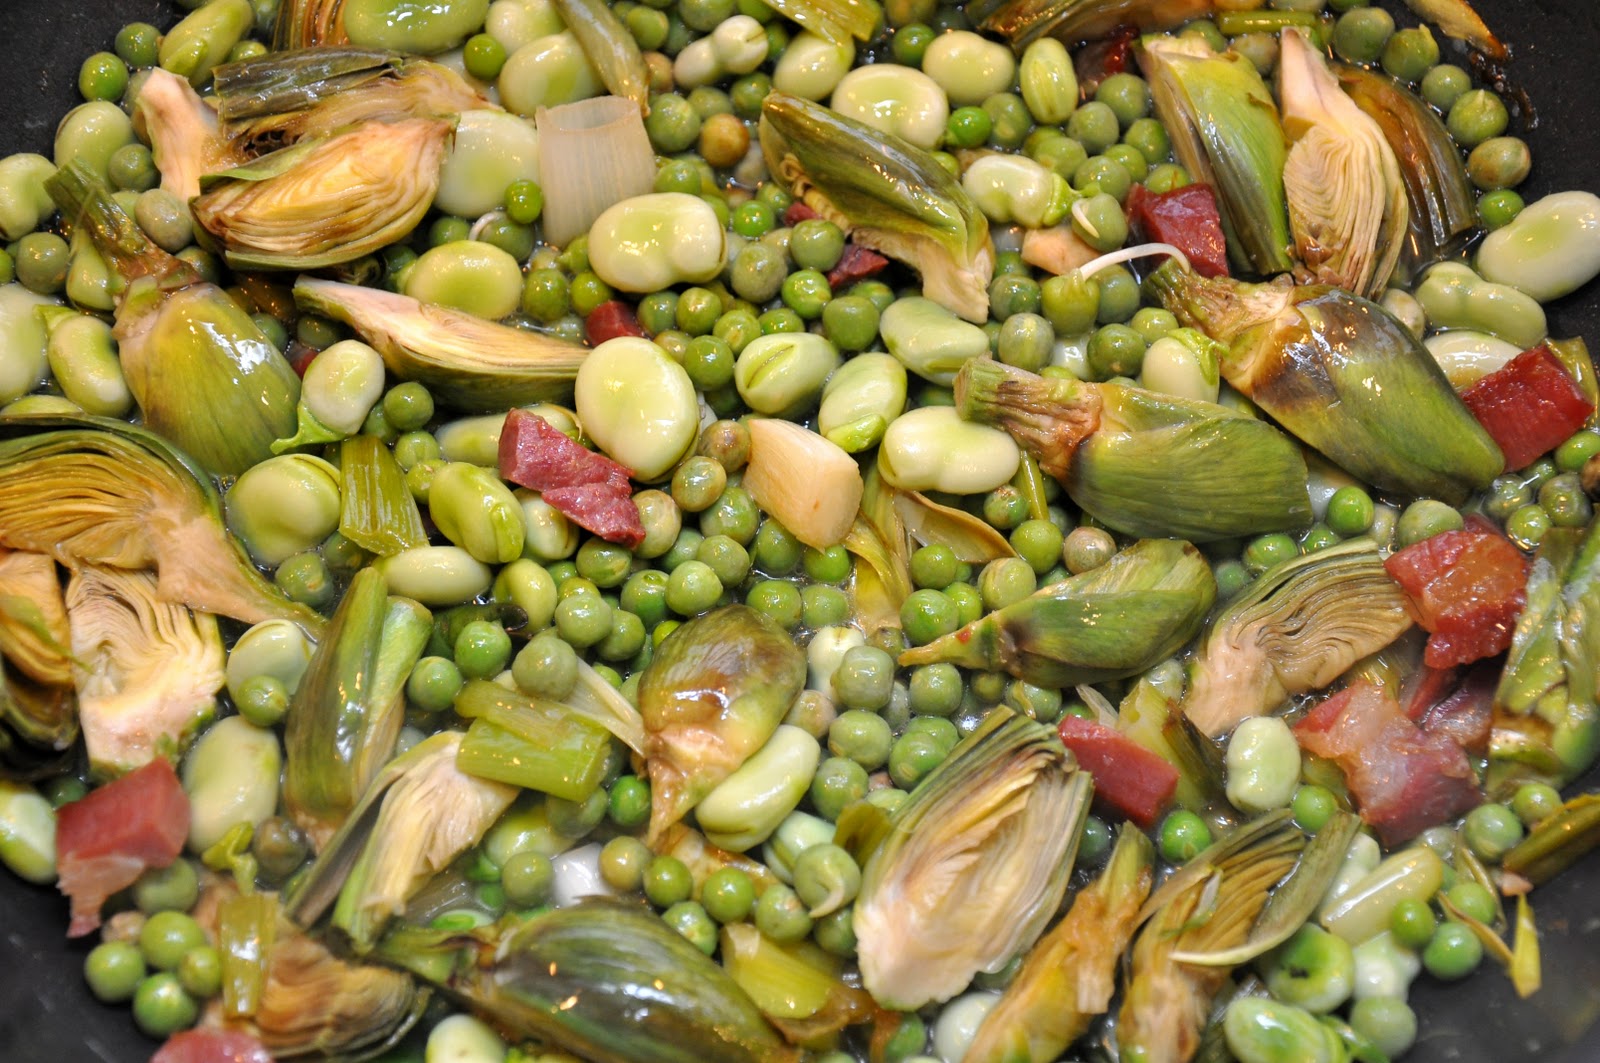
A Springtime Roman treat, la vignarola is a vegetable 'medley' made from spring onions, fava beans, artichokes, peas and tender lettuce. It comes in an entirely vegan/vegetarian version and one that uses a bit of guanciale or pancetta to lend flavor. 

You begin by lightly sautéing a bit of your cured pork meat in olive oil, just until translucent. Then add sliced fresh spring onions (scallions will do nicely as well), sauté for a minute or two, then add your artichoke, trimmed in the usual Italian manner and then sliced into wedges. Mix and continue to sauté for a minute or two longer. Then add fresh shelled fava beans and peas, season with salt and pepper, mix, and add some water to the pan. Cover and simmer gently until all your vegetables are nearly tender. Then add some tender lettuce (Boston or baby Romaine), finely shredded, and continue cooking until the lettuce has wilted and the vegetables are perfectly tender but not 'mushy'. As you prefer, you can cook off the liquid entirely or leave the dish rather 'brothy'. The exact cooking time varies according to the size and freshness of the vegetables but should take no more than 20-30 minutes at most. Serve either hot or, even better, at room temperature. 

Once again, exact measurements are hardly that important, but try to balance the ratio of the main vegetable ingredients—artichokes, peas and fava beans—so they balance each other, so roughly equal amounts by weight of each should work well. 


NOTES: While the above recipe is probably the most typical, as for so many traditional dishes, there are some variations on the theme. Some modern recipes get fancy and add that other typical, but more 'noble', springtime vegetable, asparagus. Some recipes call for the typical large Roman artichokes called mammole, similar to globe artichokes, but personally I like to use tender baby artichokes. Some recipes call for a bit of garlic in addition to the onion. I've seen one recipe that calls for a bit of peperoncino, it seems to me that would utterly overwhelm the delicate, sweet flavors of the spring vegetables. Some call for adding a bit of Roman mint called mentuccia or a few drops of lemon juice to 'brighten' the flavors. The amount of water varies from recipe to recipe. Some call for just a few drops of water—if necessary—to keep the vegetables moist. Personally, I like to add a fair amount of water to the pan and allow it to evaporate. I find that this melds the flavors more effectively and saves on the cooking time. Some recipes substitute broth or wine for the water, but I prefer the pure vegetable flavor you get from adding only water. As mentioned above, in some recipes, you serve your vignarola as a zuppa, still quite brothy, which makes for fine dipping with some crusty bread. Otherwise, you can let the liquid cook off and serve it perfectly 'dry'. 

The dish is typically an antipasto, but it can serve as a light second course or, in its vegetarian version, even as a side dish. 

La vignarola has a very short 'season' of only a few weeks while all the requisite vegetables are simultaneously in season. The dish is still good even if you're missing one of the ingredients (in fact, when I made it this time I didn't have the lettuce on hand.) But you can successfully use substitutes when one or more of the ingredients are out of season. Frozen peas are perfectly fine in lieu of fresh peas (just add them rather later in the cooking) and—believe it or not—edamame, even frozen edamame, are a fine substitute for fava beans, which can be hard to find in the US. And, in a pinch, you can use frozen artichokes. So, in fact, you can enjoy la vignarola more or less any time of year. But, of course, this dish is at its very best when you use all fresh, tender, young spring vegetables that the Italians call le primizie di primavera

By the way, vignarola is also apparently the name of a kind of bruschetta topped with a lamb and cicoria mixture, an unusual antipasto that I found in a book called Le specialità della cucina romana: ricette tratte dalla tradizionale cucina casalinga. But by far the more common use of the word is for the recipe described above. 

The word vigarola derives from 'vigna', or vine, since it is said that the vegetables that go into it were typically grown in between rows of grapevines.

Sunday, April 25, 2010

Agnello brodettato


In Italy, as elsewhere, lamb—especially the milk-fed baby lamb called abbacchio—is strongly associated with the Springtime. Roman cookery has some wonderful lamb dishes, such as the grilled rib chops known as scottadito (see this post) and lamb roasted with potatoes known as abbacchio al forno con le patate (see this post for something very similar) as well as lamb braised with rosemary, vinegar and finished with a touch of mashed anchovy called abbacchio alla cacciatora (this one is still to come). 

Slightly less usual but equally good is this dish of braised lamb with lemon and egg sauce. The term 'brodettato', literally 'in a little broth', is more or less synonymous with the term 'fricassea'; they both refer to braises that are thickened just before serving with a lemon and egg finish. The technique is wonderful with lamb, but it is widely used with vegetables, too (as in this post on green beans in fricassea). 

This dish is traditionally eaten at Easter, lamb and egg being symbols of the crucifixion and resurrection, but in my book it is too good to reserve for a single day of the year. The truly authentic version, by the way, is capretto brodettato, made with baby goat (aka kid) but since neither baby goat nor baby lamb is very common these days, at least here in the US, I have prepared the dish with good old fashioned lamb stew meat. 

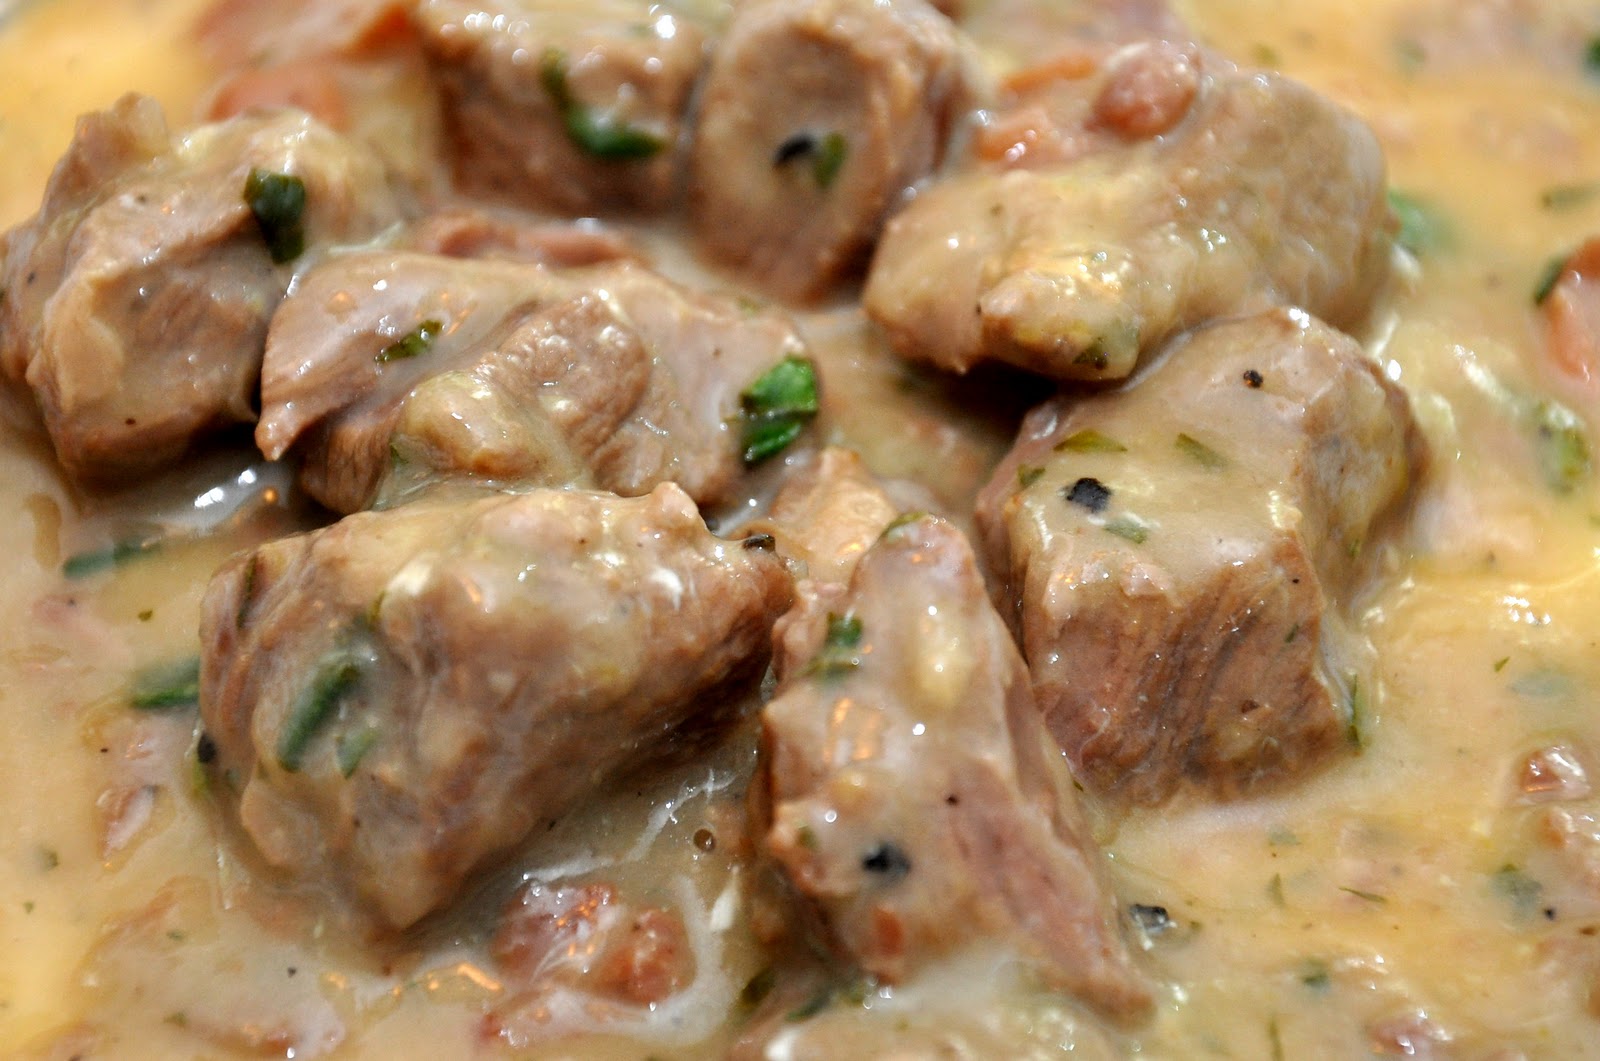
The recipe is simple but a bit tricky at the end. You begin with a soffritto of an onion and 50g (2 oz.) of rather fatty prosciutto (or pancetta), chopped together finely and gently sautéed in olive oil or, if you want to be truly authentic, lard. Then add 1 kilo (2 lbs.) of lightly floured cubes of lamb meat and turn up the heat a bit. Allow the meat to brown lightly—taking care not to burn the onion—and season with salt and pepper. Then add a splash of dry white wine and allow it to evaporate completely. Add enough water to almost cover the meat, lower the flame and cover. Let the lamb braise until tender, normally about an hour but the time will vary depending on how young your lamb is and how big your cubes of meat are. 

Shortly before the meat is done, beat two egg yolks in a bowl and mix with the juice of a freshly squeezed lemon and finely chopped parsley. When the meat is fork tender, remove from the heat. Add a spoonful of the cooking liquid to the egg and lemon mixture to temper it, then pour the mixture immediately over the lamb and stir, until well incorporated. Return to the burner over very low heat and keep stirring gently, until the egg has thickened the cooking liquid into a smooth, silky consistency. Serve immediately.


NOTES: The trickiest part of the dish is the final addition of the lemon and egg mixture. If you let it cook too long or get too hot, the egg may curdle and the sauce will 'break', so let it just thicken to the point where the sauce will coat a spoon and remove it immediately from the heat. (NB: The residual heat from the pot will continue to cook the egg and thicken the sauce, so allow for that.) If things seem to be getting out of hand, add a few more drops of lemon juice, which should cool the sauce enough to prevent it from separating. If you are using a terracotta or enameled cast iron cooking vessel, you may well find that the pot retains enough residual heat that you need not put it back on the heat at all. 

The cut of lamb is usually the shoulder or some other tough stewing cut, but this time I used some leg of lamb that I had left over from the tagliata d'agnello from the other day. 

Some recipes for this dish, including the one in La cucina romana e del Lazio by Livio Jannattoni, from Newton & Compton's wonderful Quest'Italia series, call for braising the lamb meat until only a minimal amount of liquid is left in the pot—but I prefer 'brothier' version, so I add a bit more water if need be during braising, which gives you lots of delicious sauce to fare la scarpetta.

Post scriptum: The slaughtering and eating of baby lamb for Easter is an age-old tradition in Italy and one that the first generation of immigrants to America maintained—or at least they did in my family. According to family legend, in the old days, my great aunt would buy a live baby lamb in the market, still baaing, bring it home and keep it in the bathtub. Then, the day before Easter, she would take a sharp knife and…. well, you can imagine the rest of the story.

Sunday, April 18, 2010

Carciofi alla giudia


Carciofi alla giudia, or Jewish-style artichokes, are one of the signature dishes of Roman Jewish cooking and a very popular dish in Rome. I have rarely seen this dish in Italian restaurants in the US, perhaps because it is a bit tricky to make, or because it can't be made ahead, or because of the quality of artichokes here--it is a dish that relies almost entirely on the taste of the actual artichoke--there's no way to dress it up with other ingredients to make it taste better. Anyway, you trim an artichoke in the typical Italian way, cutting off all the inedible bits (including most of the leaves), peel the stem and scoop out the choke. Then you spread the artichoke out as much as you can by hand—to do this successfully, you will need fresh and rather young artichokes that are 'flexible'. You then fry the artichoke gently in extra-virgin olive oil, starting on the sides:

As the artichoke softens, place it 'face down' in the oil, little by little pressing it down until it spreads out almost flat and the artichoke is tender. To check for tenderness, pierce the artichoke at its thickest point with a paring knife. If you can remove the knife from the artichoke without picking it up, it should be done.

Now, just before serving, comes the tricky part: dip you hang in lukewarm water and sprinkle it into the frying pan to provoke a splattering, covering the frying pan very quickly to prevent the oil from splattering all over the stovetop (and the cook!) When things have died down, you're done. The result is a lovely open "flower" whose taste is indescribable and whose texture is an amazing mixture of crispy and soft.

A view from the Ghetto in Rome
NOTES: If you are ever in Rome, the place to eat carciofi alla giudia is an area referred to as the "Ghetto", which had traditionally been the Jewish section of town. (I lived right next to the Ghetto for the first six years or so of our time in Rome, in a small square named piazza San Paolo alla Regola.) There are a number of places that specialize in Roman Jewish cooking, which has a long history—Jews have lived in Rome for over 2000 years, since the days of the Empire. It is an interesting cuisine.

The ghetto itself has an interesting history. Starting in the year 1500 Jewish Romans had to live in a particular walled in area of town, which was called the 'ghetto' (hence our word). They had to be back by sundown, at which time the gates were shut. And on Sundays, they were forced to go to Mass in a local church and hear about how they were responsible for killing Christ and were sure to go to hell if they did not convert to Christianity. (But I guess there were worse places to live if you were Jewish.) Anyway, thankfully all that came to an end in the mid-19th century. The wall was torn down long ago and today the ghetto is actually a rather tony area, located as it is right in the center of town. An enormous (and rather pompous) synagogue was built around the turn of the century and today serves as the center of the Roman Jewish community. The church is still there, by the way, and it is located among some of the most interesting and accessible ruins in Rome, the remains of the Portico d'Ottavia (see photo above). Right next to the Portico is the most famous of the Roman Jewish restaurants, called Giggetto. It's very touristy but the food is actually quite good. Down the same street a bit is the Taverna del Ghetto, which is the place the locals go (or at least they used to; a friend to whom I recommended the place came back telling me that it is now overrun with American tourists...)

It can be hard to get good artichokes in the US. Try to find ones that have leaves still tightly bound together. If the artichoke leaves are open and spottled, then don't buy it, it's too old. Unfortunately, that describes about 90% of the artichokes you'll find in the supermarkets here, at least outside California.

There are other great ways to enjoy Italian-style artichokes, like carciofi alla romana, the other signature Roman artichoke dish, or cut into wedges and deep fried, the way Angelina used to make them. If you are lucky enough to find really fresh, baby artichokes, they are lovely cut into thin slices and eaten raw in pinzimonio—dipped in olive oil seasoned with salt and pepper.

Saturday, April 17, 2010

Aïoli with Spring Vegetables


While versions of it are made around the rim of the western Mediterranean, from Spain all the way to Sicily, this garlic sauce is best known in its Provençale incarnation known as aïoli. It is a commonplace to refer to aioli in English as garlic mayonnaise, but it is really something rather different.

You begin with a mortar and pestle. Add several whole cloves of garlic and a pinch of salt. (Besides seasoning the sauce, the salt helps to soften the garlic.) Begin by crushing the garlic cloves against the side of the mortar with your pestle, then starting turn the pestle around in the mortar, always in a single direction, until the garlic has been reduced to a rough paste. This can be slow work, so be patient… 

Then add an egg yolk, mixing it into the garlic as you turn your pestle, and, drop by drop, begin to add olive oil, as you continue to turn the pestle. Don't add more oil until the last bit has completely emulsified into the sauce. Again, be patient… after a while, you will be able to add more oil at a time. Continue thus, turning always in the same direction, until the sauce is thick enough that your pestle will stand up on its own, like this:

 
Now, if you like—and I do like—you can temper the sauce with a few drops of freshly squeezed lemon juice. Adjust for seasoning and you're done! 

At this time of year, I like to serve aioli with steamed seasonal vegetables: asparagus, artichokes, green beans, together with baby carrots and new potatoes still in their jackets. If you are perfectionist, you should steam them separately so that each will be done to just the right degree, having lost their rawness but still brightly colored and offering some slightly resistance to the bite. Lazy cooks like me, however, add all the vegetables at once on a steamer placed over simmering water in a large covered sauté pan and let them all steam together until the potatoes are done. (You will know when they are done when you can prick them with a paring knife and then remove the knife without picking up the potato.) 

I like to serve this dish 'family style, by placing a small bowl with the aioli in the middle of a platter, then arranging the steamed vegetables around the platter. Each diner can spear a vegetable of their choice, dip into the sauce and eat. It's a lovely, convivial way to share a meal. But you can also serve the sauce separately, to be passed around to each diner to serve themselves—perhaps a better plan if you're not on intimate terms with your dining companions. 

NOTES: Purists will tell you that the original aioli was made only with garlic, salt and olive oil—no egg yolk. But all the contemporary recipes I have seen, including the one in the Larousse Gastronomique, call for the egg yolk which, of course, greatly helps the emulsification process. (Some versions call for adding a bit of boiled potato or soaked bread instead of egg yolk, but they are a distinct minority.) And while the same purists will tell you that aioli is definitely not a kind of mayonnaise, you can make a rather close ersatz version by adding a few cloves of garlic to mayonnaise made in a blender or food processor. It's a practical, but not very romantic, solution. And the original mortar and pestle method, once you get the hang of it, is really quite easy. It only requires a modicum of skill and, most of all, a sense of patience. They say that making aioli while you're nervous is a surefire way for it to 'curdle'. 

The best of olive oil to use for this dish is, of course, from Provence, where the olive oil is fruity but lighter than most Italian olive oils, especially the ones from Puglia and Sicily. But I've made the sauce from fruity Italian olive oil that suited me just fine. The most important point, perhaps, is to make sure that the garlic is as fresh as it can be. As for measurements, the Larousse calls for 4 cloves of garlic, one egg yolk and about 2.5 dl (1 cup) of olive oil. But being a garlic fiend, I sometimes add a clove or two more, depending on the size of the cloves. 

For a true Provençale treat, the classic Grand Aïoli is made with desalinated and poached salt cod, boiled snails (actually, a special kind of snail called bulots), hard-boiled eggs and boiled vegetables, typically green beans, new potatoes, baby carrots, cauliflower, fennel, chickpeas, zucchini, beets... It makes for a sumptuous but healthy spring or summertime meal. At the opposite end of the spectrum, aioli is perfectly delicious as a starter with a single vegetable; to my taste, asparagus and artichokes are especially lovely covered with an unctuous dressing of aioli

Post-scriptum: Contrary to what you may have read recently, the word aïoli is not Italian for mayonnaise, which is, quite simply, maionese. The word comes from ail (French for garlic) and oli, the Provencale dialect word for oil (huile in standard French). Because the word sounds Italian to many non-Italian speakers--Provencale dialect has a lot in common with Italian-it seems to create some confusion.

Sunday, April 11, 2010

Tagliata d’agnello


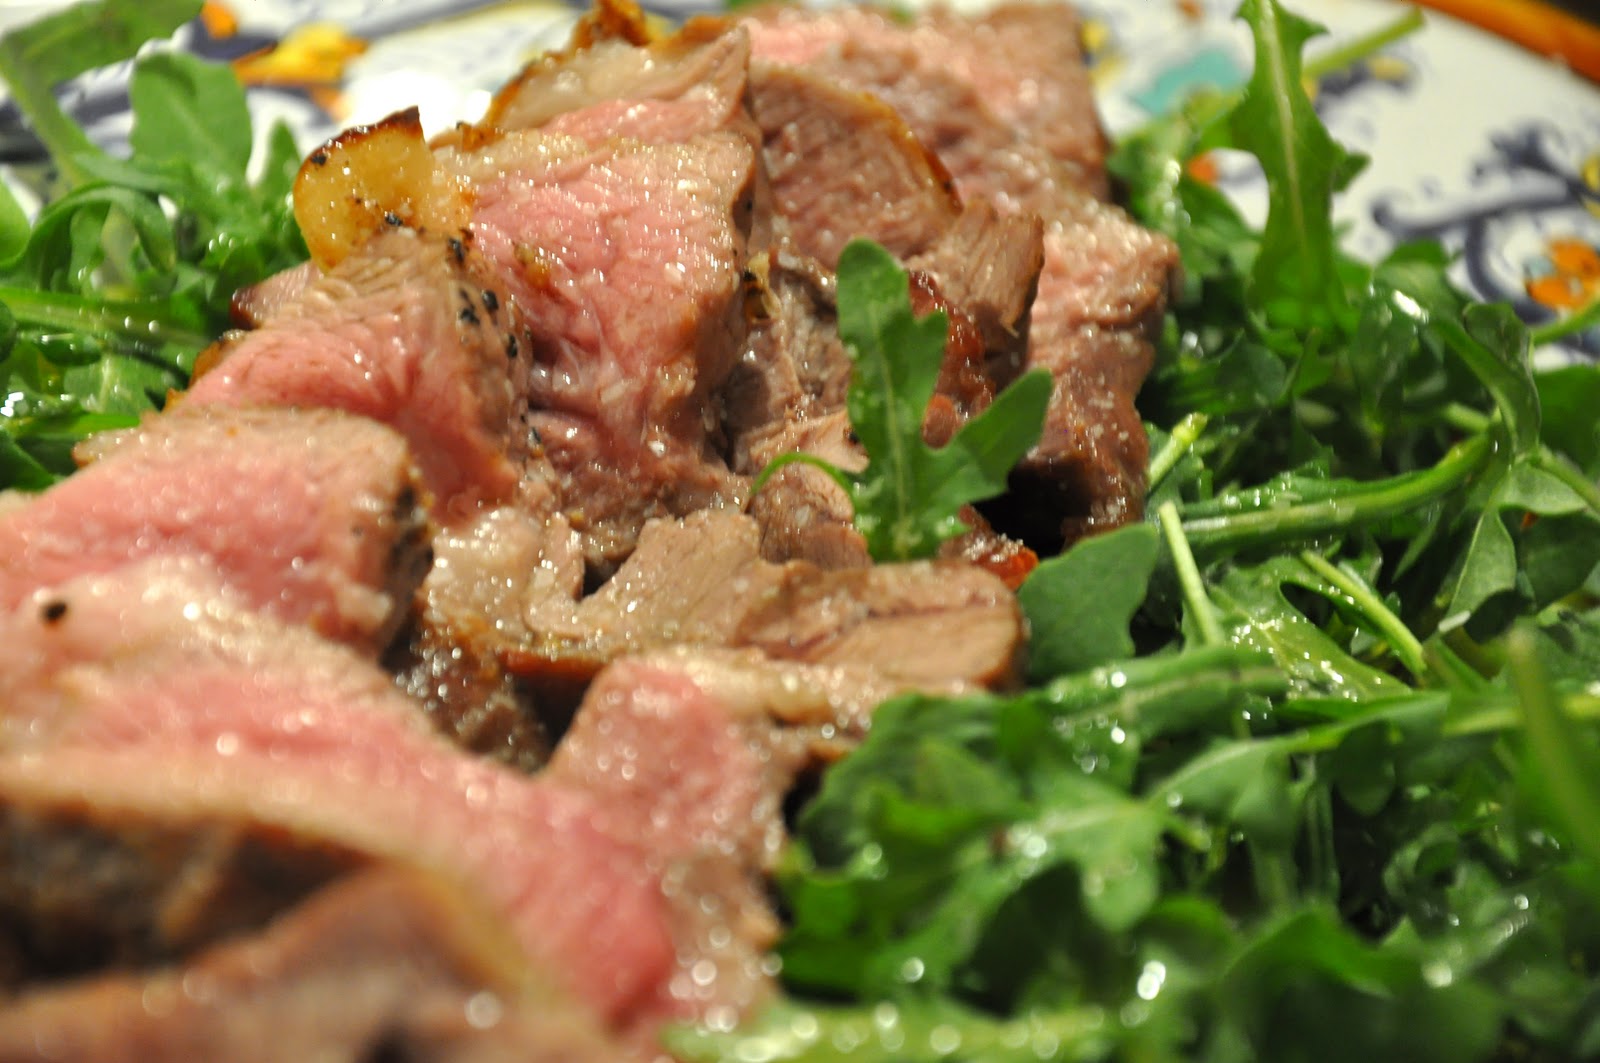
One of my favorite ways to make steak is called tagliata or, to be more precise, tagliata di manzo. The word 'tagliato' means simply 'cut' or 'sliced', and manzo means beef. The dish is, quite simply, sliced steak, grilled rare, arranged over a bed of arugula and dressed with olive oil, salt and pepper and, if you like, garnished with parmesan shavings. (See this post for the recipe.) Well, the other day I saw a nice piece of butterflied leg of lamb at the market, perfect for an early Spring cookout, and the thought occurred to me: why not make a tagliata of lamb instead of beef? An unorthodox idea— in Italian cuisine leg of lamb is usually either cut up for stew or pot-roasted—but that is what I did, and I actually rather liked the result. 

Here's what you do: Marinate a nice butterflied leg of lamb in a mixture of olive oil, salt and pepper to taste, two crushed garlic cloves and a sprig or two of rosemary. You can either whizz these together in a food processor or simply sprinkle them directly on the meat, as you prefer. Obviously, the first method will result in a more assertive flavor. For best results, let the lamb marinate overnight in the fridge, wrapped in plastic (a plastic freezer bag also works nicely). If you don't have that much time or haven't planned ahead, no worries; even an hour or two will lend flavor. If you've refrigerated the meat, take it out of the fridge and allow it to come to room temperature (this should take about a half hour or so). 

Grill the lamb directly over a hot fire, about 10-15 minutes per side, depending on the thickness of your meat, until nicely crusted on the outside and pink, or medium-rare, on the inside. Allow the meat to rest for a good 10-15 minutes, then slice it against the grain and place the slices over a bed of baby arugula. Season the whole liberally with salt and pepper, then drizzle with olive oil and, if you like, a few drops of lemon juice. If you like, some parmesan shavings would not hurt. 

NOTES: The degree of doneness is, of course, a matter of taste, but I find that grilled leg of lamb tastes best 'pink', or medium-rare, in the French manner. (If you want to be sure, check for an internal temperature of 130F/55C with a meat thermometer.) A classic tagliata di manzo is usually serve very rare—red, not pink inside—but lamb does not really lend itself to serving truly rare. On the other hand, while lamb is usually cooked well-done in Italian cuisine, I can't imagine a well-done tagliata, so I opt for the French way, however unorthodox it may be. 

Once ready to go, it is best to serve your tagliata immediately, as otherwise the arugula will wilt and the meat will get cold.

Friday, April 2, 2010

Spargel mit Sauce Hollandaise und Kartoffeln


This dish brings me back to my Vienna days: white asparagus and potatoes with hollandaise sauce. The appearance of asparagus in the markets of Vienna--as elsewhere--is a harbinger of Spring. Austrians (and Germans) have a thing for white asparagus. They prefer it to the green kind that is more familiar in most other places. In fact, ask for Spargel and they will assume you mean white asparagus, you should say Gruener Spargel, or "green asparagus" if you want the kind we're most familiar with. White asparagus are grown by keeping dirt mounded around the emerging stalk, depriving it of light. The plant cannot produce chlorophyll without light, thus there is no green color to the stalks. The flavor is more delicate, and the flesh more tender, than regular asparagus. (The same light deprivation technique is used to keep Belgian endive white as well.)

Anyway, this is another dish of utter simplicity to make, but quite beautiful to behold. Start by steaming some baby potatoes. While the potatoes are steaming, cut the bottom ends off the asparagus, peel them (but avoid the tender tips) and boil them, either in a skillet or in a asparagus cooker filled to an inch or two with water, for 5-10 minutes, depending on how thick they are and how crisp you like them. (Come to think of it, I suppose you could boil the potatoes in the same skillet where you are boiling the asparagus, in which case add the potatoes about 5-10 minutes before as they take longer to cook.)

In any event, when both the asparagus and potatoes are just about the way you like them, make the hollandaise sauce by placing two or three egg yolks in a bowl that is sitting above a pot of simmering water (in French this is called a bain marie), add the juice of half a lemon and a bit of salt and whisk briskly until the eggs are quite frothy. As they heat up, they will begin to thicken. As this happens, quickly begin to add a 1/2 cup of butter, which you will have melted separately, bit by bit, as you continue to whisk. As each bit of melted butter is absorbed by the egg, add a bit more butter, whisking all the time, until you have a nice creamy sauce. Add hot water to thin out the sauce if need be and remove from the heat. (TIP: Make sure to regular the heat so that it is at the simmer. If it gets too hot, the eggs will scramble rather than thicken. If you see this beginning to happen, you can take it off the heat immediately and add a drop of lukewarm water to cool things off, then continue.)

Transfer the asparagus and potatoes to a serving dish (making sure they are well drained--you don't want water on the dish!) and pour over the hollandaise sauce. (You will need to move quickly here, as the residual heat of the bowl will continue to thicken the sauce. If it becomes too thick, whisk in a bit more hot water.) Sprinkle some finely chopped parsley over the dish and serve immediately. Wash down with white wine. Mahlzeit!

NOTES: Those of you who have ever made mayonnaise at home will immediately see the similarities between the two sauces, the main difference being that mayo is made with oil while hollandaise is made with melted butter. In the latter case, to allow the egg yolk and butter to emulsify properly, you need to keep things warm but not hot. The need for temperature control makes hollandaise a bit more challenging to make than mayo.

Obviously, the egg yolks do not fully cook when you make hollandaise from scratch, so if you have qualms about uncooked eggs (salmonella and all that) I suppose you can use hollandaise sauce from a jar, although I have no idea if it's any good. There are also some recipes for mock hollandaise around. I haven't tried them so can't say much about them.

I won't try to sell this dish as healthful, as the hollandaise sauce, made from egg yolks and butter, is something of a cholesterol bomb. But I must say, it looks and tastes wonderful--so why not splurge once in a while?

Saturday, March 27, 2010

Frittata ai carciofi


The frittata is one of those categories of dishes, like risotto, where the main ingredient, in this case egg, can act as a foil to an almost infinite variety of flavors, being it meat, fish or vegetable. So by learning a single technique, you open up a whole new culinary galaxy. One of my favorite frittate, especially this time of year, is made with artichokes.

First, trim the artichoke in the usual Italian manner. Then cut the artichoke into very thin wedges and leave them in acidulated water. Then light sauté one or two slightly crushed garlic cloves in oil olive until it just begins to brown. Drain and add the artichoke wedges to the oil (don't worry if some water clings to them, it will actually help them to cook more quickly), season with salt and pepper, and toss to coat the wedges. Then lower the heat and cover. Allow the artichokes to stew for about 10-15 minutes, or until the artichoke wedges are quite tender. Uncover, raise the heat, and add a tritto of finely chopped garlic, parsley and mint. Mix well and sauté this mixture for a minute or two more. Remove from the heat and allow to cool.
While the artichokes are cooling, beat some eggs along with salt, pepper and some grated parmesan cheese. Fold in the artichoke wedges once they've cooled a bit (you don't want them to start cooking egg) and proceed in the usual manner for making frittata, either slowing browning it on both sides in a non-stick skillet, or frying one side and finishing off the other under the broiler, until nicely browned. 

Frittata can be served immediately, but they taste much better either lukewarm or at room temperature. 

NOTES: This frittata is especially good made with those small 'baby' artichokes. You trim baby artichokes in the same way you would a large globe artichoke, but it is actually quite a bit quicker and easier, as the leaves are more tender and, of course, there is less to trim. And most baby artichokes will not have formed that fuzzy core known as the 'choke', so you should make short work. The stem on a baby artichoke is much thinner as well, so I usually use a peeler rather than a paring knife. Otherwise, you may find yourself cutting the stem right off. 

What about measurements, you ask? Well for a normal sized skillet, I find that six large eggs and say, four or five baby artichokes work well. That will make enough for 2-4 people, depending on appetites and what else you may be serving along with the frittata. 

One nice variation is to add, instead of or in addition to the parmesan cheese, small cubes of fontina or another semi-soft cheese like Emmenthal or Munster, to the egg and artichoke mixture before you begin to slow-fry the frittata. It provides a nice creamy balance to the slightly astringent quality of the artichokes.

Frittate are quite versatile, by the way. They can serve as antipasto, primo or second, depending on your mood and the rest of the menu. They make wonderful snacks, or as filling between two slices of pane pugliese makes a delicious 'peasant' sandwich.

Sunday, March 21, 2010

Carciofi alla romana

Dear readers: I am back from my travels, at my blogging post just in time for the first day of Spring. Artichokes are back in season! And is there any vegetable more typical of Roman cooking, perhaps of all Italian cuisine, than the artichoke? What better way to get back to work, then, than this dish, one of the most typically Roman ways to prepare artichokes called, appropriately enough, alla romana, or 'in the Roman style': stuffed with garlic and herbs, and simmered in olive oil and water. Nothing could be simpler, or more flavorful.

The only tricky part of this dish, like any artichoke dish, is the initial trimming of the artichoke. Much of a mature artichoke—the outer leaves and the inner core or 'choke'—are inedible, and the Italian way with artichokes is to trim them of all their inedible parts before cooking them. In Rome, many markets, including the famous Campo de' fiori market near our place, would sell you pre-trimmed artichokes—at a higher price, of course—which saves you the trouble, but elsewhere you'll need to do it yourself. The operation is not all that difficult, but it takes some practice to get the 'hang' of it:

First, remove all the tough outer leaves from the artichoke. Beneath, you will find thinner, lighter colored leaves that you should leave on. Cut off the tip of the artichoke. Then, taking a very sharp, solid paring knife, begin to pare away the sides of the artichoke, starting from the wide base, holding the artichoke in one hand and rotating it as you pare away with the other hand, as if you were peeling an apple. Then, taking a spoon, scoop out the fuzzy core or 'choke' of the vegetable, including the thin, spiny leaves (often a dark purple color) that often surround the choke. Wash the artichoke well under cold running water to remove any of the 'fuzz' that tends to stick to the vegetable. Then cut off all but 3-4 cm (1-1-1/2 inch) of the stem, and pare away its tough, fibrous outer layer. All the while as you are paring the artichoke, you should make sure to rub it the exposed side of a lemon that you have sliced in two, to prevent discoloration. 

For a nice step-by-step visual guide to trimming an artichoke, see this article (the explanations are in Italian, but no matter: the photographs will show you the way). 

After you are through trimming, immediately drop the artichoke into a large bowl of acidulated water to prevent discoloration. Proceed in the same fashion with the rest of your artichokes:


You are now ready to staff and cook your artichokes: Make a tritto of garlic, parsley and mint, mixed with salt and pepper and wet with a bit of olive oil. Stuff the hallowed out cores of the artichokes with this mixture. Then stand the artichokes up, stems upward, in a terracotta casserole or enameled cast iron Dutch oven or other heavy pot with tall sides. Add a generous amount of olive oil and then enough water to come halfway up the artichokes (not counting the stem):


Season with salt and pepper. (Although not part of the traditional recipe, I also like to add an extra sprig of mint and garlic clove to the liquid.) If you have any extra garlic-and-herb stuffing, you can add it to the liquid as well. Cover the pot and let the artichokes simmer for about 30 minutes. Check for doneness with a knife; they should be tender but not 'mushy'. Allow the artichokes to cool before serving, moistened with a bit of the liquid.

NOTES: This recipe calls for the larger sort of artichokes known as 'globe' artichokes, known as mammole in Italian. When an artichoke is fresh, its leaves will cling tightly to the vegetable and show no sign of discoloration. Unfortunately, it is rare to find such fresh specimens in US markets (California, where most artichokes in the US are grown) might be the exception) but this treatment works well even with less than perfectly fresh artichokes. Slightly smaller artichokes will also work—and will cook in less time—but 'baby' artichokes will not. 

Carciofi alla romana are very versatile. They can be an antipasto, a secondo for a vegan/vegetarian meal or even a light lunch or supper. They are one of the two most typically Roman ways of preparing artichokes, the other being carciofi alla giudia, or "Jewish style" artichokes, which I will blog about soon. 


Post scriptum: By the way, I never throw away the cooking liquid. It is perfectly delicious and, although it is perhaps not very orthodox, I like to serve the liquid, too, at table, for dipping with nice crusty bread.