Showing posts with label Lazio. Show all posts

Saturday, March 5, 2011

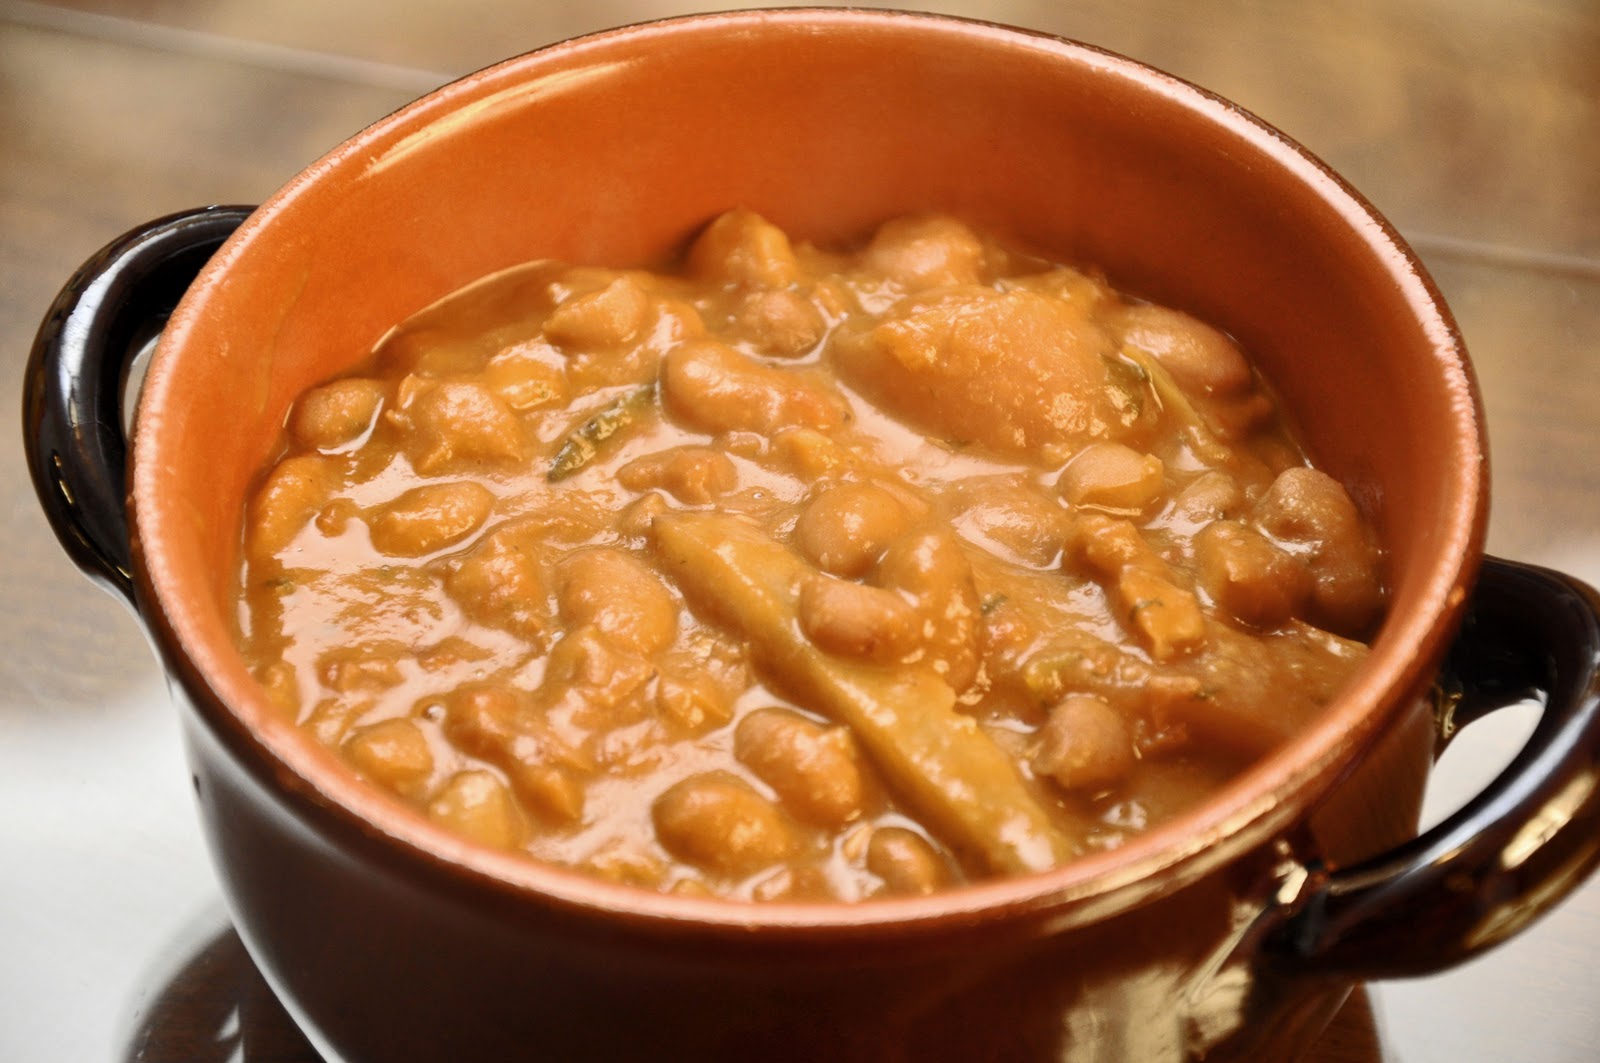
Fagioli con le cotiche


Tuscans are known for being the biggest bean-eaters in Italy, so much so that they are sometimes called mangiafagioli in Italian. But Romans are no slouches in the legume department, either. They love fava beans, of course, and they make a mean pasta e lenticchie, for example, even if the Roman version is actually quite different than the one Angelina used to make. But the ne plus ultra of Roman bean cookery has got to be fagioli con le cotiche, a kind of Roman-style pork and beans, made with cannellini or (even better, in my book) borlotti beans simmered in tomato sauce with strips of pork rind. A classic example of how Roman frugality can produces hearty and delicious results.

Ingredients (for 4-6)

For simmering the beans:
500g (1 lb.) dried cannellini or borlotti beans
A garlic clove
A sprig of fresh parsley
Salt

For simmering the pork rind:
250g-500g (1/2-1 lb.) pork rind, depending (see Notes)
A stick of celery
1/2 medium onion, in one piece
Salt and pepper

For the tomato sauce:
250-500g (1/2- 1 lb.) canned tomatoes, depending (see Notes)
1/2 medium onion, finely chopped
1-2 cloves of garlic, finely chopped
A handful of parsley, finely chopped
Lard or olive Oil
Salt and pepper

Directions

Soak the beans overnight. Simmer the beans in fresh water to cover, along with a garlic clove and parsley (if using—see Notes) until quite tender, about 1-1/2 to 2 hours.

Meanwhile, prepare the pork rind: 

Raw pork rind
Pre-boil the rind for about 15 minutes. Remove the rind and let it cool for a few minutes. When it is cool enough to handle, cut it into thin strips. (Some recipes will tell you to trim of the fatty underside with a knife, but this is a bit too fussy for my taste and, anyway, I like the fattiness!) Then simmer the strips in water to cover, lightly salted, with the celery and onion. They will be done when they are tender but still have some bite to them, which will take, say 45-60 minutes.
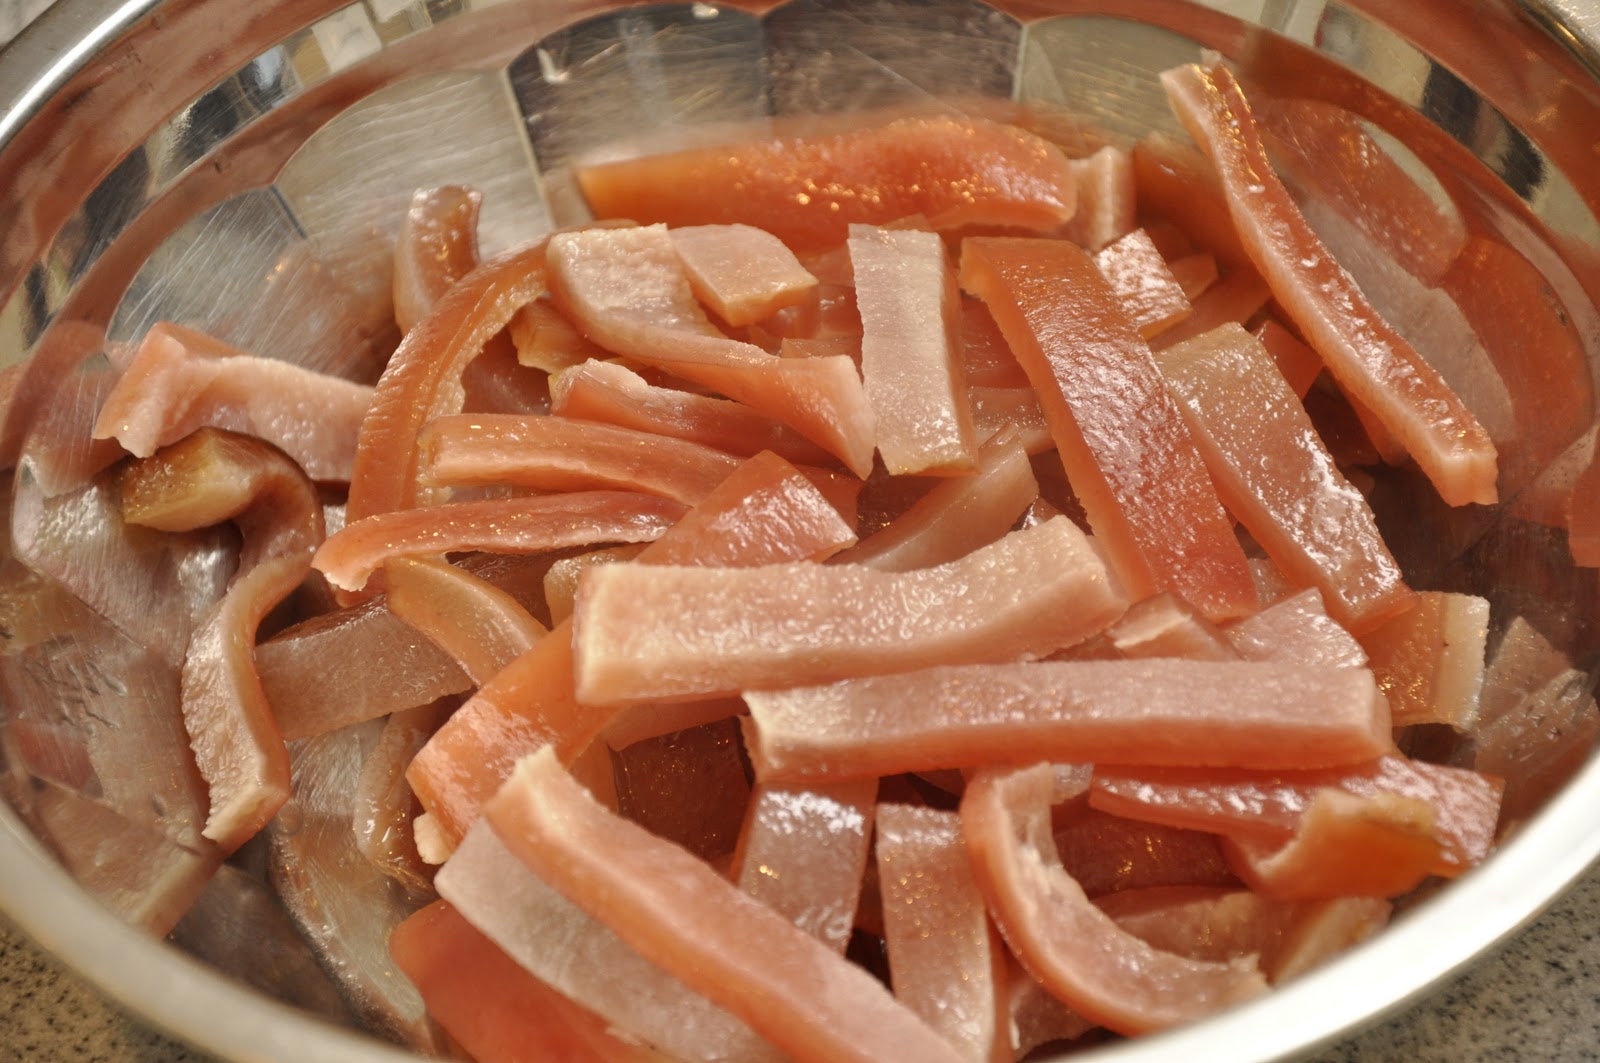
Prep'd and ready to go...

Prepare the tomato sauce in a large casserole large enough to contain all the ingredients. A terracotta or enameled cast iron pot would be ideal. Make a soffritto by sautéing the onion, garlic and parsley gently in lard (the traditional choice) or olive oil, seasoning while the odori are cooking. Add your canned tomatoes, puréeing them by passing them through a food mill into the pot. Let the tomatoes simmer until they have reduced into a sauce, about 15-20 minutes.

Now it's time to put it all together: Add the pork rind to the tomato sauce and let them insaporire (see Glossary) for a minute or two, then add the cooked beans. Mix everything together well. Add a bit of the pork rind water and/or bean water if you find that the mixture is a bit dry. Simmer it all for about 30 minutes to allow the flavors to get to know each other.

Serve hot. Like many long-simmered bean dishes, fagioli con le cotiche are even better if allowed to rest overnight and reheated the next day.

NOTES: Raw pork rind can be hard to find in the States. I am fortunate enough to have a farm supplier close by that has it, but where I live, in any event, you will rarely (if ever) find it in a supermarket. I suppose that butchers will also carry it or take an order. Unfortunately, there is no real substitute for it in this dish. After all the name of the dish is 'beans and pork rind' in Italian! But if you were to substitute pork belly or some other fatty cut of pork, I would venture you'd wind up with something quite tasty. 

The basic building blocks of this recipe—simmer the beans, simmer the pork rind, make the sauce and mix it all together and simmer for a bit more—is common to all the recipes you'll see for this dish. But like so many classics, there are variations on the basic theme, and they revolve mostly around three factors:

First, the ratio of bean to pork rind. In some recipes, the ratio is 2:1, or even greater, so that the pork is really only there as a flavoring agent. In these versions, the dish can serve as a a contorno. In other recipes, the ratio can increase to as much as 1:1, so that the pork is there as an equal partner, so to speak. In these heartier versions, the dish graduates to a full contorno or even a piatto unico or one-dish meal, accompanied by nice crusty bread and followed by a green salad and perhaps a piece of fruit.  I just use as much of each as I have on hand, since it will be delicious no matter what! (By the way, if you have any left over, these beans go great with pasta.)

Second, the dish can be more or less in rosso, by adding more or less tomato, depending on your preference. And you can use canned tomatoes passed through a food mill (my preference) or a passata di pomodoro.

Third, the aromatic vegetables (aka odori) that make up the soffritto for the tomato sauce and are thrown in to simmer with the pork and beans vary from recipe to recipe. The above options are the ones I like, but for example, many recipes will tell you to make the tomato sauce with a classic soffritto italiano of onion, celery and carrots. Personally, I don't care for the sweetness that carrots lend to beans, and prefer to stick to the allium family. Some recipes will have you simmer your beans with no aromatics at all, since they will be absorbing the flavors of the tomato sauce and pork in the final stage anyway. And the pork rind, too, can simply be simmered in lightly salted water.

Some recipes also call for adding a bit of prosciutto fat to the soffritto, but personally I'd call that gilding the lily, especially if, as I like to do, you are cooking with lard. Even I have limits to my pork fetishism.

Sunday, January 30, 2011

Slow Cooker Polenta with Sausage Ragù


Some of you will have read in a recent post that I finally broke down and bought a slow cooker, a kitchen device also known in the States—to those of you who are old enough—as a 'Crock Pot'. The thought of owning one had never really occurred to me before. The Crock Pot craze of the '70s, which brought us some pretty awful cooking (a can of this, a can of that...) was still seared into my memory banks.

But I started hearing about 'slow cookers' from cooks that I liked and admired. Then came Michele Scicolone's Italian Slow Cooker cookbook and my resolve began to waiver. And then I started reading Ad Hoc At Home, by perhaps American's most respected chef, Thomas Keller, in which he mentions the slow cooker as one of his prized kitchen tools, in particular for beans. Well, that did it. I had to see what everyone was talking about. (By the way, if you don't have these books, I would heartily recommend both of them!)

I have promised you, dear readers, to share with you my impressions, so here goes.

I realize now that a slow cooker, though marketed as a convenience tool—usually the kiss of death in my book—is really just another way to achieve the kind of gentle most cooking that most cooks will do in a Dutch oven or, in Italy, a terracotta pot. All kinds of dishes that you would want to simmer for hours on end: rich sauces, broths and, yes, beans—all come out wonderfully in a slow cooker. And, yes, it is also convenient: it frees up your stove for other uses, can be left on all day if you like, and will keep your food warm indefinitely. What it is not, as the name implies, is quick. But once you're down with the initial steps (in the Italian context, that mean making a soffritto and the rosolatura of the main ingredient) you can leave whatever you're making unattended until it's done.

So far, I've had excellent results with broth, beans (look out for coming posts!) and, as I will get to in a moment, polenta and ragù. Not everything I've made so far has been a smashing success, however. Stews and pot roasts, for example, have not turned out as I would have liked. I tried to make a brasato al vino rosso, for example—the very first dish I tried in my new slow cooker—and found the meat rather stringy and the sauce thin and bland.

That brings me to an important point when it comes to slow cooking: as when cooking in a pressure cooker, there is very little evaporation and therefore very little concentration of flavors. So you need to use much less liquid than you ordinarily would. And those dishes that requires evaporation to work will not work very well in a slow cooker. I tried making a spezzatino di pollo, for example, with vinegar. Made in the conventional way, the vinegar evaporates and its flavor mellows to the point where you would probably not know it was even there (unless you're the cook, that is!) In a slow cooker, the vinegar flavor is as strong when the dish is done as when you started, and that's not a good thing. So it's back to the drawing board for me on stews and pot roasts. I'll report back to you, kind readers, when I've figured out the best way to handle them.

In any event, on to our recipes!

SLOW COOKER POLENTA

Makingn real polenta is a laborious job, as we all know, involving a lot of stirring over a good 45 minutes or more to reach the right, creamy consistency. Italians have developed any number of tricks to make the job a bit easier, as I have outlined in my post on How to Make Polenta. The slow cooker provides yet another easy (if not very quick) way to make polenta.

Ingredients

1 part polenta (by volume)
5 parts water (by volume)
A pinch of salt

(NB: I made a batch from 1 cup of polenta mixed with 5 cups of water.)

Directions

You mix the polenta and cold water together in your slow cooker with a whisk or wooden spoon. Then spinkle the mixture with a pinch of salt. Turn on your slow cooker to high and let it go at it for 3 hours. Stir after two hours or, if you prefer, every hour. (Recipes vary.) If the polenta is getting too thick, you can add some water, but not too much—remember, you can't count on evaporation to thicken the polenta by more than a very marginal amount.

The polenta will stay smooth and soft for several hours if left on 'warm'.

NOTES: Made this way, the polenta turned out fine. Was the texture quite a fine as the hand-stirred variety made in a traditional paiolo? No, not really. But it was certainly acceptable—more than acceptable, in fact. The difference was subtle, not one that would be obvious to anyone other than the true cognoscenti

Three hours is a sort of awkward time. Too long to be 'quick', but not long enough, say, to make in the morning before work and have it ready by the time you get home. For that, you can cook your polenta over low heat for double the time (6 hours). I have not tried this variation but it would seem to work.

(NB: There is a general rule for slow cooking, which says that you can cook must about anything for x hours on high or 2x hours on low. I have yet to find an explanation of what difference, if any, it makes to the final outcome.)


SLOW COOKER SAUSAGE RAGÙ

You would think that a slow cooker would be the ideal implement for making a Sunday Sauce and, indeed, it would seem to be ideal for all sorts of long simmering sauces. To accompany this polenta, I made a variation on the classic Roman dish, polenta con salsiccia e spuntature (polenta with sausages and spareribs), which we've featured on this blog. I just left out the spareribs, since I couldn't find any in my freezer and there was just too much snow outside to make a dash to the market. The result was still delicious.

You simply proceed as you would normally do, using the classic recipe. Brown your sausages (or both sausages and spareribs) in olive oil (or lard) a skillet, transferring them to the slow cooker when they are nicely browned. Then sauté your onions and garlic in the grease left in the skillet until you have a nice soffritto. Deglaze the skillet with red wine and add it all to the slow cooker. making sure to scrape out all that goodness at the bottom with a spatula. Then pour over enough puréed canned tomato to cover the meats well. Season with salt and pepper, and let your ragù simmer on low for at least six hours, more if you like. Serve the meat and a bit of sauce over your polenta as pictured above.

NOTES: Obviously, unless you have two slow cookers, you will need to make the ragù the day before—which is fine, since like most slow-cooked foods, a ragù benefits from a day's rest.

*              *                *

Post scriptum
: You can use any leftover polenta and ragù to make a heart-warming polenta pasticciata:


Slather your leftover polenta on a baking sheet and let it cool. It will harden into a sliceable mass. (You can also just pour it into a glass or other container if you prefer, which is my usual method.)

The next day, or whenever you want to use your leftovers, take some terracotta bowls (or a single casserole if you prefer) and grease the bottoms well with a bit of olive oil. Lay over some slices of polenta, then some of the meats from the ragù, which you will have sliced or chopped into bite-sized pieces. Then spoon over a bit of your leftover ragù, and then some béchamel sauce. (If you like, you can melt some grated or sliced cheese into the béchamel for extra flavor. This time, instead of the usual parmigiano, I used slices of young asiago). Repeat until you have used up your ingredients or filled up your baking vessels. Finish with the béchamel, into which you can swirl some more ragù for color. Sprinkle over some cheese if you like (I didn't) and drizzle with some olive oil.

Bake in a hot oven (200°C, 400°F) for about 25 minutes or so, until the mixture is bubbly and nicely browned on top. Let it cool off for a few minutes before serving.

Tuesday, August 3, 2010

Pomodori ripieni di riso

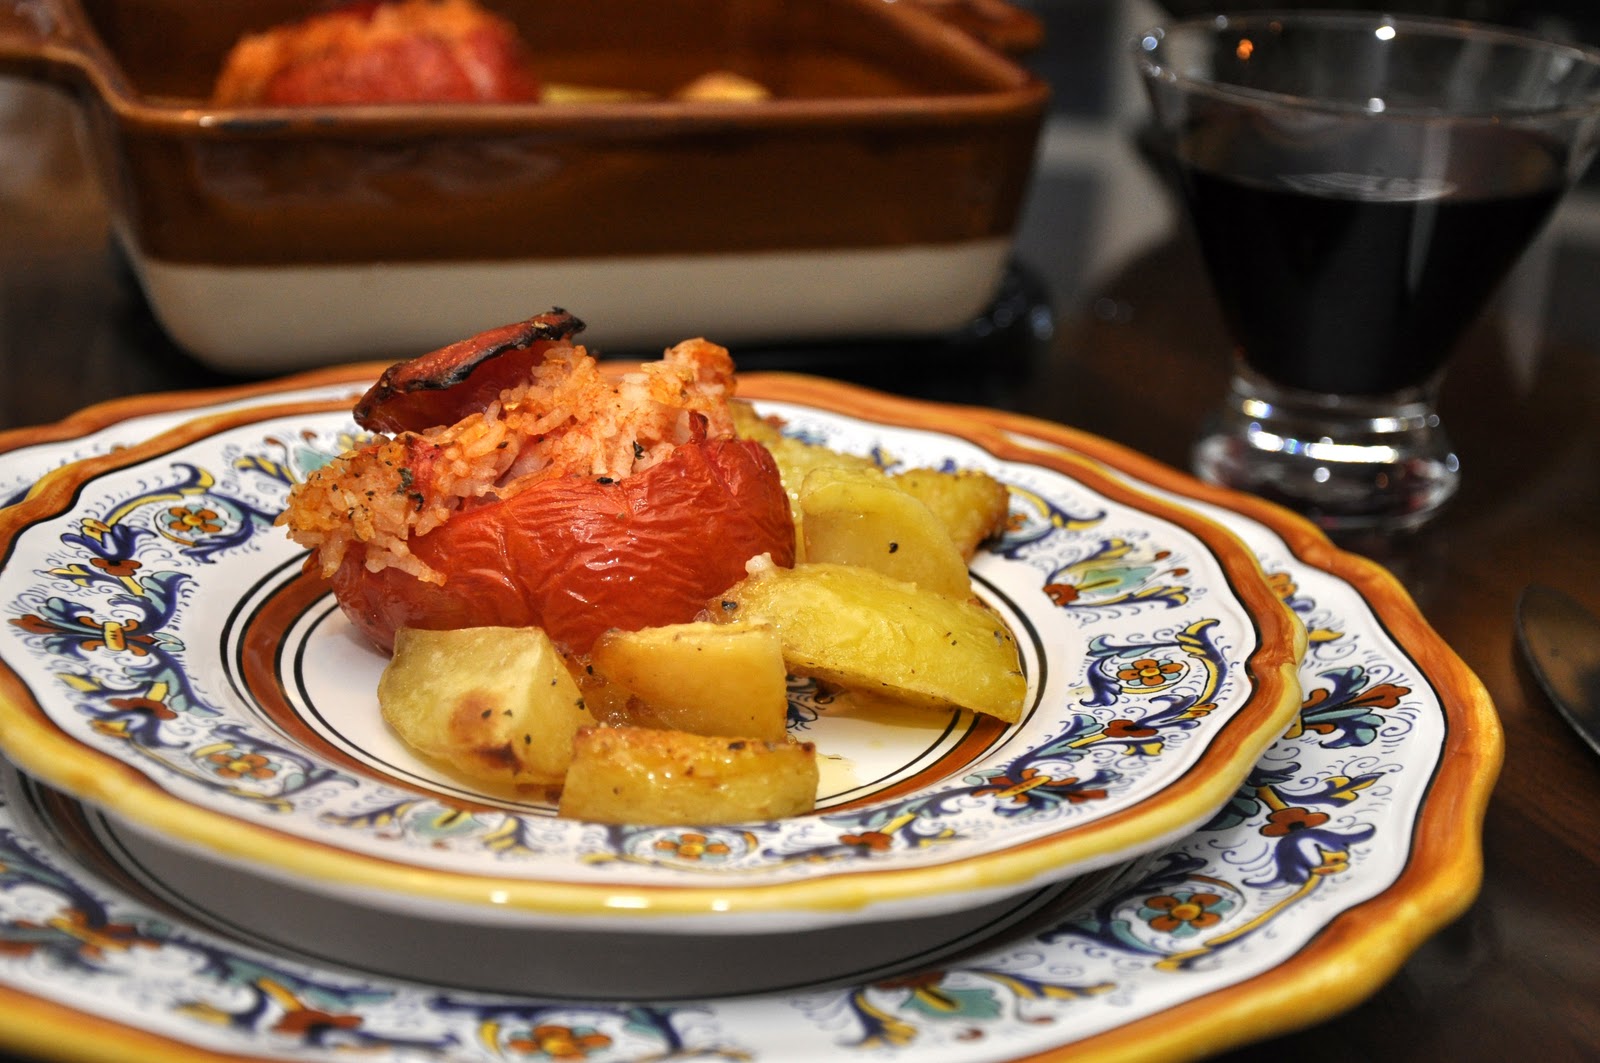
A staple of summer picnics and tavole calde, pomodori ripieni di riso, tomatoes stuffed with rice and oven roasted, make for a simple and relatively quick weekend dinner, part of a buffet or a tasty antipasto for a summer dinner for guests. Here's the recipe:

Take as many tomatoes as you have dining companions, cut off (but don't discard) the tops. Scoop out the insides of the tomatoes and chop them up, making sure you don't lose the juices. Mix the chopped up insides with some rice, which you will have parboiled until they are about half-tender. Season the rice mixture with salt, pepper, a drizzle of olive oil, just a bit of finely minced garlic and some minced herbs, typically oregano, basil and/or parsley.

Spoon the seasoned rice mixture into the insides of the tomatoes, taking care not to pack them too tightly, and place their tops back on top of the rice stuffing. Place them in a well-oiled baking pan and scatter some wedges of potato around the tomatoes. Season the dish with salt and pepper and, if you like, a sprinkling of oregano. Drizzle everything with some more olive oil. Roast in a hot oven (200C, 400F) for about 45 minutes, or until the rice and potatoes are fully cooked, the tomatoes nicely roasted—they will crinkle up and their edges will char a bit. Check on the dish from time to time while it is roasting. If it seems dry, drizzle over a bit more oil. You can also move the potatoes around so they cook evenly and are well coated with the oil.

Pomodori ripieni di riso are usually left to cool and eaten at room temperature or just slightly warm.
 

NOTES: In Rome at least, these tomatoes are invariably served with potatoes but if this is too much carb for your taste, you can omit them. Some recipes call for reserving a bit of the tomato pulp and mixing it with the potatoes so they too get some tomato flavor and a bit of color.

You can also play with the rice stuffing. As indicated, the herbs can vary with your taste. Some recipes omit the garlic, others call for some grated pecorino or parmigiano. Some add capers, olives and/or chopped anchovy, although these ingredients would change the character of the dish pretty radically and, in my humble opinion, upset the balance of flavors.
Needless to say, the success of this simple dish will depend on the quality of its ingredients, especially the tomatoes. This is really something you should save for the best, tastiest summer tomatoes you can find. The tomatoes themselves should be large enough to stuff, of course, but should not be gigantic, either, or you will wind up with too much stuffing, making for a rather stodgy dish. The tomatoes should be fully ripe, but not at all mushy, or they will disintegrate in the roasting process.

As far as the rice is concerned, the typical rice would be short-grained, but this is a forgiving recipe. You can even use leftover Chinese take-away, which is what I used tonight! Some recipes calls for adding raw rice, but in my experience this inevitably leads to a dry, chalky filling. As mentioned, it is important not to pack the stuffing too tightly or to overstuff the tomatoes; they will otherwise expand and rip open the tomatoes—not the end of the world by any means, and the tomatoes will still taste good, but you may fare una brutta figura (make a bad impression) if company is coming…

Saturday, July 31, 2010

Tonnarelli cacio e pepe


 Cacio e pepe, literally 'cheese and pepper', is a very typical Roman dish, usually made with spaghetti, bucatini or—for the ne plus ultra version of this dish—tonnarelli, a kind of square spaghetti made with egg pasta popular in Lazio and Abruzzo, as well parts of  Molise, Puglia and Le Marche. At its simplest, literally all you do is boil the pasta in well salted water, drain it (but not very well) and pour it into a heated bowl. Then add a generous amount of pecorino cheese and lots of freshly ground pepper, and mix well. The hot water that clings to the pasta should meld with the cheese to make a kind of creamy sauce. If the dish is too dry, you can add a bit more of the pasta water. If, on the other hand, you can still see water at the bottom of the bowl, add more cheese. Then top with more pecorino and another healthy grinding of pepper. That's it!


 NOTE: Like many simple dishes, cacio e pepe is easy to make passably well, but hard to master. You need to mix the pasta quickly but thoroughly, making sure that the cheese melts properly into a cream rather than clumping up into bits. The key is to balance water and cheese—and that can only really be done by eye as you mix. What I like to do is to keep a generous amount of grated pecorino on hand, about half as much as there is pasta by weight, and use as much as I need. Any leftover cheese can be sprinkled on top or kept for another use. But as often is the case with this sort of thing, no amount of coaching will substitute for practice, practice, practice.

There are some other ways to make cacio e pepe. A common modern variation, a bit more elaborate but less tricky than the traditional method, is to mix cheese and pepper with pasta water in a separate skillet and allow that to meld together over gentle heat until it forms a creamy sauce that you pour over the pasta. Some recipes also recommend adding a bit of butter or un filo d'olio before (or after) you mix the pasta, for a creamier texture. And finally, some people mix pecorino with the milder parmigiano-reggiano. To me, however wonderful parmigiano is, the salty 'bite' of pecorino is one of the attractions of the dish, so I wouldn't dilute it with anything else. But, as they say, les goûts ne se discutent pas. If you like the idea of any of these variations, by all means try them and let us know how you like them!
 
*             *               *
 
On making tonnarelli: 

In Rome, pre-made tonnarelli are sold in any supermarket but elsewhere, you may find you have to make them yourself. That makes this dish considerably less quick, of course, but I think it's worth the extra effort. Tonnarelli really are the best pasta for this dish—being an egg pasta, it absorbs the sauce more readily than either spaghetti or bucatini. At the same time, due to its thickness (and the optional use of semolina flourt) it provides more 'bite' than your average fresh pasta. 

To make tonnarelli, you need a special instrument called a chitarra, or guitar, which is why tonnarelli are also called spaghetti alla chitarra. Here's a picture of a pasta 'guitar': 


The guitar is fitted with wire 'string's top and bottom that are used to cut the pasta. The strings are narrowly spaced on one side, and widely spaced on the other. For tonnarelli, you want to use the side with the narrowly spaced strings. 

To begin, make some fresh pasta dough in the usual way—adding just a tablespoon or two of semolina flour per egg if you like for extra 'bite'—and roll it out quite thick. The pasta should be as thick as it is wide, so you can be guided by the strings of your 'guitar'. (Using a KitchenAid mixer attachment, use Setting 1 or 2.) Let the pasta sheets dry out for a good while (at least 20 minutes) so they will not stick too much as they are cut by the guitar. 

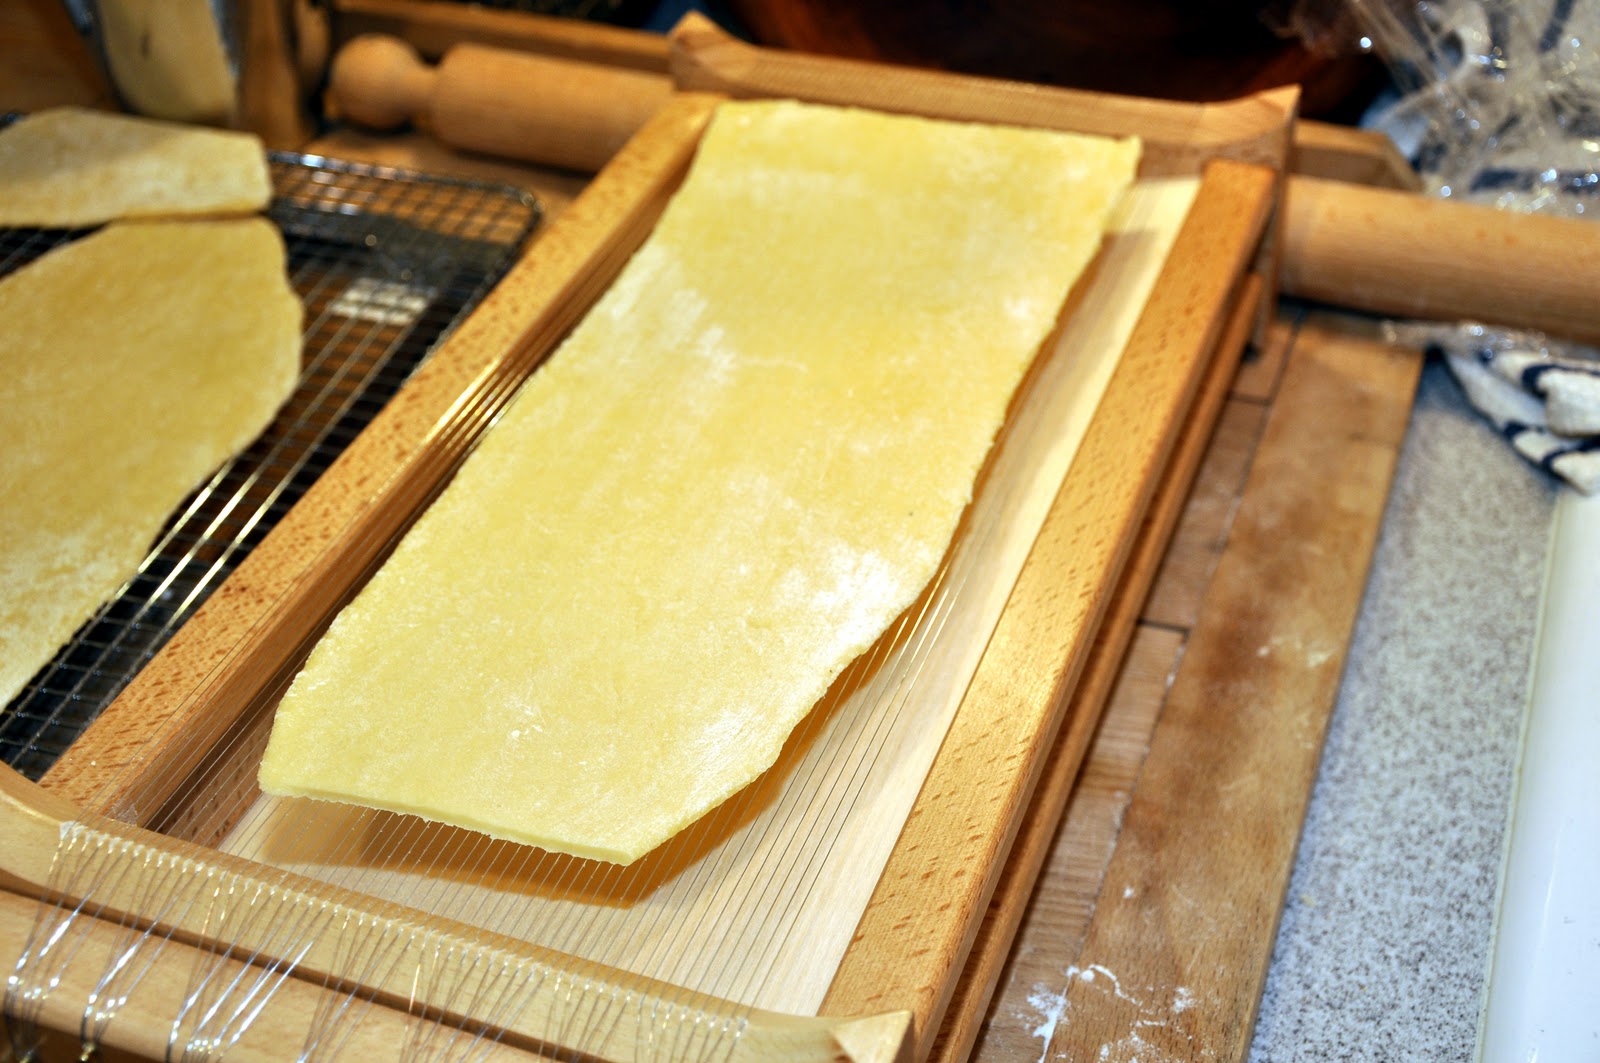
Cut your pasta into sheets about as long as the chitarra, leaving some room on each end for the pasta to stretch out, which it will as you proceed. 


Then, with a rolling pin, begin to flatten the pasta against the strings.


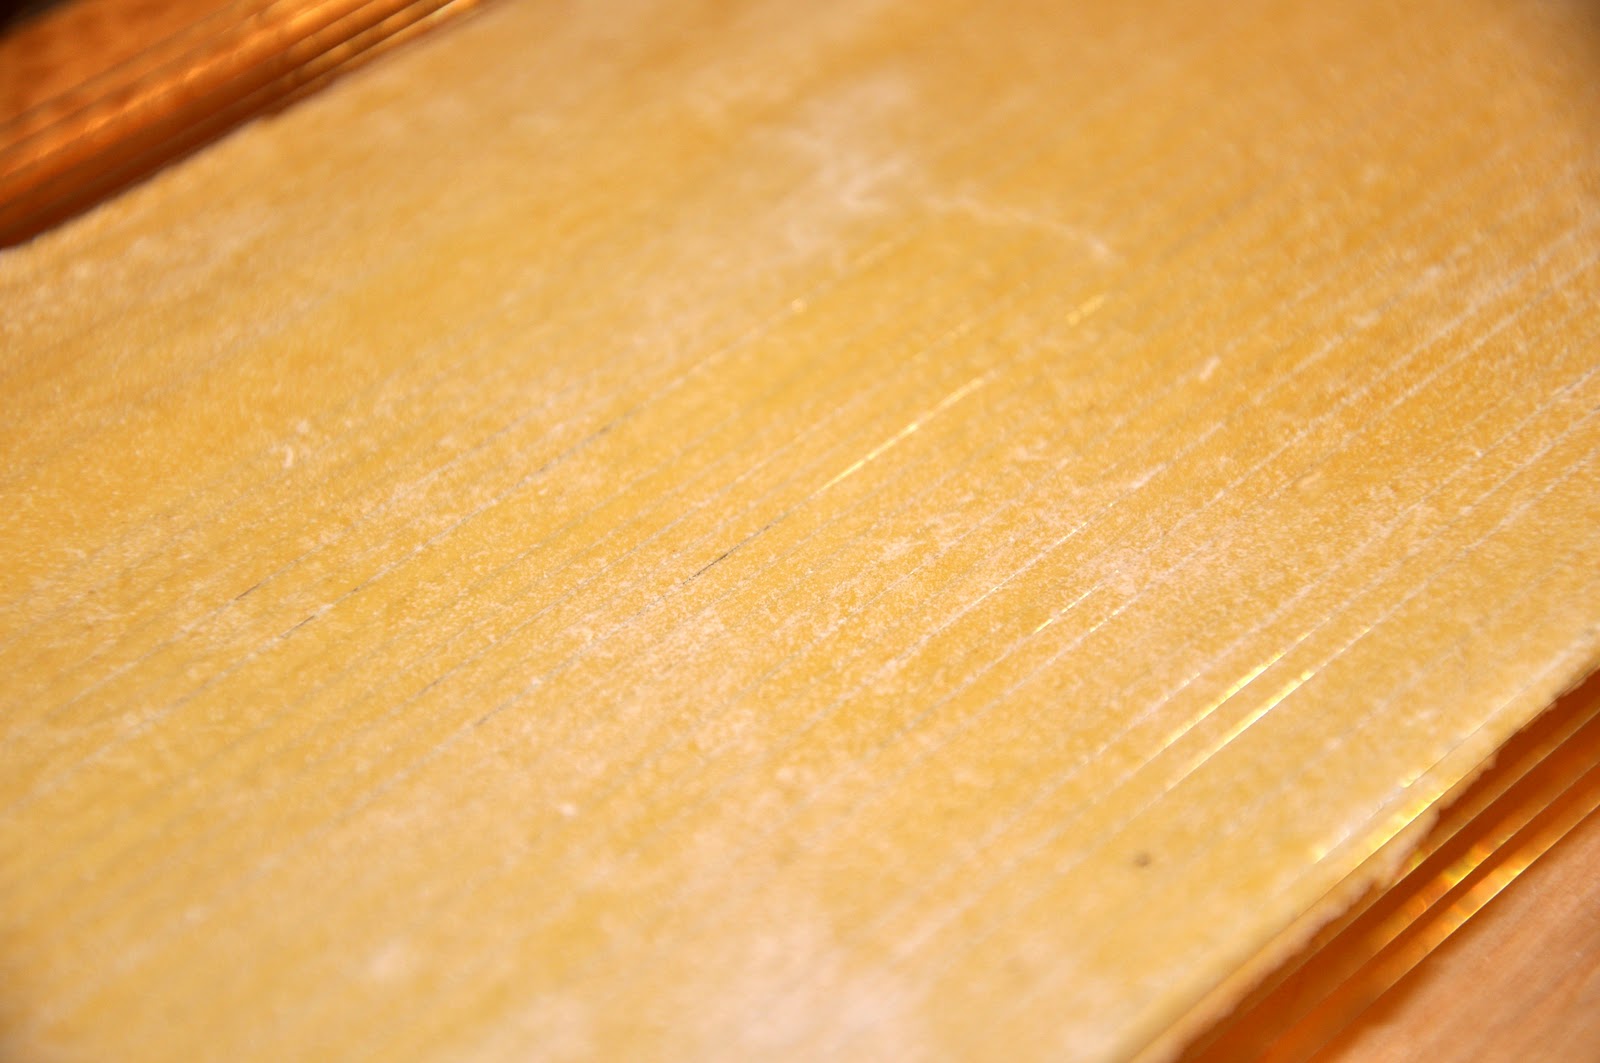
Very soon, the pasta will have passed between the strings, but will still cling to them, so that they will show flush with the pasta like this:


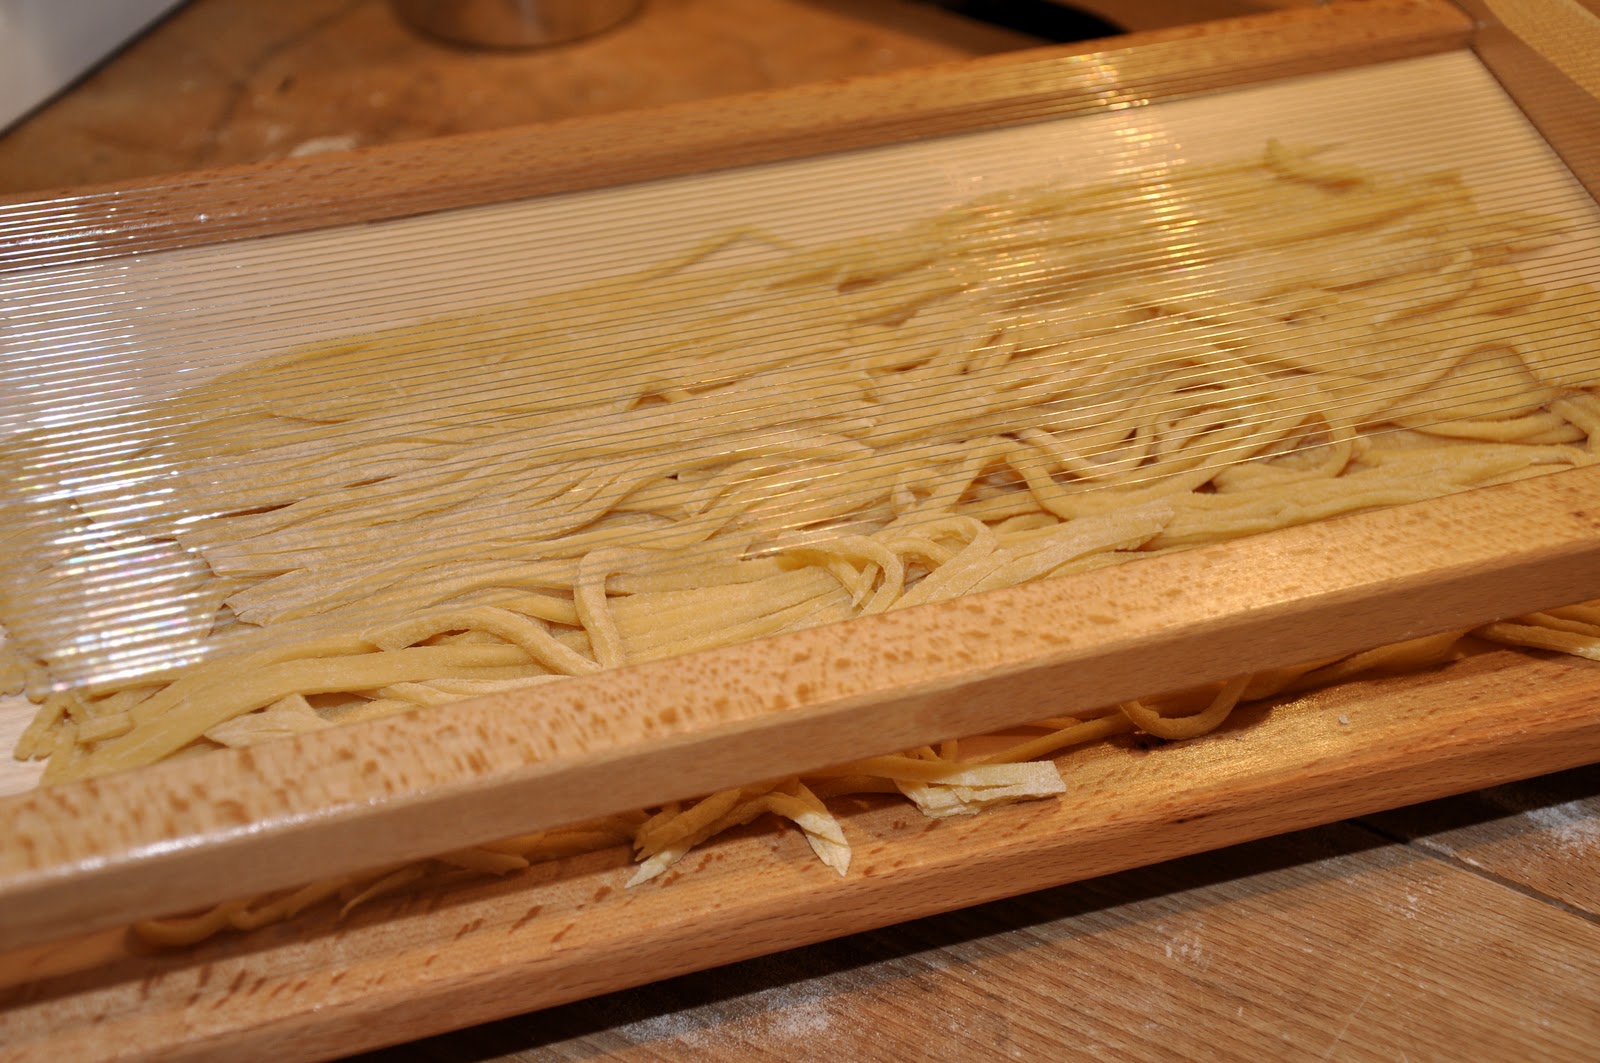
Now it's time to 'play' your guitar. Run your fingers along the length of the strings until the pasta begins to detach from the strings:


Continue playing your guitar until the pasta has detached completely and fallen into the tray below: 


Slide the tonnarelli out of the chitarra and lay them out to dry on a wooden board or towel. Repeat the operation with each additional pasta sheet. (NB: Depending on how dry the pasta sheets are, you may need to separately some of the strands by hand.)

Due to its thickness, tonnarelli take a bit longer to cook than other kinds of fresh pasta, as long as 5 minutes or more depending on how long it has been drying.

NOTES:  Tonnarelli as sometimes made exclusively with hard durum wheat flour (semolina) and sometimes just with "00" flour, which changes the character of the pasta considerably. I prefer neither 'extreme' and use mostly "00" (or simply all-purpose) flour with just a spoonful of semolina. 

Besides their use in the Roman classic cacio e pepe, in the cooking of Abruzzo,  spaghetti alla chitarra (as tonnarelli are called there) are typically dressed with a lamb-based ragu.' Tonnarelli are also very good with shellfish sauces. Indeed, they are extremely versatile and lend themselves to all sorts of sauces and condiments. 

De Cecco makes a dry pasta version of spaghetti alla chitarra, which is available through amazon.com. I have not tried it, but I have to imagine that the dry version, while surely good, will not give the same results as the fresh.

Friday, June 4, 2010

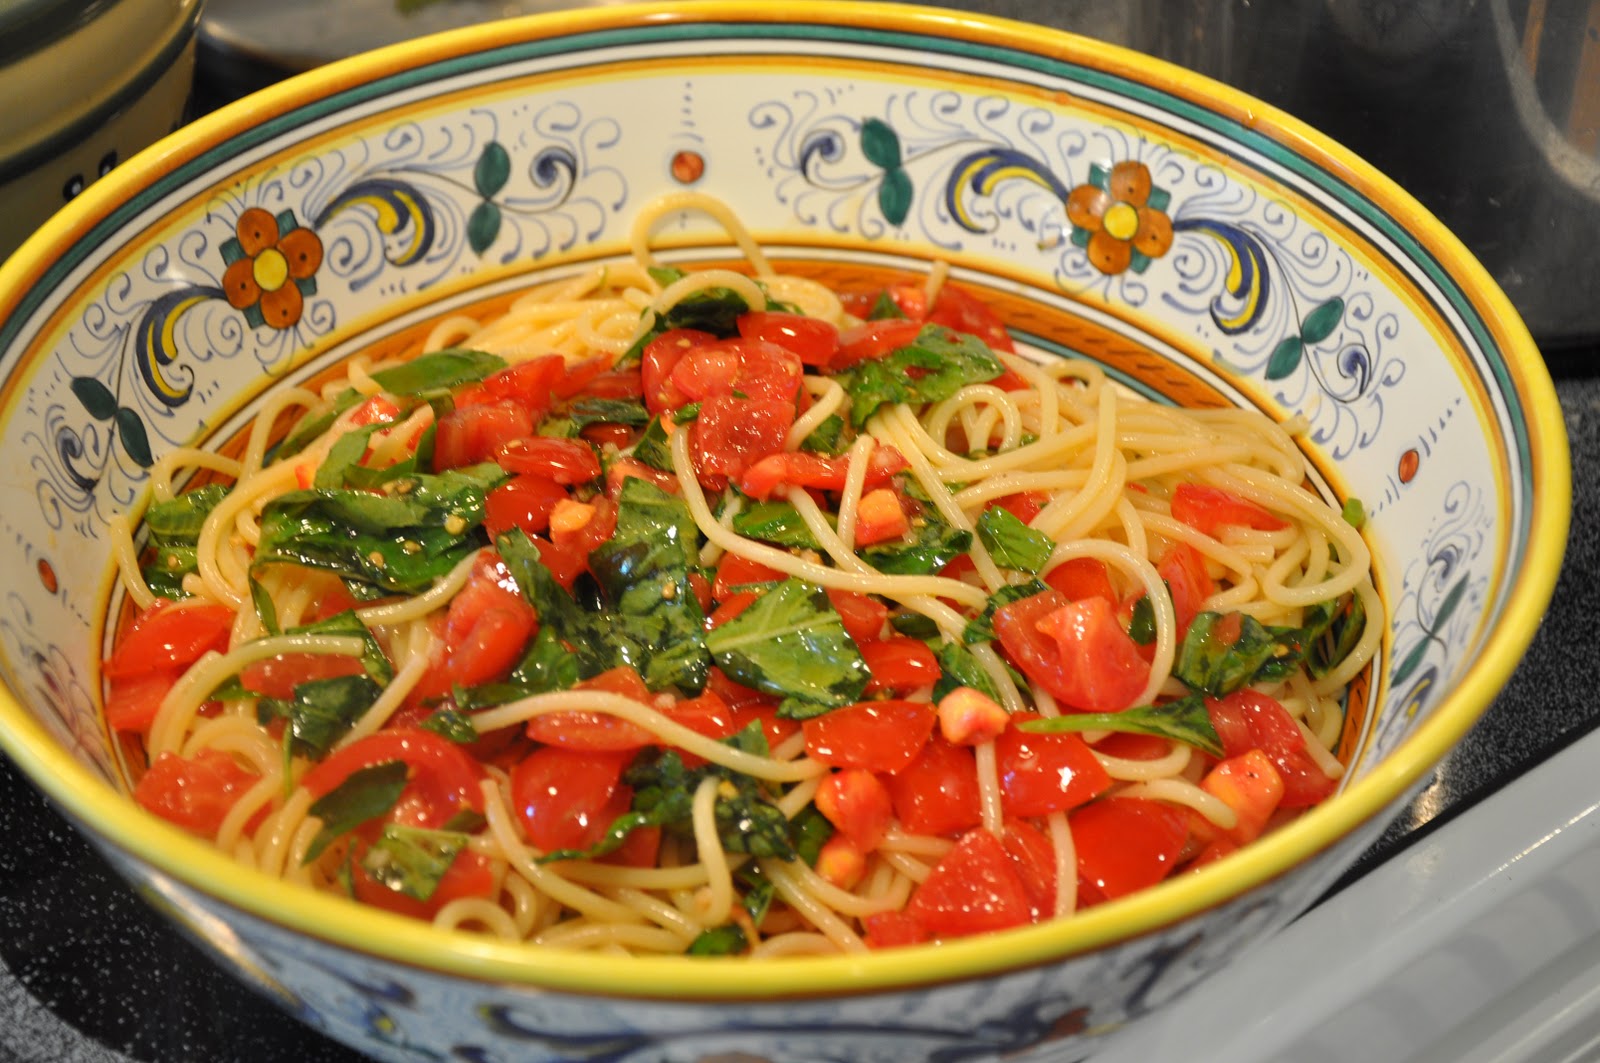
Spaghetti con pomodoro crudo

Summertime is fast approaching, the temperature is climbing, and my culinary imagination is starting to turn to dishes that quick but tasty and require minimal cooking. Here's one of the 'go to' summer pasta dishes in our house: spaghetti with a raw tomato sauce. 

The sauce should be made at least an hour ahead: take some best quality tomatoes (see Notes), cut them in half and scoop out the seeds, then chop them up into small chunks. Throw the tomato chunks into a large bowl, add a few cloves of finely chopped garlic (this is one of the few cases where a garlic press actually comes in handy), a handful of fresh basil, chopped as well, freshly ground pepper and enough olive oil to moisten all the ingredients very well—it should almost cover them. Let this mixture rest for at least an hour and up to three or four hours. This lets the flavors develop and meld. Leave it too long, however, like overnight, and the garlic flavor—which intensifies over time—may become overwhelming.

You need to salt this 'sauce' generously. Most recipes call for you to add the salt together with other ingredients. But if you are planning to leave the sauce to rest for more than an hour and/or if your tomatoes are watery, then hold off salting until about 30-60 minutes before you are ready to eat. 

Once the sauce has rested, boil your spaghetti (or other pasta—see Notes below) al dente and add it, well drained, to the sauce and serve immediately. No grated cheese is needed or wanted for this dish. 

Measurements: The main ratio is that of tomato to pasta. I find that the usual 1:1 ratio of condimento to pasta works fine, but you may even want to up this to as much as 1.5:1. So if you are having four people, say, use 400-600 grams (14-21 oz.) of tomato and 400 grams (14 oz.) of pasta. I usually use about one garlic clove per person (if they're not too big) and enough basil to balance out the tomato—see the picture to see what I mean. As usual, exact measurements are not particularly important. 

NOTES: This being a simple dish based on raw ingredients, the freshness and quality of those ingredients is crucial to the success of the dish. Most importantly, the tomatoes must not be overly watery and should actually taste like something. This dish is at its best when local tomatoes start arriving in the markets. But I have found that very small tomatoes, like cherry or grape tomatoes, or the greenhouse-grown 'Campari' tomatoes have excellent flavor and are not overly watery. If all you can find are those pinkish supermarket tomatoes, you may want to try another dish.

If your tomatoes are young and flavorful, they can be cut up as they are and added to your mixing bowl. But if you have any doubts about them, you can also improve the flavor and texture of your tomatoes by sprinkling the chunks in salt and draining them in a colander for 30 minutes or so before mixing them with the other ingredients. This should purge them of their excess water and concentrate their flavor. If you are dealing with larger tomatoes, you may want to peel their skin, which can be tough. Peeling a raw tomato is almost impossible to do, so you may want to either blanch them very briefly in boiling water or char them over a gas flame, which makes peeling much easier. 

Of course, besides the tomatoes, the basil and garlic should be as fresh as it can be and the olive oil as green and fruity as you can find it. 

Variations of this basic recipe abound: my favorite is to add some red pepper flakes, to taste, to the raw sauce. (NB: Like garlic, the flavor will intensify the longer it rests, so beware.) You can also add other typical summer ingredients like capers, olives, mozzarella, tunafish, anchovies. In addition to or instead of the garlic, some chopped white or red onion is very nice. (Avoid yellow onion, which has too strong a flavor to use raw, but if you have no other choice, soaking it in several changes of cold water will mellow it out.) A nice variation in technique is to place the raw sauce in the fridge, taking it out only just before adding the hot pasta; the combination of hot and cold produces some sort of reaction that gives the dish a very special taste.

In Roman cookery, this dish, made with slightly underripe tomatoes, olives, capers and fennel seeds, and often mozzarella and/or caciotta cheese, goes by the rather impolite name of pasta alla checca. (The word 'checca' being a pejorative Roman slang word for a gay guy, perhaps a reference to the fennel seeds, since the Italian word for fennel, finocchio, is another slang word meaning the same thing.)

You can also use other types of pasta. Linguine, of course, but also those stubby, concave pastas like conchiglie work very well with this sauce—perhaps even better than long pasta, as their nooks and crannies catch bits of tomato or other ingredients.

Sunday, May 9, 2010

Saltimbocca alla romana


One of the most famous of all meat dishes in the Roman culinary repertoire, these veal scaloppini known as saltimbocca typify Roman cooking in their simple, lusty deliciousness. And they are really quite easy to make, too, so long as you keep a few cardinal points in mind. 

You begin with slices of veal known as scallopine. Trim off any loose meat or connective tissue and pound them very thin between two sheets of wax paper (or plastic wrap), then lay a thin slice of prosciutto and a single sage leaf over each slice of veal. Skewer them all together with a wooden toothpick like this:


Then heat a skillet or sauté pan large enough to hold all your veal slices comfortably until properly hot  (see link below) and add a bit of olive oil and butter. When the butter melts, add your veal slices, with the prosciutto and sage side facing down, and allow it to brown for just a minute.  (NB: The prosciutto will harden if it fries too long.) Then flip each over and brown on the other side, again for only a minute or so, seasoning with salt (just a bit, since the prosciutto is already salty) and pepper: 


Remove the veal slices from the pan and arranged on a warmed serving platter. Then deglaze the sucs that will have formed in the pan (assuming you've used stainless steel, see Notes below), remove the pan from the heat and swirl in a dab on butter until it has completely melted, and pour the resulting sauce over your veal slices and serve immediately. 

NOTES: The main 'trick' to this otherwise easy dish is to ensure tenderness. Veal scallopine are typically cut from the top round. You can find them pre-sliced in the better supermarkets or butchers, but they are rarely made correctly here in the US. They should be cut across the grain but are almost always cut with the grain, which means the muscle fibers remain intact and the meat tends to curl and toughen as it cooks. What to do? Well, if you are on good terms with your butcher (assuming that you have a butcher, a professional that is sadly quickly disappearing) you can ask him to give you properly made scallopine. Otherwise, it becomes essential to pound the meat very well. The pounding will partially break up the fibers and tenderize the meat. And make sure that you trim off any silverskin or other connective tissue attached to the meat.

Like many traditional dishes, saltimbocca has a good number of variations. The oldest recipes I have found—including the recipe given by the romanissima Ada Boni and by Artusi—call for cooking the dish entirely in butter and using water, not wine, for the final deglazing. These traditional techniques are repeated in the authoritative La cucina romana e del Lazio by L. Jannattoni. The official cookbook of the Italian Academy of Cuisine, on the other hand, calls for deglazing with wine (but no final butter enrichment).

Most modern recipes, however, including almost all the ones you are likely to find online, call for adding the wine to the pan while the veal slices continue to cook—some recipes call for just a bit, others for a generous pour. This adds flavor to the meat and, even if I usually find the original versions of traditional recipes more appealing, this is one modernism that may actually improve on the original. A number of modern recipes also call for lightly flouring the veal slices, which, of course, aids in browning them and provides for a nice liaison for the sauce. If you do this, however, you will need to add wine, and a fair amount at that, or else you will wind up with a stodgy, gooey sauce—which is all too often what you get when you order this dish in an "Italian" restaurant outside Italy. 

Finally, there is the eternal question: do you place your sage leaf between the veal and prosciutto, or on the outside? I prefer the latter option, as it allows the sage to lend its flavor to the sauce. And I find that the sage taste is just too strong if the leaf is 'protected' by the prosciutto. 

This is one recipe where the choice of your cooking utensil will make a real difference in the end product. Many modern recipes call for using a non-stick skillet. That works fine, especially if you follow the modern practice of simmering the veal slices in white wine. But if you follow the traditional recipe, you'll want those lovely sucs that will only form if you use a stainless steel (or copper) pan. Many people these days shy away from these materials because they are afraid of the meat sticking, but if you heat your pan properly, that should not be problem. For proper use of stainless steel for pan frying, take a look at this excellent instructional video from the Rouxbe Online Cooking School.

It is common to make this and other veal scallopini recipes using with other meats instead of veal. Here in the US, the most common substitute is probably chicken, as in this recipe for chicken piccata. In Rome, however, I would dare say that chicken saltimbocca would be seen as a kind of heresy. But given the cost of veal, even in Italy, substitutions are not unheard of when making scallopine; slices of turkey breast or pork loin, however, are much more common than chicken. 

Even though saltimbocca is one of the most iconic Roman dishes you can find, it is actually rather uncharacteristic of Roman cuisine in its use of butter as a cooking medium and  its final deglazing and butter enrichment—all rather 'Frenchified' and not very Roman. Some gastronomes, including Ana Boni, cast doubt on its Roman origins. Indeed, according to Jannattoni, Boni's uncle Adolfo Giaquinto, in his Manuale pratico di cucina, includes an identical recipe called saltimbocca alla bresciana, or "Brescia-style" saltimbocca. 

Saltimbocca is usually served with a green vegetable as a contorno. This time I made piselli alla romana, Roman-style Peas, which will be the subject of a post in the near future. 

The name saltimbocca, as many of you probably already know, means 'leap into the mouth', a reference to how very good they really are.

Friday, May 7, 2010

Seppioline alla griglia


Grilled seafood is extremely popular in Italy, especially in the warm weather months. One of my favorite restaurants in Rome, a place called "La Torricella" (The Little Tower) in the Testaccio section of town, served wonderful seafood. And perhaps my very favorite dish to eat there was seppioline alla griglia, or grilled baby cuttlefish. But you don't need to take a trip to Rome to enjoy it—it's simplicity itself to make.

Begin by marinating cleaned baby cuttlefish or squid (see Notes below) in some olive oil, lemon juice, salt, pepper and parsley. If you like, you can add some red pepper flakes or a bit of chopped garlic to 'kick it up a notch' as the famous TV chef like to say. Let it sit in this marinade for an hour or two. 

Now get your grilled nice and hot. Depending on the size of the fish, you can either lay it directly on the grill, use a grilling basket or a flat grilling plate. Grease your grilling surface to prevent sticking and lay your fish on the grill. Personally, I like to flip the fish fairly often to ensure even cooking, but if you're a fan of neat grill marks, then you will need to leave the fish to cook on one side until it browns nicely. Although the fish will cook in no time, it actually takes a surprisingly long time to brown, so be patient. Once the fish is browned to your liking, transfer it to a serving dish, pour over the remaining marinade and, if you like, top with a bit of chopped parsley and serve with lemon wedges. 

NOTES: Baby cuttlefish are best for this dish, as they remain tender even after grilling. For this dish, as pictured above, I had found some incredibly small baby cuttlefish, pre-cleaned and frozen, in a local Asian supermarket. In Italy, seppioline are small but not tiny, but no matter—the flavor was incredibly good. In a 'regular' supermarket, you are more likely to find squid rather than cuttlefish. Buy it whole—not cut into rings—and, if it has not been cleaned, you'll need to do it yourself by cutting it in half just at the 'joint' between the body and the legs, then remove the cartilage 'pen' inside the body. Cut the legs into pieces, then proceed. 

Try to find smallish squid, as the large ones don't really lend themselves to this kind of treatment, as dry cooking methods like grilling tend to toughen them if left to cook more than just a minute or two. Like tough meat cuts like shoulder, they are better cooked using moist heat like a braise. 

Post-scriptum: A reader from South Africa tells me that, for those who don't have access to baby squid , larger squid can be tenderized by soaking for 5-10 minutes in warm water to which a spoonful of bicarbonate of soda has been added. Thanks for the tip!

For a great demonstration of how to clean squid, see this video from the Rouxbe Online Cooking School:

Saturday, May 1, 2010

For a May Day Picnic: Fave e pecorino


Fave e pecorino is not really a "dish" at all, you just set out the fava beans, in their pods, and a hunk of pecorino cheese. Each diner opens the pods for themselves and eats the raw fava beans they find inside with a bit of pecorino, washed down with a well-chilled dry white wine. Odd as it may sound, it is a combination that was just meant to be. 

Romans traditionally eat fave e pecorino on May 1, preferably while they picnic fuori porta, or literally 'outside the gate' meaning outside town. Romans will pick up and find any green spot (even city parks if they can't get out of the town) to set out their picnic lunch. When we were living in downtown Rome close to the Campo dei fiori, we'd often go up the Gianicolo, a high hill just across the river, for our May Day picnics. When we moved to a country setting on the outskirts of town, we could just sit outside on the terrace; and we would often come across strangers picnicking down the hill from our house!

If you want to get fancy, you can de-pod and shell the fava beans, cube the cheese and combine the two with a bit of oil, salt and pepper to make a salad. That is how I had this once in a tony restaurant in Florence. But personally I like the rustic informality of eating the raw ingredients.

Fava Beans on Foodista

Thursday, April 29, 2010

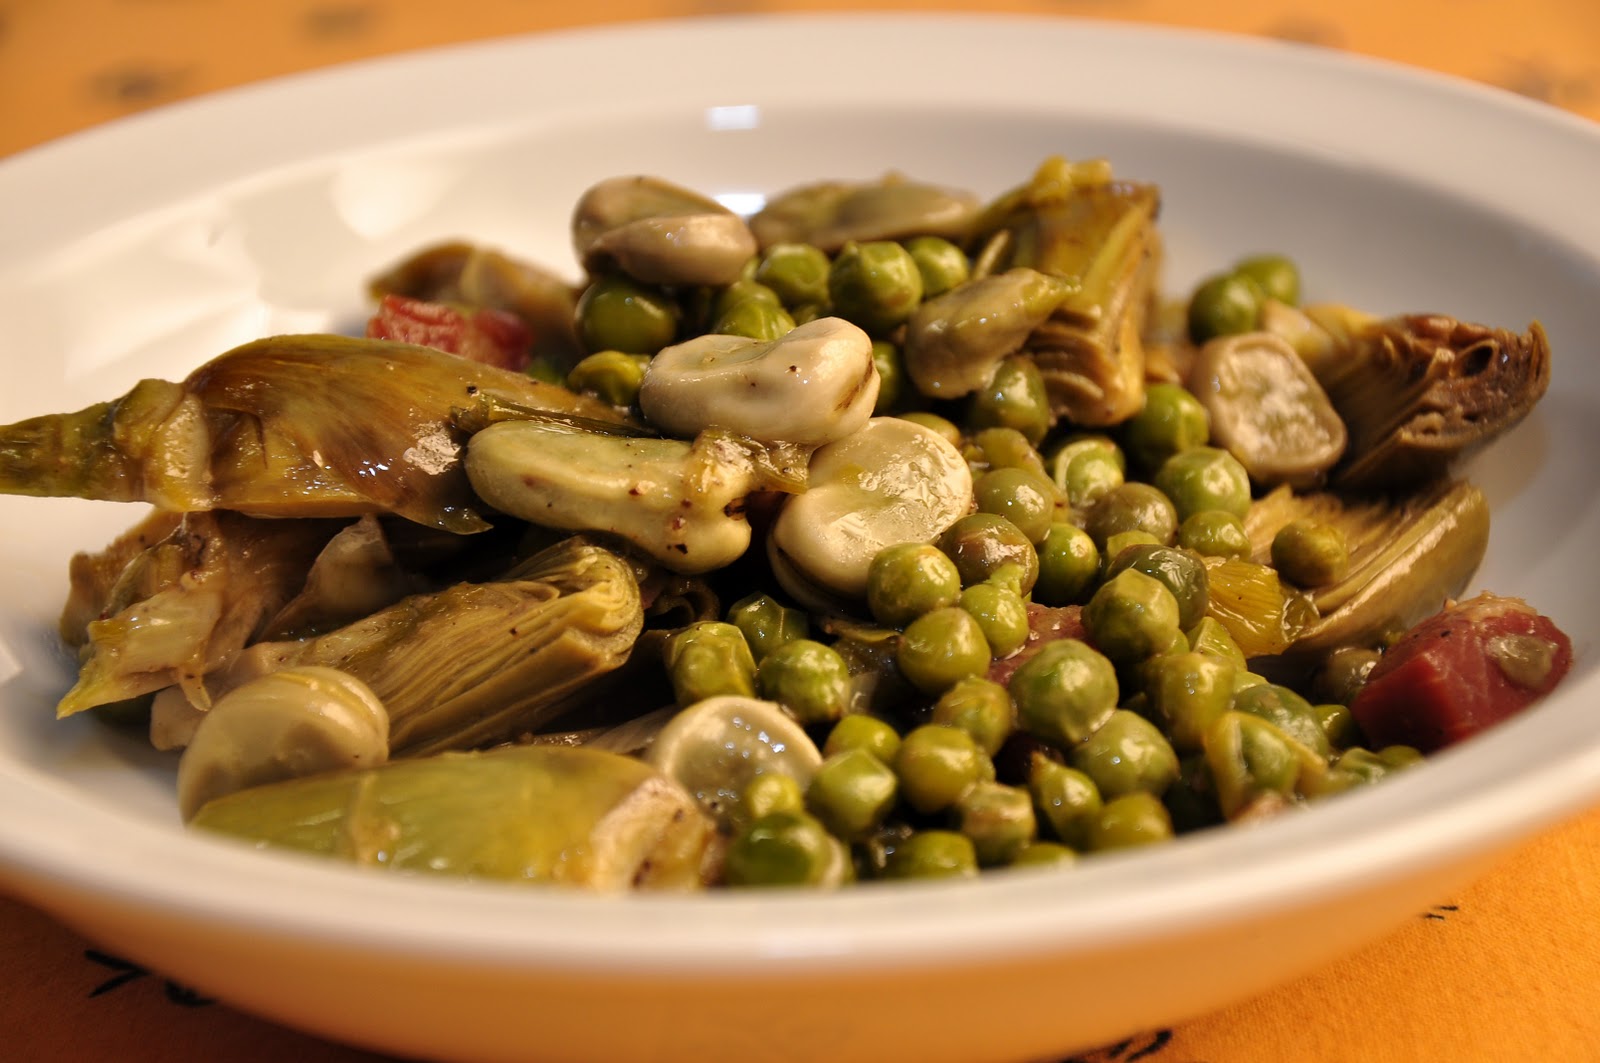
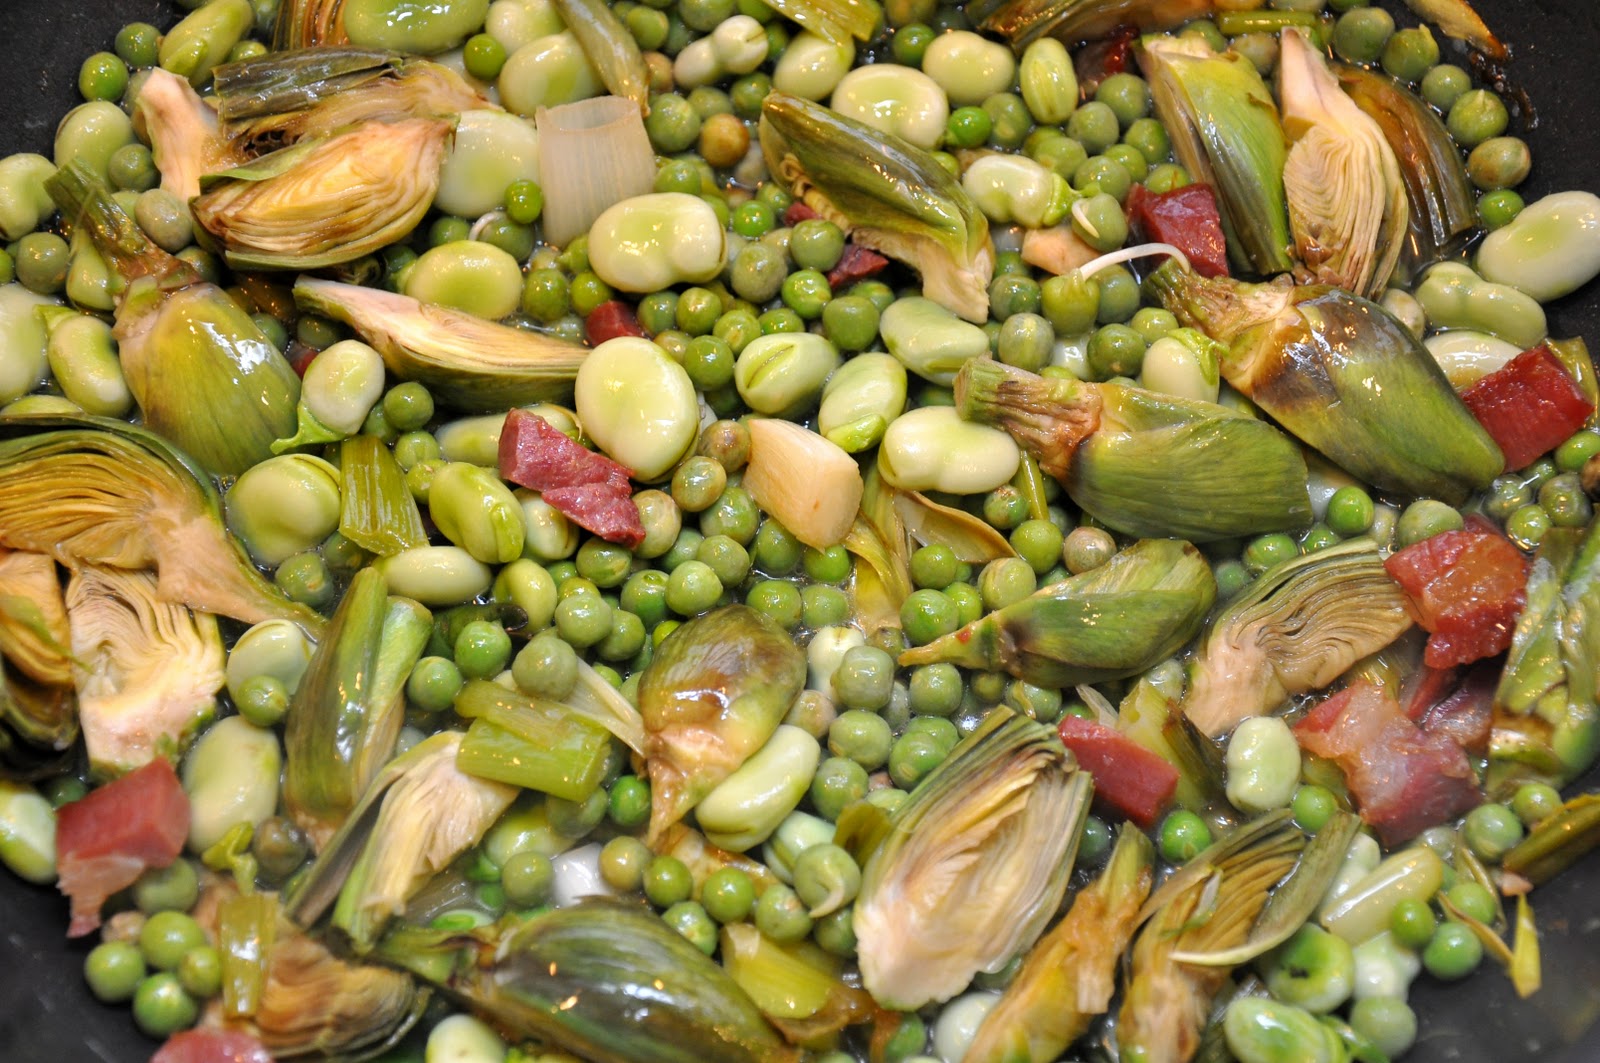
La vignarola


A Springtime Roman treat, la vignarola is a vegetable 'medley' made from spring onions, fava beans, artichokes, peas and tender lettuce. It comes in an entirely vegan/vegetarian version and one that uses a bit of guanciale or pancetta to lend flavor. 

You begin by lightly sautéing a bit of your cured pork meat in olive oil, just until translucent. Then add sliced fresh spring onions (scallions will do nicely as well), sauté for a minute or two, then add your artichoke, trimmed in the usual Italian manner and then sliced into wedges. Mix and continue to sauté for a minute or two longer. Then add fresh shelled fava beans and peas, season with salt and pepper, mix, and add some water to the pan. Cover and simmer gently until all your vegetables are nearly tender. Then add some tender lettuce (Boston or baby Romaine), finely shredded, and continue cooking until the lettuce has wilted and the vegetables are perfectly tender but not 'mushy'. As you prefer, you can cook off the liquid entirely or leave the dish rather 'brothy'. The exact cooking time varies according to the size and freshness of the vegetables but should take no more than 20-30 minutes at most. Serve either hot or, even better, at room temperature. 

Once again, exact measurements are hardly that important, but try to balance the ratio of the main vegetable ingredients—artichokes, peas and fava beans—so they balance each other, so roughly equal amounts by weight of each should work well. 


NOTES: While the above recipe is probably the most typical, as for so many traditional dishes, there are some variations on the theme. Some modern recipes get fancy and add that other typical, but more 'noble', springtime vegetable, asparagus. Some recipes call for the typical large Roman artichokes called mammole, similar to globe artichokes, but personally I like to use tender baby artichokes. Some recipes call for a bit of garlic in addition to the onion. I've seen one recipe that calls for a bit of peperoncino, it seems to me that would utterly overwhelm the delicate, sweet flavors of the spring vegetables. Some call for adding a bit of Roman mint called mentuccia or a few drops of lemon juice to 'brighten' the flavors. The amount of water varies from recipe to recipe. Some call for just a few drops of water—if necessary—to keep the vegetables moist. Personally, I like to add a fair amount of water to the pan and allow it to evaporate. I find that this melds the flavors more effectively and saves on the cooking time. Some recipes substitute broth or wine for the water, but I prefer the pure vegetable flavor you get from adding only water. As mentioned above, in some recipes, you serve your vignarola as a zuppa, still quite brothy, which makes for fine dipping with some crusty bread. Otherwise, you can let the liquid cook off and serve it perfectly 'dry'. 

The dish is typically an antipasto, but it can serve as a light second course or, in its vegetarian version, even as a side dish. 

La vignarola has a very short 'season' of only a few weeks while all the requisite vegetables are simultaneously in season. The dish is still good even if you're missing one of the ingredients (in fact, when I made it this time I didn't have the lettuce on hand.) But you can successfully use substitutes when one or more of the ingredients are out of season. Frozen peas are perfectly fine in lieu of fresh peas (just add them rather later in the cooking) and—believe it or not—edamame, even frozen edamame, are a fine substitute for fava beans, which can be hard to find in the US. And, in a pinch, you can use frozen artichokes. So, in fact, you can enjoy la vignarola more or less any time of year. But, of course, this dish is at its very best when you use all fresh, tender, young spring vegetables that the Italians call le primizie di primavera

By the way, vignarola is also apparently the name of a kind of bruschetta topped with a lamb and cicoria mixture, an unusual antipasto that I found in a book called Le specialità della cucina romana: ricette tratte dalla tradizionale cucina casalinga. But by far the more common use of the word is for the recipe described above. 

The word vigarola derives from 'vigna', or vine, since it is said that the vegetables that go into it were typically grown in between rows of grapevines.

Sunday, April 25, 2010

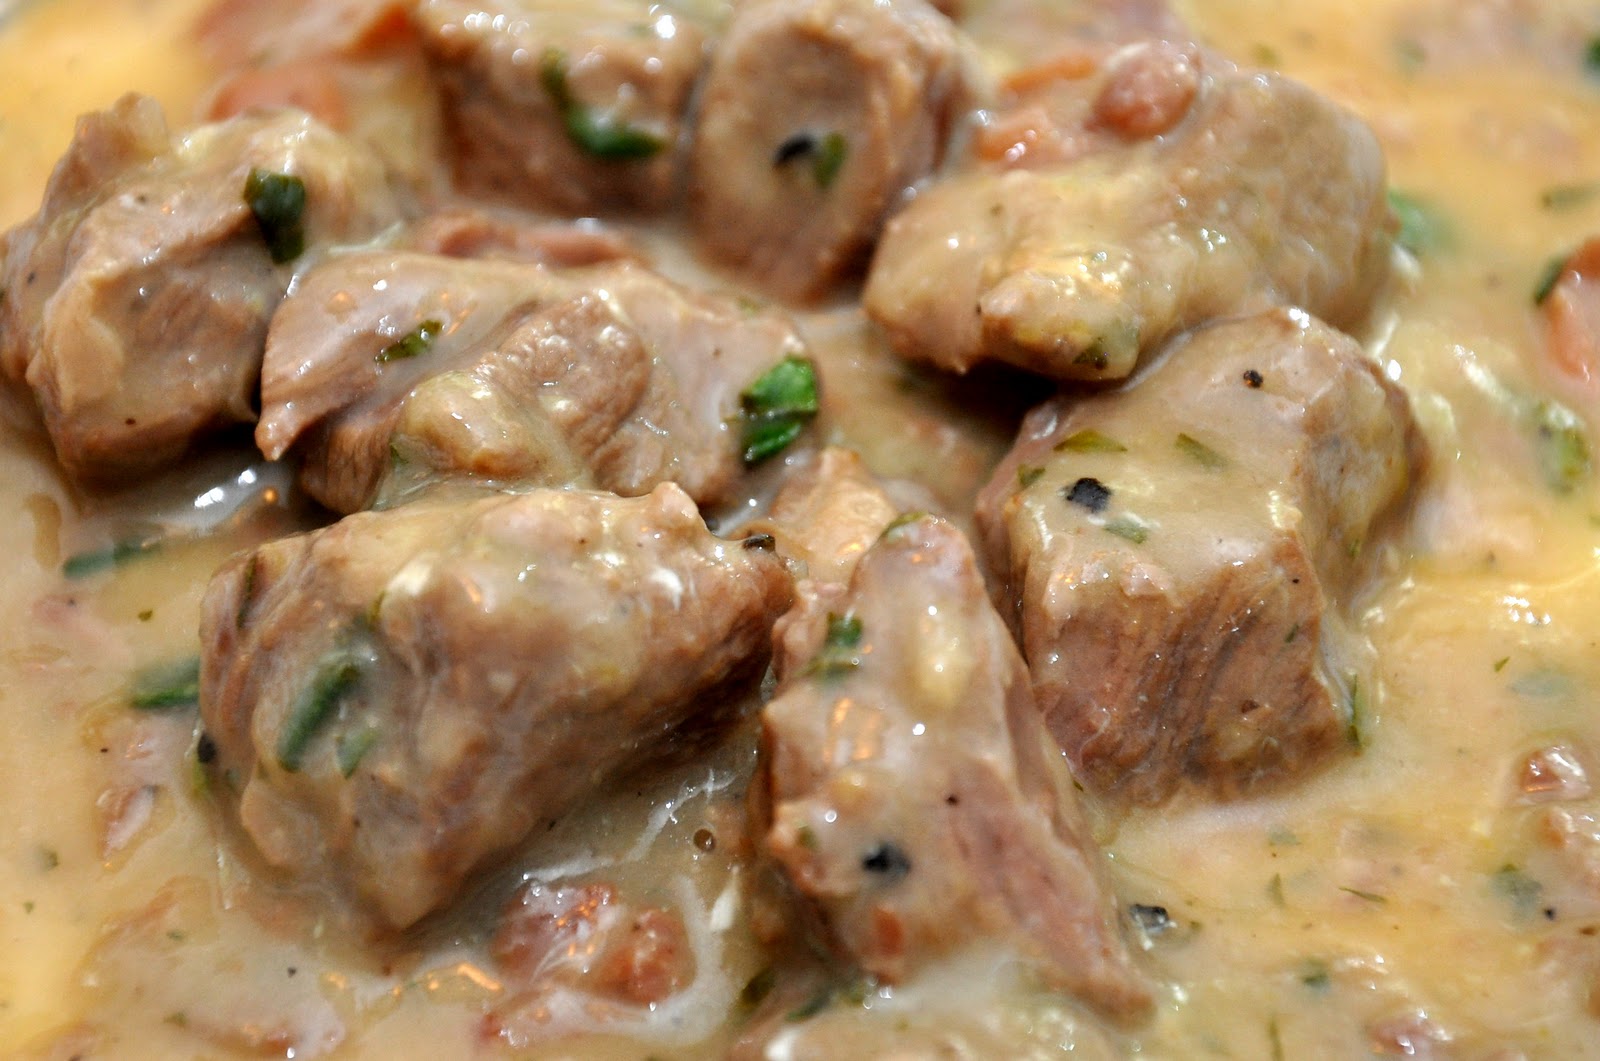
Agnello brodettato


In Italy, as elsewhere, lamb—especially the milk-fed baby lamb called abbacchio—is strongly associated with the Springtime. Roman cookery has some wonderful lamb dishes, such as the grilled rib chops known as scottadito (see this post) and lamb roasted with potatoes known as abbacchio al forno con le patate (see this post for something very similar) as well as lamb braised with rosemary, vinegar and finished with a touch of mashed anchovy called abbacchio alla cacciatora (this one is still to come). 

Slightly less usual but equally good is this dish of braised lamb with lemon and egg sauce. The term 'brodettato', literally 'in a little broth', is more or less synonymous with the term 'fricassea'; they both refer to braises that are thickened just before serving with a lemon and egg finish. The technique is wonderful with lamb, but it is widely used with vegetables, too (as in this post on green beans in fricassea). 

This dish is traditionally eaten at Easter, lamb and egg being symbols of the crucifixion and resurrection, but in my book it is too good to reserve for a single day of the year. The truly authentic version, by the way, is capretto brodettato, made with baby goat (aka kid) but since neither baby goat nor baby lamb is very common these days, at least here in the US, I have prepared the dish with good old fashioned lamb stew meat. 

The recipe is simple but a bit tricky at the end. You begin with a soffritto of an onion and 50g (2 oz.) of rather fatty prosciutto (or pancetta), chopped together finely and gently sautéed in olive oil or, if you want to be truly authentic, lard. Then add 1 kilo (2 lbs.) of lightly floured cubes of lamb meat and turn up the heat a bit. Allow the meat to brown lightly—taking care not to burn the onion—and season with salt and pepper. Then add a splash of dry white wine and allow it to evaporate completely. Add enough water to almost cover the meat, lower the flame and cover. Let the lamb braise until tender, normally about an hour but the time will vary depending on how young your lamb is and how big your cubes of meat are. 

Shortly before the meat is done, beat two egg yolks in a bowl and mix with the juice of a freshly squeezed lemon and finely chopped parsley. When the meat is fork tender, remove from the heat. Add a spoonful of the cooking liquid to the egg and lemon mixture to temper it, then pour the mixture immediately over the lamb and stir, until well incorporated. Return to the burner over very low heat and keep stirring gently, until the egg has thickened the cooking liquid into a smooth, silky consistency. Serve immediately.


NOTES: The trickiest part of the dish is the final addition of the lemon and egg mixture. If you let it cook too long or get too hot, the egg may curdle and the sauce will 'break', so let it just thicken to the point where the sauce will coat a spoon and remove it immediately from the heat. (NB: The residual heat from the pot will continue to cook the egg and thicken the sauce, so allow for that.) If things seem to be getting out of hand, add a few more drops of lemon juice, which should cool the sauce enough to prevent it from separating. If you are using a terracotta or enameled cast iron cooking vessel, you may well find that the pot retains enough residual heat that you need not put it back on the heat at all. 

The cut of lamb is usually the shoulder or some other tough stewing cut, but this time I used some leg of lamb that I had left over from the tagliata d'agnello from the other day. 

Some recipes for this dish, including the one in La cucina romana e del Lazio by Livio Jannattoni, from Newton & Compton's wonderful Quest'Italia series, call for braising the lamb meat until only a minimal amount of liquid is left in the pot—but I prefer 'brothier' version, so I add a bit more water if need be during braising, which gives you lots of delicious sauce to fare la scarpetta.

Post scriptum: The slaughtering and eating of baby lamb for Easter is an age-old tradition in Italy and one that the first generation of immigrants to America maintained—or at least they did in my family. According to family legend, in the old days, my great aunt would buy a live baby lamb in the market, still baaing, bring it home and keep it in the bathtub. Then, the day before Easter, she would take a sharp knife and…. well, you can imagine the rest of the story.

Sunday, April 18, 2010

Carciofi alla giudia


Carciofi alla giudia, or Jewish-style artichokes, are one of the signature dishes of Roman Jewish cooking and a very popular dish in Rome. I have rarely seen this dish in Italian restaurants in the US, perhaps because it is a bit tricky to make, or because it can't be made ahead, or because of the quality of artichokes here--it is a dish that relies almost entirely on the taste of the actual artichoke--there's no way to dress it up with other ingredients to make it taste better. Anyway, you trim an artichoke in the typical Italian way, cutting off all the inedible bits (including most of the leaves), peel the stem and scoop out the choke. Then you spread the artichoke out as much as you can by hand—to do this successfully, you will need fresh and rather young artichokes that are 'flexible'. You then fry the artichoke gently in extra-virgin olive oil, starting on the sides:

As the artichoke softens, place it 'face down' in the oil, little by little pressing it down until it spreads out almost flat and the artichoke is tender. To check for tenderness, pierce the artichoke at its thickest point with a paring knife. If you can remove the knife from the artichoke without picking it up, it should be done.

Now, just before serving, comes the tricky part: dip you hang in lukewarm water and sprinkle it into the frying pan to provoke a splattering, covering the frying pan very quickly to prevent the oil from splattering all over the stovetop (and the cook!) When things have died down, you're done. The result is a lovely open "flower" whose taste is indescribable and whose texture is an amazing mixture of crispy and soft.

A view from the Ghetto in Rome
NOTES: If you are ever in Rome, the place to eat carciofi alla giudia is an area referred to as the "Ghetto", which had traditionally been the Jewish section of town. (I lived right next to the Ghetto for the first six years or so of our time in Rome, in a small square named piazza San Paolo alla Regola.) There are a number of places that specialize in Roman Jewish cooking, which has a long history—Jews have lived in Rome for over 2000 years, since the days of the Empire. It is an interesting cuisine.

The ghetto itself has an interesting history. Starting in the year 1500 Jewish Romans had to live in a particular walled in area of town, which was called the 'ghetto' (hence our word). They had to be back by sundown, at which time the gates were shut. And on Sundays, they were forced to go to Mass in a local church and hear about how they were responsible for killing Christ and were sure to go to hell if they did not convert to Christianity. (But I guess there were worse places to live if you were Jewish.) Anyway, thankfully all that came to an end in the mid-19th century. The wall was torn down long ago and today the ghetto is actually a rather tony area, located as it is right in the center of town. An enormous (and rather pompous) synagogue was built around the turn of the century and today serves as the center of the Roman Jewish community. The church is still there, by the way, and it is located among some of the most interesting and accessible ruins in Rome, the remains of the Portico d'Ottavia (see photo above). Right next to the Portico is the most famous of the Roman Jewish restaurants, called Giggetto. It's very touristy but the food is actually quite good. Down the same street a bit is the Taverna del Ghetto, which is the place the locals go (or at least they used to; a friend to whom I recommended the place came back telling me that it is now overrun with American tourists...)

It can be hard to get good artichokes in the US. Try to find ones that have leaves still tightly bound together. If the artichoke leaves are open and spottled, then don't buy it, it's too old. Unfortunately, that describes about 90% of the artichokes you'll find in the supermarkets here, at least outside California.

There are other great ways to enjoy Italian-style artichokes, like carciofi alla romana, the other signature Roman artichoke dish, or cut into wedges and deep fried, the way Angelina used to make them. If you are lucky enough to find really fresh, baby artichokes, they are lovely cut into thin slices and eaten raw in pinzimonio—dipped in olive oil seasoned with salt and pepper.

Saturday, April 10, 2010

Fettuccine al salmone affumicato


I love smoked salmon. It is so incredibly versatile, delicious and good for you, too. And it adds a touch of elegance to any dish in which it appears. Who could ask for more? One of our favorite weeknight dinners at home is this simple pasta with smoked salmon and cream. If using store-bought pasta, it can be whipped up in the time it takes to bring the water to a boil and cook the pasta. But simple as it is, this dish is also elegant enough to serve as the first course of an 'important' dinner. 

For the pasta, I like to make this dish with fettuccine, the typical 'ribbon' pasta of Roman cookery, or tagliatelle, its slightly thinner cousin from Emilia-Romagna. To make your own fettuccine or tagliatelle, make your egg pasta dough and roll it out (see this post for instructions). The pasta sheets should be fairly thin for fettuccine, almost paper thin for tagliatelle. Then cut your pasta sheets into 'ribbons' about 1 cm (0.4 inch) wide. Pasta machines generally come with two cutters; use the wider one for fettuccine and tagliatelle. Like all fresh pasta, cook in well salted, gently boiling water for just a few minutes—fettuccine will take a bit longer than tagliatelle—tasting for doneness after 2 minutes or so. Cooking time will vary according to thickness and how long the pasta has been drying before cooking. 

The sauce is incredibly simple: just melt some butter in a skillet, then add heavy cream and roughly cut up smoked salmon. Simmer until the cream has reduced to a saucy consistency and the salmon has imparted its wonderful flavor to the cream. Add your cooked fettuccine to the sauce and toss. Add a bit more cream if need be, making sure that the pasta still 'flows' rather loosely—fresh pasta tends to absorb its sauce quickly, and creamy ones especially quickly. 

For a slightly more elaborate version, gently sweat a bit of shallot in butter, then add your chopped salmon and sauté until it loses its raw color. Add a splash of vodka, let is evaporate, then add cream. Add chopped parsley along with the pasta and proceed as indicated in the basic recipe. 

As far as measurements go, as usual for this kind of dish, they don't really matter all that much. As a general rule of thumb, I would suggest about half as much salmon by weight as pasta, but if you can use less according to your taste or what you have in your pantry. Even a little bit of salmon will give your dish a lot of flavor. For the cream, use enough to coat the pasta well but not so much as the pasta is 'swimming' in the sauce. 

NOTES: Some recipes call for the additional of grated parmesan cheese, but I find that smoked salmon has plenty of flavor on its own. You can use fresh salmon instead of smoked in either of the variations mentioned above, but then season more aggressively as fresh salmon is not as assertive in taste as smoked. 

While I like ribbon pasta best with this sauce, it lends itself to just about any type of pasta. Tagliolini, which are made just like tagliatelle but cut into very thin strands instead of ribbons, are lovely with this sauce. Short pastas like penne or farfalle would also work well. I would avoid large pasta shapes like rigatoni, which I feel are a bit too clunky for this elegant sauce—but that is really just a matter of personal preference. 

There are other variations on the sauce. One calls for white onion and wine rather than shallot and vodka. And some recipes call for a bit of tomato, which makes a kind of salsa rosa, or pink sauce.

Sunday, March 28, 2010

Straccetti di manzo con la rughetta


One of the iconic dishes of Roman cookery, stracetti con la rughetta, or 'little rags' with arugula, is also one of the simplest of all to prepare:

Take beef, sliced as thinly as possible and cut into short strips, and sauté it over a very high flame with a clove or two or slightly crushed garlic until it has just lost its raw color. Season liberally with salt and pepper, mix and remove from the heat. Throw is a few handfuls of raw arugula, toss until they have wilted, and serve immediately with a nice piece of crusty bread to sop up the delicious juices.

NOTES: The dish is best made with 'baby' arugula, which will wilt on contact with the hot beef and residual pan heat. If you have more 'mature' arugula, you may want to keep the skillet on the heat while you toss the beef 'rags' and greens together until they wilt. If you don't have arugula on hand or prefer a less assertive taste, baby spinach leaves (or a mixture of spinach and arugula leaves) would also work nicely. 

Depending on the cut of beef (see below) and the thickness of your slices, as well as the intensity of your heat source, the meat may give off liquid when you add it to the skillet. Not to worry, this is just fine, even desirable, as the cooking juices make a wonderful sauce for dipping bread into. Personally, however, I like to slice my beef paper-thin and keep the heat high for a 'dry' version of the dish. It is perhaps the closest think in Italian cooking to a 'stir fry'. 

One of the most common cuts of beef you'll find in an Italian supermarket or butcher are fettine di manzo, or sliced beef, which to make straccetti you beat a bit to flatten and then cut into 'rags'. In Rome, they also sell straccetti pre-flattened and cut up. Elsewhere, you may need to slice and pound the beef yourself. The cut will depend on your taste, but I find that ribeye combines great flavor with tenderness. Skirt steak is another good choice. The genius of straccetti, however, is that you can also use humble cuts like chuck that would otherwise be too tough for this sort of 'flash' cooking. If you have access to a Korean supermarket like H Mart, by the way, they often sell beef slices for Korean 'barbecue' that are excellent for making stracetti

Measurements are really pretty useless in this dish. The main point is to balance the amount of arugula against the amount of beef. Most recipes will call for roughly half as much arugula as beef by weight, but where the proper balance between the two main ingredients may lie is really up to you. Just be aware that when the leaves wilt they will reduce dramatically in volume, so if in doubt, add more than you think you need. 

There are a good number of variations on this dish, mostly riffs on the arugula. As mentioned, spinach provides a less assertive alternative to arugula. In Roman Jewish cooking, straccetti are paired with thin wedges of sautéed artichoke, which is also a lovely combination. Sautéed mushrooms are another possible combination, either instead of or in addition to arugula or spinach. Some recipes call for little cubes of raw tomato. Some recipes call for shallot or onion instead of garlic. And some recipes eschew the veg altogether and call for the 'rags' to be flash-fried in a garlic and rosemary soffritto. And for a slightly 'fancier' dish, you can top the dish with shavings of parmesan cheese and/or a few drops of balsamic vinegar—but for me, straccetti are typical cucina povera and the idea of dressing them up does not really compute. But if you like fancy, straccetti can be also made from veal. 

Arugula, by the way, is called rughetta in Roman dialect, hence the name of the dish. But you will also find it called straccetti if manzo con la rucola, since rucola is the standard Italian word for arugula. In Italy it grows wild all over the place and has always been considered a poor man's green. Funny to think that in some circles in the US it is seen as an 'elitist' vegetable! Arugula has a nature affinity with beef, and can also be found in one of my favorite ways of grilling steak called tagliata. (See my early post on an Italian cookout).

Sunday, March 21, 2010

Carciofi alla romana

Dear readers: I am back from my travels, at my blogging post just in time for the first day of Spring. Artichokes are back in season! And is there any vegetable more typical of Roman cooking, perhaps of all Italian cuisine, than the artichoke? What better way to get back to work, then, than this dish, one of the most typically Roman ways to prepare artichokes called, appropriately enough, alla romana, or 'in the Roman style': stuffed with garlic and herbs, and simmered in olive oil and water. Nothing could be simpler, or more flavorful.

The only tricky part of this dish, like any artichoke dish, is the initial trimming of the artichoke. Much of a mature artichoke—the outer leaves and the inner core or 'choke'—are inedible, and the Italian way with artichokes is to trim them of all their inedible parts before cooking them. In Rome, many markets, including the famous Campo de' fiori market near our place, would sell you pre-trimmed artichokes—at a higher price, of course—which saves you the trouble, but elsewhere you'll need to do it yourself. The operation is not all that difficult, but it takes some practice to get the 'hang' of it:

First, remove all the tough outer leaves from the artichoke. Beneath, you will find thinner, lighter colored leaves that you should leave on. Cut off the tip of the artichoke. Then, taking a very sharp, solid paring knife, begin to pare away the sides of the artichoke, starting from the wide base, holding the artichoke in one hand and rotating it as you pare away with the other hand, as if you were peeling an apple. Then, taking a spoon, scoop out the fuzzy core or 'choke' of the vegetable, including the thin, spiny leaves (often a dark purple color) that often surround the choke. Wash the artichoke well under cold running water to remove any of the 'fuzz' that tends to stick to the vegetable. Then cut off all but 3-4 cm (1-1-1/2 inch) of the stem, and pare away its tough, fibrous outer layer. All the while as you are paring the artichoke, you should make sure to rub it the exposed side of a lemon that you have sliced in two, to prevent discoloration. 

For a nice step-by-step visual guide to trimming an artichoke, see this article (the explanations are in Italian, but no matter: the photographs will show you the way). 

After you are through trimming, immediately drop the artichoke into a large bowl of acidulated water to prevent discoloration. Proceed in the same fashion with the rest of your artichokes:


You are now ready to staff and cook your artichokes: Make a tritto of garlic, parsley and mint, mixed with salt and pepper and wet with a bit of olive oil. Stuff the hallowed out cores of the artichokes with this mixture. Then stand the artichokes up, stems upward, in a terracotta casserole or enameled cast iron Dutch oven or other heavy pot with tall sides. Add a generous amount of olive oil and then enough water to come halfway up the artichokes (not counting the stem):


Season with salt and pepper. (Although not part of the traditional recipe, I also like to add an extra sprig of mint and garlic clove to the liquid.) If you have any extra garlic-and-herb stuffing, you can add it to the liquid as well. Cover the pot and let the artichokes simmer for about 30 minutes. Check for doneness with a knife; they should be tender but not 'mushy'. Allow the artichokes to cool before serving, moistened with a bit of the liquid.

NOTES: This recipe calls for the larger sort of artichokes known as 'globe' artichokes, known as mammole in Italian. When an artichoke is fresh, its leaves will cling tightly to the vegetable and show no sign of discoloration. Unfortunately, it is rare to find such fresh specimens in US markets (California, where most artichokes in the US are grown) might be the exception) but this treatment works well even with less than perfectly fresh artichokes. Slightly smaller artichokes will also work—and will cook in less time—but 'baby' artichokes will not. 

Carciofi alla romana are very versatile. They can be an antipasto, a secondo for a vegan/vegetarian meal or even a light lunch or supper. They are one of the two most typically Roman ways of preparing artichokes, the other being carciofi alla giudia, or "Jewish style" artichokes, which I will blog about soon. 


Post scriptum: By the way, I never throw away the cooking liquid. It is perfectly delicious and, although it is perhaps not very orthodox, I like to serve the liquid, too, at table, for dipping with nice crusty bread.