Showing posts with label primi piatti. Show all posts

Friday, March 11, 2011

Zuppa dei valdesi


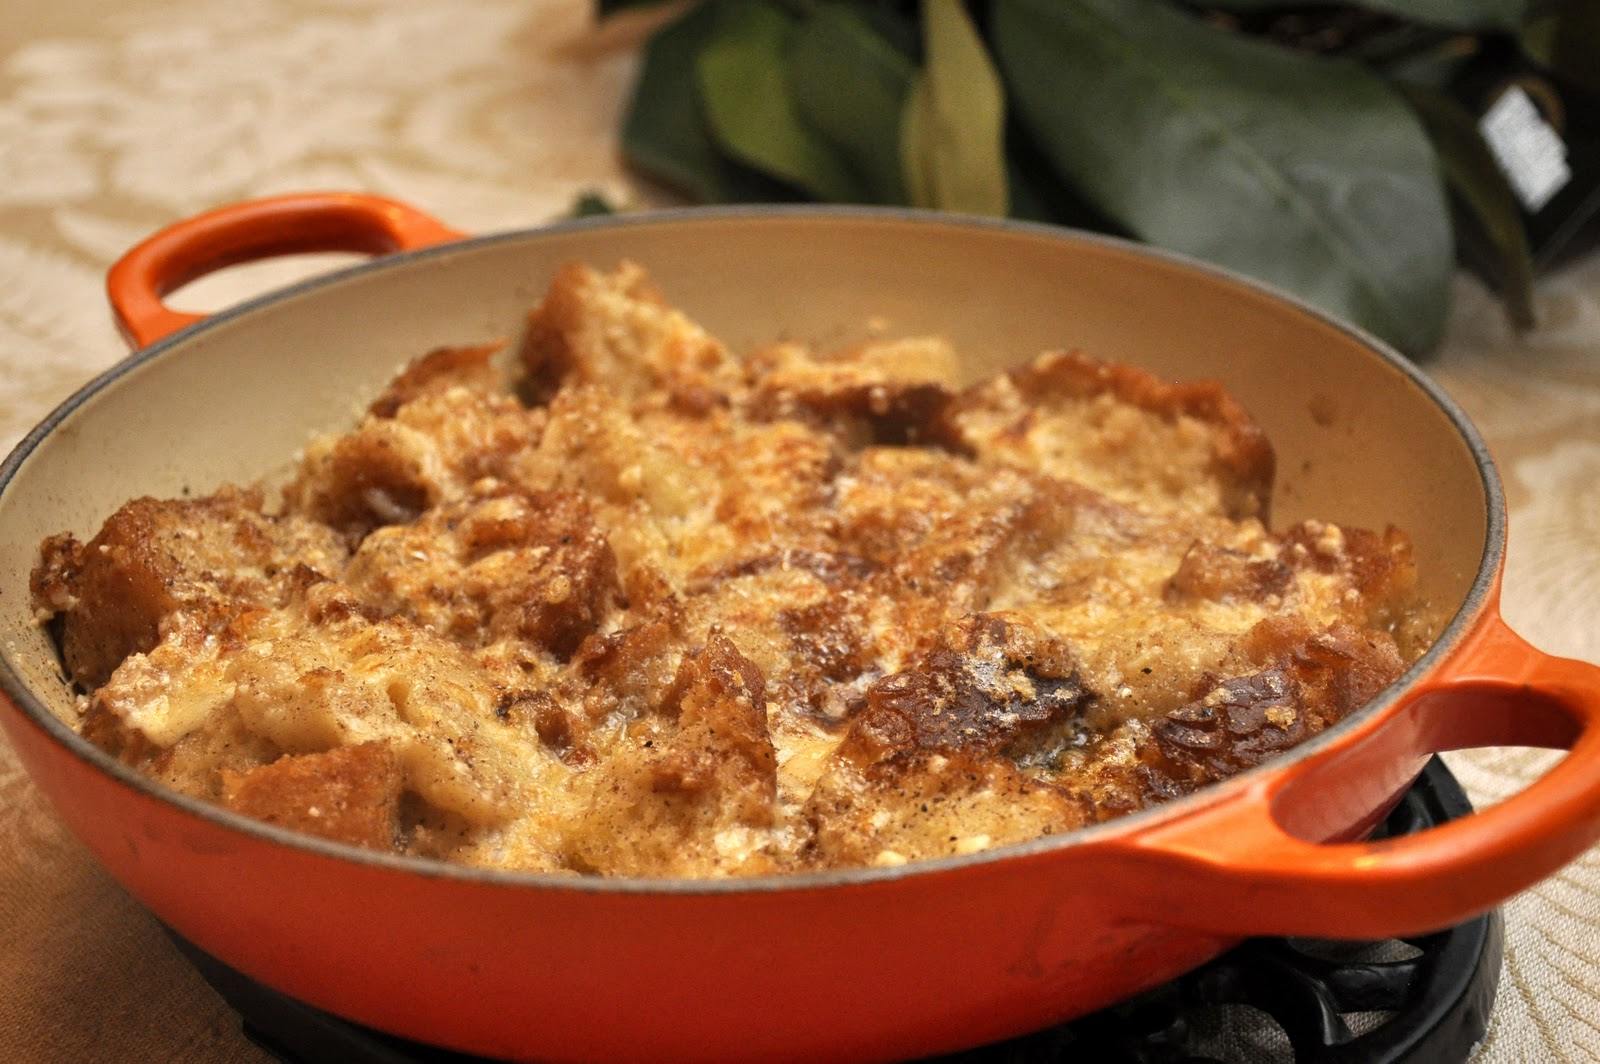
A reader who I'll call "Nancy T." wrote me recently to tell me about a dish called zuppa that her Piedmontese grandmother used to make. The word is one of several in Italian that mean 'soup' (see our Glossary for details). A zuppa is rustic soup, typically the kind that you are meant to have with bread, either dunk into it while you eat like the Neapolitan zuppa di pesce or laid at the bottom of your bowl before the soup is ladled on top like the Tuscan zuppa di porri. Nancy's grandmother's zuppa, on the other hand, is an example of the medieval practice of actually making zuppa out of leftover bread. In her zuppa, the slices of old bread are sautéed in butter and simmered with enough broth to cover and soften the bread while it cooks until it reaches the consistency of a pudding, reminiscent of the Tuscan pappa al pomodoro without the tomato.

Nancy asked if I had ever heard of her grandmother's zuppa. I hadn't but the recipe intrigued me—and it also sounded delicious! After a bit of digging, I found what I think is the traditional Piedmontese recipe for her grandmother's dish. The full name is zuppa dei valdesi,  also known in the local dialect as supa barbetta, and it comes from the valli valdesi, an area consisting of three valleys near Torino. The dish is a typical example of cucina povera, showing how, with a little imagination, the humblest of ingredients can be turned into exquisite eating.

Ingredients (for 4-6 people)

500g (1/2 lb.) stale bread or grissini
100g (3-1/2 oz.) grated cheese (see Notes)
100g (1/2 cup) butter (or more, to taste)
1 liter (4 cups) chicken (or vegetable) broth, or as much as you need.
Nutmeg, cloves and/or cinnamon, to taste
Salt, if needed

Directions

Break up the old bread (or grissini) into pieces. Sauté them gently in half the butter until lightly brown on all sides. Season with one or more of the spices, mixing a few times to ensure that the bread is evenly coated, then add enough broth to cover. Simmer the bread in the broth, covered, for about 15-20 minutes, or until the bread has softened and the broth has been completed absorbed by the bread. (You should add a bit more broth if needed to keep the bread moist.)

When the bread is done simmering, taste it and adjust for seasoning. Top with the grated cheese and the other half of the butter, which you will have melted separately.

You can serve your zuppa just like this, but for extra flavor, put the zuppa in a hot oven (200°C/400°F) for about 10 minutes until golden brown on top. Or just pass it under a broiler for a few minutes.  Serve immediately.

NOTES: Now here is the way that Nancy describes her grandmother's zuppa:
For us, typically after bagna cauda, when we have leftover bread, and it gets a little dry, we make  this dish (unless, of course, we wait too long and the bread is like a  brick).  I slice the loaves into about 1" slices.  Then, in a large pan, add "a nice piece of butter", as my grandmother would say. 3-4  Tablespoons. After the butter melts, the bread gets arranged, and it  browns in the butter.  It's turned over, adding more butter, of course.  Meanwhile, I've got about 6-8 cups of chicken broth heating up in a pot  behind the bread pan.  When the bread's been turned and had a chance to  brown a little, I start adding the broth, gradually. Kind of like  risotto. When about half of the broth is absorbed, the bread gets turned again, and more broth added.  In the end, I usually flip them once  more. 
The recipe today is usually a bit more upscale, made with those ubiquitous bread sticks called grissini, but Nancy T'.'s grandmother's version using stale bread is actually how the soup was originally made. In the old days, they often layered the bread with Savoy cabbage and let it simmer slowly for a few hours by the fire. There are also recipes that call for some sautéed onion. One rather extravagant version calls for cured pork and various herbs (bay leaf, rosemary, sage) interspersed between the layers of cabbage and bread.

The cheese would typically be Toma, a semi-hard cow's milk Piedmontese (and French) cheese, but if you can't find it, parmesan or grana padano would do. Or you could go for an Alpine cheese such as fontina, gruyère or Emmenthal.

Nancy recommends washing down this dish with some good, full-bodied red wine, and I would, too. It may be simple but—especially if you are generous with the cheese and butter—it is quite hearty.

There is little doubt that this dish is quite ancient in its origins. According to Anne del Conte in The Gastronomy of Italy:

Of all foods, zuppa is the most obvious inheritance from the feudal system centered on the castle. The lords and ladies ate what was considered noble food. The servants made use of the leftovers from the high table, which included large slices of bread that had been used instead of plates to hold meat, fish and other food, and to these they added herbs, wild plants and water, the result being cooked at length.  
The zuppe of the 15th and 16th centuries were very thick, made with toasted bread layered with other ingredients, often cheese, sugar and spices, and then placed in the oven. 

The valdesi, by the way, were the followers of a religious movement known as valdismo that began in the 12th century. It preached the virtue of humility and poverty, much like the Franciscans in Umbria who came shortly after them, and I suppose this 'poor' soup reflects those values. Unlike the Franciscans, however, they eventually broke with the Catholic Church. The Chiesa Evangelica Valdese still exists today and have a large place of worship in Rome among other places. They are known for their progressive social views, promoting, among other things, gay and reproductive rights, stem-cell research, the right to die and secular government. William Paca, one of the signers of the US Declaration of Independence, belonged to the movement. The US branch of the movement merged into the Presbyterian Church in the late 19th century.

Sunday, January 23, 2011

Risotto alla milanese


Risotto is one of the staples of northern Italian cooking, nowhere more so than in Lombardy. Here is the risotto that typifies the cooking of Milan, the capital of Lombardy region and the economic and financial capital of Italy.

This risotto follows the classic method for making risotto, which we have gone over before, but it has two defining ingredients that give it its special flavor and character. As many of you will already know, it is flavored with saffron—which gives it a beautiful gold color—but perhaps fewer people know that in a true risotto alla milanese, the soffritto must include beef marrow. The marrow lends a beefy background flavor to the dish, as well as a subtle richness and unctuousness. The ingredient is so characteristic of the dish that I have seen this risotto listed on menus in Milan as risotto al midollo, the word 'midollo' being Italian for bone marrow.

Ingredients (for 4-6 people)

400g (7 oz.) rice for risotto (arborio, vialone nano or carnaroli)
40-50g (1-1/2 or 2 oz.) bone marrow, removed from the bone (see Notes) and finely chopped
1/2 onion, finely chopped
40-50g (3 Tbs.) butter (plus a bit more for the mantecatura)
A splash of white wine
1 liter (1 qt.) broth, or q.b.
A pinch of saffron
50-60g (2 oz) grated parmesan cheese, plus some more to serve at table

Instructions

Make a soffritto by sautéing the onion and marrow in the butter. When the marrow has melted and the onion is well wilted, add the rice and let it 'toast' in the soffritto without browning. Add a splash of white wine and let it evaporate.

Proceed with the risotto in the usual way—with one little catch: While the rice is simmering, take your saffron and simmer it very gently with a ladleful of broth so it releases its flavor and color into the broth. Then, either about halfway through the cooking process, or if you prefer a more assertive flavor, about 5 minutes before the rice is done, add the saffron and its broth into the risotto. Continue to cook as usual.

Risotto alla milanese is usually served all'onda, which is to say, rather more loose than firm, so begin the final enrichment, called the mantecatura in Italian, while the rice is stlll fairly brothy. Add the cheese and, if you like, a dab of butter for extra richness (never cream!) to the rice, then stir to toss the rice around vigorously for about two minutes. (Skilled risotto chefs are a marvel to watch as they work the rice, they toss the rice into the air while they stir—not something I've tried at home., though.) If you like your risotto a bit firmer, let it sit, covered, for a minute or two before serving.

NOTES: All bones have marrow, of course, but there are particular good marrow bones (also often called soup bones) that you can buy sawed in half to expose the marrow, like these:


To prepare bone marrow for use in risotto, I like to simmer the marrow bones for just a minute or two to loosen the marrow a bit. Then, using a small spoon or knife, scrape out the marrow from the bone. Depending on how long you've simmered the bone, the marrow may also just slip out on its own.


Now for those of you who may be a bit squeamish about bone marrow, it can be left out of the dish, adding perhaps some additional butter during the mantecatura to make up for it. What you will have made is more properly called risotto allo zafferano rather than a true risotto alla milanese—but it will still be delicious! 

Saffron, as we all know, it very expensive, but a little goes a long way. It is sold in threads (the stigma of the crocus flower) and also ground into powder. Avoid the powder if you can. It melts more easily but it tends to have a rather faded flavor. A powder also allows for extraneous 'filler' or substitute ingredients. With the threads, you can be sure you are getting the real thing.

As for the rice, we've covered the three main varieties before: arborio, the most common and usually least expensive of the three, will work fine, but for this dish I would prefer Carnaroli, although many recipes call for vialone nano, which is an excellent risotto rice from the Veneto. For details, check out my post on the Italian Pantry.

There are some subtle variations to this dish you can try as you like: The broth is usually a rich beef broth, but you can equally try a mixed meat broth, a chicken broth or a vegetable broth. Some cooks use shallots rather than onion, a variation that I find particularly nice. And some avoid making a soffritto, putting the shallot or onion into the simmering rice and removing it before serving, which they claim make the risotto lighter. The famed Milanese chef Gualtiero Marchesi calls for making the onion soffritto separately, adding white wine to it, and allowing the onion to simmer until creamy. The onion cream is added at the very end of cooking to add 'acidity and aroma'. An intriguing idea, but one that I have not yet tried.

Risotto alla milanese is an ancient dish, with its origins going back to the Middle Ages, although the modern recipe apparently only goes back to the early 19th century. (See this article for a brief history.)
Risotto alla milanese is perhaps most commonly served together with ossobuco, as a piatto unico—one of the very few examples of rice being a 'side dish' in traditional Italian cookery. But it is equally good as a primo, followed, say, by a cotoletta alla milanese or perhaps a brasato.
Sunday, December 19, 2010

Canederli


Canederli is the Italian name given to the bread dumplings so popular in Austria and other parts of central Europe, known in German as Semmelknödl or just knödel. During my years in Vienna it was one of my favorite things to eat, so when I re-discovered them in Italy, on a visit to an old friend from Paris who had wound up living in Bolzano, a city in the German-speaking region of Alto Adige (aka Südtirol) in northwestern Italy, I was delighted. Not only did they bring back fond memories—they were probably the best I had ever eaten! (No offense to my Austrian friends...)

In any event, you don't need to travel to Austria or northwestern Italy to enjoy these dumplings. They are quite easy to make at home. The technique is a bit like making potato dumpling or gnocchi, but actually easier. These bread dumplings are much less prone to becoming stodgy as gnocchi can be if not made right. And it's a great way to use old bread, a nice change when you're not in the mood for a bread soup like ribollita or pappa al pomodoro.

Ingredients (for 4-6 servings)

300g (3/4 lb.) stale bread, cut into cubes
100g (1/4 lb.) speck or other cured pork product (see Notes), finely minced (optional)
2 eggs
A glass of milk
1 medium onion, finely minced
2 Tbs. flour (or more)
Parsley, finely minced
Salt and pepper

Directions

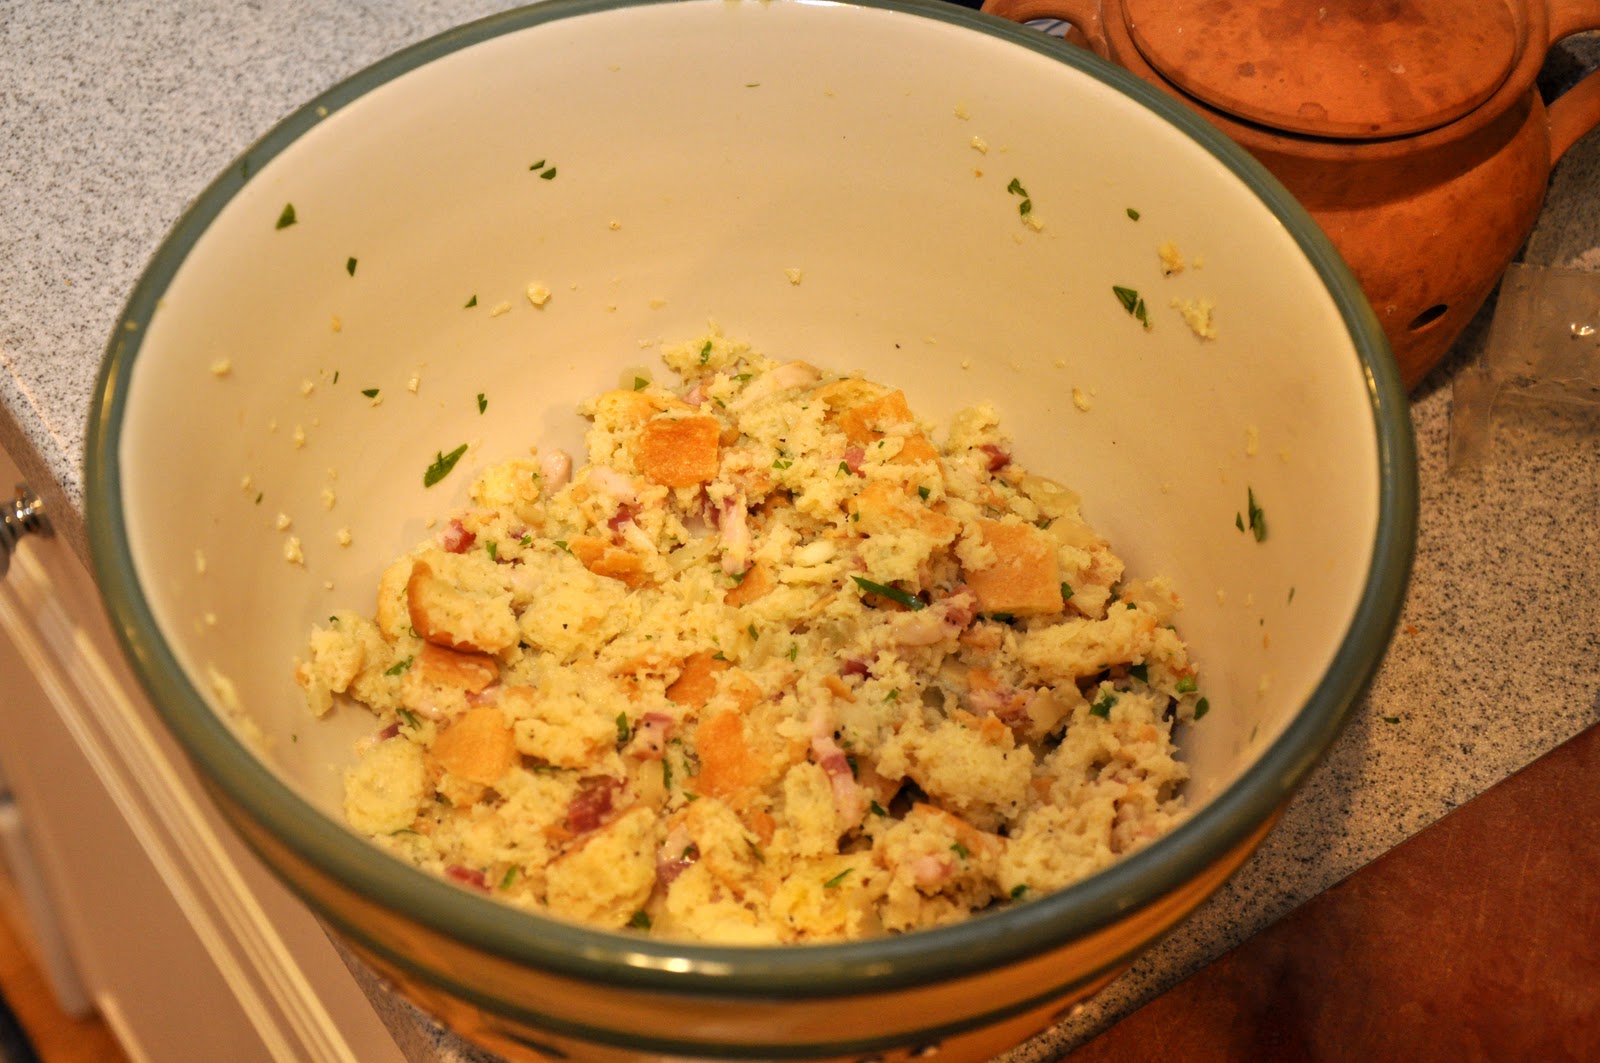
Toss together in a large bowl the bread and speck (if using), then add the eggs and milk and parsley. Mix together. Let the mixture rest for a good 20 minutes or so. The bread should be rather moist at this point, but not soaking wet. If you find the mixture a bit dry, then add more milk.
Mix in the flour, along with the onion and parsley. (NB: For added flavor, you can sauté the onions in a bit of butter before adding them to the mix.) Season well with salt and pepper.


Now form the resulting 'dough' into balls about the size of golf balls.


By the way, if the mixture does not hold together, or if you notice that it is exceedingly wet, then add more flour, a bit at a time, until you find that the mixture has reached a nice dough-like consistency that will hold together well.

Now bring a pot of well-salted water (or, for a richer taste, broth) to a gentle simmer. Add the canederli, one at a time, with a slotted spoon—or just use your hands like I usually do...  If you are not experienced with making these dumplings, just form one ball to begin with, and try simmering it. If it falls apart, then you know you need to add some more flour to your mixture. Then try again with another. If all goes well, then add all the rest.


Simmer the canederli for about 15 minutes. They should have come to the surface of your simmering liquid, much as gnocchi do.


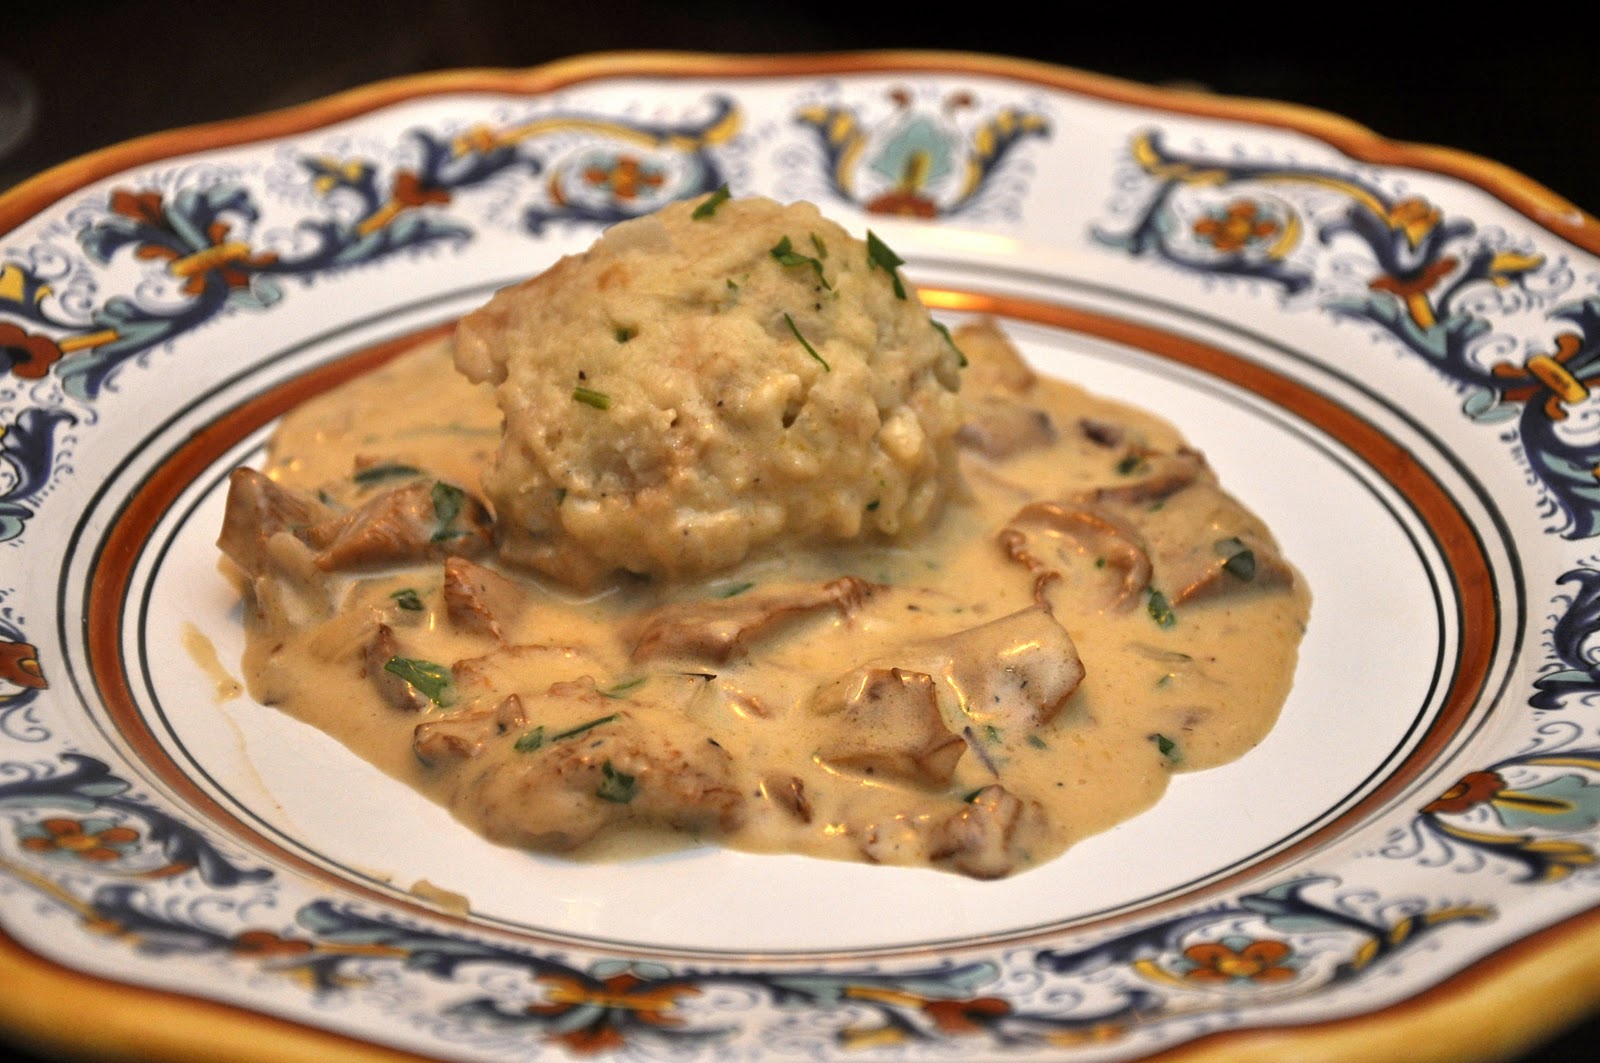
NOTES: There are various ways to serve canederli. The simplest is the way I had them at that wonderful meal in Bolzano: in a rich, homemade broth—a kind of Italo-Austrian matzo ball soup. My personal favorite way to enjoy canederli is to accompany them with a creamy mushroom sauce as pictured above, the same kind of sauce that goes so well with potato gnocchi. Also very good, and very popular in Vienna, is to serve them with beef goulash, which I hope to blog on some time quite soon.

Unlike pasta or gnocchi, however, you do not generally pour the sauce over or mix it with these dumplings, but rather lay down a 'bed' of your sauce and lay the dumplings on top. They are big enough that you will need to cut them into bite-sized pieces with a knife and fork, using your fork to fare la scarpetta as they say in Italian: dip each piece of dumpling in the sauce.


You can also make one big dumpling of the bread mixture, by forming a loaf and wrapping it in cheesecloth before simmering it. Of course, this big dumpling will take a bit longer, say 20-30 minutes, to cook. You serve it sliced like a meatloaf.

Speck is a smoked pork product that is common to Austria and this part of the Italy. It is quite delicious but can be hard to find. Feel free to substitute prosciutto or even slab bacon if you like, or omit the meat altogether, as I often do anyway.


By the way, Alto Adige, or Südtirol, is one of the most beautiful areas of Italy. It has an Alpine landscape reminiscent of nearby western Austria. In fact, it was once a part of Austria, ceded to Italy after Austria's defeat in the First World War. (It was nearby that my grandfather fought and won his posthumous medal and picked up his taste for polenta—which is why we ate that northern dish in our southern Italian family.)

In any event, the region today still retains much of its Austrian heritage, notwithstanding the best efforts of Mussolini, who 'shipped' in many Italians, especially from southern Italy, to colonize and, to his mind, 'civilize' the place. There is, in fact, a triumphal arch built by Mussolini in downtown Bolzano, the capital of the area, to celebrate the Italianization of the area. It is still the object of the occasional sabotage attempt, or so I was told when I visited, although the region was granted considerable autonomy after the Second World War. And when I was there in the late 90s the place seemed as tranquil as any I've ever been to. Besides beautiful scenery and great food, they make wonderful wines, including the popular pinot grigio, but also some excellent Chardonnays, Riesling, Sylvaner, Gewurztraminer, and Kerner. It's well worth a visit.

Beautiful Alto Adige-Südtirol


Sunday, November 28, 2010

Zuppa di porri


'Tis the season for soups! When the temperatures dive, there is simply nothing that takes the chill off like soup. The wonderful thing about soups is their enormous variety: they can be thick and stick-to-the-ribs, whole meals in themselves, or they can be light, even austere, just enough to whet the palate as the start of a formal meal or as a light supper.


Here is a lovely example of a medium-bodied soup, none too heavy but very satisfying at the same time. It's particularly nice during the holiday season, when you may feel like something warming but not too filling, a nice respite between those humongous holiday meals. The starring role is played by the leek, an often overlooked member of the onion family. Or, at least, I tend to overlook it, which is too bad because it has an incomparably savory yet mellow taste that makes any dish that contains it truly special.


Ingredients (for 4-6 servings)


5 leeks
100g (4 Tbs.) butter, or a combination of equal parts butter and olive oil, or just olive oil
20g (2 Tbs.) flour

Salt and pepper to taste

1 liter (4 cups) broth

4-6 slices of good-quality crusty bread

Grated parmesan or gruyère cheese


Directions


Rinse the leeks if necessary (see below) and trim off the root end and green tops. Cut the stalks into thin slices.


Sauté the leek slices in the butter, butter and oil mixture or the oil over gentle heat until they are well reduced and quite tender, without browning, about 15-20 minutes. Season the leeks with salt and pepper just after you add them to the skillet.


Sprinkle the flour and mix it in well, letting it sauté as well for a minute or two. Then add the broth, mix it well to fully incorporate the flour into the liquid, and let simmer, semi-covered, for another 15-20 minutes.


Meanwhile, toast your slices of bread and place each slice in the bottom of a soup bowl for each diner. Sprinkle the slices with some grated cheese. When the soup is done simmering, ladle over a nice serving into the soup bowls. Sprinkle over some more cheese and top with a nice grinding of black pepper and—if you like—a drizzle of best quality olive oil.


You can serve this soup immediately, but it is best after a few minutes' rest, which allows the soup to soak into the bread.


NOTES: These days leeks are often sold pre-washed, and can be used without fuss. But if you see that your leeks are gritty, make sure to wash them well before using. You will need to split them down the middle to make sure you remove all the grit. And, by the way, don't throw away the green tops—they are a great addition when making homemade broth, either instead of or in addition to the onion.


Speaking of which, for a simple soup like this one, where success or failure will depend on the quality of the ingredients, the broth should really be homemade. (See this post for the master recipe.) You can make your broth with beef (the usual choice) or chicken or a mixture of the two—the so-called brodo classico—and, this time of year, you can also use a turkey carcass if you happen to have one around the house…If you want to go vegetarian, then vegetable broth will, of course, do the job.


The choice of sautéing medium will subtly influence the dish. The traditional recipe calls for all butter, which gives the recipe a pleasant sweetness. But, personally, I prefer to use olive oil or a mixture of butter and olive oil, which provides a more 'rustic' taste. Some recipes add potato to the soup, which gives it more body. You can pass the soup through a food mill for a smoother texture. And instead of the toasted bread, you can fry up some croutons in olive oil, which again makes the soup a bit richer.


If you want to get fancy, you can gratinée this soup in terracotta soup bowls as you would a French onion soup, placing the bread on top of the soup, then sprinkling over all the cheese (use gruyere for this variation), drizzle with some olive oil (or melted butter) and run the soup under the broiler or in a very hot oven for a few minutes, until the top is nicely browned.

Sunday, November 21, 2010

La ribollita


We've already gone over the basic recipe for minestrone on this blog. Once you've mastered that, it is a lot of fun to explore the many varieties of minestrone from all over Lo Stivale (meaning 'the boot' one of the many nicknames Italians give to their country).

Perhaps the most delicious version of all is the Tuscan classic called la ribollita, or 're-boiled' because it is made ahead, layered with bread in a pot (preferably made of terracotta) and reheated before serving. Like any minestrone, it tastes so much better the day after—or even after a few hours—and the bread gives it a special flavor.

Ingredients (for 4-6 servings)

For the flavor base:
Olive oil
1 large red onion, cut into cubes
1-2 carrots, cut into cubes
1-2 stalks celery, cut into cubes
A handful of finely chopped parsley
1 leek (optional)
1 thick slice of pancetta, cut into cubes (optional)

More vegetables:
1 bunch black kale (aka lucinato kale), stemmed and shredded
½ head of Savoy cabbage, shredded
1 bunch Swiss chard (optional)
A few canned tomatoes, cut up (or some tomato paste)
250g (1/2 lb.) potato
250g (1/2 lb.) or more boiled or canned cannellini beans, drained

For the final assembly:
Slices of well-structured bread (preferably saltless Tuscan bread)

To finish:
Best-quality, fruity olive oil
Freshly ground black pepper (optional)

Directions

Make your minestrone, using the above ingredients, following the master recipe.

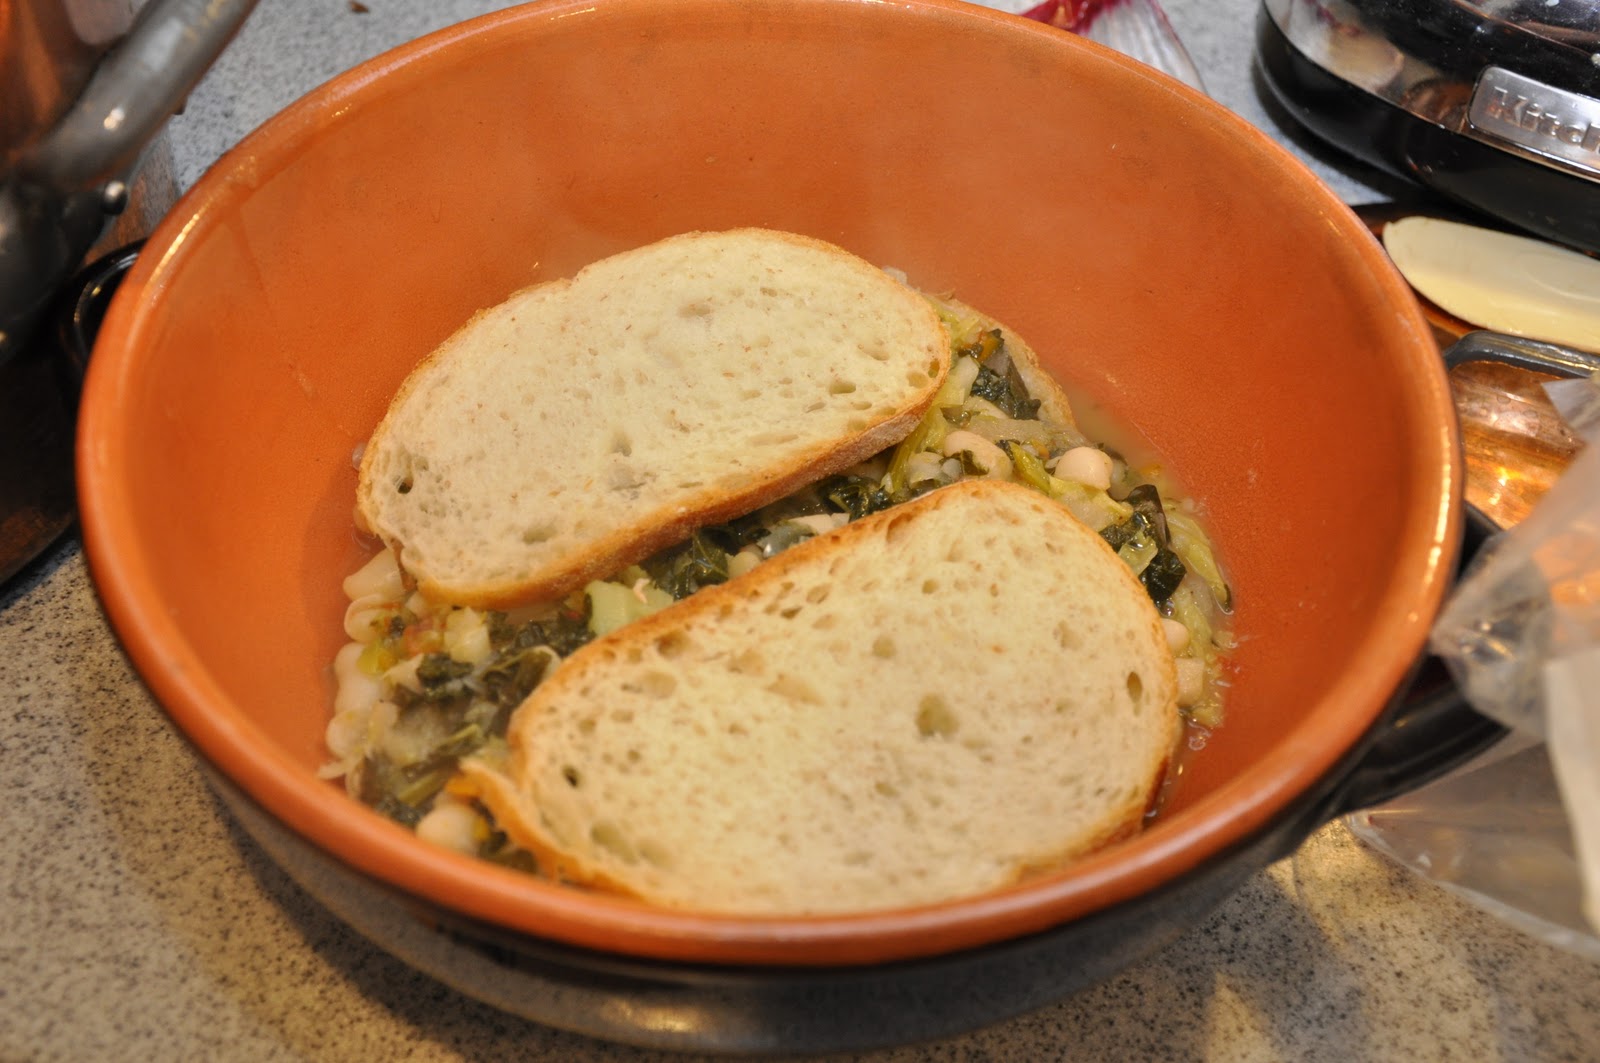
When the soup is done, place some slices of bread in the bottom of a good-sized terracotta casserole or soup pot (if you don't have a terracotta cooking vessel, the enameled cast iron or, in a pinch, a regular soup pot will do). Then ladle over a good portion of the soup.


Add another layer of bread, then another layer of soup, and so on, until you have filled the pot or used up your ingredients. End with a layer of soup.

Let the soup rest for several hours or overnight.

When you are read to eat, gently re-heat the soup. As the soup heats up, mix it up with a wooden spoon, which will break up the bread and mix it in with the rest of the ingredients. The result will be very thick, almost more a stew than a proper soup.


Serve when nice and warm, drizzled on top with un filo d'olio and, if you like, some freshly ground black pepper.


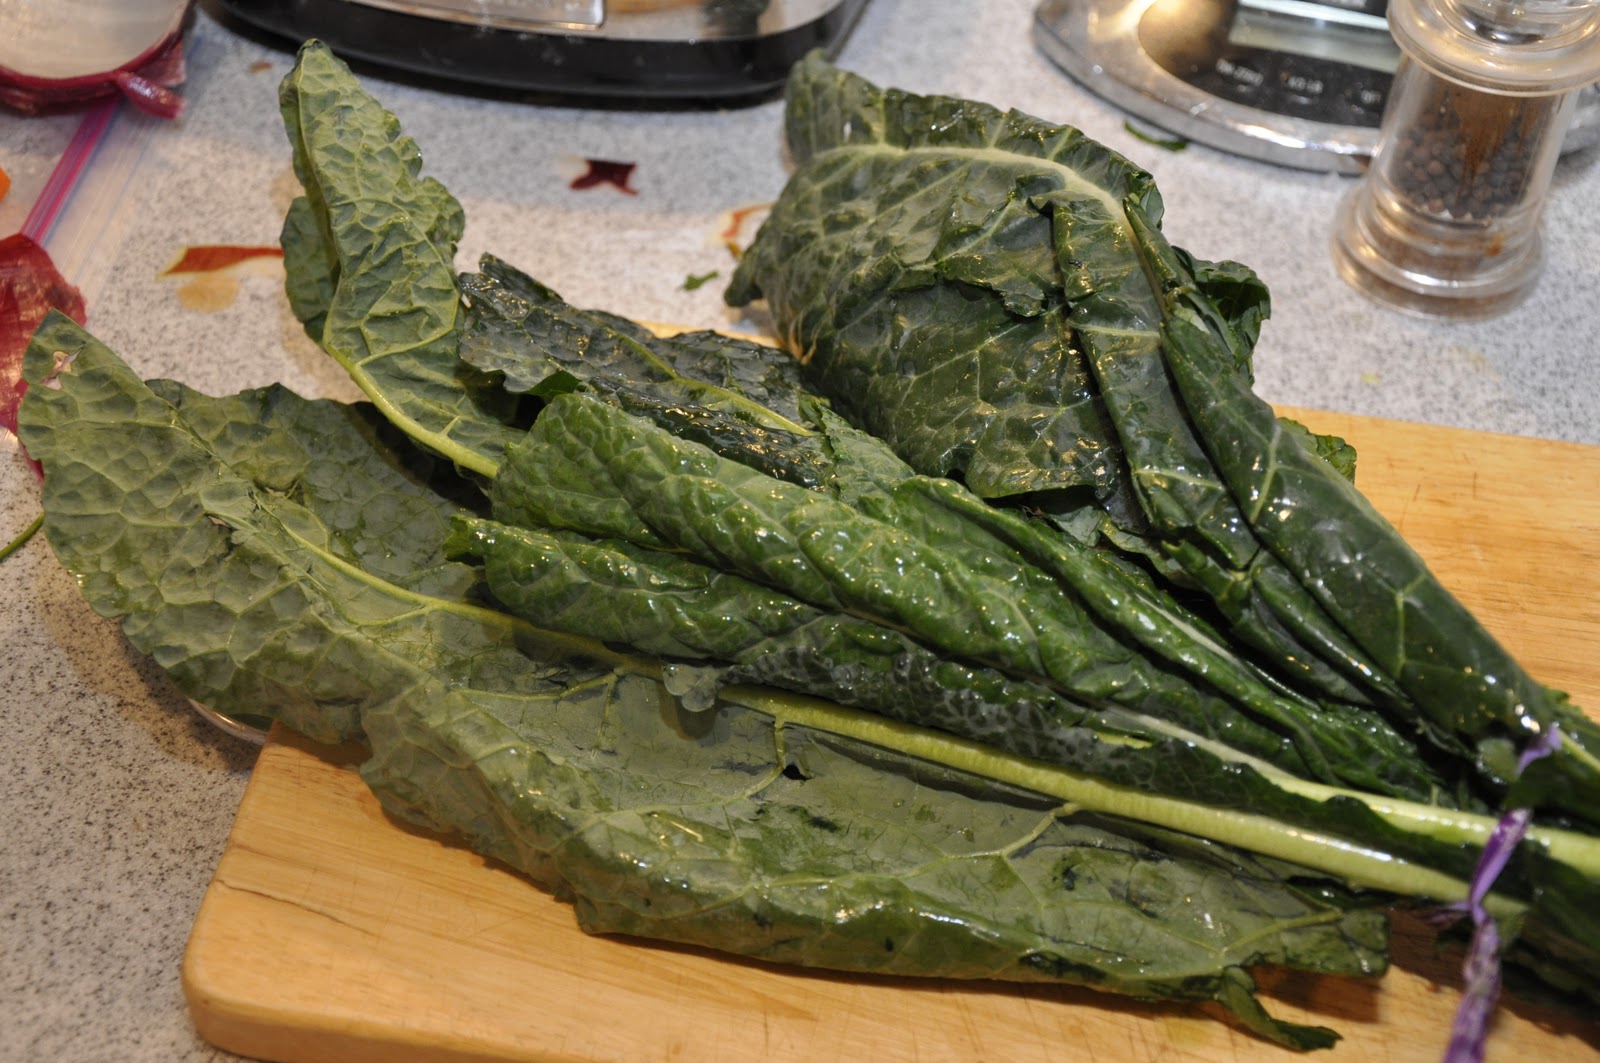
NOTES: The number or types of vegetables vary quite a bit from recipe to recipe, but the two essential ingredients—typically Tuscan—are the cannellini beans and the cavolo nero, or black kale, also marketed as lucinato kale or Tuscan kale. I have even seen a recipe that called it 'dinosaur' kale—not sure where that came from! Once impossible to find, I am happy to report that I now find black kale pretty regularly at my local supermarket here in the US. Similar in flavor to other sorts of kale, it has long, rather slender dark-green (not literally black!) leaves.


Black kale is much more tender and has a more subtle taste. To use it in the soup, you need only to remove the central stem, which can be very tough, then roll it up and shred it with a sharp knife. Other leafy greens, like Savoy cabbage or Swiss chard (or even beet greens) add a nice variety but can be omitted if you don't have them on hand, as can the leek, another vegetable used more frequently in Tuscany than in most other parts of Italy. Another typically Tuscan touch is the use of red onion, which Tuscans seem to prefer, but of course yellow or white onions will do if you don't have red onions on hand.

The choice of bread is of utmost importance. If you have Tuscan bread around, that is, of course, the best choice. Failing that, any well-structured bread that will stand up to cooking will do, although I would avoid sour-dough just because it has too strong a taste. Above all, avoid sandwich breads, which will turn to mush and give your ribollita an uncharacteristic texture.

Ribollita is best when made the day before, but you can make it in the morning for dinner or even an hour or two before—although the longer it sits, the better. The texture is thick and hearty but not heavy, and the bread gives a flavor that is really something very special.

Wednesday, November 10, 2010

Quick Note: Crema di cannellini


Here's a quick and easy weeknight supper for you: a purée of cannellini beans, seasoned with garlic and rosemary, and thinned out with water or broth to create a soup. Nothing could be simpler or more satisfying. And if you are using canned beans—which you can, why not?—the soup can be done in five minutes. There is no cream in this soup, by the way, the Italian word crema does not mean cream, as in the dairy product, but simply refers to any smooth, creamy textured purée.

Ingredients

Olive oil
1-2 garlic cloves (or more if you like), whole but lightly crushed
A sprig of fresh rosemary
Boiled or canned cannellini beans
Broth or water (or the cooking liquid if using boiled beans)
Salt and pepper
A handful of parsley, finely chopped

NB: No exact measurements for this one; use as much or as little of each ingredient as you need or feel like using. This recipe is pretty much ad lib.   

Directions

Begin by lightly sautéing your garlic and rosemary in abundant olive oil over moderately low heat. Once the garlic takes on some color, remove both the garlic and the olive oil from the pan. Then pass your cannellini beans through a food mill into the seasoned oil. Allow the beans to insaporire for a few minutes, then add enough water, broth or cooking liquid to thin out the bean purée to the consistency of a soup. Simmer the mixture for a few minutes to let the flavors meld. About a minute before its' done, stir in the chopped parsley. Drizzle with raw, best-quality olive oil just before serving.

NOTES: This basic recipe is incredible flexible and versatile. Usually, it can be served with some crusty bread on the side, or top of a piece of toasted bread laid at the bottom of the plate, or topped with croutons fried in olive oil, and—as picture above—with boiled rice mixed in. Or some soup pasta instead of the rice.

The same method lends itself to just about any other bean or legume: borlotti, lentils, fagioli all'occhio (black eyed peas), chickpeas… you name it. For a more 'refined' taste, you substitute a soffritto of onion, or onion, carrot and celery, for the garlic, in which case don't remove them from the pan as you would the garlic. For a bit more substance, you can also fry some cubed pancetta in the seasoned oil. Or top your crema with some sautéed shrimp or scallops, which makes for an elegant presentation fit for company.

Boiling dried beans takes some time but is very easy. If you have the time, soak the beans in water to cover them amply, either overnight or save yourself some time by bringing them to a boil and let them soak in the hot water for an hour. Pre-soaking is not strictly necessary, but it does save time and helps the beans to retain their taste and texture—although that's not too important if you're going to use them in a purée, of course. Then simmer them in water to cover generously, along with a drizzle of olive oil and a sprig of fresh sage (if you have some on hand) until tender. Season with salt a few minutes before the beans are done. The simmering liquid has lots of flavor and can be used to thin out the crema.

If using canned beans, on the other hand, make sure to rinse them off and drain in a colander. The canning liquid has stuff you don't want to ingest and, besides, it gives a funny 'canned' taste to the dish. When using canned beans, it is best to use broth to give the crema some extra flavor.

Crema di cannellini, when it is kept quite thick, makes for a nice topping for crostini.

Saturday, October 30, 2010

Chicons au gratin


There's something about chilly weather that demands a nice gratin—that piping-hot, cheesy, gooey goodness is just the thing to warm your body and soul on a mid-Autumn evening. And here is one that is sure to satisfy: another Belgian classic, chicons au gratin, also known in France as endives au gratin. It consists of Belgian endives, braised in butter, wrapped in ham slices and covered with a rich mornay sauce before getting browned in the oven. (I get hungry all over again thinking about it!)

Ingredients (for 4 servings)

4 medium-sized Belgian endives
30g (2-3 tablespoons) butter (plus a bit more to butter the baking pan)
Salt and pepper
500ml (2 cups) of béchamel sauce (see recipe here)
200g gruyère (or other good, meltable Swiss cheese), shredded
4 slices of best-quality cooked ham 

Directions

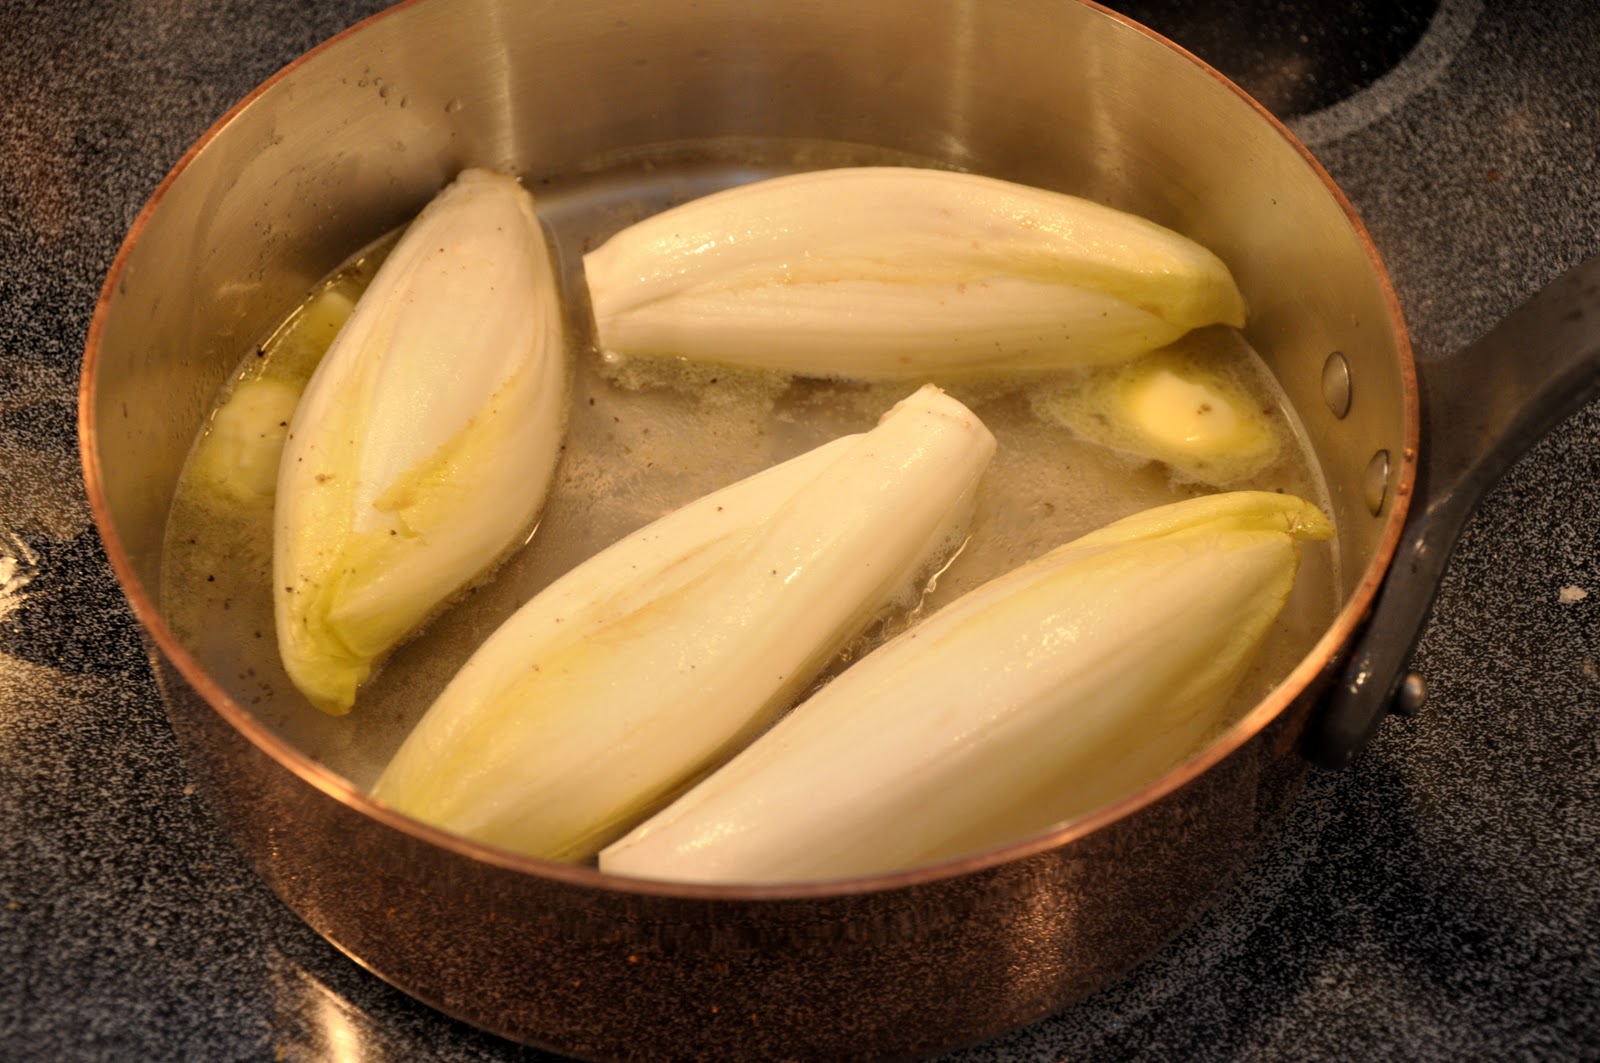
Begin by removing any discolored leaves from the endive and trimming the root end. Place the endives in a sauté pan with the butter and a glassful of water. Season with salt and pepper.


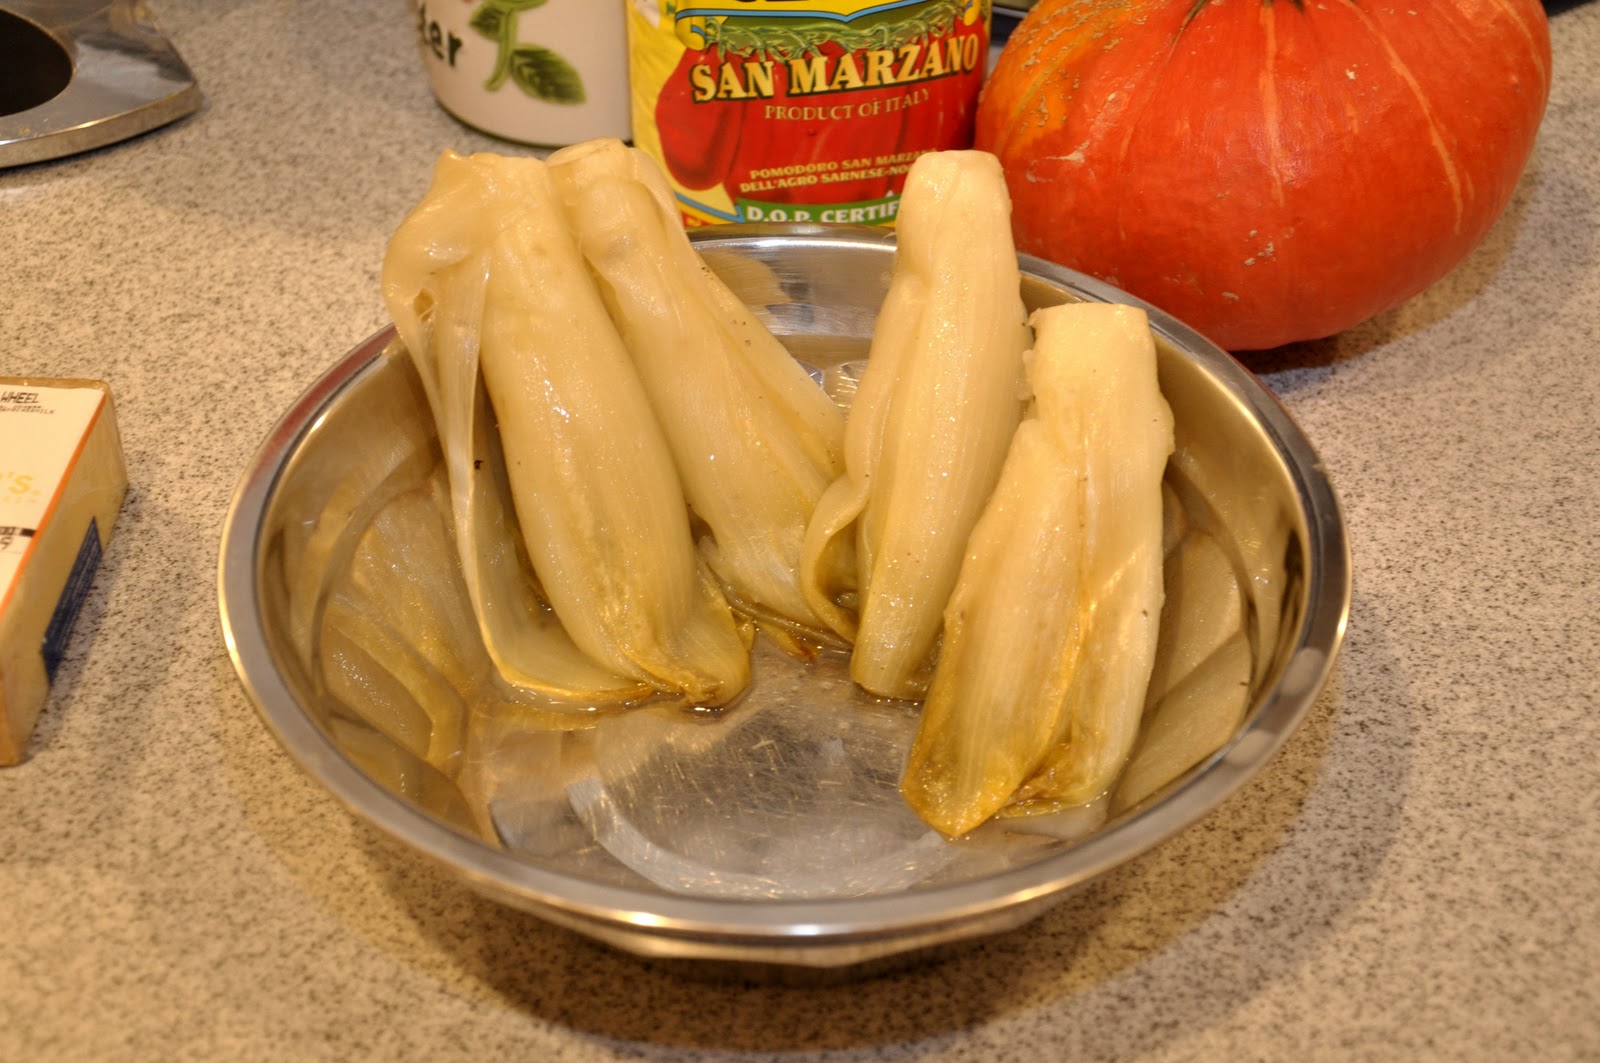
Allow the endives to simmer, covered, until they are quite soft, about 20-30 minutes. If you like, you can let them go longer, allowing them to turn a nice golden brown. Either way, drain the endives, root ends up, so that any excess water will drain off. (You may be tempted to skip this step, but don't—otherwise, you may wind up with soggy vegetables and a runny sauce!)


While your endives are braising, make your béchamel sauce in the usual way, and when it is done, add the gruyère, holding back about a third, however, for later. For extra flavor,  you can add some of any cooking liquid left over from the braising or draining of the endives. (This sort of béchamel with cheese is called a sauce mornay.)

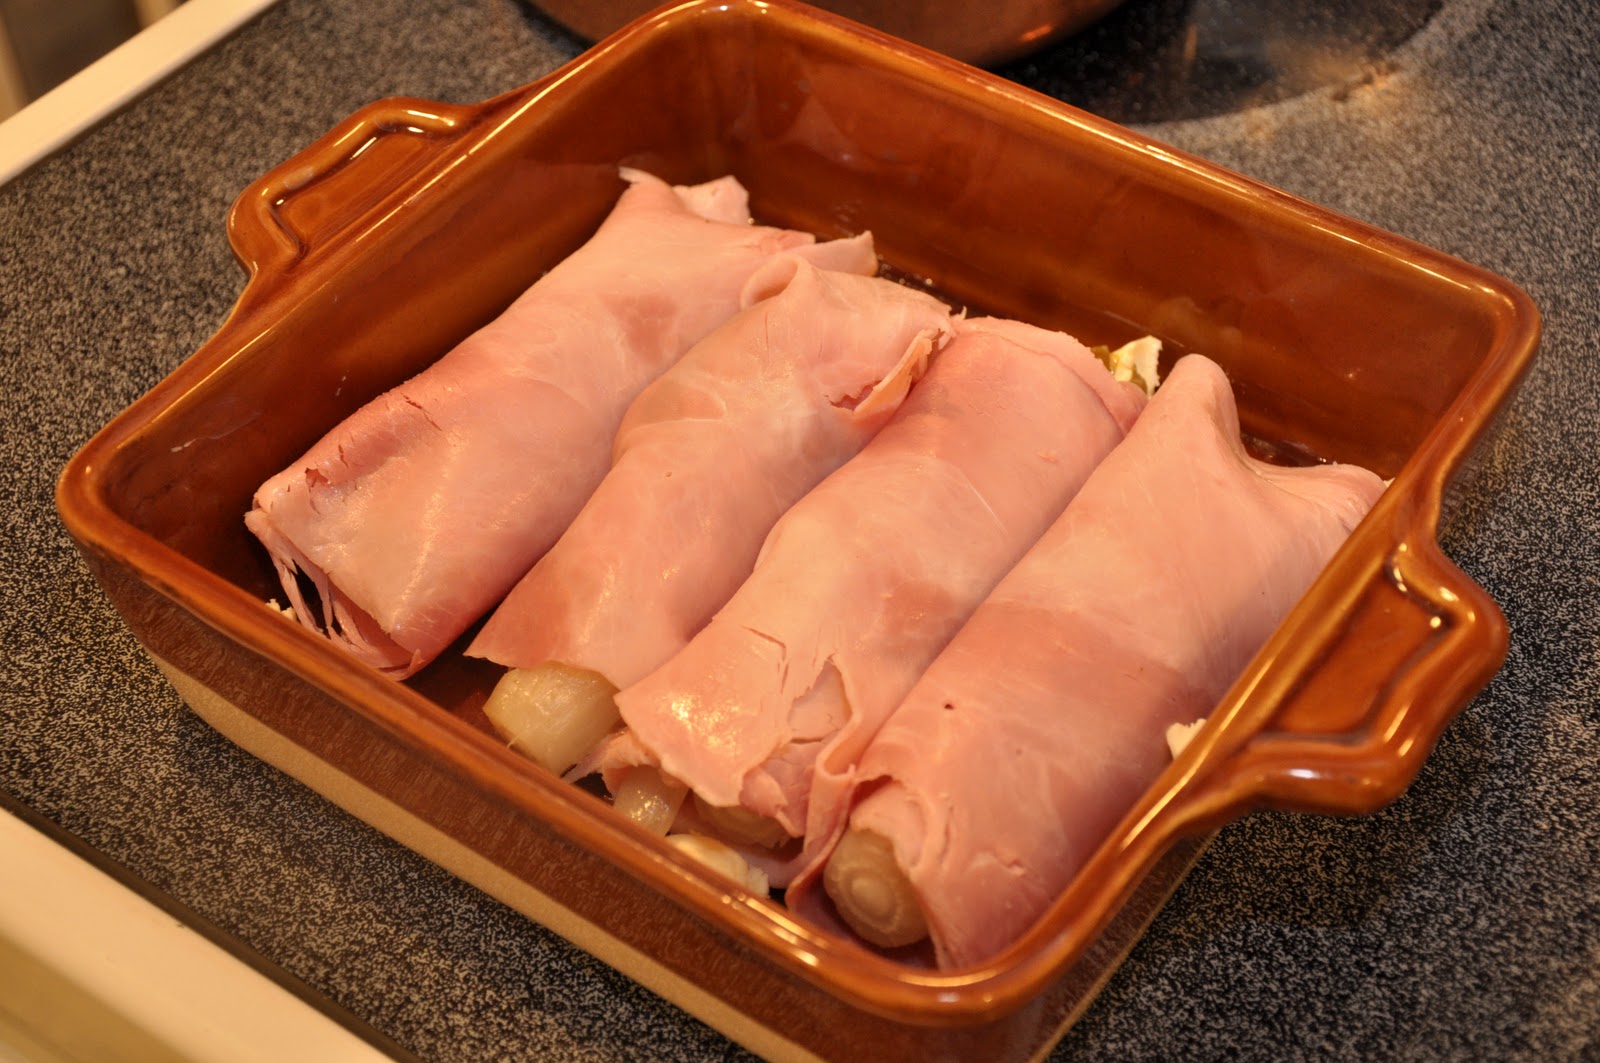
When your endives are well drained, take them one by one, and place them on one of the ham slices, then roll the slice around the endive, covering it completely.


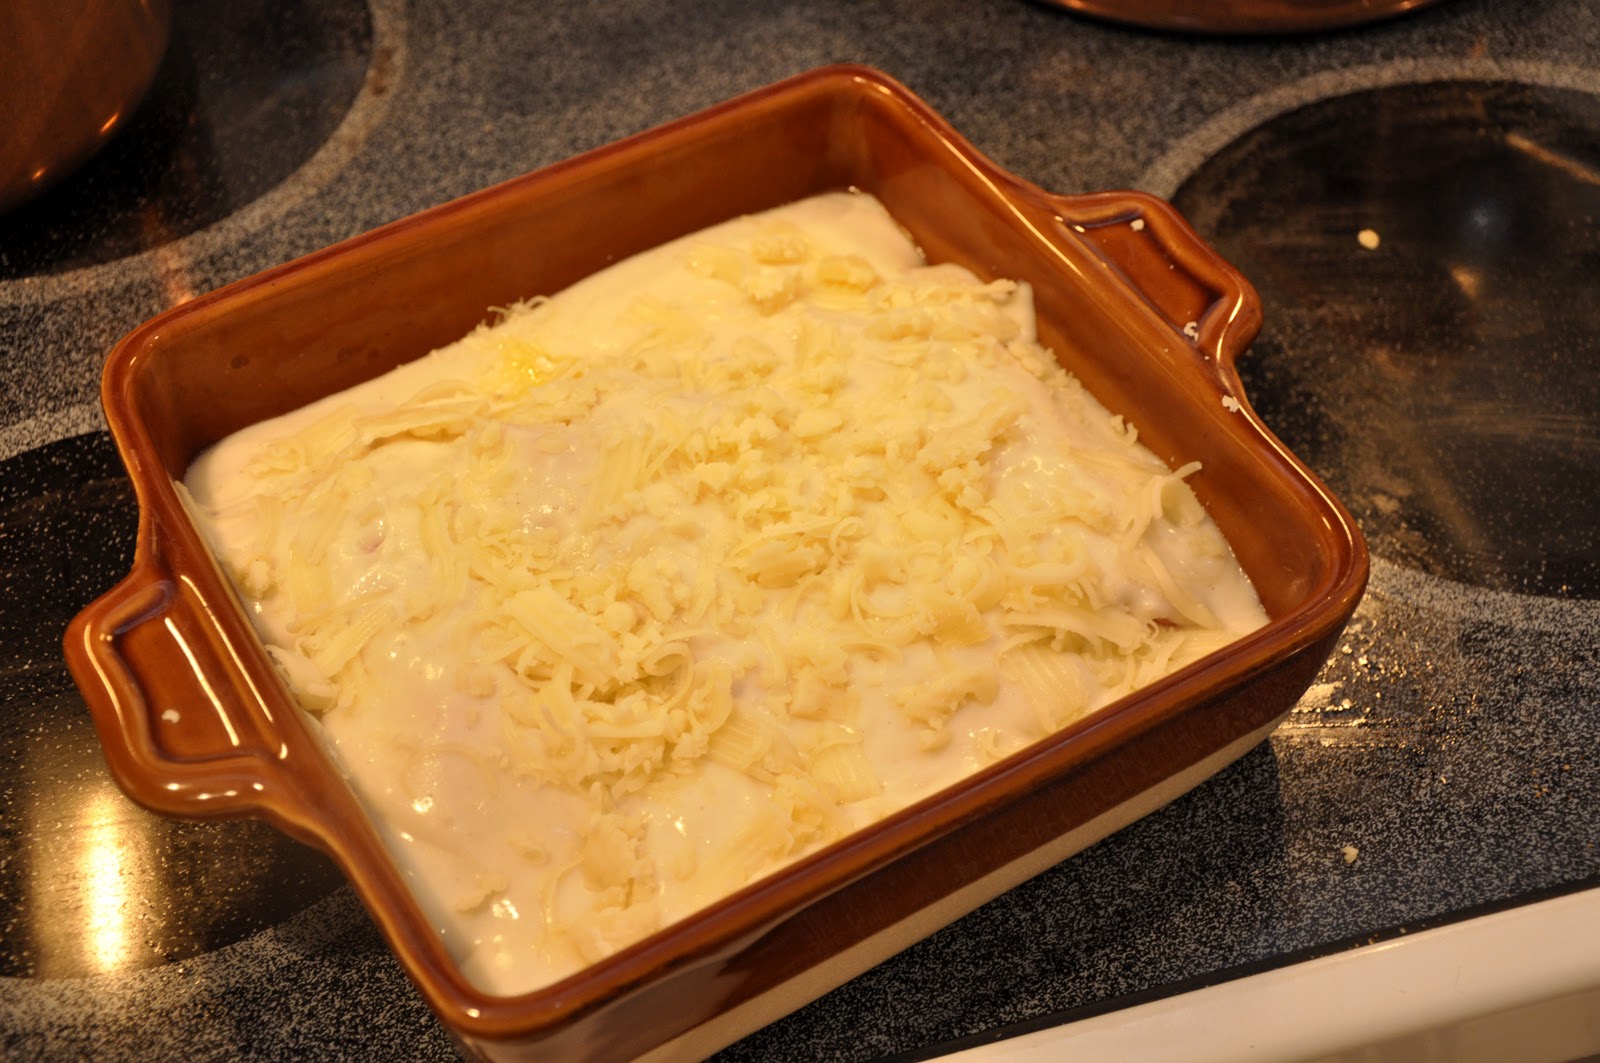
Butter a baking dish just large enough to contain your endives. Arrange them neatly in the dish, then pour over the mornay sauce. Cover the dish with the remaining cheese. Dot the top with some additional bits of butter.


Bake the dish in a hot oven (200C/400F) for about 30 minutes, or until the top is nicely browned and the sauce is bubbling hot. Let the dish cool off for a few minutes before serving.

NOTES: The success of this simple dish will rely heavily on the quality of its ingredients. Besides the endives themselves, which should be fresh, of course, and ideally free of any green leaves, you want to use the best quality ham and cheese you can afford. If you use packaged ham slices and supermarket 'Swiss cheese', you will wind up with something tasty enough but pretty pedestrian. Use real, good ham and true gruyère and you will have something very special indeed.

You can save some time by simply parboiling or, better yet, steaming the endives in lieu of braising. Many if  not most recipes call for it, in fact, and it takes only about 10-15 minutes. But I find that braising in butter makes a subtle but significant difference in taste and texture. And, not to nag, but  let me repeat: draining the endives any excess liquid is perhaps the single most important 'trick' to success, so don't forget!

This dish can be served on its own as a hefty starter. As a main course, it is often accompanied by potatoes, being Belgian, some pommes frites would be an obvious choice, although I find they go very nicely with either mashed or even just plain steamed potatoes which are delicious dipped in that mornay sauce....

Friday, October 29, 2010

Maloreddus alla campidanese


Maloreddus are a kind of pasta typical of the island region of Sardinia. Also called gnocchetti sardi or 'little Sardinian gnocchi' after their dumpling-like shape, maloreddus are made from durum wheat flour, water, salt and—a very Sardinian touch—a pinch of ground saffron. They lend themselves to a variety of sauces but perhaps my personal favorite way to make them is alla campidanese—with an utterly simple but delicious sausage and tomato sauce that is vaguely reminiscent both of the Roman amatricana and the Neapolitan ragù.

Ingredients (for 4-6 servings)

400g (14 oz.) maloreddus

For the sauce:
200g (7 oz.) mild Italian sausage meat
Olive oil
1 garlic clove
400g (14 oz.) best-quality canned tomatoes
1 tablespoon tomato paste
1 large or 2 small bay leaves
A few fresh basil leaves (optional)
A pinch of saffron threads, ground in a mortar 
Salt and pepper to taste

To finish:
100g (3-1/2 oz.) of freshly grated pecorino cheese (preferably Sardinian)

Directions 


Remove the sausage meat from its casings and crumble the meat into a skillet with a healthy drizzle of olive oil. Allow the meat to brown lightly, breaking up the sausage meat into even smaller bits with a wooden spoon as it browns. Remove the sausage meat with a slotted spoon. 

In the fat remaining in the skillet, sauté the garlic clove, which you will have slightly crushed with the side of a knife, just until it begins to give off its aroma. Immediately add the canned tomatoes, with your hands, crushing them between your fingers as they go in. Add the rest of the sauce ingredients and let the sauce simmer until it thickens nicely, about 15-20 minutes. 

Meanwhile, boil the maloreddus in abundant, well-salted water until al dente, usually about 12 minutes. Drain and add your pasta directly into the skillet and toss it all together. Add the grated pecorino and serve immediately, with more pecorino on the side for those who want some.
 
NOTES: Maloreddus are actually fairly easy to make, certainly no harder than, say regular gnocchi. You mix your dough in the usual way, using a glassful of teipd water for 400g of flour, a pinch of salt and a pinch of ground saffron. Taking a handful of the dough at a time, roll it out as you would for potato gnocchi into 'cords' but rather thinner, about the circumference of a pencil. Cut the rope at 2cm (1/2-inch) intervals and then roll the pieces using the back of your thumb, against the prongs of a fork or a gnocchi board, to create a small, ridge-backed shell-like gnocco. If you use ground saffron, your maloreddus will have a lovely golden color almost like egg pasta. But you can omit the saffron if you prefer, which is how most factory maloreddus is made.

If you can't find maloreddus in the store and don't have the time or inclination to make your own, the same sauce is perfectly delicious with more conventional stubby pastas like pennette.
 

Sunday, October 24, 2010

Tortelli di zucca


One of the nicest parts of this, my favorite season, is the arrival of wonderful Fall produce: mushrooms, endive, chestnuts, cabbage, radicchio… but for me no other vegetable is as typical of the season as hard squashes. They are sometimes called 'winter squashes' but they start appearing in the early Autumn and are a fixture of our October table.

Italy does not have the variety of winter squashes that we have here in North America—squashes are a New World plant, after all—but Italy may have the most delicious of them all, the wonderful zucca barucca. As I've mentioned before, the zucca looks for all the world like your average pumpkin, but its flesh is much less stringy and has a much more intense, sweet flavor than any pumpkin I've had on this side of the pond. Most stateside recipes call for butternut squash as a substitute, but that, too, lacks the intensity of zucca. For risotto, I usually find that baby sweet potatoes have a remarkably similar taste to zucca, even if their texture is a bit grainier. And today I tried another gambit—those smaller 'pie' pumpkins—for making one of the most popular stuffed pastas, tortelli di zucca, or 'pumpkin ravioli'.

You make tortelli di zucca just like ravioli (although they can vary in shape—see below) but the stuffing changes the whole character of the dish. Here is how you make the stuffing:


Ingredients (for 4 servings):


One 'pie' pumpkin or butternut squash, about 500g (or 1 lb.)
 
50-100g (2-4 oz.) amaretti cookies, finely crumbled 
50-100g (2-4 oz.) grated parmesan cheese 
50-100g (2-4 oz.)  mostarda (pears and apples only) 
Nutmeg, salt and pepper, q.b. 
Breadcrumbs (if needed)

Directions:


Cut open your pie pumpkin, cut it into large wedges and clean out the seeds and fibers with a spoon. Roast your pumpkin wedges in a moderate oven (180C, 350F) for about 45 minutes, or until the flesh is quite tender when pricked with a fork. (It's fine if the pumpkin browns a bit around the edges but you do not want a lot of caramelization.) Let the pumpkin cool, turning it over to allow any excess liquid to drain out. (If the pumpkin pieces seem watery still, you can wrap them in cheesecloth and squeeze them dry.) Scrape out the cooked flesh, leaving the skin behind, into a food processor.


Now add the amaretti, parmesan and mostarda, and process them until you have a perfectly smooth, stiff paste. You will note that the measurements are left pretty loose, and you will find that kind of variety among the many recipes for this dish. If you don't have real Italian zucca on hand, I would tend to go for more rather than less to make up for the blander taste of the vegetable. Do make sure each of these three main flavoring ingredients are added in balanced amounts. The thing that makes this filling unique is its harmonious combination of contrasting flavors: the sweet-bitterness of the amaretti, the savoriness of the cheese and spiciness of the mostarda, which marry so well with the natural sweetness of the squash. Season the mixture generously with freshly grated nutmeg, fresh ground pepper and salt.


Taste and adjust for seasoning. If the stuffing mixture is a bit soft or wet, mix in some breadcrumbs, a bit at a time, until the stuffing is stiff and rather dry.


*                *                 *

Now it's time to make your egg pasta, in the usual manner. (See this post on making fresh pasta.) Roll the pasta out rather thinly (setting 6—or even thinner if you want—on a pasta roller) since you will be folding the pasta into a double thickness, into long, rather slender sheets.  
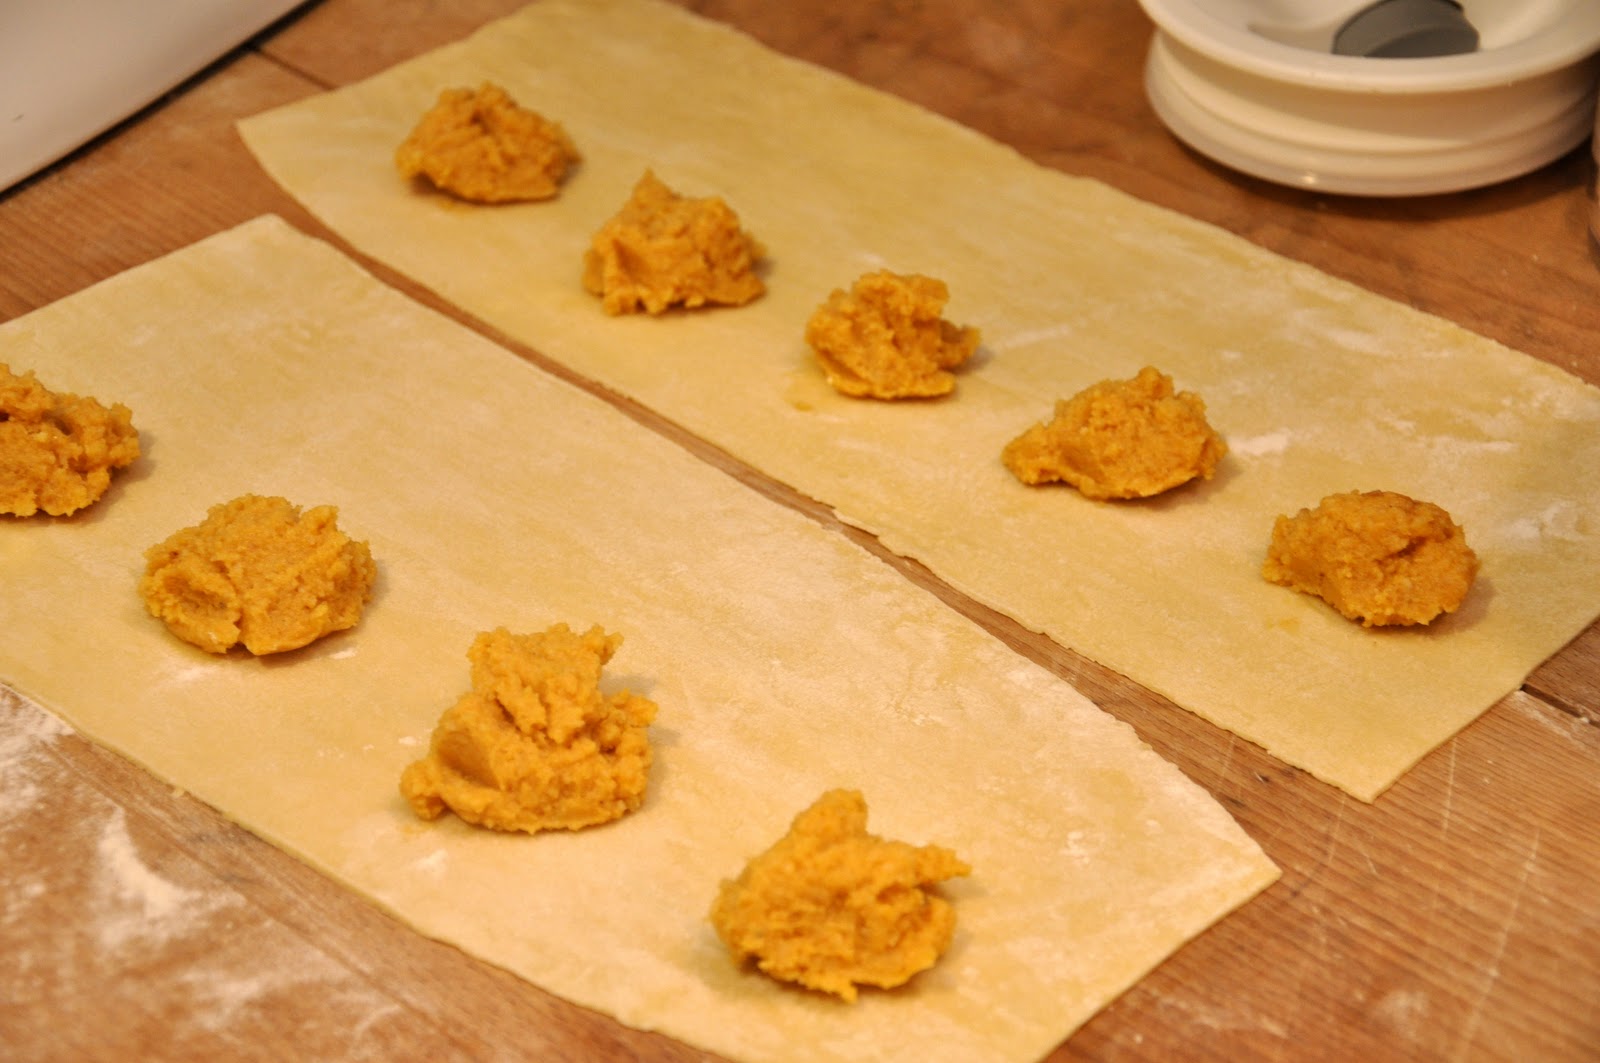
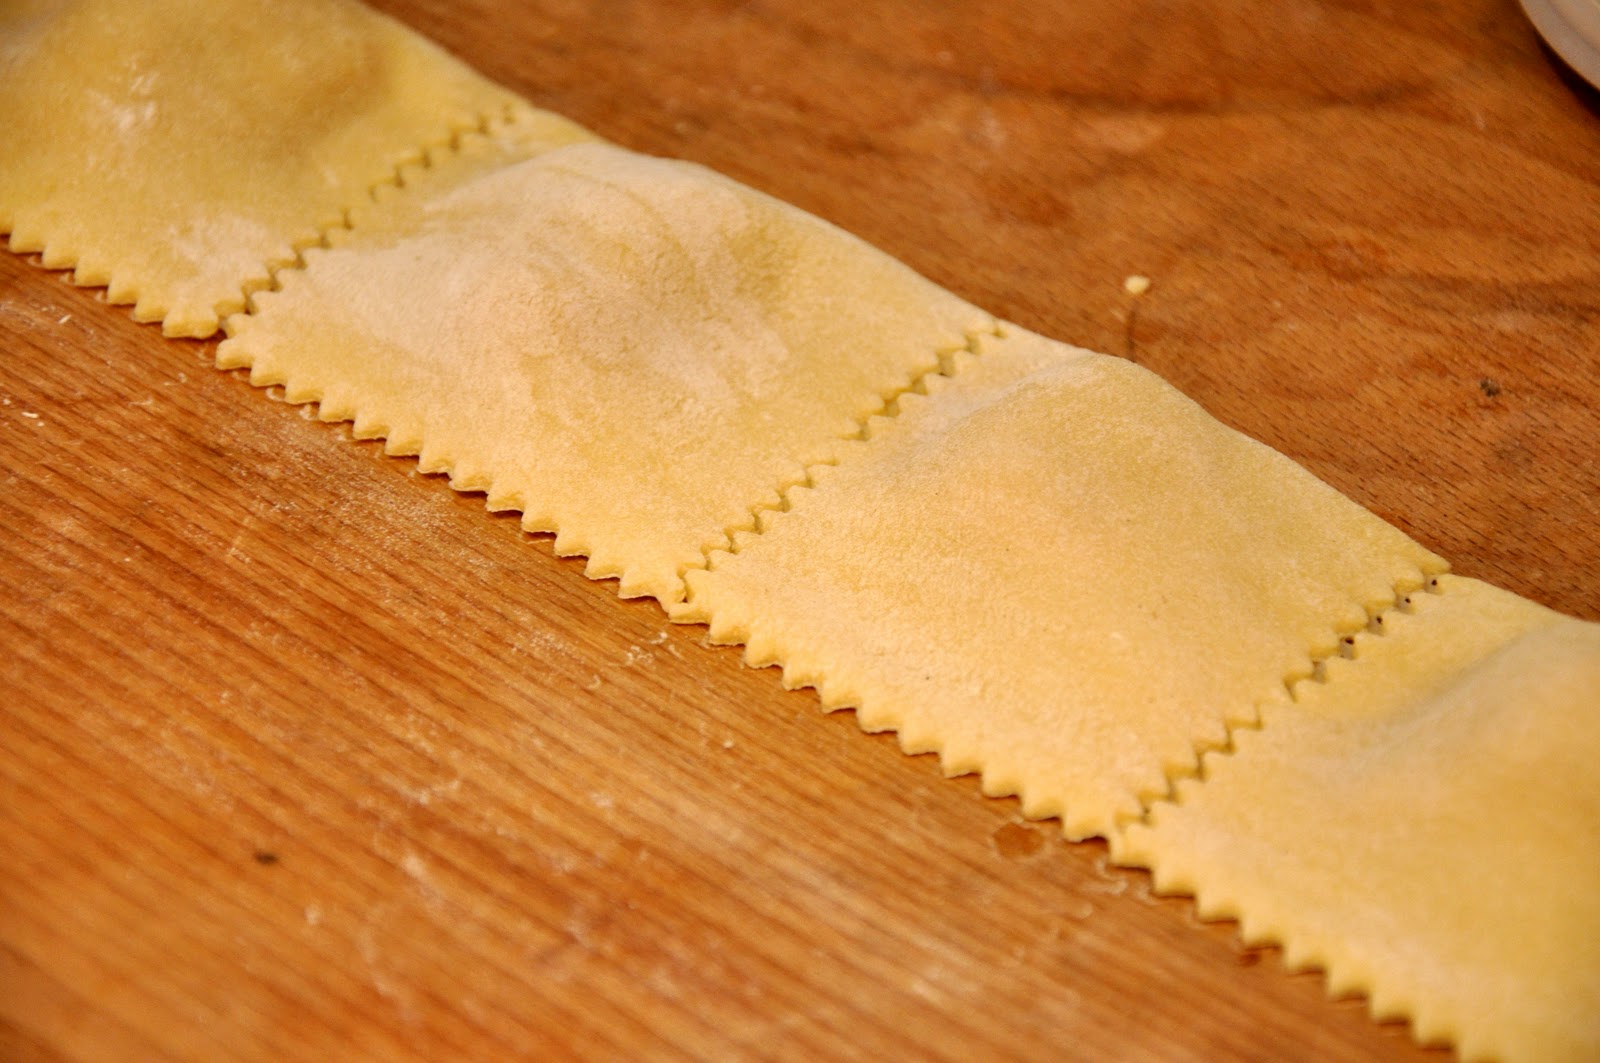
Place heaping teaspoonfuls of the stuffing about 5 cm (2 in.) apart along the length of your pasta sheet, just off center down the middle of the sheet.


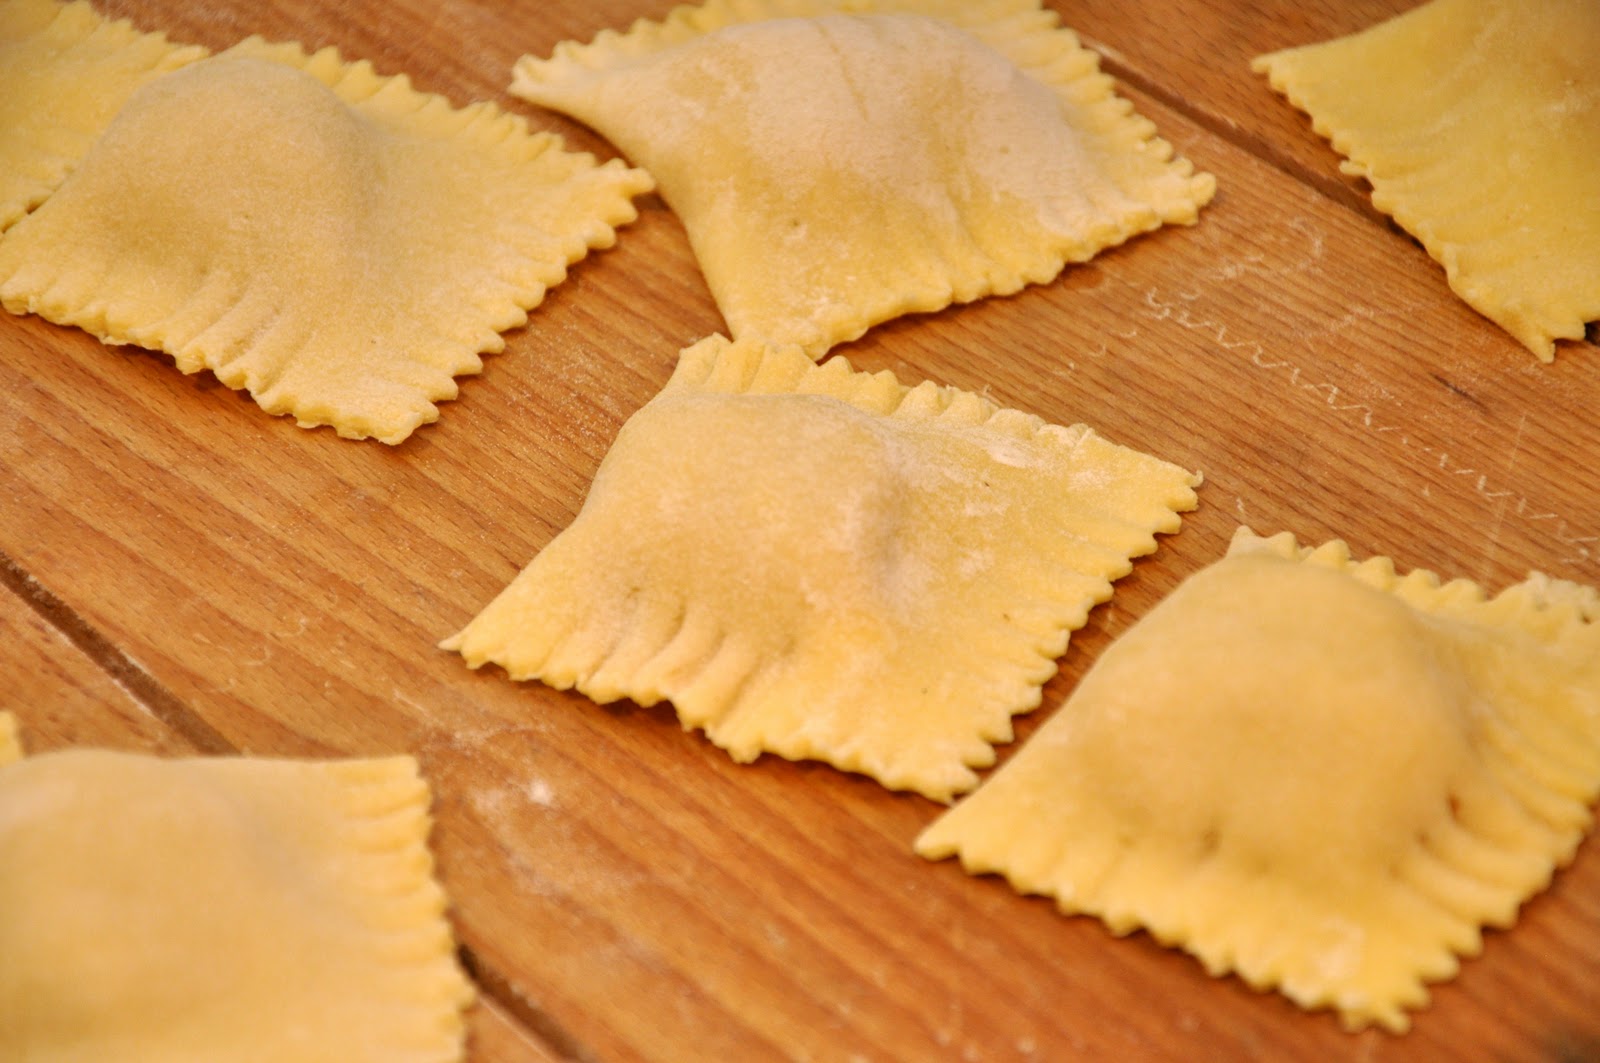
Fold the longer half of the sheet over the stuffing, pressing down with your fingers all around the stuffing to seal the top and bottom layers of pasta together. With a serrated pasta cutter (if you have one, otherwise it's fine to simply use a knife) cut out your tortelli along the three unfolded sides:


For the final touch, you can ensure a tight seal while making your tortelli ever so pretty by pressing down the edges with the prongs of a fork like so:

 
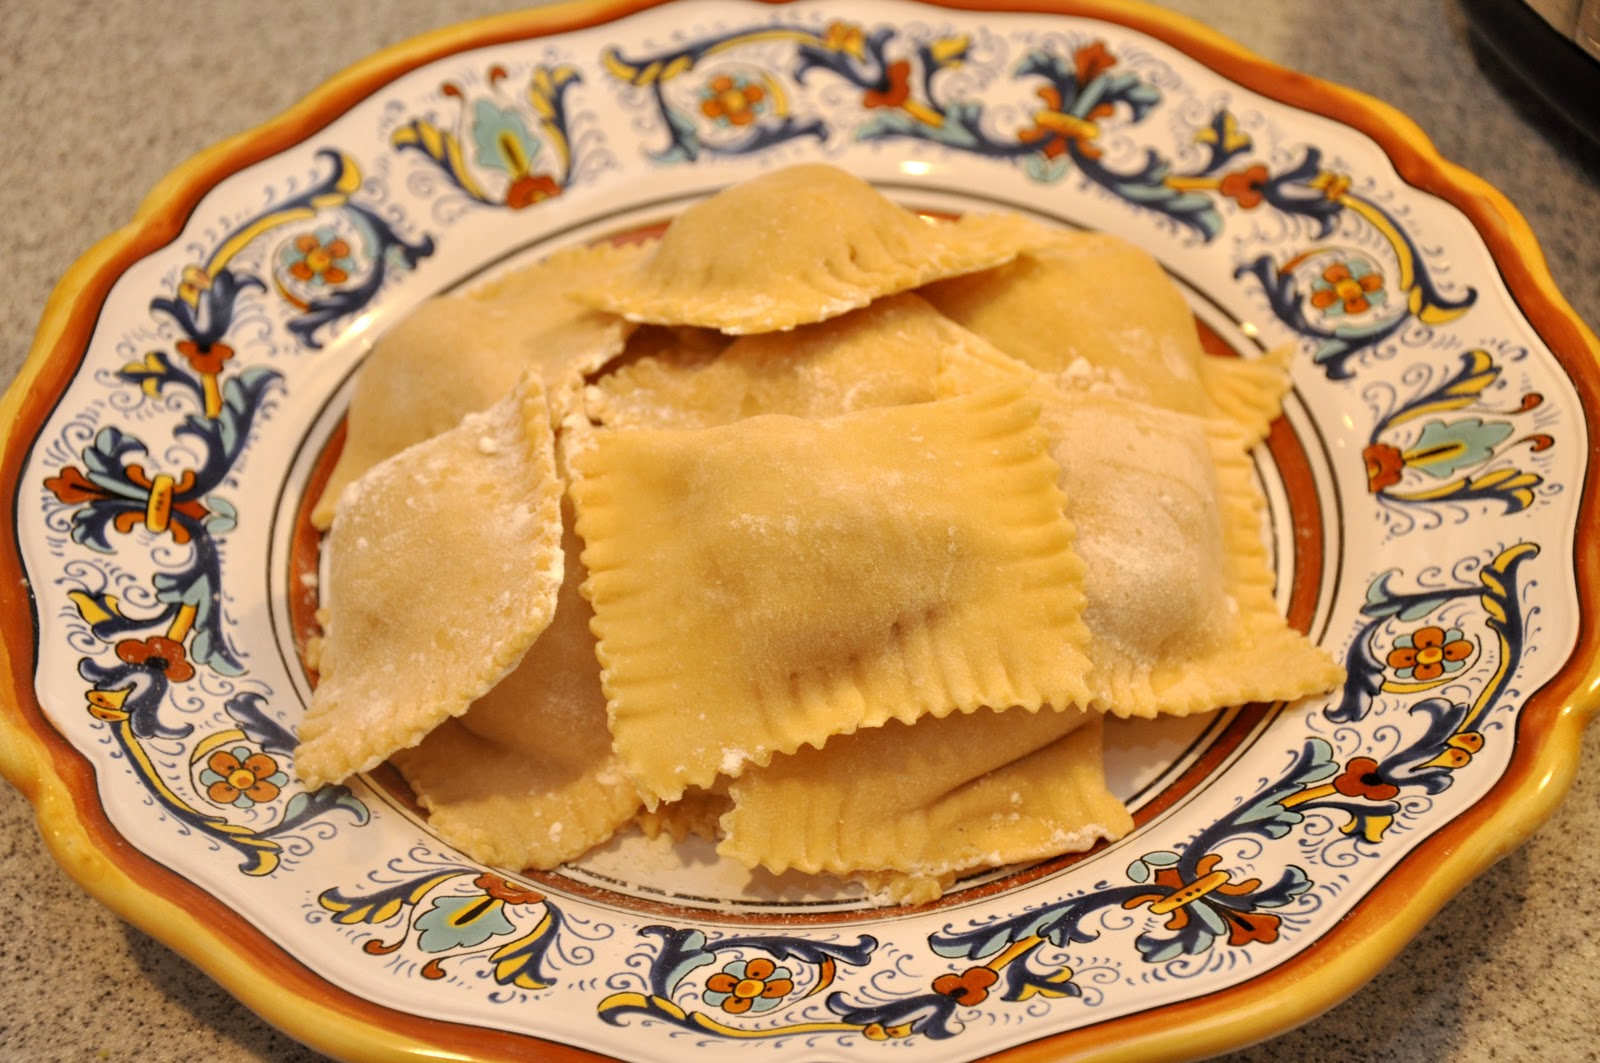
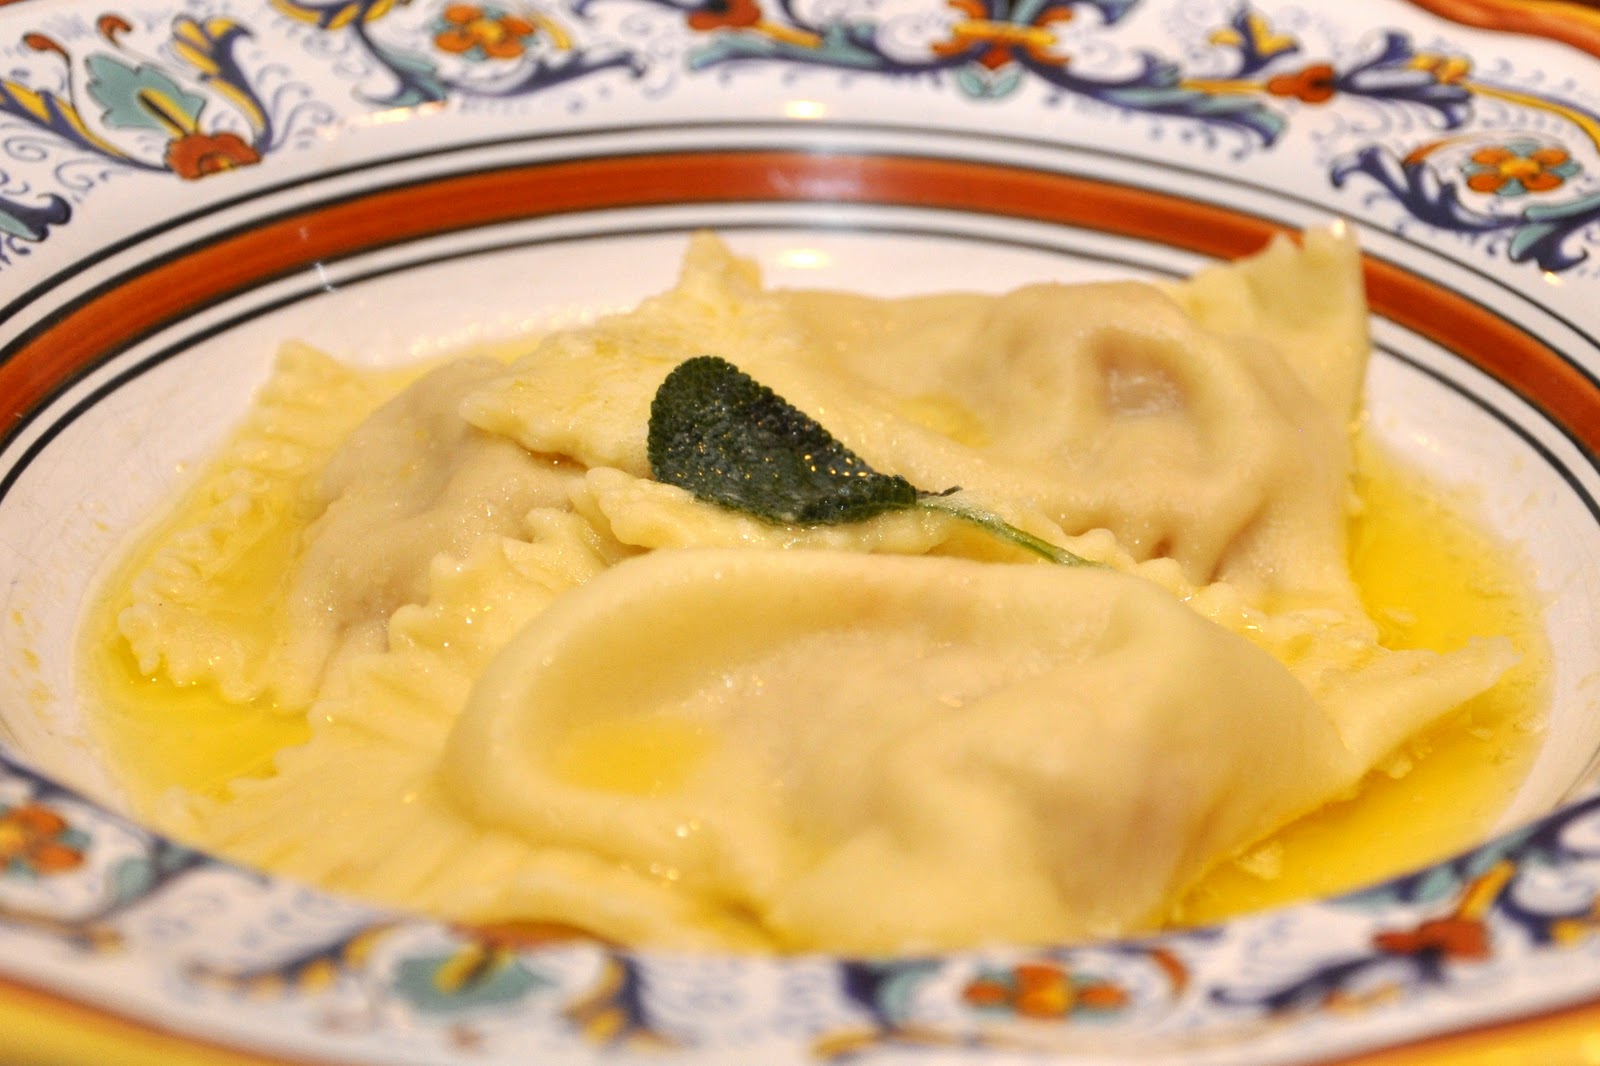
You should cook your tortelli for a good 5-7 minutes, depending on the thickeness of the dough. They take a bit longer than fresh pasta usually does, because of the double thickness of the pasta and the filling. While the tortelli are cooking, gently melt lots of butter in a small saucepan, adding a sprig of fresh sage if you like to steep along with the butter. (I have read that the sage is not original to the dish, but I like it.) Serve immediately, topped with the melted butter and—if you like—more grated parmesan on top.


NOTES: This dish comes from the region of Emilia-Romagna, and more specifically from  the city of Mantova, often called "Mantua" in English. For this reason, they are also sometimes called tortelli mantovani. But similar versions are made in the near-by towns of Parma, Reggio-Emilia, Piacenza and Cremona. In Ferrara they also make this stuffing but without the amaretti cookies. Speaking of which, it can be hard to find amaretti, which are a kind of almond macaroon—not the ubiquitous almond biscotti. If you can't find amaretti, then substitute an equal amount by weight of unflavored breadcrumbs, with a few drops of almond extract if you like.


And then there is the mostarda. Don't let the name fool you: it is not mustard at all, but a chutney-like relish typical of the cuisine of Emilia-Romagna. It is perhaps best known as an accompaniment to bollito misto, but it makes its appearance here as a flavoring. Mostarda has a unique flavor, both sweet and spicy. It is basically fruits that are candied in sugar syrup spiced with (hence the name) mustard seeds. There are various types of mostarda made in the region, but the most famous, by far, is mostarda di Cremona. If you're feeling ambitious, you can actually make it at home. (Here's the recipe.) You can also buy it in many of the finer Italian specialty shops—if they don't have it, give them a proper scolding for having neglected one of the most typical products in Italian cookery. Or you can buy it online. Mostarda di cremona contains a variety of fruits—pears, quinces, cherries, apricots, peaches, figs, but for this dish you really want another mostarda—the one from Mantova, which is made with pears or apples only. So if not making your own mostarda, just pick out the pears from the jar and use them.


Now if you can't find mostarda and don't feel up to making it yourself, you can omit it, as  you will find in most recipes for 'pumpkin ravioli'. But I would urge you to try to find it—it lends a very special, unusual taste to the dish.


You can also dress your tortelli di zucca, if you like, with a more elaborate sauce. Personally I don't think that the pumpkin stuffing goes particularly well with tomato-based sauces, but some wild mushrooms sautéed in butter with pancetta, for example, would be delightful.


The term 'tortelli' is one of the most confusing in the lexicon of pasta shapes. It can be another word for ravioli, but can also be rounded, or rounded and twisted as for a larger version of tortellini. And you will sometimes find tortelli di zucca in these shapes as well. And in Ferrara, they make cappellacci di zucca, made with a very similar stuffing (without the amaretti, as mentioned above). The pasta is cut into squares but then the two corners are joined to form a little 'hat' (hence the name, which comes from cappello, Italian for hat, since the shape was said to resemble the straw hats that local peasants used to wear.


The pie pumpkins, by the way, worked very well for this dish. True, they did not have the intensity of zucca, but their texture was perfect and, with all the added flavorings, the stuffing was perfectly delicious.  And if you have some leftover stuffing but don't feel like making another batch of pasta, you can use the stuffing to make a fine version of risotto alla zucca


By the way, don't throw away those pumpkin seeds! They are wonderful roasted in a slow oven with just a few drops of oil or melted butter until lightly brown (about 30-45 minutes) and seasoned with some sea salt. Or, for something a bit fancier, try out these two wonderful recipes by my fellow foodie, "Cookin' Canuck".

Sunday, October 3, 2010

Sformato di finocchi


The sformato (a term literally meaning 'unmolded') is something like a savory flan or perhaps a soufflé without the puff. At its most basic, it is actually a rather simple dish, a mixture of puréed or finely diced vegetables with béchamel and eggs, baked or steamed in a mold until set.

A sformato can be made with practically any vegetable which can vary according to the season, so you can serve a sformato all year round: peas or asparagus in the spring, zucchini or green beans in the summer, and so on. Now that the weather is rapidly cooling off here in the northern hemisphere, I turned to one of my favorite cool weather vegetables, fennel. Now fennel is delicious raw, served in a salad or even on its own, after dinner, as a kind of palate-cleansing 'fruit'. When cooked, its anise flavor mellows considerably and becomes, for lack of a better word, 'buttery' in flavor, and marries very well with butter, cream, cheese and other dairy products. That makes it a perfect candidate for a sformato.

Begin by boiling, or even better, steaming fennel bulbs, trimmed of their stalks and cut into halves or quarters, according to their size. For a family-sized sformato, about 500g or a pound of fennel, two large bulbs, should do well. When they are tender—a knife should slide easily in and out of them—drain them well. Let them cool a bit and, when they are cool enough to handle, either cut them into small dice or purée them, as you prefer. (I also like to add some of the fronds from the stalks for extra flavor.) A food processor works well for the purpose. Then melt a good amount of butter in a skillet and add your fennel, allowing it to absorb the flavor of the butter and to evaporate any residual liquid.

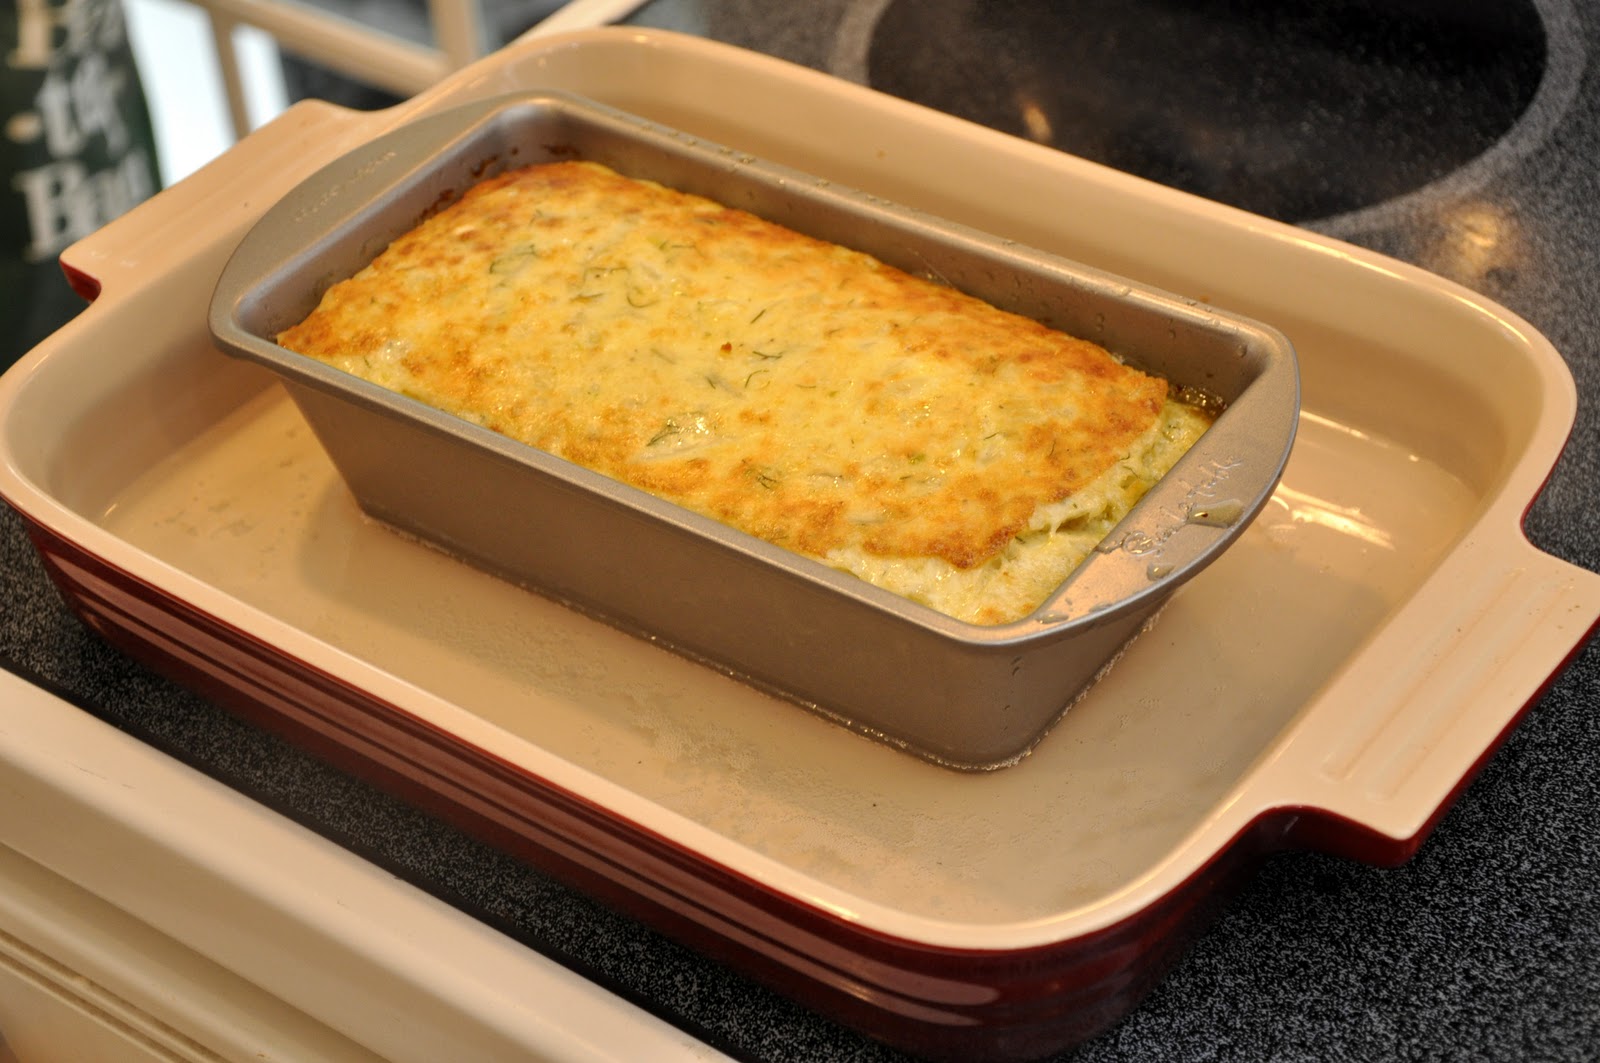
Now make some béchamel in a separate saucepan, in the usual way (see this post), using 2 cups of milk for every 500g (or pound) of fennel. Add the béchamel to the sautéed fennel, and season to taste with salt, pepper and a handful of grated parmesan cheese. Allow the mixture to cool off and  then add four eggs. Mix everything up well and pour into a well-greased loaf pan or other mold (see Notes below). Place your mold into a larger baking pan and pour water around the sides, to make what the Italians call a bagnomaria or 'bain-marie' in French and English:

 
Place the baking dish into a moderately slow oven (about 325F, 170C) and bake until the mixture has fully set. To test doneness, insert a paring knife or skewer inserted into the mold; it should come out completely clean. Baking time varies according to the size and shape of your mold, but for the loaf pan shown in the picture, it took about an hour. Individual molds will, of course, take much less time, as little as 15-20 minutes.


 Let the sformato cool for about 15 minutes or so. Loosen the sformato from its mold by running a knife along the edges of the pan. Then unmold itonto a serving platter. This can be done by placing the platter over the loaf pan or other mold, then holding pan and platter together with both hands, flipping it over. Gently remove the pan, revealing your sformato in all its glory. Serve warm or at room temperature.


 NOTES: As I mentioned, you can use the above basic recipes with just about any vegetable, using the same technique and the same proportions. I find that 'solid' vegetables like green beans, carrots, mushrooms and the like work best with the above basic recipe. Softer vegetables that tend to 'melt' when cooked, like pumpkin can also be used but you should reduce or even eliminate the béchamel and up the number of eggs to maintain the proper texture. You can also make sformati with other ingredients, including pasta, but the recipe is sufficiently different that it deserves a separate post.

The number of eggs varies from recipe to recipe. For 500g or a pound of vegetable, some recipes call for as few as a single egg, or as many as the four indicated in this recipe. Obviously, the more eggs, the firmer the texture of the final dish. Some recipes call for yolks only, which I imagine also produces a firmer result. You can also vary the texture by making the béchamel thicker or thinner, according to the amount of flour you use. (Too thin, though, and the sformato may not hold together.)

One important point: make sure that your vegetables are not 'water logged' when you mix them with the rest of the ingredients. That will tend to result in a rather flaccid texture. This is why steaming is better then boiling, and why it is important to sauté the vegetable in butter until quite dry. (The sautéing also gives it a wonderful flavor.)

As mentioned, you can use any number of different types of molds: a simple loaf pan works very well, but you can make a sformato in a round mold, or a ring mold, or a square mold, as you like. And rather than making a single 'family style' sformato, for more formal occasions you can use individual ramekins (or even a muffin pan!) to make individual sformati, which make for an impressive 'gourmet' presentation on the plate. For an even more elegant presentation, serve your sformato with a sauce—a creamy cheese sauce or a light tomato sauce or a coulis made from a vegetable with a complementary flavor. You can also garnish the sformato with sautéed vegetables, either the same vegetable as you used to make the dish, or some other vegetable that would go well with it.

At its most basic, though, this is actually a very simple, light yet rich, dish very suitable for home cooking. The only really tricky part is the unmolding. If you're lucky, the mold will come off perfectly cleanly, leaving a perfectly formed sformato. But if not, no worries—the taste will be just as good. You can just use garnish or sauce to hide the imperfection. To increase your chances of success, be generous when greasing your mold. And to be doubly sure, you can use a piece of wax paper, cut to size, to line the bottom of your mold. You then just gently remove the paper from the unmolded sformato before serving. Or, for a very informal meal, you forget all about it and just serve the sformato directly from the pan at table, with a spoon or metal spatula. Of course, technically you will not have a 'sformato' at that point, but I'm sure no one will mind.

The sformato is a usually vegetable dish, but it is too elaborate, really, to serve as a side. Traditionally, it served as an intermezzo, the course that came after the primo and before the secondo in very formal dinners. If you want to impress your guests, you can use it that way. For everyday eating, a sformato is very versatile. It can be an antipasto, a first course or even a vegetarian second course, as you prefer. There are even sweet sformati for dessert… but that's a subject for another post.

Saturday, October 2, 2010

Risotto al nero di seppia


Here's another installment from the colorful world of risotto. Last week we featured green risotto, this week it's black risotto, made with cuttlefish and its ink.

The technique for this risotto recipe is a bit different from the more usual one, in that you don't begin by toasting the rice but rather braising the cuttlefish (or, squid, if you can't find cuttlefish).  But before you start cooking, if your mollusk is not pre-cleaned,  you will need to clean it, making sure to carefully remove and reserve the ink sacs (see below). 
 
Now, make a soffritto of finely chopped onion and garlic, sautéed in olive oil. When the onion is soft and translucent, add your cuttlefish or squid (one small one or half a large one per person), which you will have chopped into little squares or sliced into thin strips, as you prefer. When the fish has turned opaque, add enough white wine to almost cover the fish and, if you like, a spoonful or two of passata di pomodoro (tomato purée) and/or a bit of peperoncino and/or some finely chopped parsley. Let the whole thing simmer until the fish is just about tender, which should take about 30-45 minutes depending on the type and age of the mollusk you are using. Then add the ink—if you've cleaned the cuttlefish or squid yourself, use the ink from the reserved ink sacs or, if using cleaned squid, about a sachet  of store-bought ink per serving—and stir so that it is fully incorporated into the liquid, forming a smooth sort of black ragù.

Add rice, stir to mix well, and simmer until the rice has absorbed the black liquid. Now proceed as you would for any risotto, adding ladlefuls of broth, one at a time, adding more broth only as the previous ladle has been absorbed. Fish or vegetable broth do best, but you can use chicken broth in a pinch, or even water. When the rice is done, remove it from the heat, add some more parsley if you like, and stir it vigorously as you would to mantecare any risotto. Add a dab of butter if you must but do not add grated cheese. Serve hot, topped with a bit of parsley if you like.

NOTES: This risotto is traditionally made with seppia, or cuttlefish, and the ink from the ink sacs that you carefully reserve when you clean it. Cuttlefish can be hard to find, and squid is a perfectly acceptable substitute. You clean both mollusks in the same basic way. Here's an excellent instructions video from the Rouxbe Online Cooking School:
 
 
In the US and perhaps elsewhere, most squid is sold pre-cleaned (which is to say, with the skin, internal cartilage and viscera (including the ink sac) removed. But nero di seppia (cuttlefish ink) is sold in small sachets in some specialty stores. They are also available online, sometimes under its Spanish name, tinta de calamar. Be careful handling the ink, as it really stains—which is perhaps why it was used as a dye and also as actual ink for writing in classical times. And, as you may have guessed by now, the English word 'sepia' comes from the Italian word for this same reason.
 
The dish takes rather longer than your usual risotto because of the initial braising, but the dish lends itself very well to pressure cooking. The cuttlefish or squid will take about 15 minutes under pressure. Then release it, add ink, then the rice and broth, and bring up to pressure again for another 5 minutes.
 
For tips on the best types of rice to use, see my post on the ABCs of Making Risotto. This dish being of Venetian origin, a vialone nano would probably be the best choice, but tonight I used carnaroli and it was very good indeed.

There are a few, but rather limited, variations on this dish. The most important being when you add the ink. Personally, I prefer to add it at the beginning, to ensure that it fully penetrates the rice, but some recipes call for adding it towards the end of cooking. One interesting variant recipe calls for making your squid or cuttlefish 'black ragù', then proceeding to make a risotto in bianco in the usual manner, in a separate pot, and adding the ragù to the risotto only towards the end of cooking.

The black ragù, by the way, makes a fine dressing for linguine, spaghetti or, for a Venetian treat, bigoli

Sunday, September 26, 2010

Risotto verde


As explained in my post on the ABCs of making risotto, it is one of those infinitely versatile dishes that smart cooks live by. Once you know the basic recipe, you've actually formed an entire repertoire by just varying the flavoring ingredient, which can be meat, fish, vegetable or even fruit. One of my favorite ways of making risotto is called risotto verde, or green risotto, made with green vegetables, most commonly—and my personal favorite—spinach. It has a wonderful flavor and, to my mind, looks very pretty on the plate.

You simply follow the basic recipe for making a risotto in bianco, starting with a soffritto of onion or shallot sautéed in butter—and I think butter tastes best here—and proceed to add your rice, then a splash of white wine, then ladlefuls of broth, one by one, until the rice is almost done. Then add some baby spinach, which you will have rinsed well of any grit and puréed in a blender with a bit of broth until perfectly smooth. Continue until the rice is done al dente, then proceed to the usual mantecatura, adding grated parmesan cheese and a dab of butter or—as I prefer—a slurp of heavy cream. The cream is not very orthodox, but I find that it complements the taste of the spinach very well. Serve immediately, with additional cheese on the side for those who want to top their risotto with it.

As for measurements, follow the general rule of 75-100g (2-1/2 to 3 oz.) of rice per person, and an equal amount by weight of spinach. The rest is to taste or, as in the case of the broth, quanto basta or as much as you need.

NOTES: I find that this dish works best with baby spinach, with has a lovely sweet taste and fine, velvety texture when puréed. But if you have older spinach on hand, then make sure to trim off their stems, and briefly blanch the leaves in boiling water, before you puréed them. They will need less broth to form a purée. If you want a richer dish, you can sauté the spinach purée in some more butter, and season it with salt, pepper and some grated nutmeg.

Some recipes, by the way, call for adding the spinach, in the more typical fashion, to the soffritto at the beginning of the cooking process, but I find that this robs the spinach of its sweetness, so I think this is one of those cases where you are well advised to wait until almost the end.

Spinach is typical but you could make risotto verde with another leafy green vegetable like swiss chard, arugula, watercress or even kale—although kale needs a lot of cooking, so you should definitely blanch it, and add it at the beginning, not the end. Some recipes combine spinach or another leafy vegetable with other green vegetables like peas or asparagus. And while my favorite version tends towards using dairy, there is a version (from Abruzzo, according to the Accademia italiana della cucina) that begins with a soffritto that combines onion, garlic and carrot sautéed in olive oil, and end with a mantecatura using some grated parmesan but no cream at the end. I have also found one recipe online that 'gilds the lily' a bit, suggesting the addition of ricotta—a classic combination with spinach, of course—along with cream and parmesan cheese.

Saturday, September 25, 2010

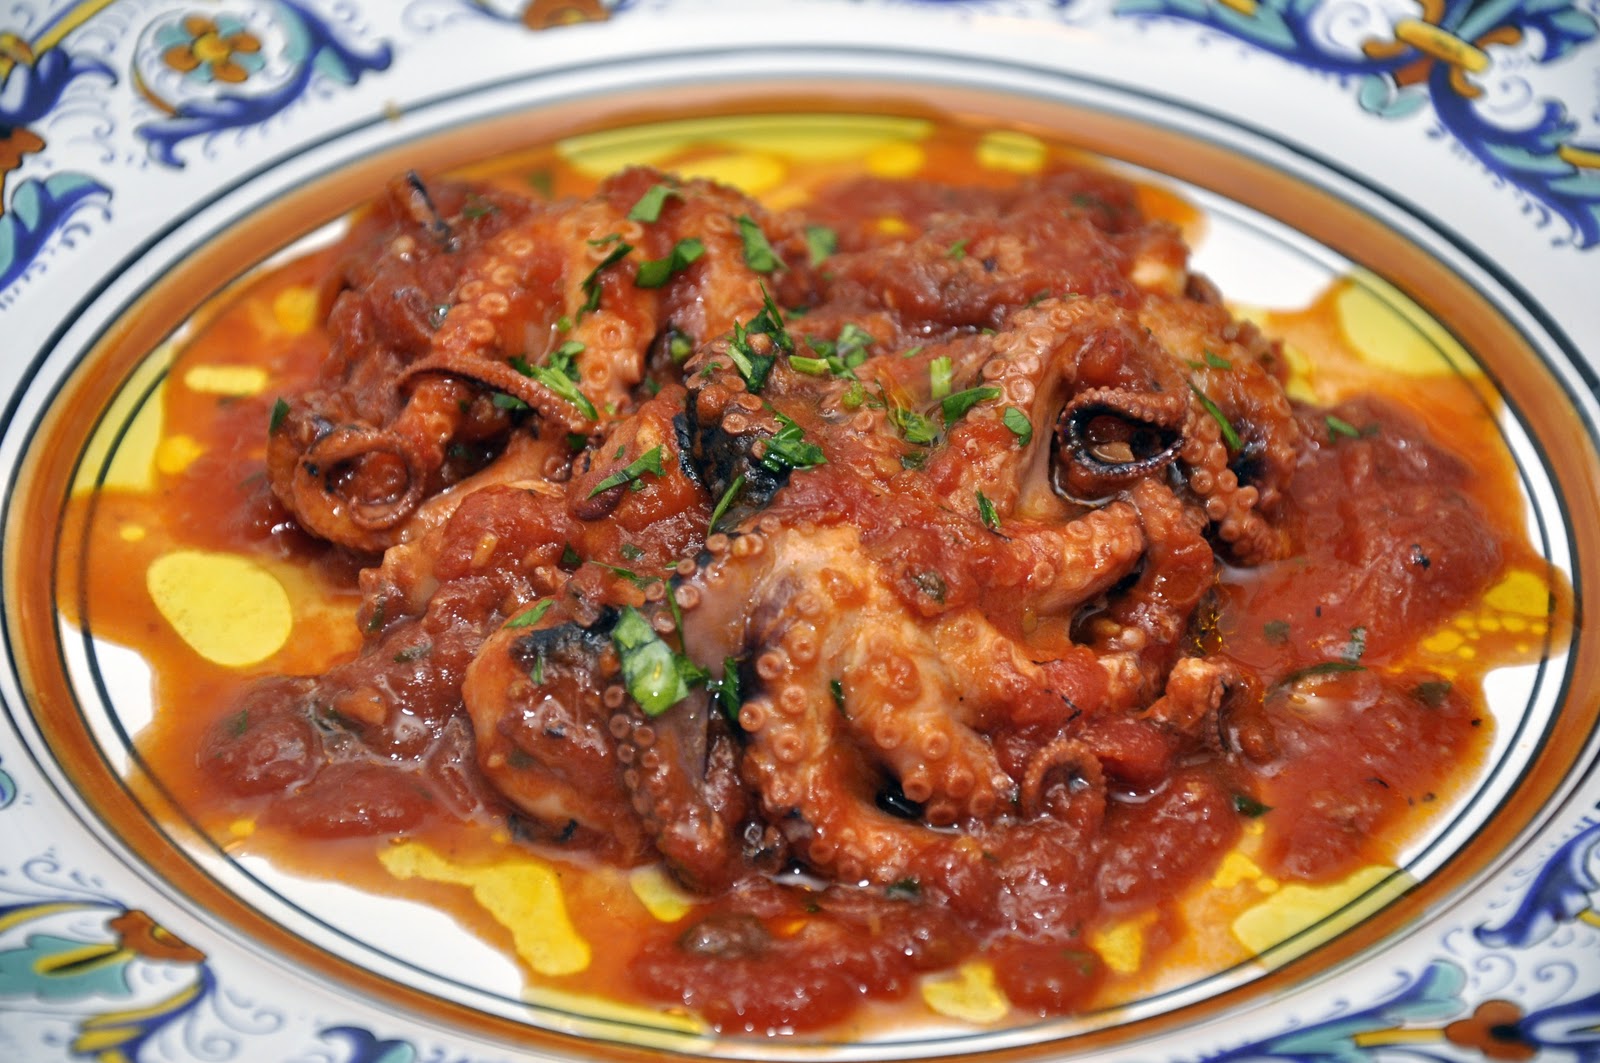
«Polpetielli» affogati


Octopus is a popular food all around the Mediterranean basin and yet elsewhere it is often, for some reason, 'controversial'. Many people who will happily scarf down fried calamari will shudder at the thought of eating its close cousin, which is too bad, because octopus is one of the finest fruits of the sea. When properly cooked, it is perfectly delicious, tasting much like squid but… more so, with a deeper flavor, almost 'gamey', in a good way. It is also very affordable. It cost me $6.00 a pound, in that store that some folks call "Whole Paycheck".

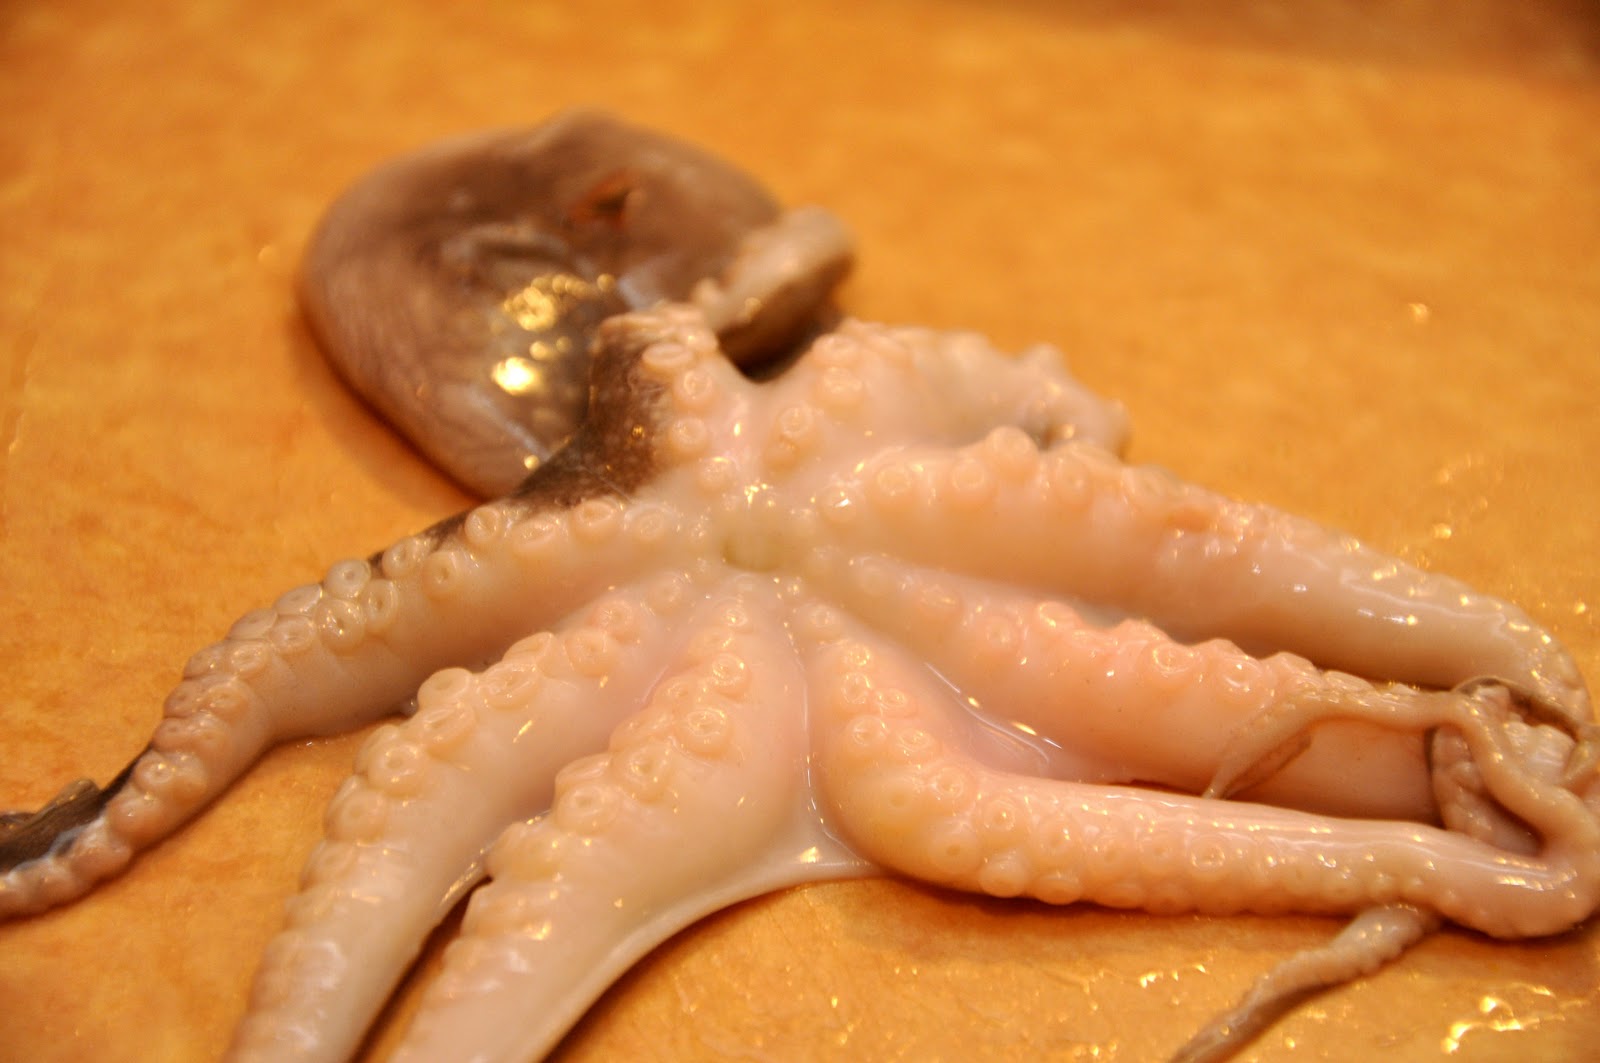
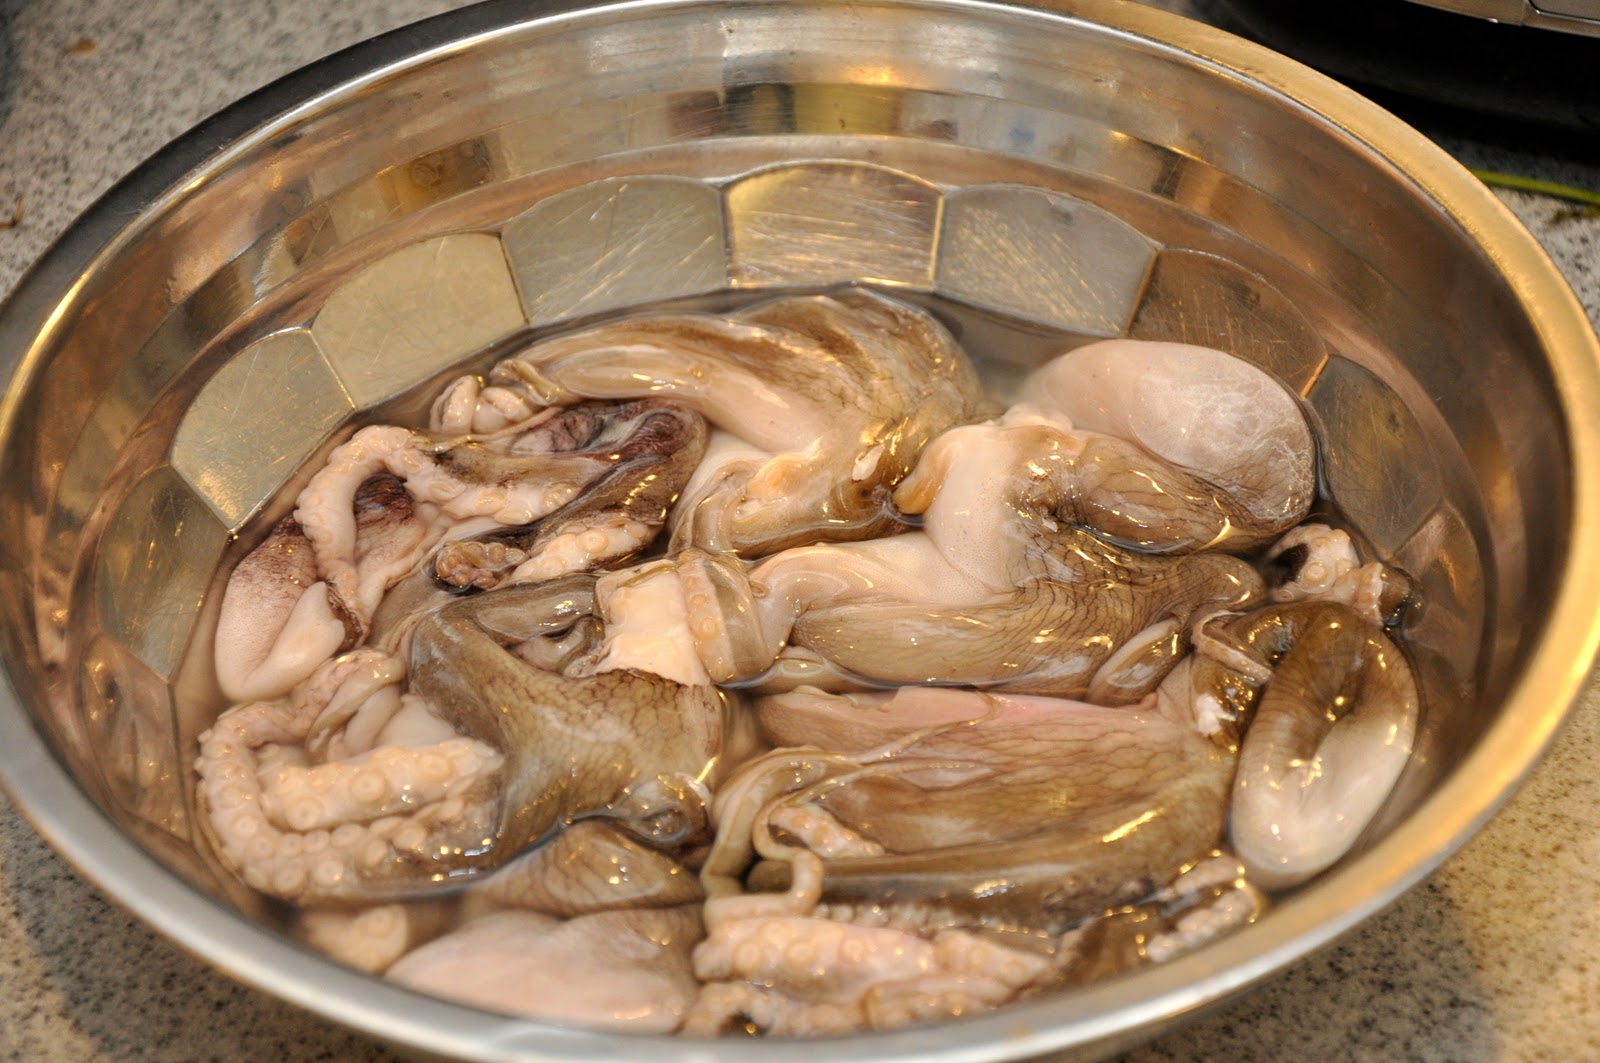
The main issue with octopus is toughness. Large octopus needs to be cooked for a very long time, and they are often beaten beforehand, a bit like tripe, for tenderize them. But baby octopus is another story. It needs long slow cooking, but 45 minutes to an hour is often enough for the smallest varieties. Slightly more mature octopus is sometimes also sold as 'baby' octopus, so cooking times may vary. Like squid, octopus also need to be cleaned (see Notes below) but more often than not they are sold pre-cleaned. Or you can ask your friendly fishmonger to clean them for you. Once they're clean, rinse them well and set them in a bowl until you are ready to begin cooking.

In any event, the cooking method is as easy as it gets. You place your baby octopus, whole, into a pot (traditionally terracotta but enameled cast iron or even a heavy stainless or copper pot will do fine) together with about half as much by weight of canned tomatoes, a drizzle of olive oil, some chopped garlic, a dash of salt and, if you want a little heat, some red pepper flakes. Cover tightly and simmer over lowish heat for 45 minutes to an hour. By this time, the octopus should be tender and the sauce should be nice and thick, and rather darker than when it started. If the octopus is done but the sauce still rather thin, which can happened since octopus tend to shed liquid while cooking, you can fish them out of the sauce and continue reducing until you have the right consistency, then add the octopus back in to heat up again. If, on the other hand, the sauce has reduced but the octopus still needs some more cooking, then just add a bit of water and continue simmering. About 5-10 minutes before the dish is done, add some chopped parsley. Serve hot, with a bit of the sauce and, if you like, some more parsley and/or a drizzle of olive oil on top.

NOTES: A bit like a pizzaiola, the red sauce makes a delicious dressing for pasta. If you want more sauce, you can up the ratio of tomato to octopus from 1:2 to 1:1. The pasta could be served as a primo before the octopus or at a separate meal.

You can also use a pressure cooker to speed up the cooking time. It should take about 20-30 minutes after it comes up to pressure. You will then need to simmer it for a few minutes to reduce the sauce, since there is much less evaporation when cooking under pressure.

The august Jeane Caròla Francesconi includes a recipe for this dish in La cucina napoletana. She is very adamant that you should make sure that the lid should be tight when simmering, and suggests using a piece of waxed paper (you could also use aluminum foil) to ensure a seal. And she admonishes the reader not to open the lid during the simmering. Not sure why but I won't question her wisdom! Of course, this is not an issue when using a pressure cooker.

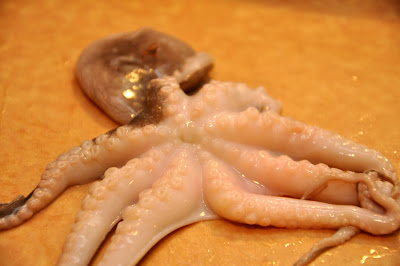
As mentioned, the only tricky part of cooking octopus is the preliminary cleaning of the octopus, which is to say removing the inedible bits. You need essentially to remove its 'mouth', which is located on its underside, at the center of its tentacles. This can be done fairly easily with a paring knife. You then remove the ink sack  (most but not all octupus have one) and any viscera through the resulting hole. (Be careful not to puncture the ink sac, as you will wind up with black ooze all over the place!)

A pre-cleaned baby octopus
This fine article by Mark Bittman on octopus, in particular its cleaning, for The Splendid Table is well-worth a read. .

Sunday, August 29, 2010

Carne alla pizzaiola


One of the pillars of everyday Neapolitan cuisine, this simple dish is a great solution for those times when you feel like a bit of solid sustenance but don't feel much like cooking something elaborate. A bit like slapping a piece of meat on the grill only a bit tastier. The name of the dish translates loosely as 'pizza-style meat' because of the sauce of tomato and oregano, a combination not nearly as ubiquitous as non-Italians often imagine but commonly associated with pizza. It goes by various names—manzo alla pizzaiola, fettine alla pizzaiola, bistecca alla pizzaiola—but, more often than not, it is simply called 'la pizzaiola'.

There are two primary ways of making pizzaiola, quick or slow, depending on the kind of meat you are using:

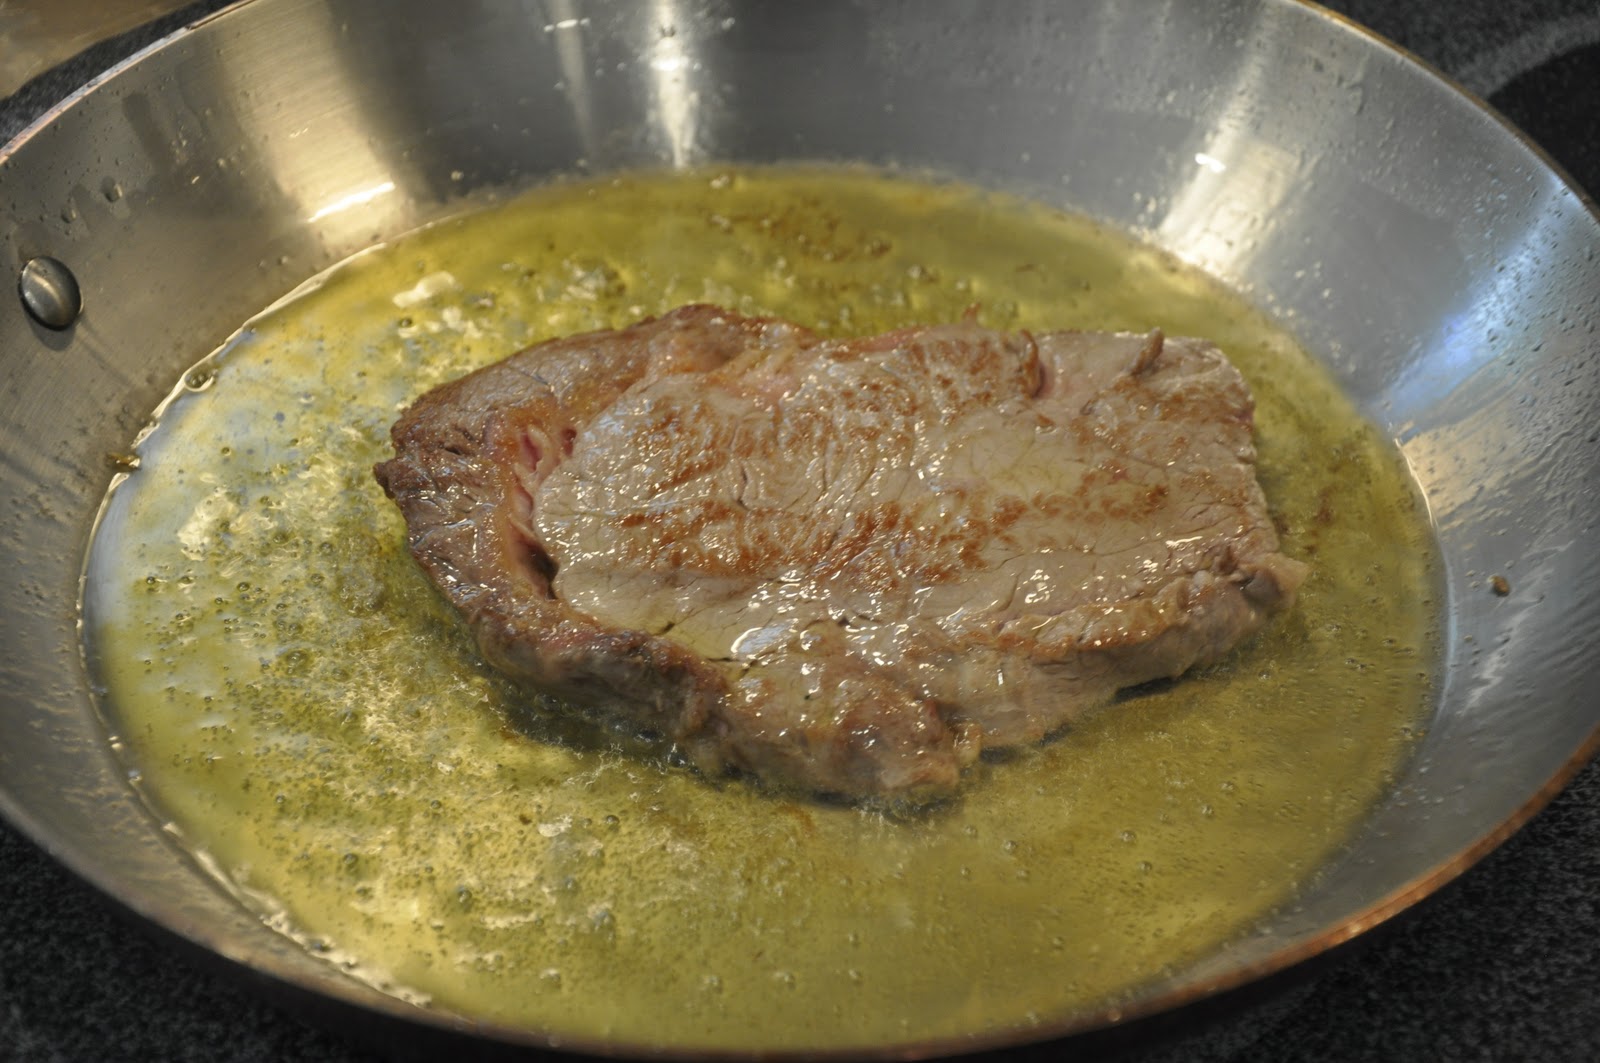
The Quick Method: If you are using tender, lean beef, then you want to opt for the quick version. In Italy, they sell thinnish (but not paper thin) slices of beef called fettine di manzo or just fettine. If you can't find anything like that, you can use boneless steaks (as pictured). If they are any thicken than say, 2 cm (1/2 inch) then I would suggest that you cut them into half thicknesses. In either case, pound your slices with a meat pounder or the back of a heavy skillet. Pat each slice dry to ensure good browning.

Add enough olive oil to nicely coat the bottom of a heavy skillet. Turn the heat to high and when the oil is very hot, quickly brown a clove or two of garlic (taking care that it does not burn) then add the beef slices and sear them quickly on each side. They should be just lightly caramelized. Don't crowd the slices which, as you probably know, would impede proper browning—you can do them in batches if need be. Remove the slices as they brown. 

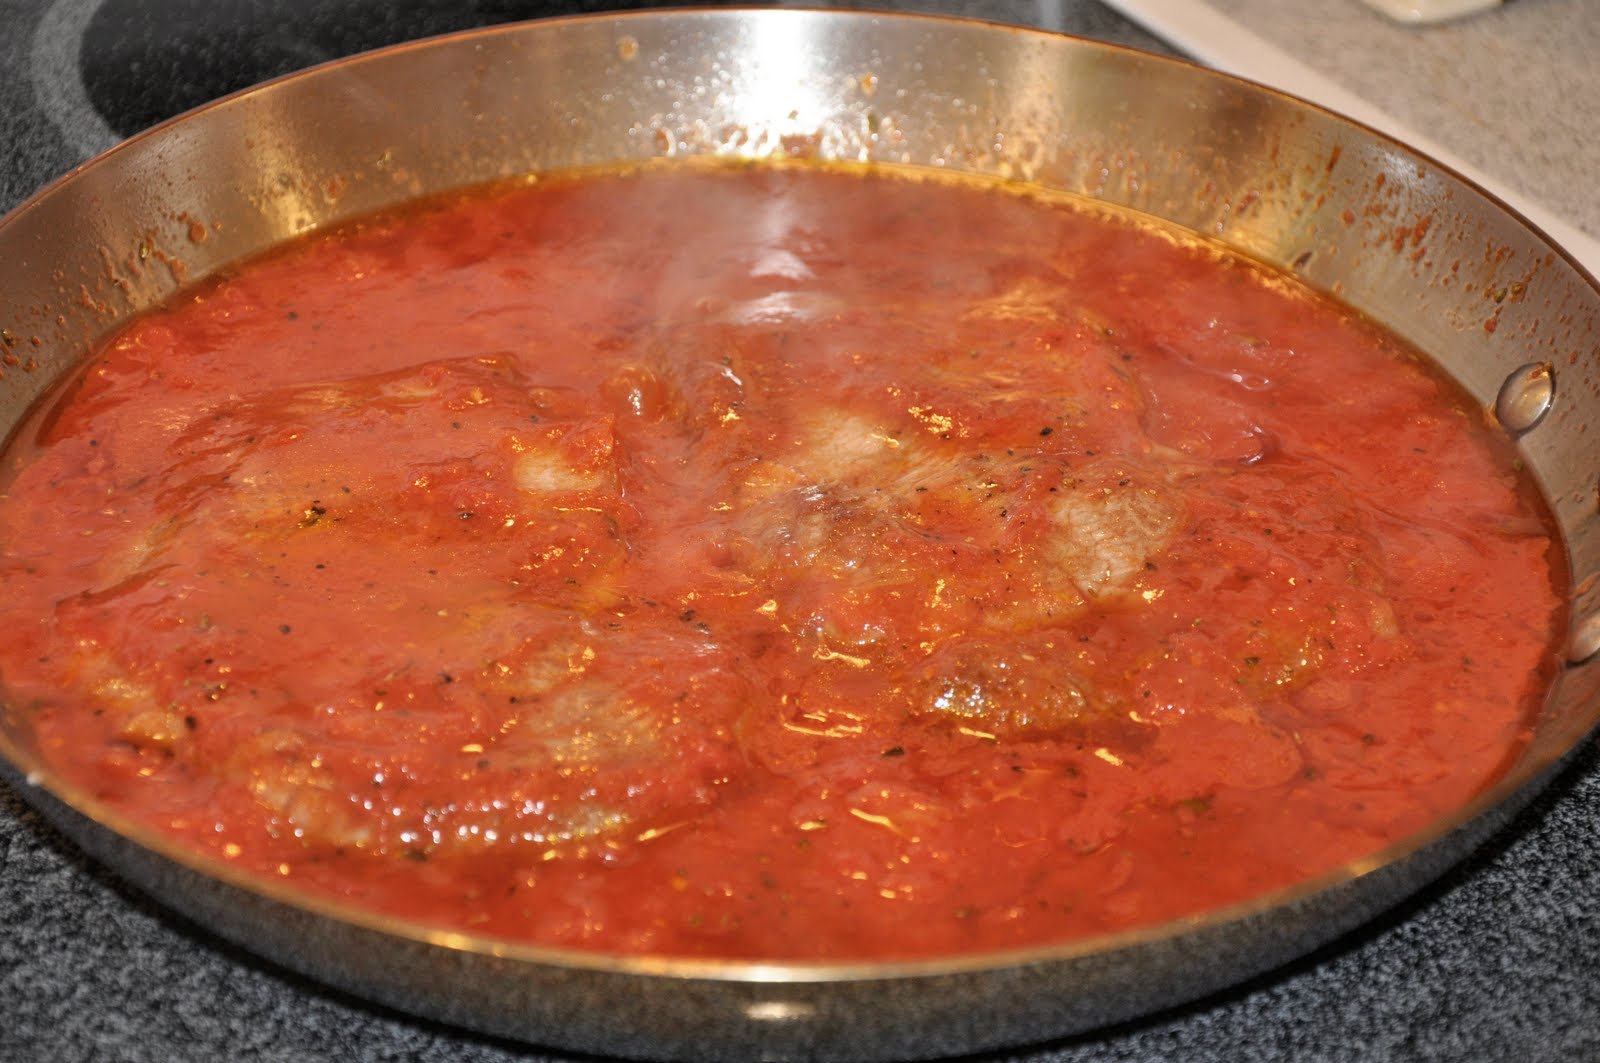
Add an ample amount of best-quality canned tomatoes, which you can simply crush with your hands, to the oil. (In the summer, if you have really good ripe fresh tomatoes, you can chop them up roughly and use them instead.) Lower the heat, season with salt, pepper and a nice sprinkling of dried oregano. Now, a word of advice: even if the oregano gives this dish its characteristic 'pizza' flavor, don't go wild with it. A little dried oregano goes a long way and you want its aroma to complement but not to overwhelm the taste of the meat.

After the pizzaiola sauce has simmered for a minute or two, add back your beef slices and continue to simmer away for about 10 minutes, until the sauce has reduced nicely and the meat is fully cooked through. You want to keep your sauce simmering at a moderate pace—not too slowly or the sauce will not reduce, but not too quickly either, which would tend to toughen the meat. Although I usually love my beef 'barking' rare, this is one dish where the meat really has to be well done, both so that the beef has time to absorb the flavor of the sauce and because, for whatever reason, tomato sauce and rare beef do not really pair very well.

The Slow Method: Although the above method is perhaps the most common way of making pizzaiola these days, the original recipe used a rather tougher cut of beef, cooked slowly. According to the authoritative JC Francesconi, author of La cucina napoletana, the typical cut in Campania is called the colarda, taken from the rear leg of the steer, a cut that is not often found even in other parts of Italy. Other places, the costata (rib) or noce, a fillet taken from the inner thigh, are used. In the US, I'd use the kind of cut you'd use for a pot roast, sliced, like a bottom round perhaps. All the ingredients are placed together in a Dutch oven, covered, and simmered over low heat for about an hour, adding a bit of water or white wine if the sauce gets too thick. This method results in a wonderfully savory version of the dish, but it does not lend itself to a 'spur of the moment' approach.

NOTES: The measurements are really pretty loose in this dish, but you may want to make ample sauce, which is wonderful with pasta, either as a first course to the meat or saved for another occasion. The sauce from the slow method is, of course, much more savory.

Variations abound, in particular for the quick method: for a lustier sauce, you may want to add olives, capers, anchovies and/or a bit of red pepper flakes. Some recipes, including Francesconi's, recommend adding a bit of white wine as well which gives the sauce a little 'zip'. Some recipes head in the opposite direction, so to speak, and omit the oregano and other flavorings in favor of a pure tomato sauce, although frankly that sounds a bit dull to me. Some modern recipes will substitute a soffritto of onion, carrot and celery for the garlic, which provides a more 'refined' but less characteristic flavor. Not all recipes call for the initial searing of the meat slices, but I find that it lends a nice depth of flavor. 

And if you are feeling particularly extravagant, you can place the cooked slices in a baking pan, nap with the sauce and lay over slices of mozzarella. Then pass under a broiler just long enough to melt the cheese and serve.

The basic method is very versatile. Other sorts of meat or even fish can be made using the same method: older veal, for example, or chicken or turkey breast. As for fish, choose one with nice, firm texture that will stand up to the assertive sauce, say some swordfish, tuna or mackerel, cut into 'steaks'. And you can even make hamburger patties this way!