Showing posts with label fish. Show all posts

Saturday, February 19, 2011

Baccalà mantecato


A not-so-distant cousin of Provençale brandade de morue, baccalà mantecato is one of the signature dishes of Venetian cuisine and a staple of those wonderful hidden-away Venetian bacari, or wine bars.

The name of the dish comes from the verb mantecare, which is a culinary term meaning to 'beat' or 'whip' or simply to 'stir vigorously' so as to create a creamy consistency. It is the same word used to describe the final stage of making a risotto, when you stir the rice vigorously to incorporate grated cheese and butter, to creating that luscious creamy consistency that we all know and love. The technique serves the same purpose here, but in a wholly different context.

Ingredients (for 4-6 servings)

250g (1/2 lb.) salt cod, soaked for 24 hours and cleaned of any stray bones
1 clove garlic, very finely chopped (optional)
Olive oil, about 100g or as much as you need
Salt and pepper, to taste
chopped parsley

Directions

Cut the salt cod into manageable pieces and place them in a saucepan. Cover with water and bring to a gentle simmer. Add a small pinch of salt, a slice or two of lemon and a bay leaf. Continue to simmer for 20 minutes, until tender but not yet falling apart. When done, transfer the pieces of salt cod to a large bowl with a slotted spoon.

Start to break up the salt cod pieces with a sturdy wooden spoon. When the fish has broken up into shreds, add the garlic (if using) and then start to drizzle the oil into the fish. Stir with the wooden spoon, incorporating the oil slowly into the fish as you stir, as if you were making mayonnaise. Continue like this until the fish has formed a nice, but not entirely smooth paste. There should still be small bits of fish here and there. If you find the paste a bit too thick, you can add a spoonful or two of the cooking water. Taste and adjust for seasoning—you may not need any salt, but you probably will, as salt cod can be surprisingly bland after it has soaked. Mix in some chopped parsley.

Baccalà mantecato should be served at room temperature, typically on top of crostini di polenta as shown in the picture above. In Venice, polenta blanca or white polenta is the most autentic choice, but yellow polenta as shown will certainly do fine if you, like me, you don't have any of the white variety on hand. It can also be served with soft, hot polenta for a more substantial dish

NOTES: To make crostini di polenta, simply make a batch of polenta using the usual method, pour it out on a wooden board or baking sheet, in a thinnish layer, to cool completely. It will have hardened enough to cut into rectangles or square pieces. Grill or griddle your crostini on each side until lightly spottled. These crostini have many other uses—they are perfectly delicious slathered with gorgonzola cheese, for example.

If you are being a bit lazy, you can—if you must—blend the salt cod in a food processor,  drizzling the olive oil through the spout as you use the pulse function to avoid overblending. Of course, this method does not produce a dish with quite as much character but it will certainly save you some effort. What you should avoid, however, is using a blender, which will purée the fish rather than producing the typically 'rough' texture that characterizes the dish.

The recipe given here is from the Dogale Confraternita del Baccalà Mantecato, one of the many confraternita or associations (literally 'brotherhoods') in Italy charged as guardians of the most significant traditional local dishes. This one is, of course, based in Venice. The original recipe calls for stoccafisso, or stockfish, which is another form of preserved codfish, wind-dried rather than salt-cured and so much harder. It requires several days of soaking. It is a rarity in the US, but salt cod is a perfectly acceptable substitute, in my humble opinion. The original recipe does not call for garlic, but most recipes (even Italian ones) will include it these days. For a more assertive flavor, some recipes call for a fillet or two of anchovy.

Many recipes you will find, perhaps most, call for a mixture of milk and oil, often in a 50:50 ratio but sometimes mostly milk (or even cream) and only a bit of olive oil.  I have read—though I can't find the source now for the life of me—that the all-oil version is typical of Venice itself, while the milk and oil version comes from the inland areas around Vicenza. In the old days, olive oil was probitively expensive outside areas where olive tree grew, which meant most of northern Italy outside Liguria. Venice, itself, however, was lucky enough to have olive oil production nearby, where a micro-climate allowed for it. I now begin to doubt this explanation, however, as  its seems that there is olive oil production in several areas in the Veneto (something I never knew until I looked into it) including around Vicenza. In fact, olive oil from the Veneto has its own DOP designation. In any event, the oil you use should not be too fruity. A lighter Ligurian or Provençale olive oil (assuming you don't have access to the local variety!) would probably be the best choices. Avoid those fruity Puglian or Sicilian oils which, as wonderful as they are, would be too 'heavy' for this dish.


Friday, February 4, 2011

Branzino al sale


This will be a short post as I've come down with a nasty cold. No matter, since this is a short and simple recipe anyway, another example of the sublime simplicity of Italian cookery, sea bass roasted in salt.

Yes, that's what I said. Not to worry, the end result is not too salty at all, but perfectly seasoned. And wonderfully moist, as the salt crust that forms around the fish as it roasts locks in the fish's natural juices.

Ingredients (for 2 people):

1 branzino (or other fish) about 500g (1 lb.), gutted but left whole
750g (1-1/2 lbs.) sea salt (or kosher salt) or as much as you need to cover the fish

For stuffing the fish(optional):
A sprig of fresh rosemary, a sliced garlic clove or a few slices of lemon

For garnish:
Best quality olive oil
Lemon wedges
Freshly ground pepper (optional)
Chopped parsley (optional)

Directions:

In a large bowl, pour in the salt and sprinkle with a bit of water. Mix well with your hands, adding more water as needed, so that the salt is ever so slightly moistened and the grains of salt begin to adhere to each other. The texture of the salt will turn coarser, a bit like wet sand.

Lay down a 'bed' of salt in a roasting pan large enough to hold the fish. Then lay your fish down. If you like, you can place a sprig of rosemary, a few bits of garlic or a few thin slices of lemon in the fish's cavity. Or you can simply leave the fish be.


Cover the fish entirely with the rest of the salt. (Some recipes suggest you leave the eye uncovered to judge doneness. I don't do this.)


Roast in a very hot oven (220°C, 450°F) for 25-30 minutes, depending on the size of the fish.

Let the fish cool for a few minutes (no more than five, however, or the salt will begin to penetrate the fish). Crack open the salt, which will have formed a hard crust around the fish, and uncover the fish. The skin should adhere to the salt as you remove it. If not, skin the fish. If you're careful (more careful than I've been here) you'll be able to lift the fillets out whole, to the admiration and wonder of your dinner guests. This particular evening, I wasn't in the mood...


Serve the fish fillets drizzled with some best quality olive oil, a squeeze of fresh lemon and, if you like, a good grinding of black pepper. Some people like to sprinkle the fish with some freshly chopped parsley for color.

NOTES: The recipe admits a few minor variations. Many recipes omit the first step of mixing the salt with liquid. Rather, the raw salt is simply piled up around the fish. That makes it much easier to get at the fish afterwards, as it does not form the same sort of hard crust. But that also means that the salt will tend to penetrate the fish, leaving a saltier taste. No bother for a salt fiend like myself, but some people might object. Interestingly, most English-language recipes for this dish call for mixing the salt with egg whites. Only one of the myriad Italian-language recipes I've seen call for this. Not sure why, nor have I tried to use egg whites—seems like a waste of good eggs!—so I can't tell you what difference it may make.

Some recipes also call for a lower roasting temperature and a longer cooking time. That also strikes me as a risky proposition. Obviously, though, if you use a much bigger fish, increase the cooking time accordingly.

Branzino (sea bass) is said to lend itself particularly well to this cooking method, but just about any fish will work, so long as it is not too small (500g/1 lb. is a kind of minimum) and is left whole. Fillets will not work, since the skin acts as a barrier against the salt and the bones add flavor and help retain the fish's natural moisture. In fact, many recipes call for leaving the scales on the fish as well for added protection.

The salt? Sea salt is best—not the very expensive finishing salts, but bult sea salt that can be had at reasonable prices. But kosher salt also works fine. Finely grained table salt does not work—its fine grain would allow the saltiness to penetrate the fish and render it inedible. And a lot of table salt has chemical additives so it won't clump together, but that is exactly what you want it to do for this dish.

The garnish, as far as I'm concerned, should be as simple as possible, so as not to distract too much from the pure flavor of the fish. But some people do like to serve this dish with a kind of salsa verde—which strikes me as gilding the proverbial lily, but to each his (or her) own as they say...

Tuesday, January 18, 2011

Quick Note: Brandade Pancakes


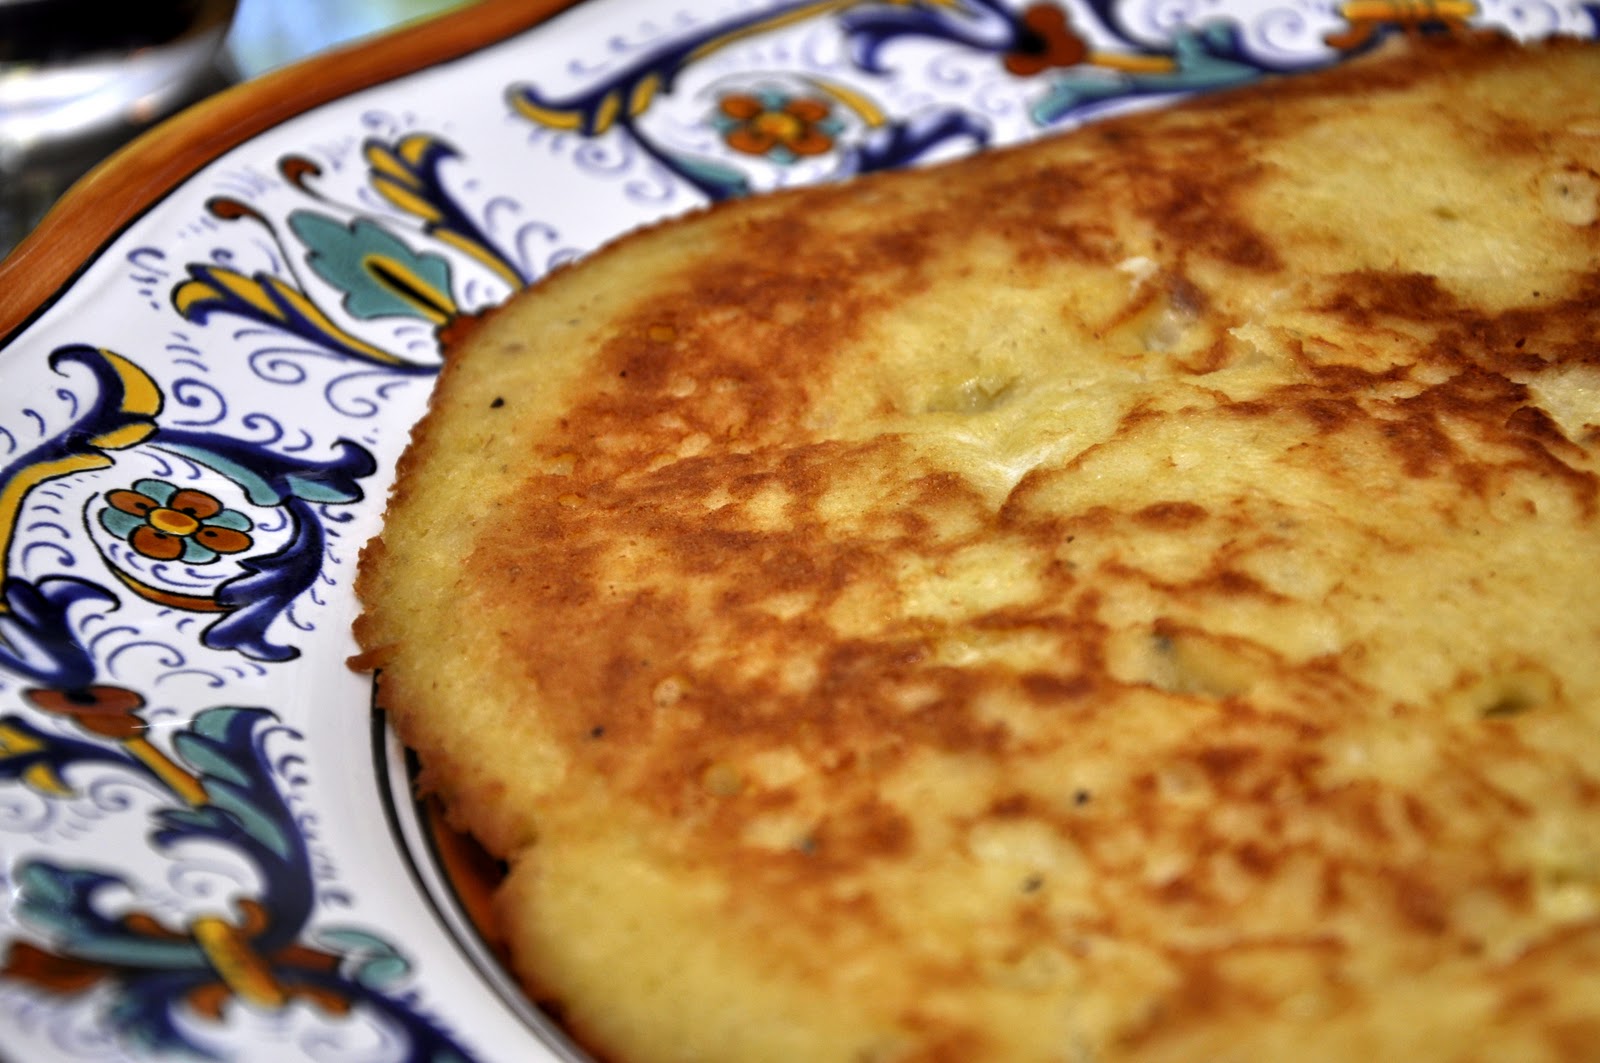
The new year brought a rush of activity that had made it hard to keep up with my blogging 'duties', but here is quick note on a nice idea for 'recycling' leftover brandade: just mix it up with an egg or two, give it a grind or two of black pepper and perhaps a bit of chopped parsley. (There should be no need for salt, as brandade is salty by nature, but taste it and see.) Fry the resulting batter in a bit of olive oil, browning it nicely on both sides.

Served with a green salad and washed down with a crisp white wine, this brandade pancake makes for a quick and tasty lunch or light weekend supper!

NB: A traditional brandade is made with soaked and poached baccalà, but you can make an easy version with smoked whitefish, as illustrated in one of my earlier posts. The taste is different from the traditional version, of course, but for me, at least, equally delicious.

Post scriptum: I recently broke down and bought a slow cooker. Never imagined that I would own one—the awful crock pot cookery of the 70's is still etched in my memory—but after reading some excellent chefs recommend it for, among other things, beans, broth and polenta, I decided to give it a go. Will be experimenting with various recipes and reporting back to you, dear readers, shortly.

Sunday, November 14, 2010

Bagna cauda


Bagna cauda or, more properly, bagna caôda, means 'hot bath' in English. It refers to a typical Piedmontese dish for communal eating that is popular in cold weather months, a kind of cross between fondue and pinzimonio, if I can put it that way. It is, quite simply, a collection of raw and steamed vegetables, which you dip into a garlic and anchovy sauce that you keep warm like a cheese fondue in a little terracotta pot placed over a flame.

Here's the recipe for making the sauce:

Ingredients (to serve 4 or more):

4 (or more) cloves of garlic
100g (4 oz.) fillets of anchovy
200 ml (1 cup or small glassful) olive oil
50g (2 oz.) butter
Freshly ground pepper

Directions

Pour the olive oil into a small saucepan and heat gently. Add the garlic, which you can either slightly crush, for a milder flavor, or slice or even finely mince for a much more assertive flavor. Keep the flame quite low. You are infusing the oil with the flavor of the garlic, which should not brown at all. (If you like you can remove some or all of the garlic at this point to avoid its flavor from becoming overpowering.) After about 5 minutes, add the anchovy fillets and butter and continue to simmer very gently for another 10 minutes, until the fillets have completely melted and the various flavors have been well amalgamated. Season with a bit of ground pepper.

Pour the sauce into a small fondue pot, preferably made of terracotta, and keep warm at the table. Regulate the flame so that the bagna cauda simmers gently all the while you are eating. Serve with various raw and steamed vegetables in season, which you dip into the sauce.

NOTES: The typical vegetables that go with bagna cauda include roasted or raw red peppers, cardoons, artichokes, steamed potatoes, steamed or raw carrots, steamed cauliflower, fennel, celery or leafy vegetables like savoy cabbage, radicchio and endive. Harder vegetables are best lightly steamed, (or roasted) while larger vegetables should be cut into bit sized pieces or sticks. To this dish I added a somewhat unusual choice of Brussel sprouts—they were delicious in this sauce. I also used a bit of frisée, which go very well with the anchovies. But really just about any seasonal vegetable would be fine.

There are lots of variations in making the sauce. While the measurements are quite flexible,  as is the order of ingredients: whether you add the butter or oil, or the garlic or the anchovy first or at the same time. But most of the variations revolve around different ways to 'soften' the flavor of the garlic. The recipe above calls for adding the garlic, raw, to the sauce, but many recipes call on you to simmer the garlic beforehand, for up to an hour in milk or cream. The garlic is then drained and crushed or puréed, and the recipe continues from there. With this method, you can use larger amounts of garlic, as the simmering considerably softens the garlic's pungency. I even found this remarkable recipe for bagna cauda from the esteemed Kyle Phillips of About Italian Food, which calls for an enormous amount of garlic—5 heads (yes, heads, not cloves)—that simmer in milk for an hour before proceeding with the sauce. Some recipes also call for adding a bit of milk or cream at the end, before serving, which also is meant to smooth out the flavor. (Being a garlic hound, I like my garlic 'straight up'.)

In Italy, it is quite usual these days to serve bagna cauda in individual little terracotta fondue pots called forneletti (known in Piedmontese as fujòt). Unfortunately, I didn't bring any back from Italy and they are apparently impossible to find here in the US, so—as you will see above—I improvised with a terracotta soup bowl placed over a fondue burner. A regular fondue pot would also do fine. The one from Emile Henry is made from terracotta and is the best one I've seen for the purpose on the market here.

While usually categorized as an antipasto, bagna cauda can easily serve as a meal, followed by some stewed fruit, for example pere in vino rosso. Serve with a robust red wine and lots of water, too, to quench your considerable thirst.

Friday, November 5, 2010

Fried Catfish


While Italian or other European dishes appear on our table most days, once in a while I do like to cook a dish from the New World, too. American food has a less than stellar reputation abroad. For many Europeans, it usually brings to mind junk food, fast food and just plain bad food. The stereotype is not totally unjustified—like many stereotypes there is some truth behind the caricature—but what most non-Americans and even a lot of Americans don't realize is that the US does have its own repertoire of wholesome, authentic traditional dishes. And not all of them are heavy, either, like this simple but tasty Southern dish: fried catfish.

In this recipe, catfish fillets are simply dredged in seasoned cornmeal and fried in vegetable oil. Since catfish, a bottom-feeder, can have a slightly gritty flavor, it benefits from pre-soaking in buttermilk (or just plain milk) before frying.

Ingredients (for 4 servings)

4 catfish fillets
Buttermilk (or milk) to cover the fillets
Cornmeal for dredging
Salt and pepper
1-2 tablespoons of Old Bay seasoning (optional)
Vegetable oil
Lemon wedges (for garnish)

Directions

Place the catfish fillets in a wide bowl and cover with the buttermilk or milk. Let it soak for about an hour (although even 30 minutes will improve the flavor).

Remove the fillets from the milk and dredge them in the cornmeal. Pat them on both sides to make sure the cornmeal coating adheres well.

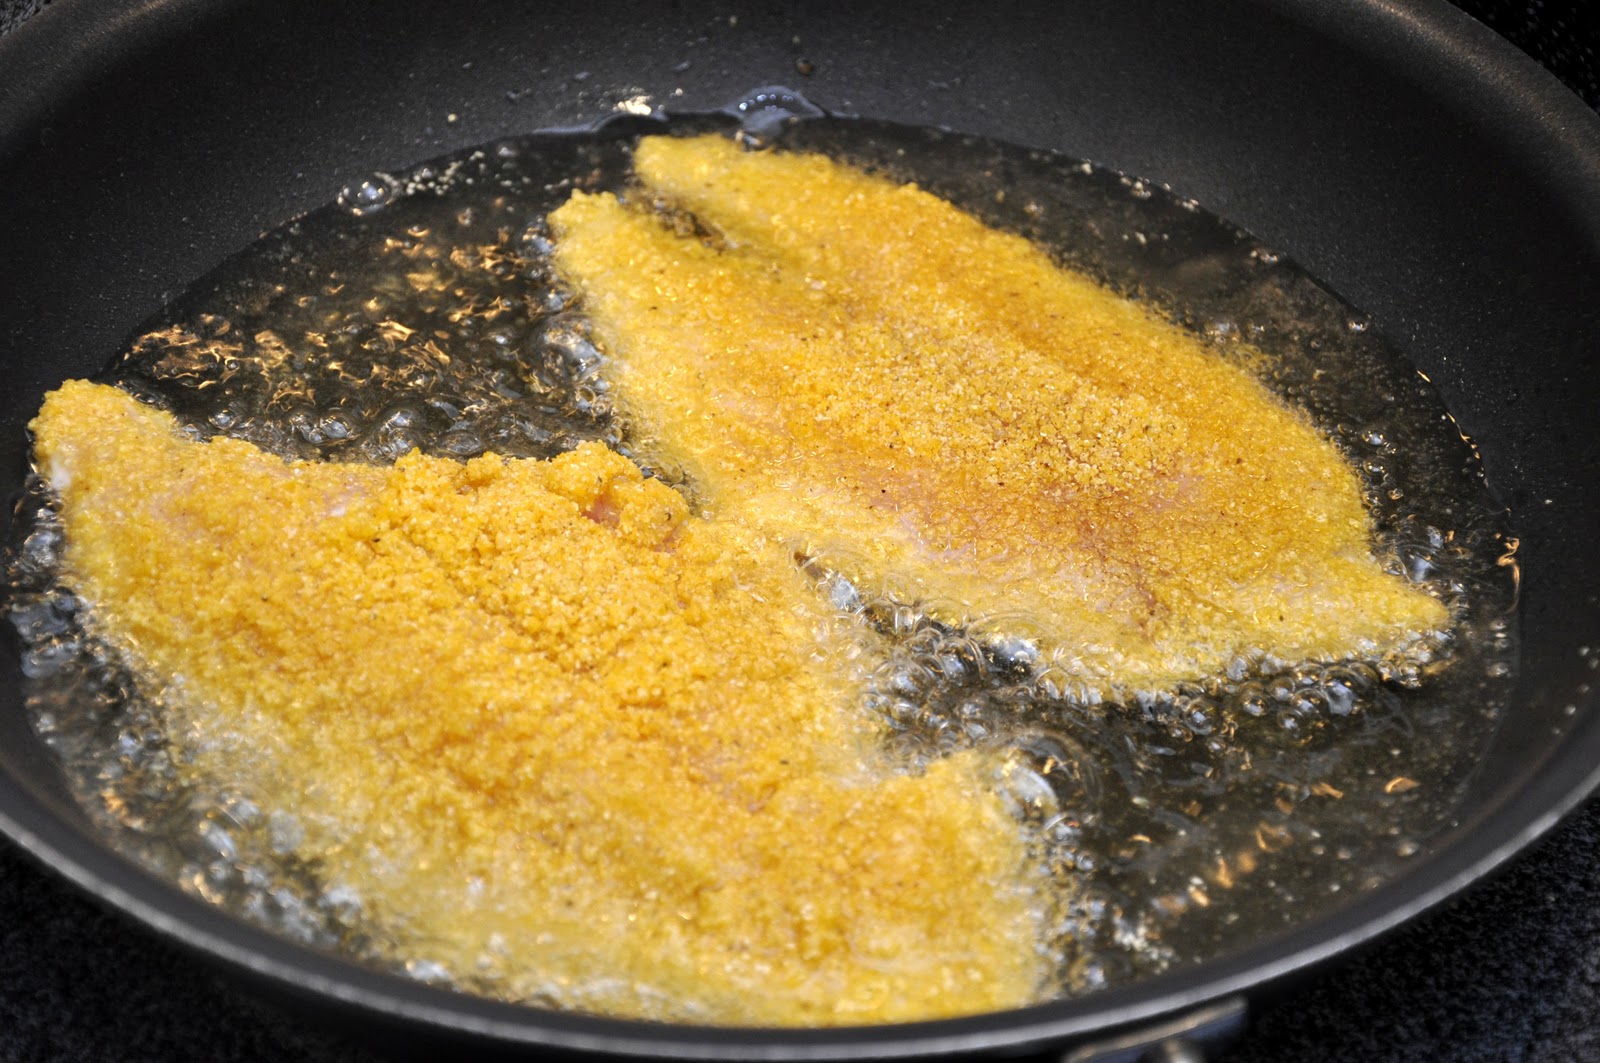
Fry the fillets in about an inch of moderately hot oil, about 5 minutes per side, until nice and golden brown. Serve hot with lemon wedges.

Lively but gentle bubbling is a good sign...

NOTES: As you can see, the recipe is simplicity itself. Like all frying, though, you do need to take care to regulate the temperature of the oil: too hot, and the coating will brown too quickly or even burn, not hot enough and your fish will turn out greasy. Your temperature is right when the oil bubbles in a lively but gentle fashion around the edges of the fillets.

The simplest recipes call for seasoning the cornmeal with just salt and pepper, but living as I do on the shores of the Chesapeake Bay, of course I add a dash of Old Bay seasoning. Many southern recipes I've seen, on the other hand, call for Lawry's Seasoned Salt, cayenne pepper, paprkia or Cajun seasoning. Some recipes will tell you to mix flour with the cornmeal and/or add some baking powder, which I assume will give you a 'puffy' crust—although I have yet to try it.

The frying medium, too, can vary. While most recipes call for vegetable oil of some type, you will see recipes that use butter or another kind of oil (even olive oil, which I assume is a modern adaption) or—and I tend to think this is the most traditional—bacon drippings. Many (perhaps most) recipes call for deep frying but I think shallow-frying works just as well.

I like simplicity, so for me this dish needs nothing more than some lemon wedges as garnish, but, of course, some people will want to use 'tartar sauce', a combination of mayonnaise, capers, and finely chopped pickles and shallots (or onions). As a side dish, to keep it simple, I find a rice pilaf goes very well, followed by a simply dressed green salad. More classic accompaniments include 'hush puppies', deep-fried cornmeal beignets, braised collard greens and—what else?—macaroni and cheese. Any of these will make for a much more substantial meal.

Saturday, October 16, 2010

Catfish «en meurette»


The term «en meurette» refers to a dish that has been braised in a particularly delicious red wine sauce from the Burgundy region of France. Probably the best known of these dishes is oeufs en meurette, made from poached eggs. But even tastier, in my opinion, is fish made this way. The firm-fleshed monkfish (lotte in French) lends itself to braising and is wonderful en meurette. Carp and other firm-fleshed river fish are typical, so in the US a natural choice would be the humble catfish. It may be suprising to pair catfish with a 'classy' French sauce but I assure you, gentle reader, that the pairing results in some fine eating.


Begin by pouring a bottle of red wine into a saucepan and adding a sliced carrot, a sliced onion, a crushed garlic clove, a chopped shallot and some fresh herbs—some parsley, a spring of thyme and a bay leaf—then season with a pinch of salt and some whole peppercorns. Simmer briskly until the wine is reduced by half. Strain the reduction through a sieve into another saucepan, then thin out the sauce with some good stock. Bring back to a simmer and then thicken the sauce with some beurre manié, about two tablespoons of flour and butter rubbed together to make a paste. You can add some more if you feel the sauce is too thin, but remember that the sauce will reduce further during the next step and you only want to give the sauce to be nice and silky, not at all stodgy.


While your wine is reducing, make the garnish for the fish by sautéing in butter or oil a goodly chunk of slab bacon or pancetta, cut into lardons, until well browned but not crisp. Set aside and, in the same skillet, sauté some button mushrooms that you have cut into quarters until they, too, are nicely softened and browned.


Now assemble your dish: butter a braiser just large enough to hold all the ingredients and lay out your catfish fillets—one large fillet is enough for two people—cut into serving pieces. Then arrange the mushrooms and lardons on top and around the fish pieces. Pour over your red wine sauce, enough to just cover them. Then bring the dish to a simmer and let it cook gently until the fish is done, about 10-15 minutes depending on the size of the pieces (and the fish—monkfish should braise for much longer). If you like, just before serving you can sprinkle the fish with some chopped parsley or, even better, a persillade—parsley and garlic finely chopped together.


NOTES: As usual, I've been vague about the measurements, and they really don't matter all that much. You can really use as much or as little garnish as you like—many recipes omit the garnish altogether, but I find that it makes the dish more interesting and tasty. The same goes for the sauce itself, but most recipes for 4-6 people will, as indicated above, call for an entire bottle of red wine.


The choice of wine will, of course, strongly influence the character of the dish. This being a dish from Burgundy, the logical choice would be a red from that region, but last night I used a Spanish tempranillo with lovely results. Some recipes (including those given in the Larousse Gastronomique) also call for adding a splash of Burgundy marc.


Not all recipes have you make the wine reduction separately as indicated in this recipe—you can also add the wine and aromatics to the main ingredient and let it reduce as they simmer together, thickening the dish at the very end. With this method, the aromatics are left in the dish. But I find that making the sauce separately gives you more control over the result and, since I like to use a bacon and mushroom garnish, I like to take out the aromatics after they've given up their flavor into the dish.


As mentioned at the start, you can use the same red wine sauce to nap poached eggs or, for a more rustic effect, poach eggs directly in the sauce. Other ingredients can be made en meurette, including mild meats like calf's brains, chicken, rabbit or veal, in which case you usually lightly brown the meat before simmering it with the sauce and any garnish you might like.


Dishes en meurette are often served with fried croutons. I find that they also go well with steamed baby potatoes or buttered noodles.

Saturday, October 2, 2010

Risotto al nero di seppia


Here's another installment from the colorful world of risotto. Last week we featured green risotto, this week it's black risotto, made with cuttlefish and its ink.

The technique for this risotto recipe is a bit different from the more usual one, in that you don't begin by toasting the rice but rather braising the cuttlefish (or, squid, if you can't find cuttlefish).  But before you start cooking, if your mollusk is not pre-cleaned,  you will need to clean it, making sure to carefully remove and reserve the ink sacs (see below). 
 
Now, make a soffritto of finely chopped onion and garlic, sautéed in olive oil. When the onion is soft and translucent, add your cuttlefish or squid (one small one or half a large one per person), which you will have chopped into little squares or sliced into thin strips, as you prefer. When the fish has turned opaque, add enough white wine to almost cover the fish and, if you like, a spoonful or two of passata di pomodoro (tomato purée) and/or a bit of peperoncino and/or some finely chopped parsley. Let the whole thing simmer until the fish is just about tender, which should take about 30-45 minutes depending on the type and age of the mollusk you are using. Then add the ink—if you've cleaned the cuttlefish or squid yourself, use the ink from the reserved ink sacs or, if using cleaned squid, about a sachet  of store-bought ink per serving—and stir so that it is fully incorporated into the liquid, forming a smooth sort of black ragù.

Add rice, stir to mix well, and simmer until the rice has absorbed the black liquid. Now proceed as you would for any risotto, adding ladlefuls of broth, one at a time, adding more broth only as the previous ladle has been absorbed. Fish or vegetable broth do best, but you can use chicken broth in a pinch, or even water. When the rice is done, remove it from the heat, add some more parsley if you like, and stir it vigorously as you would to mantecare any risotto. Add a dab of butter if you must but do not add grated cheese. Serve hot, topped with a bit of parsley if you like.

NOTES: This risotto is traditionally made with seppia, or cuttlefish, and the ink from the ink sacs that you carefully reserve when you clean it. Cuttlefish can be hard to find, and squid is a perfectly acceptable substitute. You clean both mollusks in the same basic way. Here's an excellent instructions video from the Rouxbe Online Cooking School:
 
 
In the US and perhaps elsewhere, most squid is sold pre-cleaned (which is to say, with the skin, internal cartilage and viscera (including the ink sac) removed. But nero di seppia (cuttlefish ink) is sold in small sachets in some specialty stores. They are also available online, sometimes under its Spanish name, tinta de calamar. Be careful handling the ink, as it really stains—which is perhaps why it was used as a dye and also as actual ink for writing in classical times. And, as you may have guessed by now, the English word 'sepia' comes from the Italian word for this same reason.
 
The dish takes rather longer than your usual risotto because of the initial braising, but the dish lends itself very well to pressure cooking. The cuttlefish or squid will take about 15 minutes under pressure. Then release it, add ink, then the rice and broth, and bring up to pressure again for another 5 minutes.
 
For tips on the best types of rice to use, see my post on the ABCs of Making Risotto. This dish being of Venetian origin, a vialone nano would probably be the best choice, but tonight I used carnaroli and it was very good indeed.

There are a few, but rather limited, variations on this dish. The most important being when you add the ink. Personally, I prefer to add it at the beginning, to ensure that it fully penetrates the rice, but some recipes call for adding it towards the end of cooking. One interesting variant recipe calls for making your squid or cuttlefish 'black ragù', then proceeding to make a risotto in bianco in the usual manner, in a separate pot, and adding the ragù to the risotto only towards the end of cooking.

The black ragù, by the way, makes a fine dressing for linguine, spaghetti or, for a Venetian treat, bigoli. 

Saturday, September 25, 2010

«Polpetielli» affogati


Octopus is a popular food all around the Mediterranean basin and yet elsewhere it is often, for some reason, 'controversial'. Many people who will happily scarf down fried calamari will shudder at the thought of eating its close cousin, which is too bad, because octopus is one of the finest fruits of the sea. When properly cooked, it is perfectly delicious, tasting much like squid but… more so, with a deeper flavor, almost 'gamey', in a good way. It is also very affordable. It cost me $6.00 a pound, in that store that some folks call "Whole Paycheck".

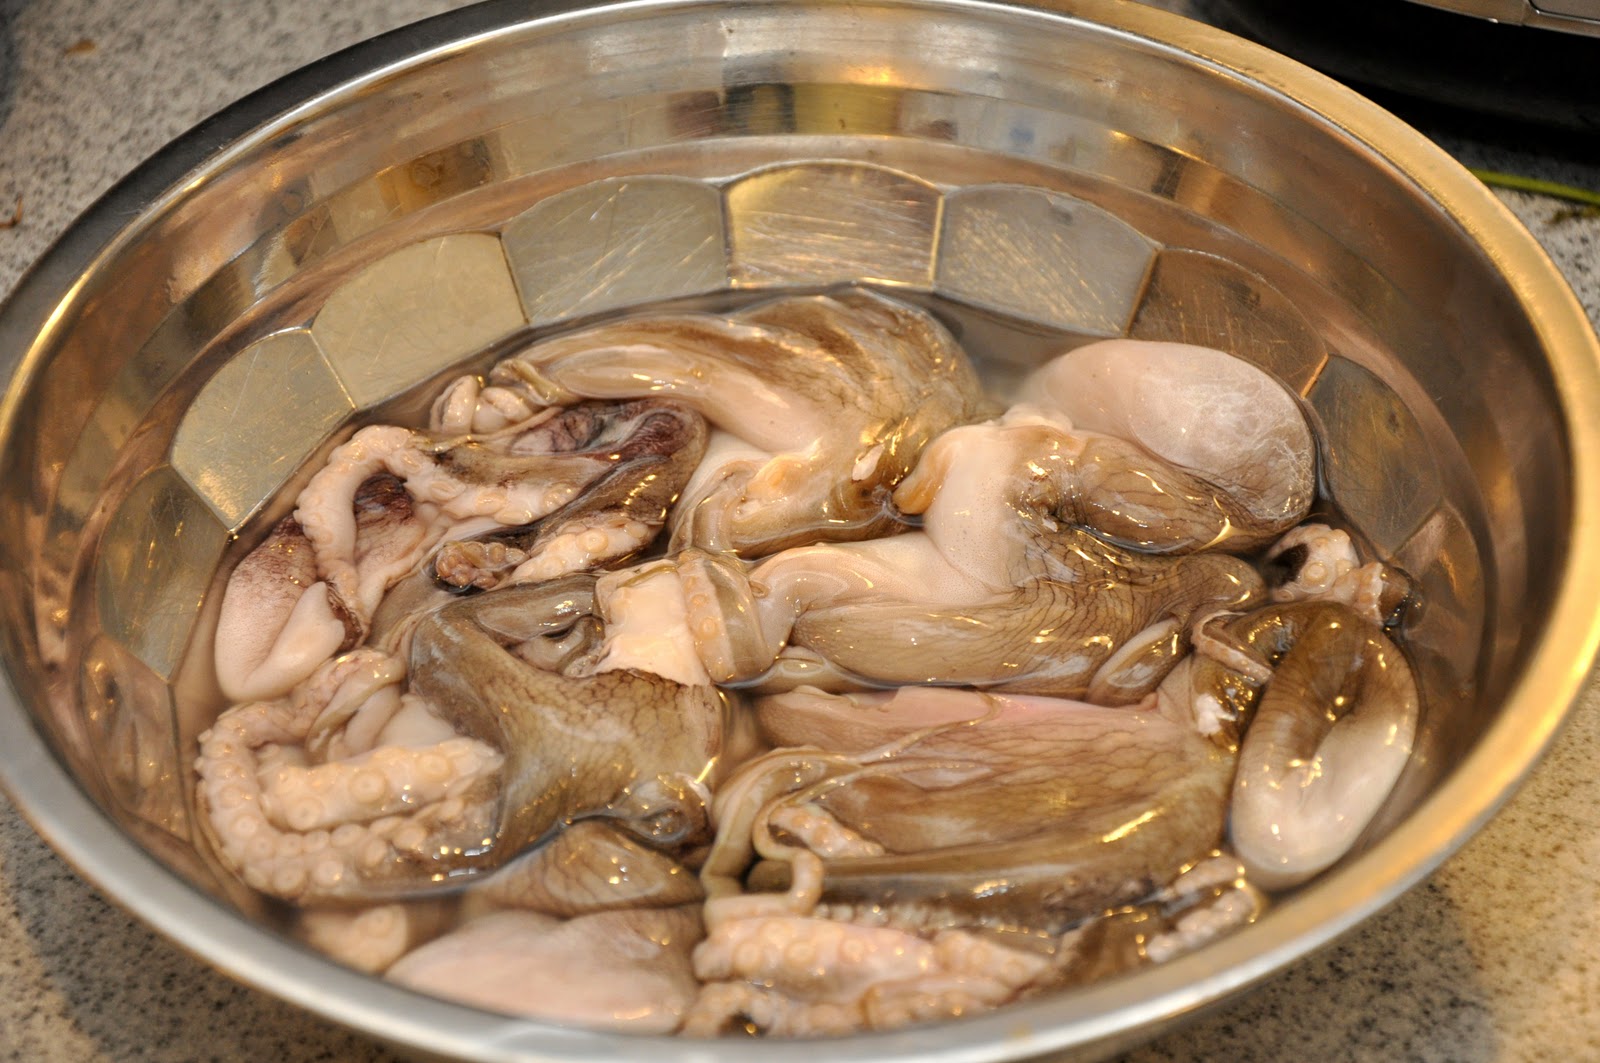
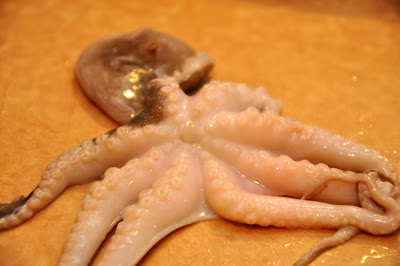
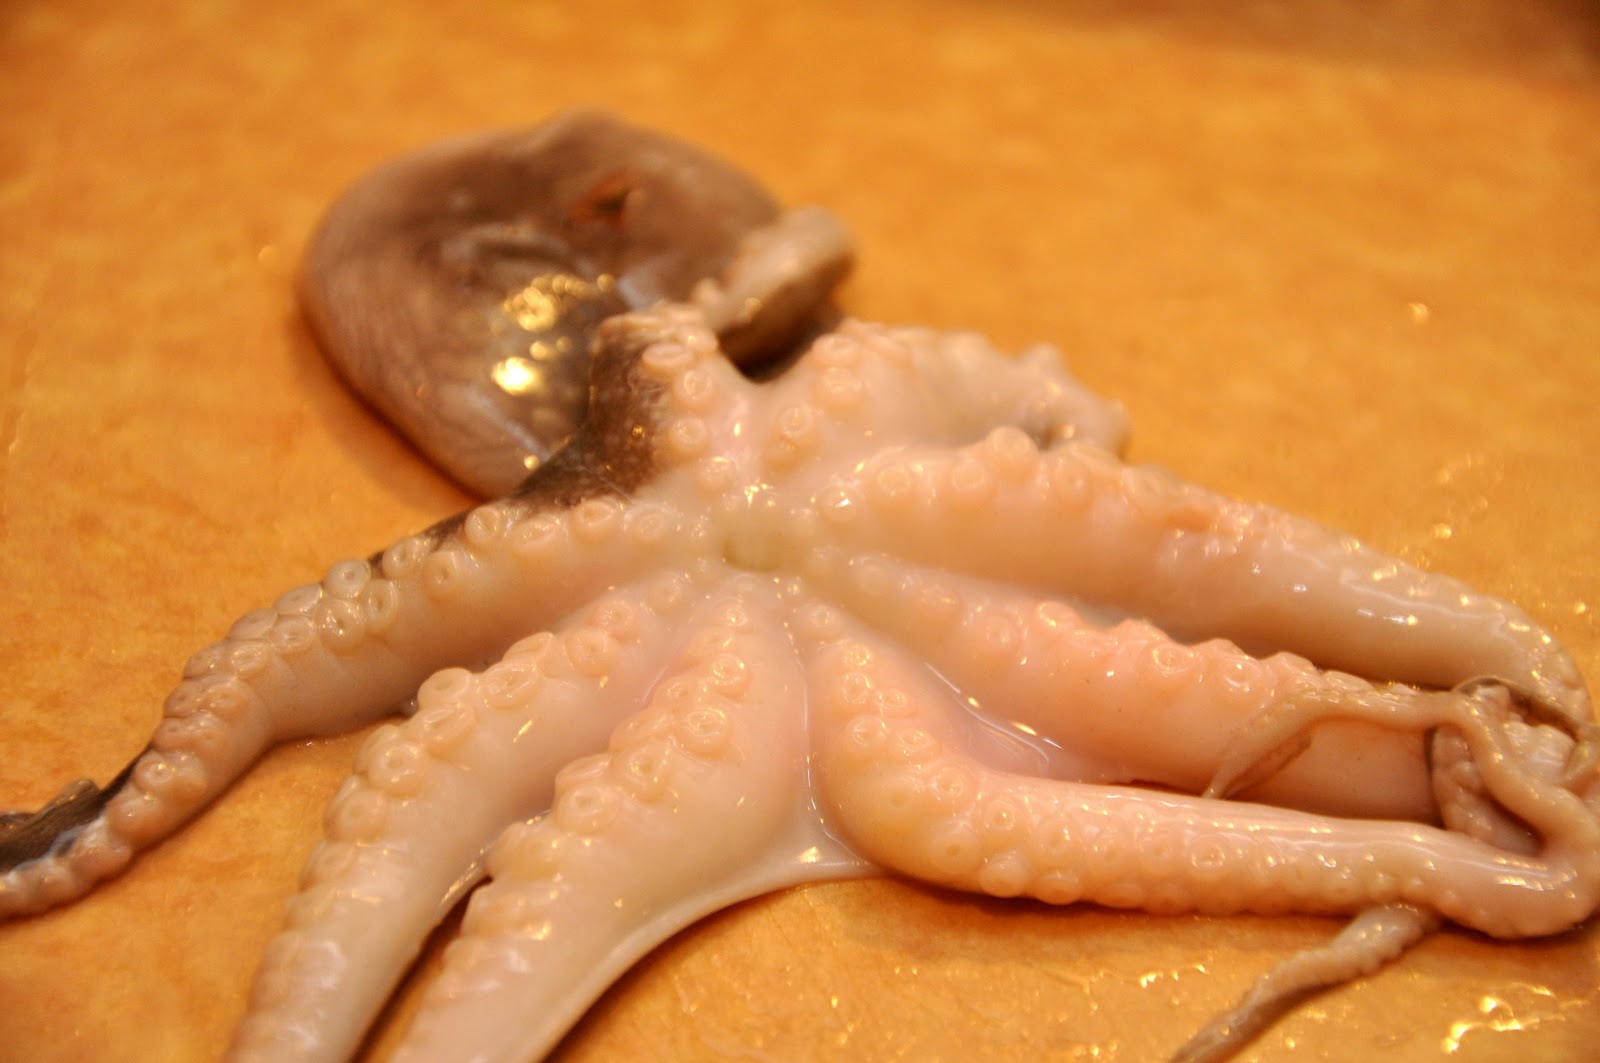
The main issue with octopus is toughness. Large octopus needs to be cooked for a very long time, and they are often beaten beforehand, a bit like tripe, for tenderize them. But baby octopus is another story. It needs long slow cooking, but 45 minutes to an hour is often enough for the smallest varieties. Slightly more mature octopus is sometimes also sold as 'baby' octopus, so cooking times may vary. Like squid, octopus also need to be cleaned (see Notes below) but more often than not they are sold pre-cleaned. Or you can ask your friendly fishmonger to clean them for you. Once they're clean, rinse them well and set them in a bowl until you are ready to begin cooking.

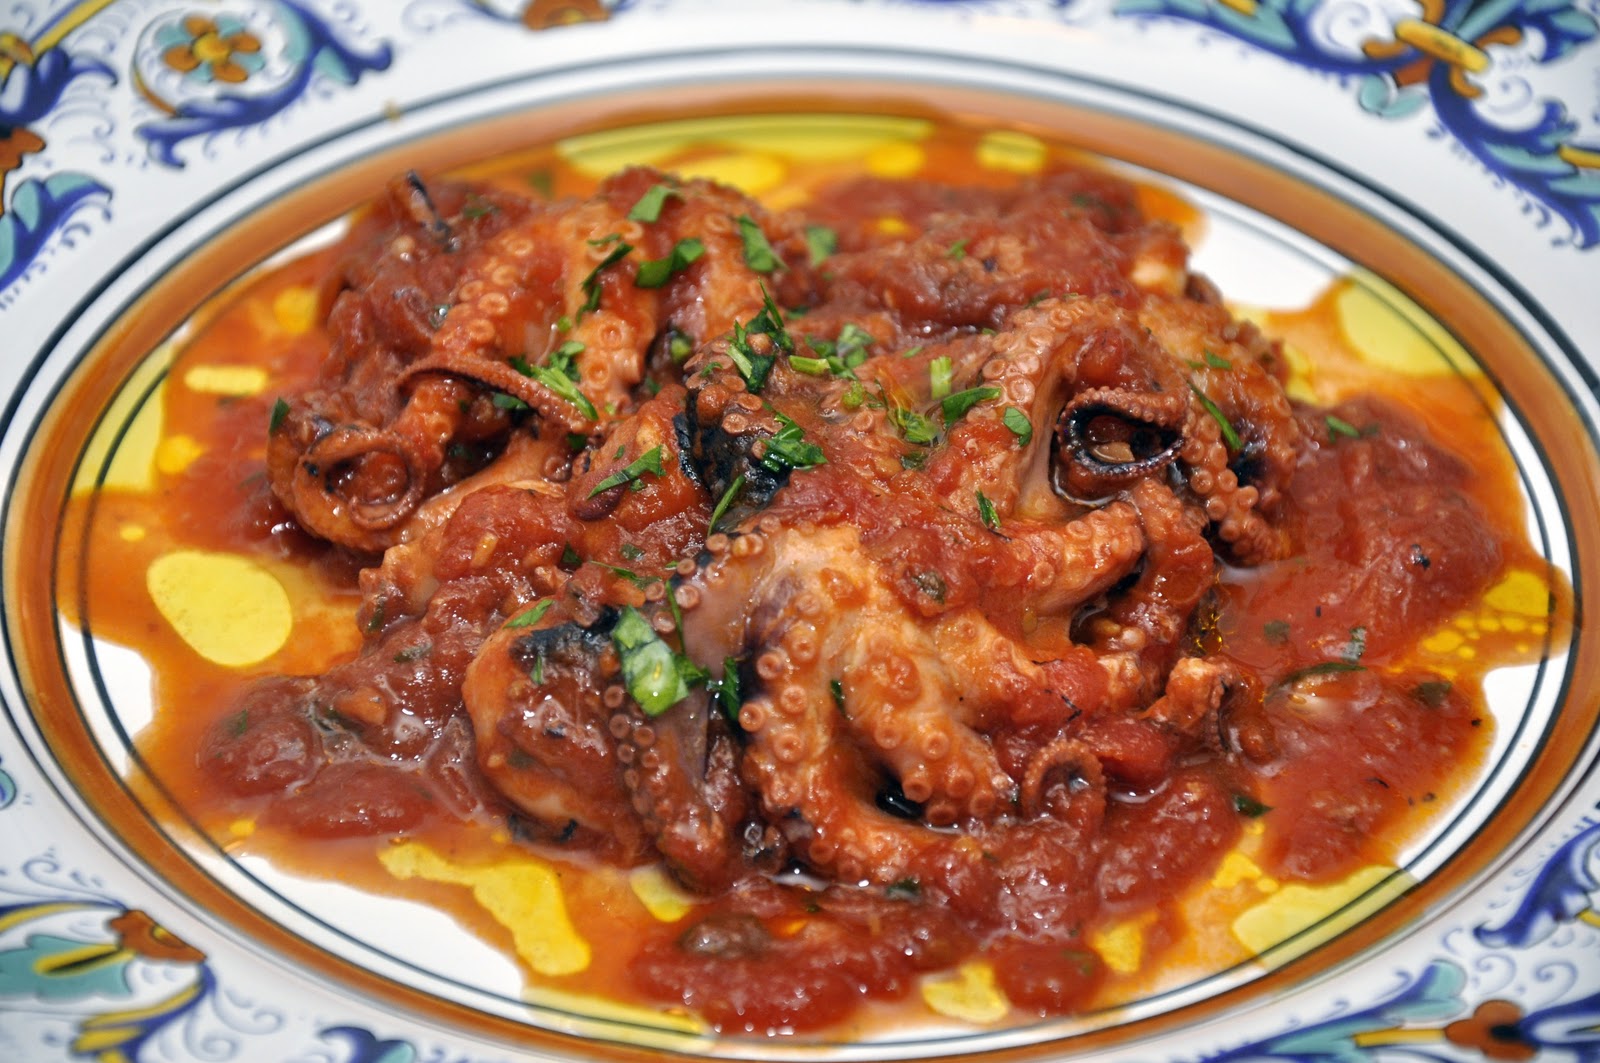
In any event, the cooking method is as easy as it gets. You place your baby octopus, whole, into a pot (traditionally terracotta but enameled cast iron or even a heavy stainless or copper pot will do fine) together with about half as much by weight of canned tomatoes, a drizzle of olive oil, some chopped garlic, a dash of salt and, if you want a little heat, some red pepper flakes. Cover tightly and simmer over lowish heat for 45 minutes to an hour. By this time, the octopus should be tender and the sauce should be nice and thick, and rather darker than when it started. If the octopus is done but the sauce still rather thin, which can happened since octopus tend to shed liquid while cooking, you can fish them out of the sauce and continue reducing until you have the right consistency, then add the octopus back in to heat up again. If, on the other hand, the sauce has reduced but the octopus still needs some more cooking, then just add a bit of water and continue simmering. About 5-10 minutes before the dish is done, add some chopped parsley. Serve hot, with a bit of the sauce and, if you like, some more parsley and/or a drizzle of olive oil on top.

NOTES: A bit like a pizzaiola, the red sauce makes a delicious dressing for pasta. If you want more sauce, you can up the ratio of tomato to octopus from 1:2 to 1:1. The pasta could be served as a primo before the octopus or at a separate meal.

You can also use a pressure cooker to speed up the cooking time. It should take about 20-30 minutes after it comes up to pressure. You will then need to simmer it for a few minutes to reduce the sauce, since there is much less evaporation when cooking under pressure.

The august Jeane Caròla Francesconi includes a recipe for this dish in La cucina napoletana. She is very adamant that you should make sure that the lid should be tight when simmering, and suggests using a piece of waxed paper (you could also use aluminum foil) to ensure a seal. And she admonishes the reader not to open the lid during the simmering. Not sure why but I won't question her wisdom! Of course, this is not an issue when using a pressure cooker.

As mentioned, the only tricky part of cooking octopus is the preliminary cleaning of the octopus, which is to say removing the inedible bits. You need essentially to remove its 'mouth', which is located on its underside, at the center of its tentacles. This can be done fairly easily with a paring knife. You then remove the ink sack  (most but not all octupus have one) and any viscera through the resulting hole. (Be careful not to puncture the ink sac, as you will wind up with black ooze all over the place!)

A pre-cleaned baby octopus
This fine article by Mark Bittman on octopus, in particular its cleaning, for The Splendid Table is well-worth a read. .

Sunday, August 8, 2010

Baccalà alla napoletana


Baccalà, or salted codfish, marries especially well with tomatoes, and the marriage reaches its apogee of deliciousness in the summer, when tomatoes are at their best. And who does tomatoes better than the people of Campania, home to Italy's best tomatoes?

Baccala alla napoletana, Naples-style codfish, is a simple dish of bold flavors reminiscent of pasta alla puttanesca. You begin, as usual, by soaking the salt cod for up to 24 hours in several changes of water. Drain the cod, pat it dry, and cut it into serving pieces.

Now make your sauce, in a skillet or flame-proof baking pan, by very lightly sautéing a soffritto of chopped garlic and parsley in olive oil until it just begins to give off it fragrance. Immediately add roughly chopped very ripe tomatoes and simmer gently. When the tomatoes start to melt into a sauce, toss in a handful each of capers—preferably the salt-packed kind, rinsed and dried—and olives—preferably the small black Gaeta or Niçoise variety.

While the sauce is simmering, lightly flour and fry your baccalà pieces in olive oil until they are lightly browned. As they brown, transfer them to the pan or skillet with the sauce.

When all the baccalà has been added to the sauce, take a spoon and nap a bit of the simmering sauce over the fish pieces. Now you have a choice: you can continue simmering the dish over the stove, or you can place the dish in a hot oven (200°C, 400°F) for 10-15 minutes, until the sauce has reduced to a nice consistency. I like the oven method, as serving the baccalà direct from its baking dish makes for an attractive presentation at table.

Remove the dish from the oven, sprinkle with a bit more chopped parsley for color, and serve with some nice, crusty bread.
 
NOTES: For some pointers on buying and soaking baccalà, check out this post.

If tomatoes are under-par or out of season, you can use canned tomatoes for this dish. For tips on selecting the best canned tomatoes, see this post.
Even after soaking, you may find that the texture of salted codfish is a bit firmer than you like your fish to be. If you prefer a softer texture, poach the codfish pieces for five minutes or so, drain and let them cool off before flouring and frying them.

Sunday, July 11, 2010

Vitello tonnato


If you've been reading this blog lately you may be wondering if we've been switching themes on you. Well, it's true that summer somehow brings out the experimental side of my otherwise rather staid culinary character. But, fear not, gentle reader, Memorie di Angelina is still, first and foremost, an Italian food blog. Now that I have put your mind at ease, on to the subject at hand…

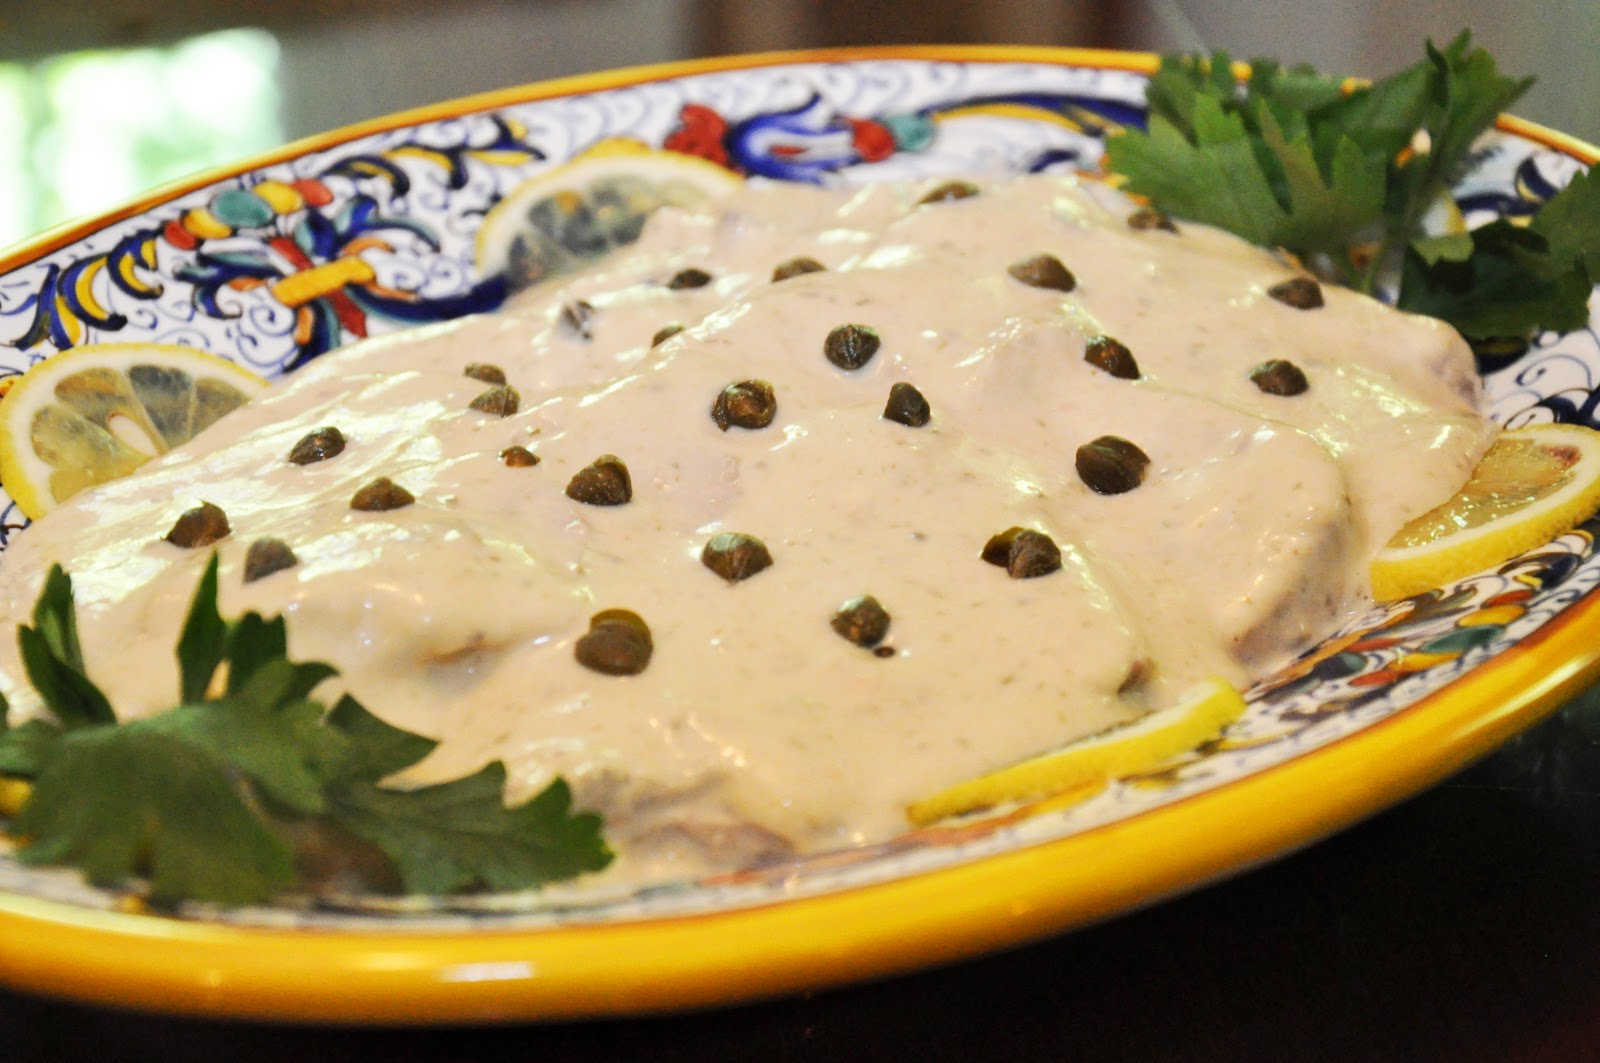
If I had to mention one dish in the Italian repertoire that epitomizes elegant summer eating, this might well be it: vitello tonnato, also called vitel tonnè in dialect, which means' tunnied veal' or simply veal in tuna sauce. More often than not, though, it is called by its Italian name in English as well. It makes for an elegant presentation, fit for an important dinner, but it is actually quite easy to make and, if made with pork or turkey rather than veal, quite inexpensive, too. 

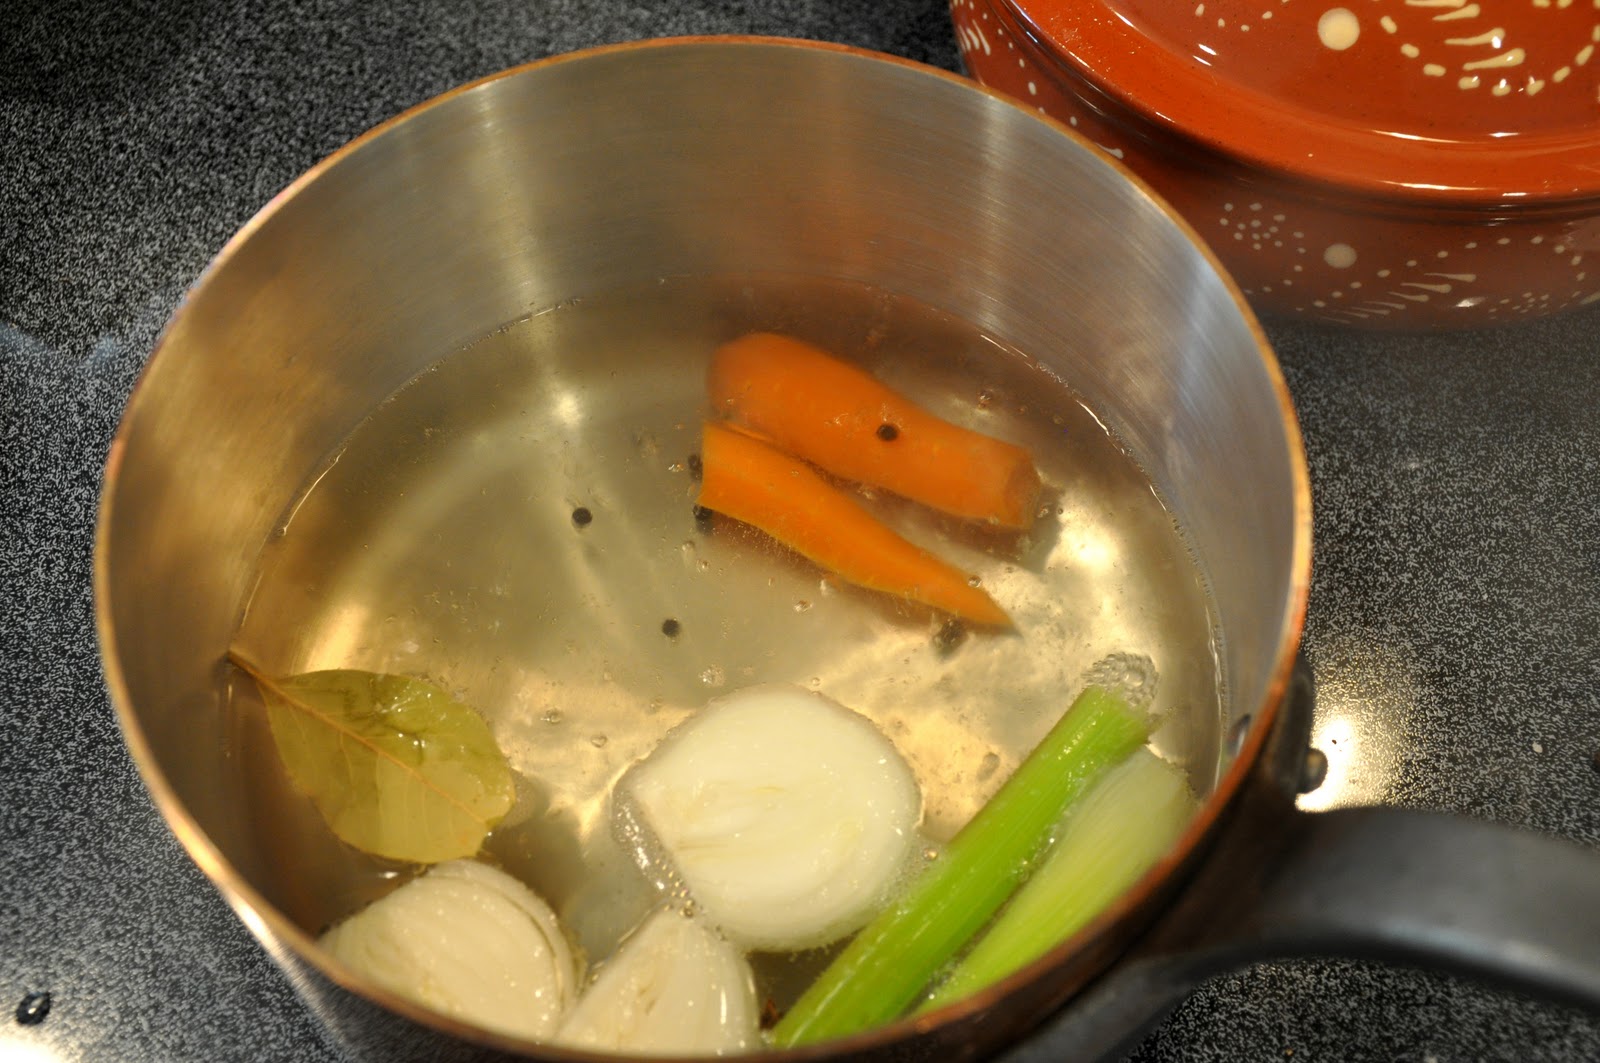
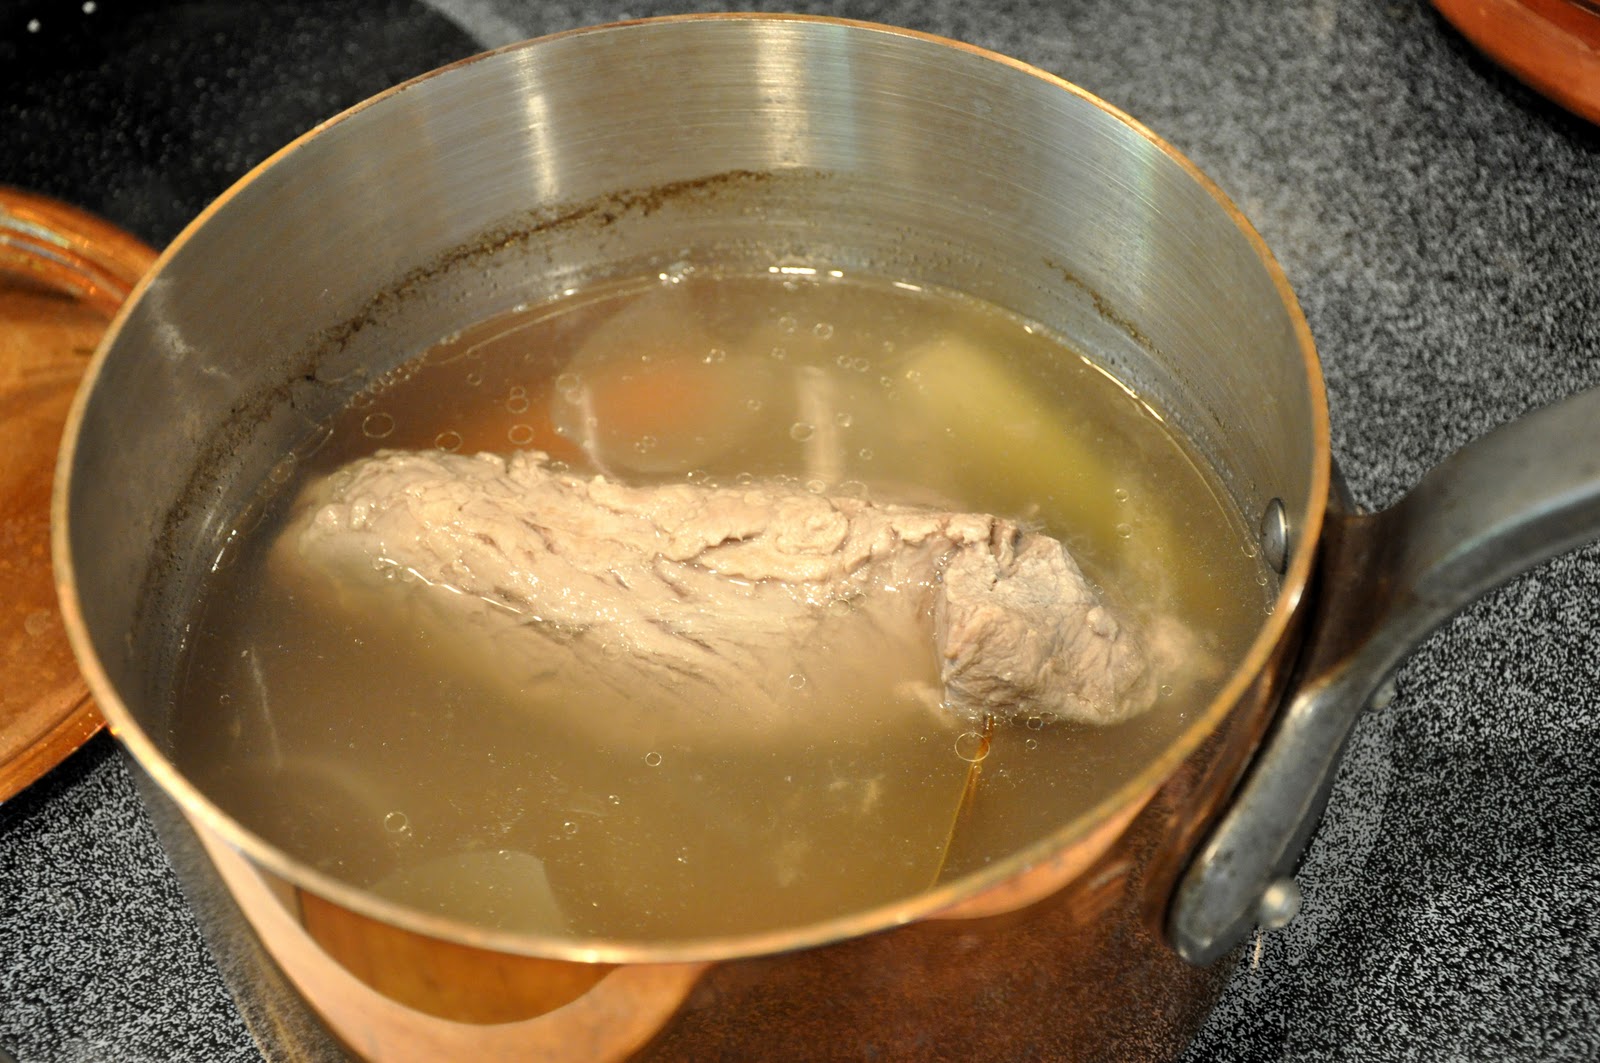
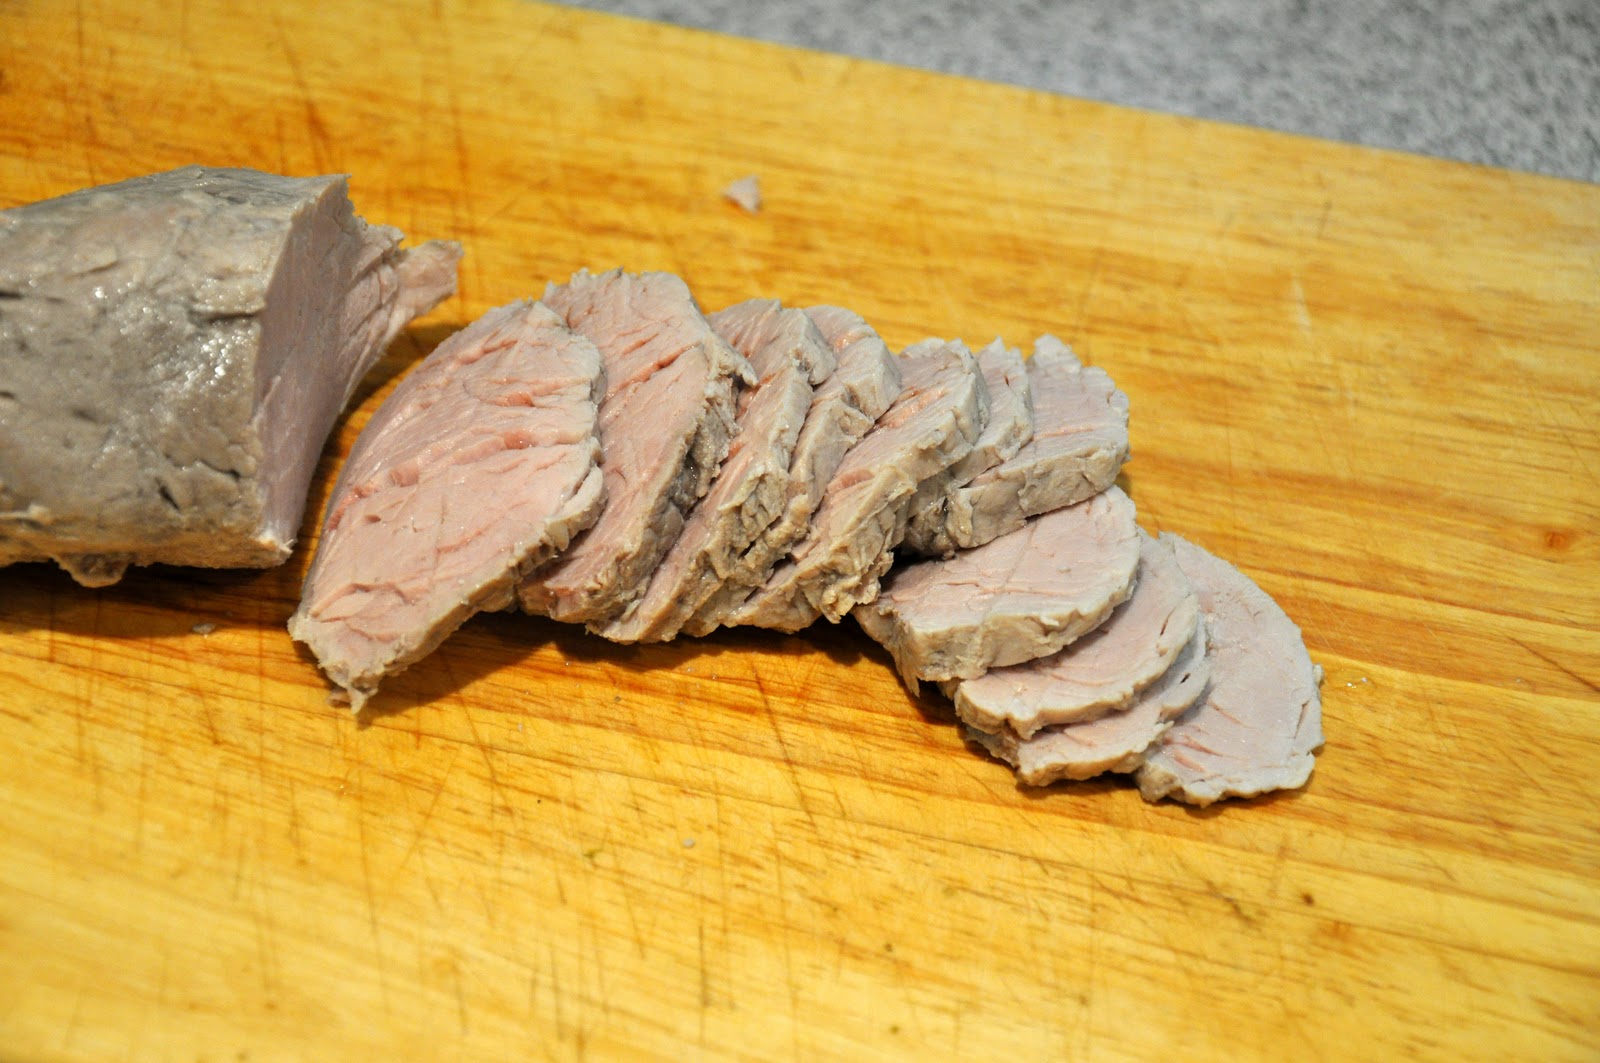
You begin with the meat. Classically speaking, this is a veal roast (see Notes below for the common cuts). But you can economize by using pork loin or—my favorite—pork tenderloin or turkey breast instead. Whichever you choose, prepare a kind of court bouillon by simmering a quartered onion, a carrot, a stick of celery, a bay leaf, a few cloves, salt and some whole peppercorns in a mixture of white wine and water, about a glassful of wine and just enough water so that the liquid will entirely cover the meat when it is placed in the pot. (To be sure, you can place the meat in the cold liquid beforehand to see if there is enough liquid.)


After the aromatics and liquids have simmered for about 10-15 minutes, add the meat, raising the heat if need be to keep the water simmering nicely but it should not boil, which would toughen the meat. I cover the pot partially to reduce evaporation. Simmering time will depend on the meat you use, but the classic recipes call for cooking the veal roast around 60-90 minutes, depending on the size and the cut. (The original cuts were suitable for long simmering, modern recipes often call for loin, which should be just cooked through.) Pork loin should take about 60 minutes or less, while the tenderloin, which is quite a 'skinny' piece of meat, should take no more than 20-30 minutes. Turkey breast should take about the same as pork tenderloin. Remove the pot from the heat and allow the meat to cool completely, still immersed in its cooking liquid. This should take about an hour or so, and it results in a moister and more flavorful meat. But if you are in a hurry, you can remove the meat from the liquid and place it in the fridge to cool down quickly. 


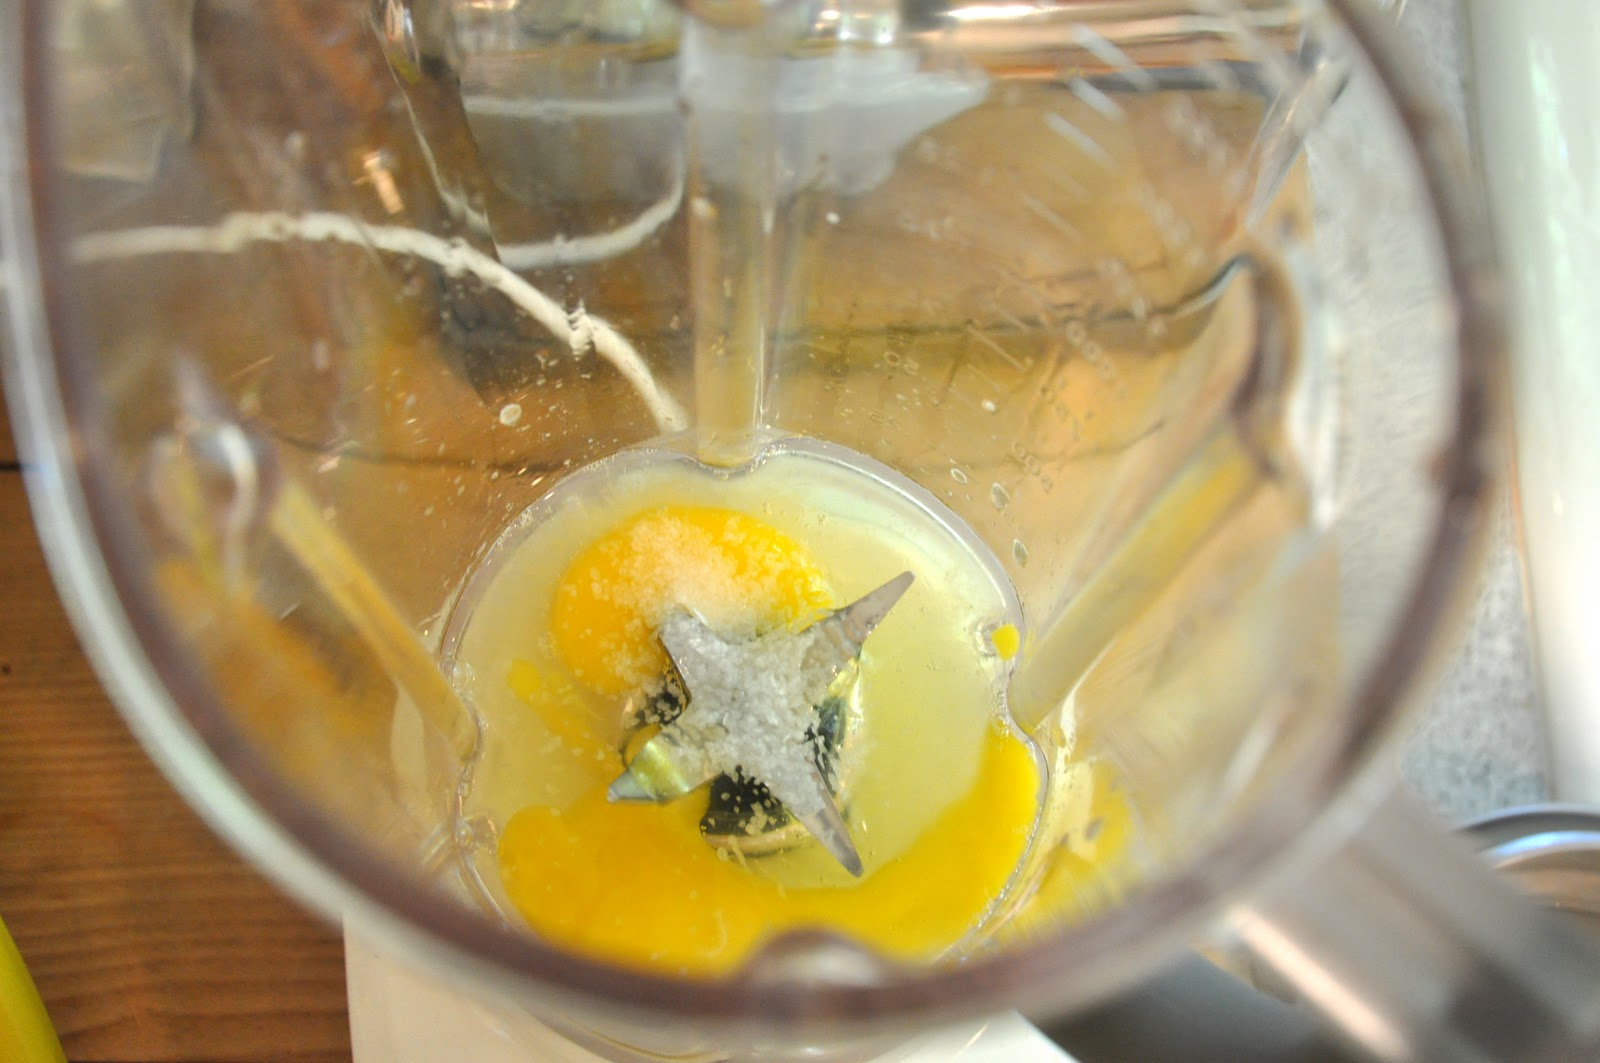
While the meat is cooling, it is time to turn to the sauce. You begin by making a mayonnaise in a blender: place two whole eggs (not just the yolks) in a blender with the juice of half a lemon and pinch of salt.


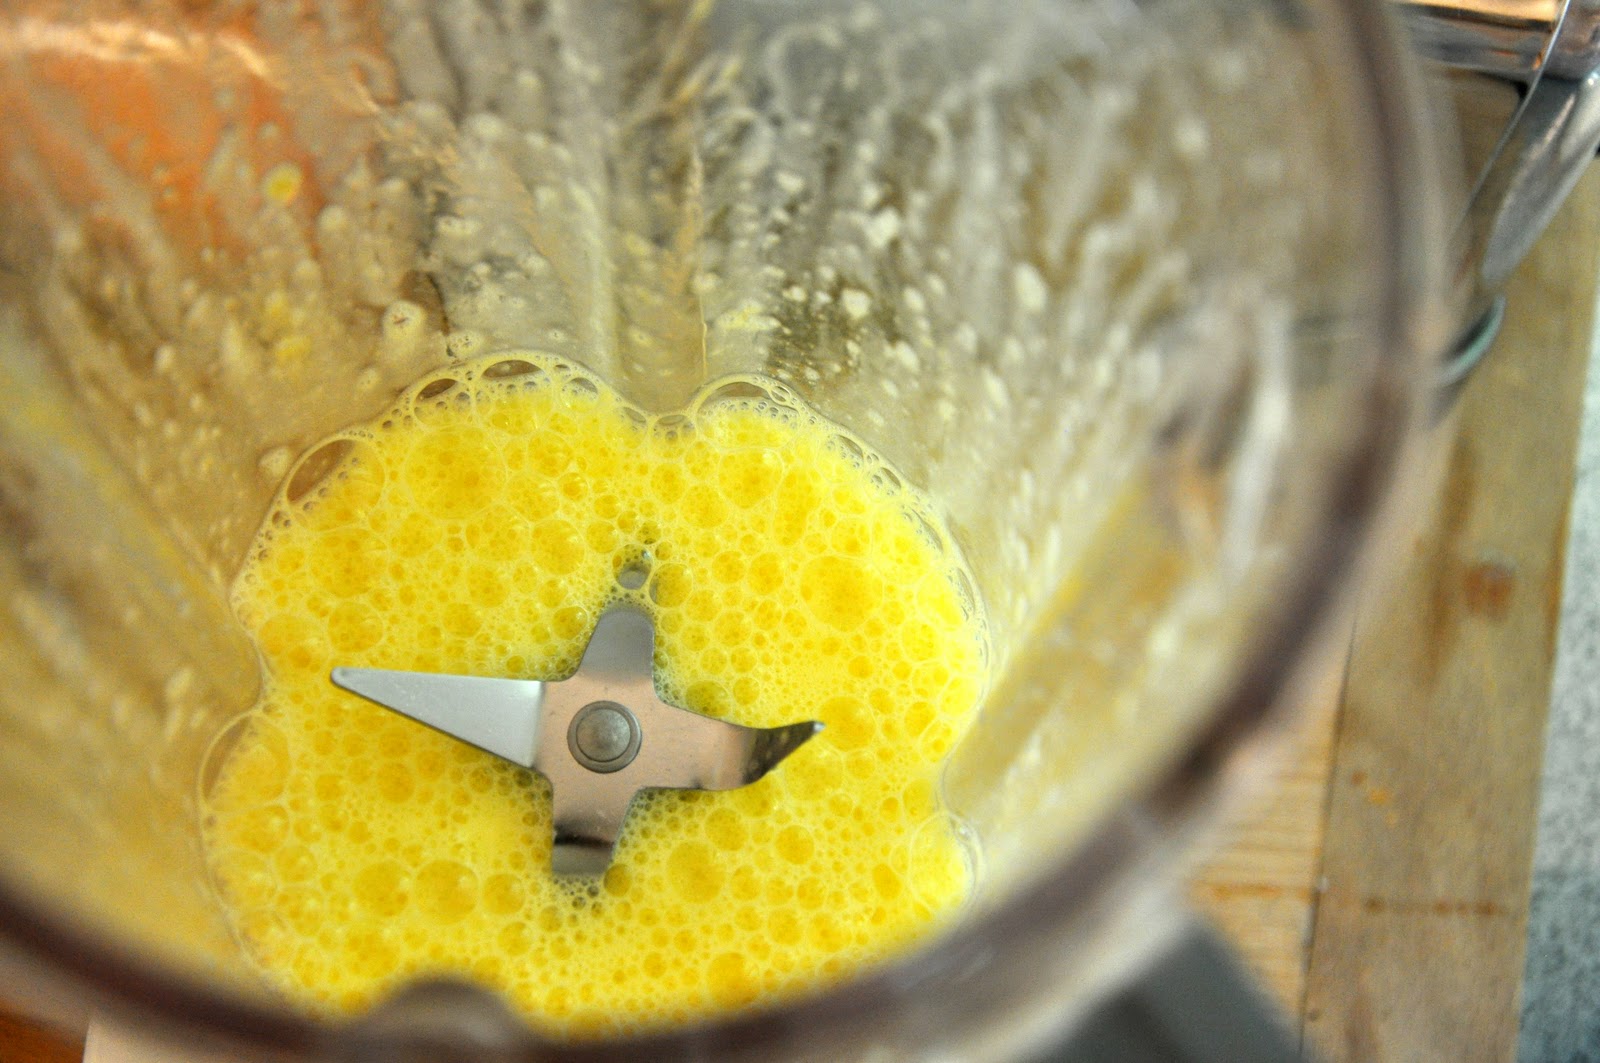
  Then turn on the blender to 'purée' and let it go for just a few seconds. The egg mixture will have turned frothy:

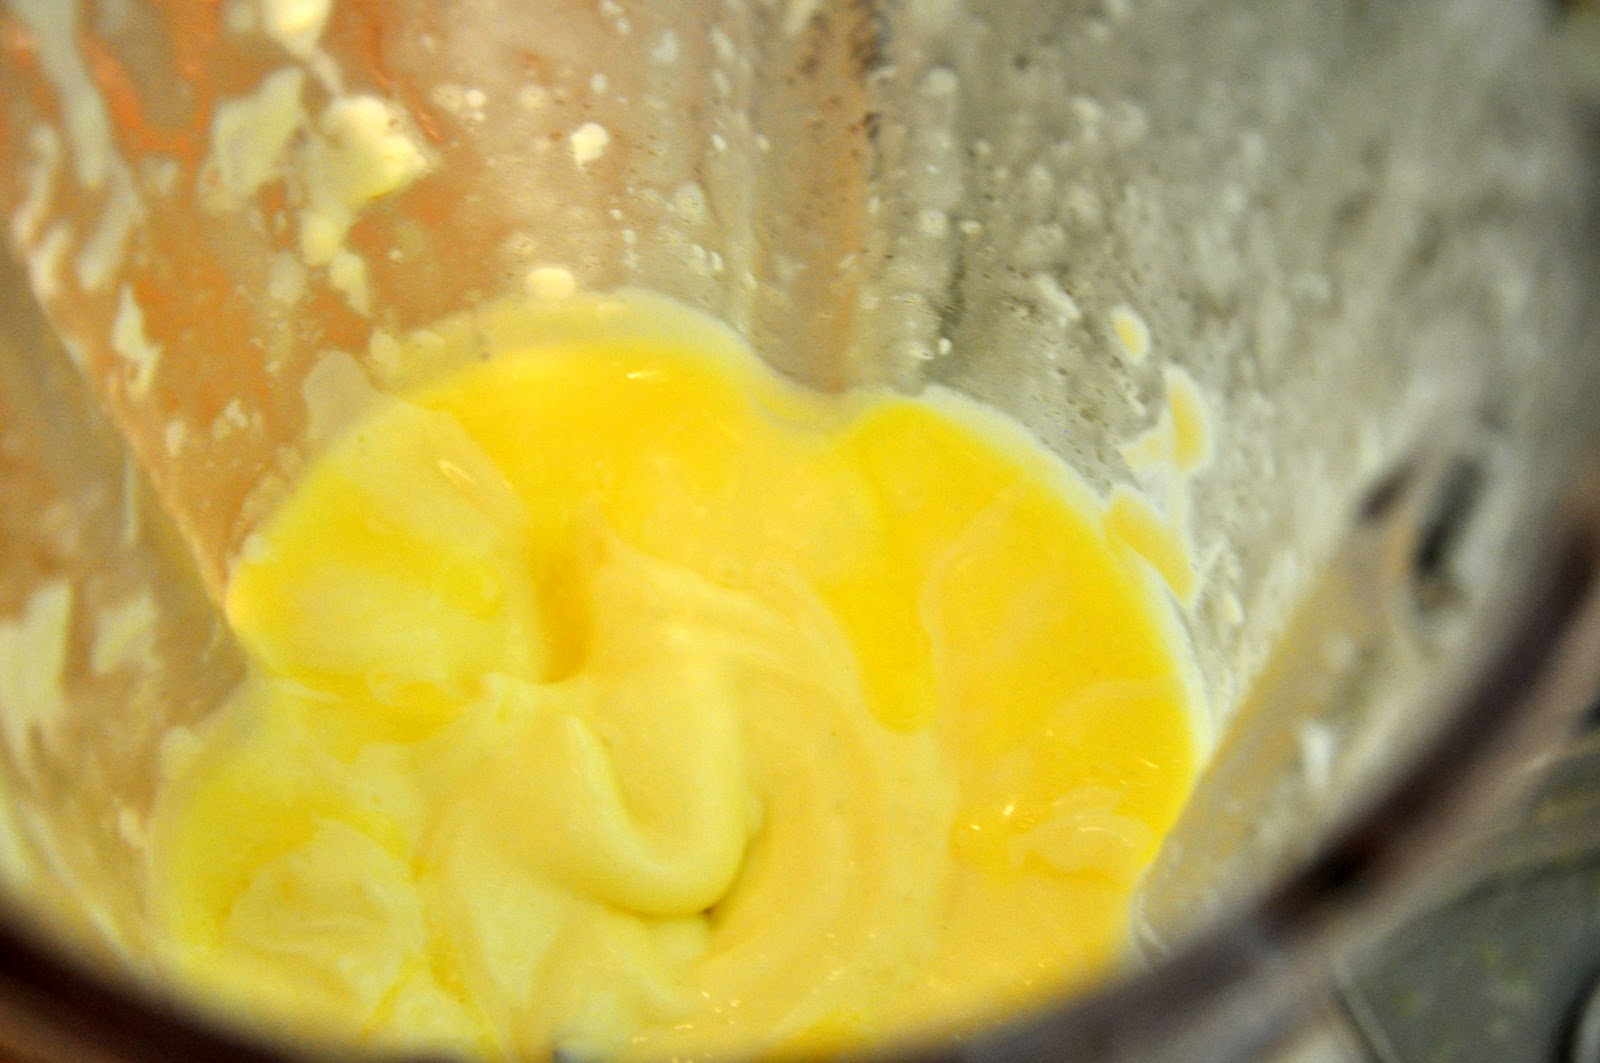
Now turn the blender on again and, with the little clear plastic 'window' in the lid removed, starting pouring in olive oil little in a slow but steady stream, until the eggs and oil emulsify and you get a nice, thick and creamy mayonnaise. I believe that the classic proportions call for one cup of oil per egg, but I usually 'eyeball' it and stop when the mayo is nice and thick, as pictured below.


By the way, this is one case where so called 'light' olive oil may be better than the dark green fruity kind, which would give the sauce a too strong olivey taste. Or you can use Provençale olive oil, which is more delicate. 

In any event, once your mayo is ready, add a fillet or two of anchovy, a spoonful of capers and a can of tunafish (preferably packed in olive oil). Blend again until smooth. 


Then temper the sauce with a couple of spoonfuls of the meat cooking liquid, enough to produce a pourable but still quite quick sauce. Transfer to a bowl. 

When the meat has achieved room temperature, remove it from its broth, pat it dry and place it on a cutting board. Slice it against the grain into thin slices.


Now take each slice (you'll probably need to do this by hand, otherwise use tongs) and dip in on each side in the tuna sauce and arrange the slices on a platter, each slice just slightly overlapping like so many roof tiles, in an attractive pattern. While pork tenderloin, there will be room for several rows of meat like so: 


Other cuts are larger, so you will probably need to make a single row or arrange them in a circular pattern on a large platter.
 
Finally, finish the dish off by pouring over the top the remaining sauce. While you can serve the dish right away, it develops better flavor if you let it sit for several hours, overnight or—in some recipes—for a few days, so the flavor of the tuna sauce penetrates the meat completely. Before you are ready to serve, garnish the dish with capers and, if you like a more elegant presentation, some thin slices of lemon around the edges and some parsley leaves. 

NOTES: If you want to save yourself the trouble or if you are worried about using raw eggs, you can use commercial mayonnaise instead of making it yourself. Just add a good two cups of mayo into the blender along with the tuna, anchovies and capers and whizz away. Or you can try the original recipe, which did not call for mayonnaise at all. Artusi, for example, calls for passing the mashed tunafish through a sieve, then adding enough olive oil and lemon juice to produce a nice creamy sauce. You can achieve a similar effect in the blender, set on 'liquify'. Artusi also suggests not throwing the cooking liquid away, but saving it for use in a risotto, which strikes me as good advice. 

You can also simplify the dish a bit by doing what most recipes call for: rather than coating each slice of vean in the sauce, line the bottom of your platter with some sauce, lay down the slices and cover them with the rest of the sauce. The slice by slice method is my own 'take' on the recipe, but one that I think pays off, as it ensures that each and every slice is enveloped in the sauce, keeping it moist and lending maximum flavor.

As mentioned, veal loin is the classic meat. And the classic cuts are either the coscia (leg), girello (top round) or magatello (eye of round), all of which allow for long simmering without drying out; modern recipes  sometimes call for the fesa (rump). In the US, these cuts of veal are not all that common, so veal loin can be substituted—and simmered for less time, more like 45-60 minutes than 60-90. These days, pork loin or turkey breast are common substitutes, even in Italy. And, if you ask me, pork tenderloin makes for a wonderful version of this dish—every bit as good, perhaps even better, than the original. 

The origins of vitello tonnato are subject to some confusion, in part because it is typical of two  adjoining but different regions of northern Italy, Lombardia and Piemonte.. According to Anna del Conte in her Gastronomy of Italy, the original version, without mayonnaise but include a bit of cream, comes from Lombardia. When it was taken up by the piemontesi, they added the mayo under French influence. On the other hand, the Oxford Companion to Italian Food has an entirely different explanation: they say that the mayonnaise version is indeed from Piemonte and the original one while the Milanese version is served hot, larded with garlic and pot roasted, the cooking liquid mixed with tunafish and thickened with a roux. And many Italians apparently believe that the dish has French origins, perhaps because of its French-sounding dialectal name, vitel tonnè, but that is apparently not the case. 

It is a summer dish par excellence that can serve as antipasto or a light secondo, as you prefer. In Lombardia, strongly associated with the summer holiday of Ferragosto on August 15, but, if you ask me, vitello tonnato is just too good to serve it only once a year.


Sunday, July 4, 2010

Paella mexicana


It's the 4th of July here in the US and the national holiday naturally makes me yearn for… paella! Well, not just any paella, but a Mexican-style version inspired by my fellow blogger Non Chef Nick's latest post on "In the Kitchen with Nick". I absolutely love paella. Having not prepared it for quite some time and being on something of a Mexican 'kick' lately, when I saw his mouth-watering recipe for Mexican paella, I knew I had to try it. Sorry, Nick for being such a copycat, but you know what they say: imitation is the sincerest form of flattery! 

Being a man of simple tastes, I have reduced the number of ingredients quite a bit and simplified the technique here and there. Here's my take: 

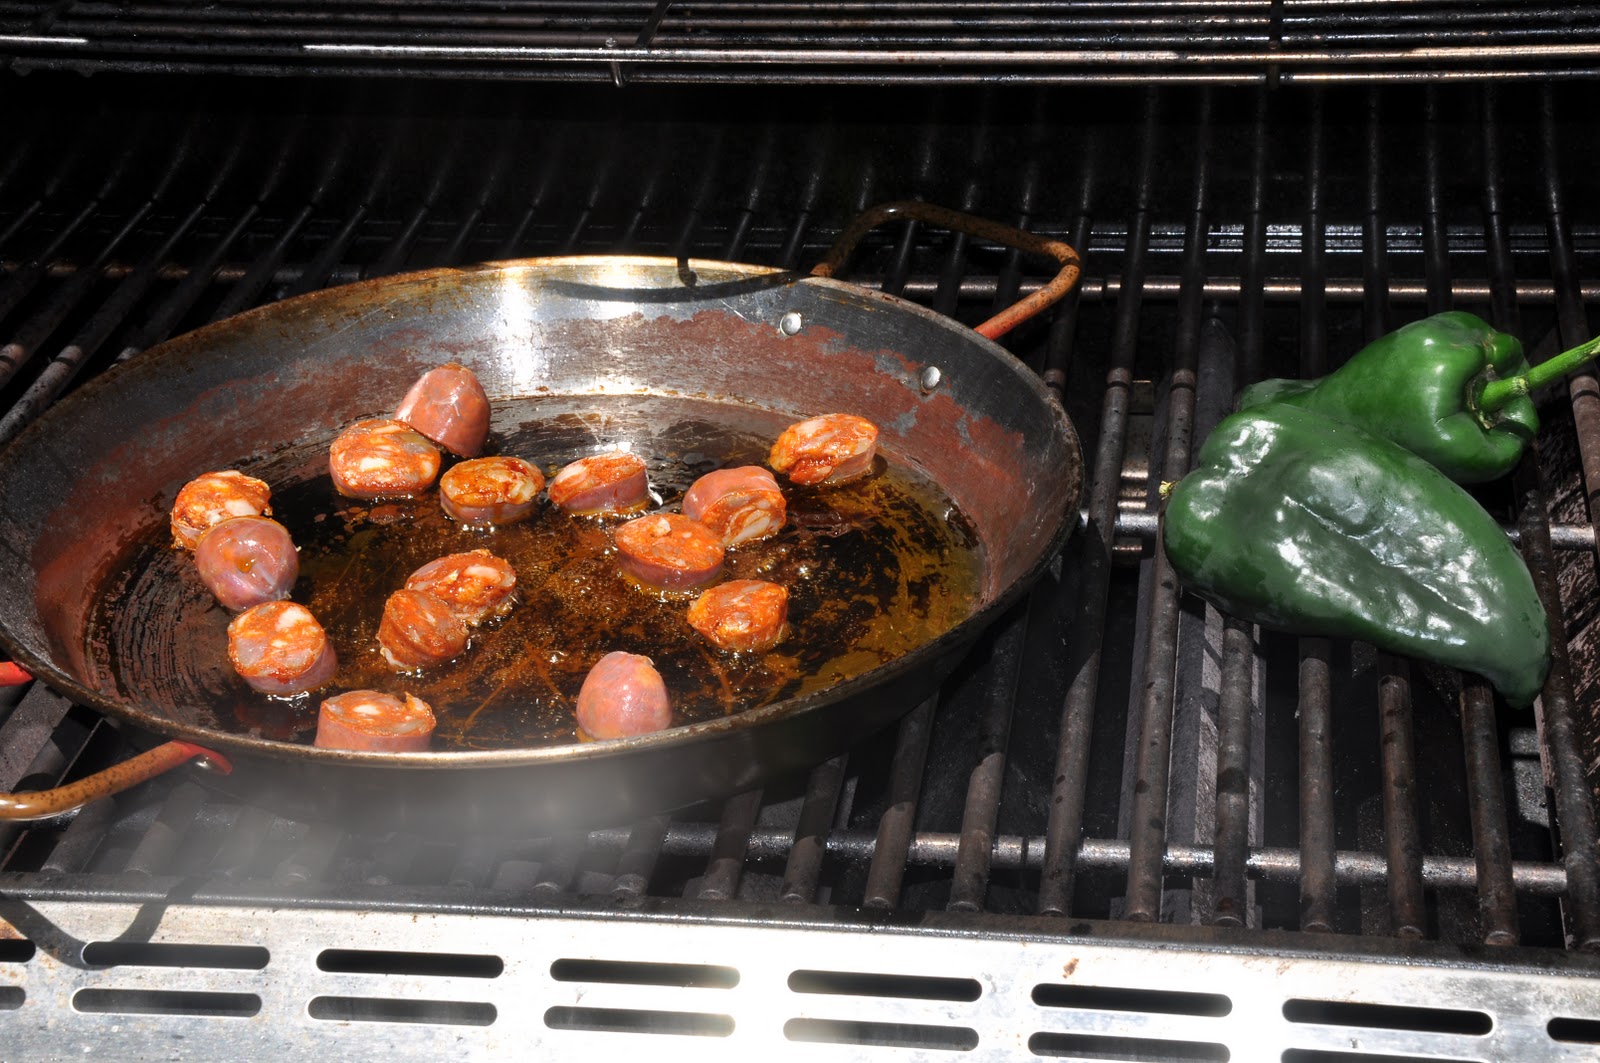
Heat a well-seasoned paella pan over high heat, preferably on a barbecue or, even better, a paella burner. (If you don't' have either, you can make paella perfectly well over the stove, but it will lack that characteristic lightly smoky flavor.) When hot but not burning, add enough olive oil to cover the bottom of the pan and sauté some Mexican chorizo. Meanwhile, char a couple of chiles poblanos over the flame and, when nicely charred on all sides, remove them and let them cool a bit, covered with a cloth or in a paper bag.


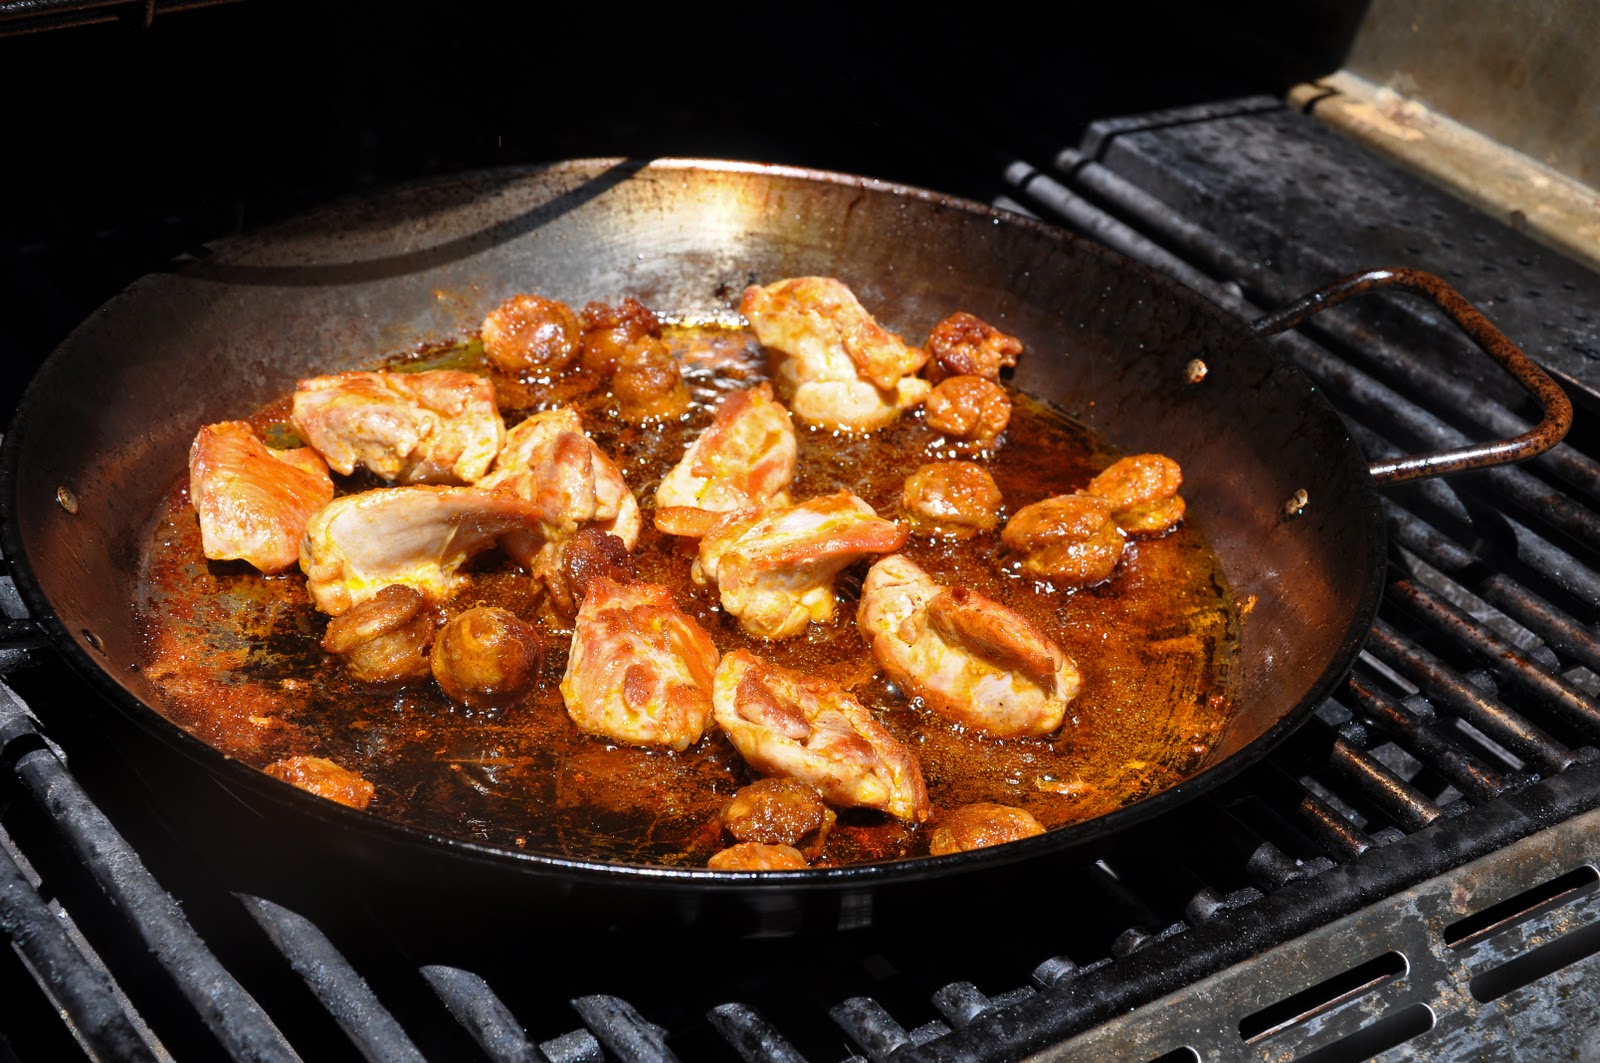
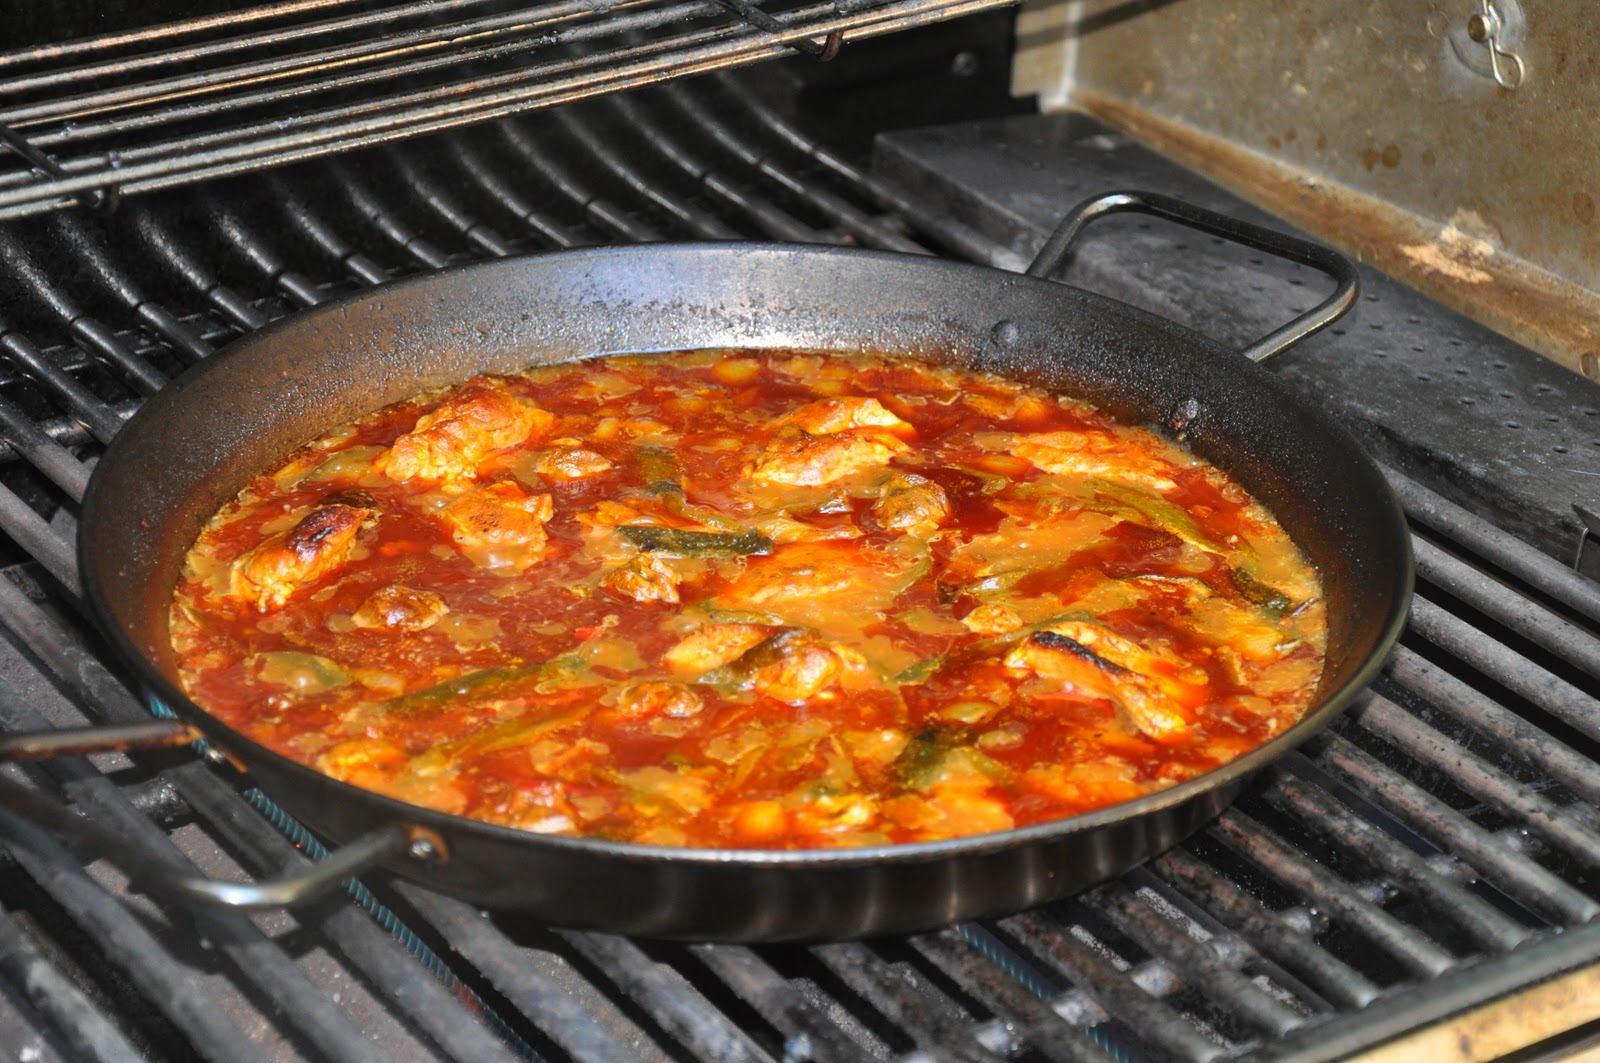
Add some chicken thighs to the pan and brown them very well. You want both the chorizo and the chicken to be very nicely golden brown, which will give your paella deep flavor. 


 While the chicken and chorizo are browning, skin your chiles poblanos with your hands, remove the seeds and cut them into rajas (or strips). When the chicken are chorizo are done, add a chopped white onion and the rajas to the pan. 


When the onion has softened, shove all the ingredients in the pan to the sides, making a 'well' in the middle. Into this well, place a spoonful of cumin (not too much, as cumin has a very strong flavor) and a heaping spoonful or two of pimentón (smoked paprika). Allow the spices to fry in the oil for a moment, until they become nicely fragrant:

As the sun sinks slowly in the West...

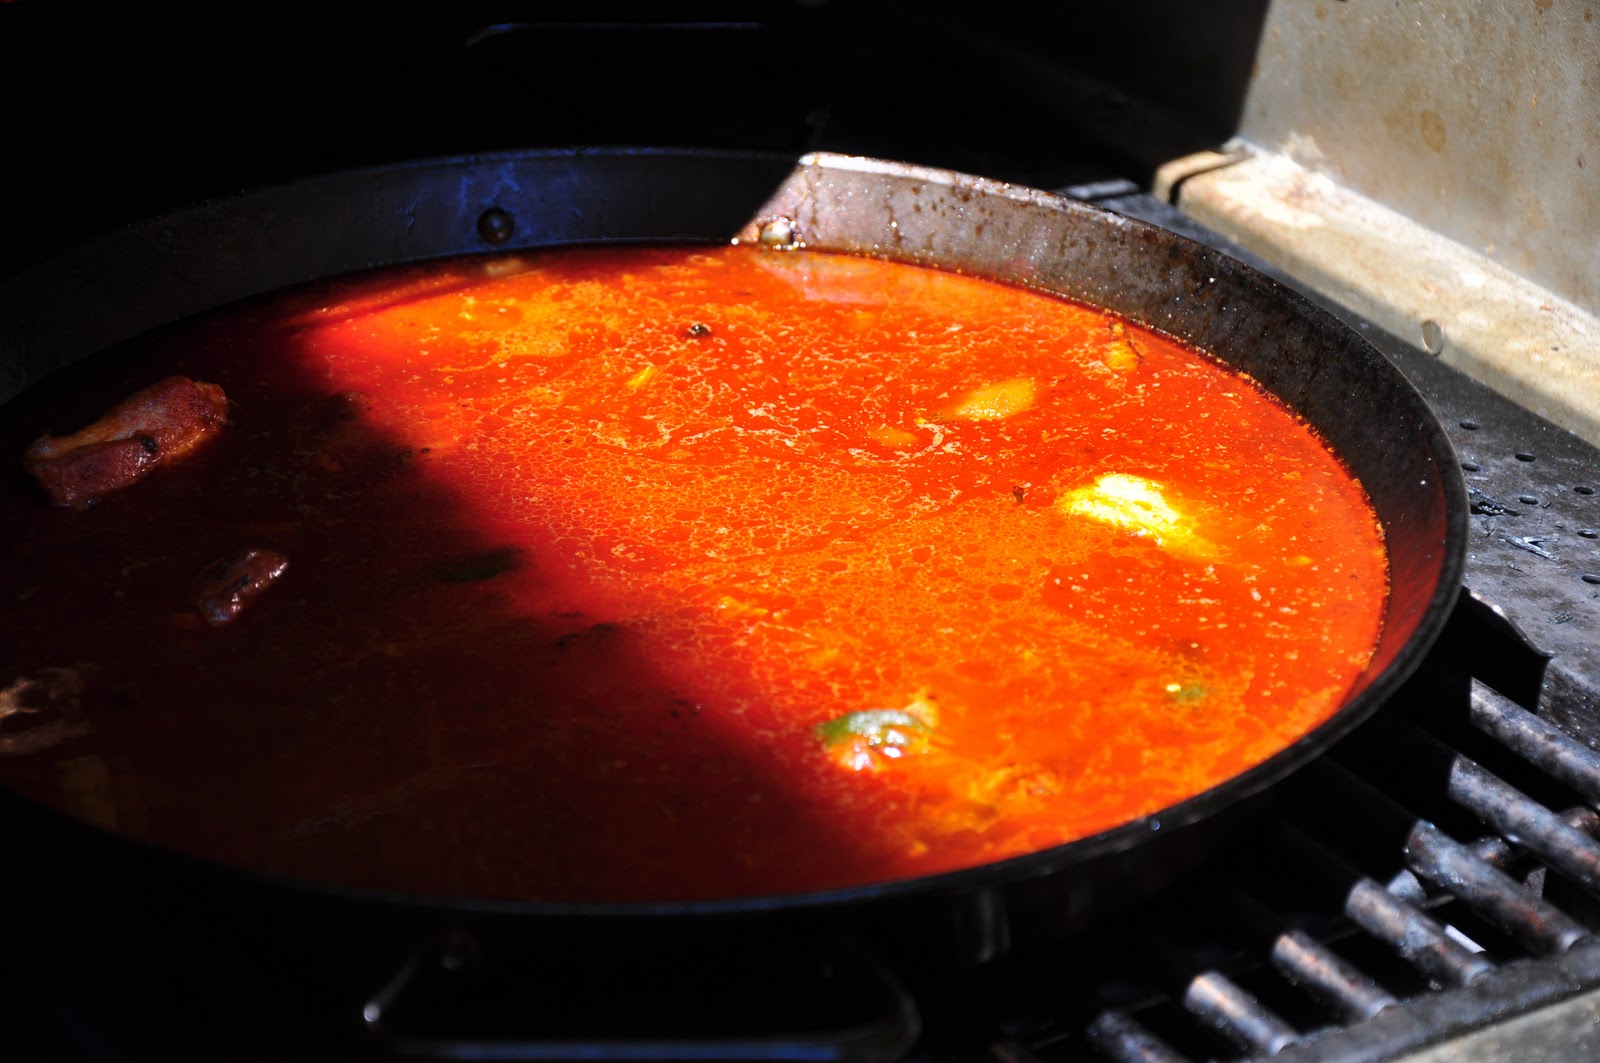
Then add two tomatoes, which you will have puréed in a blender. (For extra flavor, you can char and peel the tomatoes along with the chiles before puréeing them.) Mix the ingredients all together and let them simmer until the resulting 'sauce' thickens nicely.


Add enough water to almost fill the pan. (If using a traditional paella pan, you can use the rivets for the handles as a guide.) Season with salt and add a few threads of saffron—again, not too much as saffron too has a strong flavor and is very expensive to boot!


Allow this broth to simmer for a good 10 minutes or more, until it reduces by about half and develops a rich flavor. Taste the broth at this point to see if it sufficiently savory. Adjust for salt if need be and, if it tastes a bit 'thin', let it simmer some more. 

When your broth is ready, add your rice. The traditional Spanish way of adding the rice is by pour a line of rice from top to bottom and then from left to right to form a 'cross' in the pan that just barely rises about the top of the broth. Then you spread it out evenly. I usually simply sprinkle the rice around the pan as evenly as I can manage, enough so that it is just visible under the surface of the broth. 


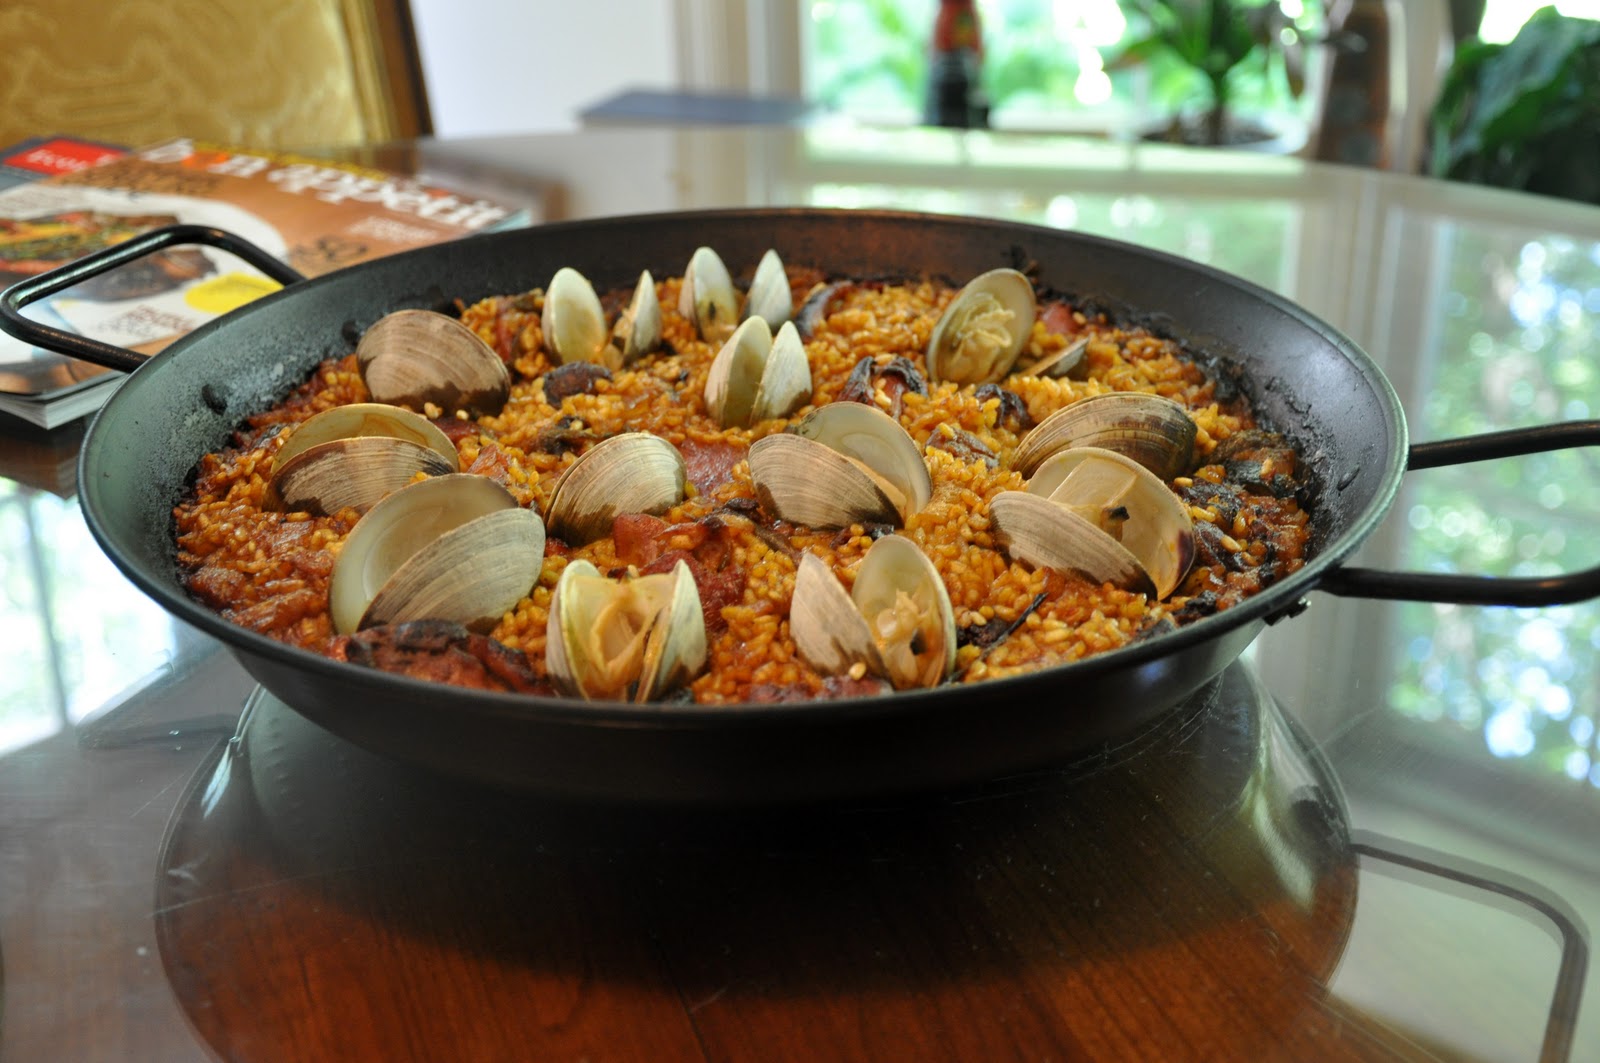
Either way, let the rice simmer undisturbed for a good 15 minutes or so, until the broth has almost but not quite entirely been absorbed. Taste a bit of the rice—if it is still quite hard, add a bit more water. Then add some clams here and there, as many as you like without overwhelming the dish:


Let the rice continue to cook until the clams have opened and the broth entirely absorbed. (NB: You may need to raise the heat a bit at this point so the clams open.) The rice should 'crackle' a bit, meaning that it is forming that delicious crust called socarrat. Remove the paella from the heat, sprinkle it with a shot or two of tequila and let it rest for 10 minute or so before serving. 

¡Buen provecho!

NOTES: The paella turned out to be truly delicious, if I do say so myself! If I had one thing to change, though, I would have held back about half of the rajas and placed them on top of the paella along with the clams toward the end of the cooking time. While the poblanos had lent their wonderful flavor to the dish, they had essentially disappeared as a separate ingredient when all was said and done. Reserving some for the end would have also added a bit of contrast and color to the final dish. 
Nick's version is a bit more elaborate than this, with shrimp, tomatillos, green beans, shallots, chicken stock, peas in addition to the ingredients used here. And he uses chicken wings instead of thighs, chili powder instead of cumin. He also 'toasts' the rice in the oil before adding his stock. It looks perfectly delicious, too. 

For detailed tips on making paella, including the right type of rice, the proper pan to use, more details on cooking technique and some online resources, see my post on paella valenciana. 


 Post scriptum: We had some fun trying to think up a name for this dish made for the 4th of July. Paella cuatro de julio was an obvious choice, but didn't seem right. Then why not paella Pancho Villa? Paella Benito Juárez? Paella Frida Kahlo? Then I suggested paella Emperatriz Carlota, at which point we realized we should quit while we were ahead and settled for plain old paella mexicana… ;)


Saturday, May 29, 2010

Zuppa di pesce alla napoletana


Italy, being a rather slender peninsula, is a country where the sea is rarely too far away. And, of course, the products of the sea play a major role in its cuisine. And so it is not suprising that zuppa di pesce, or fish soup, is a dish that you will find almost everywhere in many guises. In Tuscany they call their version of it cacciucco, and on the Adriatic coast, they call it brodetto, or 'little broth', and you will find variations of it from Venice all the way down to Abruzzo. (Further down the coast in Puglia, the name reverts to zuppa di pesce.) Although called a soup, it is actually more like a stew.

Zuppa di pesce is said that have been invented by fisherfolk, who in the days before refrigeration needed a convenient way to prepare all the unsold bits and pieces of their daily catch. So why not throw them all together in a pot to simmer with some aromatics and water or, if you could afford, white wine? When the tomato became a central part of Italian cooking, especially in the south, many local variations of fish soup turned various shades of red. 

The Neapolitan zuppa di pesce is perhaps the simplest and purest of all the fish soups in Italian cookery: you begin by sautéing a few slightly crushed garlic cloves in abundant olive oil. If you like, you can add a bit of peperoncino to sauté in the olive oil along with the garlic. When the garlic begins to give off its aroma and is just barely beginning to brown, you add tomato—ideally, the pulp of fresh, perfectly ripe San Marzano tomatoes, but otherwise use best quality canned tomatoes that you have run through the largest holes of a food mill. Season with salt and pepper (going light on the salt since the shellfish will be salty) and finely chopped parsley, then allow the tomatoes to simmer for about 10 minutes or so, or until they begin to reduce and reach a saucy consistency. Then add a splash of white wine. 

It is now time to add your seafood, starting with the varieties that take the longest to cook, then progressively adding those that take less time. The origins of the fish soup being what they are, the choice of seafood is pretty loose. But the Neapolitan version will almost always include one or more kinds of mollusks such as squid, baby cuttlefish or octopus, clams or mussels or both, and a variety fish with fins. The fish was, as mentioned, the local catch, so many local varieties of fish, most of them small and some quite bony but flavorful, can be thrown into the pot. Larger fish can be cut into serving or even bite-sized pieces. The most typical fish of all is scorfano, called 'scorpion fish' in English. (Scorfano is also typical of the Tuscan cacciucco and some of the Adriatic brodetti.) Triglie—red mullet—is also a common addition. But any firm-fleshed fish that lends itself to simmering will do: monkfish, snapper, catfish, sole. Last night I added some cut up halibut, and it was very nice. Although less typical of this kind of fish soup, sea scallops and shellfish are make nice additions. The more variety, the better the soup they say. 

You always begin with the mollusks, since they will take some time to cook. With very young calamaretti (baby cuttlefish) let them simmer about 10 minutes before you add any other fish. Octopus or mature squid (which you should cut up into bite-sized pieces) will take much longer, usually about 30 minutes, although you can sometimes find pre-cooked octopus that only needs heating up. Then add you fish and let that cook for another five to ten minutes, depending on the size. Then, finally, add the clams and mussels and simmer them until they open—if, that is, you are confident that they are free of sand. If not, steam them separately and add them at the very last moment, along with their liquid, strained to eliminate any sediment, just long enough for them to heat through. Sprinkle with a bit more finely chopped parsley and serve immediately.

Measurements are not particularly important in this rustic dish. The amount of tomato will greatly influence the end taste. Some recipes call for a lot of tomato—equal in weight to the seafood—but most call for about half as much by weight. The ratio among the various kinds of seafood is pretty free as well, but I find a good rule of them is to use about as much fish as other sorts of seafood. Or you can eliminate the fish altogether, and just use the mollusks and some shellfish like shrimp or crab, in which case you will have zuppa di pesce senza spine, or 'boneless' fish soup.
Zuppa di pesce is usually served with toasted bread, rubbed with garlic and sometimes drizzled with a bit of olive oil. The bread is also wonderful fried in olive oil—but that can be a bit heavy for modern tastes. I often just use bread to sop up the wonderful juices, an act that Italians call fare la scarpetta, meaning 'to make the little shoe' (see Glossary for details). 


NOTES: There are some minor variations among the recipes, mostly concerning when to add what. Some recipes call for adding the squid and/or octopus directly to the garlic soffritto, before the tomatoes. Some call for adding the wine either before the tomato or at the same time. And the parsley can be added at almost any time, along with the garlic at the very beginning, or at very end. And, depending how pervasive you want the garlic to be, you can use it slightly crushed (my favorite) or chopped or sliced. A few recipes call for onion instead of, or in addition to, the garlic—but onion is more typical of the northern types of fish soup.

It probably goes without saying, but any leftovers make a lovely sauce for spaghetti or linguine, not unlike the well-known dish spaghetti or linguine allo scoglio.

As mentioned, there are many varieties of fish soup to be found all over the country. You could write a book (or a blog) just about all the different versions. I plan to blog at least on the most famous of these, like cacciucco alla livornese and the broèto from Venice, in the future. 

And fish soups are not just limited to Italy. There are versions from all over the Mediterranean and beyond. The most famous one of all, without a doubt, is the wonderful Provençal bouillabaisse. The Greeks have their kakavia and the Spanish their sopa de pescado y marisco, and various fish soups can be found all over Latin America. And, of course, let's not forget the cioppino from San Francisco.

Friday, May 7, 2010

Seppioline alla griglia


Grilled seafood is extremely popular in Italy, especially in the warm weather months. One of my favorite restaurants in Rome, a place called "La Torricella" (The Little Tower) in the Testaccio section of town, served wonderful seafood. And perhaps my very favorite dish to eat there was seppioline alla griglia, or grilled baby cuttlefish. But you don't need to take a trip to Rome to enjoy it—it's simplicity itself to make.

Begin by marinating cleaned baby cuttlefish or squid (see Notes below) in some olive oil, lemon juice, salt, pepper and parsley. If you like, you can add some red pepper flakes or a bit of chopped garlic to 'kick it up a notch' as the famous TV chef like to say. Let it sit in this marinade for an hour or two. 

Now get your grilled nice and hot. Depending on the size of the fish, you can either lay it directly on the grill, use a grilling basket or a flat grilling plate. Grease your grilling surface to prevent sticking and lay your fish on the grill. Personally, I like to flip the fish fairly often to ensure even cooking, but if you're a fan of neat grill marks, then you will need to leave the fish to cook on one side until it browns nicely. Although the fish will cook in no time, it actually takes a surprisingly long time to brown, so be patient. Once the fish is browned to your liking, transfer it to a serving dish, pour over the remaining marinade and, if you like, top with a bit of chopped parsley and serve with lemon wedges. 

NOTES: Baby cuttlefish are best for this dish, as they remain tender even after grilling. For this dish, as pictured above, I had found some incredibly small baby cuttlefish, pre-cleaned and frozen, in a local Asian supermarket. In Italy, seppioline are small but not tiny, but no matter—the flavor was incredibly good. In a 'regular' supermarket, you are more likely to find squid rather than cuttlefish. Buy it whole—not cut into rings—and, if it has not been cleaned, you'll need to do it yourself by cutting it in half just at the 'joint' between the body and the legs, then remove the cartilage 'pen' inside the body. Cut the legs into pieces, then proceed. 

Try to find smallish squid, as the large ones don't really lend themselves to this kind of treatment, as dry cooking methods like grilling tend to toughen them if left to cook more than just a minute or two. Like tough meat cuts like shoulder, they are better cooked using moist heat like a braise. 

Post-scriptum: A reader from South Africa tells me that, for those who don't have access to baby squid , larger squid can be tenderized by soaking for 5-10 minutes in warm water to which a spoonful of bicarbonate of soda has been added. Thanks for the tip!

For a great demonstration of how to clean squid, see this video from the Rouxbe Online Cooking School:

Saturday, April 24, 2010

Linguine con alici


Here's another quick and easy dish for those days when you don't really feel like cooking but you want to eat something tasty. It's a riff off of the classic ajo e ojo with anchovies.

Start as you would for aglio, olio e peperoncino, by very gently browning a few cloves of garlic—for this variation, I like to chop the garlic rather than using slightly crushed cloves—in fruity olive oil. When the garlic is just beginning to brown, add some red pepper flakes and, almost immediately thereafter, a can of anchovy fillets. Allow to cook gently over low heat, stirring from time to time, until the anchovies have almost entirely 'melted'. Add a pinch of salt (not too much, since the anchovies are already salty) and chopped parsley, stir and turn off the heat.


Meanwhile, cook your linguine (spaghetti are also excellent with this sauce) al dente in well salted water, drain (but not too well) and add to the skillet. Mix well and allow the spaghetti to cook over gentle heat for just 30 seconds or so, long enough so that the pasta absorbs a bit of the sauce and any excess liquid evaporates. Taste for salt and serve immediately. Buon appetito!

NOTES: Like ajo e ojo itself, the key to success lies in the fruitiness of the olive oil and the freshness of the garlic. Go easy on the salt, however, as the anchovies, of course, are themselves quite salty. Of course, if you use anchovies packed in salt—which you need to rinse and fillet yourself under running water—the flavor will be even better, but then you will have departed from 'quick and easy' territory. 

As for measurements, this is another dish where they are not all that important—or rather, they can be varied according to taste. For two people (200g/8 oz. of pasta), I use 2 or 3 garlic cloves, a small can of anchovies and a sprinkling of red pepper. As for oil, I use just enough to cover the bottom of the skillet. Just leave any excess oil in the bottom of the skillet as you serve. But don't skimp: this pasta is supposed to slither on your plate!

Saturday, April 10, 2010

Fettuccine al salmone affumicato


I love smoked salmon. It is so incredibly versatile, delicious and good for you, too. And it adds a touch of elegance to any dish in which it appears. Who could ask for more? One of our favorite weeknight dinners at home is this simple pasta with smoked salmon and cream. If using store-bought pasta, it can be whipped up in the time it takes to bring the water to a boil and cook the pasta. But simple as it is, this dish is also elegant enough to serve as the first course of an 'important' dinner. 

For the pasta, I like to make this dish with fettuccine, the typical 'ribbon' pasta of Roman cookery, or tagliatelle, its slightly thinner cousin from Emilia-Romagna. To make your own fettuccine or tagliatelle, make your egg pasta dough and roll it out (see this post for instructions). The pasta sheets should be fairly thin for fettuccine, almost paper thin for tagliatelle. Then cut your pasta sheets into 'ribbons' about 1 cm (0.4 inch) wide. Pasta machines generally come with two cutters; use the wider one for fettuccine and tagliatelle. Like all fresh pasta, cook in well salted, gently boiling water for just a few minutes—fettuccine will take a bit longer than tagliatelle—tasting for doneness after 2 minutes or so. Cooking time will vary according to thickness and how long the pasta has been drying before cooking. 

The sauce is incredibly simple: just melt some butter in a skillet, then add heavy cream and roughly cut up smoked salmon. Simmer until the cream has reduced to a saucy consistency and the salmon has imparted its wonderful flavor to the cream. Add your cooked fettuccine to the sauce and toss. Add a bit more cream if need be, making sure that the pasta still 'flows' rather loosely—fresh pasta tends to absorb its sauce quickly, and creamy ones especially quickly. 

For a slightly more elaborate version, gently sweat a bit of shallot in butter, then add your chopped salmon and sauté until it loses its raw color. Add a splash of vodka, let is evaporate, then add cream. Add chopped parsley along with the pasta and proceed as indicated in the basic recipe. 

As far as measurements go, as usual for this kind of dish, they don't really matter all that much. As a general rule of thumb, I would suggest about half as much salmon by weight as pasta, but if you can use less according to your taste or what you have in your pantry. Even a little bit of salmon will give your dish a lot of flavor. For the cream, use enough to coat the pasta well but not so much as the pasta is 'swimming' in the sauce. 

NOTES: Some recipes call for the additional of grated parmesan cheese, but I find that smoked salmon has plenty of flavor on its own. You can use fresh salmon instead of smoked in either of the variations mentioned above, but then season more aggressively as fresh salmon is not as assertive in taste as smoked. 

While I like ribbon pasta best with this sauce, it lends itself to just about any type of pasta. Tagliolini, which are made just like tagliatelle but cut into very thin strands instead of ribbons, are lovely with this sauce. Short pastas like penne or farfalle would also work well. I would avoid large pasta shapes like rigatoni, which I feel are a bit too clunky for this elegant sauce—but that is really just a matter of personal preference. 

There are other variations on the sauce. One calls for white onion and wine rather than shallot and vodka. And some recipes call for a bit of tomato, which makes a kind of salsa rosa, or pink sauce.