Showing posts with label antipasti. Show all posts

Saturday, February 19, 2011

Baccalà mantecato


A not-so-distant cousin of Provençale brandade de morue, baccalà mantecato is one of the signature dishes of Venetian cuisine and a staple of those wonderful hidden-away Venetian bacari, or wine bars.

The name of the dish comes from the verb mantecare, which is a culinary term meaning to 'beat' or 'whip' or simply to 'stir vigorously' so as to create a creamy consistency. It is the same word used to describe the final stage of making a risotto, when you stir the rice vigorously to incorporate grated cheese and butter, to creating that luscious creamy consistency that we all know and love. The technique serves the same purpose here, but in a wholly different context.

Ingredients (for 4-6 servings)

250g (1/2 lb.) salt cod, soaked for 24 hours and cleaned of any stray bones
1 clove garlic, very finely chopped (optional)
Olive oil, about 100g or as much as you need
Salt and pepper, to taste
chopped parsley

Directions

Cut the salt cod into manageable pieces and place them in a saucepan. Cover with water and bring to a gentle simmer. Add a small pinch of salt, a slice or two of lemon and a bay leaf. Continue to simmer for 20 minutes, until tender but not yet falling apart. When done, transfer the pieces of salt cod to a large bowl with a slotted spoon.

Start to break up the salt cod pieces with a sturdy wooden spoon. When the fish has broken up into shreds, add the garlic (if using) and then start to drizzle the oil into the fish. Stir with the wooden spoon, incorporating the oil slowly into the fish as you stir, as if you were making mayonnaise. Continue like this until the fish has formed a nice, but not entirely smooth paste. There should still be small bits of fish here and there. If you find the paste a bit too thick, you can add a spoonful or two of the cooking water. Taste and adjust for seasoning—you may not need any salt, but you probably will, as salt cod can be surprisingly bland after it has soaked. Mix in some chopped parsley.

Baccalà mantecato should be served at room temperature, typically on top of crostini di polenta as shown in the picture above. In Venice, polenta blanca or white polenta is the most autentic choice, but yellow polenta as shown will certainly do fine if you, like me, you don't have any of the white variety on hand. It can also be served with soft, hot polenta for a more substantial dish

NOTES: To make crostini di polenta, simply make a batch of polenta using the usual method, pour it out on a wooden board or baking sheet, in a thinnish layer, to cool completely. It will have hardened enough to cut into rectangles or square pieces. Grill or griddle your crostini on each side until lightly spottled. These crostini have many other uses—they are perfectly delicious slathered with gorgonzola cheese, for example.

If you are being a bit lazy, you can—if you must—blend the salt cod in a food processor,  drizzling the olive oil through the spout as you use the pulse function to avoid overblending. Of course, this method does not produce a dish with quite as much character but it will certainly save you some effort. What you should avoid, however, is using a blender, which will purée the fish rather than producing the typically 'rough' texture that characterizes the dish.

The recipe given here is from the Dogale Confraternita del Baccalà Mantecato, one of the many confraternita or associations (literally 'brotherhoods') in Italy charged as guardians of the most significant traditional local dishes. This one is, of course, based in Venice. The original recipe calls for stoccafisso, or stockfish, which is another form of preserved codfish, wind-dried rather than salt-cured and so much harder. It requires several days of soaking. It is a rarity in the US, but salt cod is a perfectly acceptable substitute, in my humble opinion. The original recipe does not call for garlic, but most recipes (even Italian ones) will include it these days. For a more assertive flavor, some recipes call for a fillet or two of anchovy.

Many recipes you will find, perhaps most, call for a mixture of milk and oil, often in a 50:50 ratio but sometimes mostly milk (or even cream) and only a bit of olive oil.  I have read—though I can't find the source now for the life of me—that the all-oil version is typical of Venice itself, while the milk and oil version comes from the inland areas around Vicenza. In the old days, olive oil was probitively expensive outside areas where olive tree grew, which meant most of northern Italy outside Liguria. Venice, itself, however, was lucky enough to have olive oil production nearby, where a micro-climate allowed for it. I now begin to doubt this explanation, however, as  its seems that there is olive oil production in several areas in the Veneto (something I never knew until I looked into it) including around Vicenza. In fact, olive oil from the Veneto has its own DOP designation. In any event, the oil you use should not be too fruity. A lighter Ligurian or Provençale olive oil (assuming you don't have access to the local variety!) would probably be the best choices. Avoid those fruity Puglian or Sicilian oils which, as wonderful as they are, would be too 'heavy' for this dish.

Friday, January 28, 2011

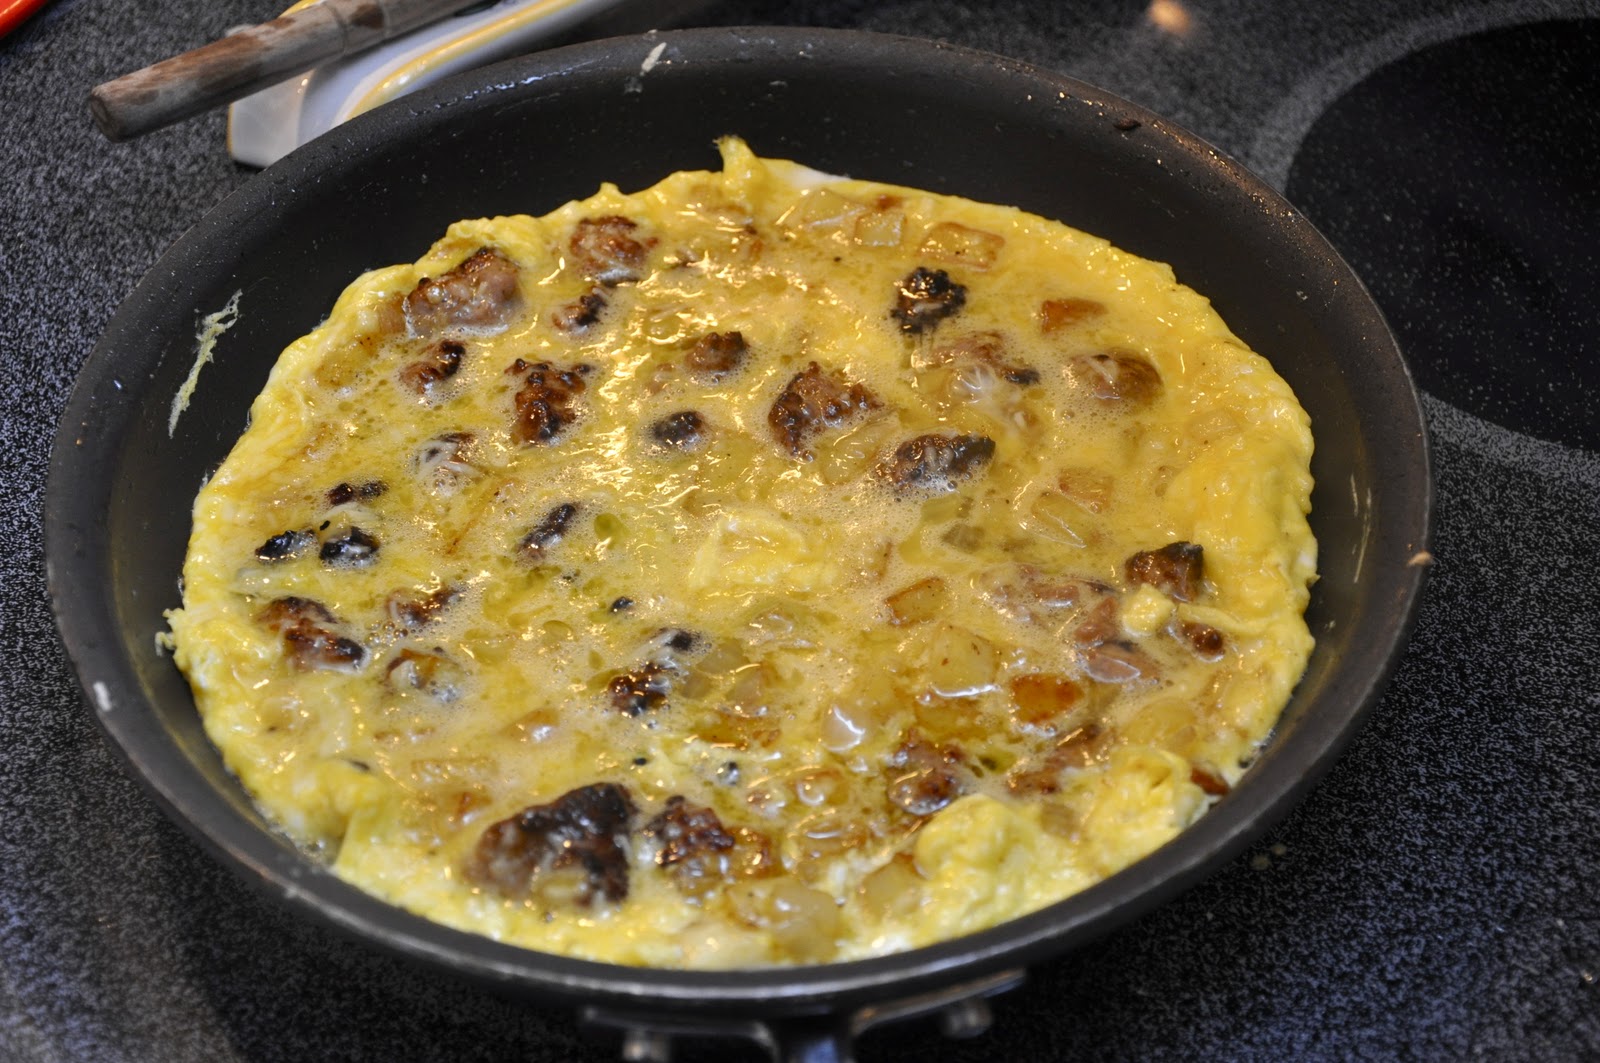
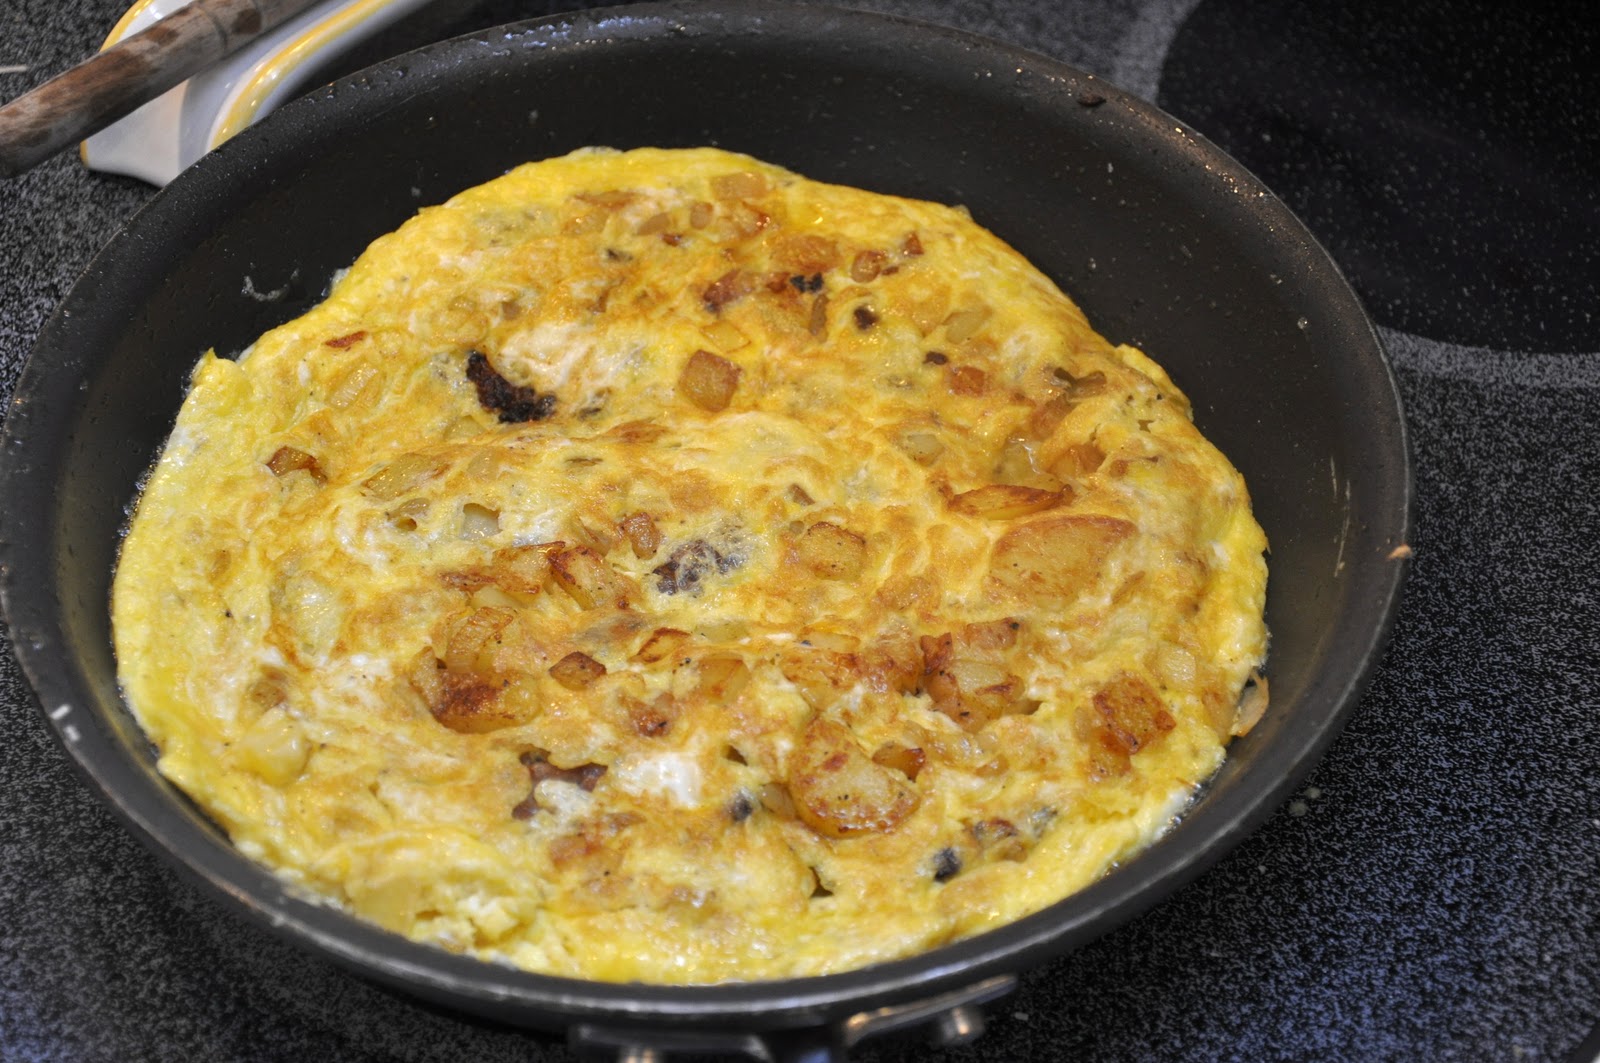
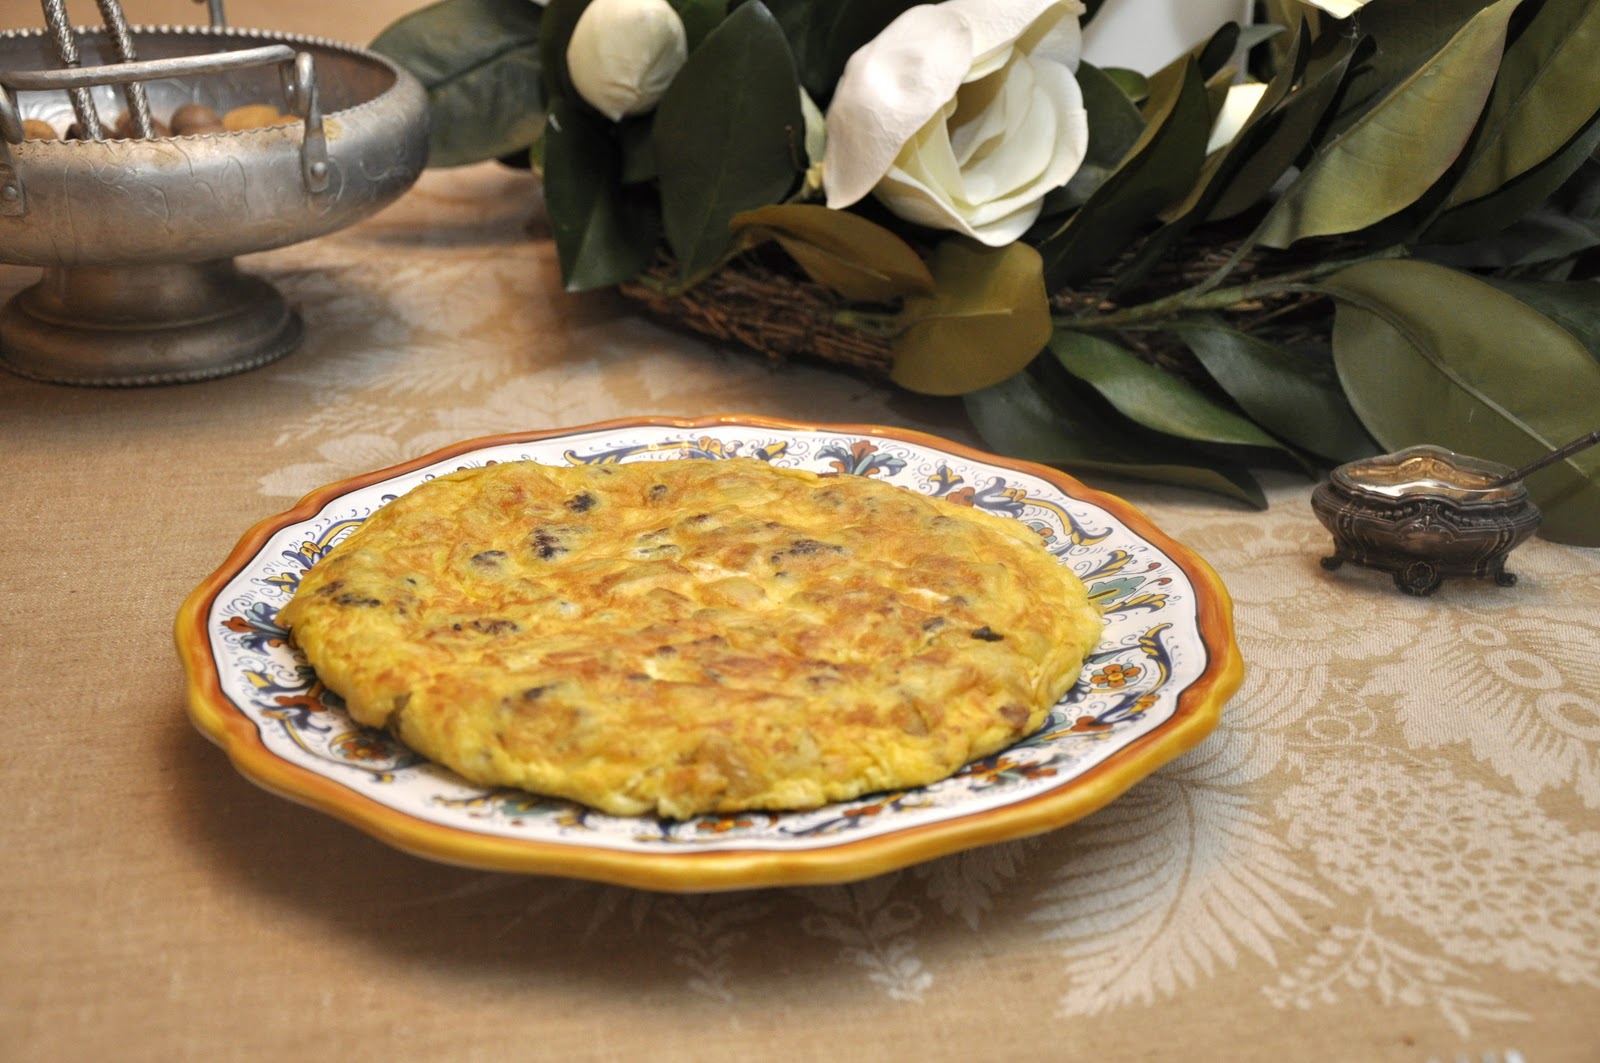
Frittata con patate e salsiccia


One of the wonders of Italian cuisine is its incredible variety, and much of that variety comes from the mix-and-match nature of so many of its dishes. You take a staple base ingredient like rice or pasta, and you pair that with all sorts of flavoring ingredients and come up with literally hundreds of variations on a theme. So pasta or risotto are not a single dish, but a whole category, a whole world of dishes that could literally fill a book, and has.

The same goes for the flat omelette known as the frittata. The combinations are endless, as we have already featured a few on these pages: frittata di patate e cipolla (with potatoes and onion), frittata ai carciofi (with artichokes) and frittata ai peperoni (with bell peppers). Here's another example, one of my favorites on a chilly winter's day when I want something a bit more substantial: a frittata with sausages and potatoes.

Ingredients (to serve 2-3 as a secondo, 4-6 people as an appetizer, snack or part of a buffet)

2-3 sausages, removed from their casings and broken up into smallish pieces
3 medium waxy potatoes, peeled and diced
1/2 onion, sliced or diced
Salt and pepper
6 eggs
100g (3-4 oz) of grated parmesan or pecorino cheese
A few sprigs of fresh parsley, finely chopped (optional)
Olive oil


Directions

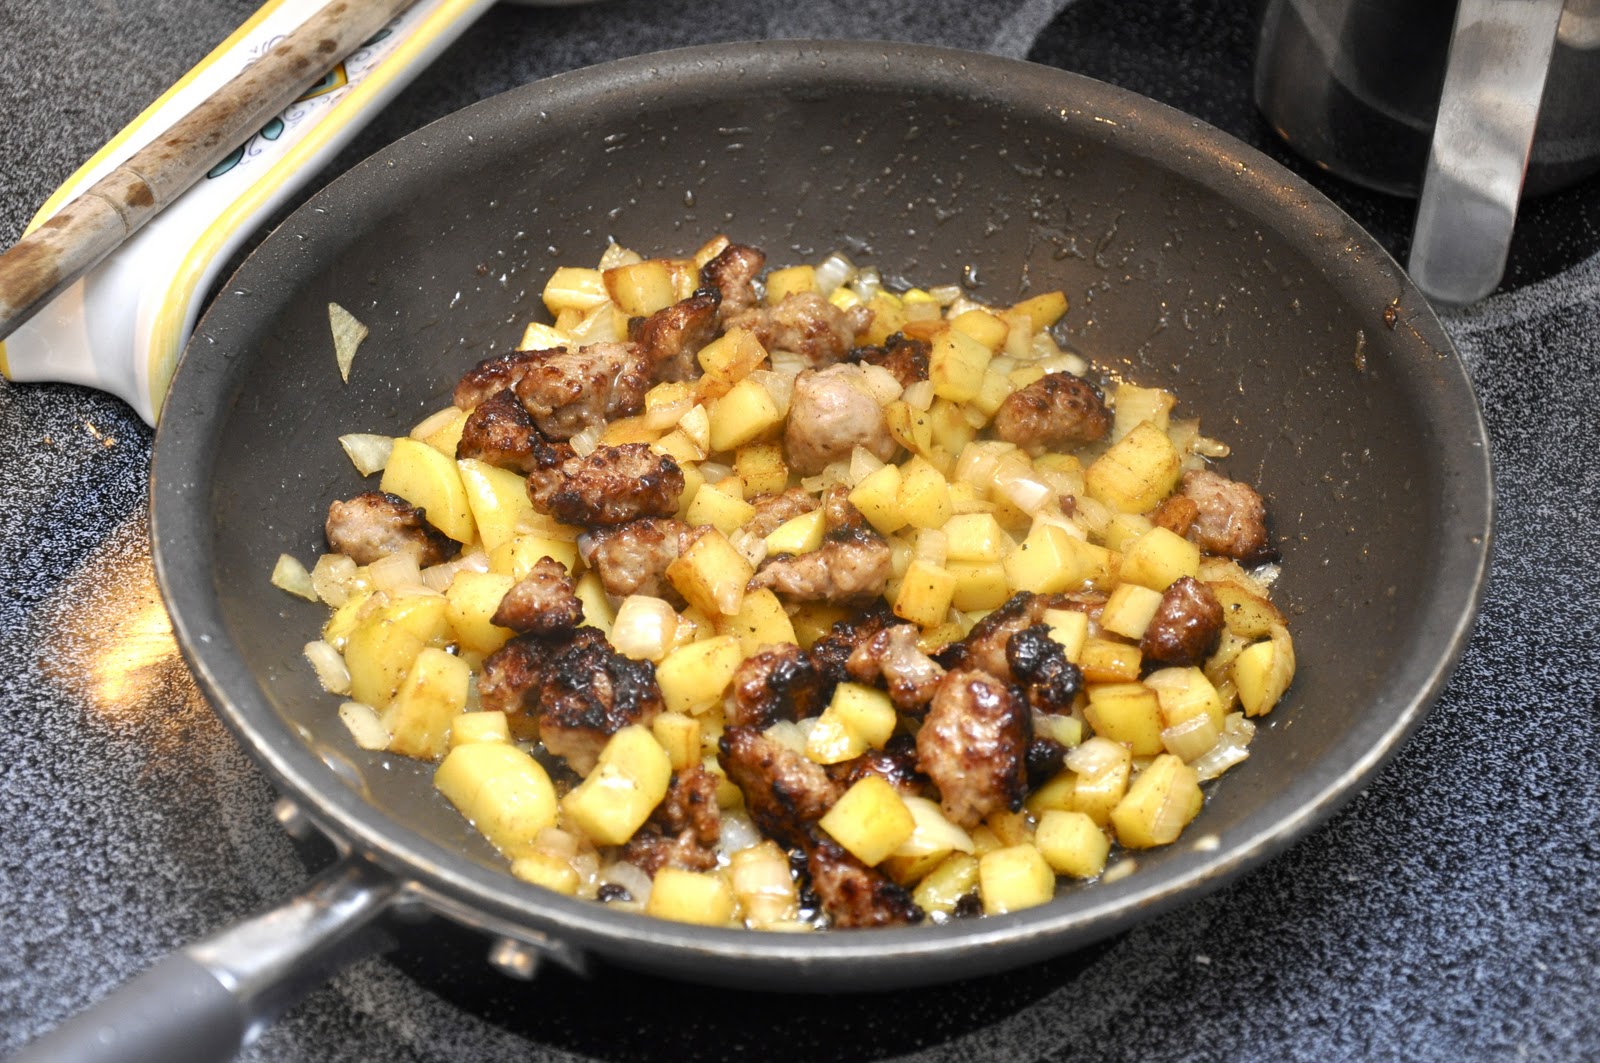
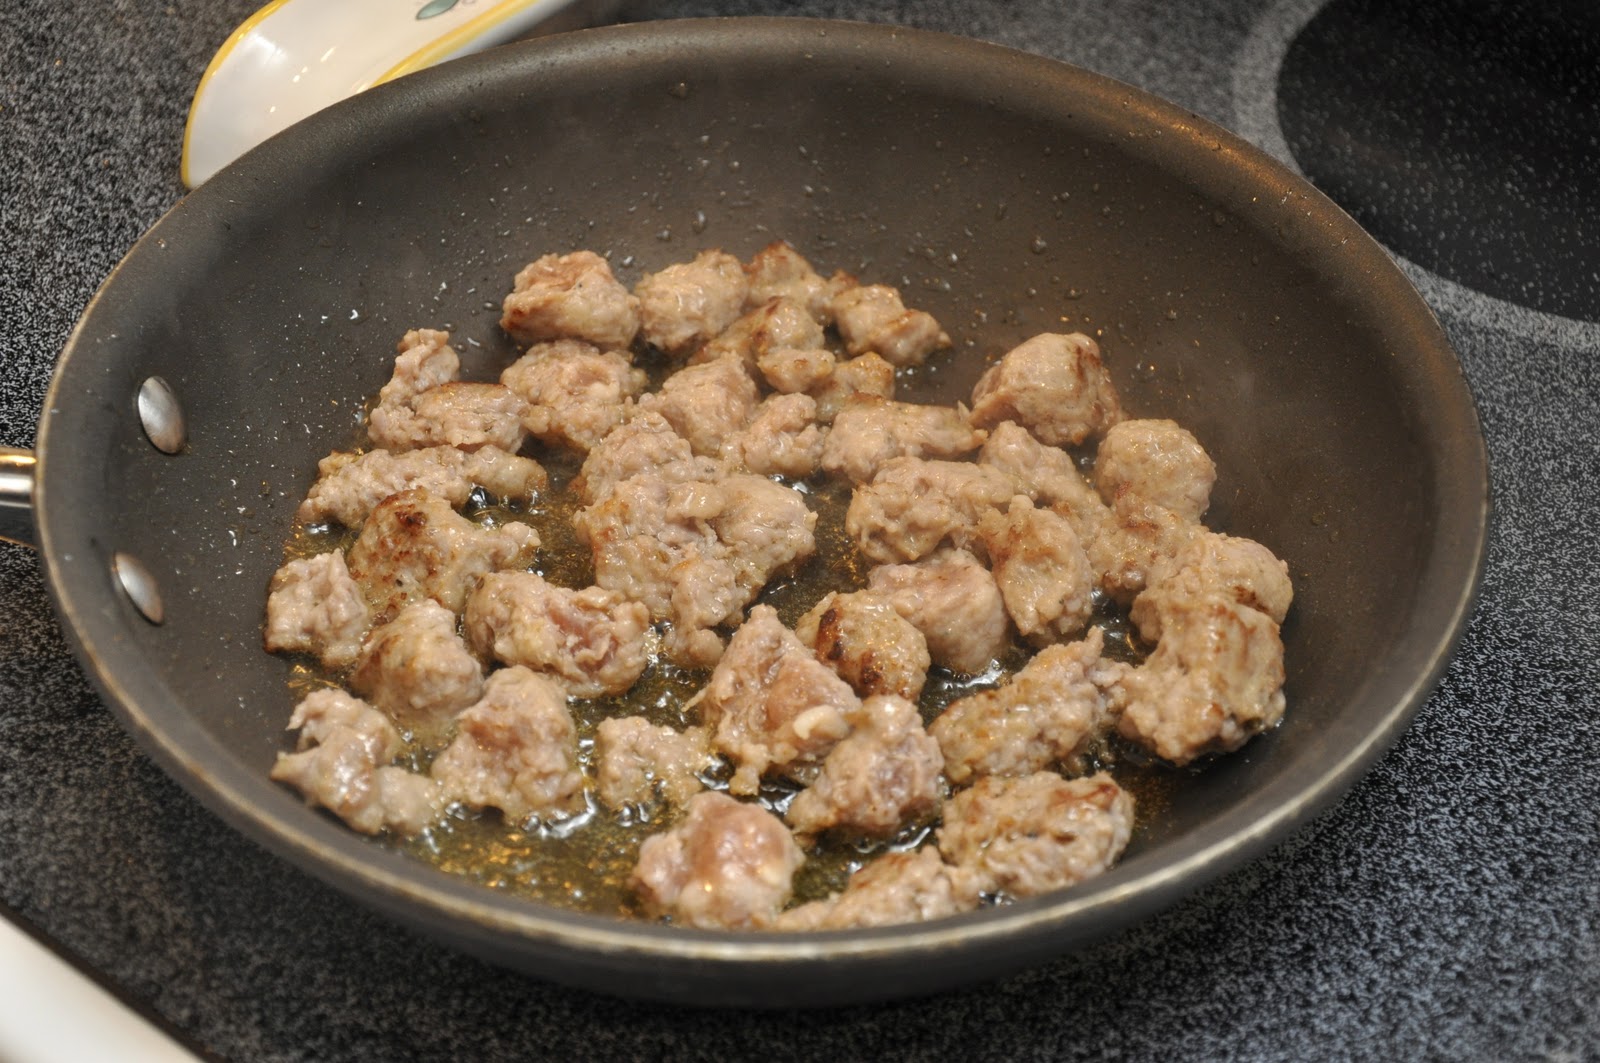
Start by taking a non-stick skillet and sautéing your sausages in a bit of olive oil over moderate heat. When they are nicely browned, you can remove them to prevent them from getting too brown, or just keep them in the pan.


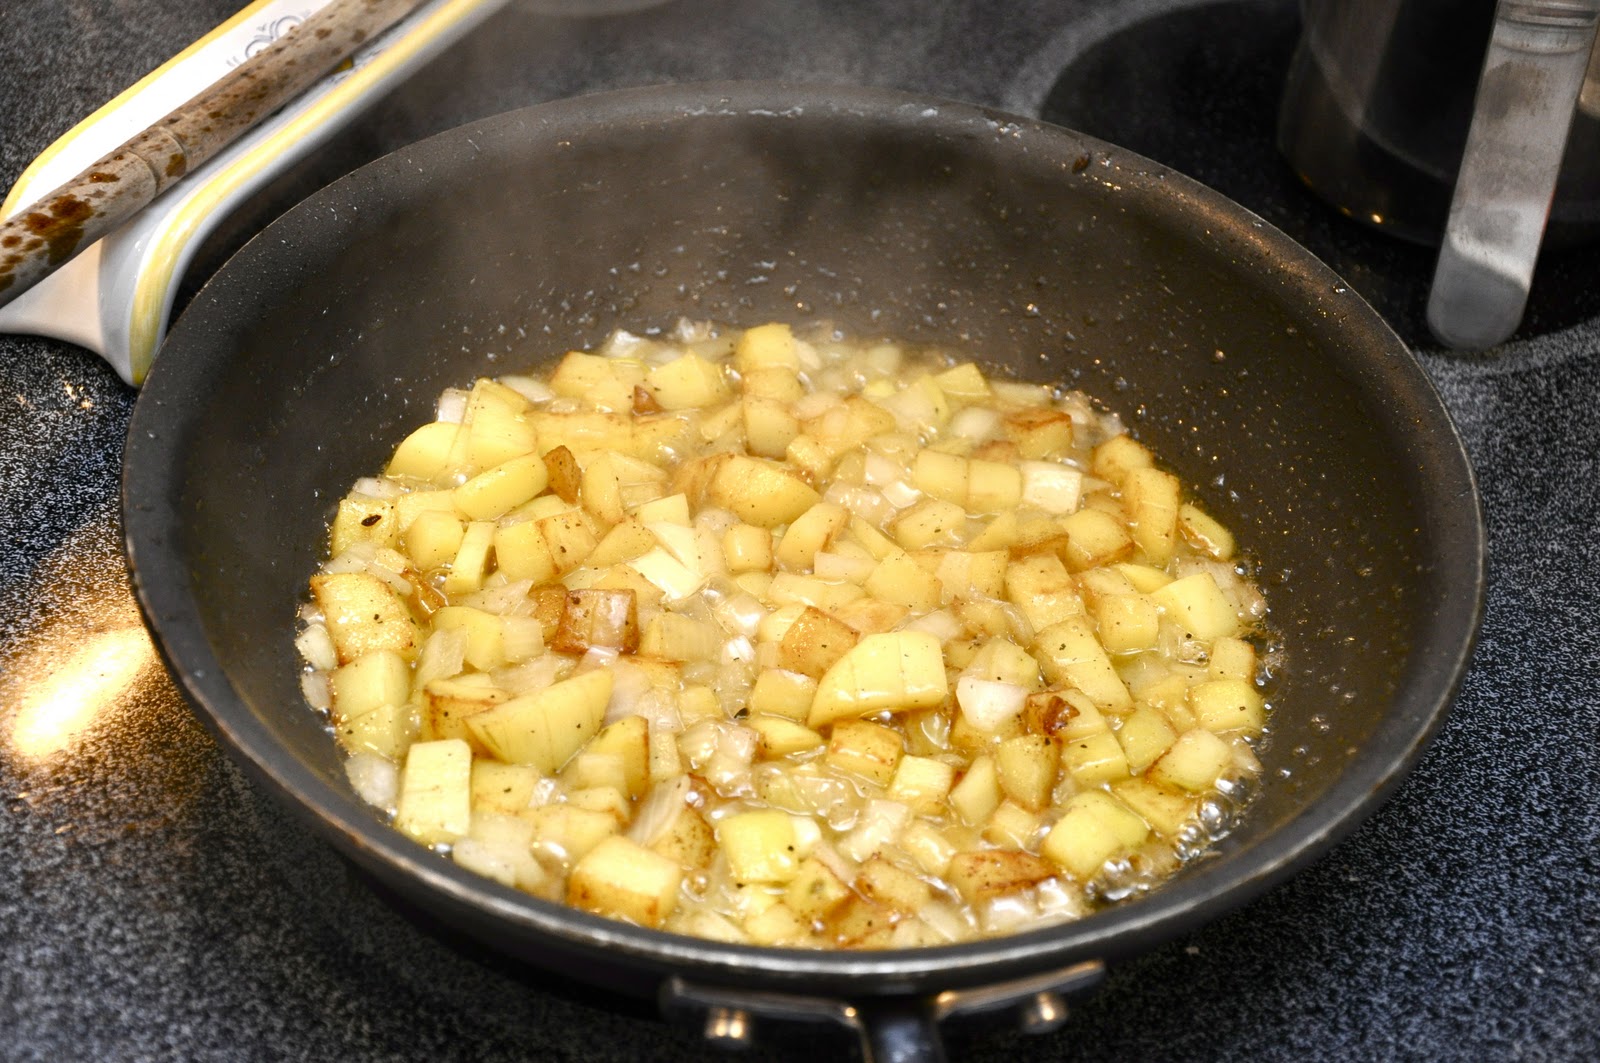
Now add your onion and potato and let them go until they are nice and tender, and not too brown. Season with salt and pepper as they sauté. I find that it helps to add some water and cover the skillet for a few minutes. This speeds up the cooking time and prevents burning.


Once the potato and onion mixture is done, add back the sausage pieces if you've removed them. Let them sauté together and get to know one another for a minute or two. If you are using the parsley, now is the time to add it to the mixture.


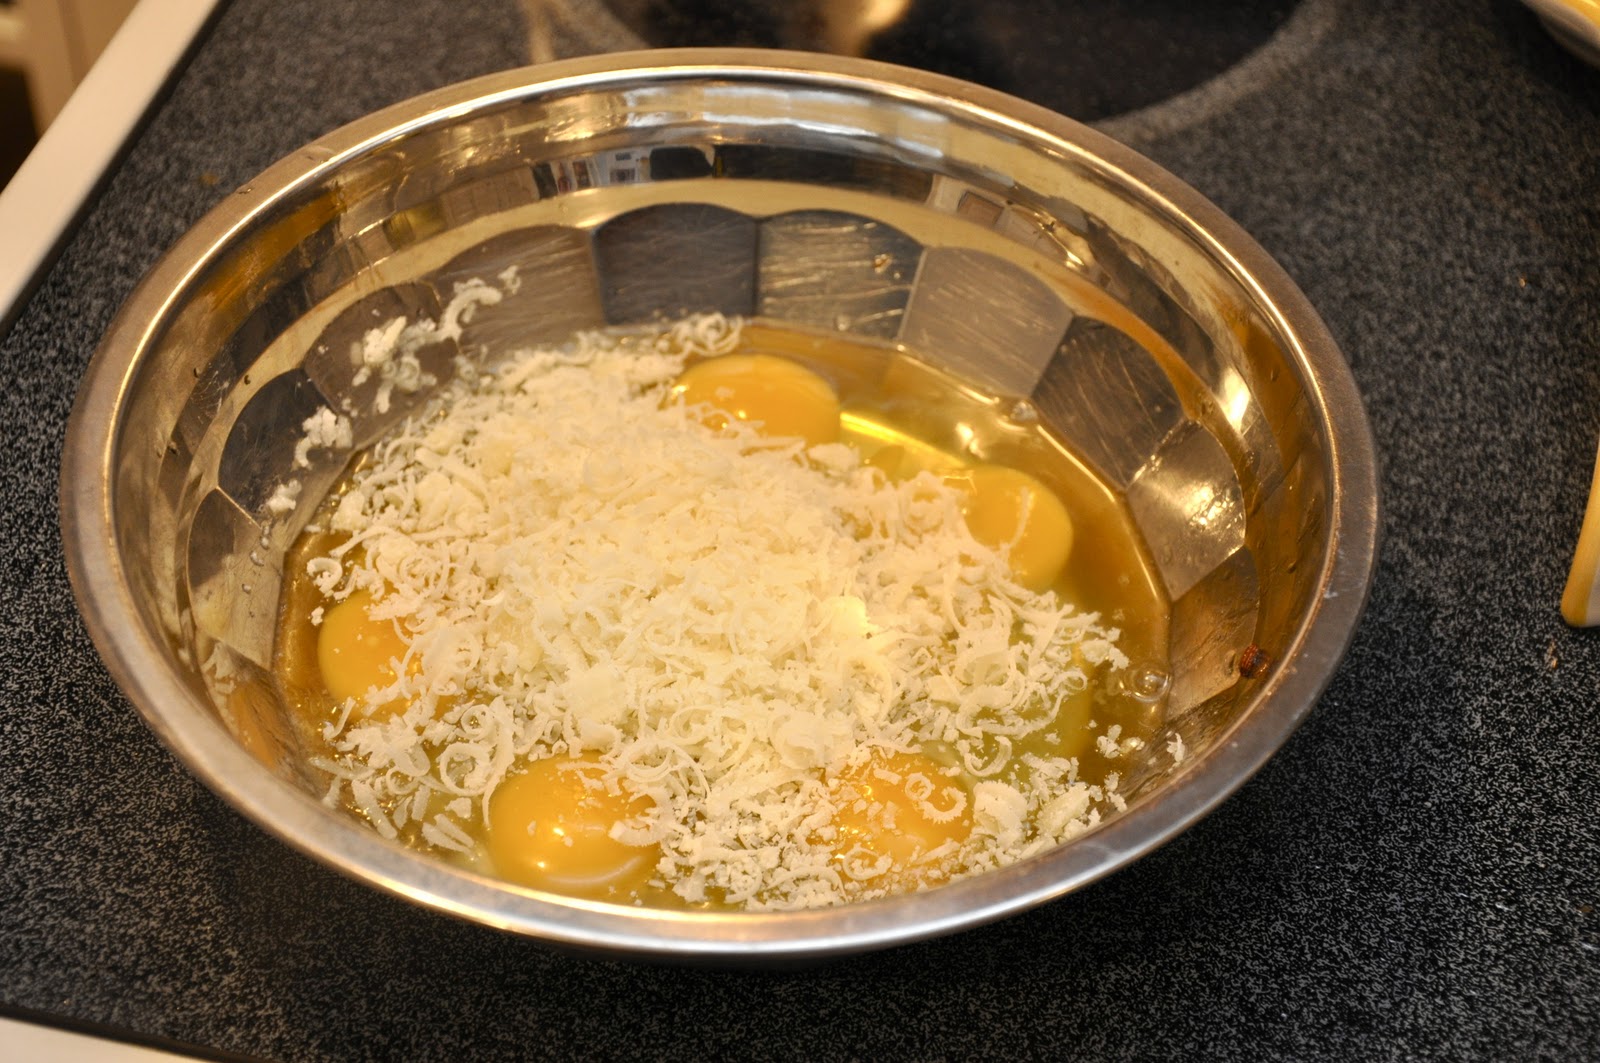
While those ingredients are getting acquainted, beat your eggs and grated cheese together in a bowl. If you are using pecorino, you should not need much salt, but with parmesan you will want to season the eggs a bit.


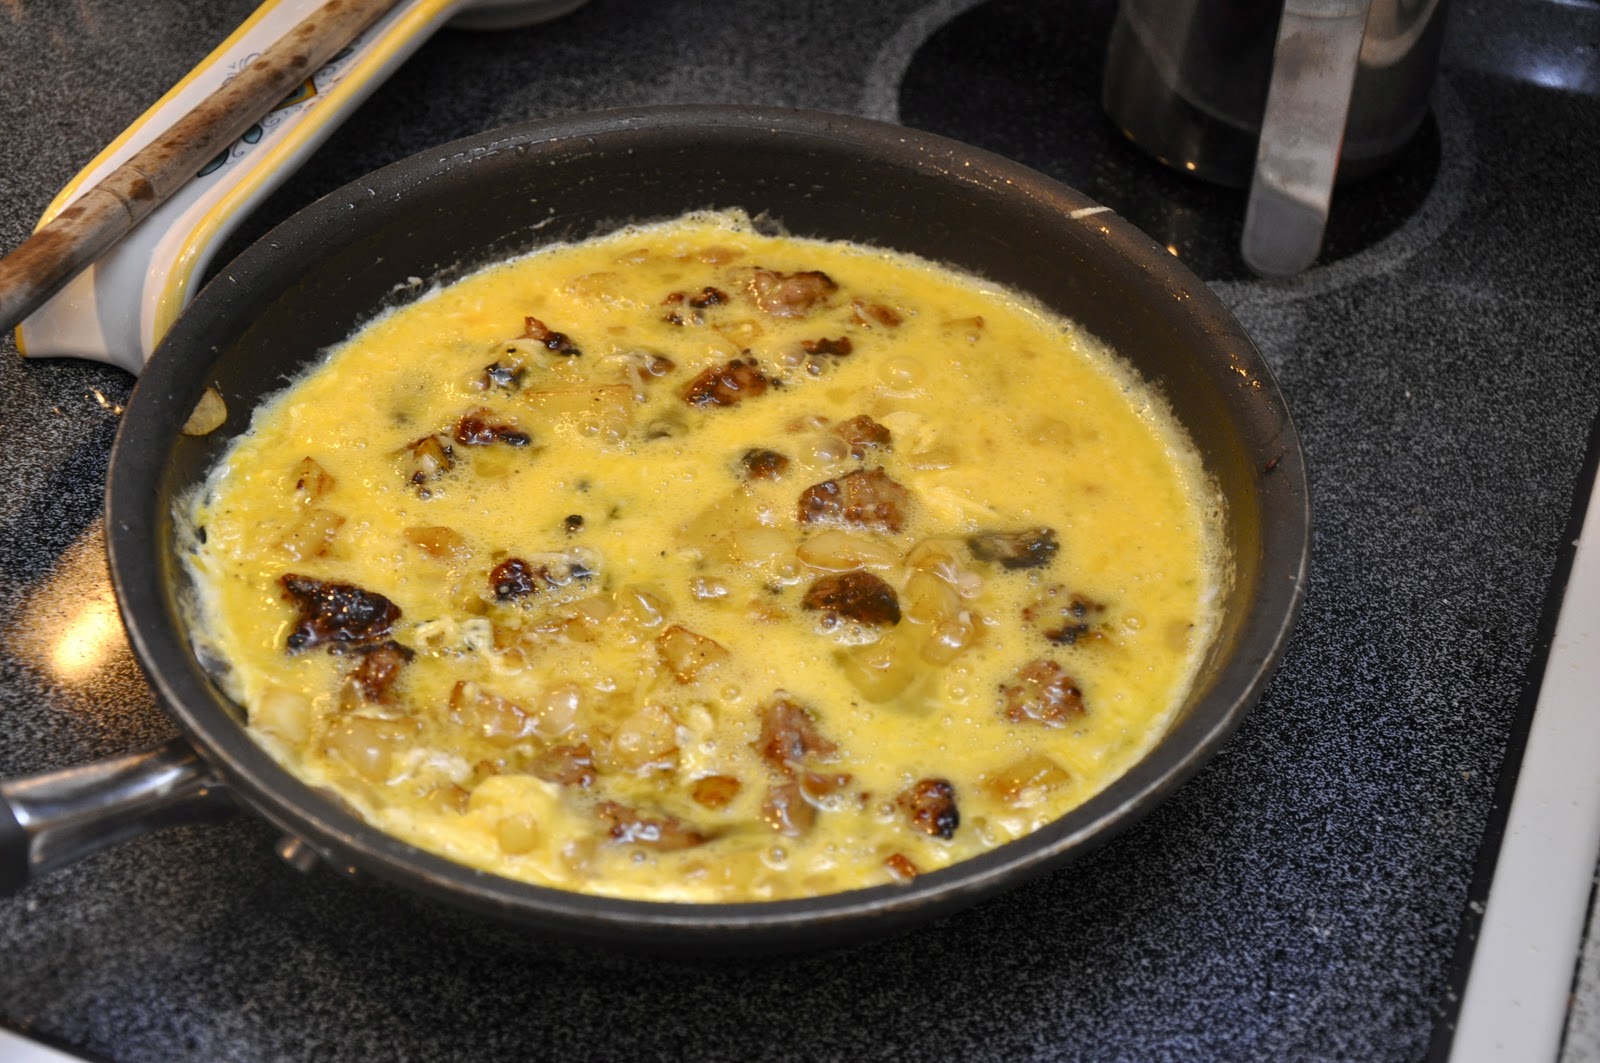
Pour the egg mixture over the flavoring ingredients in the skillet and mix once with a spatula or wooden spoon.


Once the flavoring ingredients are more or less evenly distributed though the eggs, stop and let the eggs cook, still over moderate heat, until they have almost entirely set, except for a thin layer of raw egg on top, and the bottom has nicely browned (but not too much). During this step, too, you can cover the skillet with a lid to help the eggs set. The whole process should not take more than 8-10 minutes. Use a spatula to check the bottom to make sure it's browning nicely but not burning. Regulate the heat if need be.


Now comes the tricky part: you need to flip the frittata over. I do this by using two plates. You slip the frittata out, cooked side down, onto a dinner plate. Then top that plate with another, and flip the two plates over, so that the frittata is now upside down, with the runny, uncooked side facing up.

Add a little more olive oil into the empty skillet, then slide the frittata back into the skillet. You will now want to let the runny side cook. This will take a lot less time than before, as you eggs should have already almost completely set, perhaps 3-5 minutes more. Again, check the bottom by raising a bit of the omelette with a spatula and take a peek underneath. It may look a bit misshapen at this point, but not to worry, all will be well in the end.


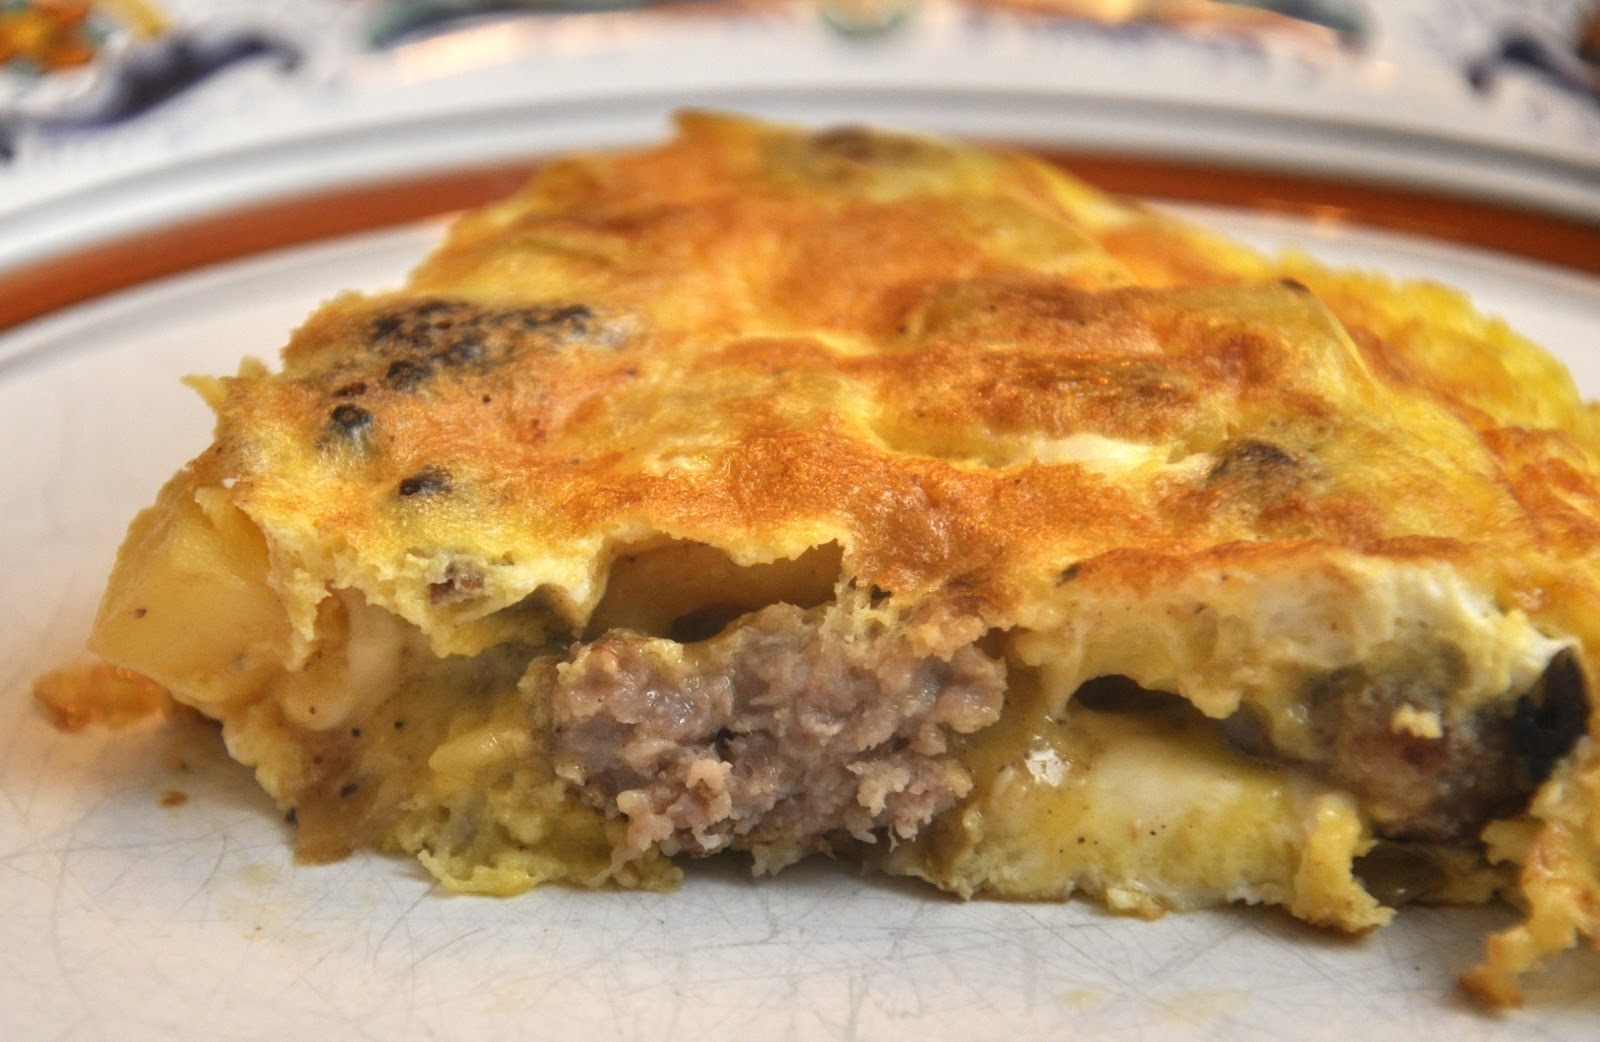
When the frittata is done, slide it out onto a dinner plate again. I find that the last-cooked side is the most attractive, so once again, I use another plate and flip it over onto its 'pretty' side. Let it cool for a few minutes and serve, cut into wedges.


NOTES: The two-plated flipping technique is one that I  really like, since it is basically foolproof. But if you like, you can use a single plate. You take the plate and cover the skillet, and then flip as described above. This saves you cleaning another plate but be careful, as the skillet is obviously going to be very hot.

Another technique is to run the skillet under a broiler for a few minutes, until the eggs are set and the top is nicely browned. This is even more foolproof than the two-plate flipping method, but don't think that the frittata turns out as attractive, and since the top has not 'tasted' any olive oil, it is a bit less savory.

Finally, they sell special double-skillets with interlocking handles specially-made for making frittata. I have never used one, so I can't comment on how well it works.

The recipe is a classic one, and admits a few variations. Besides the choice of cheese (which could also run towards fontina or another creamy cheese instead of a grated one), you can, of course, achieve a lot of variety by just your choice of sausage. And you can leave out the onion if you like, or substitute shallot or, if you want to get fancy, some chopped leeks.  And some recipes will call for parboiling the potatoes before sautéing them with the onion. That's an extra step that I've never tried and, to my mind, it takes away from the peasant character of the dish. But, of course, no one is going to  stop you if you like the idea...

A frittata can be eaten warm or at room temperature. Leftover frittata is perfectly delicious, and can be used to fill a sandwich—in the old says, this was a favorite lunch of Italian workmen and field hands. A frittata is a versatile dish. It makes a lovely and light secondo, but can be a snack or antipasto, or serve as part of a buffet. The one thing it never is—at least in Italy—is breakfast. But then again, why not? 

Sunday, January 9, 2011

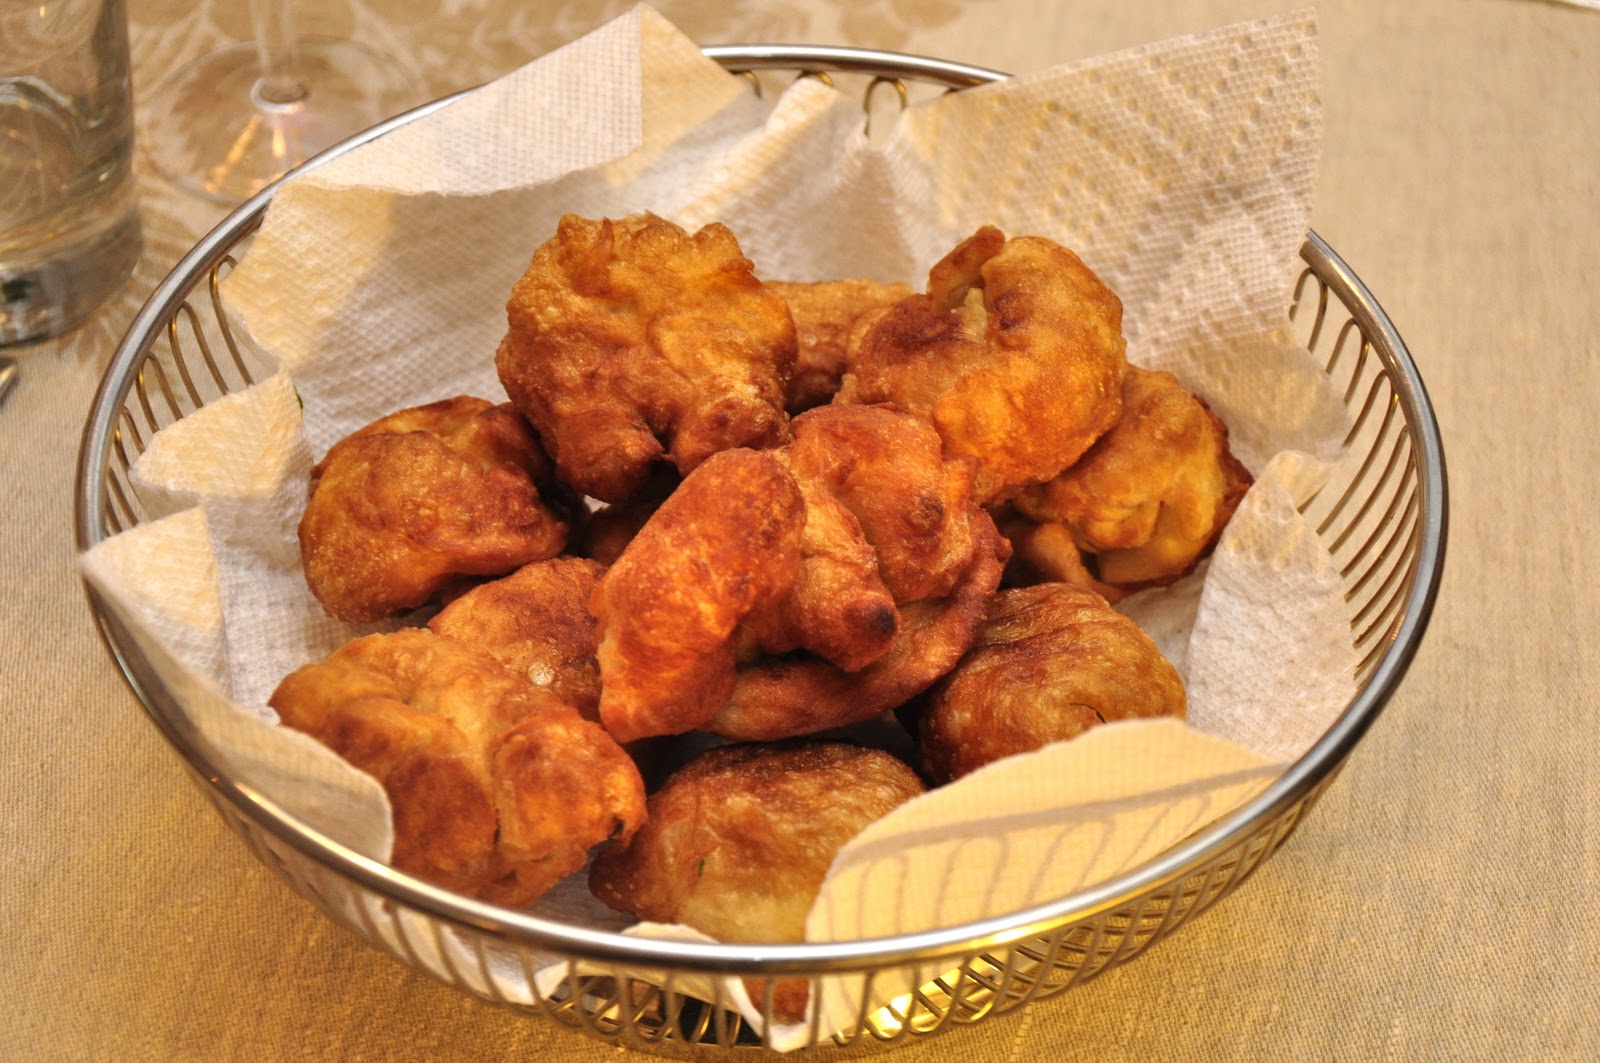
Zeppole


Zeppole are so easy to make—after all, they are basically just fried pizza dough balls—it is almost embarrassing to post about it, but since it was one of my favorite snack foods that Angelina made, it deserves pride of place on this blog. And, in any event, who doesn't like fried dough?

Zeppole can be sweet or savory. Angelina would make the savory variety. Simply make a regular batch of pizza dough (see my post on Angelina's pizza casereccia for the recipe) and, grabbing a walnut-sized ball of dough, make a well in the middle of the ball with your finger and place a single anchovy fillet inside. Then bring the sides around the fillet to cover the well and form a nice ball. You may need to roll the dough around in your hands a bit to make sure the opening is well sealed. Continue in the same fashion with the rest of the dough.

Now fry them gently in olive oil, or a mix of olive and canola oil, until they are nice and golden brown on all sides. It will take no longer than five minutes or so. Regulate the temperature so they do not brown too quickly, before the insides have a chance to cook. They will swell up as they fry, which is exactly what you want. Drain them on paper towels or on a rack.

Zeppole are really best eaten right away, but you can keep them warm in a slow oven, on a baking rack placed over a cookie sheet, or even reheat them later. They will lose a bit of their crispiness but none of their goodness.

NOTES: There seems to be some confusion, let's call it, about the name these little guys. That's not surprising, since it is common in Italian cooking, which is still highly regional, for the same dish (or with slight variations) to change name from region to place to place. According to Neapolitan gastronome Jeanne Caròla Francesconi, the 'official' name for what Angelina—and many others—call zeppole is pasta cresciuta, with the name zeppole reserved for the sweet variety. Readers have told me that they would call this dish pettole, which is apparently the name given to them in Puglia and Basilicata. Other there are still other names, depending on where you go: sfingi, fritelle... Well, this being Angelina's blog, I'll keep calling them zeppole.

The more common sweet version of zeppole are usually filled with crema pasticcera or sweetened ricotta mixed with some chocolate bits, or just the dough. Sweet zeppole dusted with confectioners' sugar before serving. Of course, all kinds of other fillings, both sweet and savory, make for many variations. Without a filling, they can be shaped into rings rather than balls. Some variations are made from choux pastry and baked. But these savory, anchovy-filled fried zeppole are the ones I remember from my childhood and will always be my favorite.

Zeppole are traditionally eaten in Naples on St. Joseph's Day, March 19. In Rome a very similar fried pastry is, in fact, called bignè di san Giuseppe and eaten the same day. But apparently in other parts of Italy, such as Calabria, zeppole are traditional around New Years, which makes them timely around now. But, honestly, these are so good you won't want to limit your zeppole making to one time of year. 

A wonderful snack food, zeppole can also be used as a kind of antipasto, either alone or as part of medley of different offerings. Just remember to make enough: like potato chips, no one can eat just one!

Post-scriptum: One reader (my mother!) informs me that, yes, Angelina also made the sweet variety of zeppole, too. Funny I don't remember that too well. But then, I was an unusual child in that I didn't have a sweet tooth. I would eat sweets, of course, if there were given to me, but I didn't seek them out. Nor, apparently, did I find them all that memorable. 

Sunday, November 14, 2010

Bagna cauda


Bagna cauda or, more properly, bagna caôda, means 'hot bath' in English. It refers to a typical Piedmontese dish for communal eating that is popular in cold weather months, a kind of cross between fondue and pinzimonio, if I can put it that way. It is, quite simply, a collection of raw and steamed vegetables, which you dip into a garlic and anchovy sauce that you keep warm like a cheese fondue in a little terracotta pot placed over a flame.

Here's the recipe for making the sauce:

Ingredients (to serve 4 or more):

4 (or more) cloves of garlic
100g (4 oz.) fillets of anchovy
200 ml (1 cup or small glassful) olive oil
50g (2 oz.) butter
Freshly ground pepper

Directions

Pour the olive oil into a small saucepan and heat gently. Add the garlic, which you can either slightly crush, for a milder flavor, or slice or even finely mince for a much more assertive flavor. Keep the flame quite low. You are infusing the oil with the flavor of the garlic, which should not brown at all. (If you like you can remove some or all of the garlic at this point to avoid its flavor from becoming overpowering.) After about 5 minutes, add the anchovy fillets and butter and continue to simmer very gently for another 10 minutes, until the fillets have completely melted and the various flavors have been well amalgamated. Season with a bit of ground pepper.

Pour the sauce into a small fondue pot, preferably made of terracotta, and keep warm at the table. Regulate the flame so that the bagna cauda simmers gently all the while you are eating. Serve with various raw and steamed vegetables in season, which you dip into the sauce.

NOTES: The typical vegetables that go with bagna cauda include roasted or raw red peppers, cardoons, artichokes, steamed potatoes, steamed or raw carrots, steamed cauliflower, fennel, celery or leafy vegetables like savoy cabbage, radicchio and endive. Harder vegetables are best lightly steamed, (or roasted) while larger vegetables should be cut into bit sized pieces or sticks. To this dish I added a somewhat unusual choice of Brussel sprouts—they were delicious in this sauce. I also used a bit of frisée, which go very well with the anchovies. But really just about any seasonal vegetable would be fine.

There are lots of variations in making the sauce. While the measurements are quite flexible,  as is the order of ingredients: whether you add the butter or oil, or the garlic or the anchovy first or at the same time. But most of the variations revolve around different ways to 'soften' the flavor of the garlic. The recipe above calls for adding the garlic, raw, to the sauce, but many recipes call on you to simmer the garlic beforehand, for up to an hour in milk or cream. The garlic is then drained and crushed or puréed, and the recipe continues from there. With this method, you can use larger amounts of garlic, as the simmering considerably softens the garlic's pungency. I even found this remarkable recipe for bagna cauda from the esteemed Kyle Phillips of About Italian Food, which calls for an enormous amount of garlic—5 heads (yes, heads, not cloves)—that simmer in milk for an hour before proceeding with the sauce. Some recipes also call for adding a bit of milk or cream at the end, before serving, which also is meant to smooth out the flavor. (Being a garlic hound, I like my garlic 'straight up'.)

In Italy, it is quite usual these days to serve bagna cauda in individual little terracotta fondue pots called forneletti (known in Piedmontese as fujòt). Unfortunately, I didn't bring any back from Italy and they are apparently impossible to find here in the US, so—as you will see above—I improvised with a terracotta soup bowl placed over a fondue burner. A regular fondue pot would also do fine. The one from Emile Henry is made from terracotta and is the best one I've seen for the purpose on the market here.

While usually categorized as an antipasto, bagna cauda can easily serve as a meal, followed by some stewed fruit, for example pere in vino rosso. Serve with a robust red wine and lots of water, too, to quench your considerable thirst.

Saturday, October 30, 2010

Chicons au gratin


There's something about chilly weather that demands a nice gratin—that piping-hot, cheesy, gooey goodness is just the thing to warm your body and soul on a mid-Autumn evening. And here is one that is sure to satisfy: another Belgian classic, chicons au gratin, also known in France as endives au gratin. It consists of Belgian endives, braised in butter, wrapped in ham slices and covered with a rich mornay sauce before getting browned in the oven. (I get hungry all over again thinking about it!)

Ingredients (for 4 servings)

4 medium-sized Belgian endives
30g (2-3 tablespoons) butter (plus a bit more to butter the baking pan)
Salt and pepper
500ml (2 cups) of béchamel sauce (see recipe here)
200g gruyère (or other good, meltable Swiss cheese), shredded
4 slices of best-quality cooked ham 

Directions

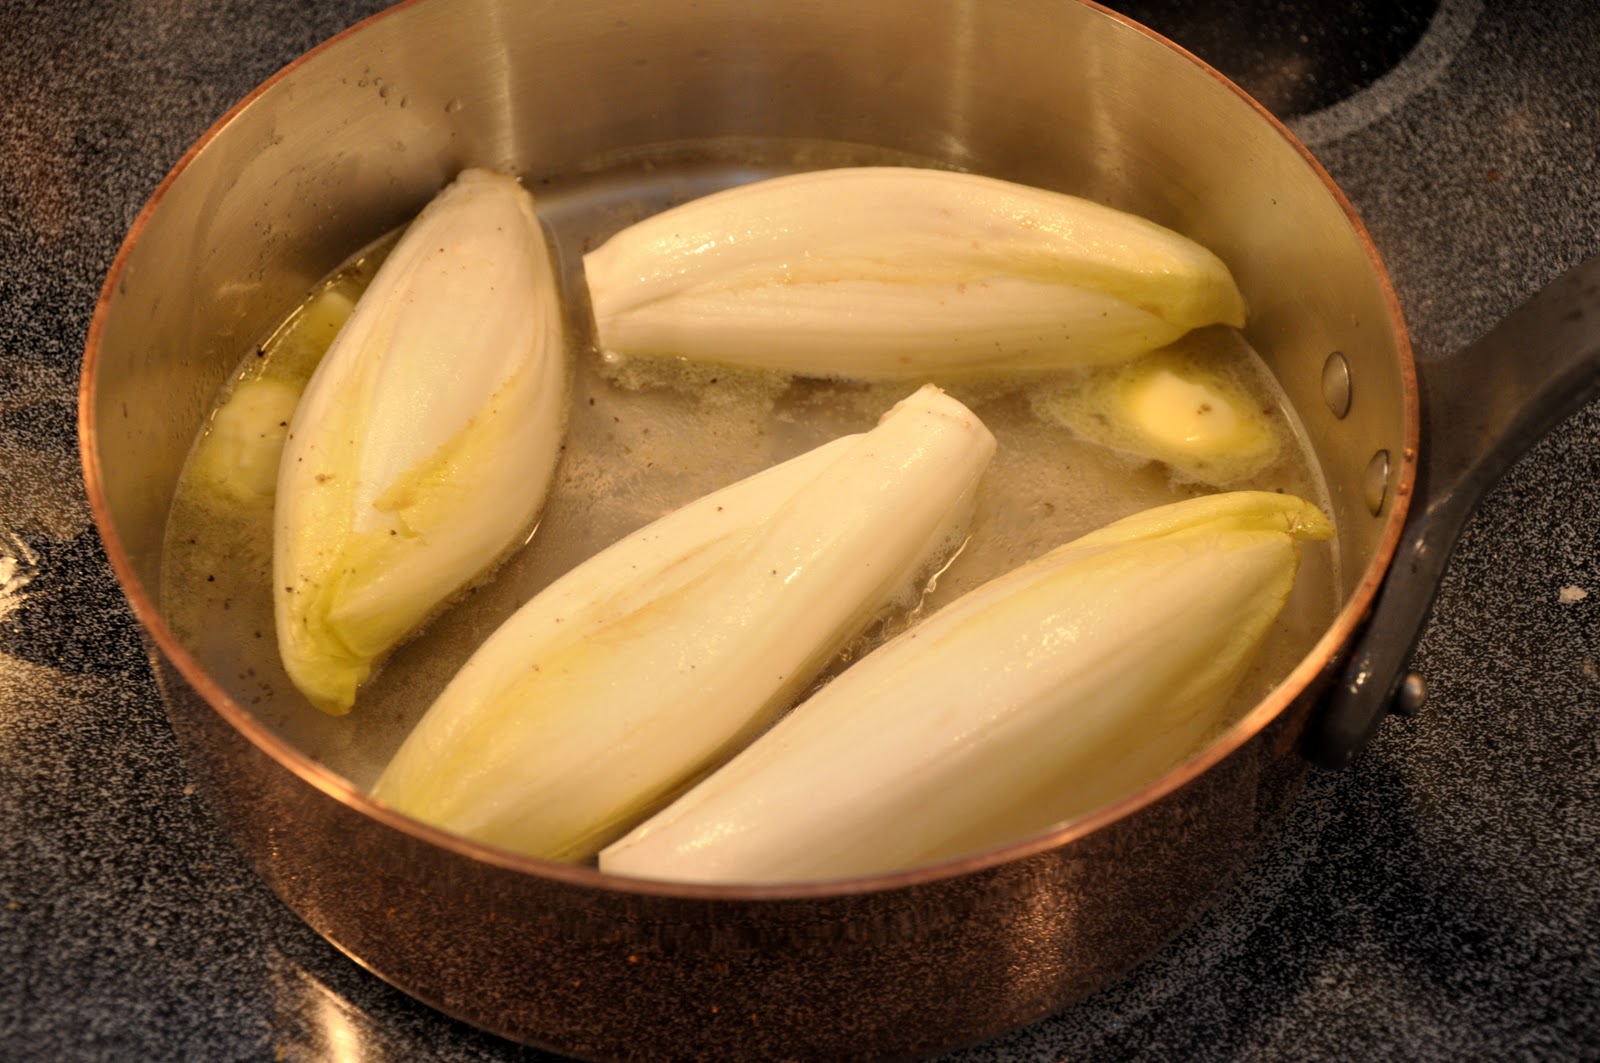
Begin by removing any discolored leaves from the endive and trimming the root end. Place the endives in a sauté pan with the butter and a glassful of water. Season with salt and pepper.


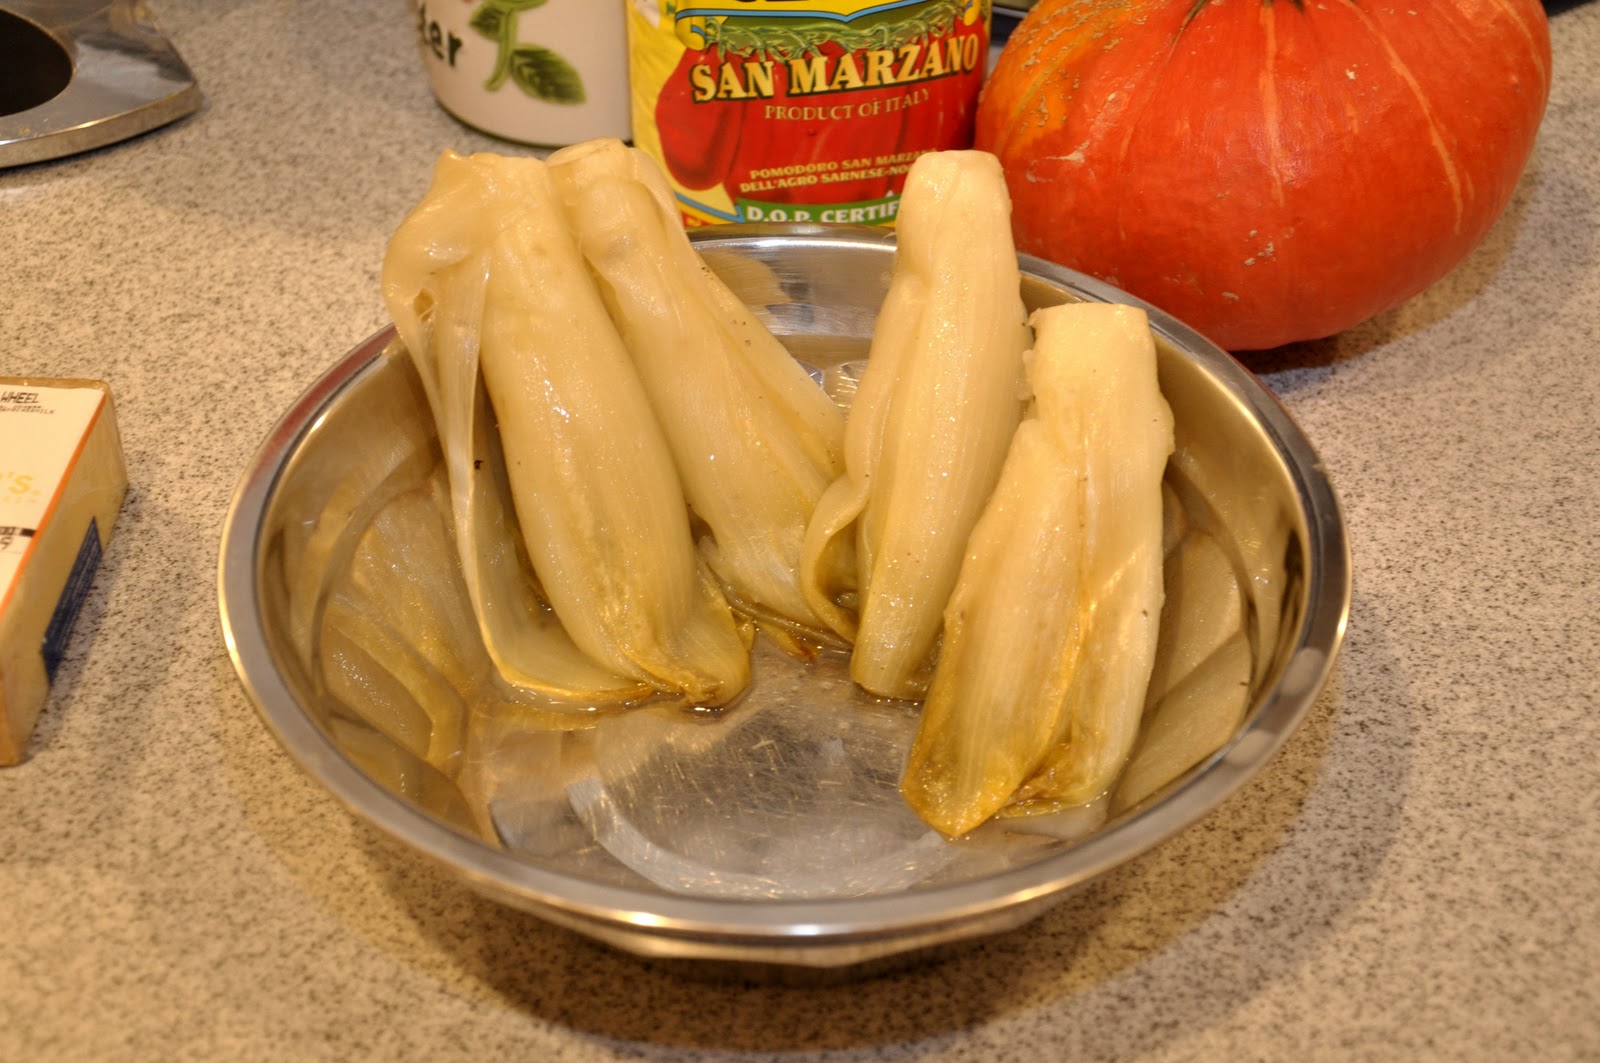
Allow the endives to simmer, covered, until they are quite soft, about 20-30 minutes. If you like, you can let them go longer, allowing them to turn a nice golden brown. Either way, drain the endives, root ends up, so that any excess water will drain off. (You may be tempted to skip this step, but don't—otherwise, you may wind up with soggy vegetables and a runny sauce!)


While your endives are braising, make your béchamel sauce in the usual way, and when it is done, add the gruyère, holding back about a third, however, for later. For extra flavor,  you can add some of any cooking liquid left over from the braising or draining of the endives. (This sort of béchamel with cheese is called a sauce mornay.)

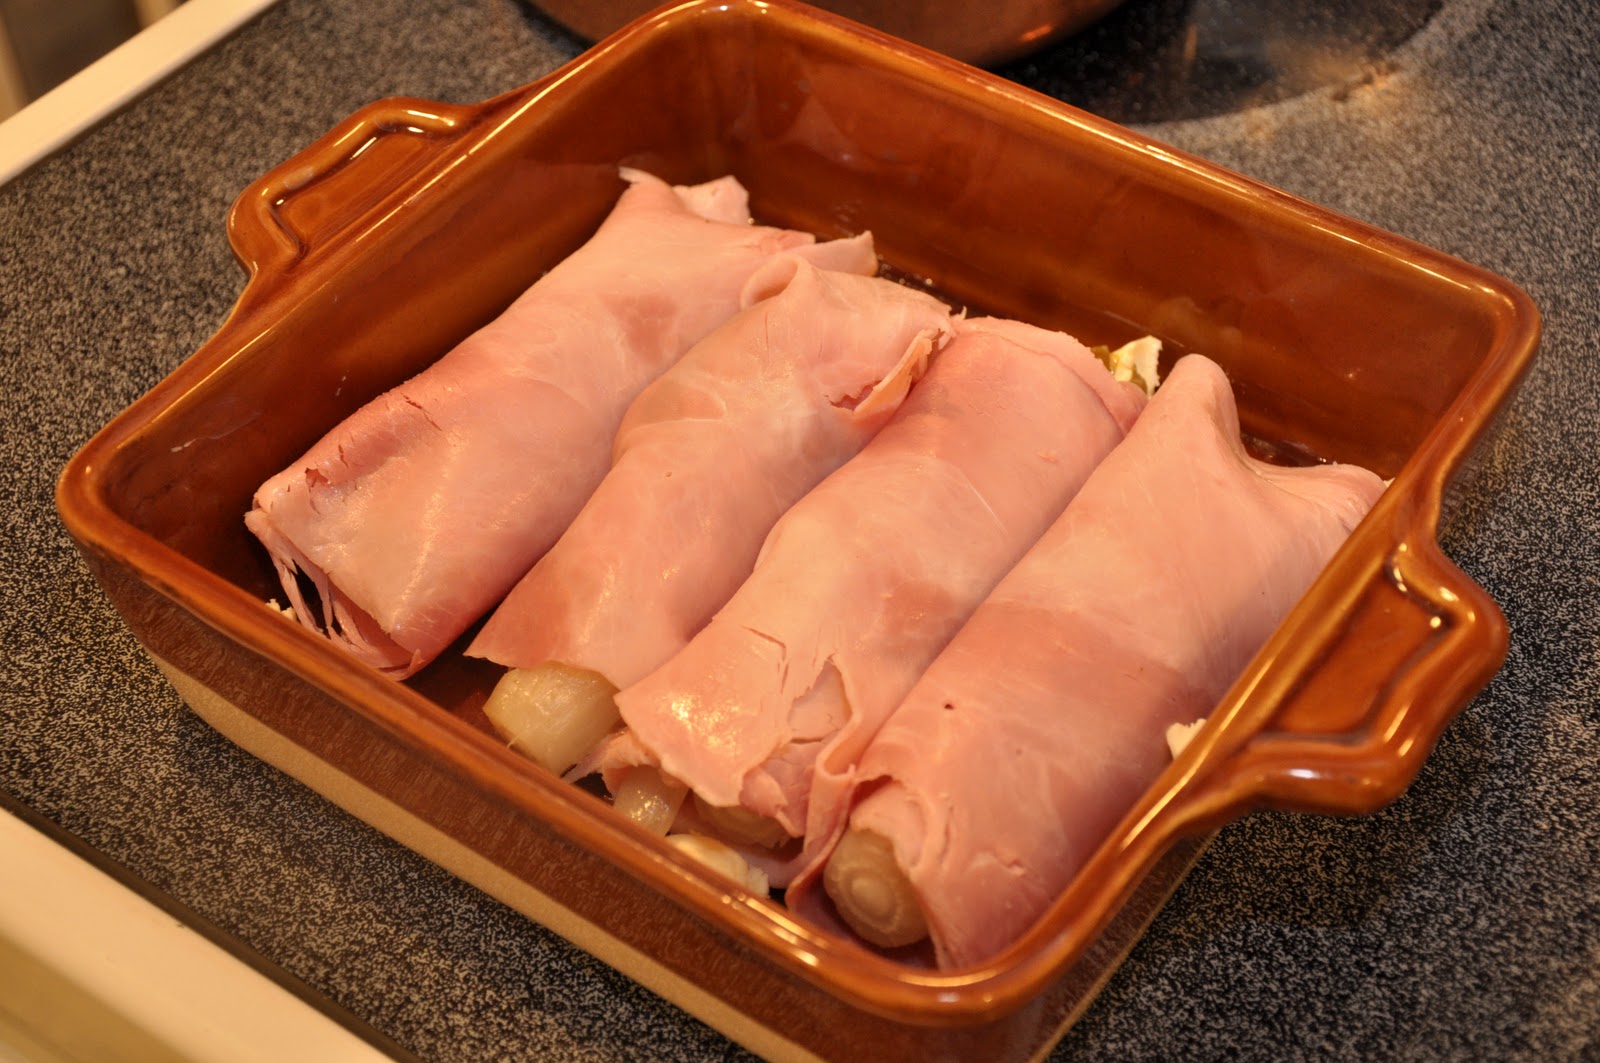
When your endives are well drained, take them one by one, and place them on one of the ham slices, then roll the slice around the endive, covering it completely.


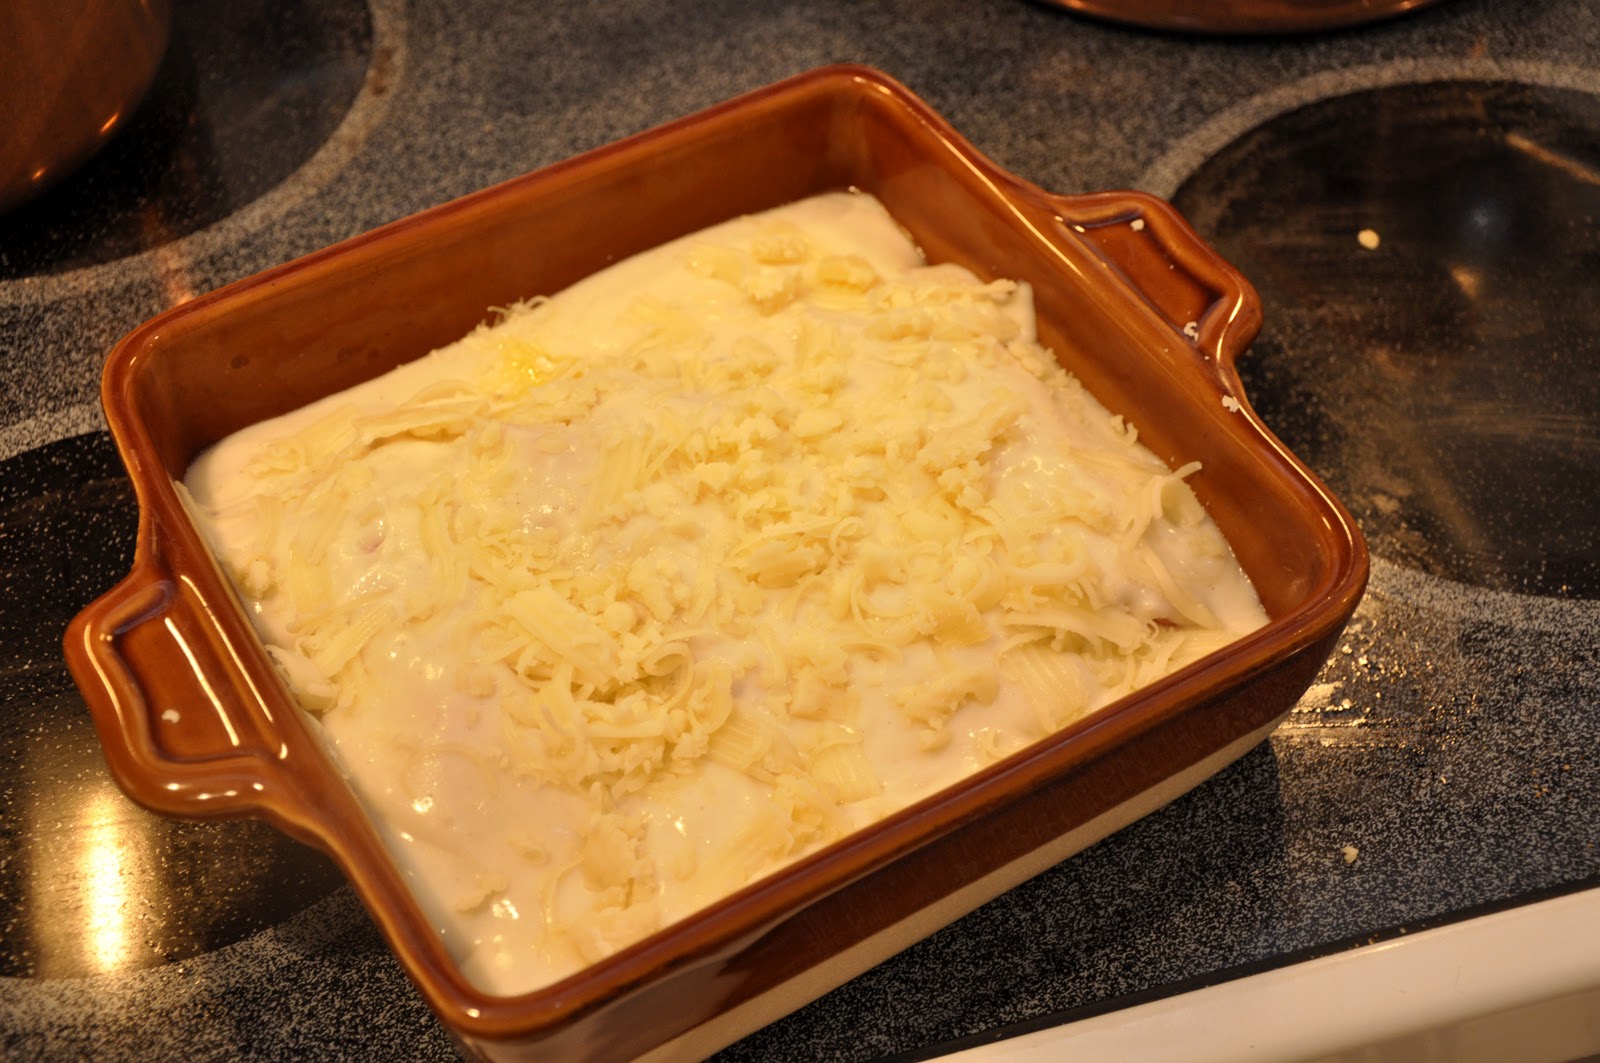
Butter a baking dish just large enough to contain your endives. Arrange them neatly in the dish, then pour over the mornay sauce. Cover the dish with the remaining cheese. Dot the top with some additional bits of butter.


Bake the dish in a hot oven (200C/400F) for about 30 minutes, or until the top is nicely browned and the sauce is bubbling hot. Let the dish cool off for a few minutes before serving.

NOTES: The success of this simple dish will rely heavily on the quality of its ingredients. Besides the endives themselves, which should be fresh, of course, and ideally free of any green leaves, you want to use the best quality ham and cheese you can afford. If you use packaged ham slices and supermarket 'Swiss cheese', you will wind up with something tasty enough but pretty pedestrian. Use real, good ham and true gruyère and you will have something very special indeed.

You can save some time by simply parboiling or, better yet, steaming the endives in lieu of braising. Many if  not most recipes call for it, in fact, and it takes only about 10-15 minutes. But I find that braising in butter makes a subtle but significant difference in taste and texture. And, not to nag, but  let me repeat: draining the endives any excess liquid is perhaps the single most important 'trick' to success, so don't forget!

This dish can be served on its own as a hefty starter. As a main course, it is often accompanied by potatoes, being Belgian, some pommes frites would be an obvious choice, although I find they go very nicely with either mashed or even just plain steamed potatoes which are delicious dipped in that mornay sauce....

Saturday, October 9, 2010

Cappelle di funghi alla griglia


Grilling need not come to an end just because the summer is over, especially if the weather is still fine, as it is this weekend where we live. Beautiful cloudless skies and mild temperatures are perfect for grilling—even better, if you ask me, than the sultry days of August and early September. And many seasonable vegetables are wonderful grilled, none more so than mushrooms. Grilled mushroom caps are a special early autumn treat. Their meaty texture and smoky flavor resembles nothing so much as a nice, juicy steak. And they're just as simple to make.


Just make a quick marinade from abundant olive oil seasoned with a finely minced garlic clove, finely chopped parsley, salt, pepper and a pinch of oregano or—if you have some—that special herb called nepitella which goes perfectly with mushrooms. Take some large mushroom caps and brush them generously with the seasoned oil, top and bottom. Then grill them over a hot fire, about 3 minutes per side, and serve on a bed of greens or—for that special Fall feeling—some radicchio leaves dressed with oil, salt and pepper. Drizzle some olive oil over the top, season generously with salt and pepper and sprinkle them with some finely chopped parsley. Ecco fatto!


NOTES: The finest mushrooms for grilling, and the most typical in Italy, are fresh porcini. But if you can't find them or just don't want to pay through the nose, then other firm-fleshed mushrooms like portobellos will do. Large whole caps really do make for great eating, but smaller mushrooms also grill up fine—just reduce the grilling time according to size. Some people like to slice the mushrooms before grilling, in which case make sure you use a fine grate or grilling basket so they don't fall on to the coals.


Mushrooms absorb a lot of condiment, so do be generous with the marinade and make sure to dress them well before serving. In fact, I like to have some extra olive oil, salt and pepper on the table so your dinner companions can add more seasoning to the mushrooms if they want.


Radicchio really marries well with mushrooms, but you can also serve your grilled mushrooms, like a fine tagliata di manzo, with arugula, or just on their own. They make for a nice antipasto or a vegetarian (vegan, if fact) second course. They can also serve as a topping for an actual steak if you feel like meat.

Sunday, October 3, 2010

Sformato di finocchi


The sformato (a term literally meaning 'unmolded') is something like a savory flan or perhaps a soufflé without the puff. At its most basic, it is actually a rather simple dish, a mixture of puréed or finely diced vegetables with béchamel and eggs, baked or steamed in a mold until set.

A sformato can be made with practically any vegetable which can vary according to the season, so you can serve a sformato all year round: peas or asparagus in the spring, zucchini or green beans in the summer, and so on. Now that the weather is rapidly cooling off here in the northern hemisphere, I turned to one of my favorite cool weather vegetables, fennel. Now fennel is delicious raw, served in a salad or even on its own, after dinner, as a kind of palate-cleansing 'fruit'. When cooked, its anise flavor mellows considerably and becomes, for lack of a better word, 'buttery' in flavor, and marries very well with butter, cream, cheese and other dairy products. That makes it a perfect candidate for a sformato.

Begin by boiling, or even better, steaming fennel bulbs, trimmed of their stalks and cut into halves or quarters, according to their size. For a family-sized sformato, about 500g or a pound of fennel, two large bulbs, should do well. When they are tender—a knife should slide easily in and out of them—drain them well. Let them cool a bit and, when they are cool enough to handle, either cut them into small dice or purée them, as you prefer. (I also like to add some of the fronds from the stalks for extra flavor.) A food processor works well for the purpose. Then melt a good amount of butter in a skillet and add your fennel, allowing it to absorb the flavor of the butter and to evaporate any residual liquid.

Now make some béchamel in a separate saucepan, in the usual way (see this post), using 2 cups of milk for every 500g (or pound) of fennel. Add the béchamel to the sautéed fennel, and season to taste with salt, pepper and a handful of grated parmesan cheese. Allow the mixture to cool off and  then add four eggs. Mix everything up well and pour into a well-greased loaf pan or other mold (see Notes below). Place your mold into a larger baking pan and pour water around the sides, to make what the Italians call a bagnomaria or 'bain-marie' in French and English:

 
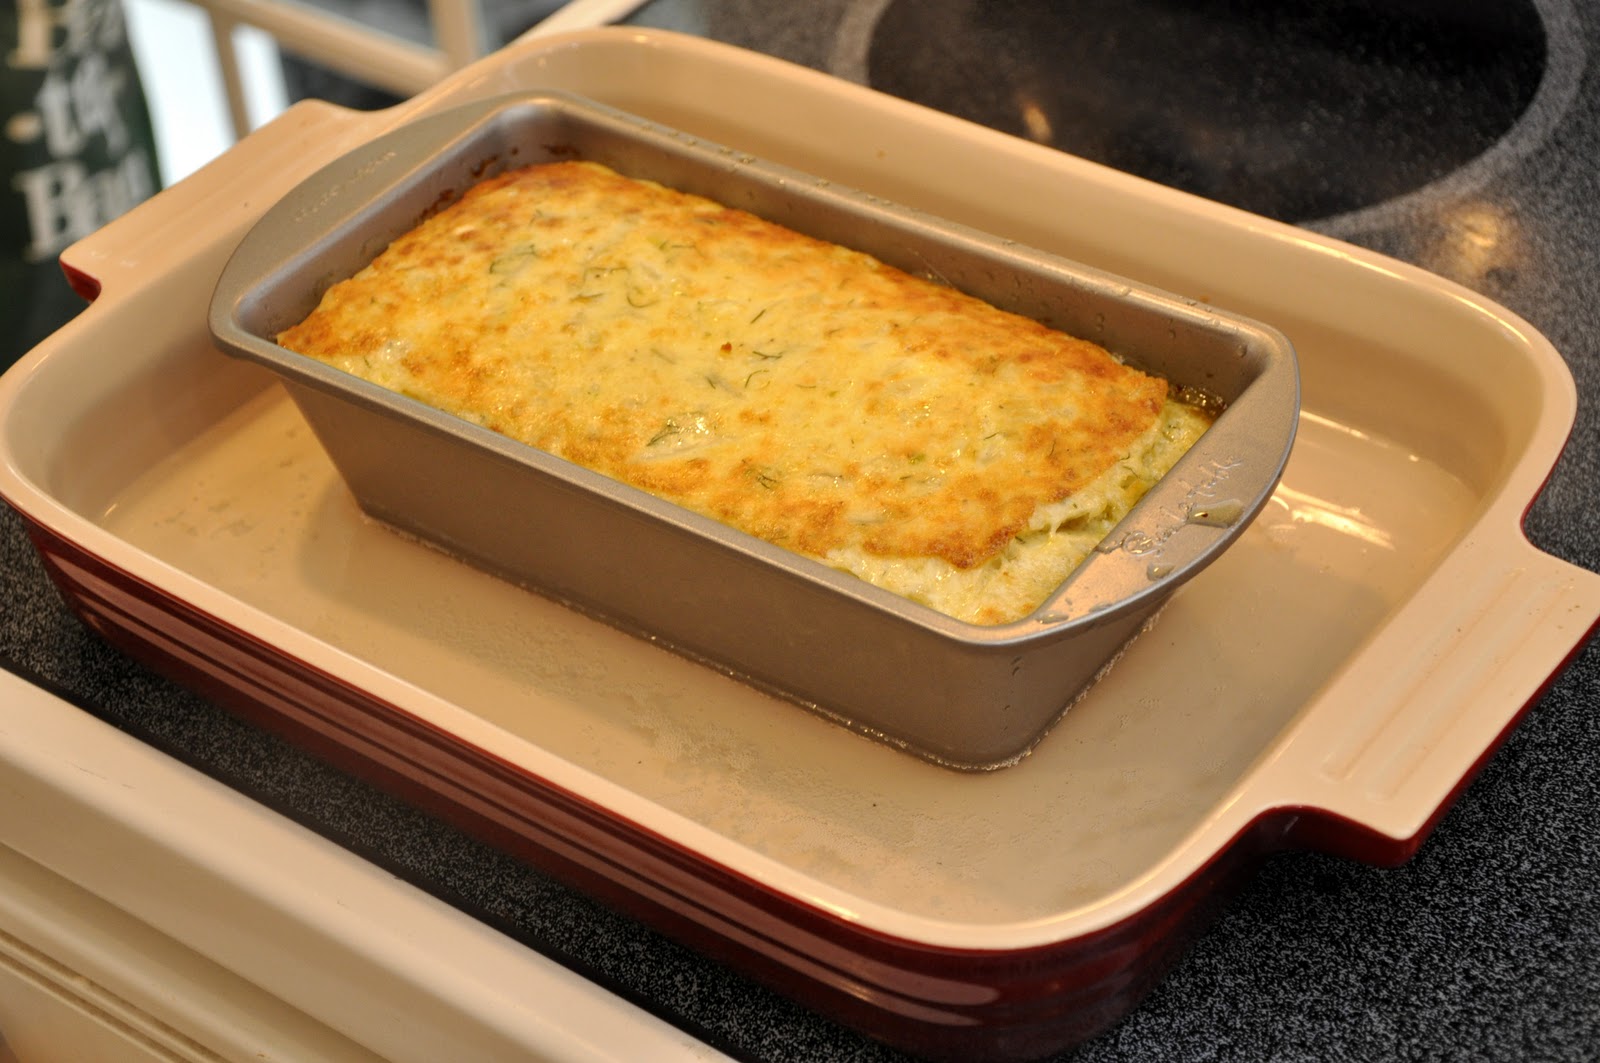
Place the baking dish into a moderately slow oven (about 325F, 170C) and bake until the mixture has fully set. To test doneness, insert a paring knife or skewer inserted into the mold; it should come out completely clean. Baking time varies according to the size and shape of your mold, but for the loaf pan shown in the picture, it took about an hour. Individual molds will, of course, take much less time, as little as 15-20 minutes.


 Let the sformato cool for about 15 minutes or so. Loosen the sformato from its mold by running a knife along the edges of the pan. Then unmold itonto a serving platter. This can be done by placing the platter over the loaf pan or other mold, then holding pan and platter together with both hands, flipping it over. Gently remove the pan, revealing your sformato in all its glory. Serve warm or at room temperature.


 NOTES: As I mentioned, you can use the above basic recipes with just about any vegetable, using the same technique and the same proportions. I find that 'solid' vegetables like green beans, carrots, mushrooms and the like work best with the above basic recipe. Softer vegetables that tend to 'melt' when cooked, like pumpkin can also be used but you should reduce or even eliminate the béchamel and up the number of eggs to maintain the proper texture. You can also make sformati with other ingredients, including pasta, but the recipe is sufficiently different that it deserves a separate post.

The number of eggs varies from recipe to recipe. For 500g or a pound of vegetable, some recipes call for as few as a single egg, or as many as the four indicated in this recipe. Obviously, the more eggs, the firmer the texture of the final dish. Some recipes call for yolks only, which I imagine also produces a firmer result. You can also vary the texture by making the béchamel thicker or thinner, according to the amount of flour you use. (Too thin, though, and the sformato may not hold together.)

One important point: make sure that your vegetables are not 'water logged' when you mix them with the rest of the ingredients. That will tend to result in a rather flaccid texture. This is why steaming is better then boiling, and why it is important to sauté the vegetable in butter until quite dry. (The sautéing also gives it a wonderful flavor.)

As mentioned, you can use any number of different types of molds: a simple loaf pan works very well, but you can make a sformato in a round mold, or a ring mold, or a square mold, as you like. And rather than making a single 'family style' sformato, for more formal occasions you can use individual ramekins (or even a muffin pan!) to make individual sformati, which make for an impressive 'gourmet' presentation on the plate. For an even more elegant presentation, serve your sformato with a sauce—a creamy cheese sauce or a light tomato sauce or a coulis made from a vegetable with a complementary flavor. You can also garnish the sformato with sautéed vegetables, either the same vegetable as you used to make the dish, or some other vegetable that would go well with it.

At its most basic, though, this is actually a very simple, light yet rich, dish very suitable for home cooking. The only really tricky part is the unmolding. If you're lucky, the mold will come off perfectly cleanly, leaving a perfectly formed sformato. But if not, no worries—the taste will be just as good. You can just use garnish or sauce to hide the imperfection. To increase your chances of success, be generous when greasing your mold. And to be doubly sure, you can use a piece of wax paper, cut to size, to line the bottom of your mold. You then just gently remove the paper from the unmolded sformato before serving. Or, for a very informal meal, you forget all about it and just serve the sformato directly from the pan at table, with a spoon or metal spatula. Of course, technically you will not have a 'sformato' at that point, but I'm sure no one will mind.

The sformato is a usually vegetable dish, but it is too elaborate, really, to serve as a side. Traditionally, it served as an intermezzo, the course that came after the primo and before the secondo in very formal dinners. If you want to impress your guests, you can use it that way. For everyday eating, a sformato is very versatile. It can be an antipasto, a first course or even a vegetarian second course, as you prefer. There are even sweet sformati for dessert… but that's a subject for another post.

Sunday, September 12, 2010

Rillettes de porc


One of my favorite ways to while away a rainy Sunday afternoon is to browse through my old cookbooks. I have a fairly extensive collection, scattered in different places around the house, and there is nothing so pleasant than finding one of those old tomes that I had forgotten I even have and diving back into its old recipes, a little like happening on an old lost friend on the street and striking up a conversation.

So it was this afternoon. I thumbing through some of my older cookbooks that I keep down in the den and came across an old, yellowed paperback, copyright 1968, entitled Everyday French Cooking. In fact, that plain-jane title is a bit deceiving, as it this little book is, in reality, a translation and adaption of the Nouveau Guide Culinaire by Henri-Paul Pellaprat, one of the most influential French chefs of the last century. I leafed through the book and found a recipe for one of my favorite appetizers of all time, rillettes de porc, or 'potted pork'. I hadn't had rillettes quite literally for years, since I lived in Paris in the early 1990s in fact. Seems like yesterday but, I suddenly realize as I write this, it was something close to twenty years now… Can it really have been that long ago? Anyway…

I quickly made note of the recipe in my head—rillettes are actually surprisingly simple to make—and whipped it up at my leisure this afternoon. It takes a long time but practically cooks itself. When it was done, I sat down to munch on a few pieces of toasted bread slathered with the stuff. Taste memories last a long, long time, I guess, because the unmistakable taste and texture was just as I had remembered it: wonderfully and deeply savory, with a creaminess that quite literally melts in your mouth. Served with a nice medium-bodied red wine, I almost felt like I had traveled back in time.

In any event, here's the recipe: Take a good 750g (1-1/2 lbs.) of pork shoulder, cut up into cubes, and mix it with an equal amount by weight of fat back or best-quality lard. (The authentic recipe calls for the actual fat, which renders in the cooking process, but since I had some very good quality lard around, I used that and it worked just fine.) Season generously with salt, freshly ground pepper, a bay leaf, thyme and—here's where I parted ways with M. Pellaprat—a few cloves. Place it all in a heavy pot (enameled cast iron works well) and add a good glassful of water. Bring to a simmer on top of the stove. Now you can continue cooking over gentle heat on top of the stove or, as I prefer, placing the pot in a slow oven (325°F, 160°C. Let the pot simmer for a good 3 hours or so, or until all the water has evaporated and the pork is fork-tender and lightly browned. If the meat hasn't browned, you can raise the heat so it does for a few minutes at the end.

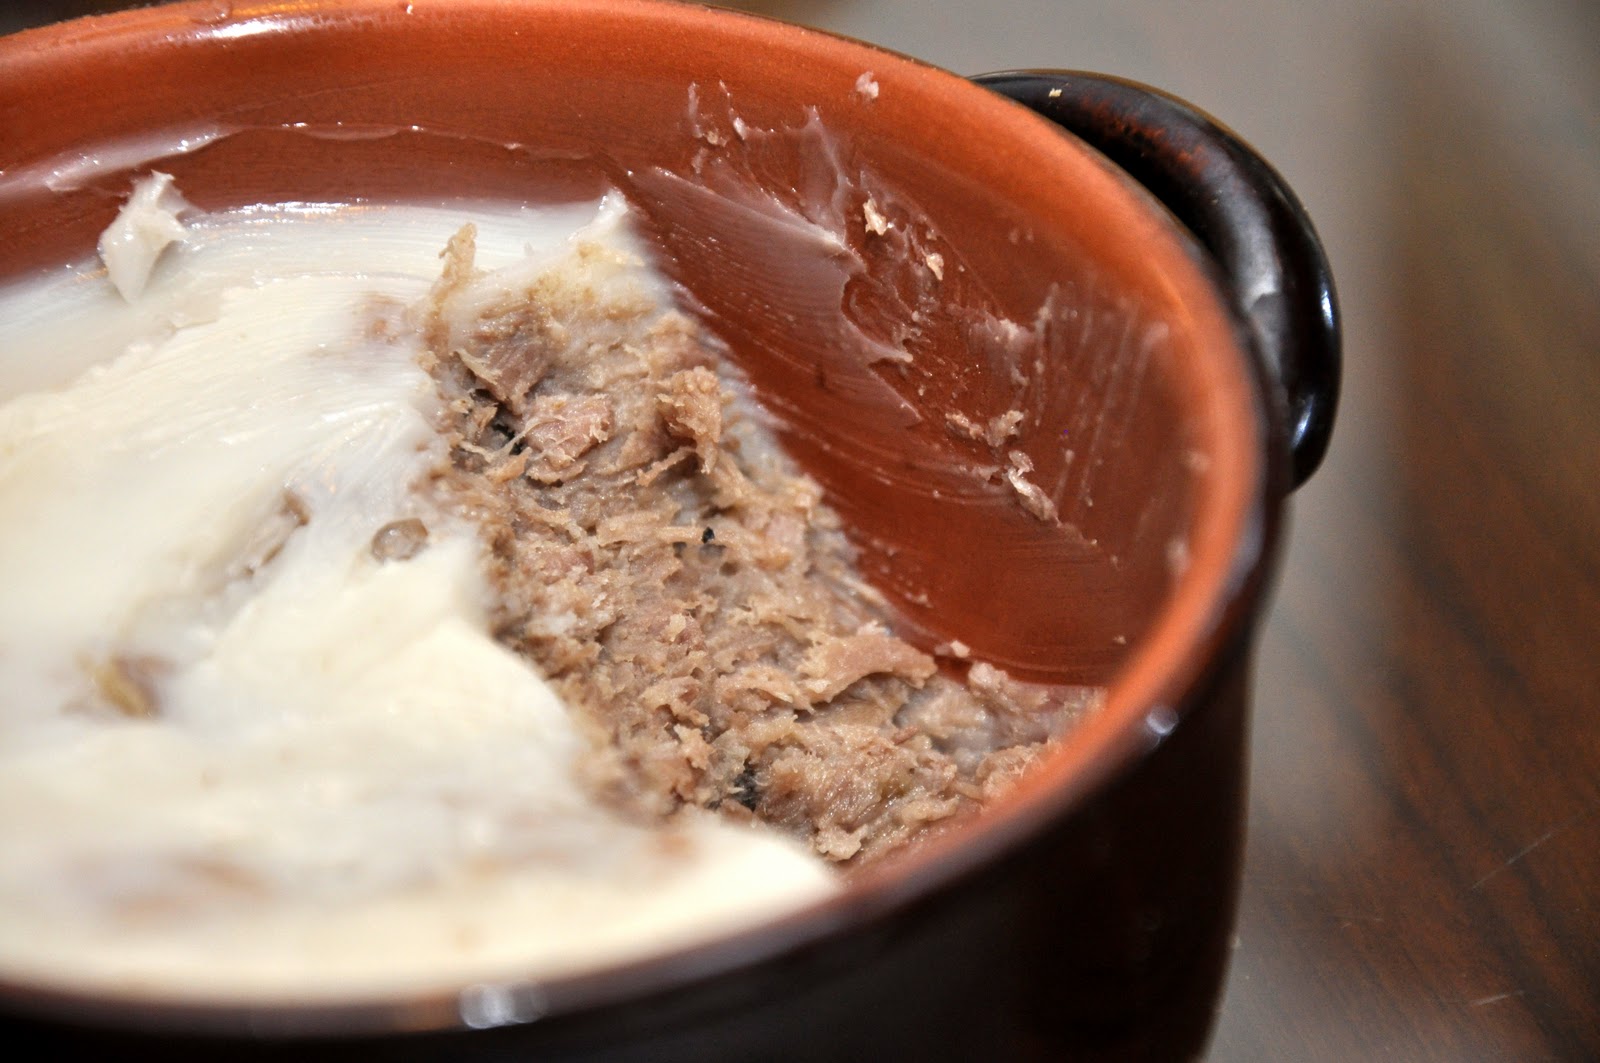
Let the pot cool down a bit, then strain the meat from the melted fat by turning the pot's contents into a colander placed inside a large bowl. Remove the bay leaf and transfer the meat into a food processor, together with a ladleful of the rendered fat. Process, using the pulse function, until the meat is nicely minced but still has some texture to it—not yet a purée. Pack the mixture into jars, ramekins or other small containers and top off with the remaining rendered fat.

Let the containers cool completely, then place them in the fridge until ready to use. The fat will congeal and turn a creamy white color, forming protective layer on top of the meat. Use as you would any spread, slathered over toasted bread.

 
NOTES: The seasonings and cuts of meat used in rillettes can vary from recipe to recipe. Pellaprat calls for minced parsley, which I omitted. Some recipes I've seen call for cinnamon, nutmeg and/or mace. A few call for garlic or onion. I've even seen an intriguing recipe calling for five-spice powder, which sounds delicious. My 'secret' ingredient is actually not so secret, as perhaps the best known version of rillettes, from the city of Tours, calls for whole peppercorns and cloves. The traditional recipe calls for some bone-in cuts, from which the meat is stripped at the end of the cooking process. Some recipes call for pork belly, which has 'built in' striations of meat and fat, so you can reduce or even eliminate additional fat from the recipe.

Rillettes can be made from any number of ingredients. Goose rillettes are fabulous as are rabbit rillettes. For something a bit lighter, rillettes can be made from fatty fish, such as tuna or sardines. One particularly lovely example of the latter variety are rillettes made from fish are these smoked mackerel rillettes from fellow food blogger and professional chef, Sylvia of Citron et Vanille.

Friday, August 27, 2010

Panzanella


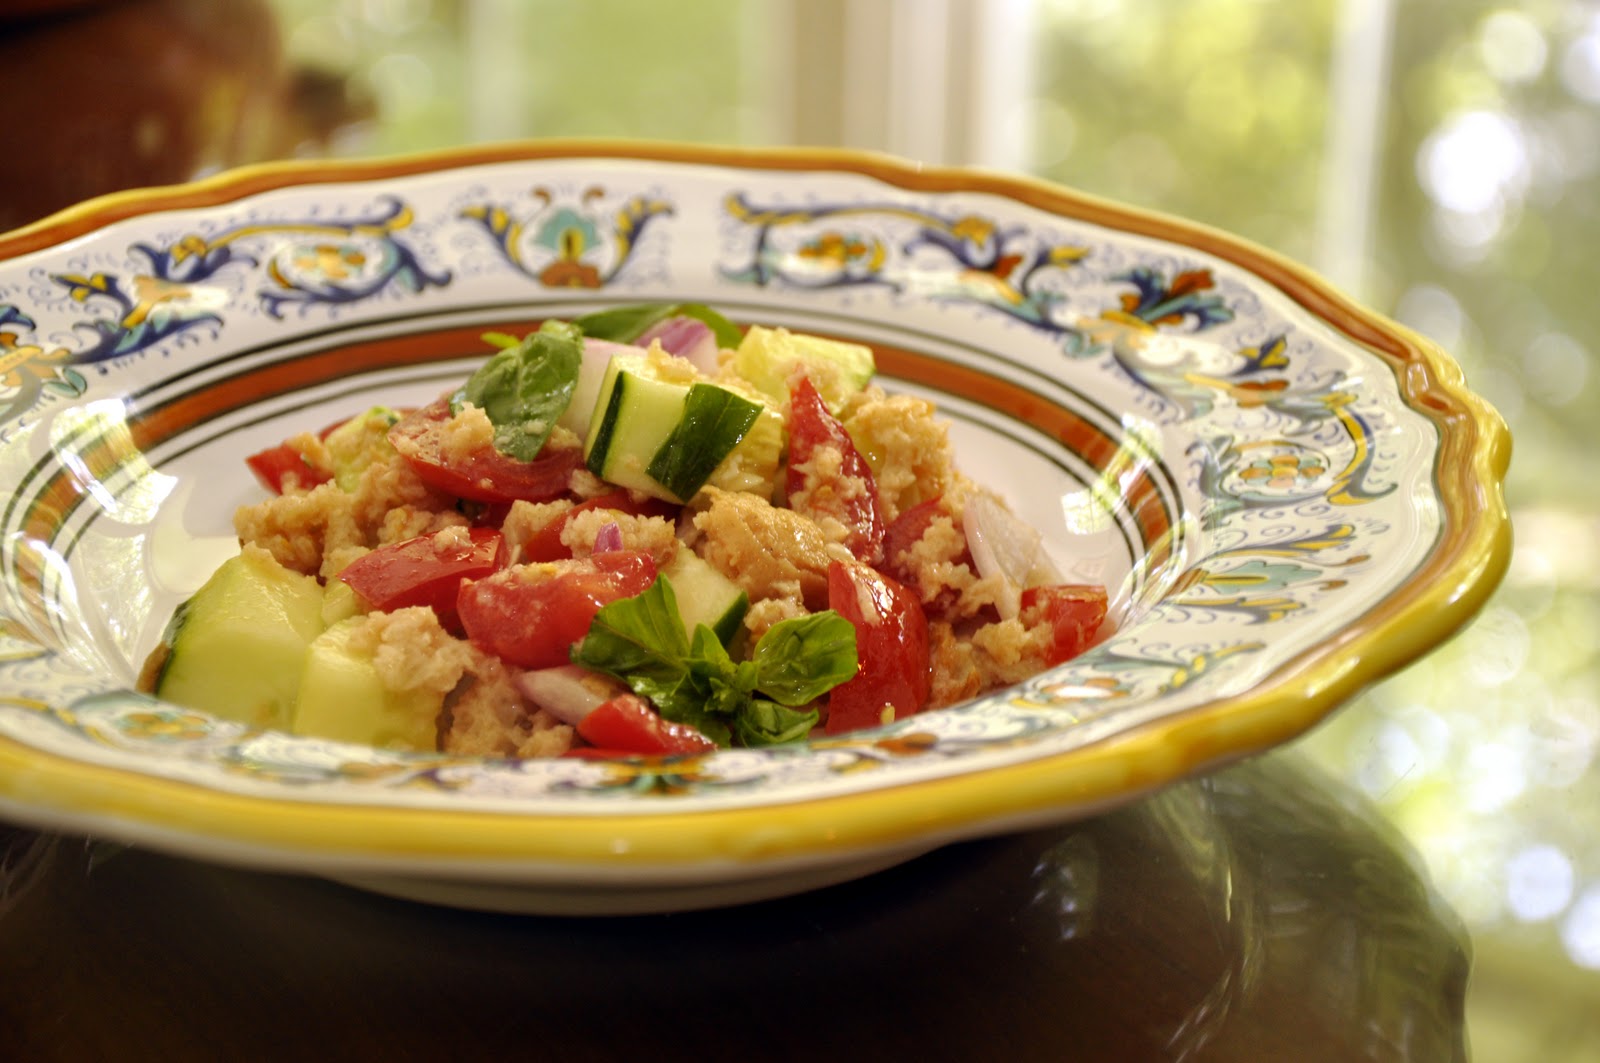
Panzanella, a Tuscan bread salad, is a great way to use old bread and avoid cooking in hot weather at the same time. And it is so simple to make, too. Take some slices or chunks of stale bread and dunk them in water until they begin to soften. This should not take long. Remove them and squeeze out the water, then shred the bread with your hands into a salad bowl. Throw in some chopped ripe tomatoes, sliced or chopped red onion and a few basil leaves. Dress your salad in the usual manner, with abundant olive oil, some wine vinegar, salt and pepper. You can serve panzanella immediately if you like, but it doesn't mind a wait. In fact, it develops flavor if let it rest for a while, say an hour or two. It can even be made well ahead, in which case you may want to hold off on the vinegar, which can become overpowering, until you are ready to serve.

NOTES: It is quite common to add some chopped cucumber to the above basic recipe, which I do whenever I have it on hand. It lends a certain brightness to the recipe. Chopped celery can also be a nice addition. In fact, I sometimes like to experiment with panzanella—with apologies to my Tuscan friends—with all sorts of additional ingredients (see my post on panzanella «con un po' di tutto»).
 

Red wine vinegar is usual for panzanella—remembering that Tuscany is the home of Chianti wines—but personally I prefer to use white wine vinegar which doesn't 'stain' the salad and, to my taste anyway, has a less assertive flavor. A few drops of lemon juice would not be amiss, either. There are also recipes that omit any acid altogether. Some recipes call for you to add the vinegar to the water in which the bread is soaked, rather than as part of the dressing.

Whether you chop your vegetables large or small is also a matter of taste. I vary according to my mood, although I tend to like moderation in all things, so I usually use a 'medium' chop. So those of you who like to get fancy, you can use a very fine chop and form the panzanella in a ring mold in individual portions as an antipasto for an elegant summer meal.

The ideal bread would, of course, be Tuscan bread, traditionally the darker pane scuro. But if you don't happen to live in Tuscany, any good quality, well-structured bread will do the trick. Just make sure it is the kind of bread that will stand up to being soaked, squeezed and shredded without turning into mush. Sandwich bread won't do—you need the kind of bread that you buy in a whole, unsliced loaf. One good test to see if the bread has adequate structure is to squeeze the loaf when you buy it: if it collapses easily (like Wonder bread) then it won't work for this dish. The more resistance it gives, the better—well, to a point, of course…
The measurements are really totally up to your taste. I've seen the dish made with mostly bread, or with mostly vegetables. This being an old peasant dish, surely the proportions depended entirely on what was on hand at the time you made the dish, and that is what I do, too. A good rule of thumb, however, is that bread should make up about half the volume of the salad.

Saturday, August 21, 2010

Parmigiana di melanzane


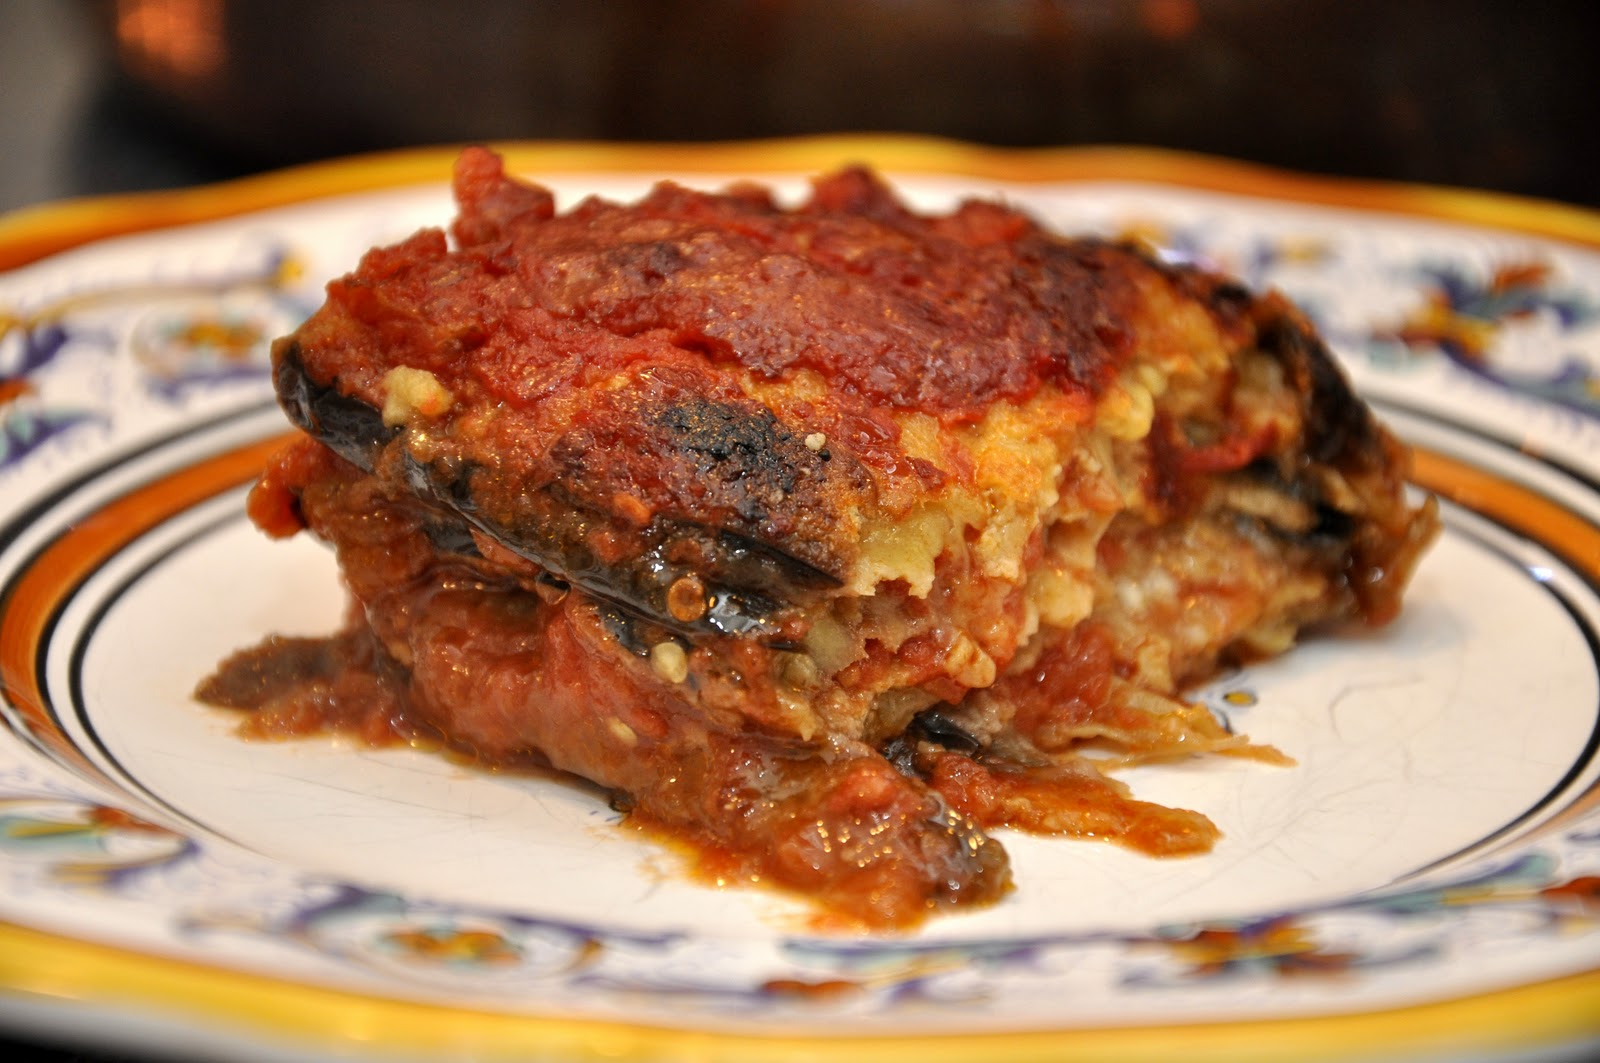
Being a lover of good food, I find it almost impossible to answer the question 'what's your favorite dish?' But if I had to, my answer would probably be eggplant parmesan--parmigiana di melanzane--the way Angelina used to make it.

This is a simple dish to make, but it involves several steps. Allow yourself a good two hours to prepare this dish. It tastes much better made ahead, so if you have the time, make it in the morning and have it for dinner or, even better, make it at your leisure the day before.
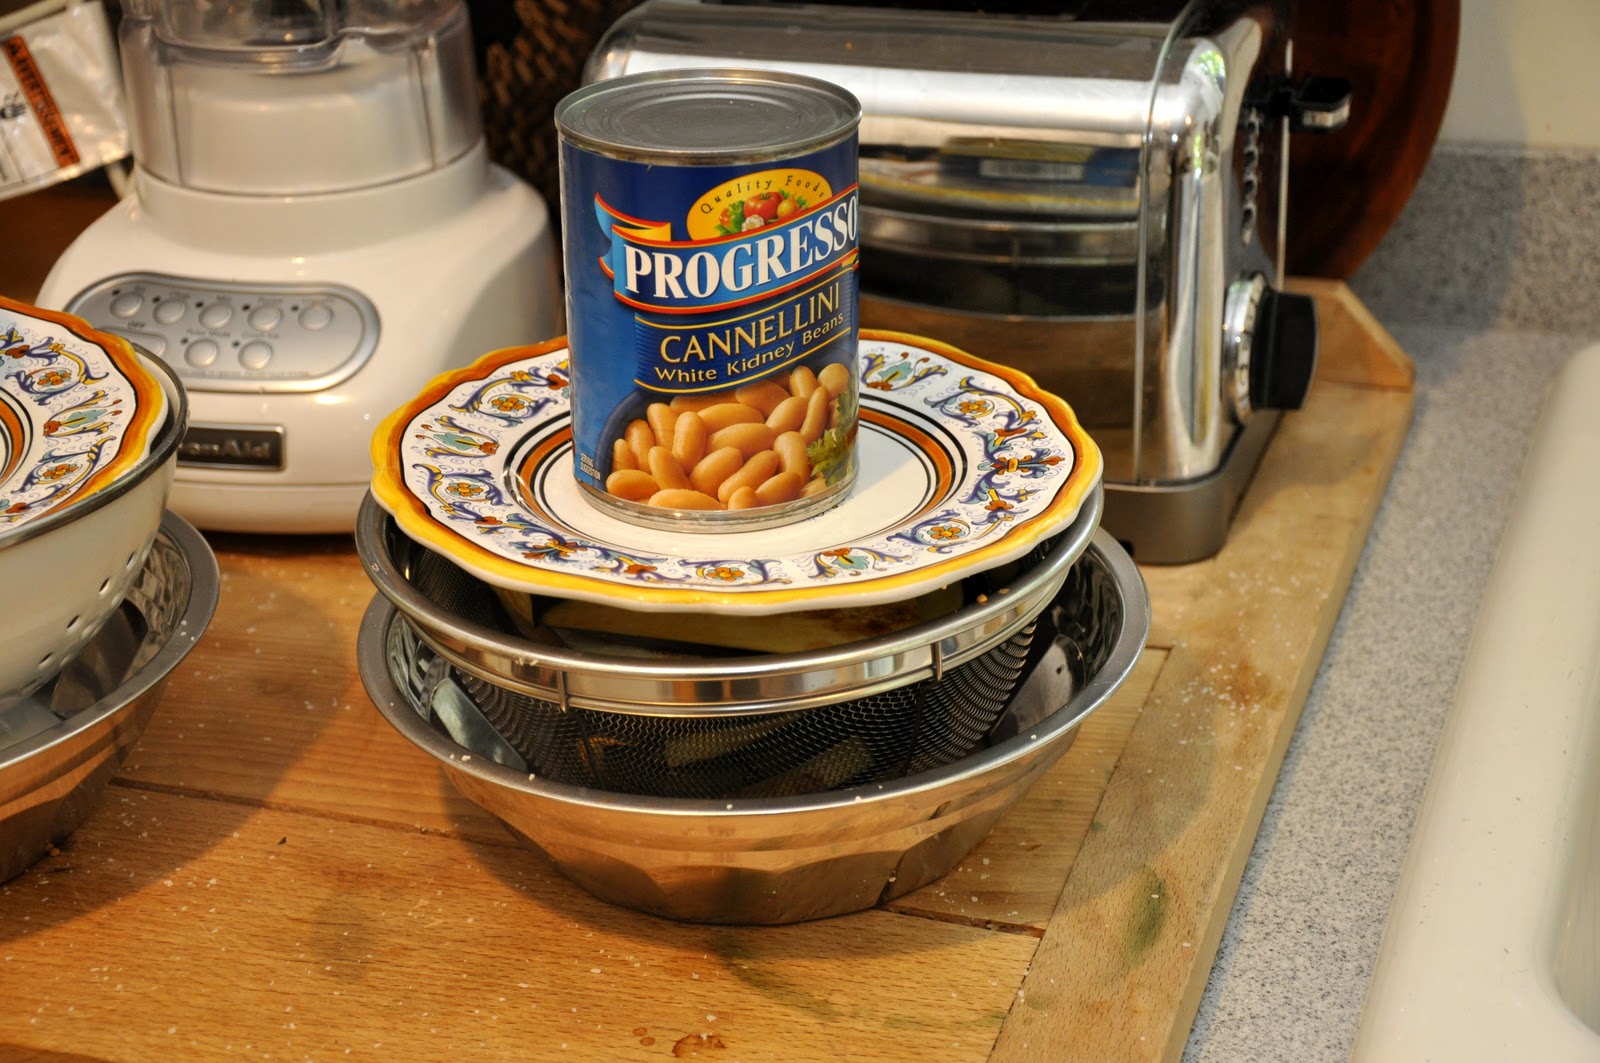
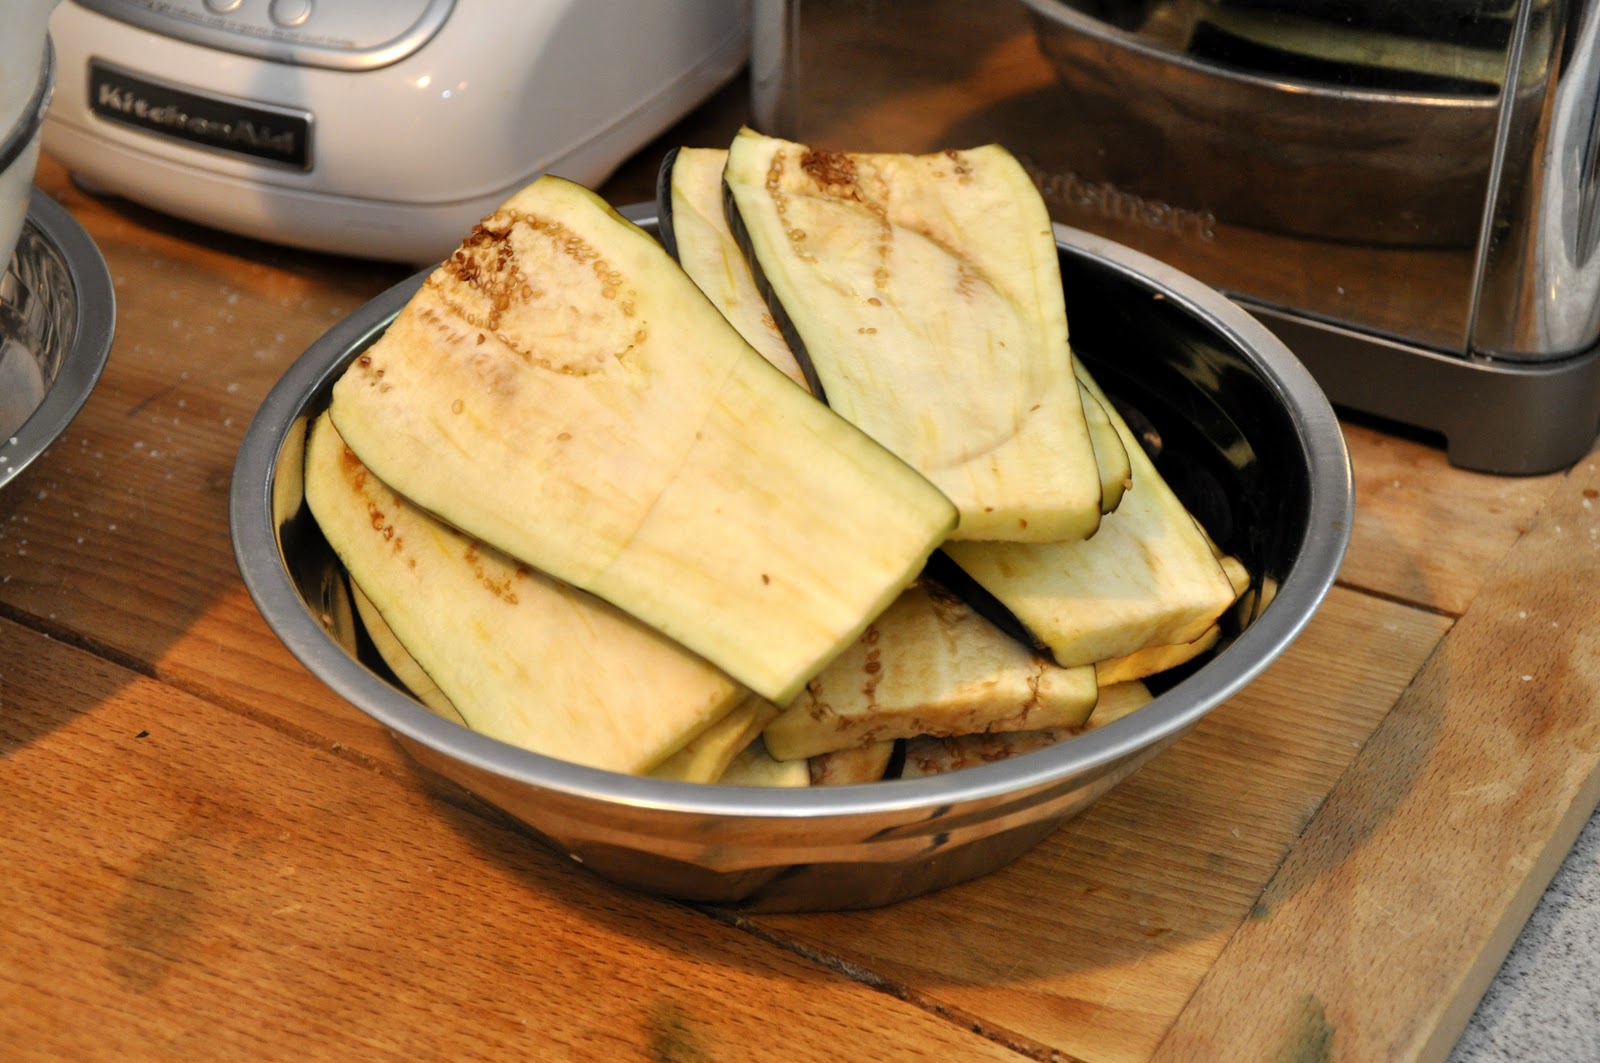
Step 1: Prepare the eggplant. You begin with eggplant, of course. For this dish, the large, purple variety is preferable; about two should do you for a good sized baking dish. You cut the eggplants into fairly thin slices. Now you should 'purge' them of their excess liquid, which can be bitter. Sprinkle the eggplant slices with salt, and then lay them in a colander laid on top of a plate. Cover the slices with a small plate on which you should place something a bit heavy like a can of beans or tomatoes. This will help press the liquid out of the eggplant. Leave them for about an hour.


You should notice a small puddle of brownish water below the colander, which you should discard, of course. Remove the slices from the colander and pat them dry.


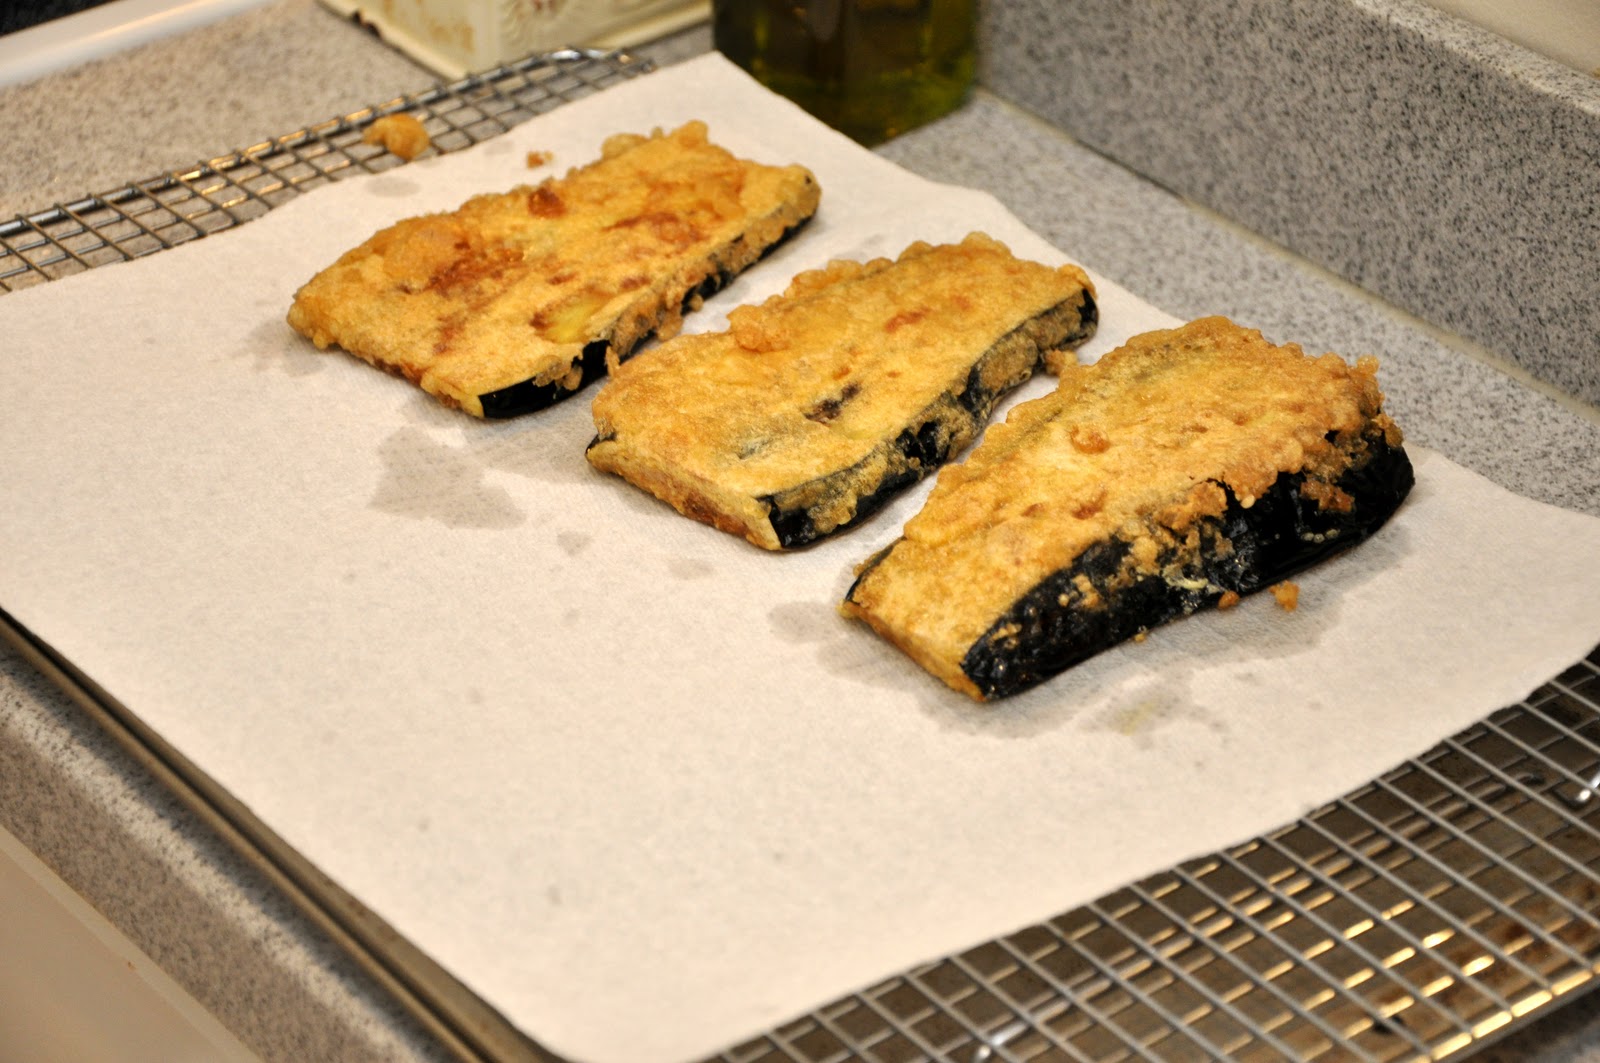
Step 2: Fry the eggplant. Now you dip the eggplant slices in flour, followed by an egg and cheese 'bath' made from beaten eggs, grated pecorino cheese, finely chopped parsley, salt and pepper. Shallow fry the eggplant slices over moderate heat until they are golden brown on the outside and tender inside.


You will need to fry the eggplant slices in batches. As each batch is done, drain and set on paper towels to absorb the excess oil as you continue with the next batch. Repeat until you're done.


Step 3: Prepare the tomato sauce. While this is going on, prepare a very light tomato sauce by combining chopped tomatoes (fresh if in season, but canned tomatoes are fine), a few leaves of fresh basil, salt, chopped garlic and just a few drops of olive oil. (Some people omit the olive oil altogether since the eggplant, even after draining, can be a bit oily.) Simmer for about 15 minutes, until the tomatoes have melted into a sauce If using canned tomatoes, add a bit of water to loosen the sauce before simmering. You will want a good amount of sauce, so be sure to make a potful--you can always any extra to dress pasta.

Step 4: Prepare the cheeses. Take a large mozzarella, preferably fresh, and slice it. Grate lots of parmesan cheese, at least a cupful (you can grate it as you assemble the dish).

First layer down...
Step 5: Assemble the dish. You are now ready to assemble the dish. In a bake-and-serve pan, place a layer of the fried eggplant slices, then a bit of the tomato sauce, then a few mozzarella slices, a bit of shredded basil (optional) and grated parmesan cheese. Season. Then add another layer of eggplant and continue until you've used up your ingredients. End with tomato sauce and parmesan. (Don't put mozzarella on top, it will brown too quickly in the oven and burn.)

Ready for the oven...


Step 6: Baking. Bake in a hot oven (400 F, 200 C) for about 30 minutes, or until the dish is bubbling hot and the top a bit brown. Don't worry if it even looks a bit 'burnt' around the edges--that's normal and, to some tastes, the best part! Let the dish cool a bit before eating, at least 15 minutes. In fact, it tastes best made ahead and reheated (just a bit) before eating. It can also be eaten at room temperature. Just don't eat it piping hot, because you will miss the full, wonderful flavors!

NOTES: A friend from Naples once told me that this version of parmigiana--made with eggplant slices dipped in egg--is typical of the interior of Campania, the region where Naples is located and of which it is the capital. In fact, that's where Angelina was from, a small mountain town near Benevento. In Naples proper, this dish is made with eggplant slices that are simply lightly floured and fried. Most modern recipes you will find follow the Neapolitan method. I've tried it that way and it makes for a lighter dish. But I still like Angelina's version best! For an even lighter dish, you can brush the eggplants with olive oil and grill them instead of frying. The result is actually very nice, but you are getting pretty far from the original flavor and texture of the classic dish. They also make this dish in Sicily (in fact, the Sicilians claim the dish is theirs-see below) but without the mozzarella cheese.

If you are pressed for time, you can skip the initial 'purging' of the eggplants. As long as the eggplants are reasonably fresh, it should not make that much difference. I sometimes skip this step myself. But be aware, there is a chance that the dish will have a bitter aftertaste. And if you want an even quicker dish, instead of a tomato sauce, you can use passata di pomodoro or crushed canned tomatoes--it will cook in the oven--a drizzle un filo d'olio over each layer.

Some recipes calls for baking the dish in a moderately slow oven and for a longer period, from 45 minutes up to an hour, raising the temperature at the very end if necessary to brown the top. The advantage of this method is that you are less likely to burn the top.

This dish can play many roles in an Italian meal. It can serve as an antipasto, as part of a buffet, as a light secondo or as a piatto unico: a single-dish meal in itself. And, to be honest, I even eat it, the morning after I make it, for breakfast!

By the way, as is typical for a popular dish with many variations, there are a good number of different stories about the origins of this dish. some of them place it in or around Naples, while say the dish originated in Sicily. Despite the name, however, it is very doubtful that this dish comes from Parma. The name may refer simply to the generous use of parmgiano cheese in the dish. Some early sources say that the parmigiani were known for making layered vegetable casseroles. The Sicilians say that the name comes from  parmiciana, which the dialect word the slots in window shutters (persiane in proper Italian) since the eggplant slices lined up in the baking dish were said to resemble said shutters.
This interesting article discusses the various claims and their relative merits. If you can read Italian, Wikipedia also has an article on the dish. Both place the probable origin to Campania and to the 18th century chef and writer Vincenzo Corrado.

My sous-chef....


Eggplant Parmesan on Foodista

Sunday, August 15, 2010

Insalata di riso


Mid-August, when the temperatures climb to tropical heights, is a time when even the enthusiasm of even the most avid cook can begin to wane. Italians often turn to easily prepared dishes that need minimal or no actually cooking. Salads are an obvious choice, and rice salads are a favorite. Not only are they delicious, but they are easy to prepare, adaptable to just about whatever happens to be in the cupboard and can be easily made ahead—which makes them perfect picnic or summer buffet food.

Begin by boiling your rice al dente. It will take anywhere from 10-15 minutes to boil your rice, depending on the variety of rice you use; rice cooks more quickly when boiled in abundant water than for a risotto. Drain the rice in a colander and rinse it quickly under cold water to stop the cooking. Give it a good shake or two to get out all the water and transfer to a large mixing bowl.

Then add your choice of condiments from your pantry. My favorite is based on tuna fish, which you add to the boiled rice together with a handful of capers, some chopped gerkins and a handful of olives (green and/or black, as you prefer). I sometimes add some chopped anchovies as well. Some people add even more ingredients, usually pickled onions or pimentos, or both. Today I had some mozzarella on hand, so I chopped that into cubes and added it, too. 

Finish off with some chopped parsley for color, a good drizzling of olive oil, salt, pepper and some freshly squeezed lemon juice—just enough to 'brighten' the dish. Mix gently but well with a spatula until the ingredients are evenly mixed. (Try not to break up the tuna completely—it's nicest with little chunks here and there, I find.) You can serve the salad immediately, but it develops flavor if you let it rest for an hour or more.

Rice salad can be made as much as a day ahead—in which case, leave it in the fridge, of course, and take it out about an hour ahead so it returns to room temperature. Before serving, you may want to 'refresh' the salad with a bit more oil and lemon juice before serving.

NOTES: And unlike risotto, you can really use just about any kind of rice. Italians often use a slightly lesser grade of rice—called 'fino' rather than a 'superfino' like arborio, carnaroli or vialone nano that you would use for a risotto. These go by the names of ribe or Roma, and you can sometimes find these in specialty shops. You can also use long grained rice if you prefer. In fact, many Itailans use parboiled rice, since it holds its texture well when made ahead. Personally, I rather like sticking with a superfino.

As for measurements, I follow the 'golden rule' of 100g of raw rice per person. The amount of condiments really depends on your taste, but for 200-400g of rice I use a small to medium-sized can of tuna, plus about a handful of each of the other ingredients. Just trust your instincts.

Like pasta, there is an almost infinite variety of rice salads—and you can really just make up your own version using whatever suits your fancy. Besides this tuna-based salad, another very popular salad includes—believe it or not—sliced würstel, the German word that Italians use for those little smoked sausages otherwise known as 'hot dogs'—cubed boiled ham can substitute—usually combined with cubed pieces of swiss cheese, olives and some of those pickled vegetables. Also popular is a completely vegetarian version with mixed pickled vegetables called giardiniera. Or dress your rice with prepared seafood salad from a deli for an insalata di riso marinara. Some halved cherry tomatoes can be added to any of these varieties if you like. And all are finished off with a dressing of olive oil, salt, pepper and lemon juice.

Feel free to give full rein to your imagination and creativity. Italian cuisine has all sorts of 'rules' that Italians take very seriously even if they are often broken—but there is something about summer that makes people want to let their hair down, so why fight the urge?

Tuesday, August 3, 2010

Pomodori ripieni di riso

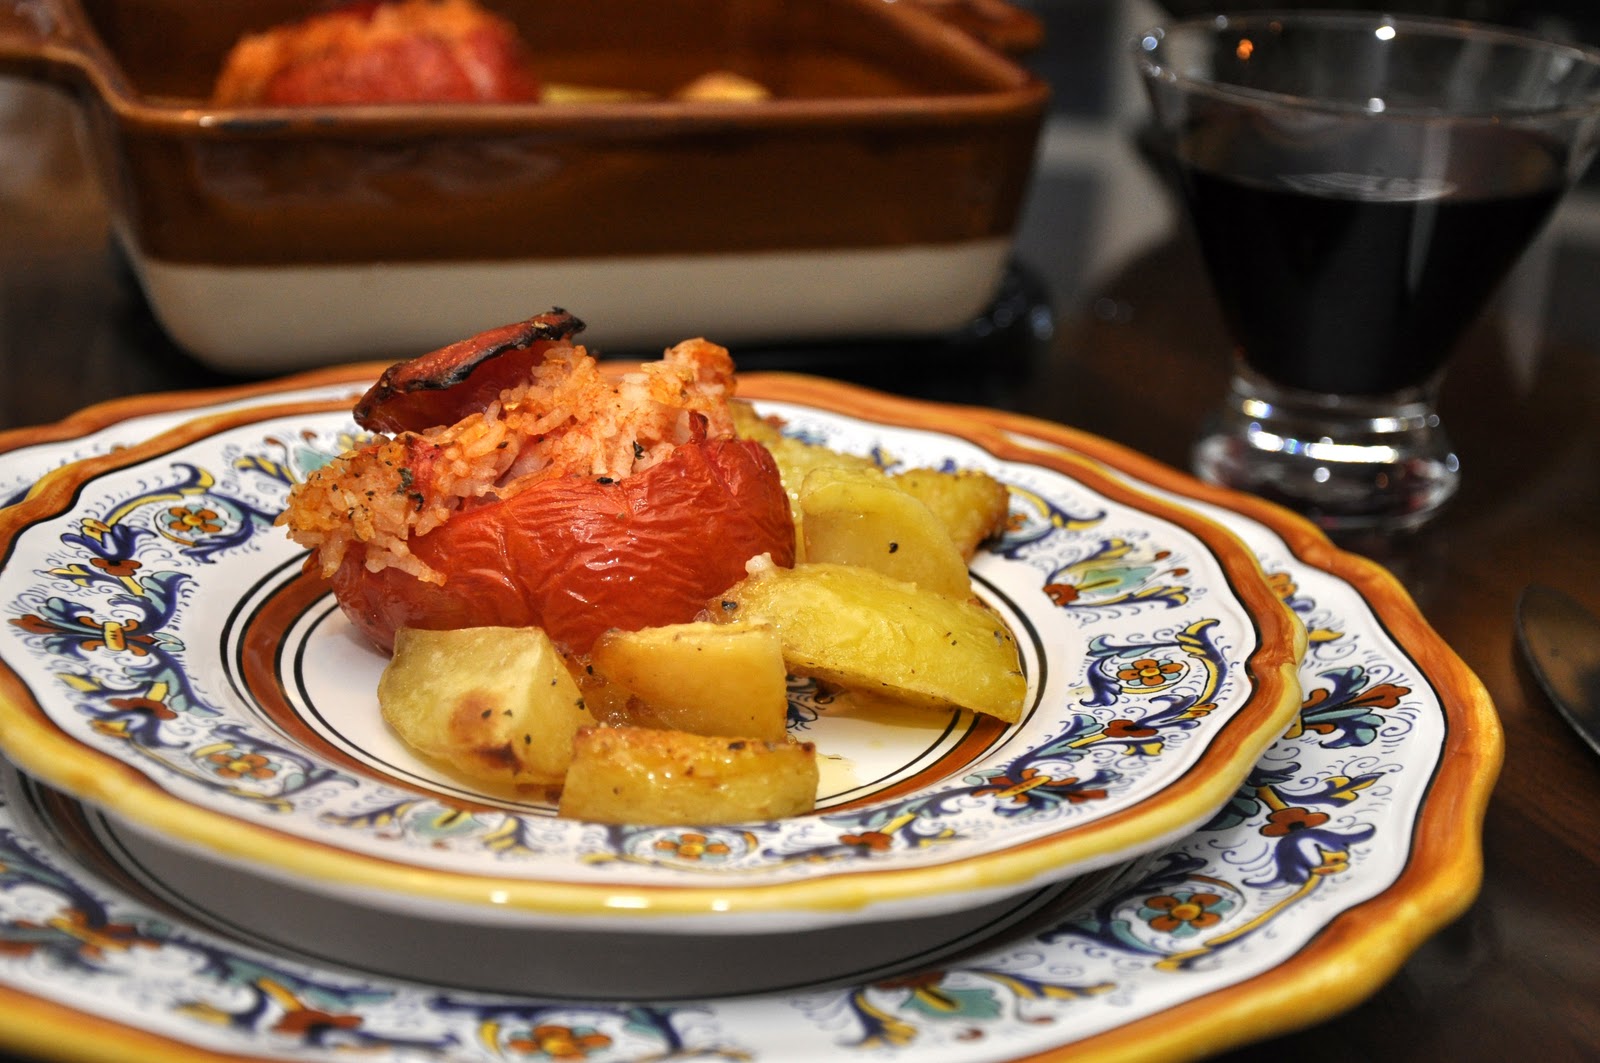
A staple of summer picnics and tavole calde, pomodori ripieni di riso, tomatoes stuffed with rice and oven roasted, make for a simple and relatively quick weekend dinner, part of a buffet or a tasty antipasto for a summer dinner for guests. Here's the recipe:

Take as many tomatoes as you have dining companions, cut off (but don't discard) the tops. Scoop out the insides of the tomatoes and chop them up, making sure you don't lose the juices. Mix the chopped up insides with some rice, which you will have parboiled until they are about half-tender. Season the rice mixture with salt, pepper, a drizzle of olive oil, just a bit of finely minced garlic and some minced herbs, typically oregano, basil and/or parsley.

Spoon the seasoned rice mixture into the insides of the tomatoes, taking care not to pack them too tightly, and place their tops back on top of the rice stuffing. Place them in a well-oiled baking pan and scatter some wedges of potato around the tomatoes. Season the dish with salt and pepper and, if you like, a sprinkling of oregano. Drizzle everything with some more olive oil. Roast in a hot oven (200C, 400F) for about 45 minutes, or until the rice and potatoes are fully cooked, the tomatoes nicely roasted—they will crinkle up and their edges will char a bit. Check on the dish from time to time while it is roasting. If it seems dry, drizzle over a bit more oil. You can also move the potatoes around so they cook evenly and are well coated with the oil.

Pomodori ripieni di riso are usually left to cool and eaten at room temperature or just slightly warm.
 

NOTES: In Rome at least, these tomatoes are invariably served with potatoes but if this is too much carb for your taste, you can omit them. Some recipes call for reserving a bit of the tomato pulp and mixing it with the potatoes so they too get some tomato flavor and a bit of color.

You can also play with the rice stuffing. As indicated, the herbs can vary with your taste. Some recipes omit the garlic, others call for some grated pecorino or parmigiano. Some add capers, olives and/or chopped anchovy, although these ingredients would change the character of the dish pretty radically and, in my humble opinion, upset the balance of flavors.
Needless to say, the success of this simple dish will depend on the quality of its ingredients, especially the tomatoes. This is really something you should save for the best, tastiest summer tomatoes you can find. The tomatoes themselves should be large enough to stuff, of course, but should not be gigantic, either, or you will wind up with too much stuffing, making for a rather stodgy dish. The tomatoes should be fully ripe, but not at all mushy, or they will disintegrate in the roasting process.

As far as the rice is concerned, the typical rice would be short-grained, but this is a forgiving recipe. You can even use leftover Chinese take-away, which is what I used tonight! Some recipes calls for adding raw rice, but in my experience this inevitably leads to a dry, chalky filling. As mentioned, it is important not to pack the stuffing too tightly or to overstuff the tomatoes; they will otherwise expand and rip open the tomatoes—not the end of the world by any means, and the tomatoes will still taste good, but you may fare una brutta figura (make a bad impression) if company is coming…

Sunday, July 11, 2010

Vitello tonnato


If you've been reading this blog lately you may be wondering if we've been switching themes on you. Well, it's true that summer somehow brings out the experimental side of my otherwise rather staid culinary character. But, fear not, gentle reader, Memorie di Angelina is still, first and foremost, an Italian food blog. Now that I have put your mind at ease, on to the subject at hand…

If I had to mention one dish in the Italian repertoire that epitomizes elegant summer eating, this might well be it: vitello tonnato, also called vitel tonnè in dialect, which means' tunnied veal' or simply veal in tuna sauce. More often than not, though, it is called by its Italian name in English as well. It makes for an elegant presentation, fit for an important dinner, but it is actually quite easy to make and, if made with pork or turkey rather than veal, quite inexpensive, too. 

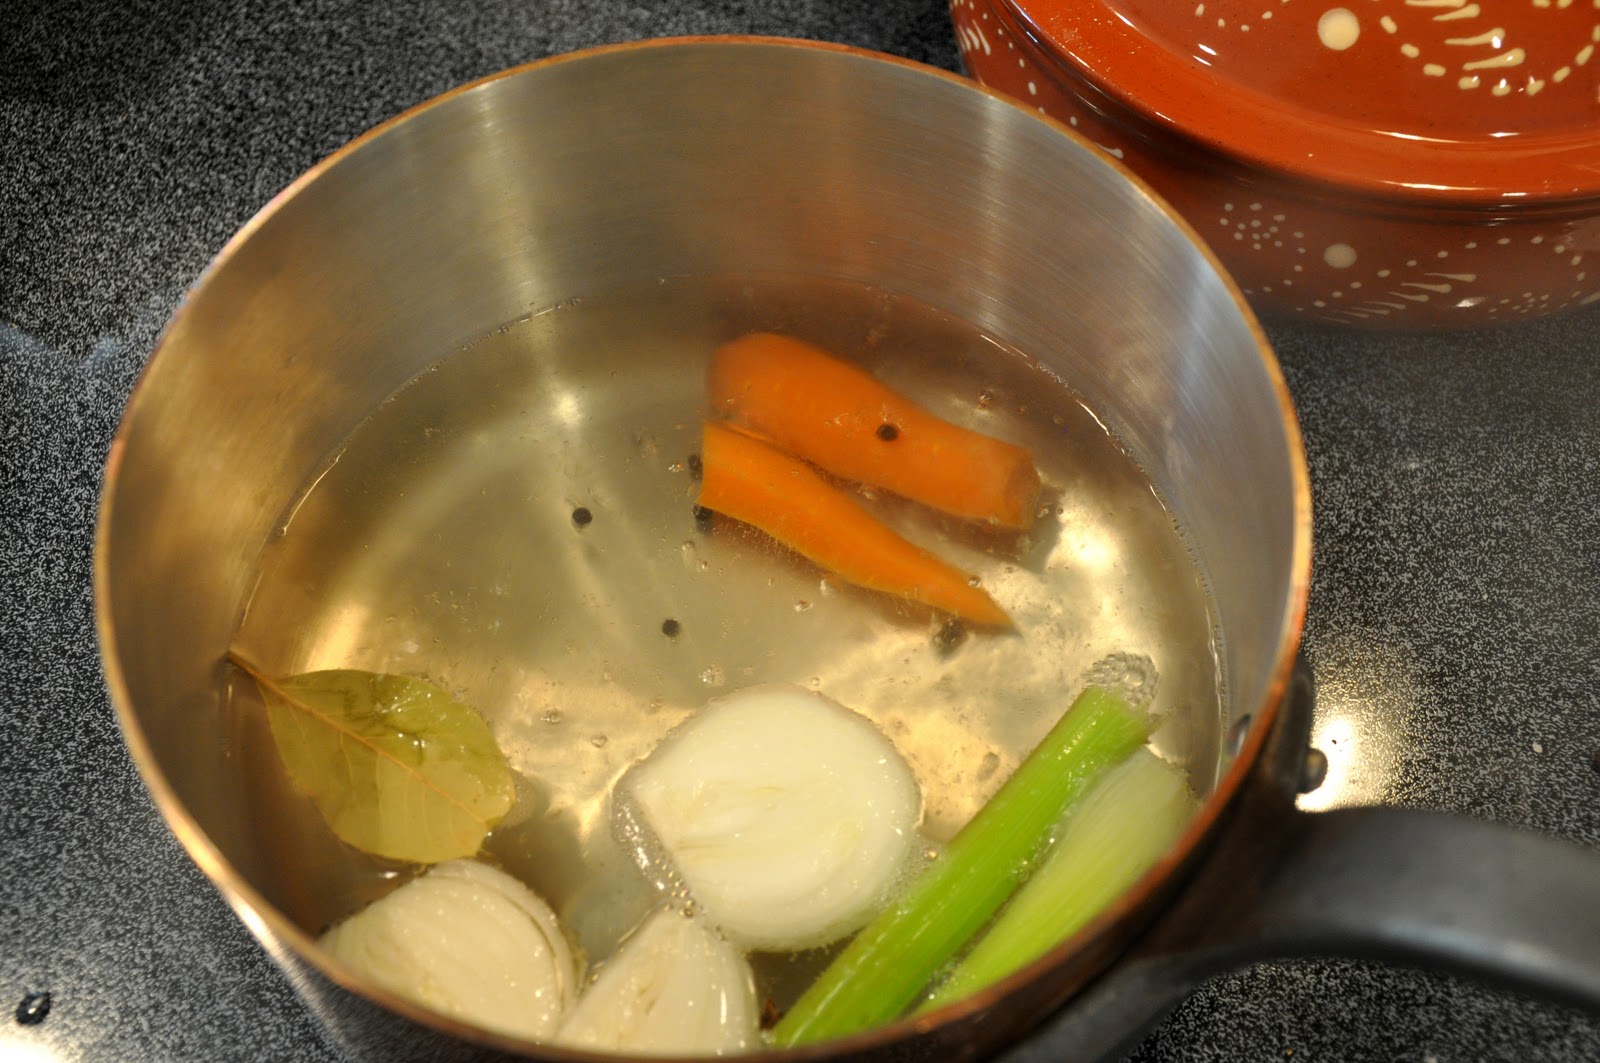
You begin with the meat. Classically speaking, this is a veal roast (see Notes below for the common cuts). But you can economize by using pork loin or—my favorite—pork tenderloin or turkey breast instead. Whichever you choose, prepare a kind of court bouillon by simmering a quartered onion, a carrot, a stick of celery, a bay leaf, a few cloves, salt and some whole peppercorns in a mixture of white wine and water, about a glassful of wine and just enough water so that the liquid will entirely cover the meat when it is placed in the pot. (To be sure, you can place the meat in the cold liquid beforehand to see if there is enough liquid.)


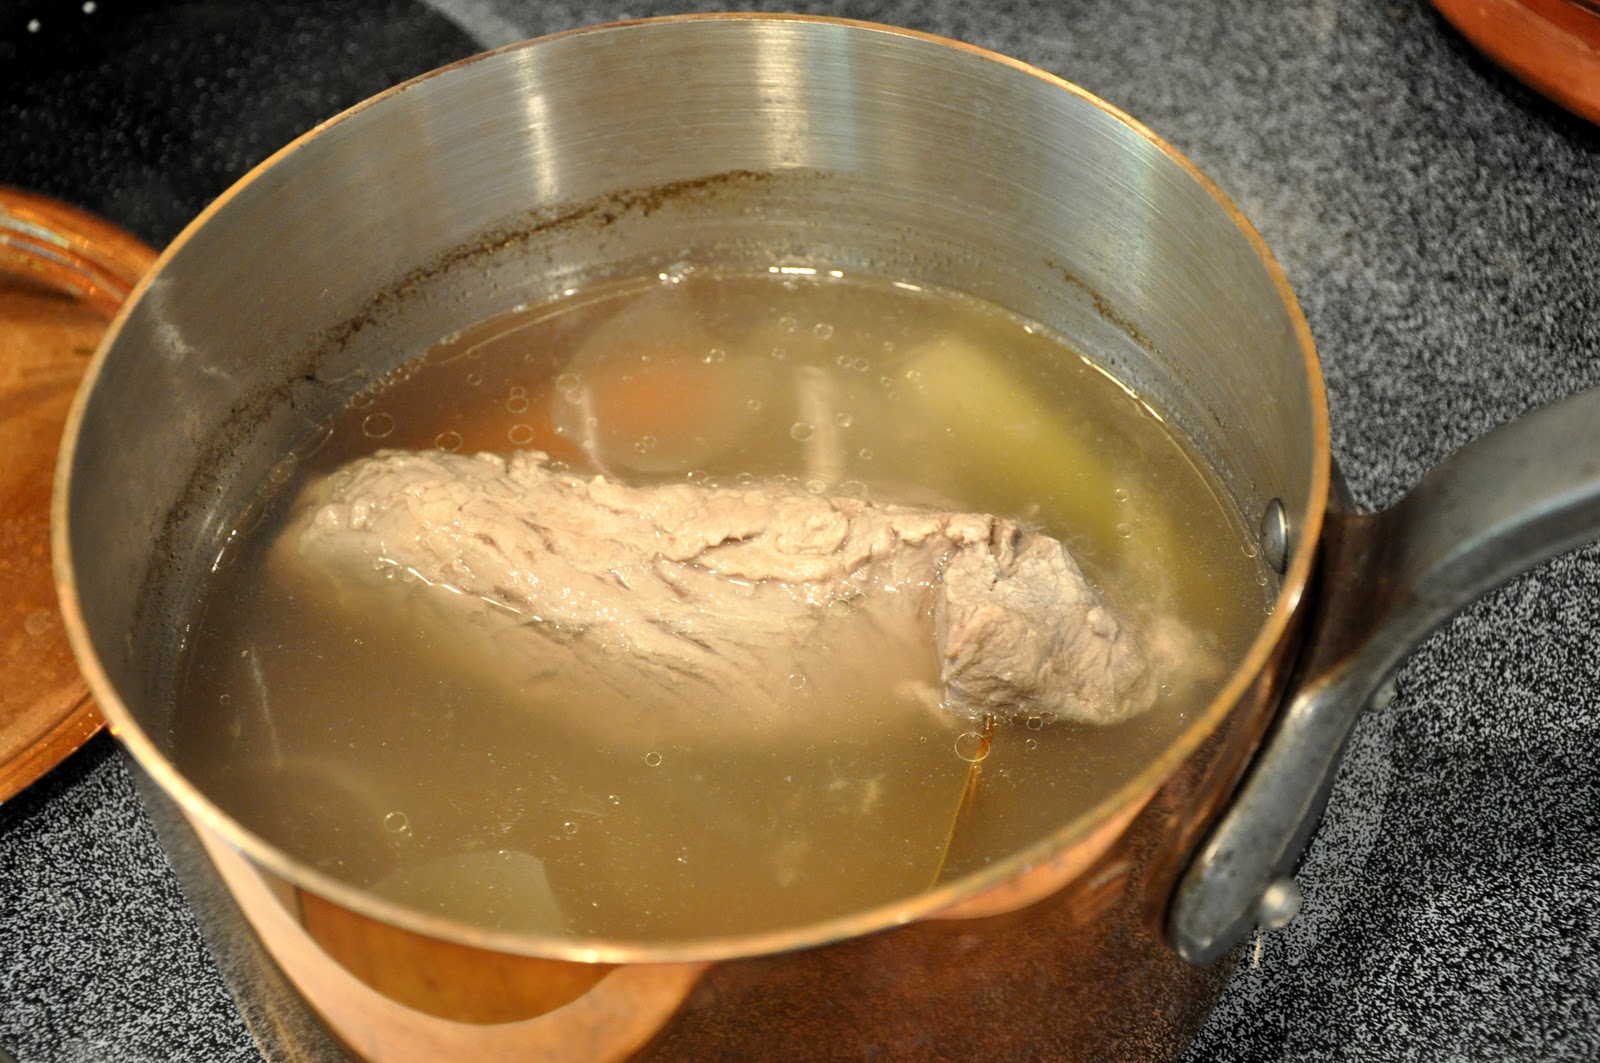
After the aromatics and liquids have simmered for about 10-15 minutes, add the meat, raising the heat if need be to keep the water simmering nicely but it should not boil, which would toughen the meat. I cover the pot partially to reduce evaporation. Simmering time will depend on the meat you use, but the classic recipes call for cooking the veal roast around 60-90 minutes, depending on the size and the cut. (The original cuts were suitable for long simmering, modern recipes often call for loin, which should be just cooked through.) Pork loin should take about 60 minutes or less, while the tenderloin, which is quite a 'skinny' piece of meat, should take no more than 20-30 minutes. Turkey breast should take about the same as pork tenderloin. Remove the pot from the heat and allow the meat to cool completely, still immersed in its cooking liquid. This should take about an hour or so, and it results in a moister and more flavorful meat. But if you are in a hurry, you can remove the meat from the liquid and place it in the fridge to cool down quickly. 


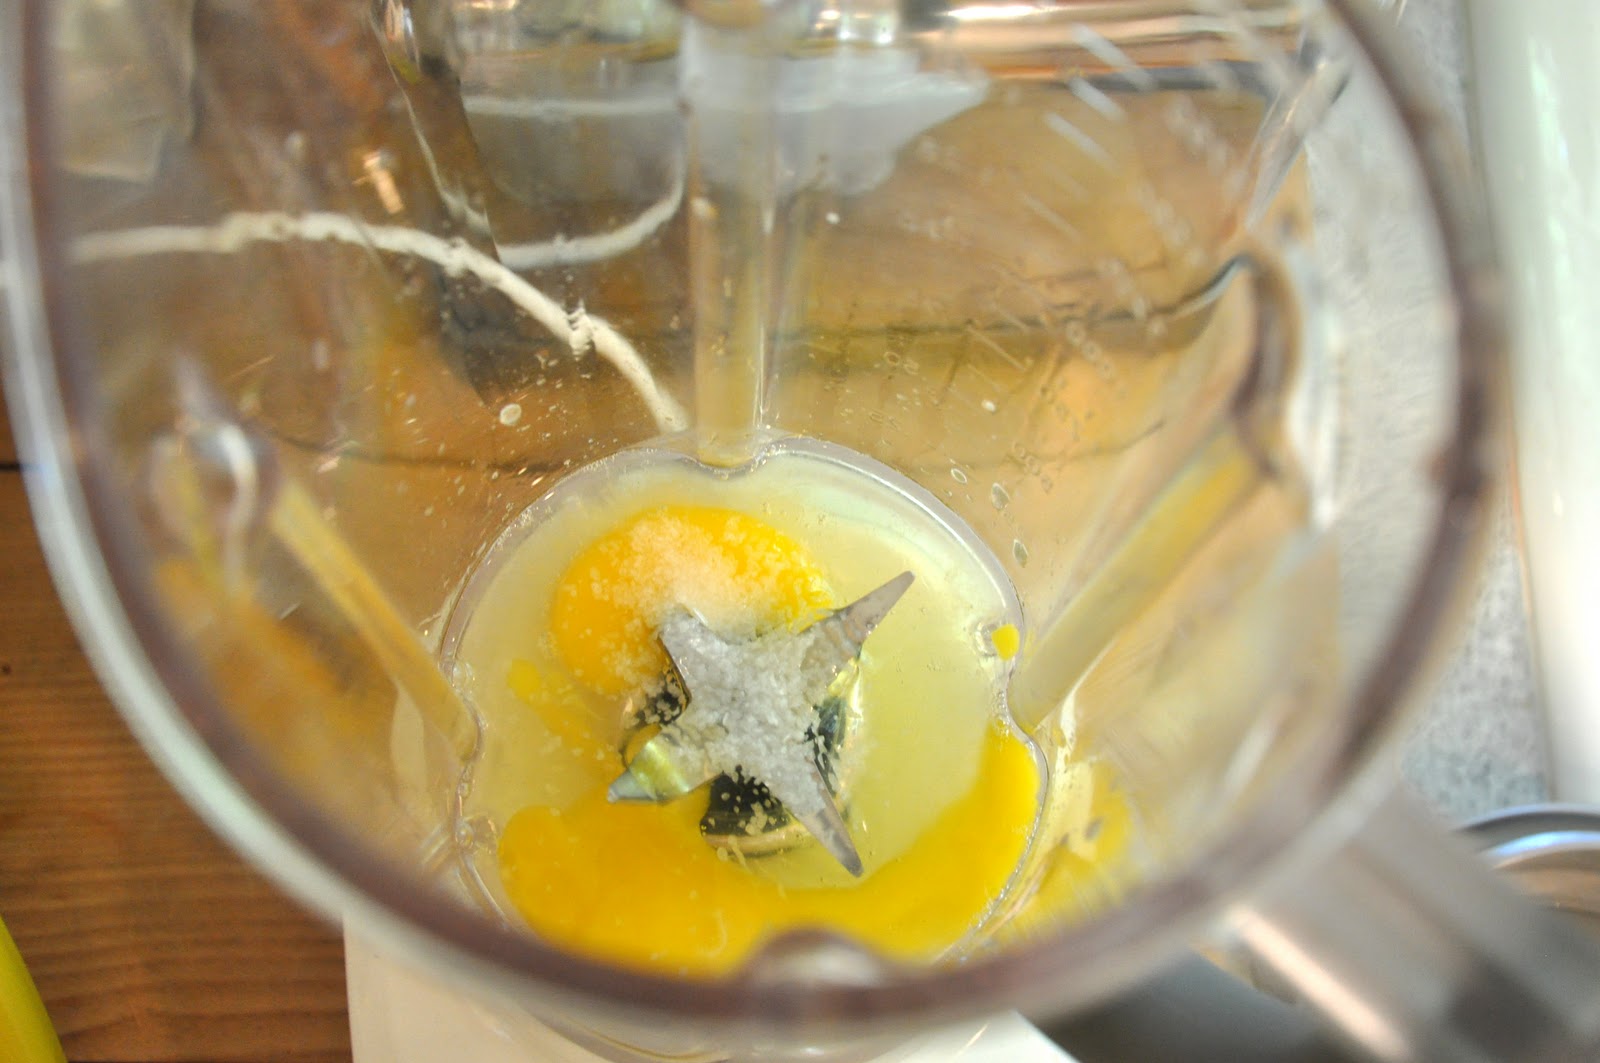
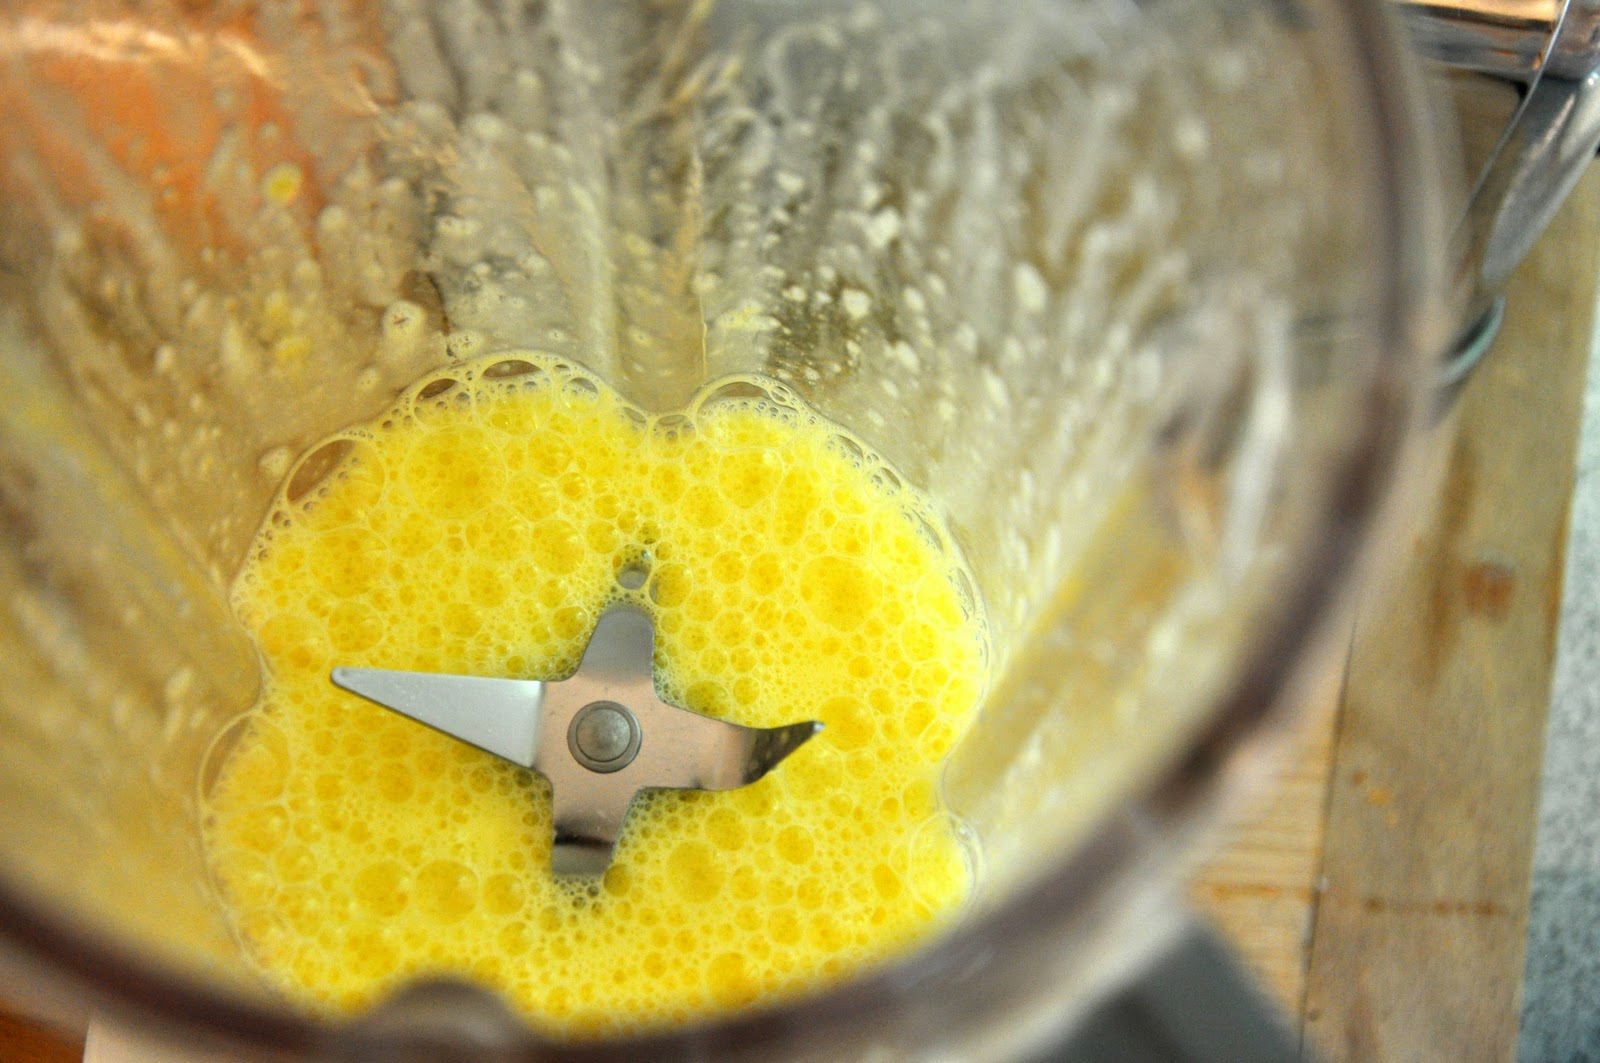
While the meat is cooling, it is time to turn to the sauce. You begin by making a mayonnaise in a blender: place two whole eggs (not just the yolks) in a blender with the juice of half a lemon and pinch of salt.


  Then turn on the blender to 'purée' and let it go for just a few seconds. The egg mixture will have turned frothy:

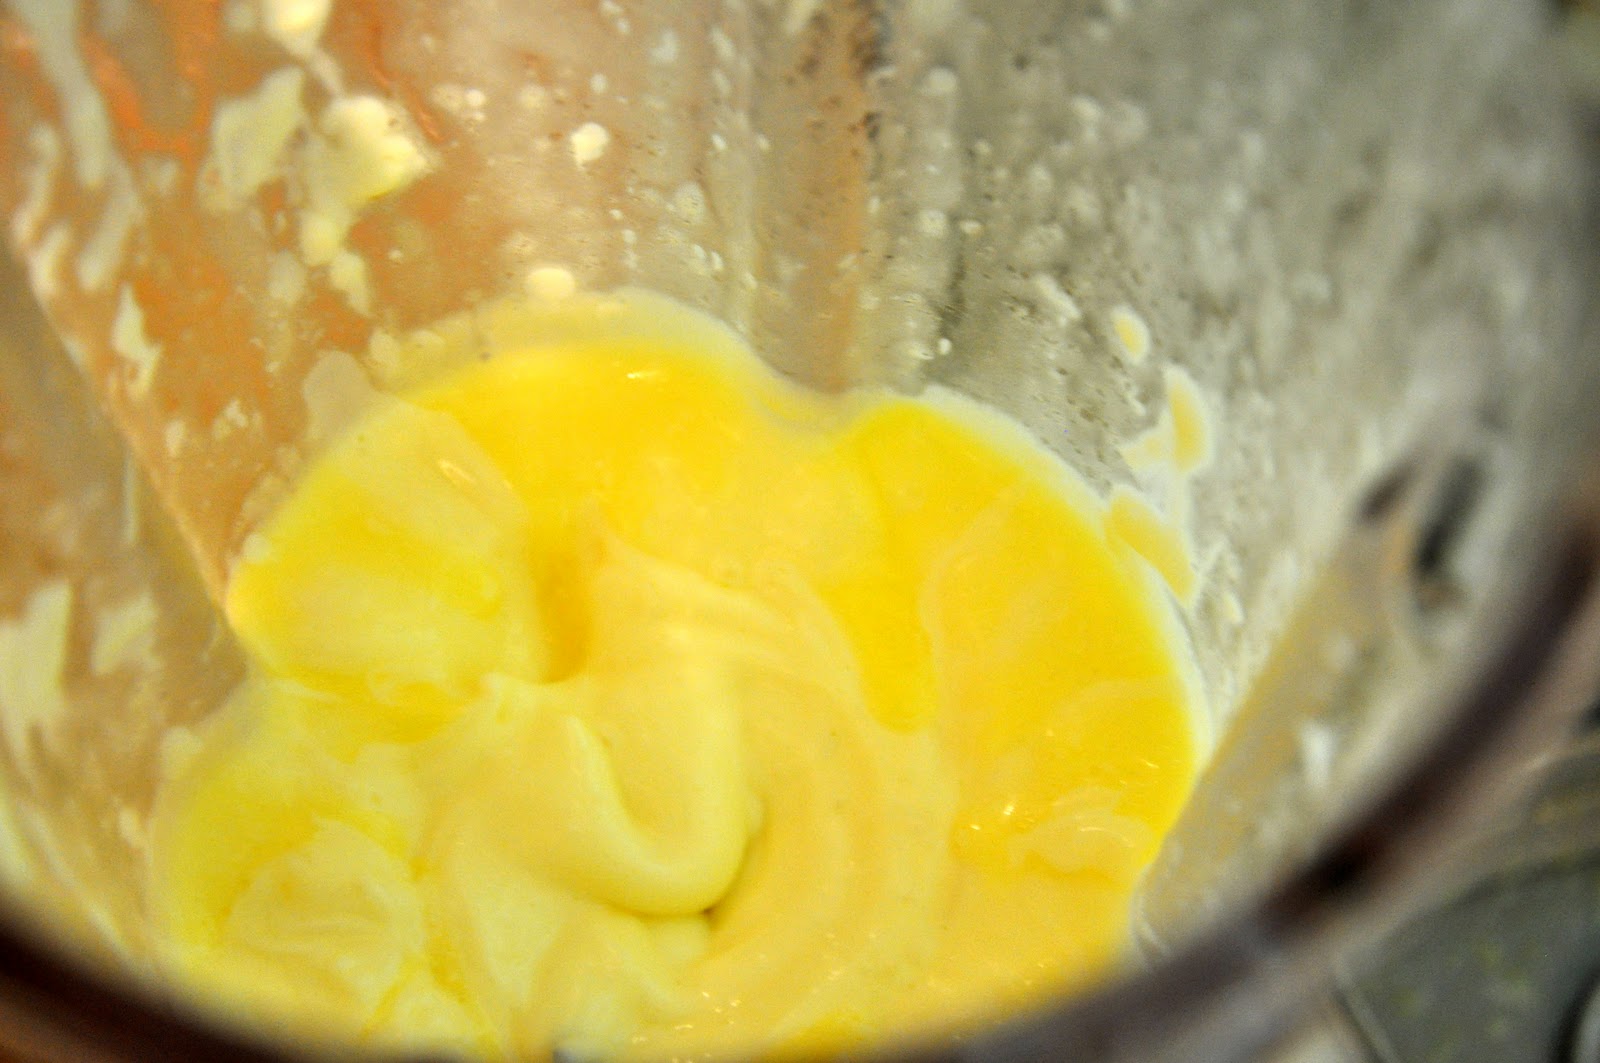
Now turn the blender on again and, with the little clear plastic 'window' in the lid removed, starting pouring in olive oil little in a slow but steady stream, until the eggs and oil emulsify and you get a nice, thick and creamy mayonnaise. I believe that the classic proportions call for one cup of oil per egg, but I usually 'eyeball' it and stop when the mayo is nice and thick, as pictured below.


By the way, this is one case where so called 'light' olive oil may be better than the dark green fruity kind, which would give the sauce a too strong olivey taste. Or you can use Provençale olive oil, which is more delicate. 

In any event, once your mayo is ready, add a fillet or two of anchovy, a spoonful of capers and a can of tunafish (preferably packed in olive oil). Blend again until smooth. 


Then temper the sauce with a couple of spoonfuls of the meat cooking liquid, enough to produce a pourable but still quite quick sauce. Transfer to a bowl. 
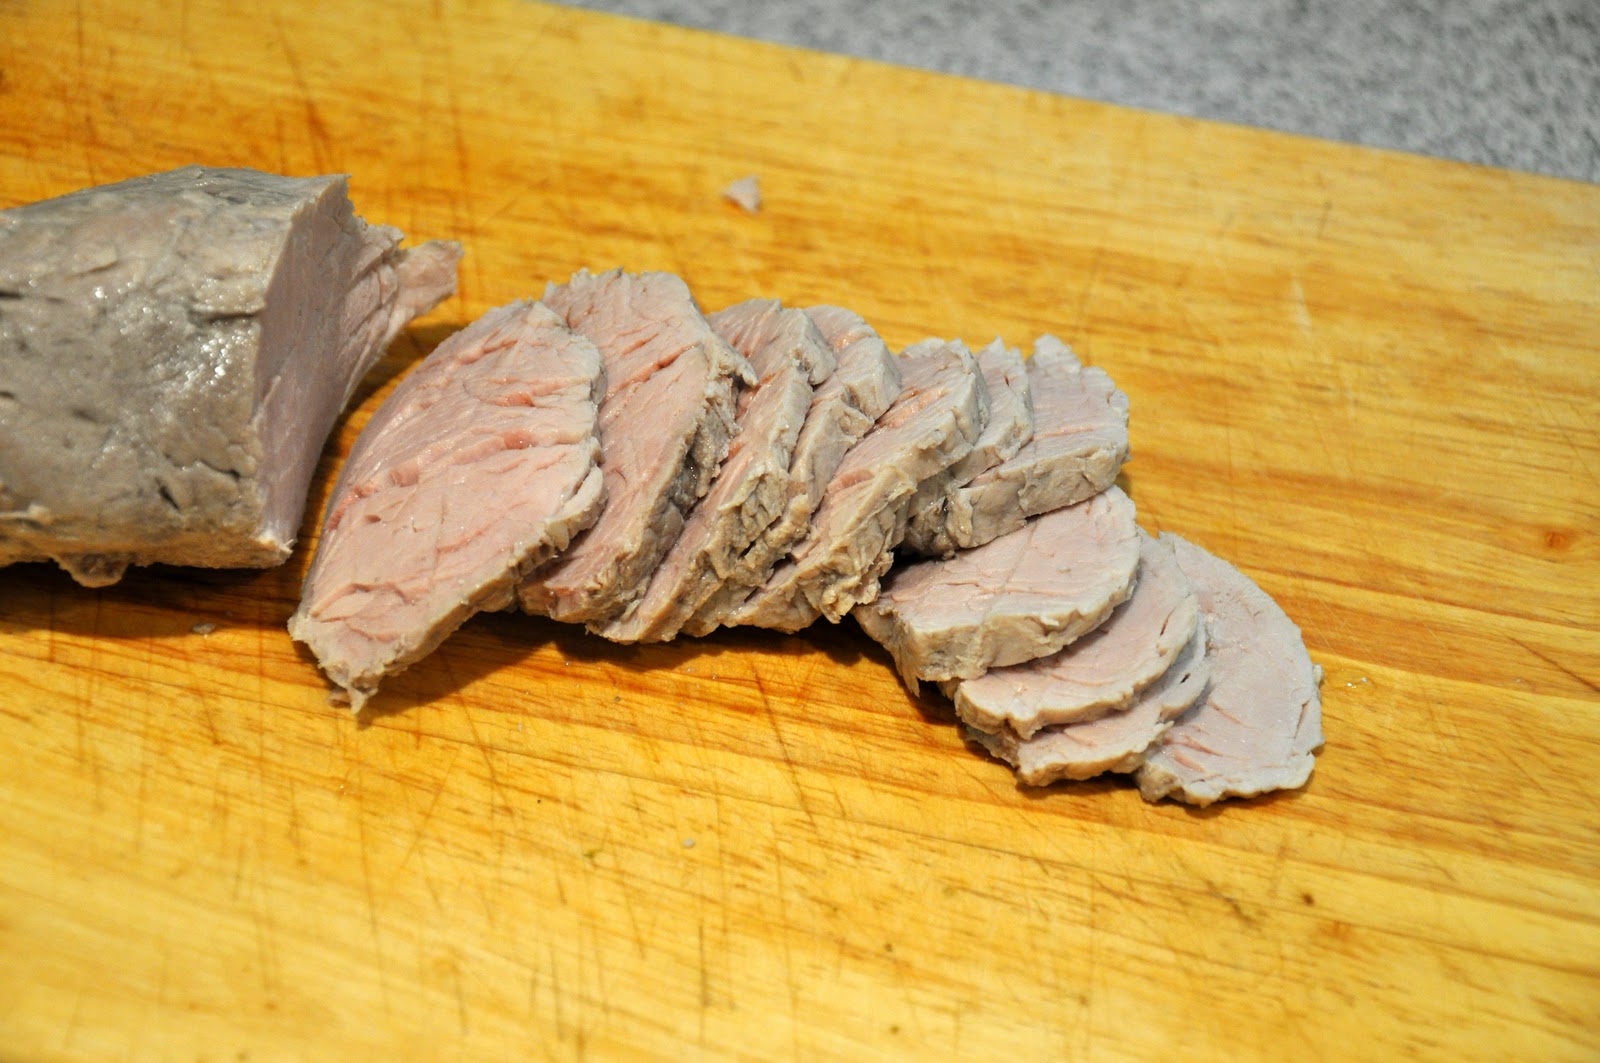
When the meat has achieved room temperature, remove it from its broth, pat it dry and place it on a cutting board. Slice it against the grain into thin slices.


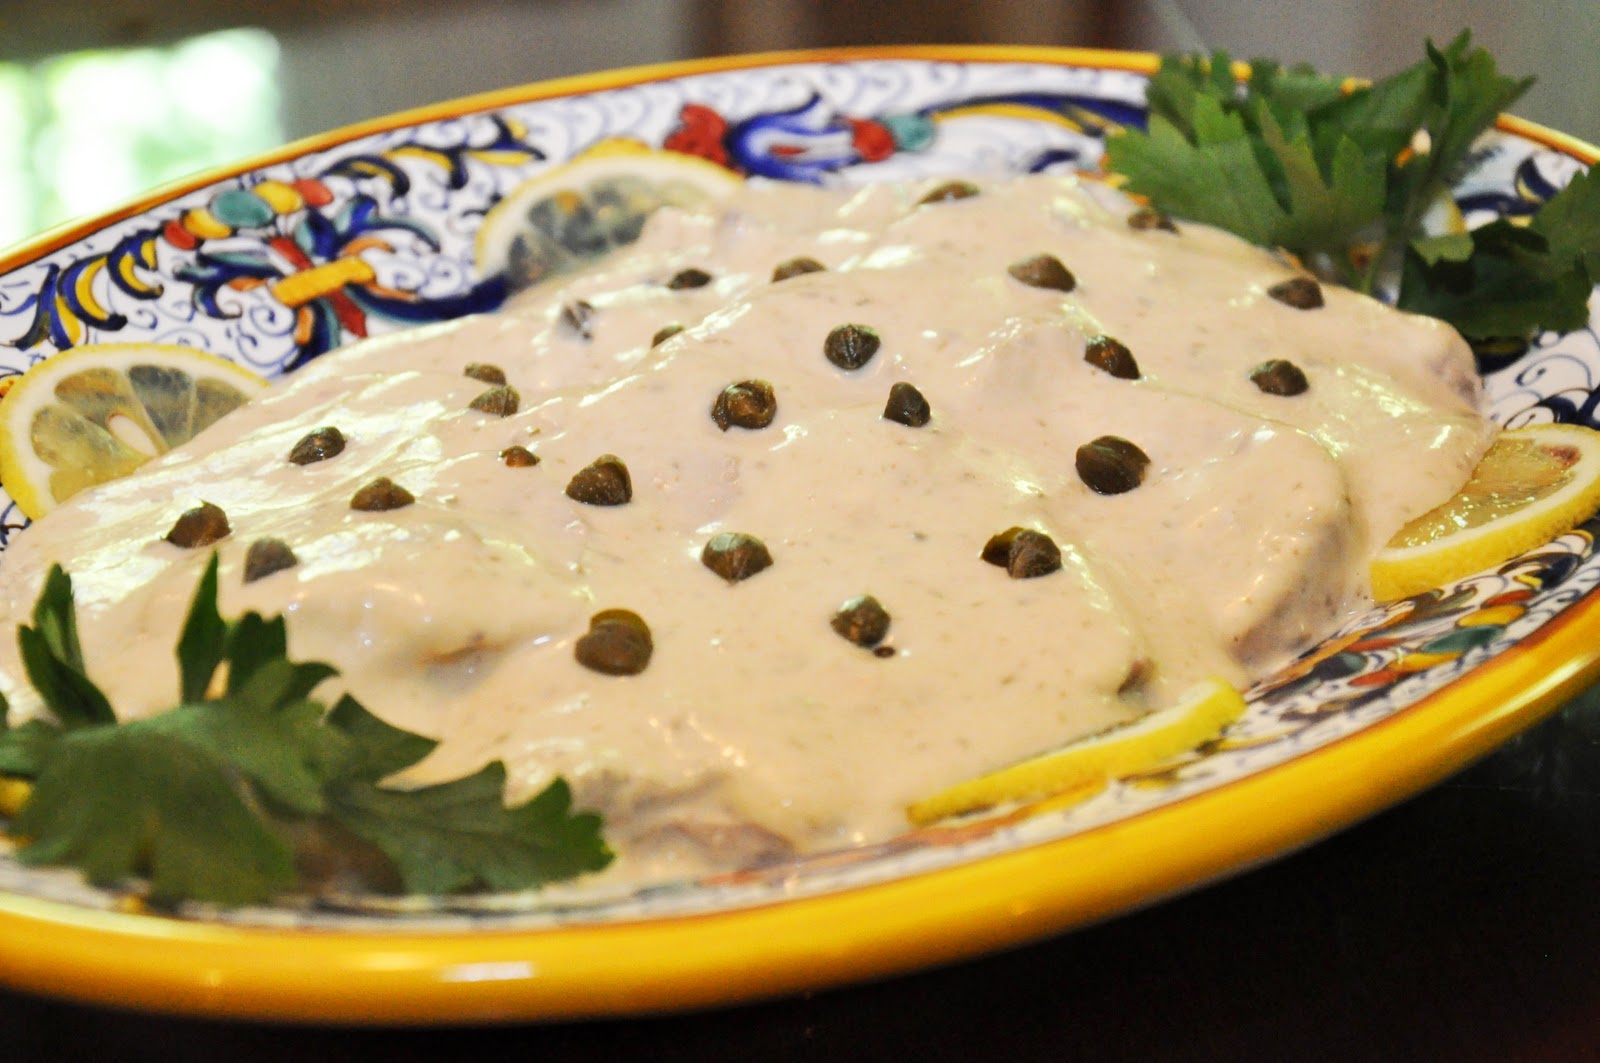
Now take each slice (you'll probably need to do this by hand, otherwise use tongs) and dip in on each side in the tuna sauce and arrange the slices on a platter, each slice just slightly overlapping like so many roof tiles, in an attractive pattern. While pork tenderloin, there will be room for several rows of meat like so: 


Other cuts are larger, so you will probably need to make a single row or arrange them in a circular pattern on a large platter.
 
Finally, finish the dish off by pouring over the top the remaining sauce. While you can serve the dish right away, it develops better flavor if you let it sit for several hours, overnight or—in some recipes—for a few days, so the flavor of the tuna sauce penetrates the meat completely. Before you are ready to serve, garnish the dish with capers and, if you like a more elegant presentation, some thin slices of lemon around the edges and some parsley leaves. 

NOTES: If you want to save yourself the trouble or if you are worried about using raw eggs, you can use commercial mayonnaise instead of making it yourself. Just add a good two cups of mayo into the blender along with the tuna, anchovies and capers and whizz away. Or you can try the original recipe, which did not call for mayonnaise at all. Artusi, for example, calls for passing the mashed tunafish through a sieve, then adding enough olive oil and lemon juice to produce a nice creamy sauce. You can achieve a similar effect in the blender, set on 'liquify'. Artusi also suggests not throwing the cooking liquid away, but saving it for use in a risotto, which strikes me as good advice. 

You can also simplify the dish a bit by doing what most recipes call for: rather than coating each slice of vean in the sauce, line the bottom of your platter with some sauce, lay down the slices and cover them with the rest of the sauce. The slice by slice method is my own 'take' on the recipe, but one that I think pays off, as it ensures that each and every slice is enveloped in the sauce, keeping it moist and lending maximum flavor.

As mentioned, veal loin is the classic meat. And the classic cuts are either the coscia (leg), girello (top round) or magatello (eye of round), all of which allow for long simmering without drying out; modern recipes  sometimes call for the fesa (rump). In the US, these cuts of veal are not all that common, so veal loin can be substituted—and simmered for less time, more like 45-60 minutes than 60-90. These days, pork loin or turkey breast are common substitutes, even in Italy. And, if you ask me, pork tenderloin makes for a wonderful version of this dish—every bit as good, perhaps even better, than the original. 

The origins of vitello tonnato are subject to some confusion, in part because it is typical of two  adjoining but different regions of northern Italy, Lombardia and Piemonte.. According to Anna del Conte in her Gastronomy of Italy, the original version, without mayonnaise but include a bit of cream, comes from Lombardia. When it was taken up by the piemontesi, they added the mayo under French influence. On the other hand, the Oxford Companion to Italian Food has an entirely different explanation: they say that the mayonnaise version is indeed from Piemonte and the original one while the Milanese version is served hot, larded with garlic and pot roasted, the cooking liquid mixed with tunafish and thickened with a roux. And many Italians apparently believe that the dish has French origins, perhaps because of its French-sounding dialectal name, vitel tonnè, but that is apparently not the case. 

It is a summer dish par excellence that can serve as antipasto or a light secondo, as you prefer. In Lombardia, strongly associated with the summer holiday of Ferragosto on August 15, but, if you ask me, vitello tonnato is just too good to serve it only once a year.


Saturday, July 10, 2010

Baba Ghanoush


I love eggplant and I am always looking for new ways to prepare it. One of the simplest and yet most delicious in my book is Baba Ghanoush, a specialty of the Levant. If you've ever made hummus, then the recipe will sound very familiar.

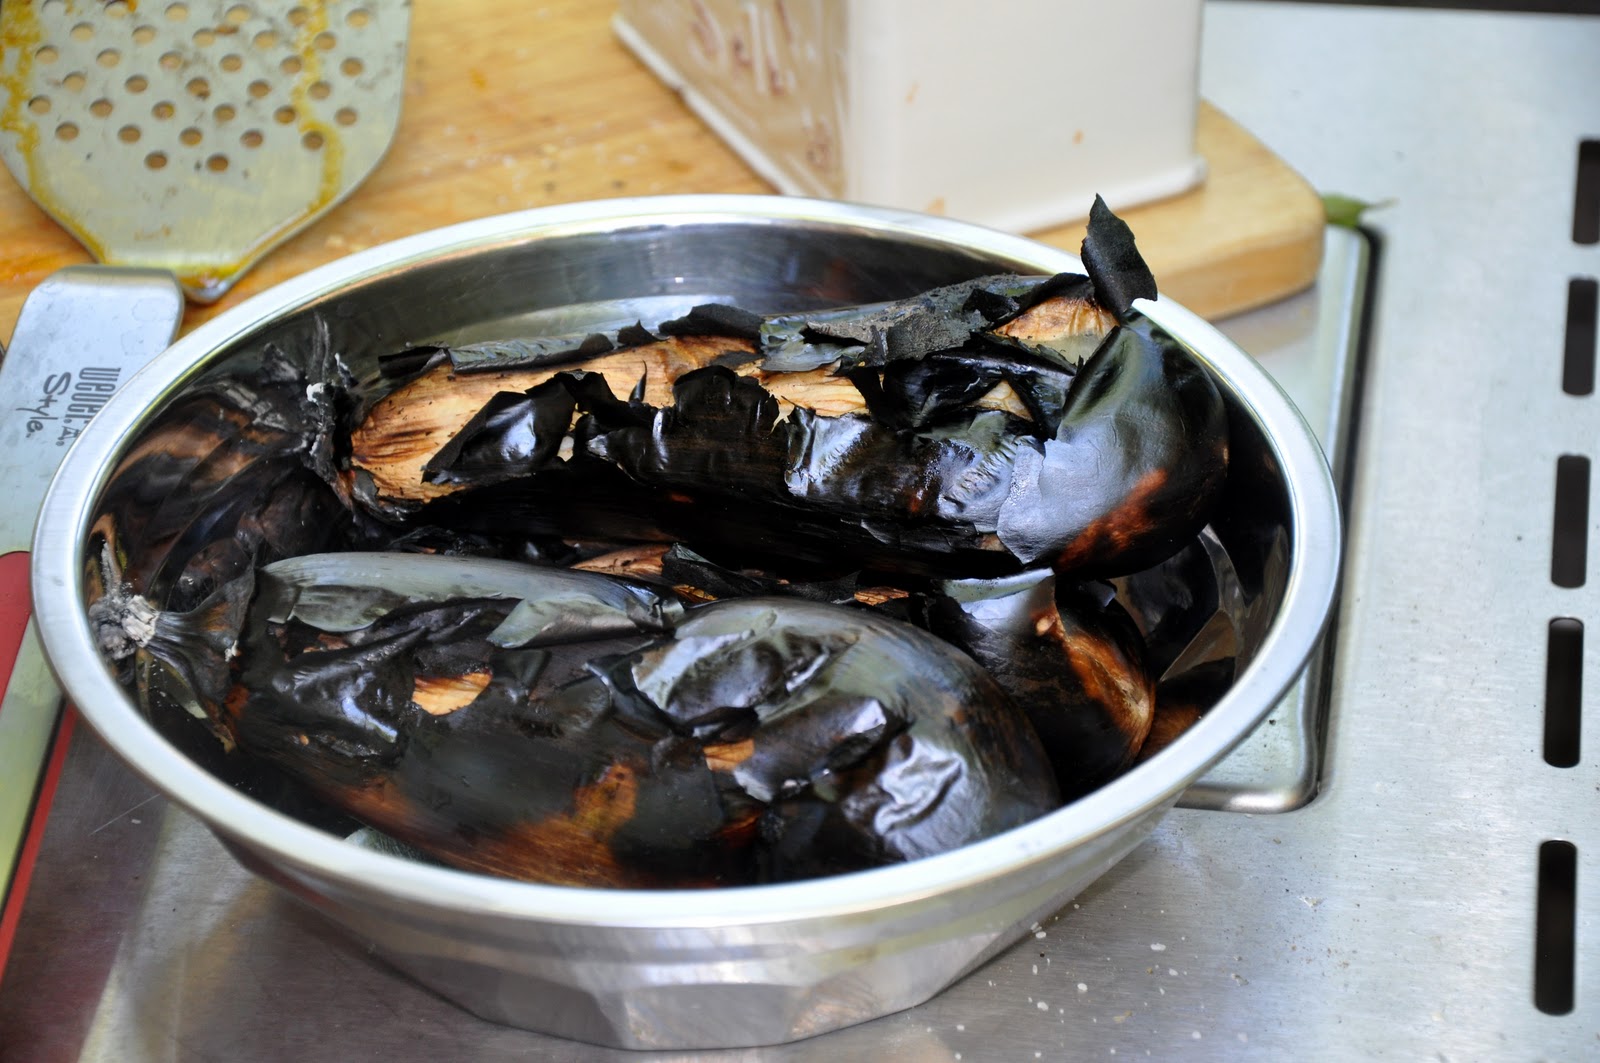
Place a whole eggplant (or several, since the eggplant reduces quite a bit when cooked this way) on a hot grill (or in a hot oven) and roast until the eggplant is fully tender and the skin well charred, turning from time to time to ensure even cooking. This will take anywhere from 30-45 minutes, depending on the size of your eggplants.


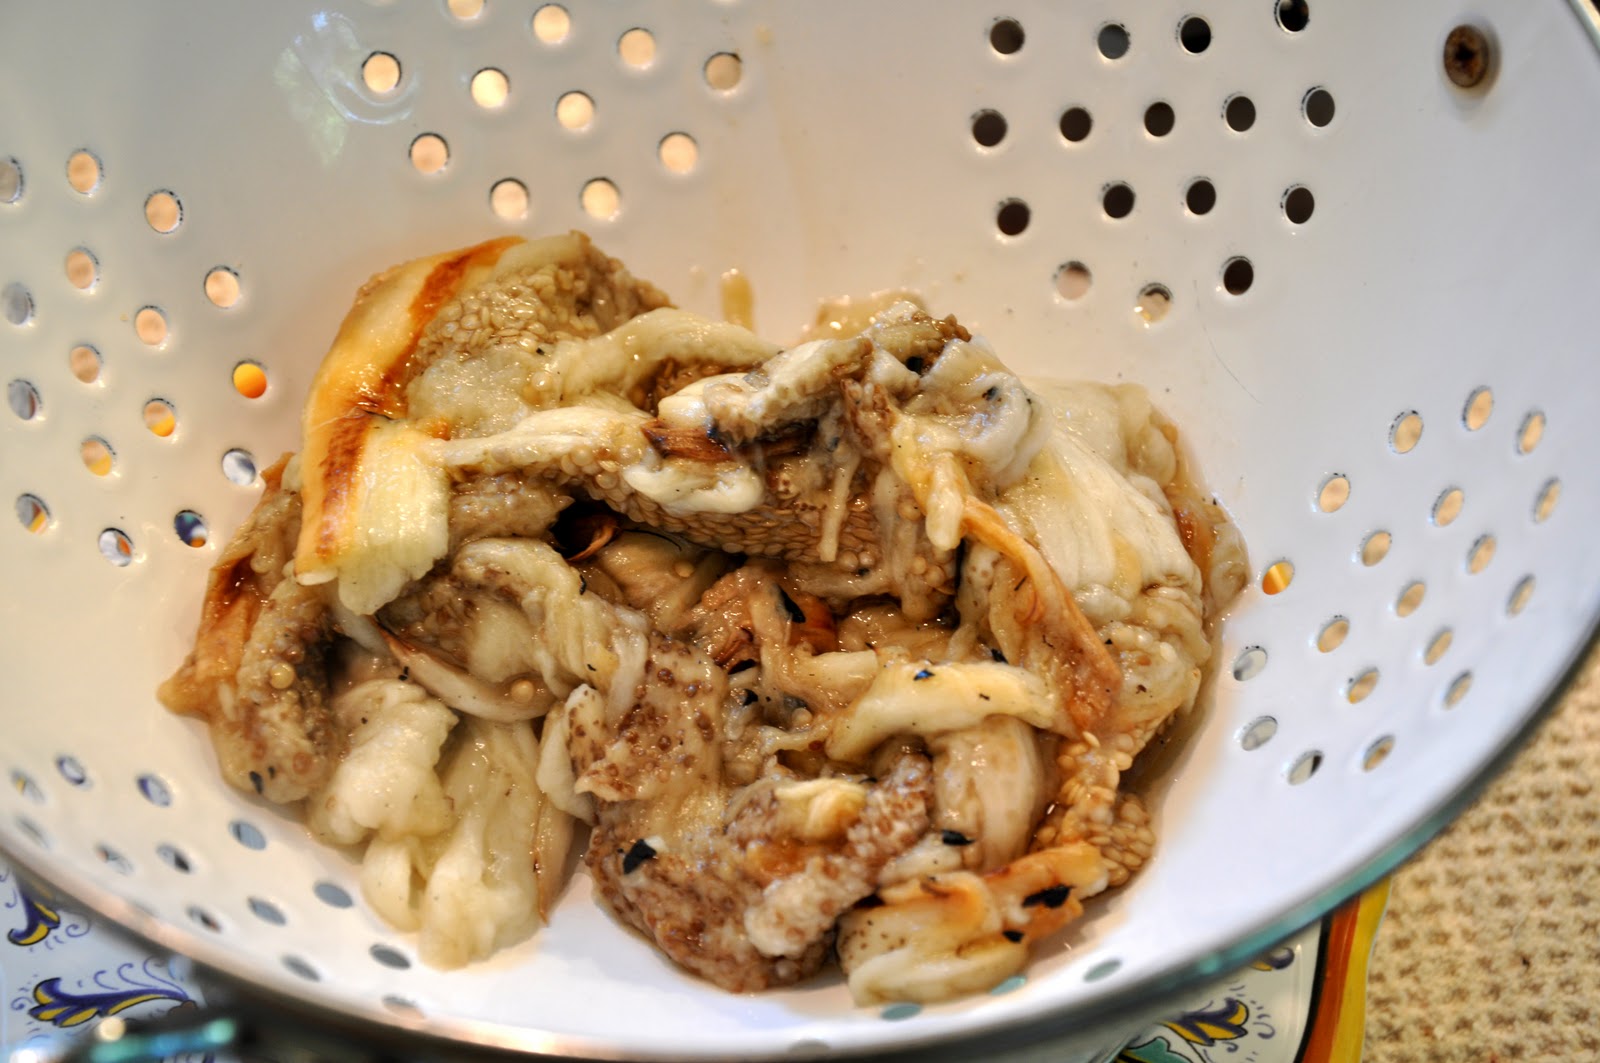
Remove the eggplants from the heat and let them sit, covered, until they have cooled off enough to handle. Then split the eggplant in half and scrape out the tender pulp from the inside, making sure to leave the charred skin behind. Drain the pulp in a colander for at least 15 minutes to remove any excess liquid. 


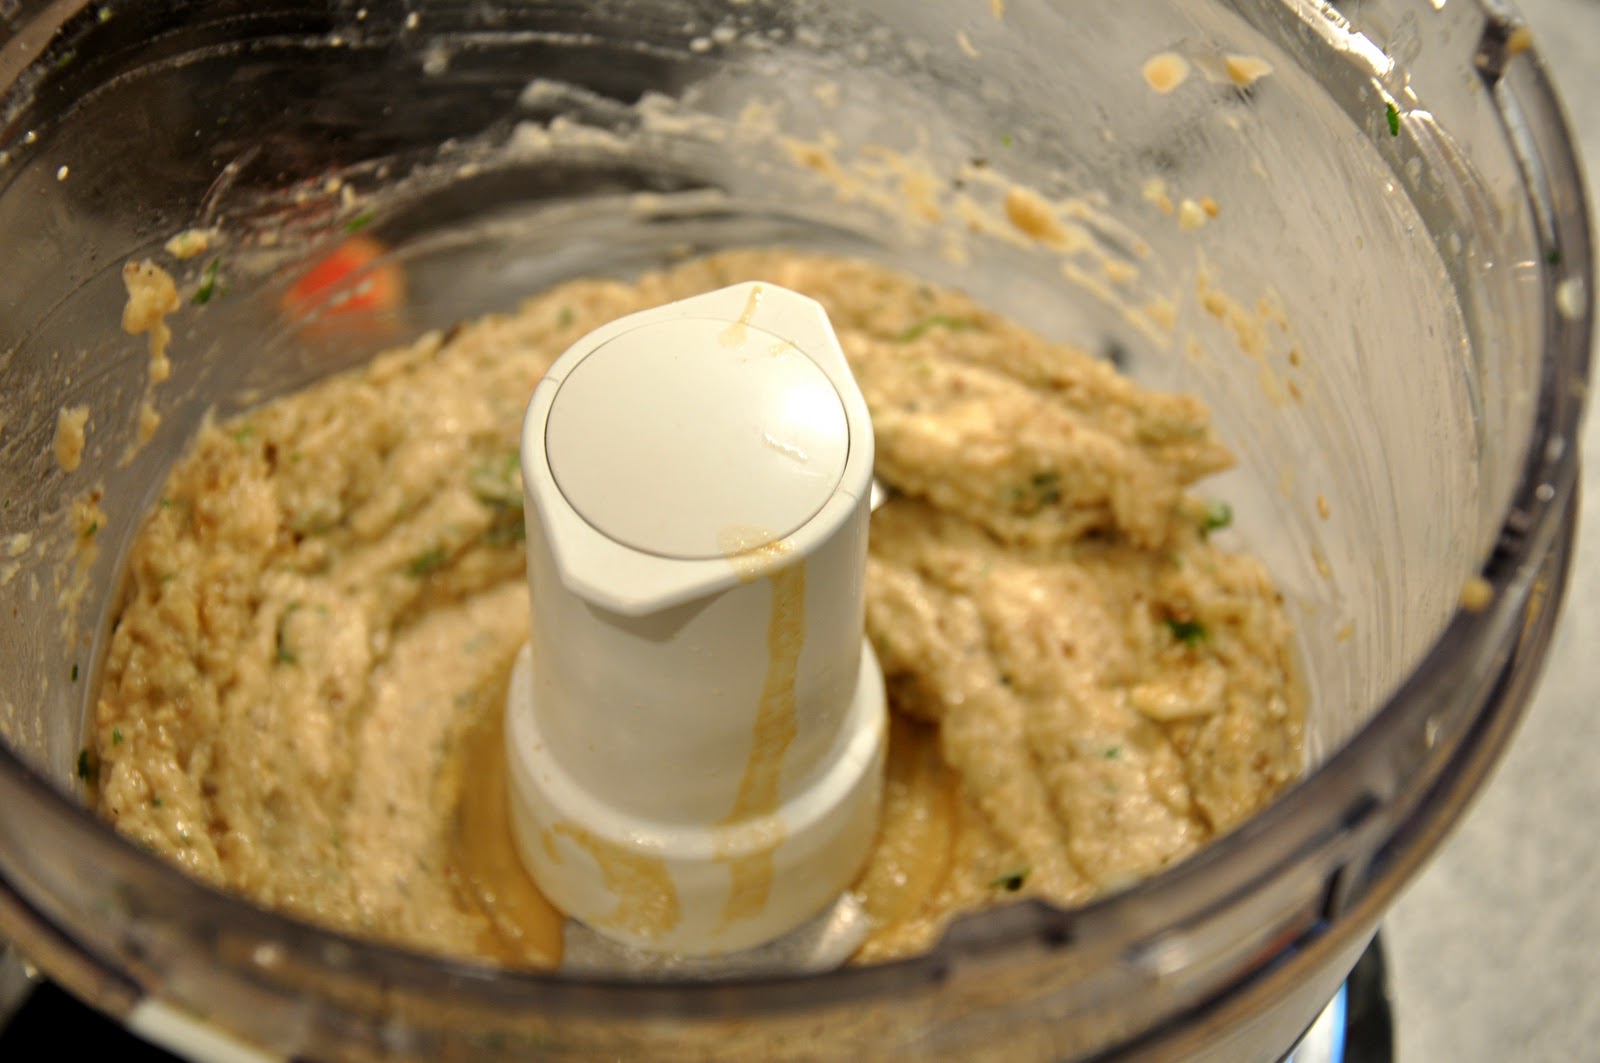
In a food processor, spin a couple of cloves or garlic around with some salt. Then add your eggplant pulp, a bit of freshly squeezed lemon juice and tahini (sesame paste). If you like, add a bit of cumin or chili powder, mint or parsley. Process until smooth. 

 
Serve on a platter or in a bowl and top with a drizzle of olive oil and a bit more parsley or mint for color. 

NOTES: The amounts of all to taste. The amount of tahini, in particular, varies wildly from recipe to recipe. You can add as little as a spoonful or two if you want a 'light' version or lots more if you want a richer version.
(I usually just taste and adjust as I go, although using this method you risk winding up with precious little to actually serve after you're done...) Some recipes specify that the eggplant pulp should be chopped not mashed or puréed.

Baba ghanoush is typically served as a dip to be eaten with pita bread, but I ate it with—hold on to your hats—some tortillas chips I had left over from a party. It was perfectly delicious, although I must admit that the chips may have overpowered the delicate taste of the dip. Next time I'll stick to pita. 

This dish is a wonderful example of how using many of the same ingredients, the peoples of the Mediterranean basin have come up with such different taste experiences. For someone from an Italian background, the taste of this eggplant dip is familiar and yet, for lack of a better term, exotic. It works perfectly as an antipasto in an otherwise Italian menu, or as part of a buffet or as a nice savory snack.

This blog post, from the Green Prophet website, has an excellent discussion of Baba Ghanoush and its many variations.