Showing posts with label Nana. Show all posts

Sunday, March 6, 2011

Chiacchiere


I wasn't much on sweets even as a kid, but these little sugar-dusted ribbons of fried dough—variously known as chiacchiere, nastrini, stracci, cenci, frappe and a myriad of other names—were my one weakness in the sweets department. They are a traditional treat for Carnival, a time for over-indulgence, culinary and otherwise, getting in your 'last licks' before the privations of Lent.

The recipe is actually quite simple. The dough strongly resembles the dough for making stuffoli, but it is rolled out flat like pasta and cut into ribbons or squares or other shapes as you like. Even with such similar ingredients, the taste and texture are entirely different, an example of the Italian talent for creating incredible variety out of a limited palette.

They are not overly sweet—one reason I like them so much—but they are surprisingly addictive. So make lots!

Ingredients (enough for a large plateful of chiacchiere)

200g flour
1 whole egg plus 1 yolk
50g sugar
2 Tbs. olive oil (or butter)
1 jigger of sambuca, anisette, grappa or white wine
A pinch of baking powder (optional)

Oil for frying
Confectioner's sugar for dusting

Directions

Mix the first six ingredients together into a ball. You may need to add more flour or a bit of water until you have a mixture that is rather soft but neither sticky nor tacky. Knead the mixture for a good five minutes until you have a nice, elastic dough. (If using a KitchenAid mixer, use the paddle to mix the ingredients, then switch to the hook to knead the dough on slow.) Wrap your ball of dough in cellophane and then a towel and let it rest for at least an hour.

Divide the two into two parts and roll it out just as if you were making fresh egg pasta. If using a pasta machine, roll it to a medium thinness (notch 3 on a KitchenAid mixer pasta attachment).

Then cut the dough out into the shape(s) you like with a fluted pastry wheel. The most typical, perhaps, is the rectangle that is partially split in the middle as pictured above, but Angelina favored simple ribbons (see photo below). Some folks like to pinch the ribbons in the middle to create little 'bow-ties'.

Deep fry the dough shapes in moderate hot oil. (Not too hot: remember dough fries very quickly and  if your oil is too hot, it may darken too much.) They should puff up immediately, especially if you've used a bit of baking powder. Turn them often with a slotted spoon so they cook evenly. Fry until they are just golden brown, not too dark. (The dark ones don't look as pretty but they are still good—you can exercise you cook's prerogative and enjoy them yourself in the kitchen while no one is looking...)

Drain the fried chiacchiere on paper towels and let them cool. (They can be served lukewarm or at room temperature.) Before serving, dust them with confectioner's sugar. I like to toss them delicately the a bit of sugar first, then top them with a further dusting. They are at their best eaten immediately but are still good for a day or two after they are made.

Chiacchiere, Nana-style


NOTES: No Italian carnevale would be complete without a plate (or two) of chiacchiere, although other Carnival sweets can also be found around the country. In Naples, the other classic dish of the season is lasagna di carnevale, Angelina's signature dish. A dinner featuring both—and a nice roast, perhaps, for the secondo—would be almost overwhelming, but then, Carnival is all about excess.

The recipe for chiacchiere has changed remarkably little. Northern versions tend to use butter and spirits like grappa for the dough, while in the south they use olive oil and sambuca. (The original recipe, I believe, used lard, which you may try if you dare!) Modern recipes add a bit of baking powder (as for stuffoli) for a lighter, puffier result. You will also see recipes that add some additional flavors, usually lemon zest or, as in this lovely version I just saw today, a bit of orange zest. Some recipes will have you bake the dough ribbons in a hot oven, but I've never tried that—don't like the idea, frankly.

The recipe is apparently extremely old, dating back to ancient Roman times, when they (or something similar) was called frictilia.

Friday, January 28, 2011

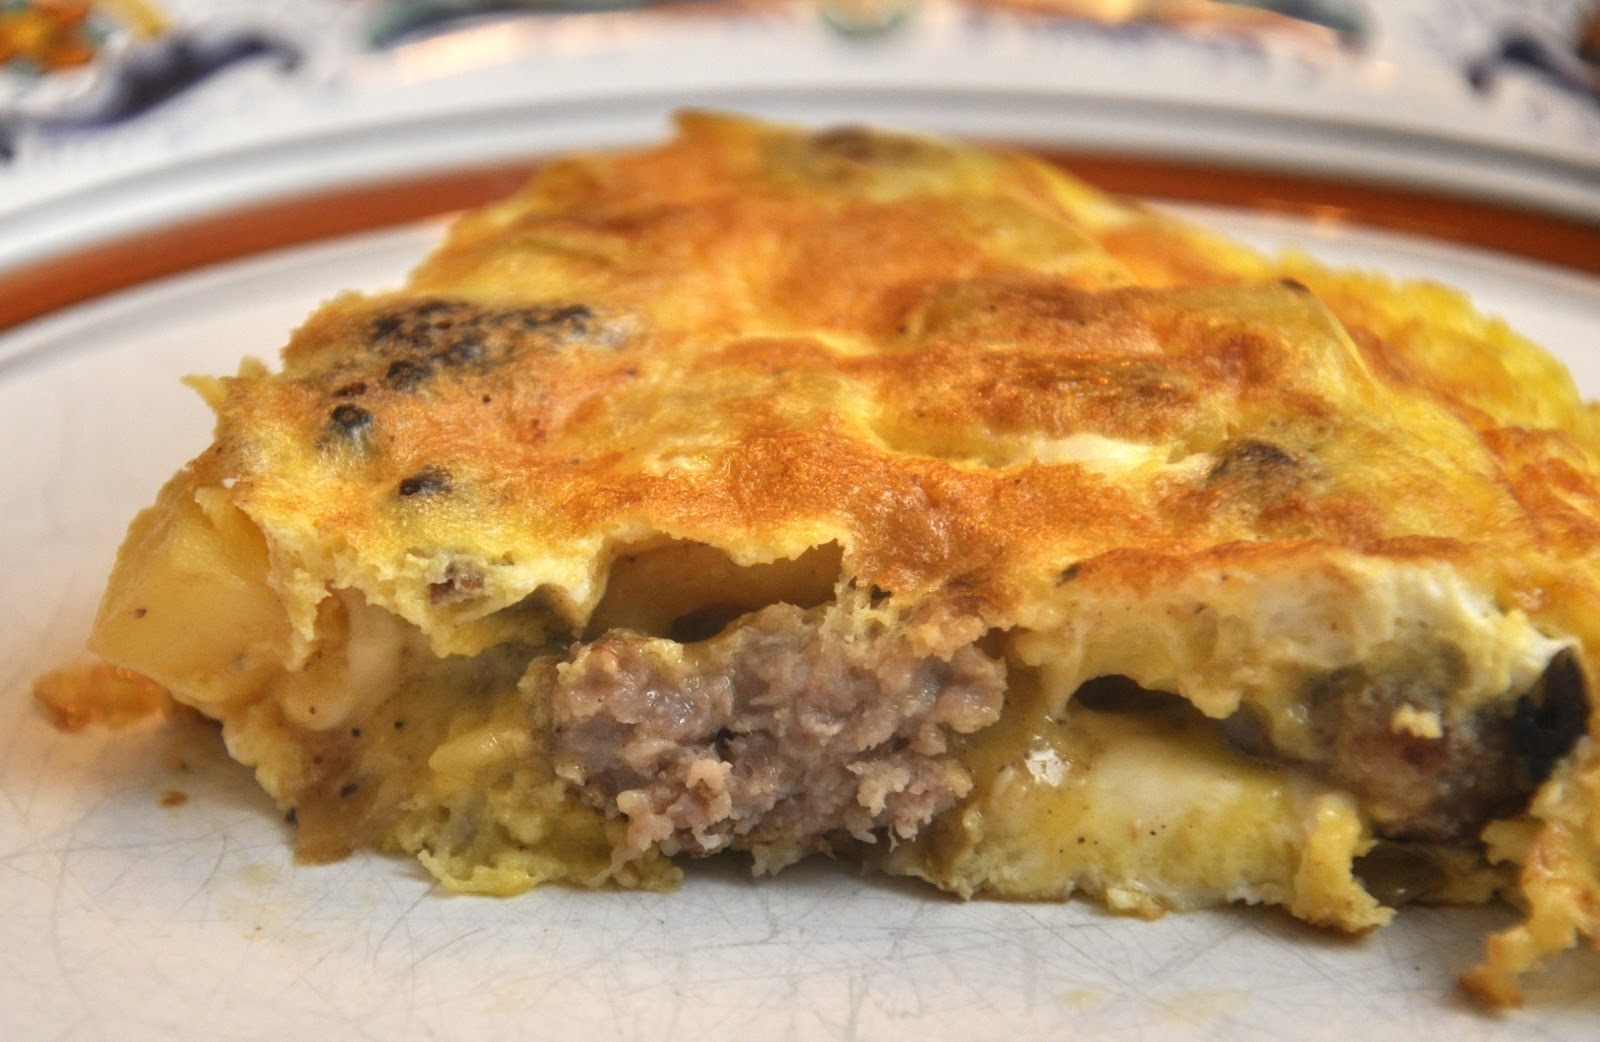
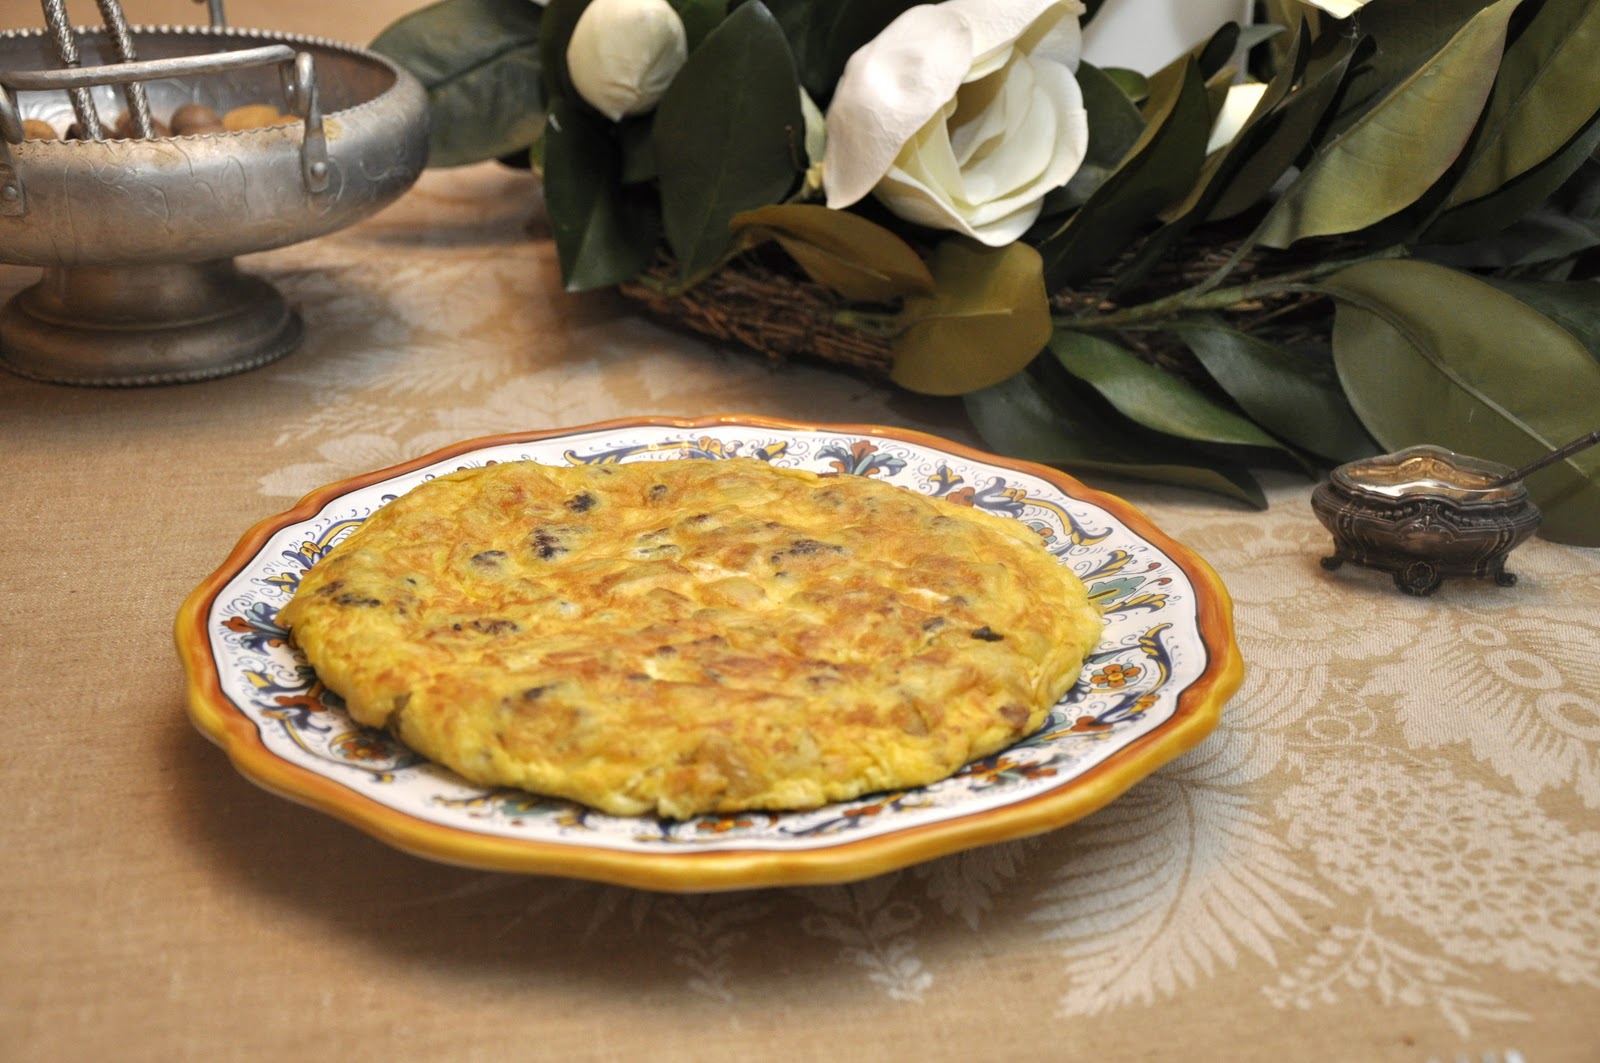
Frittata con patate e salsiccia


One of the wonders of Italian cuisine is its incredible variety, and much of that variety comes from the mix-and-match nature of so many of its dishes. You take a staple base ingredient like rice or pasta, and you pair that with all sorts of flavoring ingredients and come up with literally hundreds of variations on a theme. So pasta or risotto are not a single dish, but a whole category, a whole world of dishes that could literally fill a book, and has.

The same goes for the flat omelette known as the frittata. The combinations are endless, as we have already featured a few on these pages: frittata di patate e cipolla (with potatoes and onion), frittata ai carciofi (with artichokes) and frittata ai peperoni (with bell peppers). Here's another example, one of my favorites on a chilly winter's day when I want something a bit more substantial: a frittata with sausages and potatoes.

Ingredients (to serve 2-3 as a secondo, 4-6 people as an appetizer, snack or part of a buffet)

2-3 sausages, removed from their casings and broken up into smallish pieces
3 medium waxy potatoes, peeled and diced
1/2 onion, sliced or diced
Salt and pepper
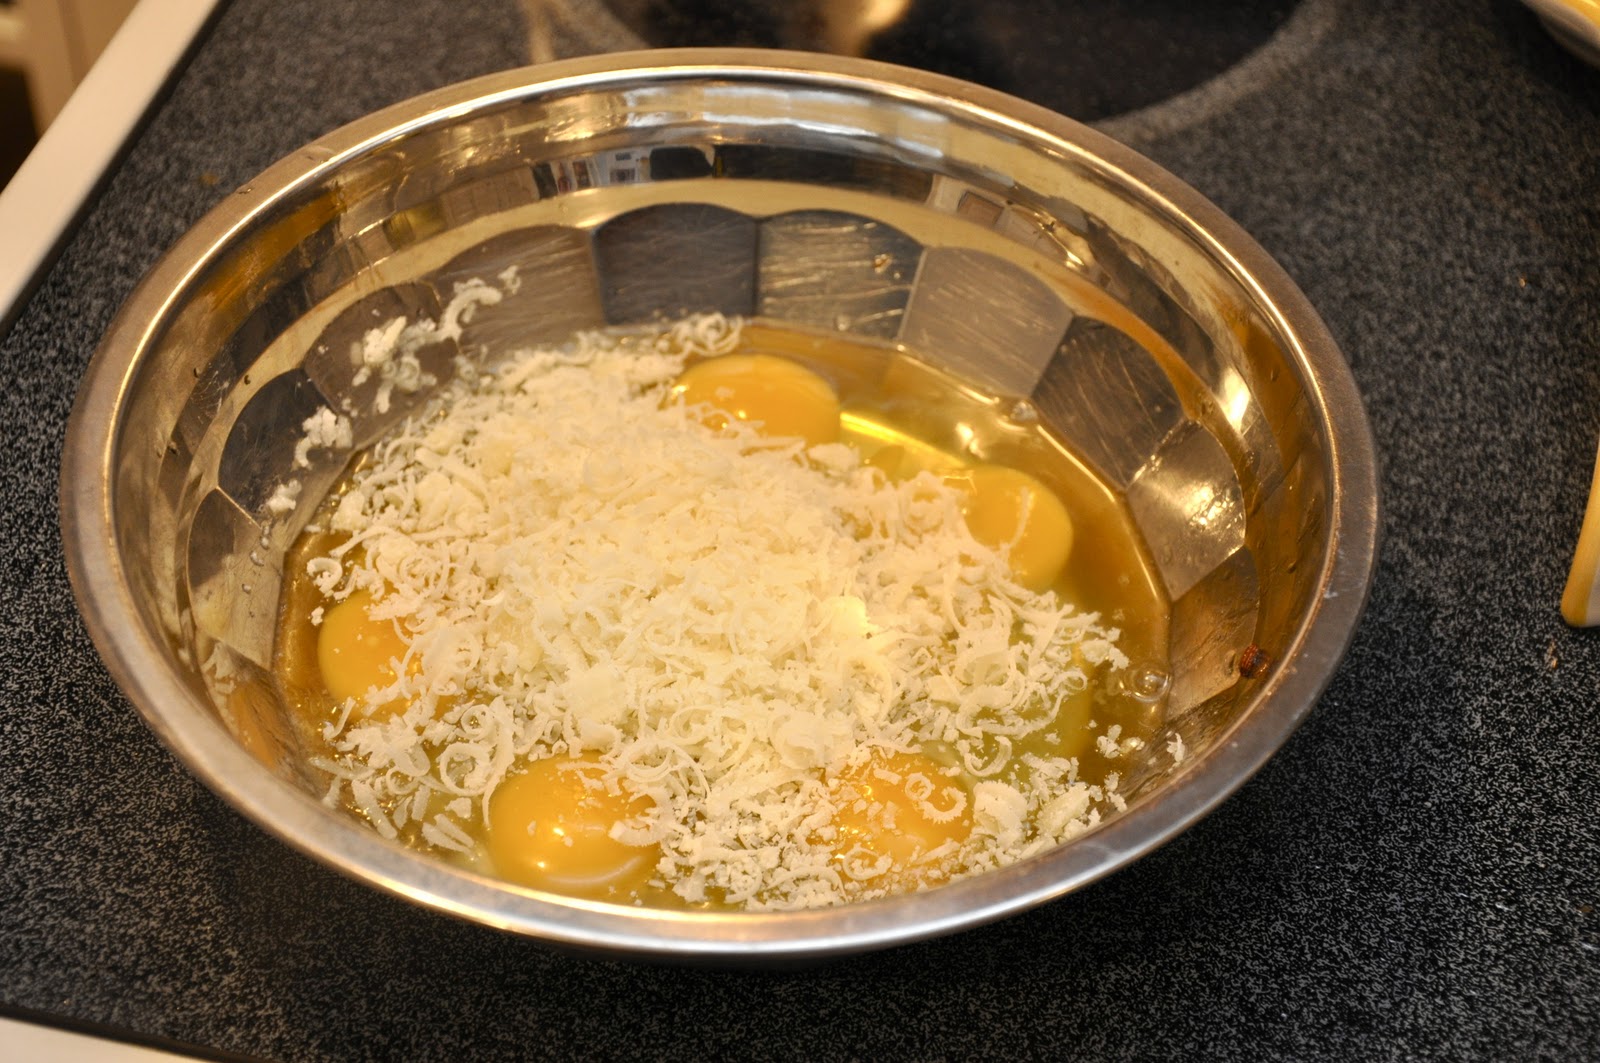
6 eggs
100g (3-4 oz) of grated parmesan or pecorino cheese
A few sprigs of fresh parsley, finely chopped (optional)
Olive oil


Directions

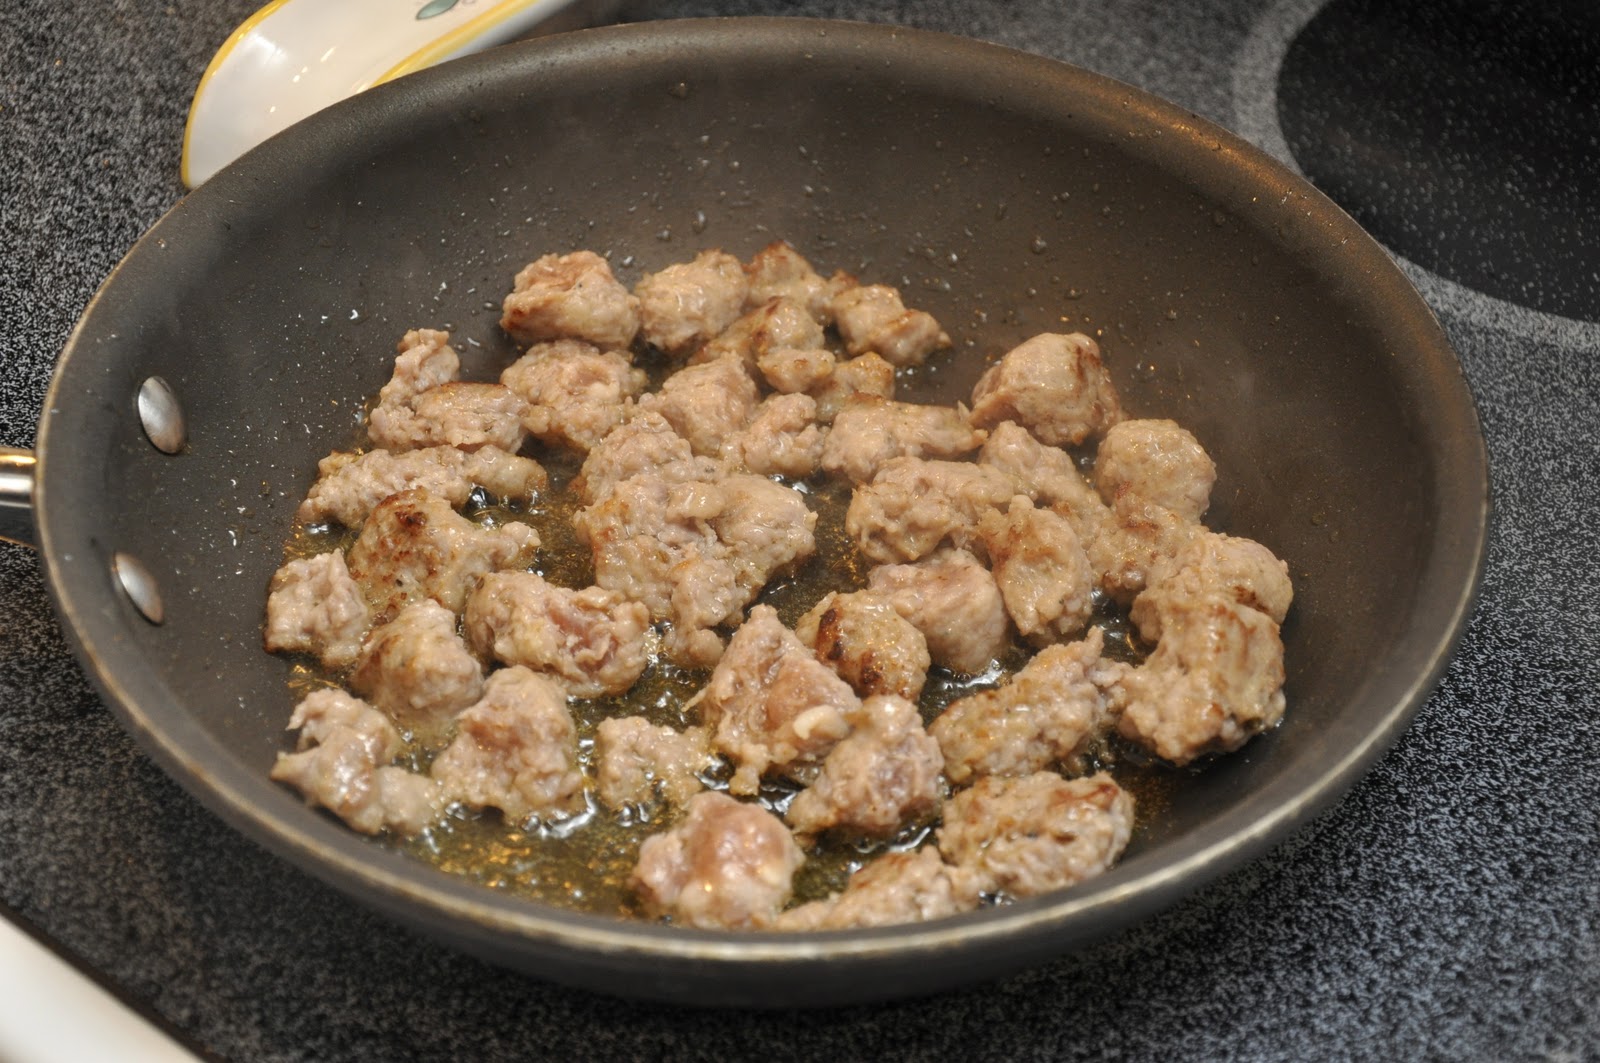
Start by taking a non-stick skillet and sautéing your sausages in a bit of olive oil over moderate heat. When they are nicely browned, you can remove them to prevent them from getting too brown, or just keep them in the pan.


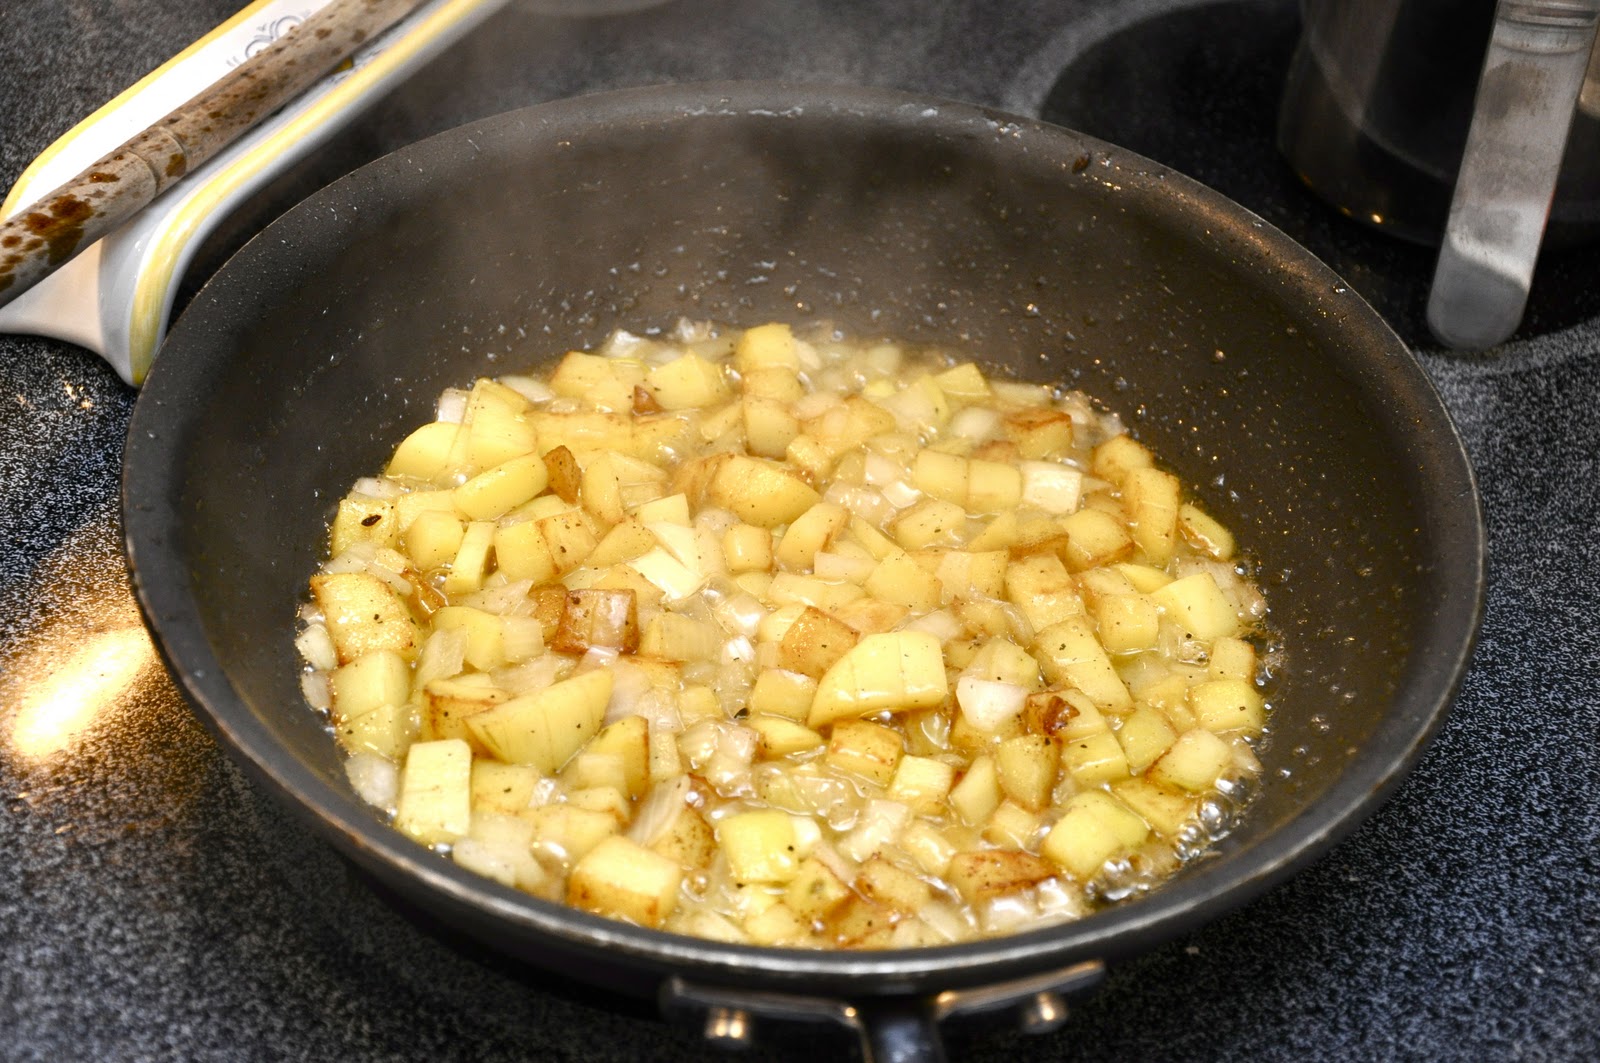
Now add your onion and potato and let them go until they are nice and tender, and not too brown. Season with salt and pepper as they sauté. I find that it helps to add some water and cover the skillet for a few minutes. This speeds up the cooking time and prevents burning.


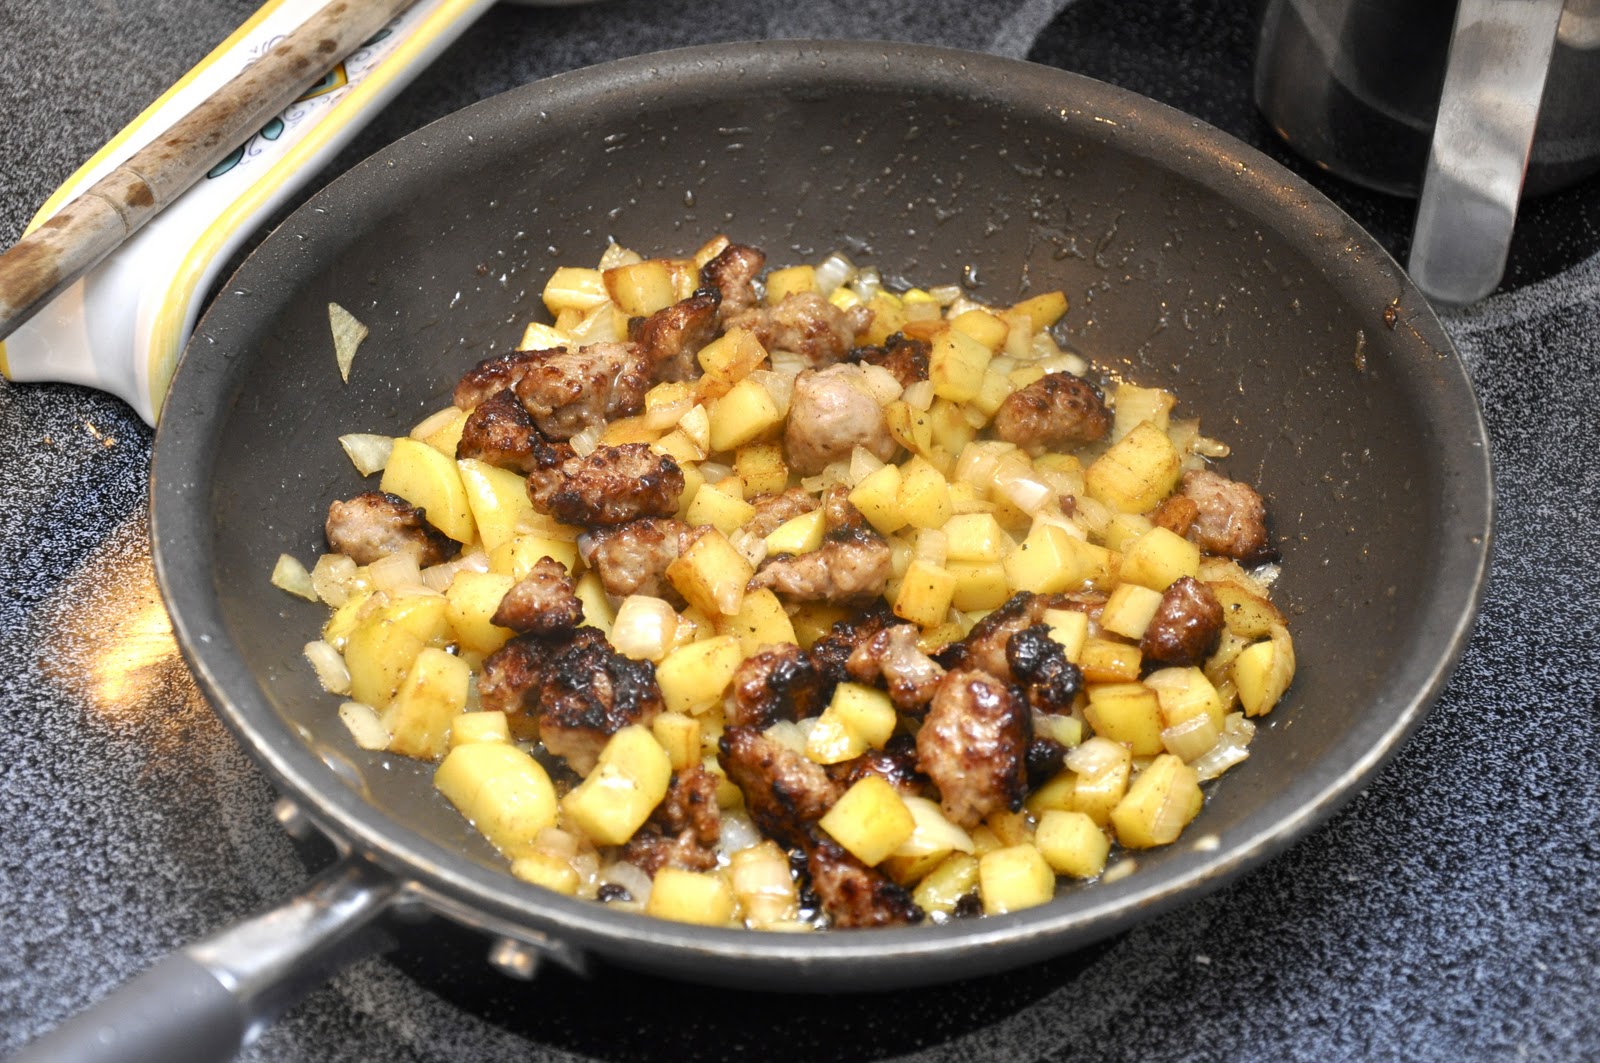
Once the potato and onion mixture is done, add back the sausage pieces if you've removed them. Let them sauté together and get to know one another for a minute or two. If you are using the parsley, now is the time to add it to the mixture.


While those ingredients are getting acquainted, beat your eggs and grated cheese together in a bowl. If you are using pecorino, you should not need much salt, but with parmesan you will want to season the eggs a bit.


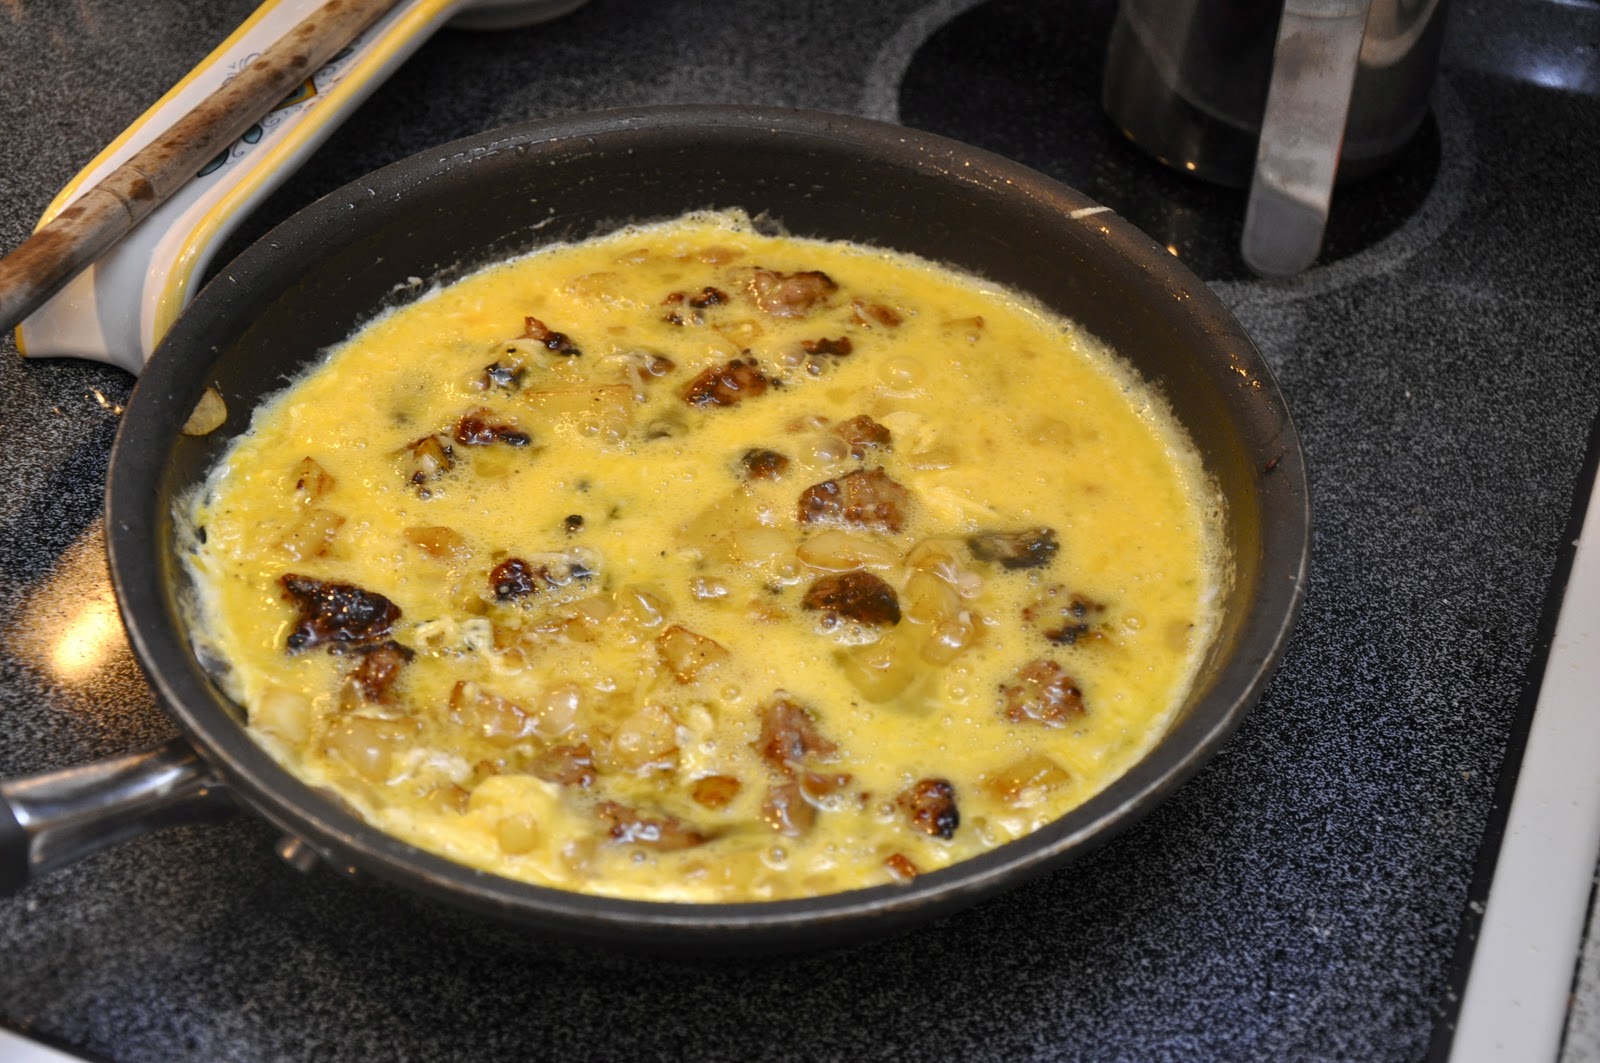
Pour the egg mixture over the flavoring ingredients in the skillet and mix once with a spatula or wooden spoon.


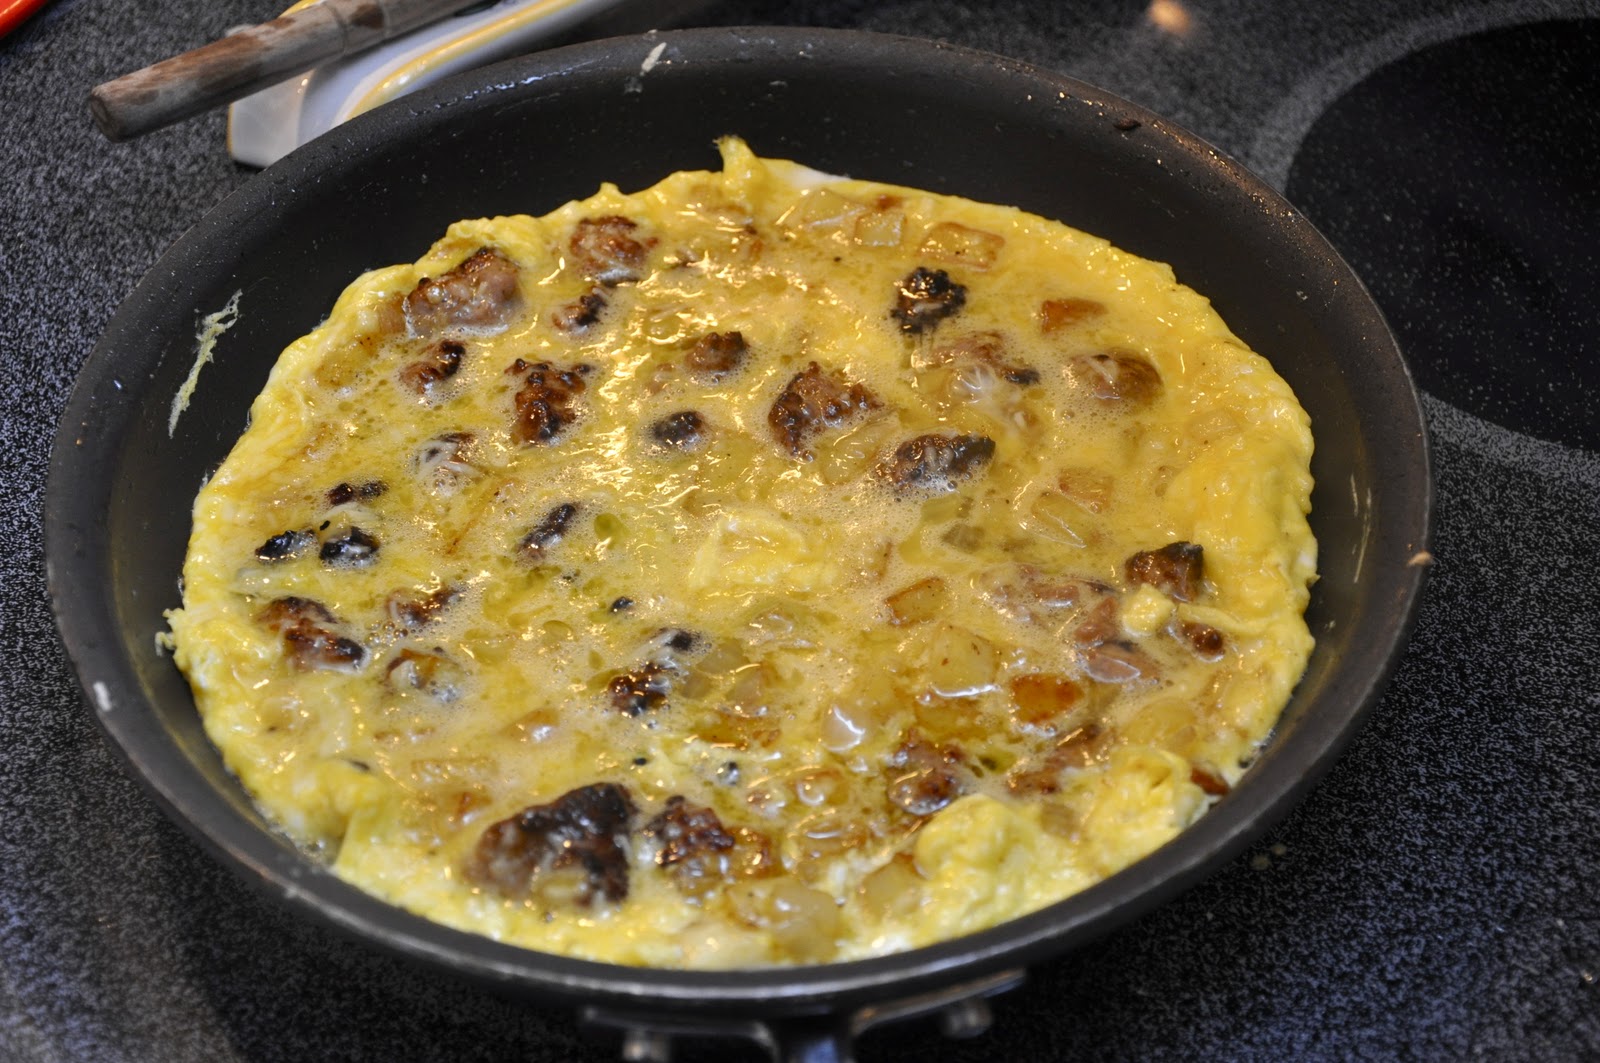
Once the flavoring ingredients are more or less evenly distributed though the eggs, stop and let the eggs cook, still over moderate heat, until they have almost entirely set, except for a thin layer of raw egg on top, and the bottom has nicely browned (but not too much). During this step, too, you can cover the skillet with a lid to help the eggs set. The whole process should not take more than 8-10 minutes. Use a spatula to check the bottom to make sure it's browning nicely but not burning. Regulate the heat if need be.


Now comes the tricky part: you need to flip the frittata over. I do this by using two plates. You slip the frittata out, cooked side down, onto a dinner plate. Then top that plate with another, and flip the two plates over, so that the frittata is now upside down, with the runny, uncooked side facing up.

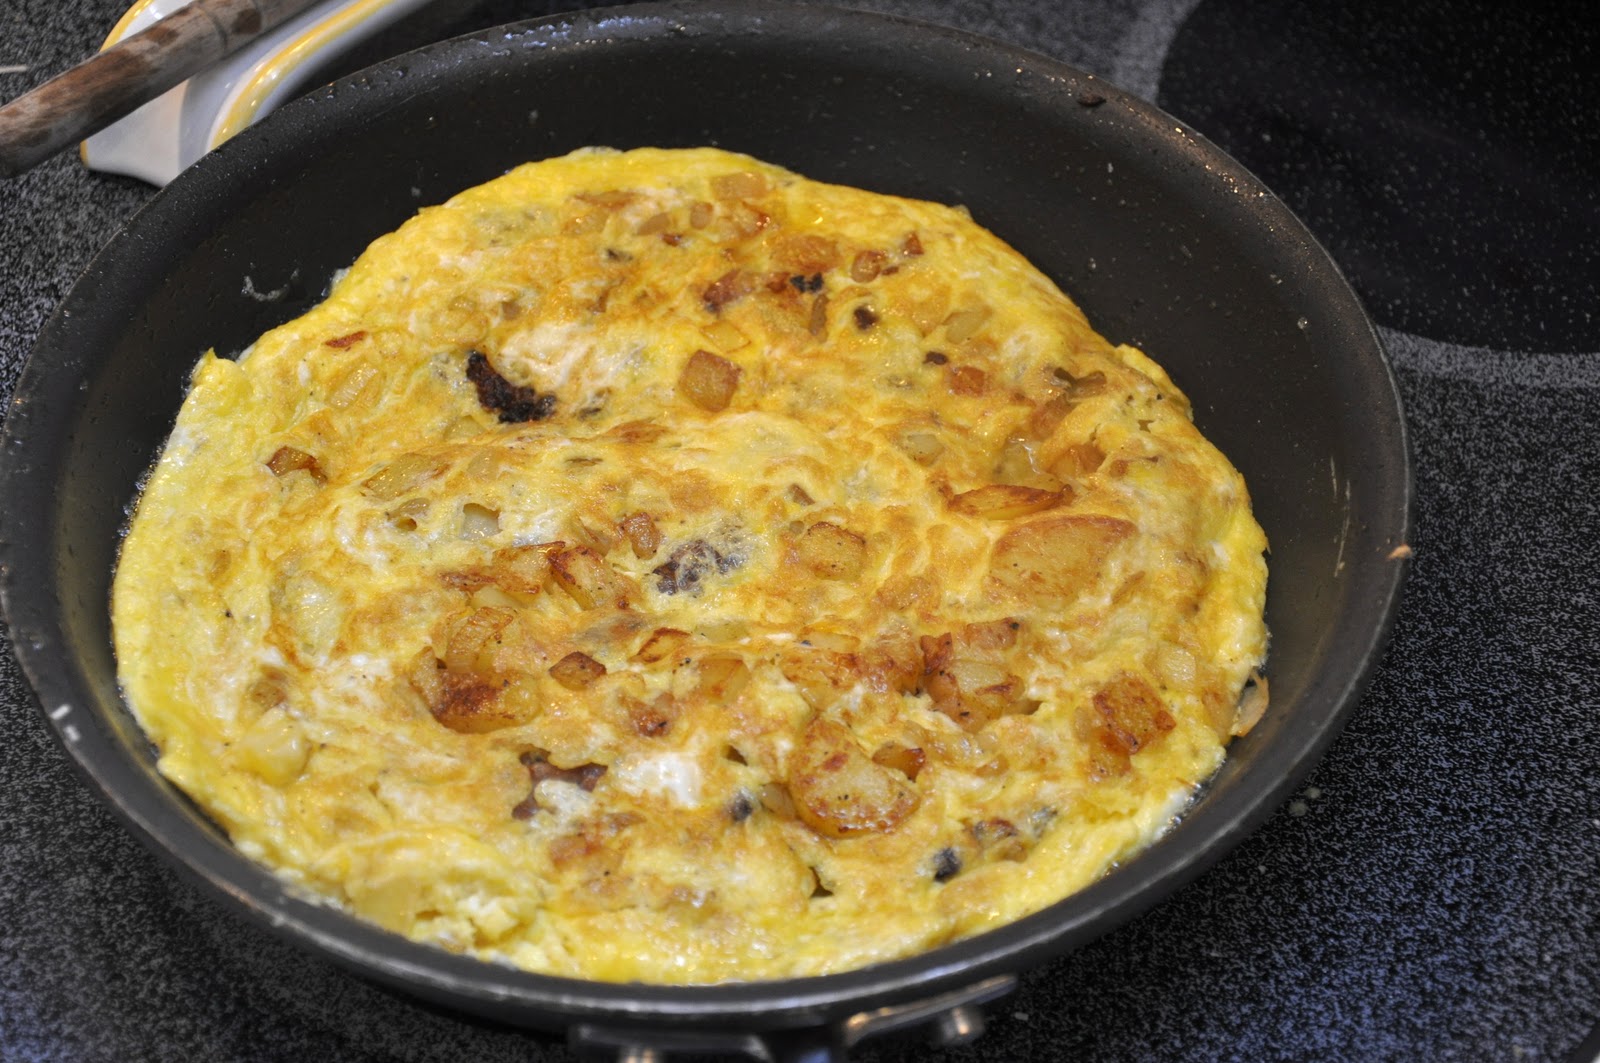
Add a little more olive oil into the empty skillet, then slide the frittata back into the skillet. You will now want to let the runny side cook. This will take a lot less time than before, as you eggs should have already almost completely set, perhaps 3-5 minutes more. Again, check the bottom by raising a bit of the omelette with a spatula and take a peek underneath. It may look a bit misshapen at this point, but not to worry, all will be well in the end.


When the frittata is done, slide it out onto a dinner plate again. I find that the last-cooked side is the most attractive, so once again, I use another plate and flip it over onto its 'pretty' side. Let it cool for a few minutes and serve, cut into wedges.


NOTES: The two-plated flipping technique is one that I  really like, since it is basically foolproof. But if you like, you can use a single plate. You take the plate and cover the skillet, and then flip as described above. This saves you cleaning another plate but be careful, as the skillet is obviously going to be very hot.

Another technique is to run the skillet under a broiler for a few minutes, until the eggs are set and the top is nicely browned. This is even more foolproof than the two-plate flipping method, but don't think that the frittata turns out as attractive, and since the top has not 'tasted' any olive oil, it is a bit less savory.

Finally, they sell special double-skillets with interlocking handles specially-made for making frittata. I have never used one, so I can't comment on how well it works.

The recipe is a classic one, and admits a few variations. Besides the choice of cheese (which could also run towards fontina or another creamy cheese instead of a grated one), you can, of course, achieve a lot of variety by just your choice of sausage. And you can leave out the onion if you like, or substitute shallot or, if you want to get fancy, some chopped leeks.  And some recipes will call for parboiling the potatoes before sautéing them with the onion. That's an extra step that I've never tried and, to my mind, it takes away from the peasant character of the dish. But, of course, no one is going to  stop you if you like the idea...

A frittata can be eaten warm or at room temperature. Leftover frittata is perfectly delicious, and can be used to fill a sandwich—in the old says, this was a favorite lunch of Italian workmen and field hands. A frittata is a versatile dish. It makes a lovely and light secondo, but can be a snack or antipasto, or serve as part of a buffet. The one thing it never is—at least in Italy—is breakfast. But then again, why not? 

Wednesday, December 22, 2010

Struffoli!


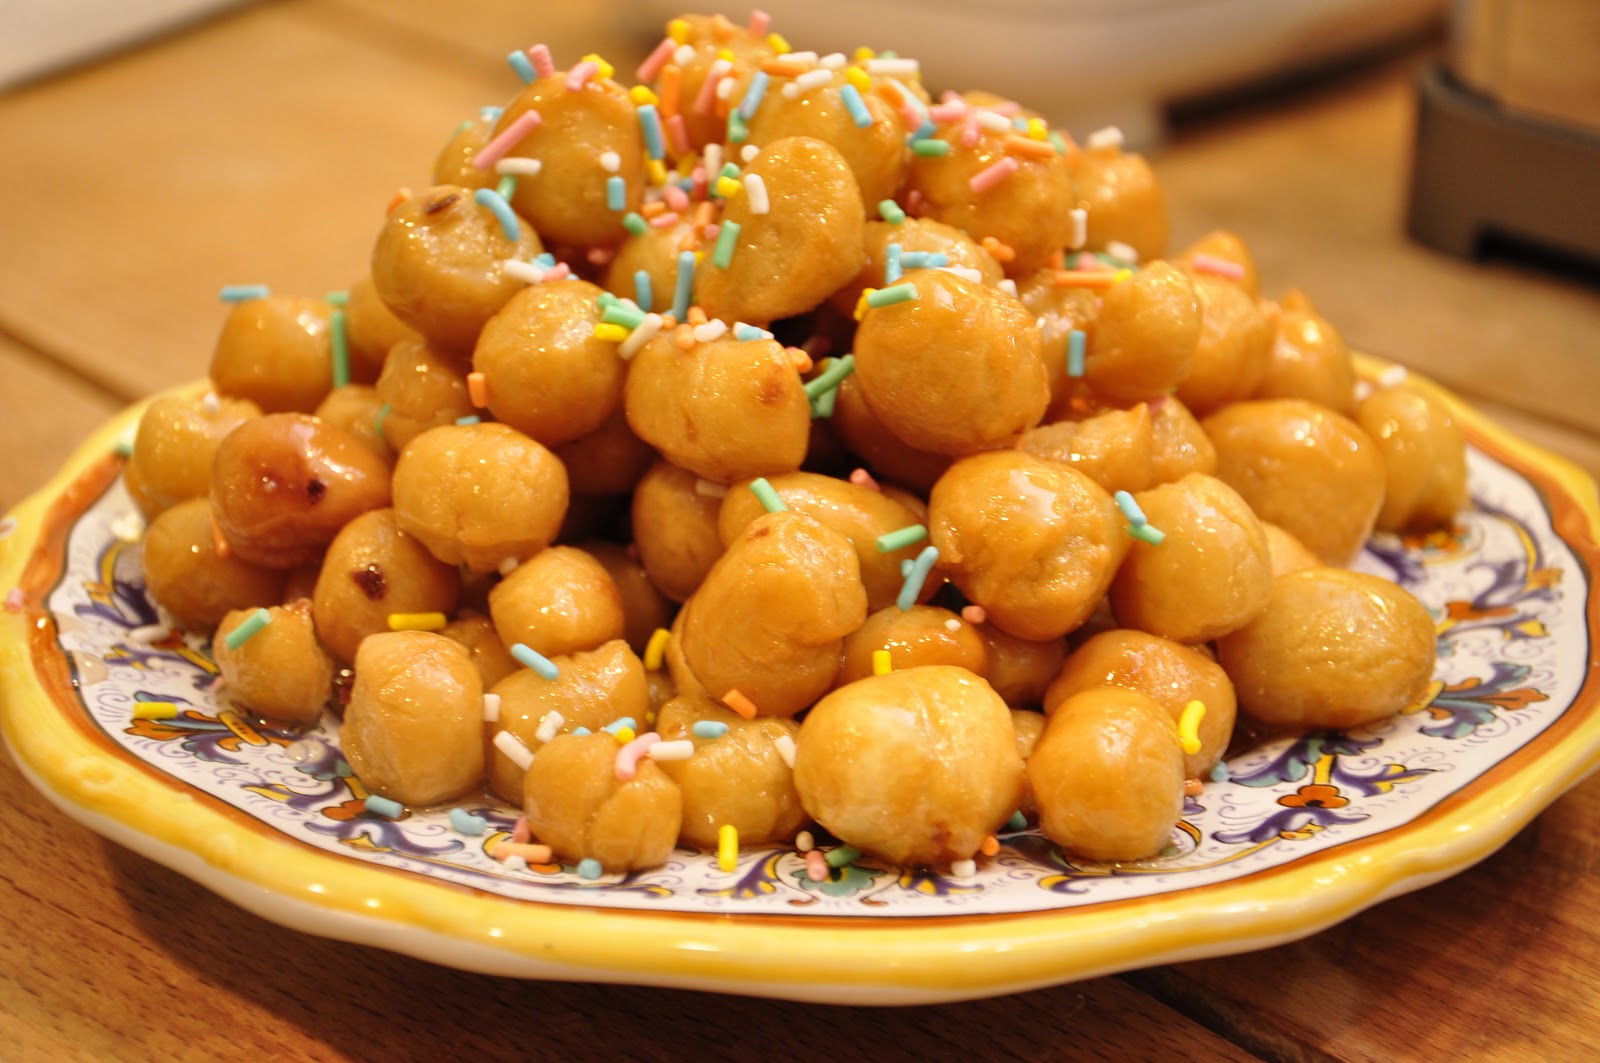
Struffoli, small balls of dough fried and then covered in honey, is the quintessential Christmas sweet of Naples and its region of Campania. Although I don't have much of a sweet tooth, it is very dear to my heart; it was one of nonna Angelina's signature dishes, and it never failed to make an appearance each year around the holidays. In our family they were known as 'Nana's honey balls'. As a child I took the name literally, and until I moved to Italy, I thought that they were my grandmother's invention. You can imagine my surprise then, when, on vacation on the Amalfi coast one year, I peered into the window of a pasticceria and saw... Nana's honey balls! Where on earth, I thought to myself, had they gotten the recipe? Well, I soon enough learned that Nana's secret recipe was actually no secret at all. In fact, the recipe is ancient, dating all the way back to the Greeks who settled southern Italy, founding, among other things the city of Naples or Neapolis, meaning 'new city' in Greek.

In any event, these little babies are actually quite simple to make, but, like many old-fashioned dishes, they require a bit of time and tender loving care:

Ingredients (for a small plateful of stuffoli)

300g (3 cups) flour
3 eggs
Butter, a walnut-sized chunk or 3 Tbs. oil
Rum,  or other spirit (optional)
Zest of one lemon
Salt, a pinch

Vegetable (or olive) oil for frying

300g (1 jar) honey
Candied fruits (optional)
Confettini or candied 'sprinkles'

Directions

You begin by making dough with the first six ingredients. This was traditionally done by making what the Italians call a fontana, or fountain of flour, in the middle of which you make a well for other ingredients, then slowly incorporating the flour into the well by hand as you beat the eggs and other liquid ingredients with a fork. These days, however, a stand mixer makes short work of this. Just put in your flour, then the other ingredients, and mix until you get a nice dough, just as if you were making pasta.

Once the ingredients have formed a smooth dough, form it into a ball and wrap it in plastic wrap. Let the dough rest for a good 30 minutes or so.

After the dough has rested, take a handful of it at a time and roll them out into 'cords' as if you were making gnocchi, about the thickness of your little finger (if you can manage it, otherwise as close to that as you can get). Then cut the cords into short lengths, again just like you are making gnocchi.


 Take each little piece of dough, one by one, and quickly rub them between your palms in a circular motion to form little balls, the smaller the better. Place the little balls on a floured towel as you work, making sure that they are all in a single layer so they don't stick. Just before proceeding to the next step, you grab the ends of the towel and swish the balls around to lightly flour them.


Heat the oil in a large pan. You want lots of oil so the little balls can deep fry in it. When the oil is nice and hot, but not boiling, plunge the dough balls into the oil a handful at a time. The oil will immediately bubble up vigorously. Not to worry, it's supposed to be that way.


Fry the dough balls until they are lightly browned. Drain on paper towels while you proceed to the next step.


 Now, in an ample sauté pan or saucier large enough to hold all of the dough balls, gently heat the honey until it liquifies. Add the dough balls, stir them gently to coat. Allow the balls to soak up the honey for just a minute or two. (They should not get soggy at all.) If using candied fruit (see Notes below) you will want to add some at this point.


Remove your struffoli from the pan with a slotted spoon and arrange them on a plate. It is common to arrange struffoli in a ciambella or ring, but you can also simply pile them high. I like to form them into a little 'Mount Vesuvius' as picture above. Then sprinkle your pile with confettini  (or candy sprinkles). It is also customary to decorate and flavor struffoli with candied fruits, in particular little bits of candied oranges and cherries, in addition to the spinkles. You can do this if you like, although—as far as I can remember—Angelina never did, so I follow suit. They can be eaten immediately, but improve with age.

NOTES: Although it takes a few steps, the recipe is really pretty much foolproof. The only trick, the extent there is one, is to make your struffoli as small as you can manage, as that will mean more honey flavor and less chance of an undercooked middle.

There are a few variations on the dish, although none that change its essential character. Like many traditional recipes, the original fat for both making and frying the dough was strutto or lard, not oil. Today, it is more usual to use butter for the dough and vegetable or even olive oil for frying. Not all recipes call for the liquor. And some recipes call for orange rather than lemon zest. And the ratio of egg to flour varies from recipe to recipe. Here I have indicated the same 'golden rule' as for pasta dough: 1 egg per 100g (1 cup) of flour. But recipes may call for more or less egg, some for an extra yolk for color and richness. Some recipes omit the fat from the dough—be it butter, oil or lard—altogether, while others call for significantly more fat than indicated here. And, finally, some modern recipes, especially Italian-American ones, call for a pinch of baking powder, which lightens the honey balls considerably but is obviously a modern permutation.

To tell you the truth, struffoli were not all that popular among the younger generation of my family. I like them well enough, but one of my sisters actively despised them. Being a natural born politician, however, that didn't stop her from complimenting our grandmother profusely one Christmas. Well, our ever thoughtful grandmother took note and the following Christmas  brought a double batch of her 'honey balls', one for the family as usual, and another just for my sister, since she loved them so much! You should have seen the look on my sister's face as Angelina handed her that enormous second bag full of struffoli...

Saturday, September 25, 2010

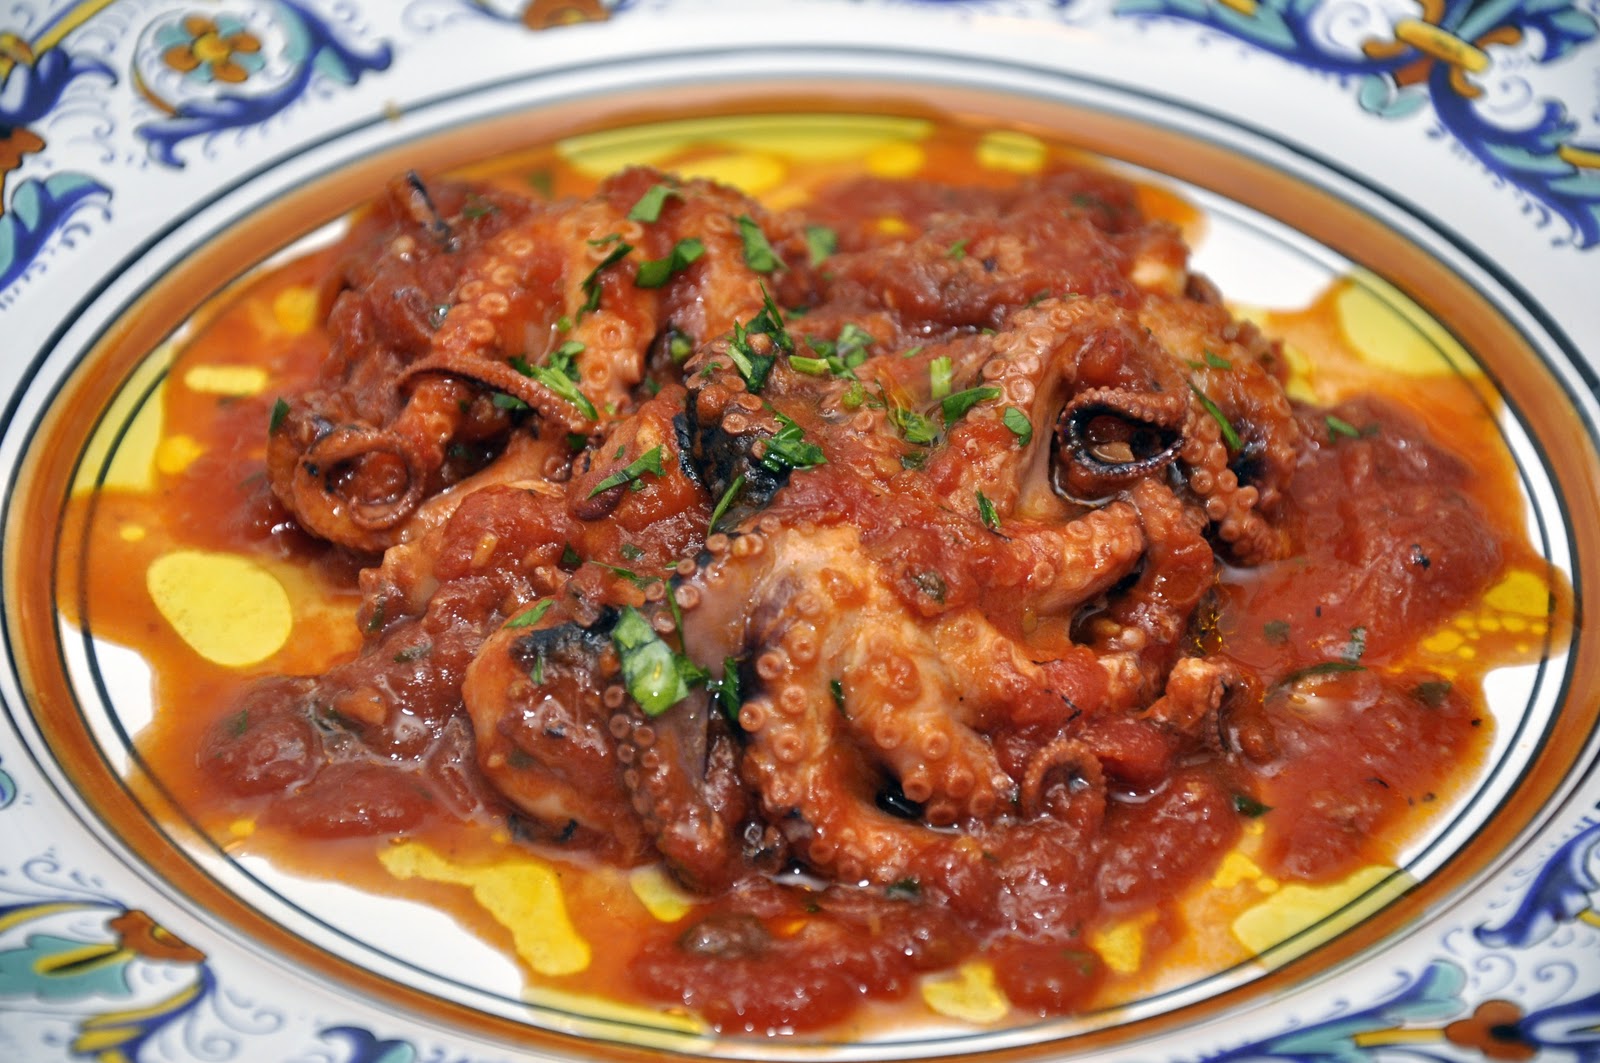
«Polpetielli» affogati


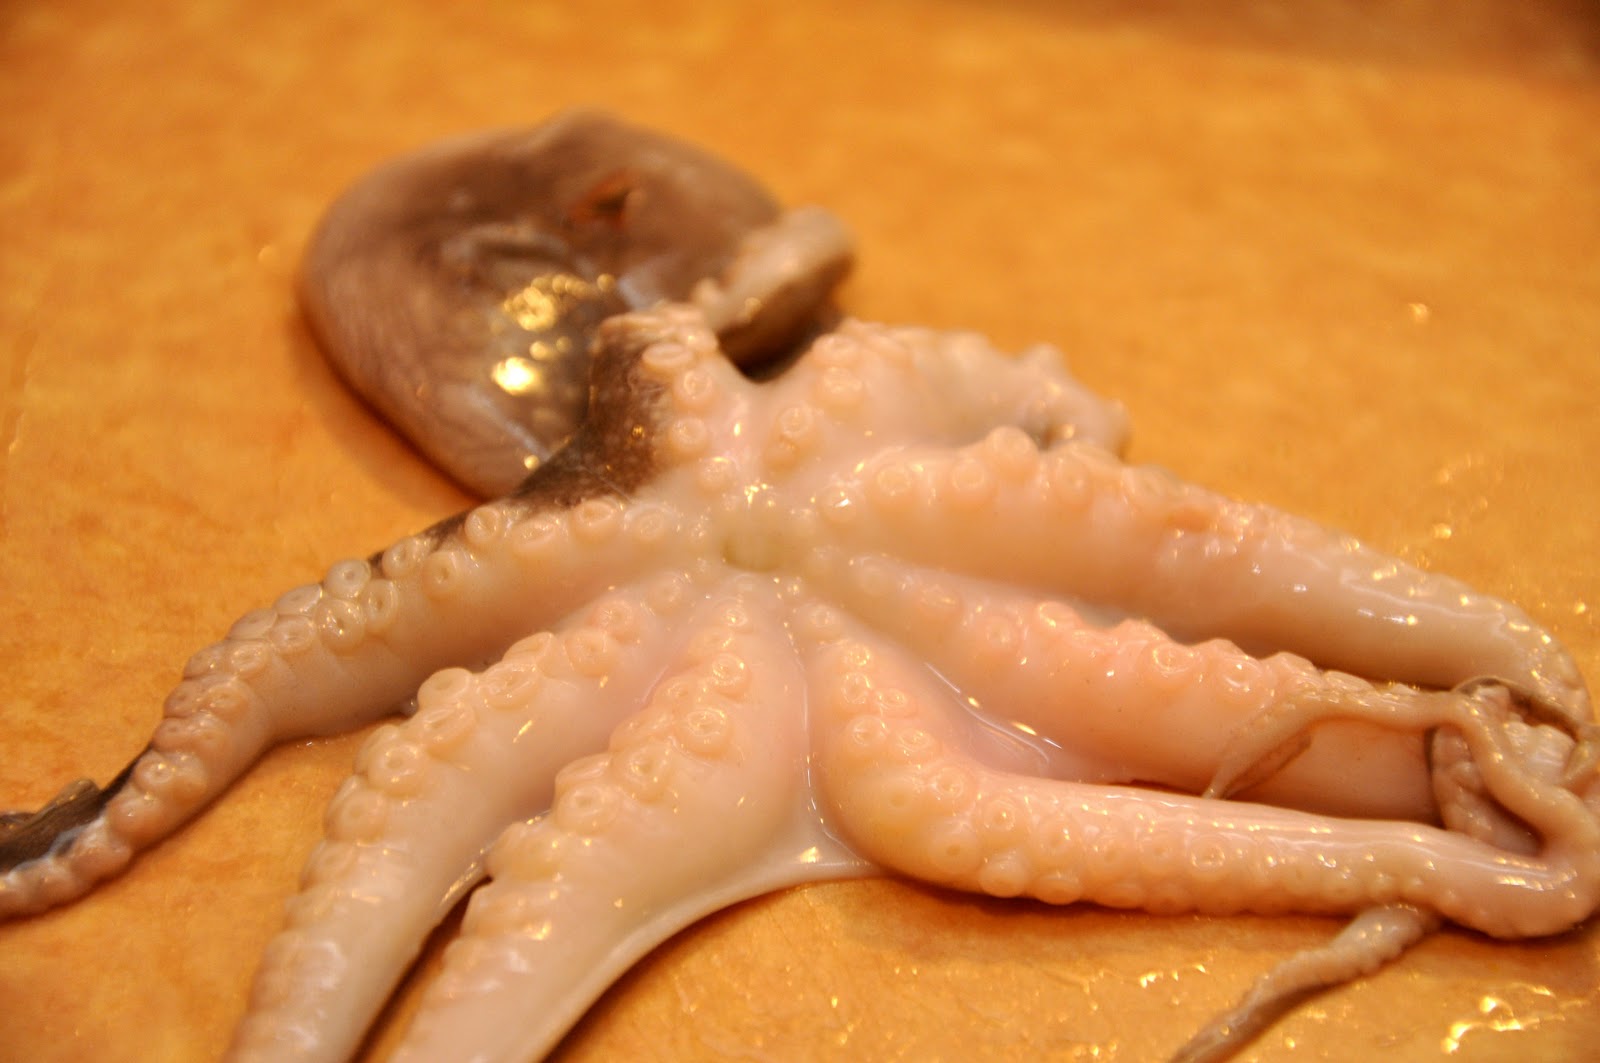
Octopus is a popular food all around the Mediterranean basin and yet elsewhere it is often, for some reason, 'controversial'. Many people who will happily scarf down fried calamari will shudder at the thought of eating its close cousin, which is too bad, because octopus is one of the finest fruits of the sea. When properly cooked, it is perfectly delicious, tasting much like squid but… more so, with a deeper flavor, almost 'gamey', in a good way. It is also very affordable. It cost me $6.00 a pound, in that store that some folks call "Whole Paycheck".

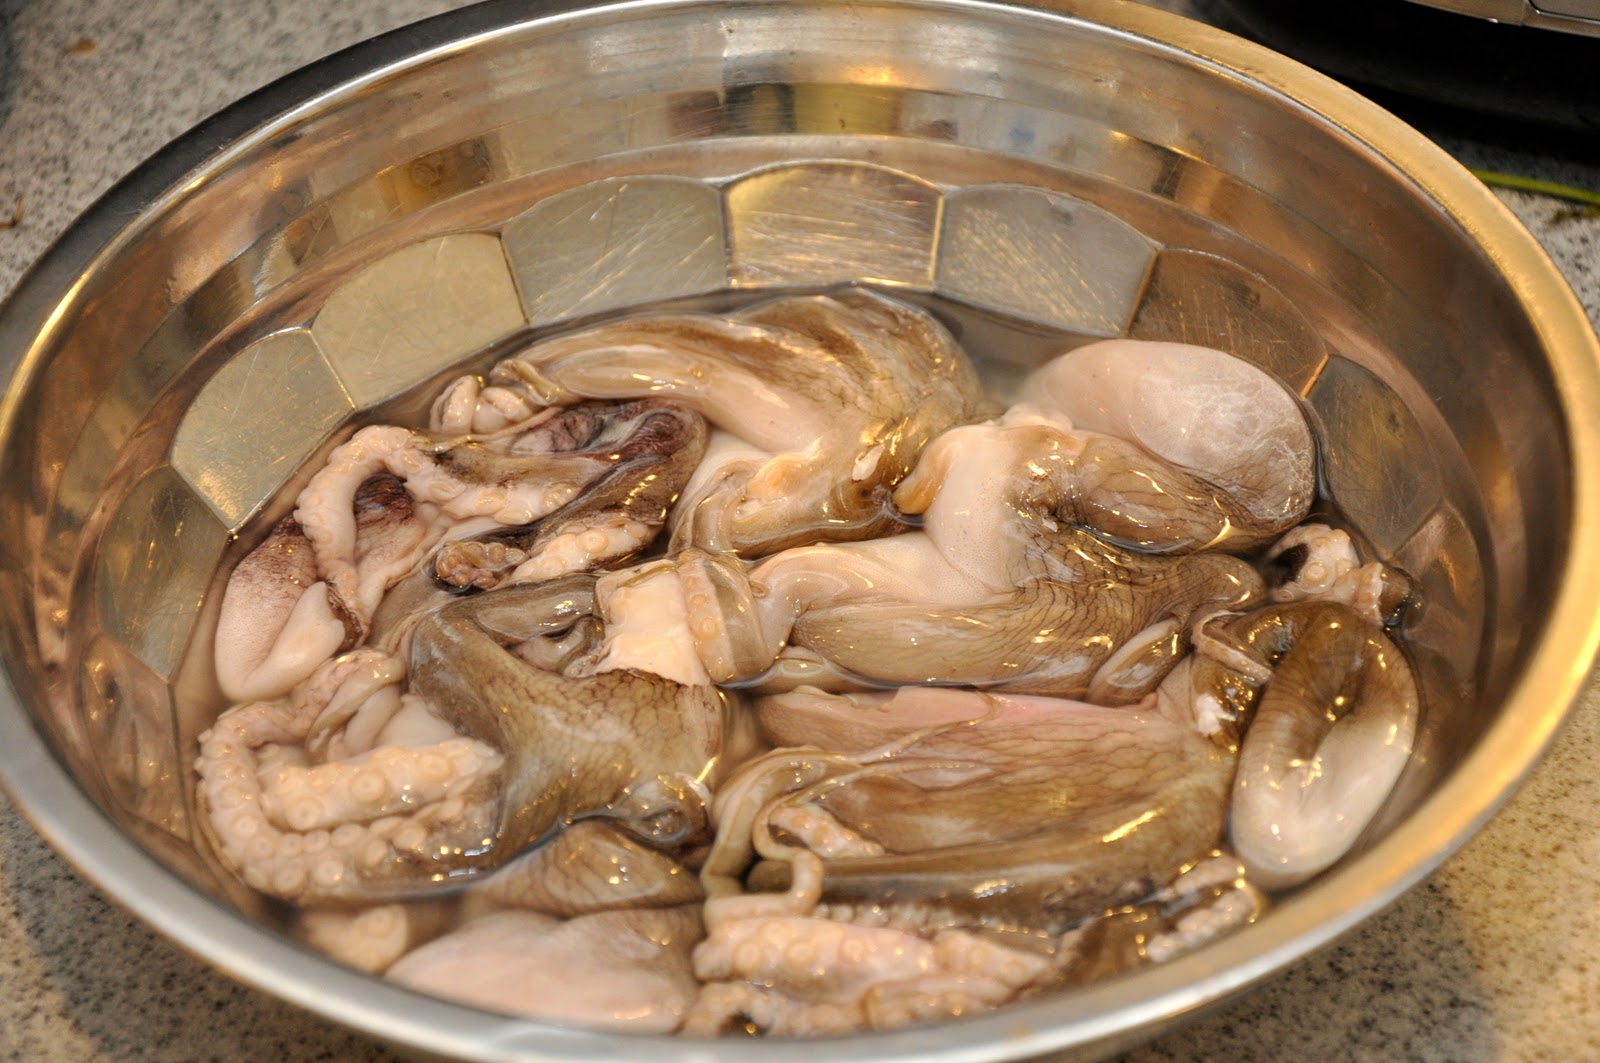
The main issue with octopus is toughness. Large octopus needs to be cooked for a very long time, and they are often beaten beforehand, a bit like tripe, for tenderize them. But baby octopus is another story. It needs long slow cooking, but 45 minutes to an hour is often enough for the smallest varieties. Slightly more mature octopus is sometimes also sold as 'baby' octopus, so cooking times may vary. Like squid, octopus also need to be cleaned (see Notes below) but more often than not they are sold pre-cleaned. Or you can ask your friendly fishmonger to clean them for you. Once they're clean, rinse them well and set them in a bowl until you are ready to begin cooking.

In any event, the cooking method is as easy as it gets. You place your baby octopus, whole, into a pot (traditionally terracotta but enameled cast iron or even a heavy stainless or copper pot will do fine) together with about half as much by weight of canned tomatoes, a drizzle of olive oil, some chopped garlic, a dash of salt and, if you want a little heat, some red pepper flakes. Cover tightly and simmer over lowish heat for 45 minutes to an hour. By this time, the octopus should be tender and the sauce should be nice and thick, and rather darker than when it started. If the octopus is done but the sauce still rather thin, which can happened since octopus tend to shed liquid while cooking, you can fish them out of the sauce and continue reducing until you have the right consistency, then add the octopus back in to heat up again. If, on the other hand, the sauce has reduced but the octopus still needs some more cooking, then just add a bit of water and continue simmering. About 5-10 minutes before the dish is done, add some chopped parsley. Serve hot, with a bit of the sauce and, if you like, some more parsley and/or a drizzle of olive oil on top.

NOTES: A bit like a pizzaiola, the red sauce makes a delicious dressing for pasta. If you want more sauce, you can up the ratio of tomato to octopus from 1:2 to 1:1. The pasta could be served as a primo before the octopus or at a separate meal.

You can also use a pressure cooker to speed up the cooking time. It should take about 20-30 minutes after it comes up to pressure. You will then need to simmer it for a few minutes to reduce the sauce, since there is much less evaporation when cooking under pressure.

The august Jeane Caròla Francesconi includes a recipe for this dish in La cucina napoletana. She is very adamant that you should make sure that the lid should be tight when simmering, and suggests using a piece of waxed paper (you could also use aluminum foil) to ensure a seal. And she admonishes the reader not to open the lid during the simmering. Not sure why but I won't question her wisdom! Of course, this is not an issue when using a pressure cooker.

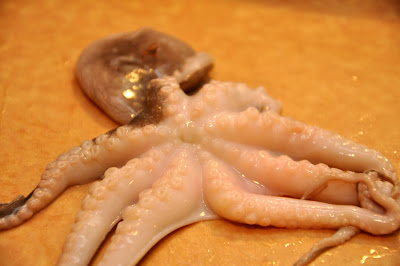
As mentioned, the only tricky part of cooking octopus is the preliminary cleaning of the octopus, which is to say removing the inedible bits. You need essentially to remove its 'mouth', which is located on its underside, at the center of its tentacles. This can be done fairly easily with a paring knife. You then remove the ink sack  (most but not all octupus have one) and any viscera through the resulting hole. (Be careful not to puncture the ink sac, as you will wind up with black ooze all over the place!)

A pre-cleaned baby octopus
This fine article by Mark Bittman on octopus, in particular its cleaning, for The Splendid Table is well-worth a read. .

Saturday, August 21, 2010

Parmigiana di melanzane


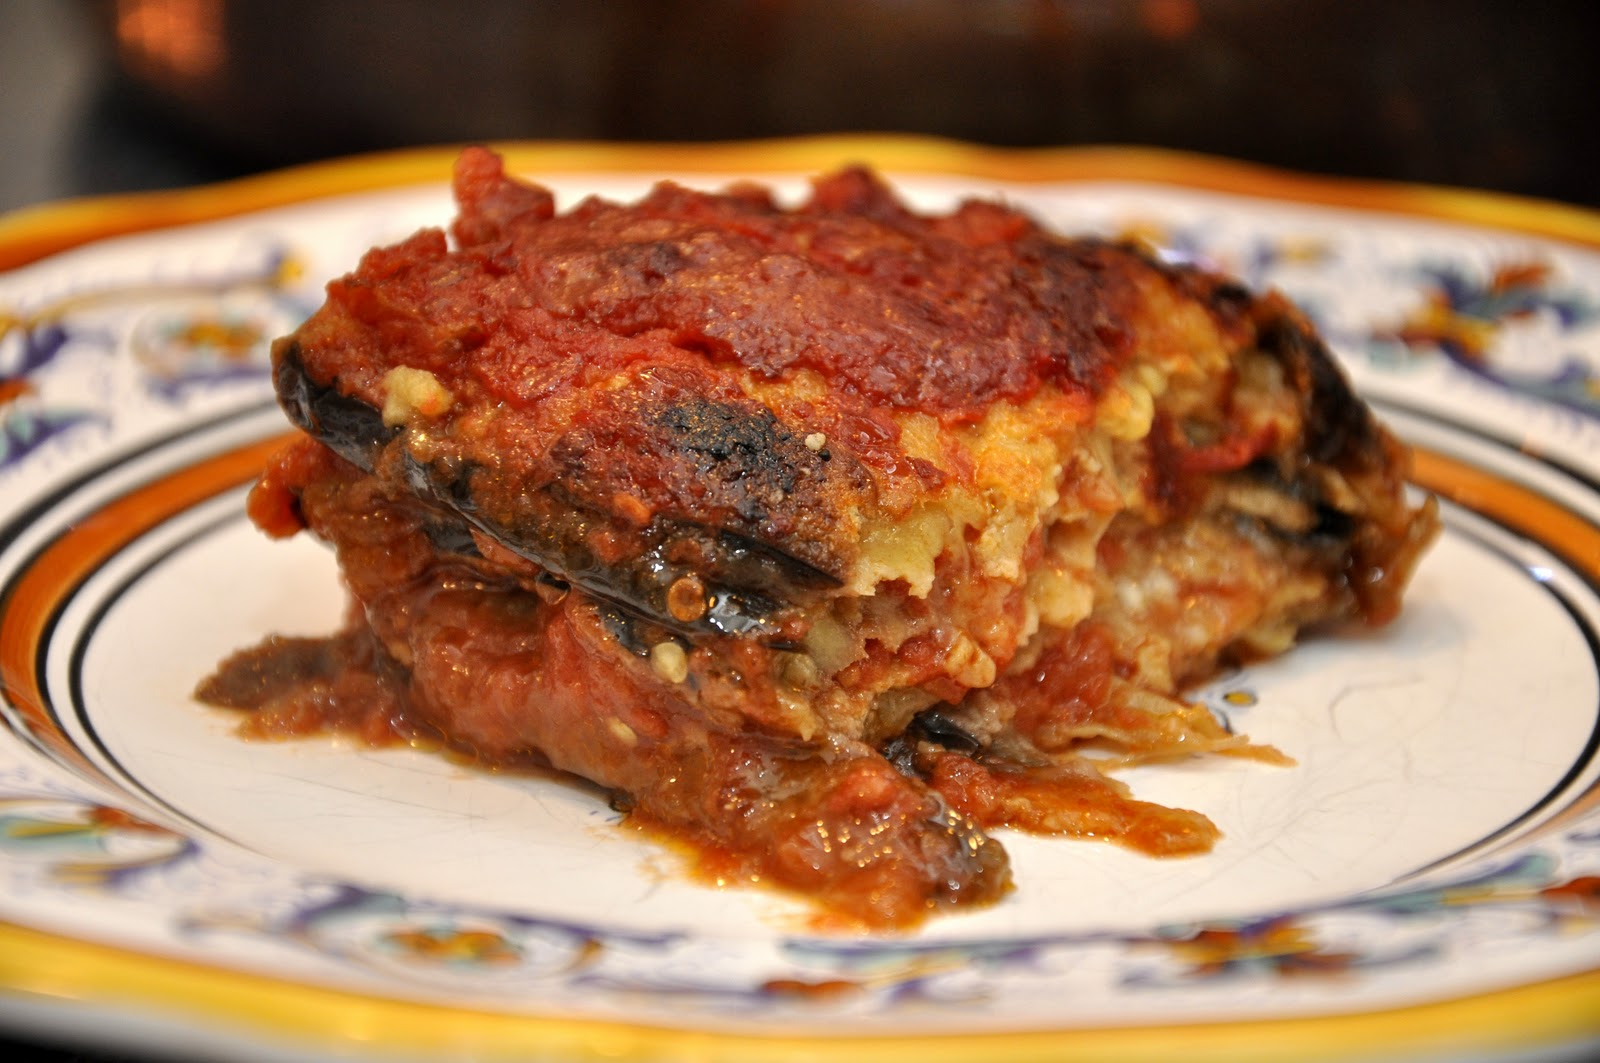
Being a lover of good food, I find it almost impossible to answer the question 'what's your favorite dish?' But if I had to, my answer would probably be eggplant parmesan--parmigiana di melanzane--the way Angelina used to make it.

This is a simple dish to make, but it involves several steps. Allow yourself a good two hours to prepare this dish. It tastes much better made ahead, so if you have the time, make it in the morning and have it for dinner or, even better, make it at your leisure the day before.

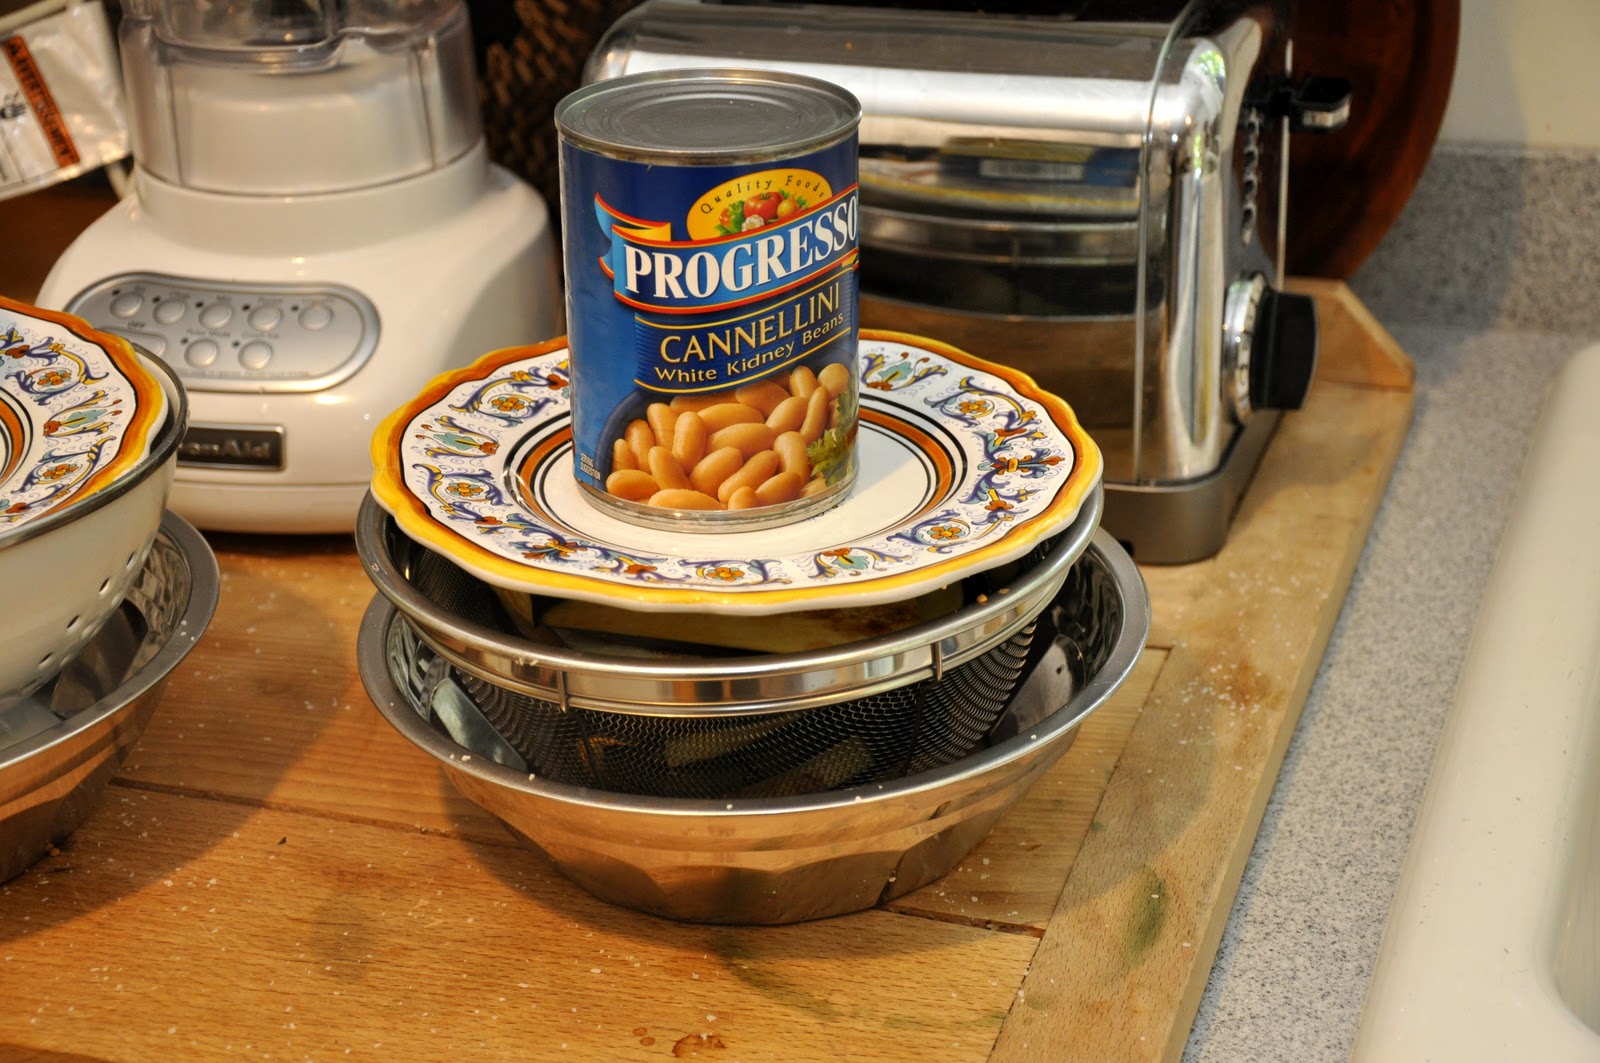
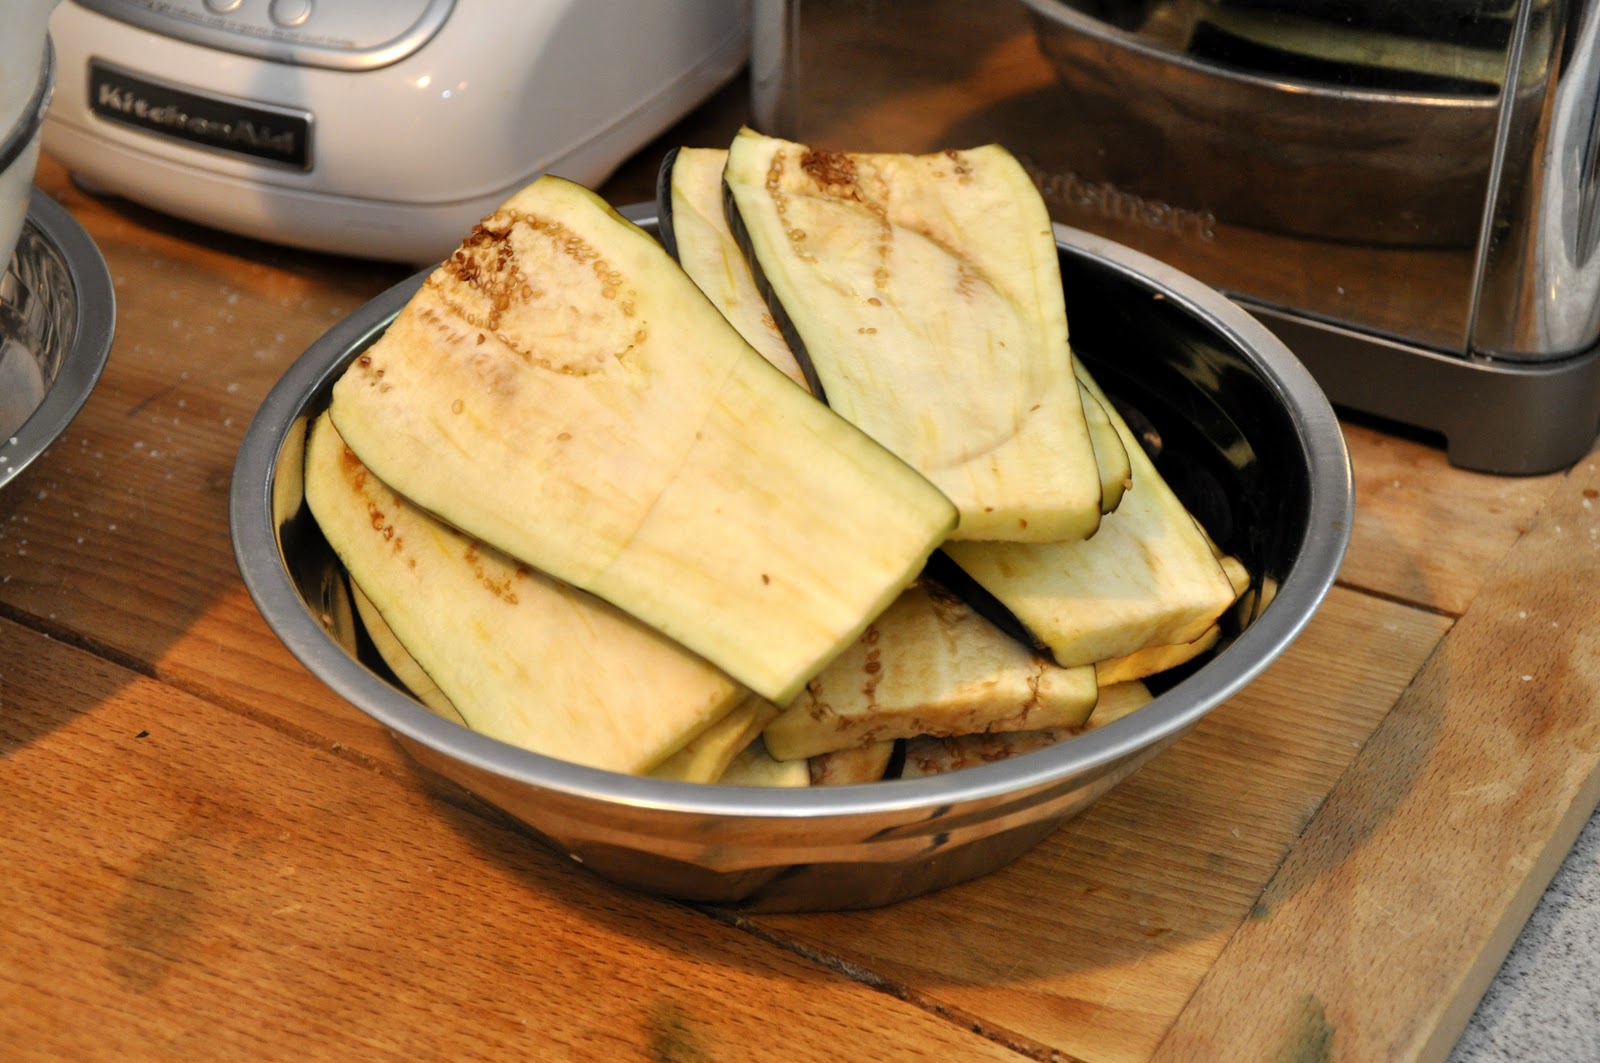
Step 1: Prepare the eggplant. You begin with eggplant, of course. For this dish, the large, purple variety is preferable; about two should do you for a good sized baking dish. You cut the eggplants into fairly thin slices. Now you should 'purge' them of their excess liquid, which can be bitter. Sprinkle the eggplant slices with salt, and then lay them in a colander laid on top of a plate. Cover the slices with a small plate on which you should place something a bit heavy like a can of beans or tomatoes. This will help press the liquid out of the eggplant. Leave them for about an hour.


You should notice a small puddle of brownish water below the colander, which you should discard, of course. Remove the slices from the colander and pat them dry.


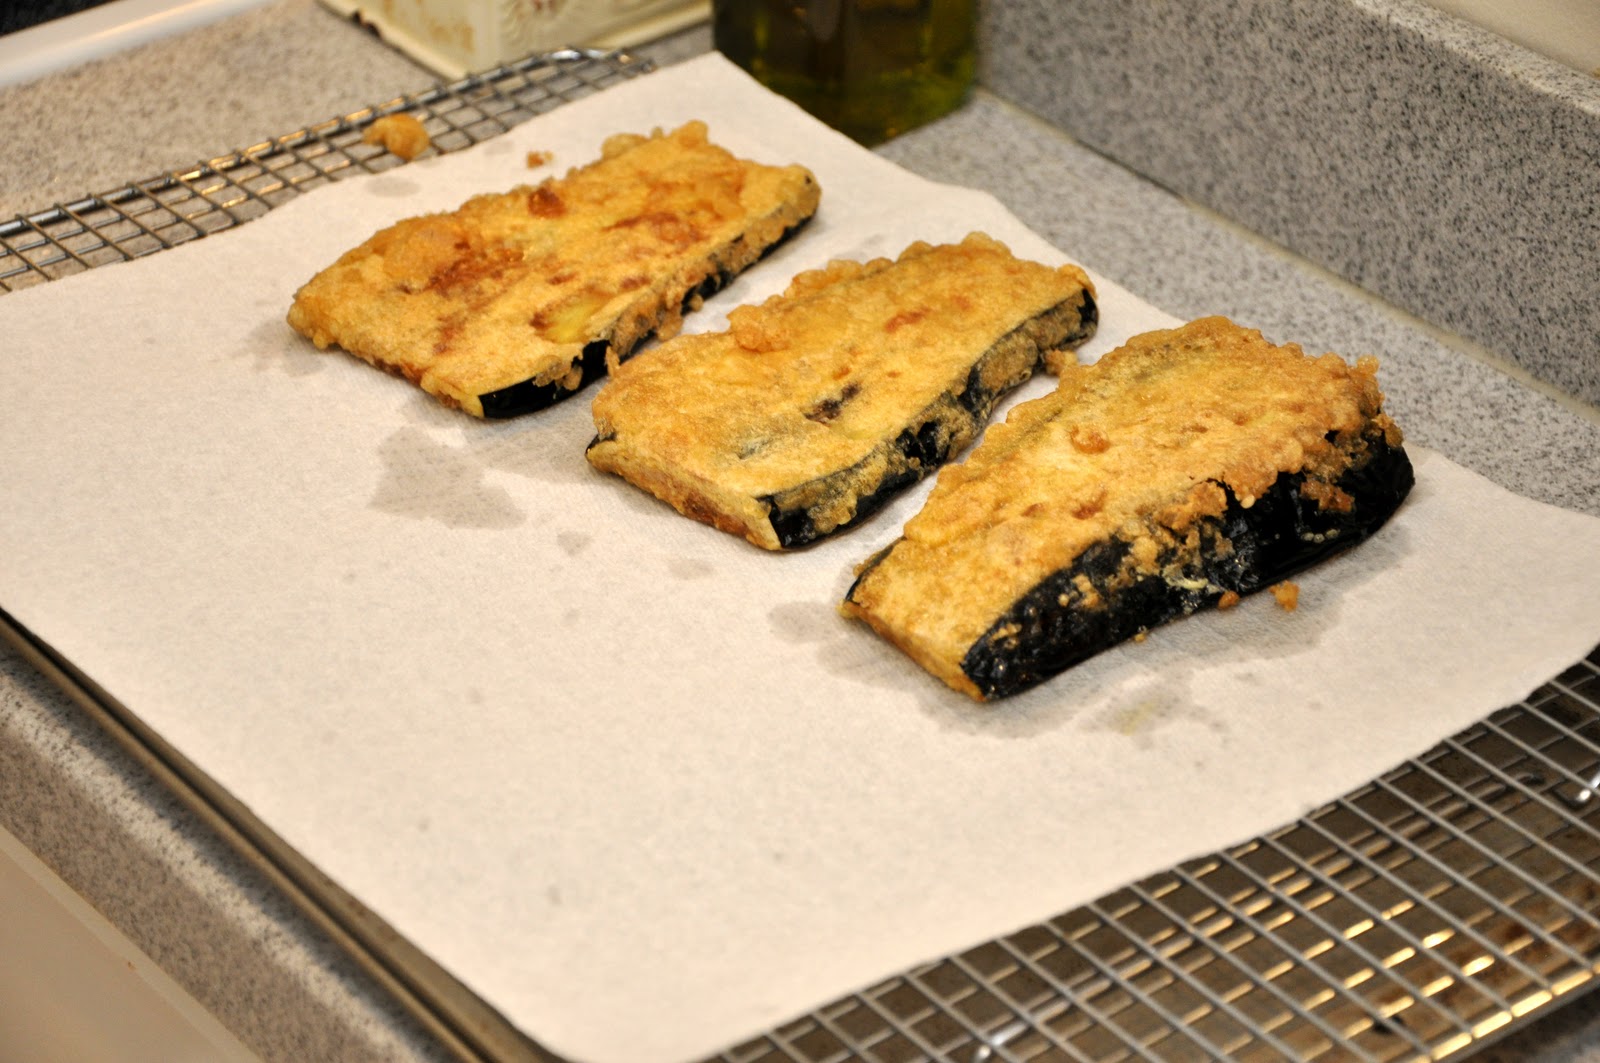
Step 2: Fry the eggplant. Now you dip the eggplant slices in flour, followed by an egg and cheese 'bath' made from beaten eggs, grated pecorino cheese, finely chopped parsley, salt and pepper. Shallow fry the eggplant slices over moderate heat until they are golden brown on the outside and tender inside.


You will need to fry the eggplant slices in batches. As each batch is done, drain and set on paper towels to absorb the excess oil as you continue with the next batch. Repeat until you're done.


Step 3: Prepare the tomato sauce. While this is going on, prepare a very light tomato sauce by combining chopped tomatoes (fresh if in season, but canned tomatoes are fine), a few leaves of fresh basil, salt, chopped garlic and just a few drops of olive oil. (Some people omit the olive oil altogether since the eggplant, even after draining, can be a bit oily.) Simmer for about 15 minutes, until the tomatoes have melted into a sauce If using canned tomatoes, add a bit of water to loosen the sauce before simmering. You will want a good amount of sauce, so be sure to make a potful--you can always any extra to dress pasta.

Step 4: Prepare the cheeses. Take a large mozzarella, preferably fresh, and slice it. Grate lots of parmesan cheese, at least a cupful (you can grate it as you assemble the dish).

First layer down...
Step 5: Assemble the dish. You are now ready to assemble the dish. In a bake-and-serve pan, place a layer of the fried eggplant slices, then a bit of the tomato sauce, then a few mozzarella slices, a bit of shredded basil (optional) and grated parmesan cheese. Season. Then add another layer of eggplant and continue until you've used up your ingredients. End with tomato sauce and parmesan. (Don't put mozzarella on top, it will brown too quickly in the oven and burn.)

Ready for the oven...


Step 6: Baking. Bake in a hot oven (400 F, 200 C) for about 30 minutes, or until the dish is bubbling hot and the top a bit brown. Don't worry if it even looks a bit 'burnt' around the edges--that's normal and, to some tastes, the best part! Let the dish cool a bit before eating, at least 15 minutes. In fact, it tastes best made ahead and reheated (just a bit) before eating. It can also be eaten at room temperature. Just don't eat it piping hot, because you will miss the full, wonderful flavors!

NOTES: A friend from Naples once told me that this version of parmigiana--made with eggplant slices dipped in egg--is typical of the interior of Campania, the region where Naples is located and of which it is the capital. In fact, that's where Angelina was from, a small mountain town near Benevento. In Naples proper, this dish is made with eggplant slices that are simply lightly floured and fried. Most modern recipes you will find follow the Neapolitan method. I've tried it that way and it makes for a lighter dish. But I still like Angelina's version best! For an even lighter dish, you can brush the eggplants with olive oil and grill them instead of frying. The result is actually very nice, but you are getting pretty far from the original flavor and texture of the classic dish. They also make this dish in Sicily (in fact, the Sicilians claim the dish is theirs-see below) but without the mozzarella cheese.

If you are pressed for time, you can skip the initial 'purging' of the eggplants. As long as the eggplants are reasonably fresh, it should not make that much difference. I sometimes skip this step myself. But be aware, there is a chance that the dish will have a bitter aftertaste. And if you want an even quicker dish, instead of a tomato sauce, you can use passata di pomodoro or crushed canned tomatoes--it will cook in the oven--a drizzle un filo d'olio over each layer.

Some recipes calls for baking the dish in a moderately slow oven and for a longer period, from 45 minutes up to an hour, raising the temperature at the very end if necessary to brown the top. The advantage of this method is that you are less likely to burn the top.

This dish can play many roles in an Italian meal. It can serve as an antipasto, as part of a buffet, as a light secondo or as a piatto unico: a single-dish meal in itself. And, to be honest, I even eat it, the morning after I make it, for breakfast!

By the way, as is typical for a popular dish with many variations, there are a good number of different stories about the origins of this dish. some of them place it in or around Naples, while say the dish originated in Sicily. Despite the name, however, it is very doubtful that this dish comes from Parma. The name may refer simply to the generous use of parmgiano cheese in the dish. Some early sources say that the parmigiani were known for making layered vegetable casseroles. The Sicilians say that the name comes from  parmiciana, which the dialect word the slots in window shutters (persiane in proper Italian) since the eggplant slices lined up in the baking dish were said to resemble said shutters.

This interesting article discusses the various claims and their relative merits. If you can read Italian, Wikipedia also has an article on the dish. Both place the probable origin to Campania and to the 18th century chef and writer Vincenzo Corrado.

My sous-chef....


Eggplant Parmesan on Foodista

Tuesday, July 6, 2010

Pasta con la cicoria


Cicoria, or chicory, also known in English as 'curly endive', is a staple of the central and southern Italian diet, or at least so it was traditionally. People from Campania like Angelina were said to be especially fond of leafy green vegetables, so much so that they were sometimes called mangiafoglie, or 'leaf eaters' (just as Tuscans are sometime called mangiafagioli for their love of beans). Leafy greens were affordable and could even be scavenged from the countryside. That frugal tradition continues even today; I can remember when I was living outside Rome it was not unusual to see people out in the fields, leaning down here and there to pick up some wild chicory or other greens for their supper. 

The health effects of eating your greens were unknown in the old days—in fact, if you read some of the classic older texts like Artusi, you will find that greens were considered poor substitutes for more solid sustenance like meat. These days we know that leafy green vegetables are healthy but, unfortunately, they are no longer super-affordable peasant food. One of the ironies of modern life is how the staples of the underprivileged, vegetables like arugula or radicchio (which is a form of chicory, by the way) have become expensive items that 'regular' folks can scarcely afford. But green chicory at least can still be had at a reasonable price and, if you ask me, it is one of the more delicious vegetables. It is crisp and slightly bitter when eaten raw in a salad, while it develops a pleasantly soft texture and almost sweet flavor when cooked.

And it is easy to prepare. You just follow the usual in padella technique that we have featured before: trim the chicory of any wilted external leaves, wash it well (the heart often has sand) and parboil in abundant well salted water until just tender. Remove the chicory from the water, cut it up roughly and sauté it in olive and garlic, seasoned with salt and pepper and, if you like it spicy, a bit of peperoncino. 

Prepared this way, cicoria is a standard contorno or even main dish on central and southern Italian tables. (Angelina practically lived off the stuff!) But it also makes for an excellent condimento for pasta. Just add your pasta, cooked very al dente preferably in the same water in which you have already cooked the chicory, to the skillet with the sautéed chicory. Add a bit more of the pasta-vegetable water and mix well, allowing the pasta to absorb the flavors for a minute or two, by which time most of the liquid should have evaporated and the chicory will have partially 'melted' into a kind of sauce for the pasta. 

Perfect for a quick weekend supper. 

NOTES: Some recipes call for a bit of anchovy, as you might add to broccoletti (broccoli rabe) but, as much as I love anchovies, I find that their saltiness clashes with the sweetness of the chicory. There is also a version in rosso, where you add tomatoes to the olive and garlic to make a quick sugo di pomodoro before adding the chicory. You will also find recipes that call for topping the pasta with grated cheese (usually pecorino) which I don't particular feel the need for, but it is no doubt a valid option. 

As for the pasta, I would recommend a 'stubby' kind like penne (pictured here) but you will also find recipes calling for bucatini (aka perciatelli).

Wednesday, June 23, 2010

Spinaci ripassati in padella


Here's a 'master recipe' for one of the most common techniques in Italian cookery for preparing vegetables, particularly green, leafy vegetables. The technique is called rispassato in padella or saltato in padella which literally means 'tossed in the skillet' and could be translated simply as 'sautéed'. 

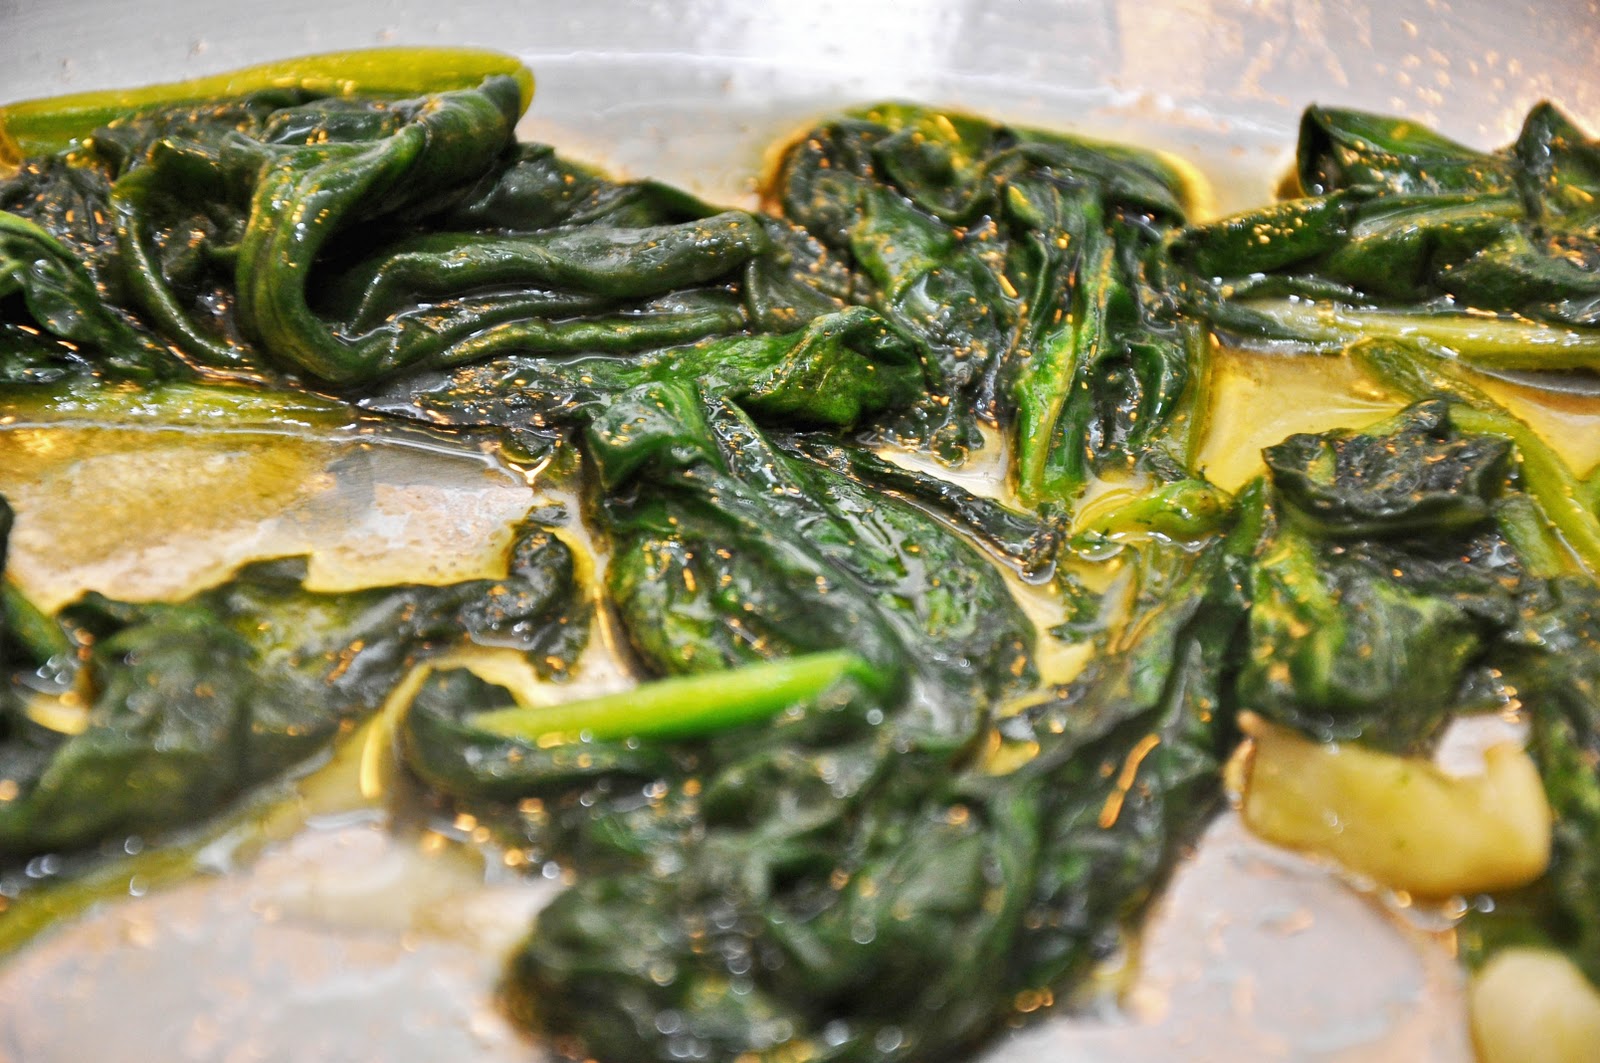
As an example, spinach is a good place to start. If you are using very tender 'baby' spinach, simply rinse it well in water without drying it out. Then make a soffritto by very lightly sautéing a clove or two of garlic, slightly crushed, until it just begins to give off a bit of fragrance. If you're cooking for company, you can remove the garlic at this point for a more elegant presentation. But at home I just leave them in for extra flavor (and it wards off vampires, too).

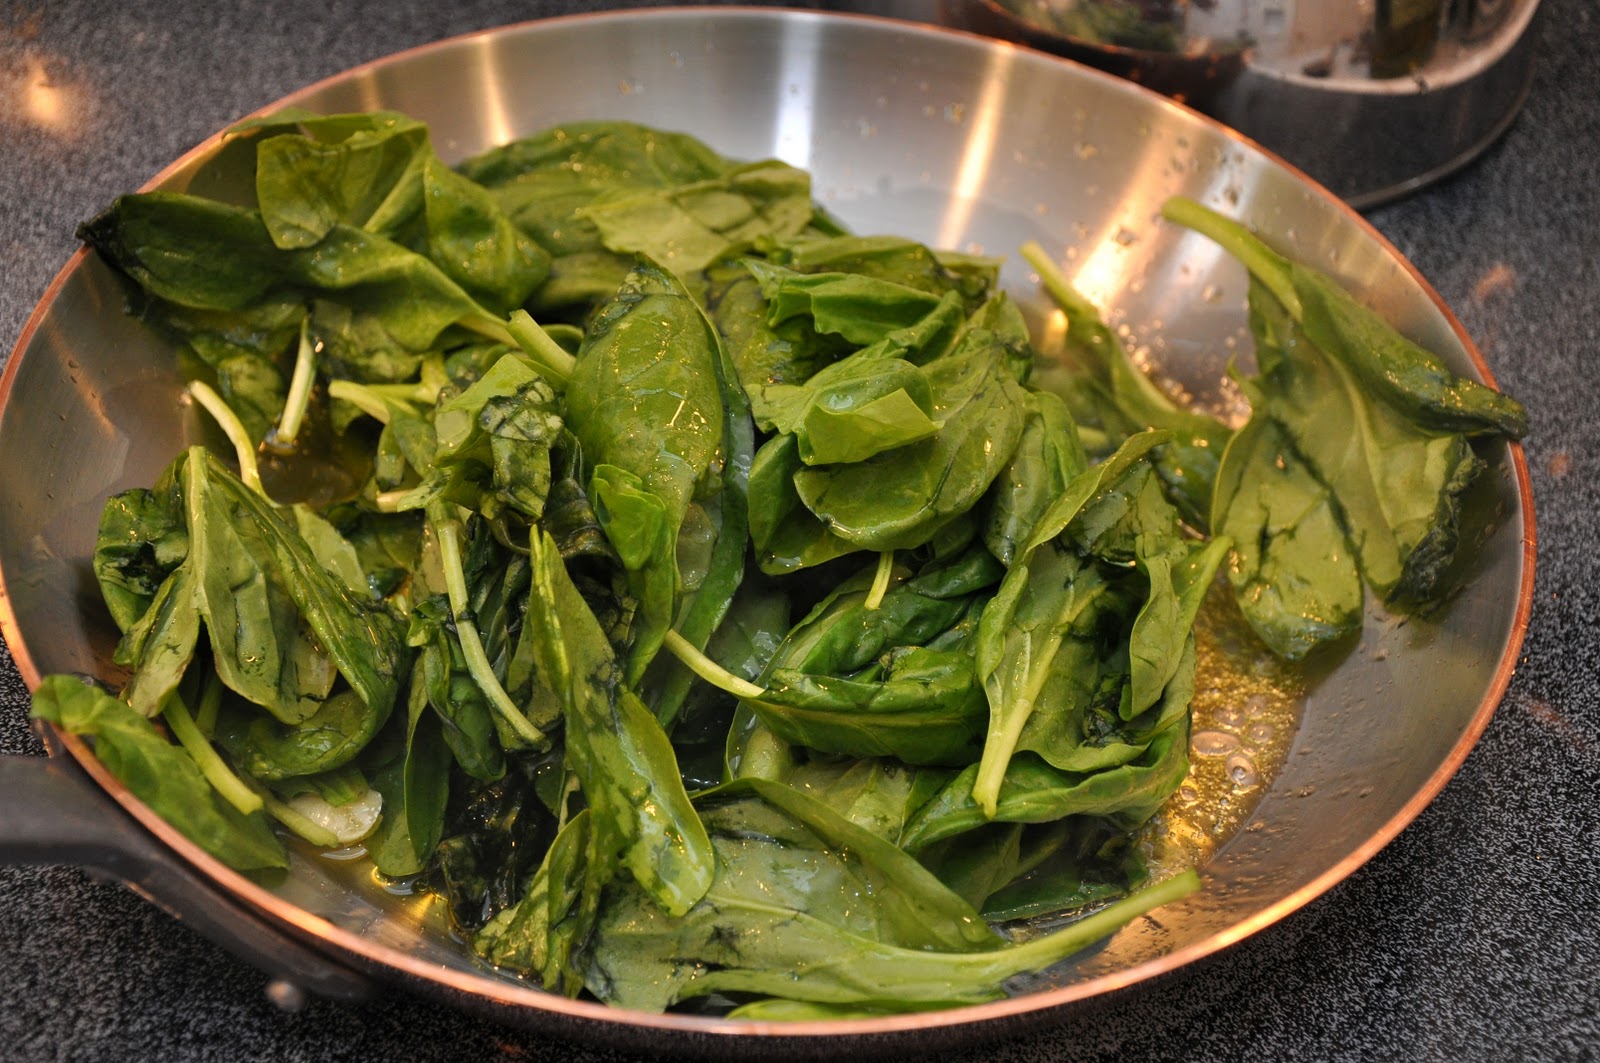
Then add your raw spinach leaves with the water that clings to them, along with a sprinkling of salt. 


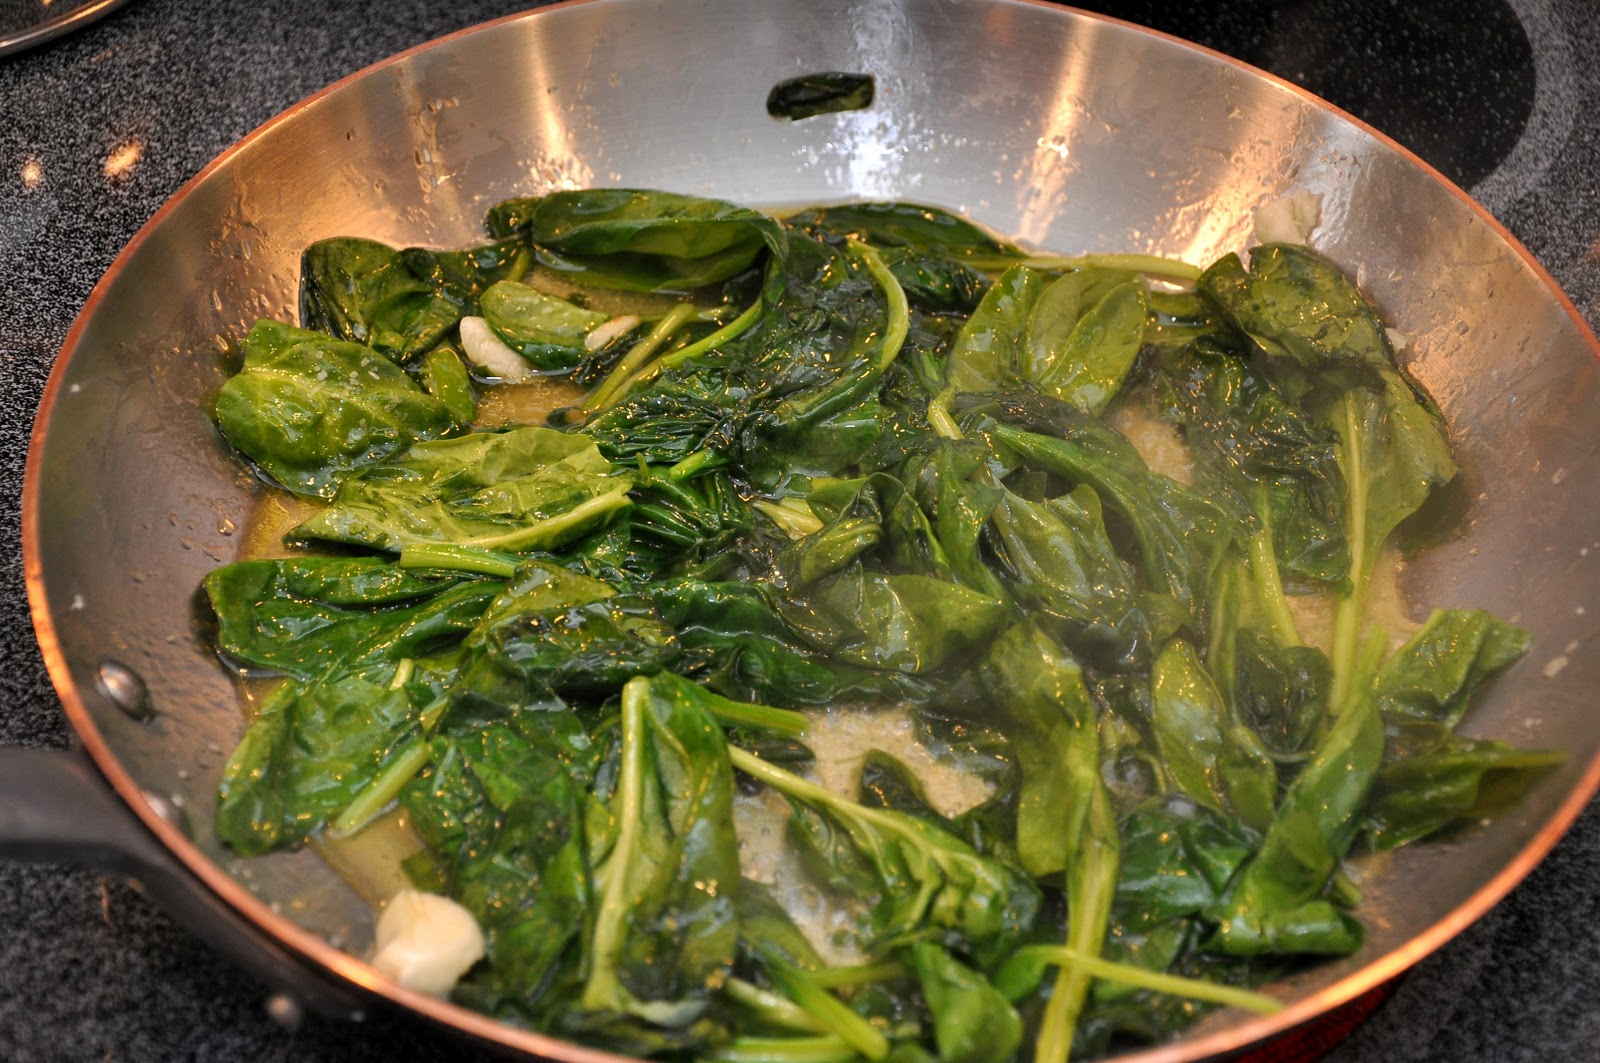
Toss the spinach leaves well and they will quickly begin to wilt under the heat of the hot oil. 


 Allow the spinach to simmer and absorb the flavors of the soffritto for just a couple of minutes, until the spinach is well reduced and tender. Adjust the seasoning to taste.

And that's all there is to it! 

Now, if you are using more mature spinach—the kind with dark green, crinkly leaves and thick stems—you should trim the leaves of their stems and blanch them for a minute or two in salted water before sautéing. They are easy to trim: just hold each leaf in your hand on each side of the stem. Then pull the stem off with your other hand—it should come off easily. Drain them before adding them to the soffritto. Some recipes, in fact, call for rinsing and squeezing them dry, but, except for specific uses where you really need a 'dry' vegetable (such as in a filling for stuffed pasta) I generally leave a little bit of moisture on the vegetable, and that's the way that Angelina used to do it. 

NOTES: The same technique, as mentioned, can be used with just about any leafy vegetable. You can judge for yourself whether the vegetable needs pre-boiling or not: delicate greens like watercress generally do not, while most, including more robust greens like escarole, chicory, broccoletti (broccoli rabe) or kale, generally do. Pre-boil them until they are just a bit under-done, then transfer them to the skillet. Other vegetables can also be made this way, including broccoli, cauliflower, reen beans, peppers. And then there are other vegetables like funghi trifolati that have another name but use essentially the same technique, with some minor adjustments to account for the different textures involved. 

Vegetables made this way make wonderfully simple but savory contorni to accompany grilled or roasted meats or fish. They can also star on their own as a light vegetarian second course. And they can go into other dishes, most commonly as a kind of condimento for pasta, as in dishes like orecchiette ai broccoletti, or as a component in a vegetarian stuffed pasta like lasagne in bianco.

When pasta is tossed in a skillet with a sauce, it is also sometimes called in padella—in fact, one of the most popular frozen prepared pastas in Italy is called Quattro salti in padella or 'four tosses in the skillet'. Other kinds of food can also be prepared in padella, in particular scallops, shrimp or calamari, but let's leave those dishes for another post.

Saturday, June 19, 2010

Angelina’s Green Beans with Onions and Mint


Although our favorite way of having green beans when we were kids, especially in the summer, was in umido, or stewed with tomatoes, Angelina had another nice way of making green beans with sautéed onions and mint. As it turns out, at least according to this article, the recipe is from Puglia and is called fagiulini spilusieddi, meaning 'imaginative green beans' in the local dialect. Now, I have two theories about this: my grandfather being from Puglia, it is possible that she learned this Puglian way of making green beans to please her husband. It is also possible that in her area, which is not very far from Puglia, they also made green beans this way. 

In any event, the dish is very simple, tasty and definitely worth a try: you boil green beans in well salted water until tender. While the green beans are cooking, sauté sliced onions (perhaps half as much by weight as the green beans) in a generous amount of olive oil over moderate heat until they are nicely softened.  (Adding a sprinkling of salt and a spoonful of water helps them to cook more quickly.) Mix a handful of chopped parsley and mint into the onions. Then, if you like, add some bread crumbs, turn up the heat a bit and let them saute until they turn golden. Otherwise, turn off the heat.

When the green beans are tender, drain them and add them to the skillet with the onions and herbs. Turn them to coat well and let them stew for just a few minutes to insaporire. Before serving, sprinkle the beans with a bit of freshly squeezed lemon juice, just enough to brighten the flavors, season with salt and pepper, and serve hot. 

That's it. Simple but delicious! 

NB: I wanted to dub this dish 'fagiolini alla pugliese' but, just to confuse matters even more, it turns out that there is such a dish, more or less identical to fagiolini in umido, but with a bit of peperoncino for spice. Go figure…

Sunday, February 14, 2010

Angelina’s Lasagna di Carnevale


Among Angelina's generation, each of the female family members had a special dish that she was known for. My great-aunt, Angelina's sister, who we called zi'-zi' (loosely translated, 'auntie'), was the ravioli specialist. Another great-aunt, zi' Annin',  was known as "the little pie-maker" and yet another specialized in calzone pugliese, which we used to call 'onion pie'. Angelina, on the other hand, was known for her lasagna, which was almost always a part of our ritual Sunday dinners at her place. 

It was only later in life that I realized that the lasagna that Angelina made had a name, and was not really her lasagna, but a traditional dish from Campania, the region where she was born. There the dish is called lasagna di carnevale (also called lasagne di carnevale in the plural) since this meaty lasagna is traditionally eaten around Carnevale aka Mardi Gras time, as a last meat 'splurge' before the privations of Lent—a vestige of the days when Catholics were expected to give up meat for the entire 40 days. As I have mentioned before, this lasagna is one of the two 'mother' lasagna dishes in Italian cuisine, the rustic southern cousin to the North's elegant lasagna alla bolognese. Since most Italian immigrants to the US came from the South, it is this lasagna that will be most familiar to Italian-Americans.

Angelina's lasagna did have some subtle differences from the classic recipe, which I will point out later. But here is the way she made her lasagna:

Step 1: Make the ragù: This step should be done the day before, both because the ragù itself takes several hours to cook and because it tastes much better the next day. Angelina always used her signature ragù della domenica or Sunday sauce. Make sure that the ragù is not too thick—it should be quite loose—loose enough to pour easily—to account for evaporation as the dish bakes. Dilute with water if need be.


Step 2: Make the pasta: While lasagna di carnevale can be made with factory-made hard durum wheat lasagna, Angelina usually made her own fresh egg pasta (see this post for instructions). Unlike the pasta for lasagne alla bolognese, however, for this rustic dish you need to roll out your pasta rather thicker than usual; use setting '4' on most pasta machines. And I like to add a heaping spoonful of semolina flour for each 100g/1 cup of "OO" flour, to give the pasta a bit more 'bite'. Cut the pasta into large sheets that will fit into your baking pan. (I usually make mine big enough so that two sheets of lasagna will cover the entire pan.)


 Step 3: Make the polpettine: The lasagna is stuffed with, among other things, polpettine, or little tiny meatballs. You should use the same mixture of beef, pork, cheese, bread and seasonings as you would for polpettone, or Italian meatloaf (see this post for the recipe) but make the meatballs just as small as you possibly can, no more than 2-3cm/1 inch round, at most, smaller if you can manage it, remembering that they will be placed between the lasagna layers. Then shallow fry them in light olive oil until just golden brown. The recipe for zitoni al forno con le polpettine, or baked ziti, gives details on how to make these little meatballs.


 Step 4: Fry the sausage (optional): In a classic lasagna di carnevale, the stuffing also includes long, thin sausages called cervellatine. They don't make them outside Campania, as far as I know. If you don't have them, you can either omit them and just use more meatballs, or cut up some 'sweet' Italian sausages and fry them in olive oil. (Or just slice up some of the sausages from the ragù.) 

 Little meatballs and sausage pieces, fried and ready for the stuffing

Step 5: Make the ricotta cream and cut up the mozzarella: Take ricotta cheese (250g/8 oz.) and mix it well with 2-3 eggs, lots of grated parmesan cheese and a good handful of chopped parsley.to form a kind of 'cream'. Season with salt and pepper. 


 Take a large ball of fiordilatte (mozzarella made from cow's milk) and cut it into cubes. (NB: This is one dish where expensive imported mozzarella di bufala is not really necessary or even ideal.) 


Step 6: Cook the pasta sheets: Cook the lasagna sheets al dente, remembering that they will cook again in the oven. Since these sheets are thicker than the usual pasta and contain a bit of semolina, however, you will need to cook them for longer than other types of fresh pasta, say around 3-5 minutes, depending on how long they have been left to dry. If using factory-made pasta, follow the directions on the box. Do not crowd the lasagna or they may stick together; you may have to cook them in batches. When done, scoop them out with a slotted spoon and pat dry with a towel, taking care not to burn yourself with the hot water that will cling to the pasta sheets. 


Step 7: Assemble the dish: In a large baking or 'lasagna' dish, which you will have greased with lard or olive oil, spread a bit of the ragù over the bottom. Then cover the bottom with a layer of pasta. Since these pasta sheets are rather thick, avoid overlapping them. (You may have to trim the pasta with a knife or a pair of scissors, but that's fine.) Then cover the pasta with a generous layer of ragù. Top the ragù with the polpettine and, if using, the sausage pieces, and then with dabs of the ricotta cream here and there. (You can add more grated cheese if you like, but in Angelina's version, there is ample grated cheese in the ricotta cream.) Then place another layer of pasta and repeat, until you've used up your ingredients. Top with a generous dusting of grated parmesan cheese and a nice layer of ragù. Drizzle with olive oil.


Step 8: Bake the lasagna: Bake your lasagna in a moderately hot oven (180C, 350F) for about 45 minutes, until the top is just beginning to brown. (Some like a nice crusty top, but I don't and neither did Angelina.)


Step 9: Serving the lasagna: When done, remove the lasagna from the oven and allow to settle and cool for at least 30 minutes. In fact, Angelina almost always made her lasagna ahead and reheated it gently, which gave it a rather firm texture and allowed the flavors to meld beautifully. I still like it better that way. 

NOTES: As mentioned above, Angelina's version varies in a few details from the classic lasagna di carnevale as found in the 'old country'. First, she always used fresh pasta made from soft flour, while it more usual to use hard-wheat pasta. In fact, according to J.C. Francesconi, author of the much respected La cucina napoletana, hard wheat pasta is actually preferable. Second, she used her ragù della domenica, made from pork ribs and sausages, while the traditional lasagna di carnevale, according to Francesconi, has a somewhat different ragù, made from a single piece of pork roast and some pancetta. And some folks prefer a lighter ragù, cooked only for a few hours, rather than the dark ragù, cooked for six hours or more, that Angelina used. Third, Angelina used the ricotta cream described above, mixed with parmesan and egg, while the usual traditional recipes call for ricotta only, or sometimes loosened with some water. milk or ragù

And one thing that distinguished Angelina's lasagna from most Italian-American lasagna you will find: she was very discreet in her use of cheese. Most Italian-American lasagna comes oozing with ricotta and mozzarella. Angelina's was all about the ragù. And her use of a ricotta cream mixed with egg gave it a different, firmer texture. (There is, by the way, a delicious Neapolitan lasagna dish called lasagna alla ricotta, where cheese is the 'star', but that is a different matter.) 

There are subtle variations also in the way that the lasagna can be assembled. Some recipes (including Francesconi's) call for covering the pasta first with the ricotta, then adding the other cheeses and the meats, and lastly napping the whole with ragù. Other recipes call for mixing equal parts of ricotta and ragù together and layering this mixture on the pasta.

Francesconi also cites an interesting variation from Pozzuoli (a coastal town near Naples) where they add cut up bits of the local salami rather than the traditional cervatelline sausages and include hard-boiled eggs sliced into wedges. This is the version that is set out in another favorite cookbook, Napoli in bocca by Antonella Santolini. And in another delightful Neapolitan cookbook, Cucina napoletana: ricette raccontate, Martinella Penta de Peppo suggests using beef, rather than the more traditional pork, as a 'lighter' alternative for making the ragù. Rather than little meatballs and sausage, she suggests stuffing the lasagna with slices of the meat from the ragù rather than the usual meatballs and sausage, together with ricotta (loosened with a bit of water), ragù, mozzarella and grated parmesan cheese.

Friday, February 12, 2010

Angelina's Fried Vegetables


I was feeling sort of nostalgic today for the fried vegetables my grandmother used to make. They were almost always the start of our family's six-hour Sunday dinners, laid out (along with a big wedge of provolone) on the table to pick on as we played cards and waited for the main event. Hmmm, they disappeared fast! There's a saying in Italian: fritte son bone anche le scarpe, even shoes taste good when they're fried. And it's so true.

Fried vegetables are not at all hard to make, but they can be time consuming, as the various vegetables need to be peeled and cut up, then parboiled, and then fried. One way to cut down on this work is to use frozen vegetables, which respond very well to this treatment. And, in the US at least, the quality of frozen vegetables is often comparable, in some cases superior, to that of fresh ingredients (see below). Today we had artichoke hearts, cauliflower florets and asparagus, all of which come already parboiled and cut into pieces. All you need to do is let them defrost, then roll them in flour, dip them in a mixture of eggs beaten with finely chopped parsley, salt, pepper and just a bit of grated pecorino cheese. Shallow fry them gently in a mixture of olive and canola oils (or in a light olive oil) until they turn a light golden brown.

The oil should be about 1/2 inch (1 cm) or so deep, or enough to come about halfway up the pieces. Make sure that the oil is just hot enough so that it gently bubbles around the pieces as you place them into the pan. If the oil is not hot enough, the vegetables will turn out greasy; too hot and the egg batter will brown before the insides of the vegetable pieces are fully cooked. (It is a bit like making fried chicken, if you've done that.) You then drain the vegetables, either on a plate lined with paper towels or--my preferred method--on a cooling rack placed over a baking sheet to catch the oil and stray bits of batter. You'll need to fry a few pieces at a time, as many as will fit comfortably in your frying pan without crowding. (If you crowd them, they will steam, and get soggy and greasy.) Keep your already fried vegetables warm in the oven while you are frying the rest.

Sprinkle the fried vegetables with salt and serve either hot or at room temperature. I promise, they're addictive!

NOTE: The vegetables mentioned above were the ones that Angelina made most often. But other vegetables are also great fried like this, including broccoli, peppers and--my personal favorite--eggplant. In fact, this is the way you fry eggplant to make a parmigiana di melanzane, eggplant parmesan, or at least the way Angelina used to make it.

As mentioned, however sacrilegious it may seem, when I don't have access to best quality fresh vegetables, I am a fan of using frozen vegetables for this dish, especially for the ones that require parboiling and cutting up, like cauliflower, artichoke, broccoli or even asparagus. (Vegetables like eggplant and peppers, of course, are another story.) Frankly, I find that, in the US at least, frozen vegetables can equally good, if not better, than 'fresh' vegetables that have been picked before they are ripe, shipped across country and force-ripened by gas or whatever other artificial means modern industry has devised, and then left to sit on a supermarket shelf for however long. Frozen vegetables are picked at their best and freezing preserves them that way. Of course, not all vegetables freeze well. Eggplant and peppers, and summer vegetables in general, are not very good frozen. Potatoes take on an 'off' flavor when frozen. But for many other vegetables, frozen are a viable and practical alternative.

Another way to fry vegetables is to substitute parmesan for the pecorino and, after the egg bath, cover the vegetables pieces in bread crumbs. It produces a more 'refined' dish--but I like this way better. It brings me back to my childhood.

If you have any of the egg mixture left over, by the way, don't throw it out. Mix it with some breadcrumbs and pour into the pan like so much pancake batter and fry until golden brown. It's the best part!

These fried vegetables are basically a kind of vegetarian fritto misto, as befits a modest country gal like Angelina. Italian cuisine abounds in fritti misti--the 'fried course' was once a standard part of a complete Italian dinner--and there are many regional versions of the fritto misto. My personal favorite, found  in coastal areas all over Italy, is the fritto misto di mare, which we have already featured here. In Rome, they make a wonderful fritto misto alla romana with calf's brains and artichokes. In Piemonte, they make an elaborate fritto misto with many different meats, crochette and vegetables. In Bologna, the gran fritto misto features bits of mortadella, cheese, semolina croquettes and even 'fried cream' (pastry cream enriched and thickened with egg yolk). 

Sunday, February 7, 2010

A Word of Thanks


Dear readers, 

Just a quick word to let you know that Memorie di Angelina now has well over 2000 followers via email, readers and various social networks, up from 1500 only about a month ago. I wanted to express my sincerest thanks for your readership. It's what makes the time and effort worthwhile! Angelina is no doubt smiling down at all of you!

Abbracci,
Frank

Pasta e fagioli


Pasta e fagioli, or pasta and beans, which goes by the amusing nickname 'pasta fazool' in Italian-American slang, is one of the most internationally famous dishes in the entire Italian repertoire.  It is, however, a victim of its own success, and is too often made badly, very badly, which is why I would never order this dish in a restaurant outside Italy. The real thing, however, is not at all hard to make at home. In fact, it is a great standby for weeknights where you don't have much time and need to whip up something quickly. And the results are really wonderful on a cold winter night. 

There are lots of authentic variations on the dish, but here is the way I like to make it:

Fry some pancetta, cut up into cubes or lardons, in olive oil until just beginning to brown, then add a few lightly crushed garlic cloves and a spring of fresh rosemary. (You can also add a peperoncino at this point if you like some spice.) Just when you start to smell the garlic and rosemary, add some crushed tomatoes (I just add one or two plus a little juice, just enough to lightly color the soup and add a little flavor) and simmer until the tomatoes have separated from the oil. Then add your drained cooked (or canned) cannellini beans, allow them to simmer for a minute or two to insaporire (absorb the flavors of the tomato and other ingredients) and then add water (or broth) and partially cooked pasta (see below). Continue simmering, squashing some of the beans against the side of the pot so that they 'melt' into the liquid and thicken it, until the pasta is fully cooked. I like to mix in a bit of grated pecorino cheese to enrich the soup before serving . Serve topped with you choice of additional grated cheese, freshly ground pepper and/or un filo d'olio.

NOTES: There are, as always, quite a few variations to this dish. First of all, if you prefer a vegetarian dish, you can omit the pancetta, which I often do. And if you wish to 'veganize' it, don't use cheese either. Or you can use crumbed sausage meat instead of the pancetta, if you want some meat flavor but can't find pancetta. Salt pork also works well, as does something called 'country ham'. Regular cooked ham, however, does not give you the right flavor for this dish, IMHO. You can make the soup even meatier by using broth, but I find that with all the other flavors going on, water is not only acceptable but preferable. If you've made the beans yourself, do use the cooking water from the beans, which have wonderful flavor.

You can also use other kinds of beans. In fact, just about any legume could do, although most typical would be a bean like pinto or cranberry beans. Chickpeas are wonderful in this dish, in which case you will have made a pasta e ceci. In our family pasta and lentils are typically made a different way, as a pasta asciutta rather than a soup, but you might want to try it made this way and see what it's like. By the way, canned beans are perfectly acceptable, but do remember to drain and wash them well. The canning liquid would otherwise give the dish an 'off', artificial taste. One legume that I would not try this way are peas; their flavor is too delicate to stand up to such a robust, rustic treatment. Try instead this delicate pasta e piselli dish with just onions, parsley and broth.

And, of course, the choice of pasta can vary, although small, stubby pastas work best. I personally like ditali (as shown above) but small shells or 'elbows' would work well. In Italy, it is very common to use the odds and ends of different pastas you have around, called pasta mista--it's a great way to use up those last few pieces of pasta that inevitably wind up at the bottom of the box. Collect them in a towel or bag, then smash them with meat pounder or the back of a skillet to reduce them all to about the same small size. Some recipes call for adding the pasta directly to the soup pot without pre-cooking them. If you do that, however, be careful; I find that the pasta inevitably sticks to the bottom of the pot and can burn. And be sure to add quite a bit extra water as the pasta will absorb it readily as it cooks. 

As I mentioned, this soup is all too often subject to culinary abuse. If you want to be authentic, by the way, the soup should not be brothy, as you will often see when this and other pasta and legume dishes (including minestrone) are made outside Italy. Rather, you should end up with a thick soup that is almost a stew. And ignore recipes that use this soup as a dumping ground for all sorts of extraneous dried herbs or overwhelm the other flavors with too much tomato. And this recipe, supposedly from the Olive Garden restaurant chain, is a true monstrosity, more of a bad chili than an Italian soup.

You can also make a milder, more 'refined' dish by making a different kind of flavoring base or soffritto of onion, carrot and celery rather than garlic, rosemary and red pepper, in which case you can substitute parmesan for the pecorino. Personally, I prefer this heartier, earthier version.

Sunday, January 24, 2010

How to Make Polenta

Polenta is one of the most emblematic dishes of the northern Italian cuisines from the Veneto to Lombardia to Piemonte. It is also one of the oldest foods eaten in Italy, dating back at least to 990 BCE. In its original form, polenta—known to the ancient Romans as pulmentum—was a porridge made from spelt. In later ages other grains such as barley and millet as well as pulses and even chestnuts were used to make various kinds of gruels eaten generally by the poor. It is said to have originally been an Etruscan dish, which the Romans adopted and spread throughout the Empire, although today polenta is not particularly important in the cooking of Tuscany or (with one exception) Lazio. In the 1600s, after maize, a New World grain, was introduced into Italy by the Venetians, polenta took on the form we know today.

Polenta, as befits la cucina povera, is quite simple to make but requires patience and care. Polenta was traditionally made by the fire, cooked in a copper pot known as a paiolo, hung close to the fireplace and stirred  with a wooden stick known as a tarai (or tarel in some areas). Polenta today is usually made on top of a stove, and besides the traditional method, some modern methods have been developed.

Traditional method for making polenta: In a paiolo or other large pot, preferably made of copper, bring some lightly salted water to the simmer. I find that a ratio of 1 liter (1 quart) of water for 250g (1/2 lb.) of polenta flour works well. Have some more water on hand, simmering in a saucepan or kettle at the back of the stove:


When the water in paiolo has come to the simmer, add the polenta in a constant but gradual stream—in Italian they say 'a pioggia' or like rain—stirring the pot all the while with a whisk or wooden spoon in one direction until all the polenta has been incorporated into the water:


NB: This technique should avoid the awful fate of badly made polenta: the formation of unpleasant lumps or grumi. (I find the use of a whisk, while unconventional, is particularly helpful.) But don't be surprised if you wind up with a few lumps on your first few attempts to make polenta; it is part of the learning process.

The polenta will soon thicken. Turn down the heat to low immediately; be careful, as polenta has a tendency to spatter if it 'boils'. If this happens, take the paiolo off heat for a moment and add some water. That will stop the sputtering, and you can return to the heat and continue to stir:


If you have been using a whisk, you will eventually need toswitch to a wooden spoon as the polenta thickens. Continue stirring and, when the polenta gets too thick to stir without great effort, add some of the hot water you have kept in reserve and continue to stir:


Although some recipes call for you to stir constantly throughout the cooking period to avoid scorching the bottom, I find that if the heat is low enough and you keep the polenta rather loose by adding water from time to time, you only need to stir every so often—say every 5 minutes or so. The polenta should simmer like this for at least 45 minutes, and it is even better after an hour. Some recipes even call for cooking the polenta for 90 minutes—something I've never had the patience to do.

The polenta is done when it is perfectly creamy and has attained the consistency you desire. The polenta should pull away from the pot when you run your spoon across the bottom of the pot:


Depending on your tastes and the use you will be making of the polenta, it can be either all'onda, or rather soft like a risotto, or quite stiff. (More on this later.) If you want a stiff polenta, stop adding water for the last 15-20 minutes or so, and allow the polenta to thicken; you will need to stir more during this final period.
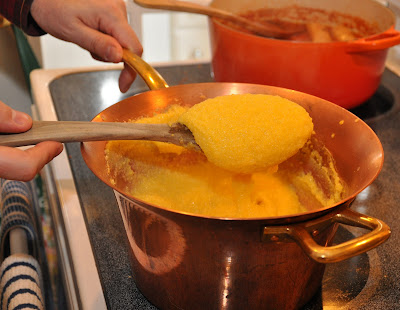
 
A nice thick polenta 

Pressure cooker method: The traditional method, even without constant stirring, is quite a job. If you want to cut down both on time and effort, you can make polenta in a pressure cooker. To avoid scorching the bottom, use more water than you normally would (say 25% more) and as soon as the polenta begins to thicken a bit, close the lid and bring the pot up to pressure. Turn down the heat to the barest flame, just enough to maintain the pressure, and cook for 20 minutes. Release the pressure, either gradually by just letting it come down by itself off heat, or 'forcing' the pressure down by opening the valve and/or running the pot under cold water in the sink. Remove the lid. Bring the pot back to the stove and over gentle heat begin stirring your polenta. Depending on the consistency you want, add some more water to loosen the polenta or, if it is already rather looser than you want your final product to be, just keep stirring as the polenta thickens.

Slow cooker/rice cooker method: Although I don't own a slow cooker and only occasionally use a rice cooker, I find this method attractive. You mix your polenta flour with cold water (like the pressure cooker, use about 25% more than you would normally) and a pinch of salt in the cooker, close the lid and proceed to cook according to the instructions for your machine (usually 6 hours on low, 3 hours on high). Some recipes call for you to grease the inside of the cooker with a bit of butter or oil to prevent scorching.

Oven method: This is one I've never tried, but it is said that you can make polenta by mixing cold water and polenta flour in a casserole and placing it in moderate oven (180°C, 350°F) to bake for about 45 minutes, stirring it at least once towards the end of the cooking period. 

Electric polenta pot: My favorite method back in Italy was to use an electric paiolo or polenta pot. After the initial addition of polenta flour, as soon as the polenta began to thicken, you attached a paddle with an electric motor to the top of the pot and plugged it in. The paddle would rotate slowly, stirring the polenta, for as long as you wished to cook it. It is a wonderful invention but I had to give it away before leaving Italy, because of the difference in current. Despite having looked high and low, I have not managed to find anything comparable in the US.

Instant polenta: Even in Italy, partially pre-cooked 'instant' polenta,  sometimes called polenta lampo or 'lightning polenta', which can be eaten after only 5-10 minutes of simmering, is quite popular. Of course, it goes without saying that both taste and texture suffer when compared to 'real' polenta. But the result is acceptable in some dishes where the polenta is paired with an especially hearty condimento, like the Roman classic, polenta con spuntature e salsicce.

NOTES: Polenta is traditionally served heaped onto a large wooden board, in the middle of which a shallow well is formed to hold the sauce or other condimento to go with it. Served this way, polenta is paired with a broad variety of dishes from meat to vegetables to fish. Traditionally, polenta was cut with a heavy string, served with wooden spoons and eaten on wooden plates, as contact with metal was said to ruin its flavor. (This was the original reason for cooking polenta in copper pot, since unlike other metals copper was said not to have this deleterious effect.) These days, a serving platter will do, and the advent of stainless steel has rendered these precautions unnecessary, although like many, I still use copper and wood implements. It just feels right…

There are other ways to serve polenta. While still warm, thickly cooked polenta (either leftover or made for the purpose) can be spread in a shallow layer on a plate or cookie sheet or other flat surface and left to cool; the polenta hardens as it cools and is then cut into squares or other shapes. These can be fried or grilled and used as a kind of contorno, or as the bed of a crostino. The polenta squares can also be arranged in a casserole with béchamel, cheese and sauce like lasagne to make a 'polenta pasticciata'.


There are various types of polenta flour you should use according to the region and dish you are making, as well as your personal taste. The most common type of polenta flour is called bramata, a medium-coarse, yellow cornmeal. It is used for rustic polenta dishes and is well suited for chilling and grilling or baking. It is the kind most often found both inside and (especially) outside Italy. You can use it as a kind of 'all purpose' polenta flour. For a finer texture, which results in a softer, more refined polenta, use the kind of polenta known as fioretto, which is very finely ground. In parts of northern Italy, particularly in the Veneto, a finely ground white cornmeal called polenta bianca is quite commonly used to accompany local dishes like baccalà alla vicentina. A rather unusual, but delicious polenta is made with a mixture of buckwheat and cornmeal, called polenta taragna, both very coarsely ground. It is very typical of the Valtellina—the Alpine area of Lombardia which is home to the buckwheat pasta known as pizzoccheri—and also eaten a further to the south, in the areas around Brescia and Bergamo. Rather than a sauce, copious amounts of cheese and butter are usually added just before serving this kind of polenta.

Although polenta is typically thought of (and is) a northern dish, polenta is eaten all over Italy. And although Rome is not really polenta country, in the winter the aforementioned hearty dish of polenta with sausages and spareribs is much appreciated there. Angelina also made polenta, rather soft, served with a simple sugo di pomodoro or with ragu. In my family the story goes that she learned to make polenta to please my grandfather, who had fought in the First World War against the Austrians and, while up north, developed a taste for the stuff. (Following an long tradition, as puls was the usual ration for Roman soldiers in ancient times.) The story may be apocryphal, however, as polenta is also popular in the area she came from around Benevento and Avellino, perhaps a holdover from the times when polenta was enjoyed all over the Roman world.