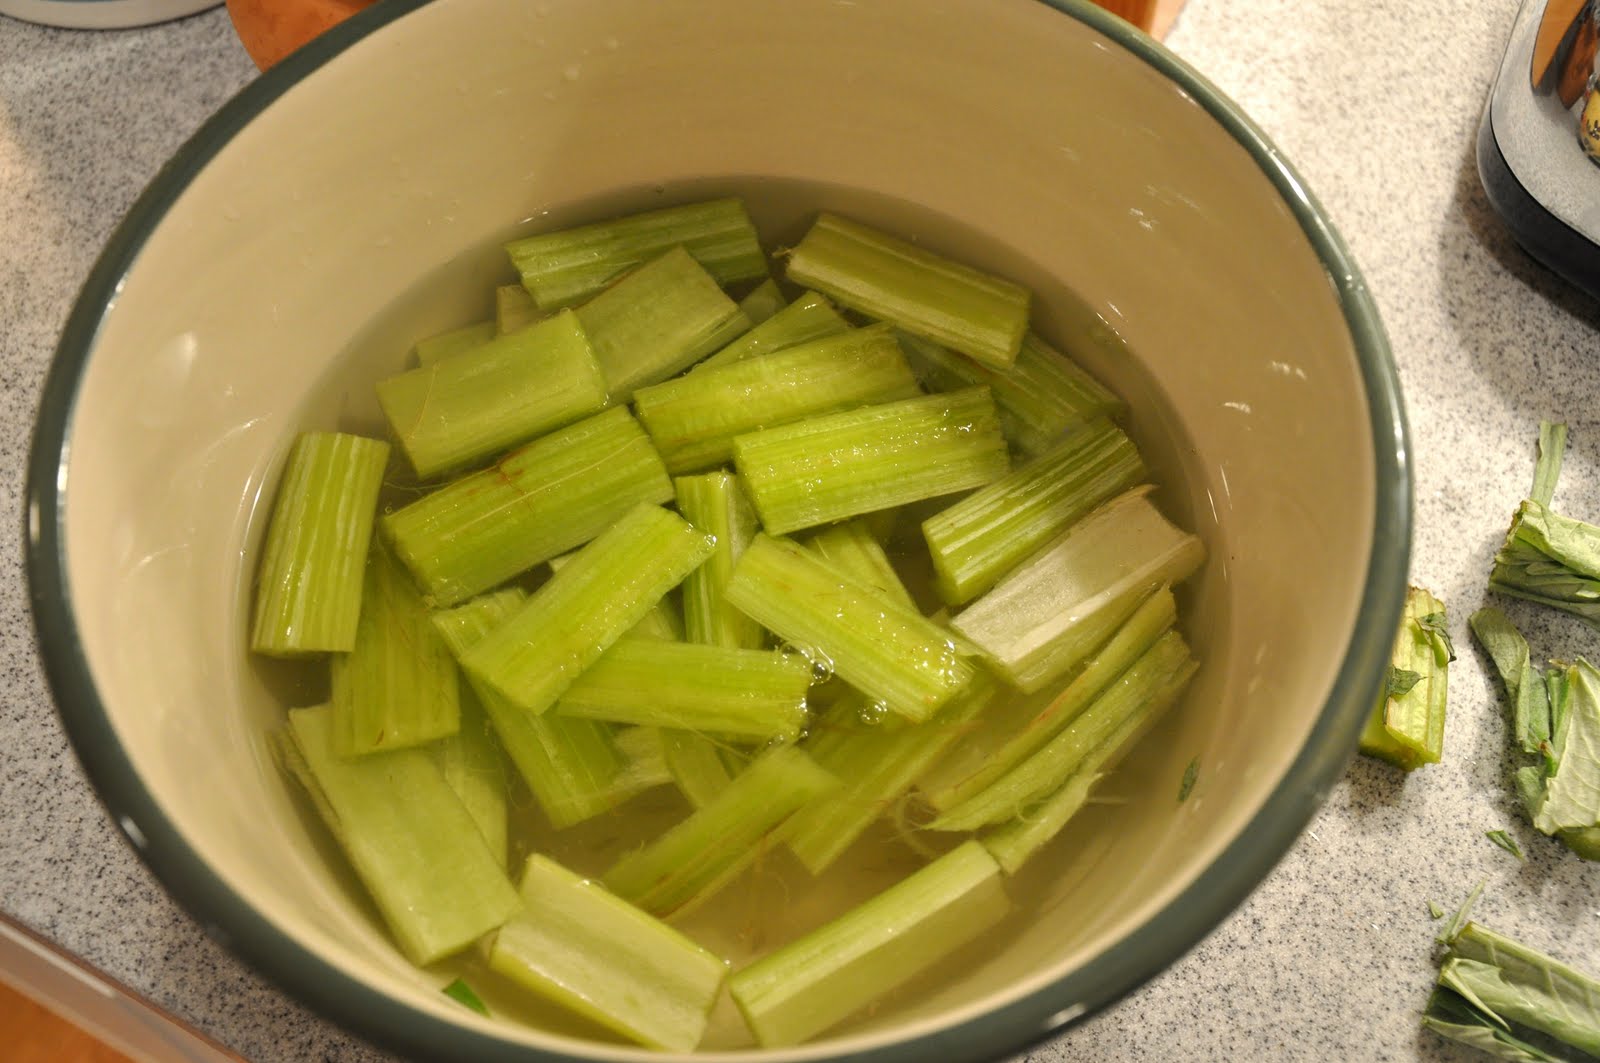
Showing posts with label contorno. Show all posts

Saturday, March 5, 2011

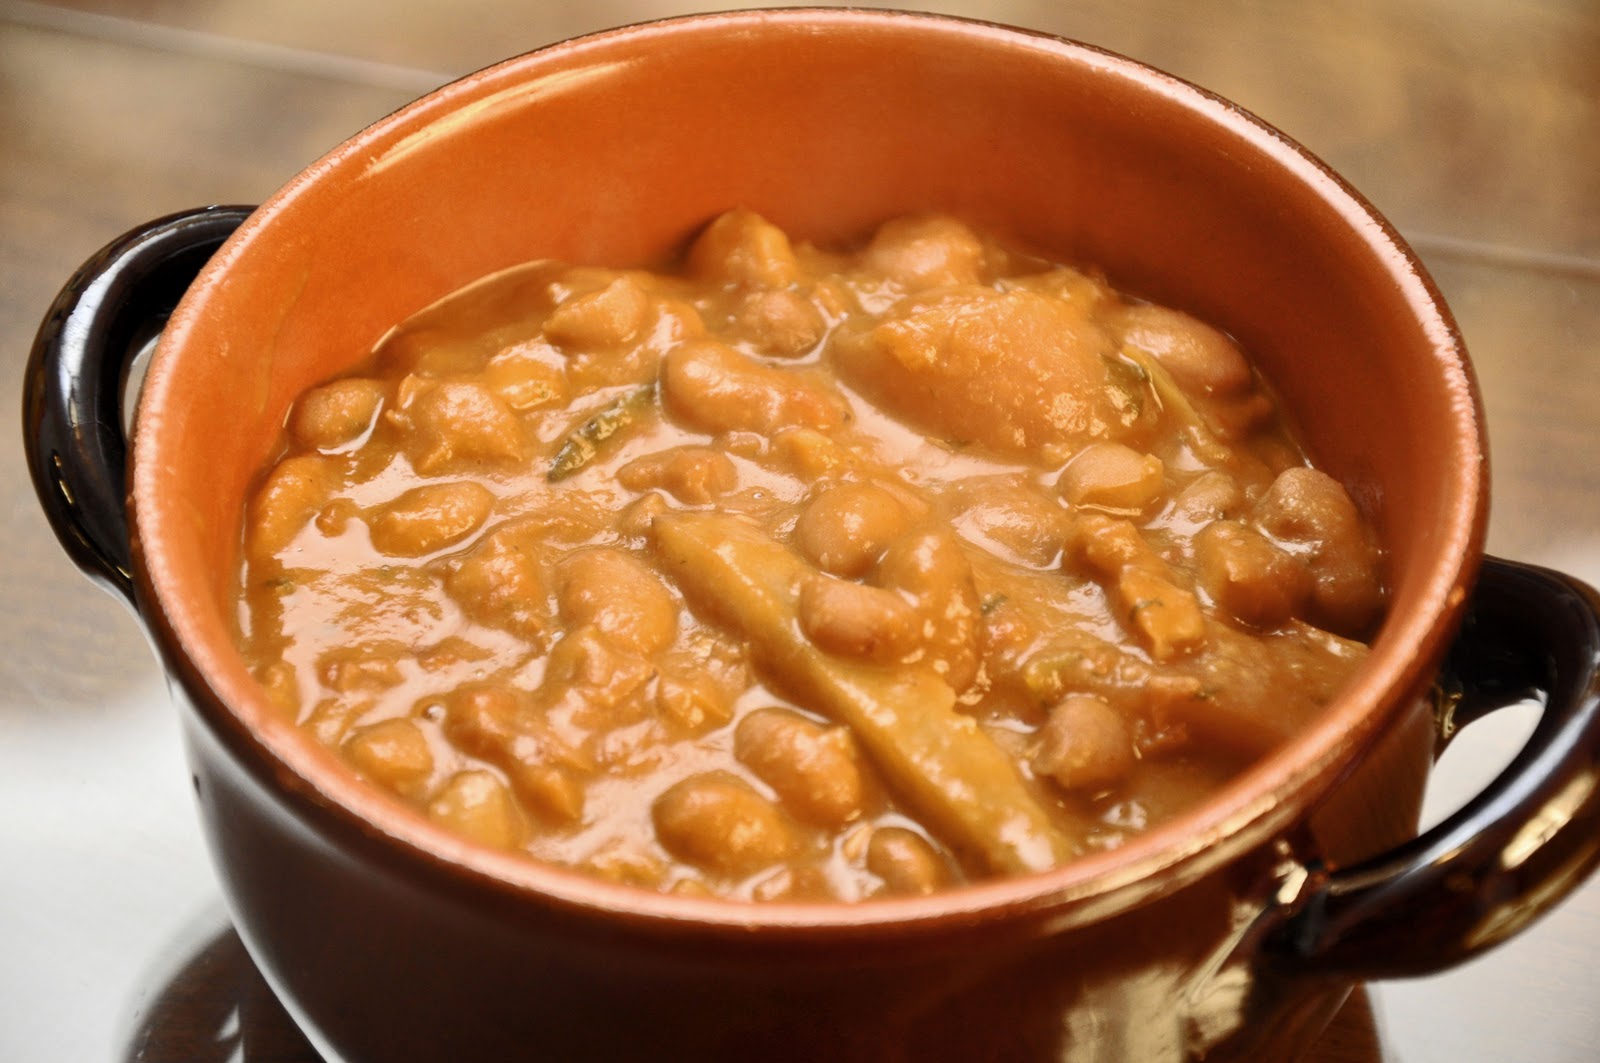
Fagioli con le cotiche


Tuscans are known for being the biggest bean-eaters in Italy, so much so that they are sometimes called mangiafagioli in Italian. But Romans are no slouches in the legume department, either. They love fava beans, of course, and they make a mean pasta e lenticchie, for example, even if the Roman version is actually quite different than the one Angelina used to make. But the ne plus ultra of Roman bean cookery has got to be fagioli con le cotiche, a kind of Roman-style pork and beans, made with cannellini or (even better, in my book) borlotti beans simmered in tomato sauce with strips of pork rind. A classic example of how Roman frugality can produces hearty and delicious results.

Ingredients (for 4-6)

For simmering the beans:
500g (1 lb.) dried cannellini or borlotti beans
A garlic clove
A sprig of fresh parsley
Salt

For simmering the pork rind:
250g-500g (1/2-1 lb.) pork rind, depending (see Notes)
A stick of celery
1/2 medium onion, in one piece
Salt and pepper

For the tomato sauce:
250-500g (1/2- 1 lb.) canned tomatoes, depending (see Notes)
1/2 medium onion, finely chopped
1-2 cloves of garlic, finely chopped
A handful of parsley, finely chopped
Lard or olive Oil
Salt and pepper

Directions

Soak the beans overnight. Simmer the beans in fresh water to cover, along with a garlic clove and parsley (if using—see Notes) until quite tender, about 1-1/2 to 2 hours.

Meanwhile, prepare the pork rind: 

Raw pork rind
Pre-boil the rind for about 15 minutes. Remove the rind and let it cool for a few minutes. When it is cool enough to handle, cut it into thin strips. (Some recipes will tell you to trim of the fatty underside with a knife, but this is a bit too fussy for my taste and, anyway, I like the fattiness!) Then simmer the strips in water to cover, lightly salted, with the celery and onion. They will be done when they are tender but still have some bite to them, which will take, say 45-60 minutes.
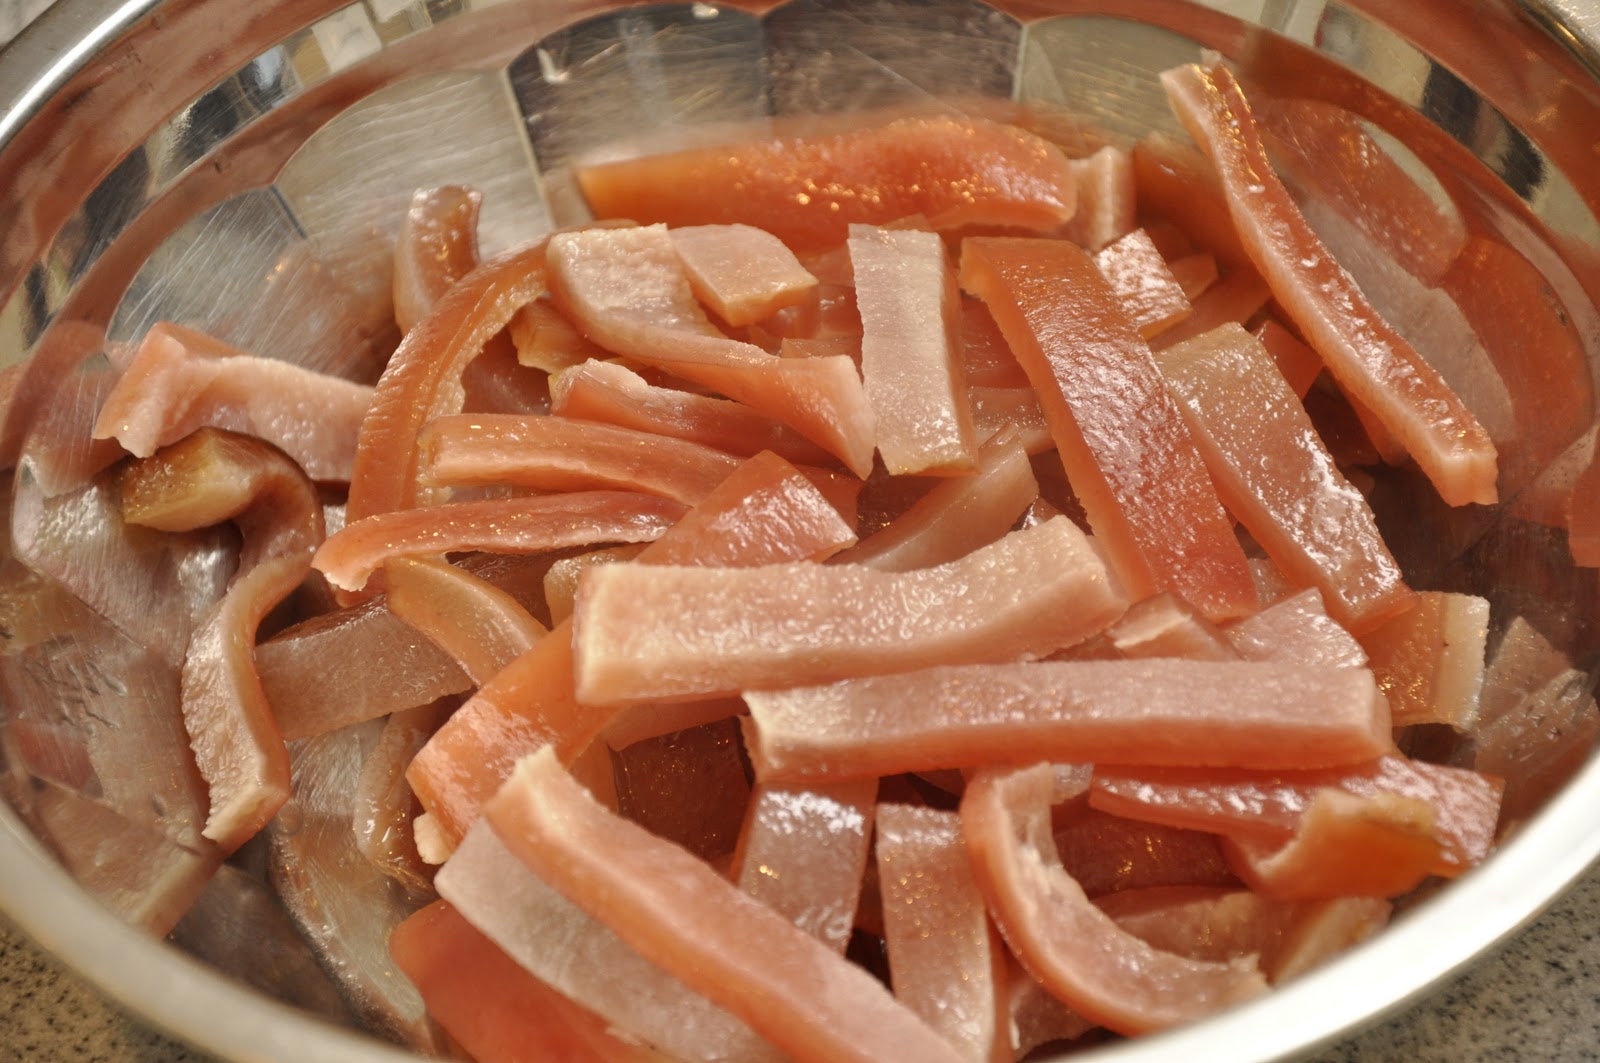
Prep'd and ready to go...

Prepare the tomato sauce in a large casserole large enough to contain all the ingredients. A terracotta or enameled cast iron pot would be ideal. Make a soffritto by sautéing the onion, garlic and parsley gently in lard (the traditional choice) or olive oil, seasoning while the odori are cooking. Add your canned tomatoes, puréeing them by passing them through a food mill into the pot. Let the tomatoes simmer until they have reduced into a sauce, about 15-20 minutes.

Now it's time to put it all together: Add the pork rind to the tomato sauce and let them insaporire (see Glossary) for a minute or two, then add the cooked beans. Mix everything together well. Add a bit of the pork rind water and/or bean water if you find that the mixture is a bit dry. Simmer it all for about 30 minutes to allow the flavors to get to know each other.

Serve hot. Like many long-simmered bean dishes, fagioli con le cotiche are even better if allowed to rest overnight and reheated the next day.

NOTES: Raw pork rind can be hard to find in the States. I am fortunate enough to have a farm supplier close by that has it, but where I live, in any event, you will rarely (if ever) find it in a supermarket. I suppose that butchers will also carry it or take an order. Unfortunately, there is no real substitute for it in this dish. After all the name of the dish is 'beans and pork rind' in Italian! But if you were to substitute pork belly or some other fatty cut of pork, I would venture you'd wind up with something quite tasty. 

The basic building blocks of this recipe—simmer the beans, simmer the pork rind, make the sauce and mix it all together and simmer for a bit more—is common to all the recipes you'll see for this dish. But like so many classics, there are variations on the basic theme, and they revolve mostly around three factors:

First, the ratio of bean to pork rind. In some recipes, the ratio is 2:1, or even greater, so that the pork is really only there as a flavoring agent. In these versions, the dish can serve as a a contorno. In other recipes, the ratio can increase to as much as 1:1, so that the pork is there as an equal partner, so to speak. In these heartier versions, the dish graduates to a full contorno or even a piatto unico or one-dish meal, accompanied by nice crusty bread and followed by a green salad and perhaps a piece of fruit.  I just use as much of each as I have on hand, since it will be delicious no matter what! (By the way, if you have any left over, these beans go great with pasta.)

Second, the dish can be more or less in rosso, by adding more or less tomato, depending on your preference. And you can use canned tomatoes passed through a food mill (my preference) or a passata di pomodoro.

Third, the aromatic vegetables (aka odori) that make up the soffritto for the tomato sauce and are thrown in to simmer with the pork and beans vary from recipe to recipe. The above options are the ones I like, but for example, many recipes will tell you to make the tomato sauce with a classic soffritto italiano of onion, celery and carrots. Personally, I don't care for the sweetness that carrots lend to beans, and prefer to stick to the allium family. Some recipes will have you simmer your beans with no aromatics at all, since they will be absorbing the flavors of the tomato sauce and pork in the final stage anyway. And the pork rind, too, can simply be simmered in lightly salted water.

Some recipes also call for adding a bit of prosciutto fat to the soffritto, but personally I'd call that gilding the lily, especially if, as I like to do, you are cooking with lard. Even I have limits to my pork fetishism.

Wednesday, December 29, 2010

Fagiolini alla panna


When most people (myself included) think of Italian style green beans, fagiolini in umido (green beans in tomato sauce) is likely to come to mind or perhaps fagiolini all'agro, a simple green bean salad. Here is a less well known but perfectly delicious dish from Lombardia that I recent came across while  perusing a little cookbook called La cucina lombarda by Alessandro Molinari Pradelli: green beans simmered in cream. I can almost guarantee that once you try this, it will become a regular part of your repertoire!

Ingredients (for 4-6 servings)

1 kg (2 lbs.) green beans
A shallot, fine chopped
50g (3 Tbs) butter (or more if you're feeling indulgent)
2 dl (3/4 cup) cream (or as much as you need)
Nutmeg
Salt and pepper
A handful of parsley, finely chopped

Directions

Trim off the ends of your green beans, then plunge them into a big pot of well-salted boiling water. Cook them until they are quite al dente, remembering that they will cook some more later. This should take no more than 5 minutes or so, depending on the size and quality of the beans.

While the green beans are boiling away, gently sweat your chopped shallot in the butter in an ample skillet or sauté pan until soft but not browned.

Transfer the green beans from the boiling water right into the skillet and mix them well with the butter and shallot soffritto. [NB: If you like, you can 'refresh' the green beans in cold water before adding them to the skillet, which will help them retain their color, but being a bit lazy I often skip this step.] Raise the flame just a bit and let the green beans braise for a few minutes, stirring frequently, so they can absorb the flavors of the soffritto.

Now add your cream, enough to just about cover the beans. Season with salt, pepper and nice scrape of nutmeg. Raise the flame a bit more so that the cream bubbles fairly vigorously. Continue stirring from time to time, and simmer until the cream has thickened into a saucy consistency. Taste and adjust for seasoning if need be.

Mix in the chopped parsley and serve immediately.

NOTES: The great thing about this dish, as for any braised vegetable dish, is that you can use green beans that may have been around for a while without much trouble. That is, in fact, what I did this time and I can tell you the results were more than satisfactory. 

This makes for a fine contorno for grilled meats, in particular. I would not serve it, on the other hand, with a braised meat dish. And I actually had it as a vegetarian lunch one day, with a nice chunk of crusty bread.


Monday, October 11, 2010

Pommes frites


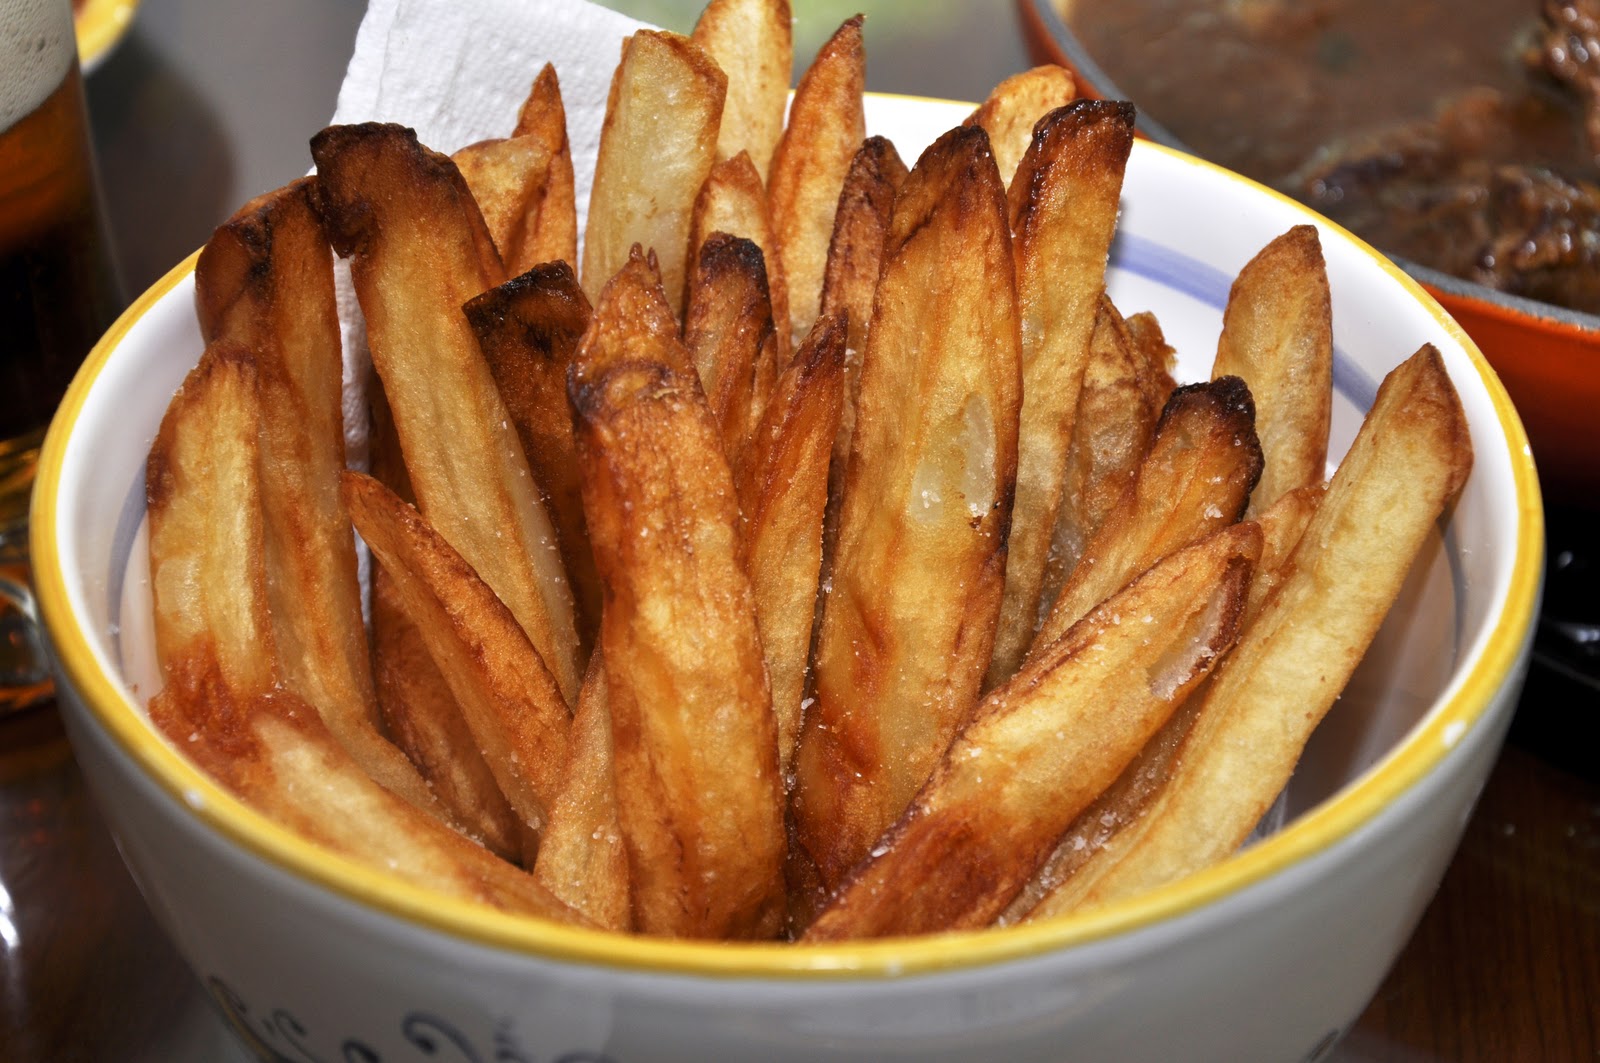
Deep fried potatoes, which in the US usually go by the misnomer "French fries", have suffered from association with fast food and the modern aversion to deep fried foods in general, but a well-made batch of pommes frites is one of the tastiest ways to prepare potatoes. And while they will never qualify as health food, if made properly and eaten in moderation, they fit perfectly well in a well-balanced diet.


Fried potatoes are, quite simply, just that: potatoes deep fried in fat. But as simple as the recipe is, there are a few 'tricks' to ensure that they come out at their best. Begin by peeling and cutting your potatoes into sticks. At home, it is easier to cut them fairly thick (as pictured) but if you have the patience, pencil-thin fries are quite delicious. As you go, immerse the pieces in bowl of cold water so they won't discolor.


I have already discussed the most important tips for successful frying, and the same rules go for fried potatoes. But there are a few extra tips to keep in mind when frying potatoes. You see, potatoes are both hard and starchy, two qualities that you will need to account for as you fry them. Since they are hard, they need to cook for some time to soften, but because they are starchy, they brown rapidly in hot oil. What's the solution? Frying the potato in two goes, or 'double frying': first in moderately hot oil (350°F or 180°C), for 3-5 minutes (depending on their thickness) until just tender, then for another 3-4 minutes in really hot oil (375°F, 190°C) to brown them up nicely. If done right, this technique results in fries that are nice and soft on the inside and brown and crispy on the outside.


The other 'tricks' aim to avoid greasiness. Make sure to fry your potato pieces in small batches, with plenty of room for the oil to encase each piece and seal it. This also helps maintains a more constant temperature—as with any deep frying, you want to avoid allowing the temperature of the oil to drop too much or the oil will be absorbed more readily into the food you are frying. After each round of frying, pat the potato pieces dry of any excess oil, gingerly so you don't crush them—or burn your fingers on the hot oil—and keep them on a grate in a warm oven while you continue frying the other batches. (The grate lets air circulate around the top and bottom, which helps keep them crisp.)


Once all your potato pieces are nicely fried to a golden brown, sprinkle them generously with salt and serve immediately. If you need to, you can hold them on a grate in a warm oven for a few minutes—but not too long—but if you do, only salt them just before serving or they may go soggy.


NOTES: Even though they are very much in vogue these days, better not to use those young yellow-fleshed, thin-skinned potatoes that you would use for a sauté, potato salad or gratin, but rather use the larger, starchy kind that you would use for mashed potatoes. The starch helps the fries to brown as they should while getting soft and creamy inside. In North America, Idaho or Russet potatoes work well, as do so called 'all purpose' potatoes. I read that Yukon Golds also have a following, although I have not tried them made this way.


You can cut potatoes either thinly or thickly. In France, thick-cut fries are called "pommes Pont-Neuf"[or simply "pommes frites", about 10 millimeters (3/8 inch), while "pommes allumettes" (matchstick potatoes) are cut about 7 millimeters (1/4 inch) thick and "pommes pailles" (potato straws) only about 3–4 millimeters (⅛ inch). The very thinnest French fries do not need the double fry technique, but cutting them that finely can be very fussy for home cooks.


The other crucial choice for this dish is the fat in which you fry the potato. Most people will use a light vegetable oil. Peanut oil works well, given its high smoking point. Lard is wonderful for deep frying—it ensures crispiness and adds flavor—and personally I like to use a combination of canola or peanut oil mixed with a bit of lard. But just make sure to use good-quality, true lard made from rendered fat back. Supermarket lard is generally hydrogenated and contains those harmful trans fats. One oil you should not use is olive oil, as it has a low smoking point, as well as rather strong flavor that is not characteristic of this dish.


And now, since a (moving) picture is worth a thousand words, you may want to check out this instructional video from our friends at the Rouxbe Online Cooking School:


As many readers will know, "French fries" are not actually French but Belgian. It seems that this misnomer began with American soldiers fighting in Belgium in the First World War. They tasted Belgian pommes frites and called them "French" since that was the official language of their Belgian army colleagues. Or perhaps they didn't realize that they weren't in France… In any event, today fried potatoes are, of course, popular all over the Western world. Made in slices rather than sticks, they become 'chips' in Britain and many other English speaking countries. In French speaking Canada they are doused with gravy and cheese curds to make the Québecois classic called poutine. And, of course, in the US they are ubiquitous, accounting for fully a quarter of the total vegetable consumption in the country, most of them, unfortunately, consumed in fast food outlets, although there has recently been a movement by fast food chains to make them healthier by using fats like canola oil that are free of trans fat. But no matter what, making and eating them at home has to be better for you and your loved ones.

Saturday, July 3, 2010

An Italian Cookout

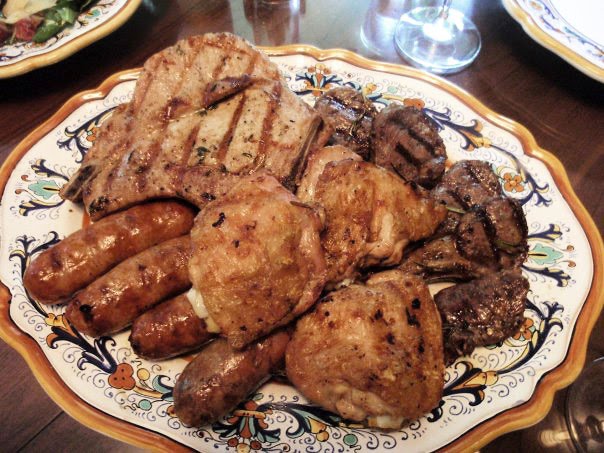
For many Italians, Summer means outdoor grilling, just as it does for much of the rest of the world. One of my grilling favorites is the grigliata mista, mixed grilled meats. The choice of meats is up to the cook, but it usually includes lamb, pork, chicken and, sometimes, but much less often than in places like the US or Argentina, beef. For this cookout, I made some rib lamb chops, pork chops, chicken, sausage and a T-bone steak, each (except for the sausage) with its own, slightly different marinade for variety: for the lamb chops, rosemary, salt and pepper (a mixture, when finely chopped together, is sometimes referred to as a salamoia toscana) and olive oil; for the pork chops, cumin (not very Italian, I know), salt, pepper and a bit of olive oil; for the chicken, red pepper flakes, salt, pepper, freshly squeezed lemon juice and olive oil, a style known as alla diavola for its spiciness, and usually used to marinate a whole, young butterflied chicken, but in this case I used just the thighs. I rubbed the T-bone with a bit of salt--that was it, as I don't mess with the pure flavor of good beef!

I grilled all the meats, other than the steak, over a moderate fire until golden brown on both sides and set them all on a large platter. The steak was grilled over very high flame to seal the outside while leaving the inside quite rare, although not quite as rare as I usually like it, since some of my guests were not hard-core carnivores like myself! Sliced thin on the bias and laid on a bed of arugula leaves, seaonsed with salt and freshly ground black pepper, topped with shards of parmesan, and drizzled with olive oil, the steak is called a tagliata di manzo. Except for a big 'cowboy ribeye', this is my favorite way to eat a steak.


Of course, an Italian meal would not be complete without some contorni, or side dishes, to round it out. This time I made a 'home-style' version of a classic Tuscan bean dish, fagioli al fiasco, potato salad and sauteed swiss chard. Now the real fagioli al fiasco is made by putting cannellini beans in a wide-bottomed bottle (hence the name, which means "beans in a flask" in Italian) with sage leaves, garlic cloves, black pepper and water to cover. You top with the bottle with a cork and place it by an open fire for about four hours. Not having a proper bottle or four hours to spare, I put the same ingredients in a pressure cooker for about an hour. You then season with salt and allow the beans to sit for while. Serve the beans in a bowl, dressing with abundant, fruity olive and some more black pepper ground on top. (As for all beans, they are best soaked beforehand, either overnight in cold water or, to speed up the process considerably, simply by bringing them just to the boil in enough water to cover them by about 5 cm (2 in), then letting them soak off heat for about an hour).


I prefer potato salad made without mayo or sour cream. Steam red baby potatoes until just tender, then drain them and let them cool a bit. When just cool enough to handle--warm potatoes will absorb the dressing more readily--cut then into slices or, if you prefer, into wedges. (If they are very young and have thin skins, there is no need to peel them.) Then pour over a vinaigrette made by whisking together olive oil, white wine vinegar, mustard, salt and pepper, into which you add chopped shallots and parsley. Fold the potatoes and vinaigrette together well but gently (a rubber spatula works well here) and let steep for an hour or two to develop flavor, mixing very gently from time to time. Serve topped with un filo d'olio and some more chopped parsley for color.


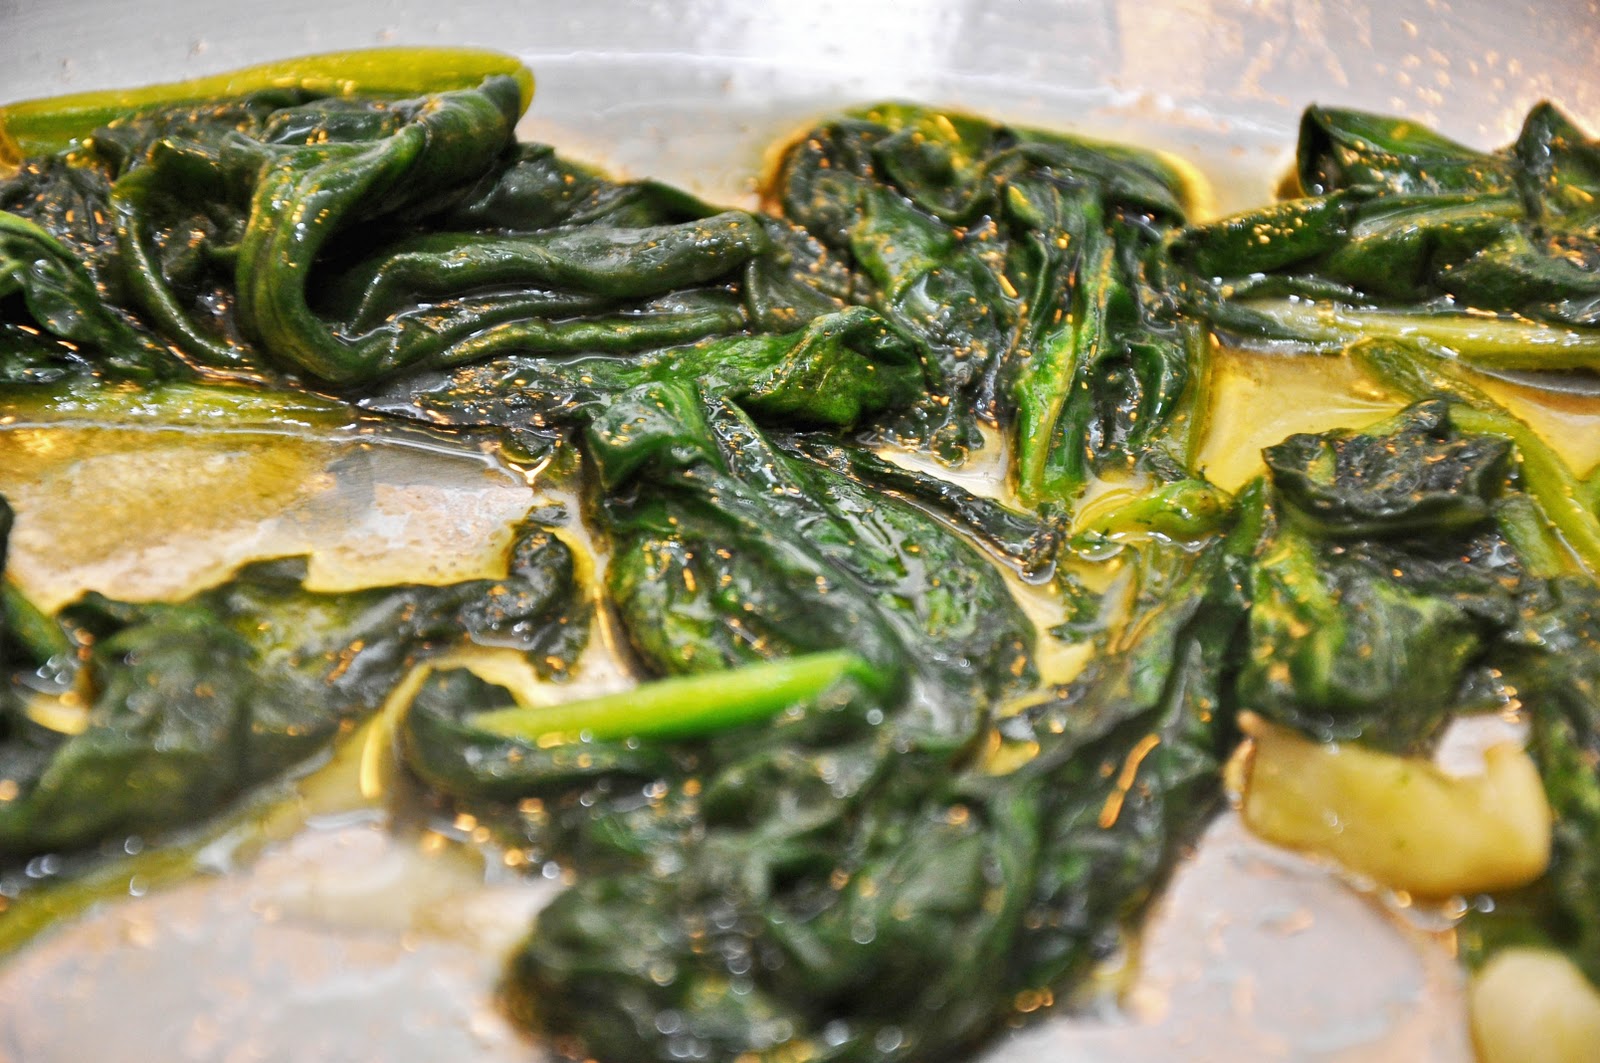
Last but not least, there was bieta ripassata in padella, sauteed swiss chard. Greens made this way--more often than not with the wild cicoria that grows in the countryside around the city--are a staple of the Roman table. But the same method works well for swiss chard spinach or, for that matter, just about any leafy green. You wilt the washed greens by placing them in a pot and cooking them covered in a pot with just the water that clings to them. (You can also parboil them in salted water, in the French manner, if you prefer.) You then run them under cold water to stop the cooking, allow them to drain in a colander. Chop the greens roughly and saute them in olive oil in which you have lightly browned a few garlic cloves and a hot red pepper (peperoncino) for a few minutes, to allow the greens to absorb the flavors of the seasonings.

After all this, there was little room for dessert. We just had some fresh cherries served in a bowl of ice water--my favorite way to eat them. After a caffe' corretto, I was ready for a nap!

The meats marinating before grilling

Wednesday, June 23, 2010

Spinaci ripassati in padella


Here's a 'master recipe' for one of the most common techniques in Italian cookery for preparing vegetables, particularly green, leafy vegetables. The technique is called rispassato in padella or saltato in padella which literally means 'tossed in the skillet' and could be translated simply as 'sautéed'. 

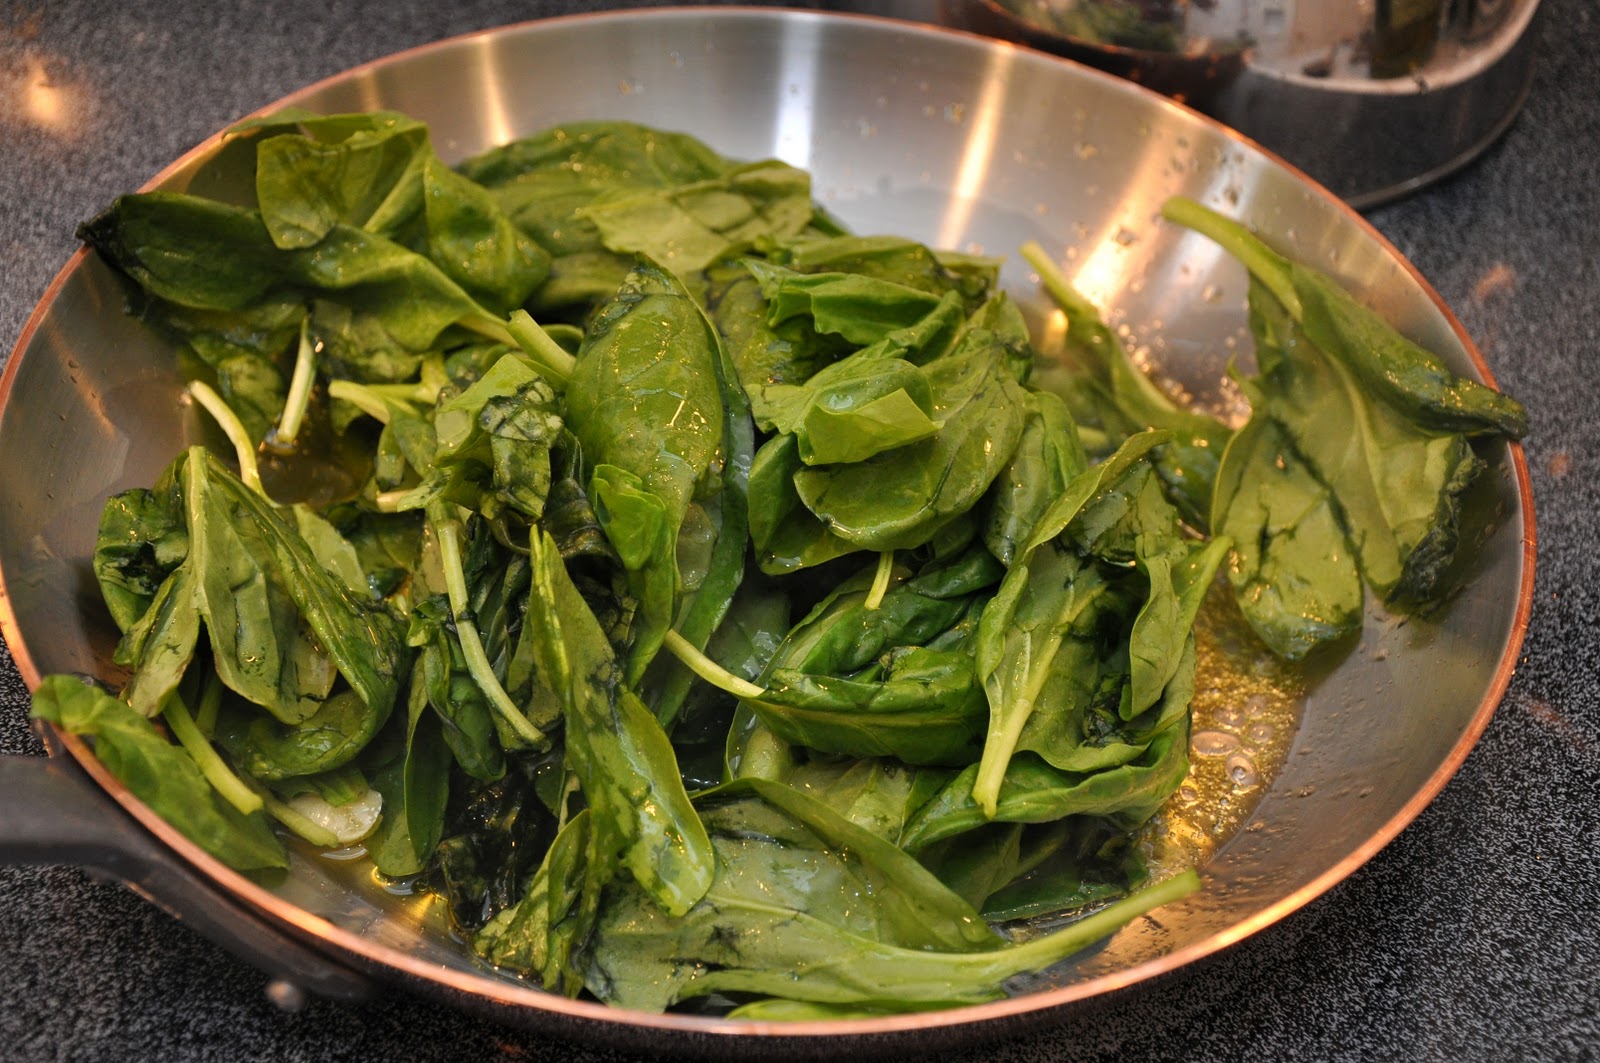
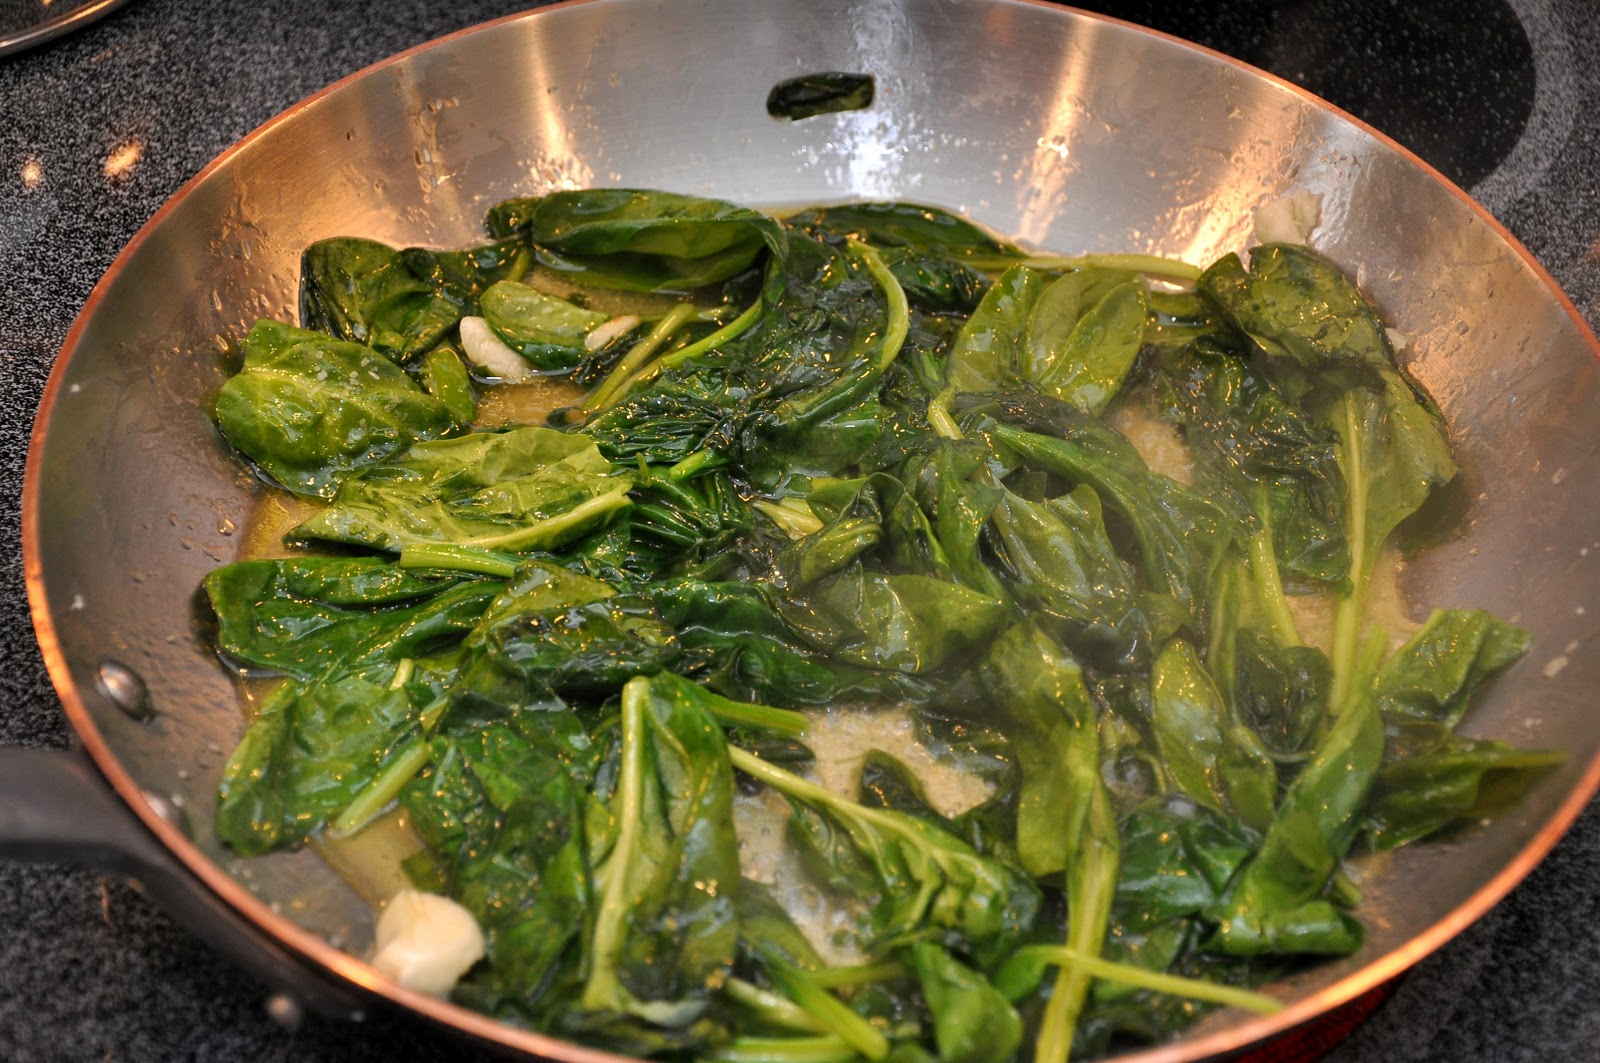
As an example, spinach is a good place to start. If you are using very tender 'baby' spinach, simply rinse it well in water without drying it out. Then make a soffritto by very lightly sautéing a clove or two of garlic, slightly crushed, until it just begins to give off a bit of fragrance. If you're cooking for company, you can remove the garlic at this point for a more elegant presentation. But at home I just leave them in for extra flavor (and it wards off vampires, too).

Then add your raw spinach leaves with the water that clings to them, along with a sprinkling of salt. 


Toss the spinach leaves well and they will quickly begin to wilt under the heat of the hot oil. 


 Allow the spinach to simmer and absorb the flavors of the soffritto for just a couple of minutes, until the spinach is well reduced and tender. Adjust the seasoning to taste.

And that's all there is to it! 

Now, if you are using more mature spinach—the kind with dark green, crinkly leaves and thick stems—you should trim the leaves of their stems and blanch them for a minute or two in salted water before sautéing. They are easy to trim: just hold each leaf in your hand on each side of the stem. Then pull the stem off with your other hand—it should come off easily. Drain them before adding them to the soffritto. Some recipes, in fact, call for rinsing and squeezing them dry, but, except for specific uses where you really need a 'dry' vegetable (such as in a filling for stuffed pasta) I generally leave a little bit of moisture on the vegetable, and that's the way that Angelina used to do it. 

NOTES: The same technique, as mentioned, can be used with just about any leafy vegetable. You can judge for yourself whether the vegetable needs pre-boiling or not: delicate greens like watercress generally do not, while most, including more robust greens like escarole, chicory, broccoletti (broccoli rabe) or kale, generally do. Pre-boil them until they are just a bit under-done, then transfer them to the skillet. Other vegetables can also be made this way, including broccoli, cauliflower, reen beans, peppers. And then there are other vegetables like funghi trifolati that have another name but use essentially the same technique, with some minor adjustments to account for the different textures involved. 

Vegetables made this way make wonderfully simple but savory contorni to accompany grilled or roasted meats or fish. They can also star on their own as a light vegetarian second course. And they can go into other dishes, most commonly as a kind of condimento for pasta, as in dishes like orecchiette ai broccoletti, or as a component in a vegetarian stuffed pasta like lasagne in bianco.

When pasta is tossed in a skillet with a sauce, it is also sometimes called in padella—in fact, one of the most popular frozen prepared pastas in Italy is called Quattro salti in padella or 'four tosses in the skillet'. Other kinds of food can also be prepared in padella, in particular scallops, shrimp or calamari, but let's leave those dishes for another post.

Saturday, June 19, 2010

Angelina’s Green Beans with Onions and Mint


Although our favorite way of having green beans when we were kids, especially in the summer, was in umido, or stewed with tomatoes, Angelina had another nice way of making green beans with sautéed onions and mint. As it turns out, at least according to this article, the recipe is from Puglia and is called fagiulini spilusieddi, meaning 'imaginative green beans' in the local dialect. Now, I have two theories about this: my grandfather being from Puglia, it is possible that she learned this Puglian way of making green beans to please her husband. It is also possible that in her area, which is not very far from Puglia, they also made green beans this way. 

In any event, the dish is very simple, tasty and definitely worth a try: you boil green beans in well salted water until tender. While the green beans are cooking, sauté sliced onions (perhaps half as much by weight as the green beans) in a generous amount of olive oil over moderate heat until they are nicely softened.  (Adding a sprinkling of salt and a spoonful of water helps them to cook more quickly.) Mix a handful of chopped parsley and mint into the onions. Then, if you like, add some bread crumbs, turn up the heat a bit and let them saute until they turn golden. Otherwise, turn off the heat.

When the green beans are tender, drain them and add them to the skillet with the onions and herbs. Turn them to coat well and let them stew for just a few minutes to insaporire. Before serving, sprinkle the beans with a bit of freshly squeezed lemon juice, just enough to brighten the flavors, season with salt and pepper, and serve hot. 

That's it. Simple but delicious! 

NB: I wanted to dub this dish 'fagiolini alla pugliese' but, just to confuse matters even more, it turns out that there is such a dish, more or less identical to fagiolini in umido, but with a bit of peperoncino for spice. Go figure…

Friday, May 28, 2010

Céléri rémoulade


I normally like my salads with a simple oil and vinegar dressing in the typical Italian manner, but once and a while I get the urge for one of those rich and creamy salads like cole slaw or Russian salad … or this French classic: céléri rémoulade, shredded celery root dressed with a mustardy mayonnaise.

With the help of a food processor, the dish is quite simple to make—even simpler, actually, than cole slaw. First, you peel the celery root with a knife (the skin is too tough and irregular for a peeler), cut  it into chunks, and then shred a celery root in a processor. Immediately fold in a good cup of mayonnaise, enough to dress the celery root well—along with a generous dollop of Dijon mustard, a splash of vinegar (or some freshly squeezed lemon juice), salt and pepper. If you like, you can some chopped parsley for extra flavor and color. Refrigerate for a good hour or more before serving. 

To this basic rémoulade dressing, you can add some extra flavorings if you like, such as capers or chopped cornichons or some other herbs like tarragon, chives and/or chervil. The Larousse Gastronomique suggests finishing the sauce with a bit of 'anchovy essence'—whatever that is (anchovy paste?). Some recipes call for adding the yolk of a hard boiled egg to a raw egg yolk to make the mayonnaise, assuming you are making it by hand. As an unorthodox variation, you can lower the caloric content a bit by folding in some sour cream in lieu of some of the mayo, in which case best to go light on the vinegar or lemon juice.

Sauce rémoulade is quite versatile. It is lovely served with all sorts of cooked vegetables, as an accompaniment to poached or roasted fish or even with a nicely grilled steak.

Saturday, May 8, 2010

Fagioli all’uccelletto


Tuscans love beans. They eat them as part of many of the famous Tuscan soups like ribollita, they eat them in a salad with tuna as an antipasto, and, of course, they eat them as a contorno, or side dish, especially with grilled meats like the mythical bistecca alla fiorentina. In fact, they are so well known in Italy for their love of legumes that Tuscans are sometimes jocularly called mangiafagioli, or 'bean eaters'.

I love Tuscan cuisine not only because I love legumes of all sorts, but also because it embraces the qualities that, for me, epitomize good eating: it is simple but delicious, rustic yet elegant, hearty yet healthy. This dish, fagioli all'uccelletto, or beans made in the manner of little birds, is a perfect example. 

You begin by making a simple tomato sauce: gently sauté a few garlic cloves and some fresh sage leaves in olive oil. When the garlic is just beginning to brown, add either fresh or canned tomatoes, which you will have puréed through a food mill, and let it simmer, always on gentle heat, until the tomatoes have reduced nicely to a saucy consistency. Then add boiled or canned cannellini beans, season with salt and peppers, and allow them to simmer in the tomato sauce for about 10 minutes or so, just long enough for them to absorb the flavor of the sauce. Test for seasoning, adjust if need be, and serve immediately. I like to drizzle a little olive oil over the top before serving.

As far as measurements go, the key is the ratio (by weight) of tomatoes to beans: if you want a rather 'saucy' dish, then use a ratio of 1:1. For a drier, less tomato-y version, add more beans, up to a 1:2 ratio. 

NOTES: Fagioli all'uccelletto, as mentioned, is a usually served as a side dish. It goes particularly well with roasted or grilled meats, and is a staple of our backyard barbecues—that is, when I don't opt for the equally delicious fagioli al fiasco. It is a forgiving dish, and because of the assertive flavors of the tomato sauce, I find that canned beans work very well here. Just make sure that you buy a brand that is not too 'mushy' straight out of the can, and then rinse and drain them well before adding them to the sauce. If you use canned tomatoes as well, the dish is extraordinarily quick to make—I usually use the side burner on my barbecue to make it while the meats are grilling. It is done in about the same time. 

Although cannellini are the beans typically associated with this dish, of course many different kinds of beans—and other legumes—lend themselves well to this treatment. Feel free to experiment! 

According to Florentine gastronome Giuliano Bugialli, the curious name of this dish comes from the manner in which little songbirds were traditionally cooked. 

By the way, Il mangiafagioli is the title of a well-known  painting by the Baroque  painter Annibale Carracci.  If you're ever in Rome, it hangs in the Galleria Colonna. It is also featured on the cover of various editions of the iconic Italian cookbook, Il Talismano della Felicita'

A. Carracci, Il mangiafagioli (1583-84)

Thursday, April 29, 2010

La vignarola


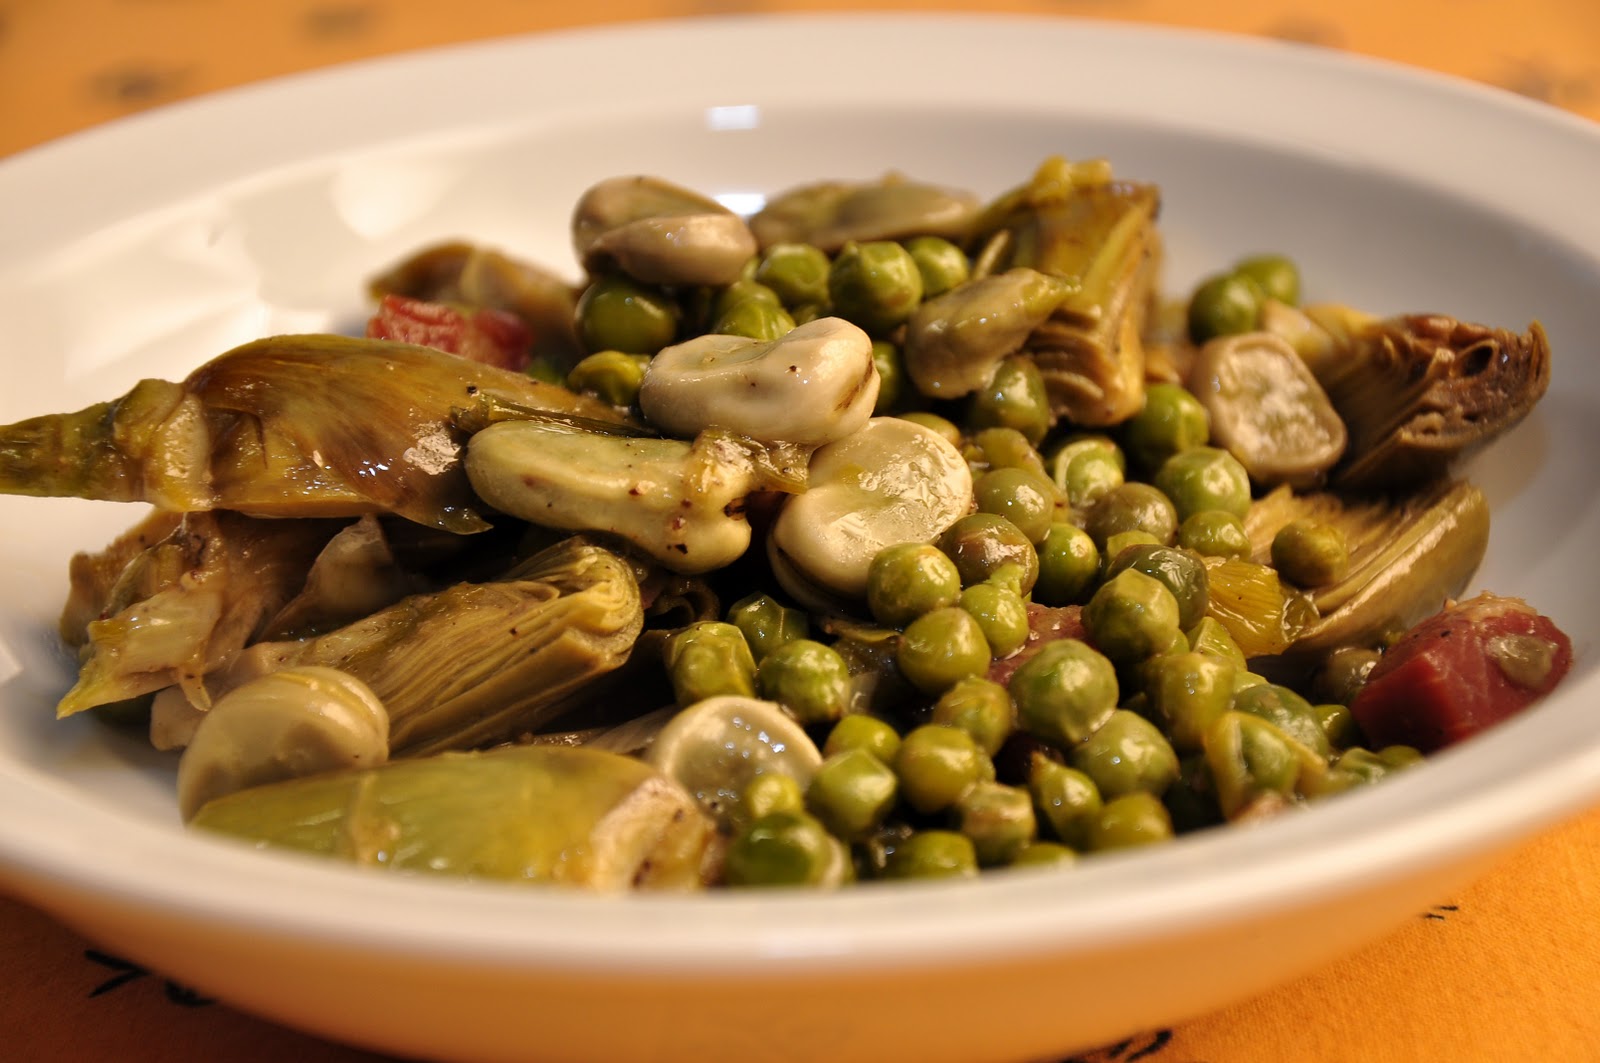
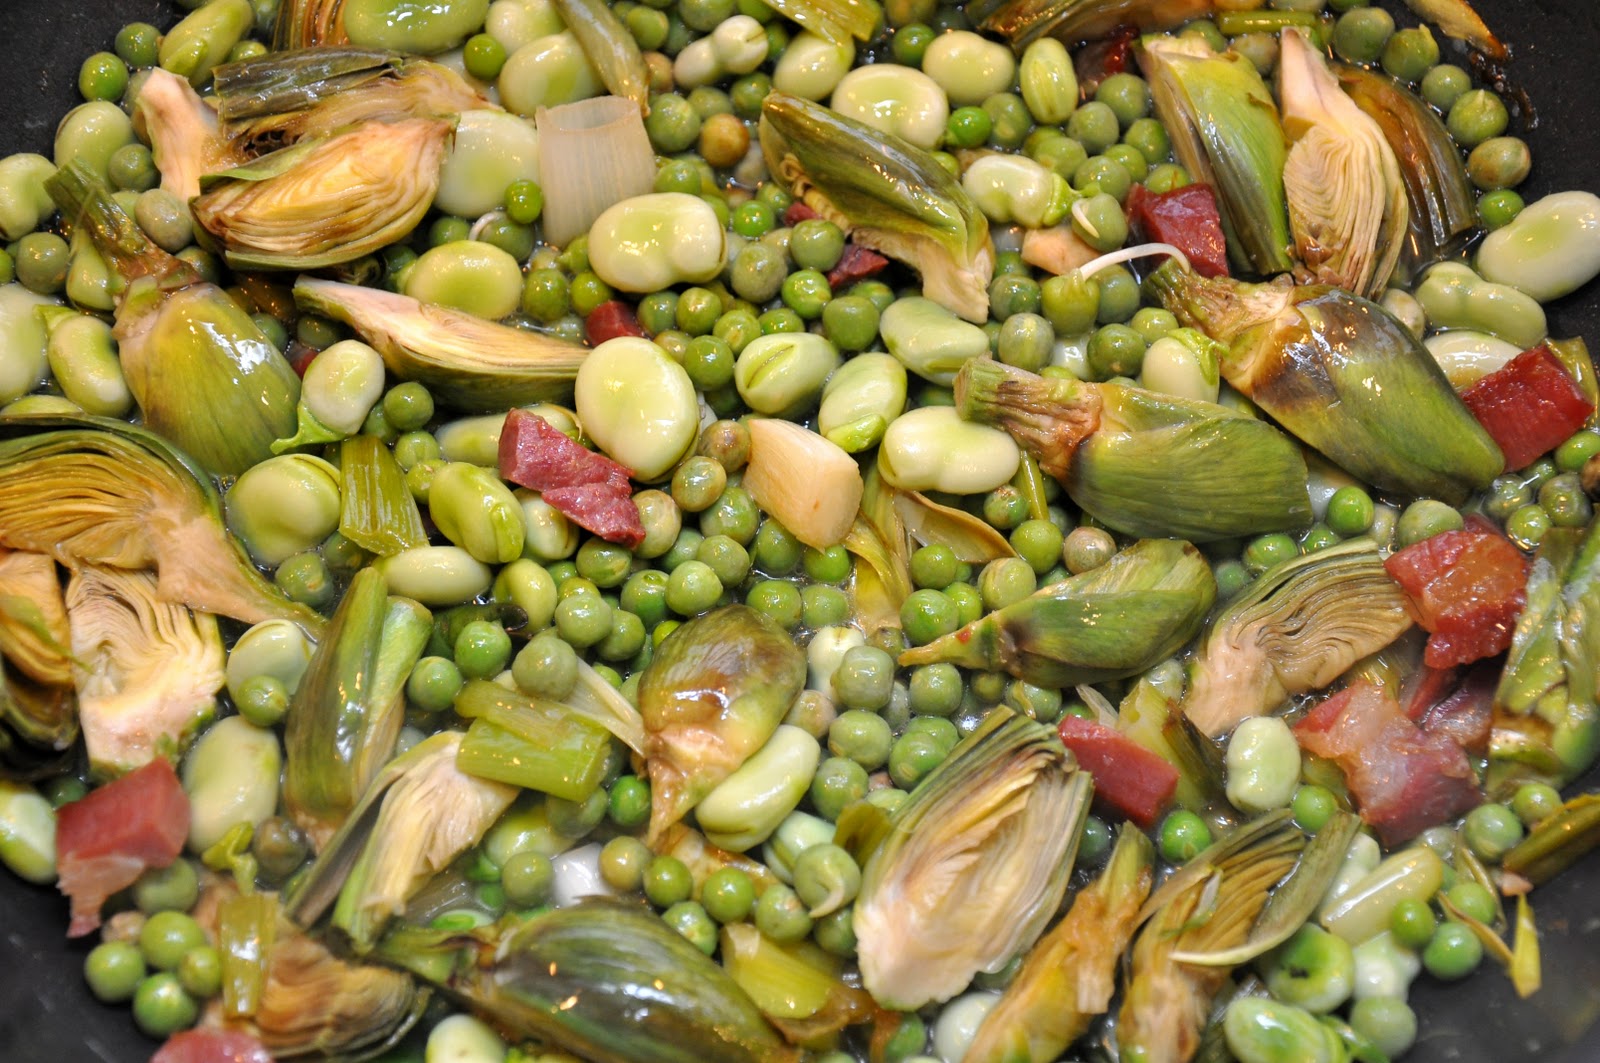
A Springtime Roman treat, la vignarola is a vegetable 'medley' made from spring onions, fava beans, artichokes, peas and tender lettuce. It comes in an entirely vegan/vegetarian version and one that uses a bit of guanciale or pancetta to lend flavor. 

You begin by lightly sautéing a bit of your cured pork meat in olive oil, just until translucent. Then add sliced fresh spring onions (scallions will do nicely as well), sauté for a minute or two, then add your artichoke, trimmed in the usual Italian manner and then sliced into wedges. Mix and continue to sauté for a minute or two longer. Then add fresh shelled fava beans and peas, season with salt and pepper, mix, and add some water to the pan. Cover and simmer gently until all your vegetables are nearly tender. Then add some tender lettuce (Boston or baby Romaine), finely shredded, and continue cooking until the lettuce has wilted and the vegetables are perfectly tender but not 'mushy'. As you prefer, you can cook off the liquid entirely or leave the dish rather 'brothy'. The exact cooking time varies according to the size and freshness of the vegetables but should take no more than 20-30 minutes at most. Serve either hot or, even better, at room temperature. 

Once again, exact measurements are hardly that important, but try to balance the ratio of the main vegetable ingredients—artichokes, peas and fava beans—so they balance each other, so roughly equal amounts by weight of each should work well. 


NOTES: While the above recipe is probably the most typical, as for so many traditional dishes, there are some variations on the theme. Some modern recipes get fancy and add that other typical, but more 'noble', springtime vegetable, asparagus. Some recipes call for the typical large Roman artichokes called mammole, similar to globe artichokes, but personally I like to use tender baby artichokes. Some recipes call for a bit of garlic in addition to the onion. I've seen one recipe that calls for a bit of peperoncino, it seems to me that would utterly overwhelm the delicate, sweet flavors of the spring vegetables. Some call for adding a bit of Roman mint called mentuccia or a few drops of lemon juice to 'brighten' the flavors. The amount of water varies from recipe to recipe. Some call for just a few drops of water—if necessary—to keep the vegetables moist. Personally, I like to add a fair amount of water to the pan and allow it to evaporate. I find that this melds the flavors more effectively and saves on the cooking time. Some recipes substitute broth or wine for the water, but I prefer the pure vegetable flavor you get from adding only water. As mentioned above, in some recipes, you serve your vignarola as a zuppa, still quite brothy, which makes for fine dipping with some crusty bread. Otherwise, you can let the liquid cook off and serve it perfectly 'dry'. 

The dish is typically an antipasto, but it can serve as a light second course or, in its vegetarian version, even as a side dish. 

La vignarola has a very short 'season' of only a few weeks while all the requisite vegetables are simultaneously in season. The dish is still good even if you're missing one of the ingredients (in fact, when I made it this time I didn't have the lettuce on hand.) But you can successfully use substitutes when one or more of the ingredients are out of season. Frozen peas are perfectly fine in lieu of fresh peas (just add them rather later in the cooking) and—believe it or not—edamame, even frozen edamame, are a fine substitute for fava beans, which can be hard to find in the US. And, in a pinch, you can use frozen artichokes. So, in fact, you can enjoy la vignarola more or less any time of year. But, of course, this dish is at its very best when you use all fresh, tender, young spring vegetables that the Italians call le primizie di primavera

By the way, vignarola is also apparently the name of a kind of bruschetta topped with a lamb and cicoria mixture, an unusual antipasto that I found in a book called Le specialità della cucina romana: ricette tratte dalla tradizionale cucina casalinga. But by far the more common use of the word is for the recipe described above. 

The word vigarola derives from 'vigna', or vine, since it is said that the vegetables that go into it were typically grown in between rows of grapevines.

Wednesday, February 24, 2010

Funghi trifolati


This is one of the easiest and most versatile vegetable dishes in the Italian repertoire: funghi trifolati, or 'truffled' mushooms, so called because the thinly sliced and sautéed mushrooms are said to resemble that other, more highly prized tuber. I use two methods to make funghi trifolati, and both are equally easy:

Using the traditional recipe (pictured above), you thinly slice your mushrooms, then sauté them over a lively flame in olive oil and a clove of garlic. (If you want a little heat, you can add a peperoncino or some red pepper flakes.) Sprinkle the mushroom slices with a pinch of salt right away—this will cause the mushroom to exude its juices. In just a few minutes, the juices will evaporate and you will begin to hear the mushrooms start to sizzle and lightly brown. Once that happens, add some finely chopped parsley and, if you like, freshly ground pepper, and serve. 

I also like to use a more 'refined' variation: you sauté the mushroom slices in a mixture of olive oil and butter (omitting the garlic) and when you get to the sizzling stage, add finely chopped shallot and parsley. Sauté a minute or two further to cook the shallot and serve. 

NOTES: In Italy, the typical mushroom for this dish would be porcini. But I find these methods work with every kind of mushroom I've tried. Even the rather wan 'button' mushrooms seems to develop some lovely flavor when made this way. If using garlic, you can add it slightly crushed, chopped or still in its jacket, depending on the result you are looking for: chopping will give you the most assertive garlic flavor (but be careful to avoid burning the garlic); leaving the jacket, of course, produces the most subtle effect (just remember to remove the garlic before serving); personally, I like the 'middle way' of using a peeled and slightly crushed garlic clove (which, by the way, I don't remove unless company is coming).

Some recipes call for covering the pan and braising the mushrooms in some liquid (eg, white wine) for 15 minutes or more after an initial sauté over gentle rather than lively heat, but I prefer the methods mentioned here. The mushrooms are perfectly tender after an initial sauté over high heat, and indeed tend to become mushy if you let them cook too long. 

Funghi trifolati, in either version, makes for a great Fall or Winter contorno with just about any meat dish. It can also be added to stews, fricasées and sautés. (It's particularly nice with sautéed chicken.) 

 
With a little additional oil or butter, funghi trifolati make a wonderful sauce for pasta or gnocchi or even polenta, just by itself (see this post on strozzapreti ai funghi and the photo of linguine ai funghi above) or in combination with tomatoes (see this post on penne ai funghi) or, particularly in the 'refined' version, with the addition of broth and/or cream that you then reduce down to a nice saucy consistency (see this post on gnocchi ai funghi). The latter mushroom cream sauce is wonderful with meat also, as in this post on gratinéed ox tongue

It's really up to you—this dish is a starting point for all sorts of creativity in the kitchen.

Sunday, January 31, 2010

Cavolfiore alla napoletana


Here's another quick and easy vegetable side dish or light supper: "Neapolitan style" cauliflower, known in Naples itself as cavolfiore con passi e pinoli.

It may come as a shock, but this dish contains no tomato, giving lie to the notion that all Neapolitan dishes rely on that ubiquitous vegetable. You begin by lightly boiling a trimmed head of cauliflower for 5-10 minutes, depending on its size, draining it and letting it cool a bit. Then cut the head into flowerets, dividing the largest ones so all of them are of more or less equal size. You can cut up the stem as well—which is perfectly edible as well—into sections. Allow the flowerets to braise over gentle heat in some olive oil and a clove of garlic for about 20 minutes, or until just tender. Regulate the heat if need be—the cauliflower should brown only slightly—and stir from time to time to ensure even cooking. (Remove the garlic clove if it browns too much.) When the cauliflower is just about done, add a mixture of equal parts chopped parsley, pinoli nuts and raisins (which you will have softened in lukewarm water for about 15 minutes or so and drained).  Season with salt and pepper, mix well and continue cooking until the cauliflower is tender.

NOTES: The combination of sweet and savory is not a very common one in Italian cooking, but it works very nicely here. Raisins are often a sign of oriental influence. They feature in southern Italian cooking— particularly in Sicily, where the Moorish influence is strong—as well as in Venice, which carried on an active trade with the Near East. 

Since we were out of pinoli nuts at home, I used roasted Mexican pumpkin seeds known as pepitas. There were an excellent substitute and perfectly delicious. 
A recipe for this dish is contained in the classic tome, La cucina napoletana by J.C. Franscesconi (recipe 527 on page 534).

Saturday, January 30, 2010

Cipolline all’agrodolce


If there were an 'all purpose' side dish, this might be it. Cipolline all'agrodolce, also called cipolline in agrodolce, in English 'sweet and sour baby onions', go with just about any meat dish, although it is particularly lovely with roasts. And, the best part is, it is quite simple to make and is even better made ahead.. This is one of those truly indispensable dishes. 

There are various ways to make the dish. Here is my favorite method, which is also the simplest:

Peel and trim your onions, then place them in a saucepan. Add enough water to come up, say, halfway up their height, together with some oil, salt and pepper to taste, a pinch of sugar and a dash of white wine vinegar. Allow the onions to simmer gently until the liquid has totally evaporated. At this point, the onion will begin to caramelize as the oil and sugar do their thing. Continue until the oinions are nicely browned and quite tender. Allow the onions to cool  a bit before serving; they are also fine at room temperature. 

Another method calls for boiling the onions for about 5 minutes in salted water, then browning them in oil (or lard) until brown, then adding the sugar and vinegar and seasonings at the end of their cooking period. This method provides a more assertive sweet and sour flavor. 

Yet a third method is a kind of fusion of the two foregoing methods: simmer your onions in water and oil until the water evaporates and the onions are fully cooked. Then add your sugar and vinegar, together with salt and pepper, and until they are well amalgamated. 

NOTES: In Italy, the onion to use for this recipe is the somewhat squat onion called, of course, the cipollina. The well-known cipolle di Tropea, especially sweet red onions from Calabria, are also quite good made this way. Cipollina-type onions are now grown in the US and sold in the more upscale markets and, I would assume this is probably true elsewhere. But the same method works for other sorts of small onions, including those very small ones known as 'pearl onions'. You can even use the same methods for frozen baby onions, although the result will not as fine. Fresh onions like green onions (aka scallions) are not really suited, however, to this use. 

The 'trick', if there is one, to a successful dish is to balance the sweet and sour tastes so that they balance each other. Ideally, neither should dominate. Since both vinegar and sugar can vary, the best way to make sure you've got the balance right is to taste—but be careful as boiling sugar is very hot. You can also dissolve the sugar into the vinegar before adding them to the dish. This allows you to taste them together while they are still cold. 

And personally, I like a rather subtle sweet-sour flavor, which is why I generally add the sugar and vinegar at the beginning rather than at the end of cooking. White wine vinegar is preferably with white onions to avoid discoloration, but red wine vinegar will do fine as well. As for the sugar, I particularly like brown sugar, which caramelizes more readily than white, refined sugar. I have even used honey with good results. But there is room here to vary the type and amount of both ingredients to suit your own taste and imagination. 

The only real difficult part with this dish is the initial preparation of the onions for cooking. Of course, the smaller the onion, the fussier the preparation will be. In Italy, cipolline are often sold ready to cook, but  not where I live now. To prepare an onion for cooking, you peel it, using a sharp paring knife, starting from  the tip and moving to the root. You then trim off a bit of the base and cut a cross into it to aid  even cooking. The peeling can be made considerably easier by blanching your unpeeled onions for about a minute just before peeling. Run under cold water for a moment so the onions will be cool enough to handle, then peel them while they are still warm. The skin should slip off easily. 

Besides onions, carrots are very nice made this way. In Sicily, zucca (Italian pumkin) is also made in agrodolce, with the addition of raisins and mint. In summer, peppers can also be made in agrodolce by sautéing them in oil with a bit of garlic and, when they are nearly done, adding vinegar and sugar. Zucchine can also be made in a very similar way. In Italian Jewish cookery, braised cabbage is made in agrodolce by adding vinegar, sugar and raisins, softened in lukewarm water, at the end of cooking.

Friday, January 29, 2010

Fagiolini in fricassea


So far on this blog we have seen many of the most common techniques in Itailan cuisine for cooking vegetables, including in padella (lightly boiled and then sautéed in garlic and olive oil), fritti (deep-fried in a flour and egg batter), gratinati (baked in the oven with a topping of cheese with or without béchamel), in umido (stewed in tomato sauce), all'agro (boiled and dressed with lemon and olive oil) and as a purée. Here is a less common, but very delicious way of making vegetables (and other foods) called 'in fricassea'

This technique has little to do with the fricassees most non-Italians will be familiar with.  In Italian cooking the term rather refers to the addition of egg yolk and lemon, off heat, just before serving. To make green beans in fricassea, you boil the green beans (see post on fagiolini all'agro for instructions) but  drain them slightly underdone. While the green beans are boiling, sweat some chopped onion in olive oil in a heavy pot or casserole and, when the beans are done, drain them and add them to the oil and onions. Mix well to coat the beans and cover the pot. Allow the beans to braise, turning them from time to time, until they are quite tender. 

Just before serving, while the beans are still quite hot, take the pot off the heat and immediately add a mixture of egg yolk and lemon juice (I use two yolks and the juice of half a lemon for each 500g/1 lb. of green beans) seasoned with salt and pepper. Mix well, allowing the mixture to thicken using just the residual heat in the pot, until a creamy 'sauce' coats the beans well. Serve immediately. 

NOTES: Made this way, green beans make a great contorno, especially for roasted or grilled lamb. They are hearty enough to also make for a fine light supper with some bread, followed by a piece of fruit. 

Other vegetables can be made following the same technique shown here: cardoons, for example, are lovely made this way, as are artichokes, fennel, mushrooms, swiss chard stalks (called coste in Italian), peas… I've even come across a recipe for eggplant in fricassea, but I'm a little skeptical of that one.

Most recipes will call for more lemon juice than I have specified,  usually the juice of a whole lemon for every 2 yolks, but personally I am not a big fan of harshly sour tastes. Suit yourself. One thing to avoid is using bottled lemon juice; it is much too acid and, unless you are very sparing, will ruin the dish.

But, in fact, the most common use for this technique is with meat, particularly lamb. Indeed, lamb and artichokes in fricassea is a classic spring dish. Italians also make chicken, rabbit and veal in fricassea. For meat fricasee, you proceed as for a French fricassee, browning the pieces of meat and then braising, before adding the egg-and-lemon mixture before serving. You can even take leftover lesso (boiled meat) and treat it as you would vegetables in fricassea. I will blog on these some time soon, but in the meanwhile, a number of excellent recipes can be found at liquida.it (in Italian). 

Despite some hunting around, I have yet to discover the origins of this technique. A fricassea recipe (for veal, lamb or chicken) was featured in Artusi, but I am fairly sure that the technique is older than that. The egg-and-lemon is obviously reminiscent of Greek cooking, in particular the famed avgolemono, which can be used to thicken a stew just before serving, but whether this technique was imported from Greece, I cannot say.

Friday, December 11, 2009

Mock «puntarelle» alla romana


One of the dishes I miss most from my Roman days is the winter salad known as le puntarelle. Puntarelle are a kind of chicory native to the countryside around Rome. In fact, the vegetable is sometimes called "Roman chicory" in English. The shoots are rather thick but tender, white at the base and green at their tips. The taste is pleasantly bitter and peppery. When used in salads, puntarelle are typically peeled and cut into thin strips, then soaked in cold water until they curl up. They are then dressed in an anchovy vinaigrette.

So far as I know, puntarelle are not widely grown outside Italy. This source says that they are grown locally in California, but, in any event, I have never found them in the markets where I now live. But I can approximate the experience by using the tender white hearts of curly endive (which also a kind of chicory). Cut the stalks into short lengths, and dressing them with the same anchovy vinaigrette you would use for real puntarelle.

To make the vinaigrette, finely chopped a clove of garlic or pass it through a garlic press (one of the few good uses for that gadget, in my opinion) and place in a mortar (or a mixing bowl). Then add chopped anchovy fillets (either salted or canned will do fine), and grind them together into a paste. (If using a mixing bowl, you can just crush them as best you can with the back of a wooden spoon.)  The paste need not be perfectly uniform; in fact, I prefer little bits of anchovy, which is more interesting to the eye and taste. Thin this paste out with a bit of either white or red vinegar (not too much, remember...) and then add a healthy pour of olive oil. Mix well with a fork or a whisk until well blended but not emulsified. Then season with a bit of salt (not too much as the anchovies, of course, are already salty) and freshly ground pepper. Pour over your greens and mix well. Adjust for seasoning and, if a bit dry, you can add a bit more olive oil. Serve with crusty bread so you can sop up the delicious dressing.

NOTES: You will find some non-Italian recipes calling for a bit of mustard to the anchovy vinaigrette, something that is not authentic and, in any event, does not appeal to me. On the other hand, I do like to add lots of freshly ground pepper, something that is not necessary 100% doc. As you may remember from an earlier post on making salads the Italian way, this is one of the only (perhaps the only) example in traditional Italian cooking of making salad dressing separately from the salad itself.

As an alternative to curly endive, some sources recommend radicchio which, though I've never tried it, would no doubt be nice. On occasion, I've used belgian endive with fine results.

By the way, don't disgard the green outer leaves of the curly endive. While they are too bitter raw to be eaten as a salad, when cooked they lose their bitterness and develop a wonderful, mild flavor in soups such as  minestra di riso e cicoria or blanched and then sauteed with garlic and olive oil, a technique known as ripassare in padella.


Real puntarelle


Sunday, November 29, 2009

Cardi gratinati


Cardoons are one of my favorite winter vegetables but they can be hard to find. So when I spied some in the market the other day I did a double-take and smiled. I hadn't had them quite literally for years. The bunch I found was a bit bruised but would still be quite usable after they were trimmed.


Cardoons look like overgrown celery but taste very much like artichokes, which is not surprising since they are of the same botanical species as globe artichokes. They need to be properly trimmed of their leaves, which grow from the top and edges of the stalks, then cut into lengths, scraped on their outer sides to remove the fibrous ribs and hard green skin. (It helps to split them in half lengthwise so they lay flat on your cutting surface.) Like artichokes, they should be immediately submerged in acidulated water to prevent them from discoloring. They then should be simmered in salted water for about an hour (or 15 minutes under pressure) until they are quite tender. You are then ready to use them in a variety of ways.


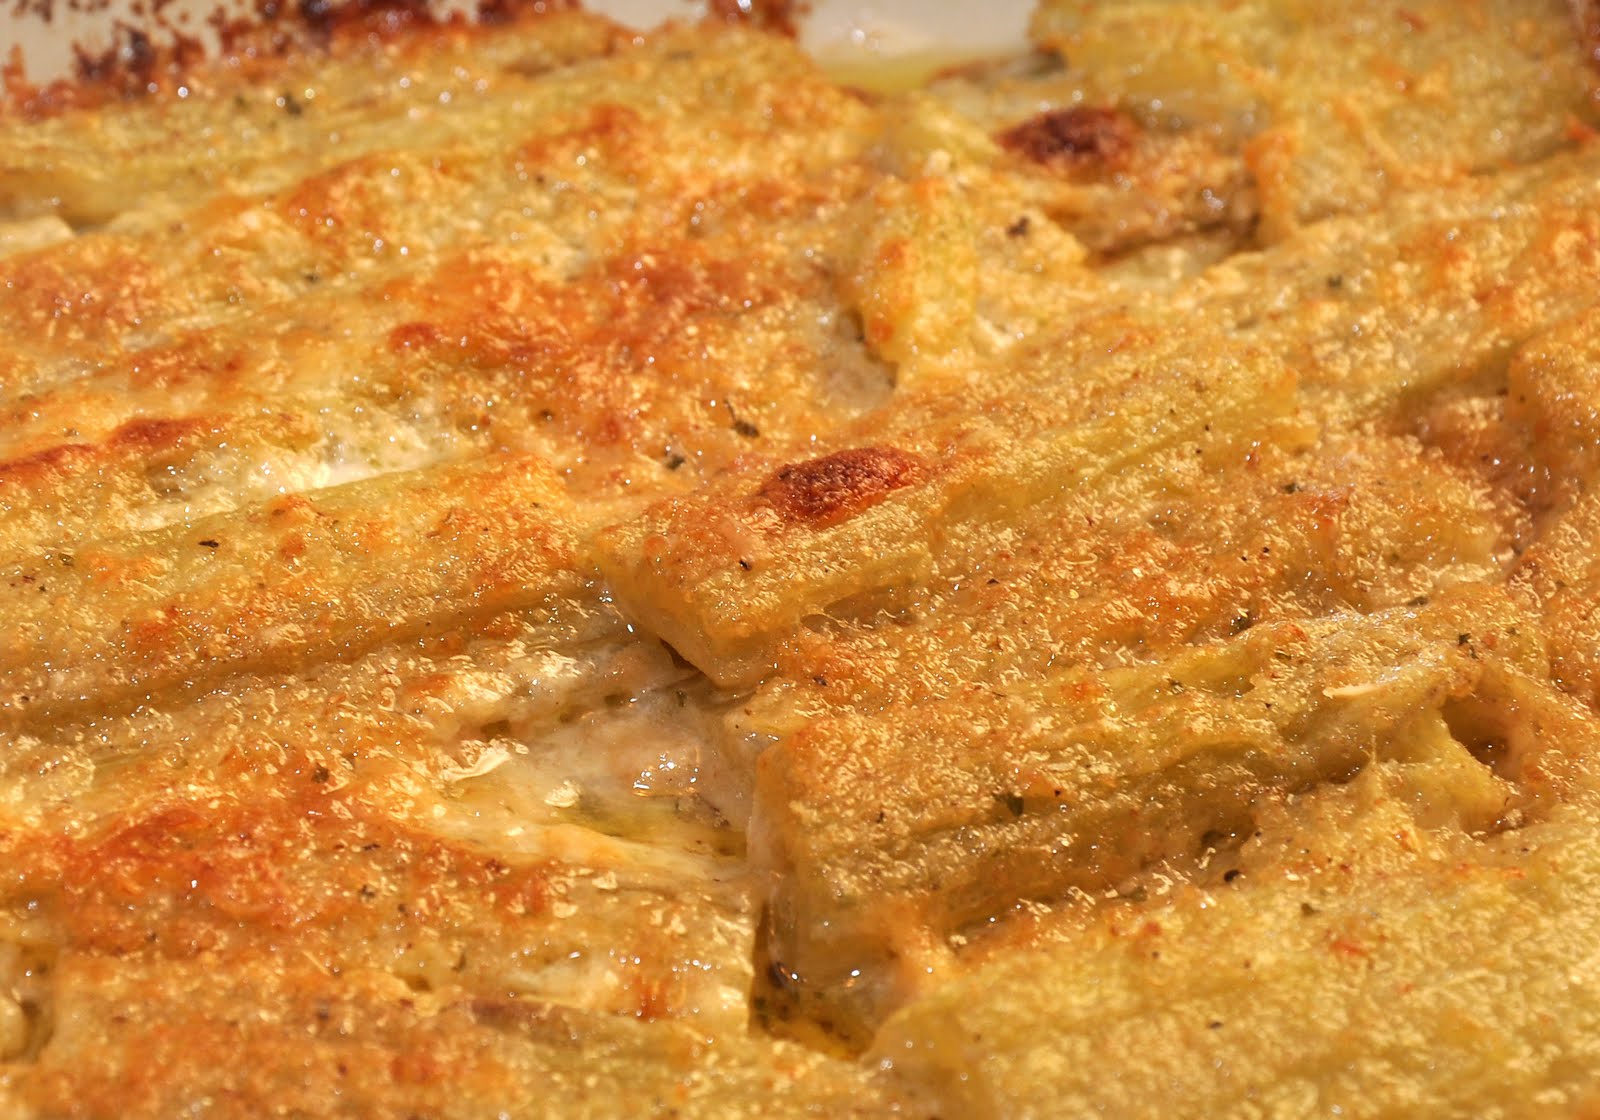
One fine and easy way to make cardoons is to simply gratinée them. Place them neatly in layers in a buttered baking dish, each layer sprinkled with copious amounts of grated parmesan cheese and melted butter, seasoned with salt and pepper and—my little extra touch—a few spoonfuls of cream. (I also sometimes sprinkle some bread crumbs as well over each layer.) Bake in a very hot oven (220C, 250F) until nicely golden brown on top. Allow to cool off a bit before serving.


NOTES: Cardi gratinati would normally be a side dish. Cardoons have a wonderfully subtle flavor that goes with just about any roasted or braised meat, or even fish. But  made this way they are so satisfying you could easily make a light dinner out of them, served with crusty bread and followed by some fruit and cheese.

For an even richer version of cardi gratinati, top each layer with a fairly loose and well-seasoned béchamel and grated parmesan cheese, dotting with butter on top. Nutmeg adds a nice extra bit of flavor as well. In Puglia, a very different version of cardi gratinati calls for baking the cardoons with minced garlic, capers, pitted olives, grated pecorino cheese, sprinkled with bread crumbs and drizzled with olive oil.

Cardoons are also very good prepared in a myriad of other ways: in soup, simmered in tomato sauce, with anchovy and butter sauce, simmered in cream. It really is an incredibly versatile vegetable. (If you read Italian, see this useful webpage for a good survey of recipes.) Personally, I particularly like them breaded and fried. And cardoons are one of the classic vegetables to serve as part of a bagna caôda, one of the signature winter dishes of Piemontese cuisine.

For more background on cardoons, see this article.


Tuesday, November 10, 2009

Fagiolini in umido


While Sundays dinners at Angelina's house were once-a-week, belly-busting, meaty affairs, she practically lived on vegetables during the week. This was long before vegetarianism went mainstream and she would not have thought of herself as a 'weekday vegetarian' or anything of that sort. It was just the way that she grew up eating in a family of modest means living in small southern Italian village. But frugality had its benefits, and sure lydiet was one reason Angelina lived to be 98 years old.

In any event, when I was growing up one of my favorite vegetable dishes in Angelina's repertoire were these green beans (or string beans, as we used to call them) stewed in a simple tomato sauce.

You start, as so often, with a soffritto of onion and/or garlic sautéed in olive oil. Then you add best quality canned tomatoes, crushed in your hands, and allow them to simmer. Meanwhile, blanch your trimmed green beans in abundant, well-salted water until crisp-tender, add them to the tomato sauce along with some of their cooking water and allow them to simmer until quite tender.

NOTES: This recipe is quite forgiving, and even green beans of indifferent quality will turn out nicely. In fact, if anything, I find that regular 'garden variety' green beans turn out better cooked this way than the fancier—and more expensive—French green beans. (French green beans, on the other hand, are preferable when making fagiolini all'agro, where their tenderness and delicate flavor can really shine.) If you can find them, the extra long string beans sometimes sold in Asian markets in the US, known in Italy as serpenti, are especially nice.

It is important to cook the green beans to the right degree of doneness. They should fully cooked, not crisp-tender, with no trace of that green bean raw taste, but not overcooked and soggy either. It is impossible to give a standard cooking time, since it varies wildly according to the freshness and thickness of the beans, anywhere between 10 minutes for very tender young green beans to 30 minutes or more for more mature ones.

Angelina would vary the dish from time to time by adding other vegetables to simmer along with the green beans, typically sliced carrots, cubed potatoes or boiled (or fresh) cranberry beans. In the summer, adding a few leaves of basil give the dish a nice fresh taste. Another variable is the 'sauciness' of the dish. Angelina's version of this dish was actually quite brothy, with lots of rather thin tomato sauce to sop up with bread. In modern-day Italy, however, where this dish is a standard contorno, it is customary to reduce the sauce down until the dish is almost dry. And while Angelina's version was obviously Neapolitan, in Tuscany they also make fagiolini in umido, but with a soffritto of onion, carrot and celery rather than onion and garlic.

Some recipes call for adding the raw green beans directly into the simmering tomato sauce, rather than putting them through an initial blanching. I've tried it both ways and, for reasons I cannot really explain, the blanching really does result in finer flavor and texture.

The dish is typically a side dish or contorno, but like Angelina I sometimes eat just this, with some crusty bread, as a light supper.


Saturday, October 3, 2009

Buttery Mashed Potatoes


While it's true that we mostly eat Italian at home, there are some dishes that even I have to admit the French do better. (I hope Angelina isn't listening....) One of them is potato puree, also known as mashed potatoes, and, more specifically, the incredibly buttery version made famous by Joel Robuchon at Jamin, his Paris restaurant.

You begin by either steaming or boiling mealy potatoes in their jackets (russets or Yukon golds would do well here) until perfectly tender. Drain them and run some cold water over them to cool them off slightly. Peel them as soon as they are cool enough to handle and cut them into chunks into a food mill.

Mill the potatoes into a dry pan over medium heat. With a wooden spoon, stir them and allow any water to evaporate. The potato puree will be rather stiff and hard to stir, but persist. And don't worry if some of the potato begins to stick to the bottom of the pan, as  this is a sign that the potatoes are drying as they should and will anyway soon rectify itself.

Now that the potato flesh is perfectly dry, it is ready to absorb lots and lots of butter, which you will add to the potatoes a bit at a time. When I say a lot, I mean at least a stick or more (100 g) for 1 kilo (2 lbs.) of potatoes. Season liberally with salt. As you add successive bits of butter, the puree will soften and form a kind of a ball. Taste them--they should be well seasoned and have a wonderfully buttery flavor. If not, add more butter and/or salt. Finally, thin out the puree with some hot milk (whole milk, obviously!) or, if you are feeling particularly decadent, with some cream, until you reach the consistency you prefer. I like mashed potatoes rather soft, just thick enough to hold their shape.

Serve immediately. I like to place a dab of butter on top of the mashed potatoes, just for show.

NOTES: This recipe is from a wonderful cookbook co-authored by Robuchon and Patricia Wells called Simply French (William Morris & Co. 1991). Robuchon calls for a full 12 tablespoons (1-1/2 sticks or 150g) of butter and says that the amount may be doubled for a richer version! He also calls for passing the puree through a fine sieve, which produces a velvety texture. But for this 'home-style' version the food mill is enough. Unlike most mashed potatoes, these will keep for up to a hour before serving.

Sunday, August 30, 2009

Fagiolini all'agro

This dish of green beans dressed with fresh lemon juice and olive oil, to my mind, typifies the simple elegance of Italian cuisine. Fagiolini all'agro, also known as fagiolini all'insalata, is austere in its simplicity but yet, when made with the freshest and best quality ingredients, is truly delectable.

Trim both ends of your green beans, and then cook them in abundant, rapidly boiling and lightly salted water. When they are just done, drain them and plunge them into cold water until they are perfectly cool. Then drain them in a colander and let them sit until dry. Arrange them on a serving platter, sprinkle them with lemon juice and salt, and pour a generous amount of olive oil. Sprinkle with a bit more salt on top and serve.

NOTES: As with so many Italian dishes, the quality of the ingredients is crucial to the success of the dish. Use the freshest, youngest green beans that you can find, preferably of the slender variety sometimes called 'French beans'. The olive oil should be fruity and of the best quality you can afford. The lemons should also be fresh—the juice of older lemons can become unpleasantly acid—and preferably organic. And, in a dish as spare as this one, even the quality of the salt will make a difference. Tonight, I used some wonderful fiore di sale, sea salt from the province of Trapani in Sicily—a kind gift of friends who were staying for the weekend. (The island of Pantelleria off the coast of the province of Trapani is well known for its wonderful capers. Trapani is also home to the famous Marsala wine. )

Equally important is the attention given to preparation. The green beans should be cooked until just tender—not really crisp-tender, mind you, as in much Asian cooking or in nouvelle cuisine, but not soft, either. The bean should still offer some resistance to the bite, but should have lost any rawness in either flavor or texture. Once it is at this perfect point, they must be drained and immersed in cold water as quickly as possible to preserve its texture and color. The beans should be allowed to dry completely and dressed according to the usual Italian rules for salads—with just a few drops of lemon, enough to enliven the beans but to be just barely noticeable, with just the 'right' amount of salt, enough to provide savoriness without being cloying, and abundant olive oil.

Some recipes are a bit more elaborate, calling for some chopped parsley or basil. Mint would also go very nicely. And there is also what is basically a different dish going by the same name of fagiolini all'agro, green beans sautéd in butter, lemon juice, parsley and—of all things—paprika.

This dish is typically a contorno, or side dish. It can accompany all sorts of meats but is perhaps at its best with roasted or grilled lamb. Eaten with some crusty bread, it can also serve, either on its own or with other blanched vegetables, as a light lunch or supper.

Sunday, August 16, 2009

Angelina's Peperonata (Fried peppers)

Everyone has heard of, if not made, fried peppers, a summertime standby. They make an appearance at just about every Italian street festival. So this dish can be a bit banal. But Angelina had her own, special way with fried peppers, one that made them especially tasty. Her recipe is simplicity itself, but there are just a few 'tricks' that make it special.

You start by cutting up frying peppers, those light green, elongated peppers known as friggitelli or friarelli in Italian. You cut the peppers in half lengthwise, remove the stems, seeds and white ribbing from the inside of the peppers. Then cut them into strips lengthwise, and cut the strips in half across. You will wind up with strips of pepper about 1 cm wide and 3-4 cm long:

You sauté the pepper strips and some sliced onion in abundant olive oil over moderately high heat until the peppers and onions just begin to caramelize a bit. Then lower the heat, season with salt and pepper, then cover and allow the peppers to simmer until they are quite soft. (Add a few drops of water, if need be, to aid in the softening and avoid any further browning.) When the peppers are almost done, take them off the heat and, still covered, allow them to cool completely. The peppers taste best when made several hours ahead. When you are ready to eat them, just reheat them gently and serve. They are also quite good served at room temperature.

NOTES: Do not be shy with the oil. You need to use a lot of oil to get the right flavor and consistency for this dish. And use olive oil—no other oil will do. You can remove the excess oil before serving if you want a lighter dish.

Angelina's peperonata was made with only a bit of onion—say, about one small onion for every 5 or 6 peppers. The onions should be sliced from top to bottom, with the grain, so they don't 'melt' entirely. You will find recipes where more onion is called for, sometimes in a 1:1 ratio with the peppers, and this makes for a fine dish as well.

Other recipes for peperonata call for red and/or yellow peppers, which are much sweeter, either instead of, or in addition to, the green ones. A peperonata made from all three kinds of peppers does make for a lovely sight. Angelina, being a frugal cook, invariably made her peperonata with the less expensive green peppers.

Many peperonata recipes call for adding a bit of tomato or tomato purée after the initial browning. Angelina sometimes added a splash of vinegar to her peperonata, almost at the end of cooking, for a bit of extra 'zip'. (Ada Boni's version calls for both variations.) I'm not partial to either of these variations, but it's a matter of personal taste. And in La cucina napoletana, Francesconi suggests omitting the onion (as well as the tomato and vinegar) but adding black Gaeta olives, capers, garlic and chopped parsley to the peppers shortly before they're cooked through. She also offers an alternative recipe particularly for frying friarelli in olive oil just with garlic and peperoncino.

Peperonata goes well, of course, with sausages, but it also goes well with just about any roasted or grilled meat you can think of.

Fried Peppers on Foodista