Showing posts with label Piemonte. Show all posts

Friday, March 11, 2011

Zuppa dei valdesi


A reader who I'll call "Nancy T." wrote me recently to tell me about a dish called zuppa that her Piedmontese grandmother used to make. The word is one of several in Italian that mean 'soup' (see our Glossary for details). A zuppa is rustic soup, typically the kind that you are meant to have with bread, either dunk into it while you eat like the Neapolitan zuppa di pesce or laid at the bottom of your bowl before the soup is ladled on top like the Tuscan zuppa di porri. Nancy's grandmother's zuppa, on the other hand, is an example of the medieval practice of actually making zuppa out of leftover bread. In her zuppa, the slices of old bread are sautéed in butter and simmered with enough broth to cover and soften the bread while it cooks until it reaches the consistency of a pudding, reminiscent of the Tuscan pappa al pomodoro without the tomato.

Nancy asked if I had ever heard of her grandmother's zuppa. I hadn't but the recipe intrigued me—and it also sounded delicious! After a bit of digging, I found what I think is the traditional Piedmontese recipe for her grandmother's dish. The full name is zuppa dei valdesi,  also known in the local dialect as supa barbetta, and it comes from the valli valdesi, an area consisting of three valleys near Torino. The dish is a typical example of cucina povera, showing how, with a little imagination, the humblest of ingredients can be turned into exquisite eating.

Ingredients (for 4-6 people)

500g (1/2 lb.) stale bread or grissini
100g (3-1/2 oz.) grated cheese (see Notes)
100g (1/2 cup) butter (or more, to taste)
1 liter (4 cups) chicken (or vegetable) broth, or as much as you need.
Nutmeg, cloves and/or cinnamon, to taste
Salt, if needed

Directions

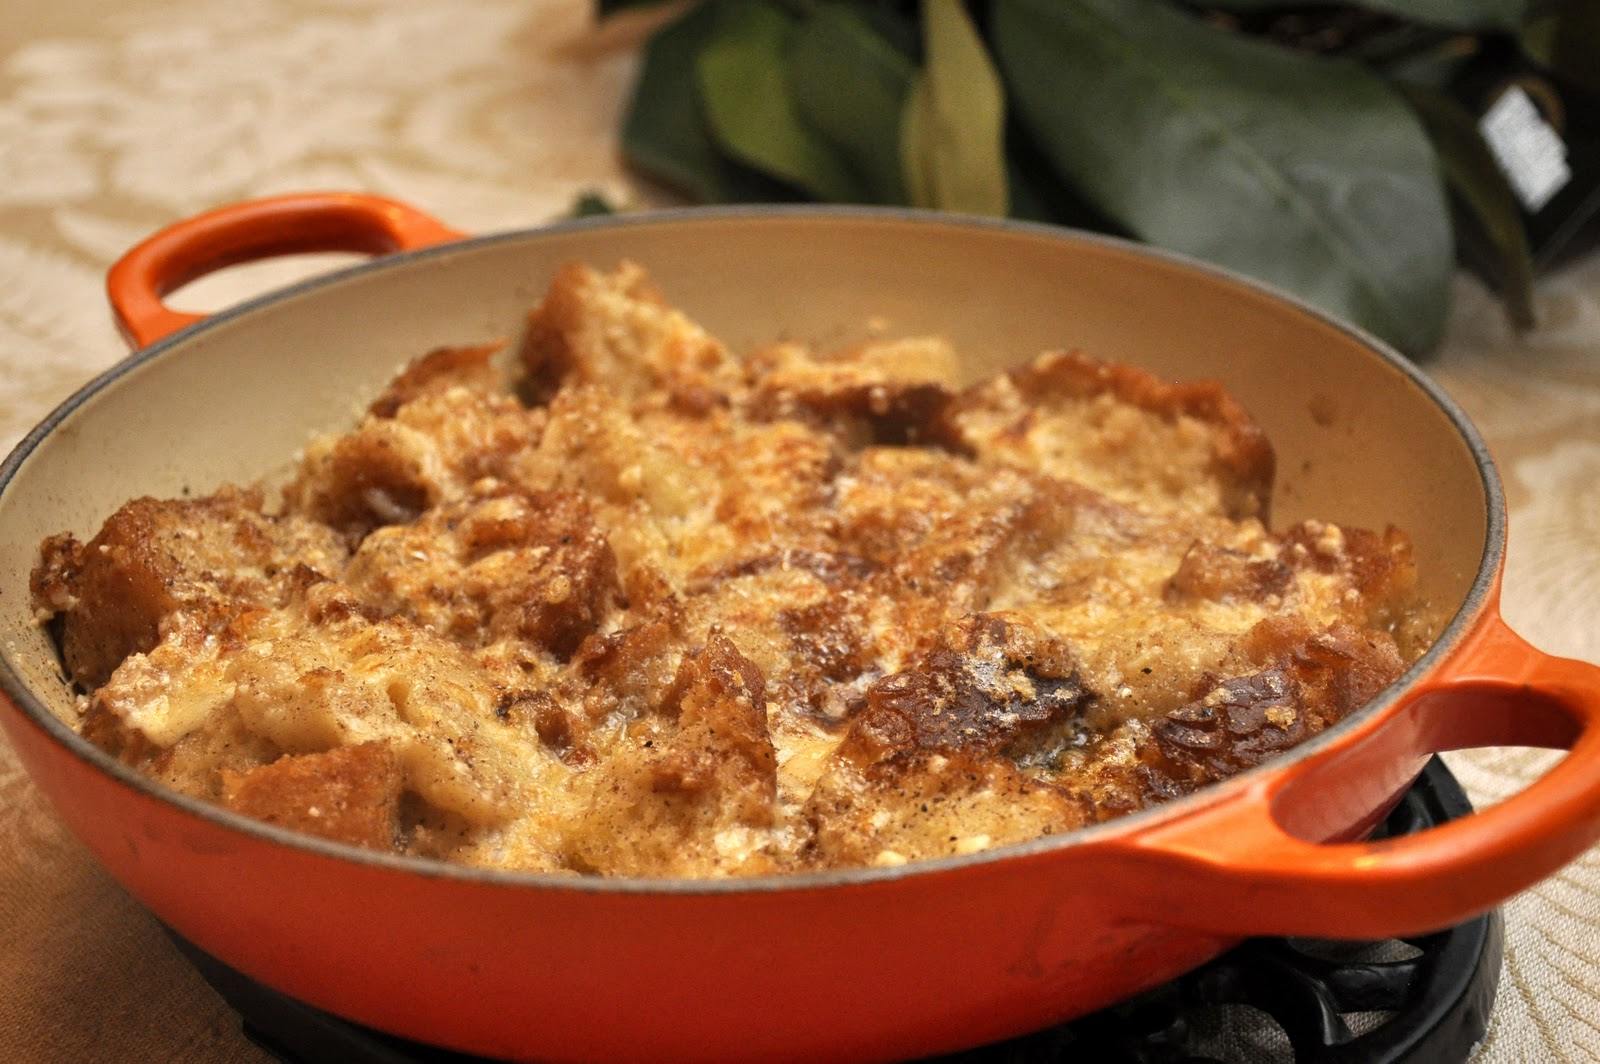
Break up the old bread (or grissini) into pieces. Sauté them gently in half the butter until lightly brown on all sides. Season with one or more of the spices, mixing a few times to ensure that the bread is evenly coated, then add enough broth to cover. Simmer the bread in the broth, covered, for about 15-20 minutes, or until the bread has softened and the broth has been completed absorbed by the bread. (You should add a bit more broth if needed to keep the bread moist.)

When the bread is done simmering, taste it and adjust for seasoning. Top with the grated cheese and the other half of the butter, which you will have melted separately.

You can serve your zuppa just like this, but for extra flavor, put the zuppa in a hot oven (200°C/400°F) for about 10 minutes until golden brown on top. Or just pass it under a broiler for a few minutes.  Serve immediately.

NOTES: Now here is the way that Nancy describes her grandmother's zuppa:
For us, typically after bagna cauda, when we have leftover bread, and it gets a little dry, we make  this dish (unless, of course, we wait too long and the bread is like a  brick).  I slice the loaves into about 1" slices.  Then, in a large pan, add "a nice piece of butter", as my grandmother would say. 3-4  Tablespoons. After the butter melts, the bread gets arranged, and it  browns in the butter.  It's turned over, adding more butter, of course.  Meanwhile, I've got about 6-8 cups of chicken broth heating up in a pot  behind the bread pan.  When the bread's been turned and had a chance to  brown a little, I start adding the broth, gradually. Kind of like  risotto. When about half of the broth is absorbed, the bread gets turned again, and more broth added.  In the end, I usually flip them once  more. 
The recipe today is usually a bit more upscale, made with those ubiquitous bread sticks called grissini, but Nancy T'.'s grandmother's version using stale bread is actually how the soup was originally made. In the old days, they often layered the bread with Savoy cabbage and let it simmer slowly for a few hours by the fire. There are also recipes that call for some sautéed onion. One rather extravagant version calls for cured pork and various herbs (bay leaf, rosemary, sage) interspersed between the layers of cabbage and bread.

The cheese would typically be Toma, a semi-hard cow's milk Piedmontese (and French) cheese, but if you can't find it, parmesan or grana padano would do. Or you could go for an Alpine cheese such as fontina, gruyère or Emmenthal.

Nancy recommends washing down this dish with some good, full-bodied red wine, and I would, too. It may be simple but—especially if you are generous with the cheese and butter—it is quite hearty.

There is little doubt that this dish is quite ancient in its origins. According to Anne del Conte in The Gastronomy of Italy:

Of all foods, zuppa is the most obvious inheritance from the feudal system centered on the castle. The lords and ladies ate what was considered noble food. The servants made use of the leftovers from the high table, which included large slices of bread that had been used instead of plates to hold meat, fish and other food, and to these they added herbs, wild plants and water, the result being cooked at length.  
The zuppe of the 15th and 16th centuries were very thick, made with toasted bread layered with other ingredients, often cheese, sugar and spices, and then placed in the oven. 

The valdesi, by the way, were the followers of a religious movement known as valdismo that began in the 12th century. It preached the virtue of humility and poverty, much like the Franciscans in Umbria who came shortly after them, and I suppose this 'poor' soup reflects those values. Unlike the Franciscans, however, they eventually broke with the Catholic Church. The Chiesa Evangelica Valdese still exists today and have a large place of worship in Rome among other places. They are known for their progressive social views, promoting, among other things, gay and reproductive rights, stem-cell research, the right to die and secular government. William Paca, one of the signers of the US Declaration of Independence, belonged to the movement. The US branch of the movement merged into the Presbyterian Church in the late 19th century.

Sunday, November 14, 2010

Bagna cauda


Bagna cauda or, more properly, bagna caôda, means 'hot bath' in English. It refers to a typical Piedmontese dish for communal eating that is popular in cold weather months, a kind of cross between fondue and pinzimonio, if I can put it that way. It is, quite simply, a collection of raw and steamed vegetables, which you dip into a garlic and anchovy sauce that you keep warm like a cheese fondue in a little terracotta pot placed over a flame.

Here's the recipe for making the sauce:

Ingredients (to serve 4 or more):

4 (or more) cloves of garlic
100g (4 oz.) fillets of anchovy
200 ml (1 cup or small glassful) olive oil
50g (2 oz.) butter
Freshly ground pepper

Directions

Pour the olive oil into a small saucepan and heat gently. Add the garlic, which you can either slightly crush, for a milder flavor, or slice or even finely mince for a much more assertive flavor. Keep the flame quite low. You are infusing the oil with the flavor of the garlic, which should not brown at all. (If you like you can remove some or all of the garlic at this point to avoid its flavor from becoming overpowering.) After about 5 minutes, add the anchovy fillets and butter and continue to simmer very gently for another 10 minutes, until the fillets have completely melted and the various flavors have been well amalgamated. Season with a bit of ground pepper.

Pour the sauce into a small fondue pot, preferably made of terracotta, and keep warm at the table. Regulate the flame so that the bagna cauda simmers gently all the while you are eating. Serve with various raw and steamed vegetables in season, which you dip into the sauce.

NOTES: The typical vegetables that go with bagna cauda include roasted or raw red peppers, cardoons, artichokes, steamed potatoes, steamed or raw carrots, steamed cauliflower, fennel, celery or leafy vegetables like savoy cabbage, radicchio and endive. Harder vegetables are best lightly steamed, (or roasted) while larger vegetables should be cut into bit sized pieces or sticks. To this dish I added a somewhat unusual choice of Brussel sprouts—they were delicious in this sauce. I also used a bit of frisée, which go very well with the anchovies. But really just about any seasonal vegetable would be fine.

There are lots of variations in making the sauce. While the measurements are quite flexible,  as is the order of ingredients: whether you add the butter or oil, or the garlic or the anchovy first or at the same time. But most of the variations revolve around different ways to 'soften' the flavor of the garlic. The recipe above calls for adding the garlic, raw, to the sauce, but many recipes call on you to simmer the garlic beforehand, for up to an hour in milk or cream. The garlic is then drained and crushed or puréed, and the recipe continues from there. With this method, you can use larger amounts of garlic, as the simmering considerably softens the garlic's pungency. I even found this remarkable recipe for bagna cauda from the esteemed Kyle Phillips of About Italian Food, which calls for an enormous amount of garlic—5 heads (yes, heads, not cloves)—that simmer in milk for an hour before proceeding with the sauce. Some recipes also call for adding a bit of milk or cream at the end, before serving, which also is meant to smooth out the flavor. (Being a garlic hound, I like my garlic 'straight up'.)

In Italy, it is quite usual these days to serve bagna cauda in individual little terracotta fondue pots called forneletti (known in Piedmontese as fujòt). Unfortunately, I didn't bring any back from Italy and they are apparently impossible to find here in the US, so—as you will see above—I improvised with a terracotta soup bowl placed over a fondue burner. A regular fondue pot would also do fine. The one from Emile Henry is made from terracotta and is the best one I've seen for the purpose on the market here.

While usually categorized as an antipasto, bagna cauda can easily serve as a meal, followed by some stewed fruit, for example pere in vino rosso. Serve with a robust red wine and lots of water, too, to quench your considerable thirst.

Sunday, July 11, 2010

Vitello tonnato


If you've been reading this blog lately you may be wondering if we've been switching themes on you. Well, it's true that summer somehow brings out the experimental side of my otherwise rather staid culinary character. But, fear not, gentle reader, Memorie di Angelina is still, first and foremost, an Italian food blog. Now that I have put your mind at ease, on to the subject at hand…

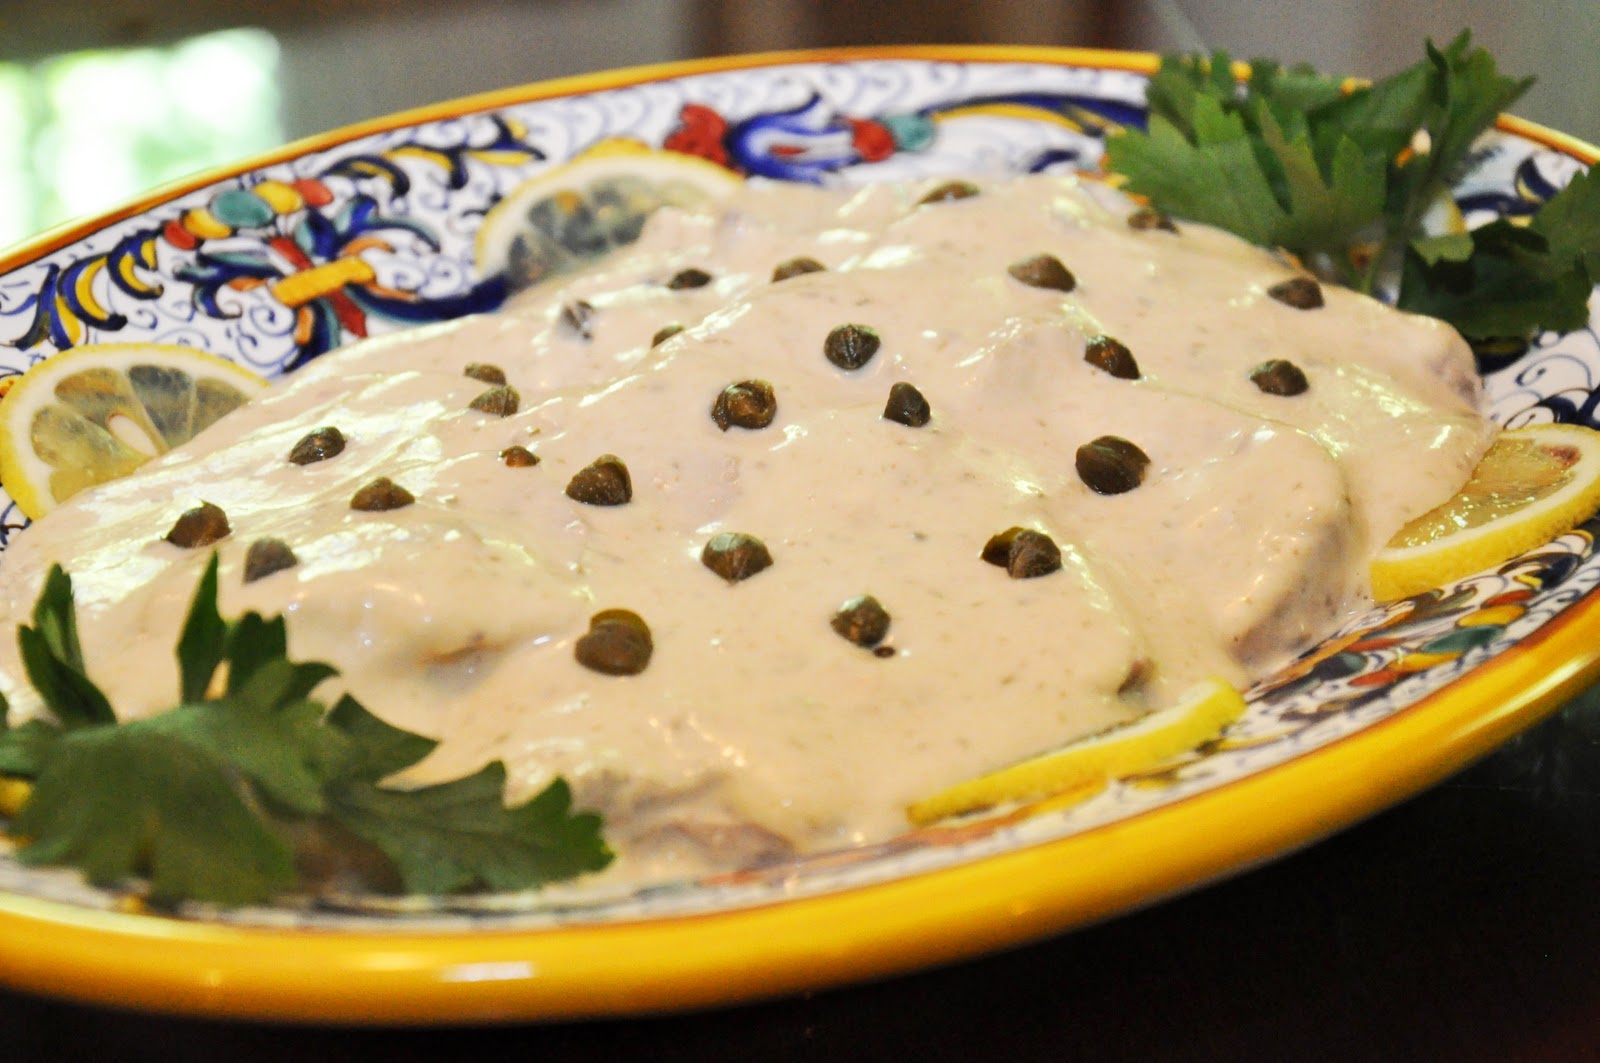
If I had to mention one dish in the Italian repertoire that epitomizes elegant summer eating, this might well be it: vitello tonnato, also called vitel tonnè in dialect, which means' tunnied veal' or simply veal in tuna sauce. More often than not, though, it is called by its Italian name in English as well. It makes for an elegant presentation, fit for an important dinner, but it is actually quite easy to make and, if made with pork or turkey rather than veal, quite inexpensive, too. 

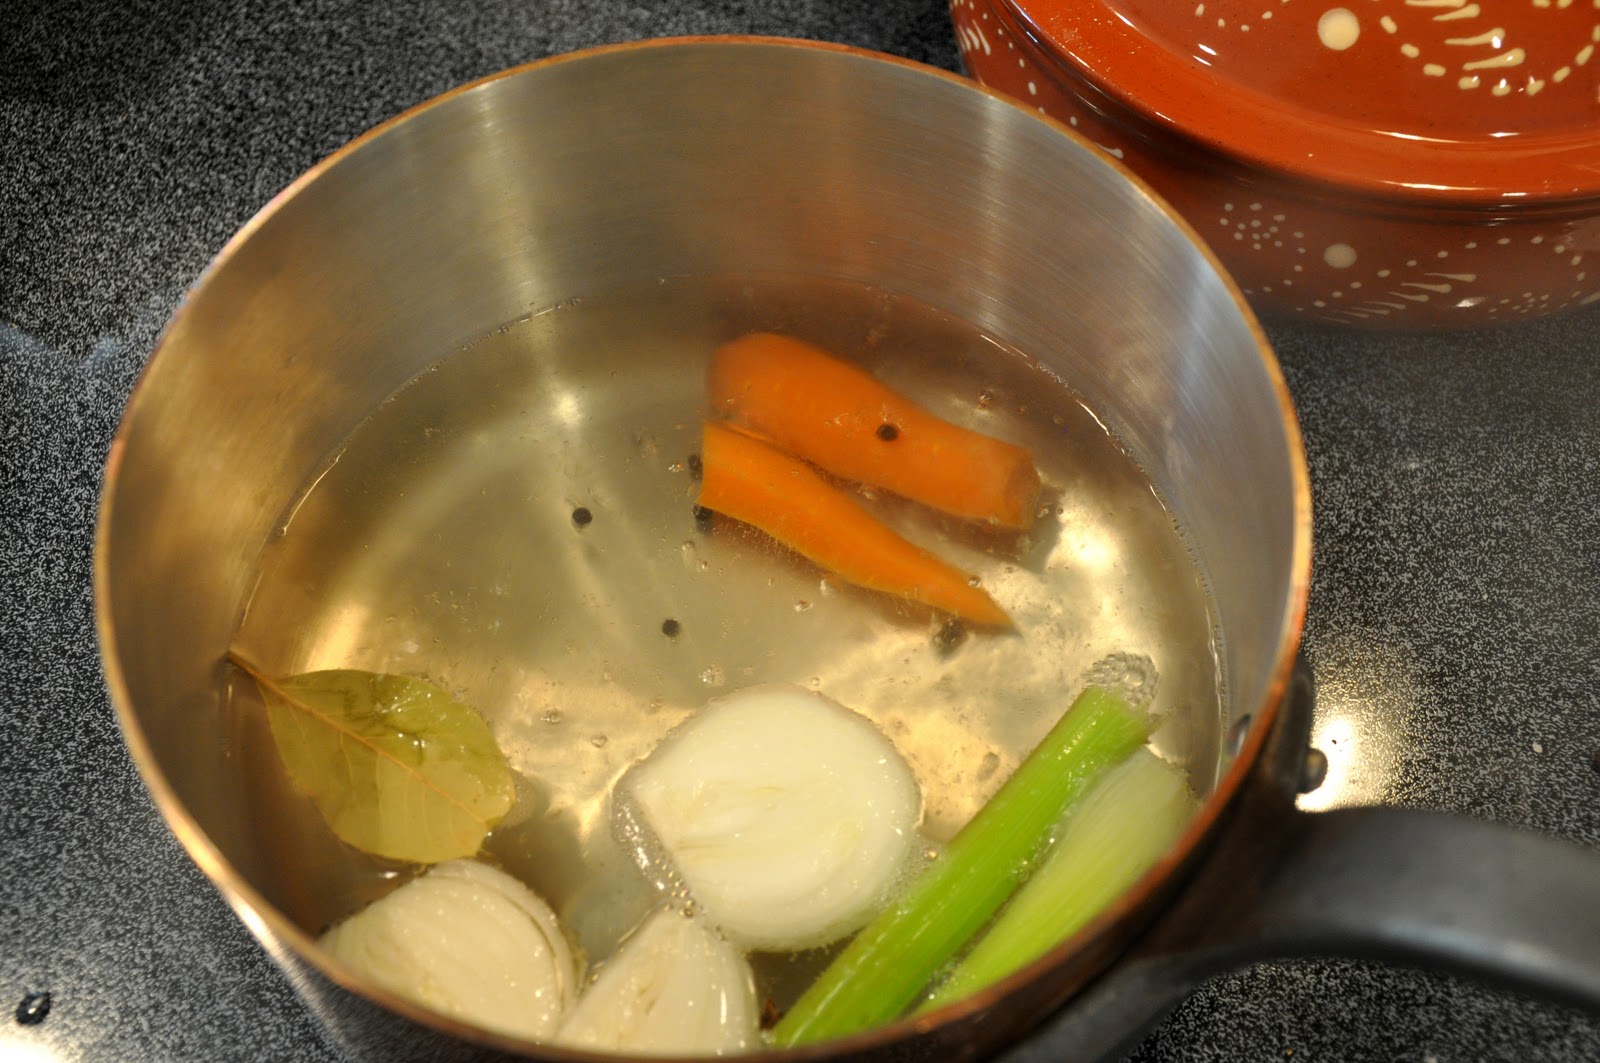
You begin with the meat. Classically speaking, this is a veal roast (see Notes below for the common cuts). But you can economize by using pork loin or—my favorite—pork tenderloin or turkey breast instead. Whichever you choose, prepare a kind of court bouillon by simmering a quartered onion, a carrot, a stick of celery, a bay leaf, a few cloves, salt and some whole peppercorns in a mixture of white wine and water, about a glassful of wine and just enough water so that the liquid will entirely cover the meat when it is placed in the pot. (To be sure, you can place the meat in the cold liquid beforehand to see if there is enough liquid.)


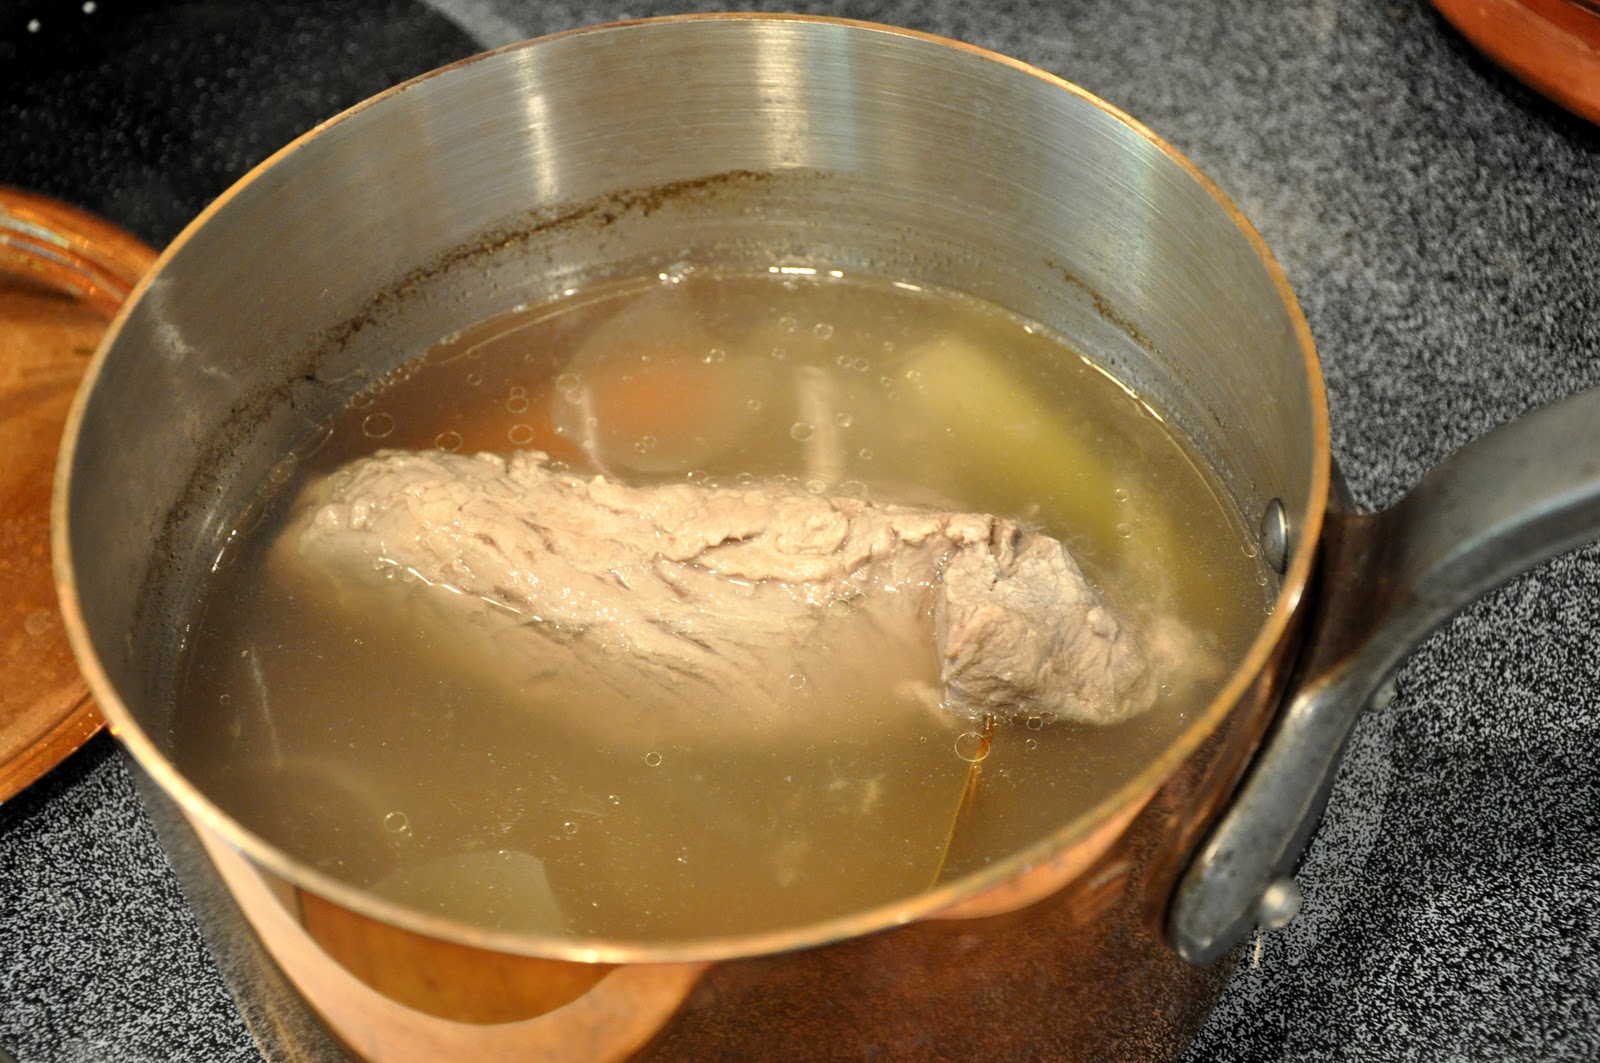
After the aromatics and liquids have simmered for about 10-15 minutes, add the meat, raising the heat if need be to keep the water simmering nicely but it should not boil, which would toughen the meat. I cover the pot partially to reduce evaporation. Simmering time will depend on the meat you use, but the classic recipes call for cooking the veal roast around 60-90 minutes, depending on the size and the cut. (The original cuts were suitable for long simmering, modern recipes often call for loin, which should be just cooked through.) Pork loin should take about 60 minutes or less, while the tenderloin, which is quite a 'skinny' piece of meat, should take no more than 20-30 minutes. Turkey breast should take about the same as pork tenderloin. Remove the pot from the heat and allow the meat to cool completely, still immersed in its cooking liquid. This should take about an hour or so, and it results in a moister and more flavorful meat. But if you are in a hurry, you can remove the meat from the liquid and place it in the fridge to cool down quickly. 


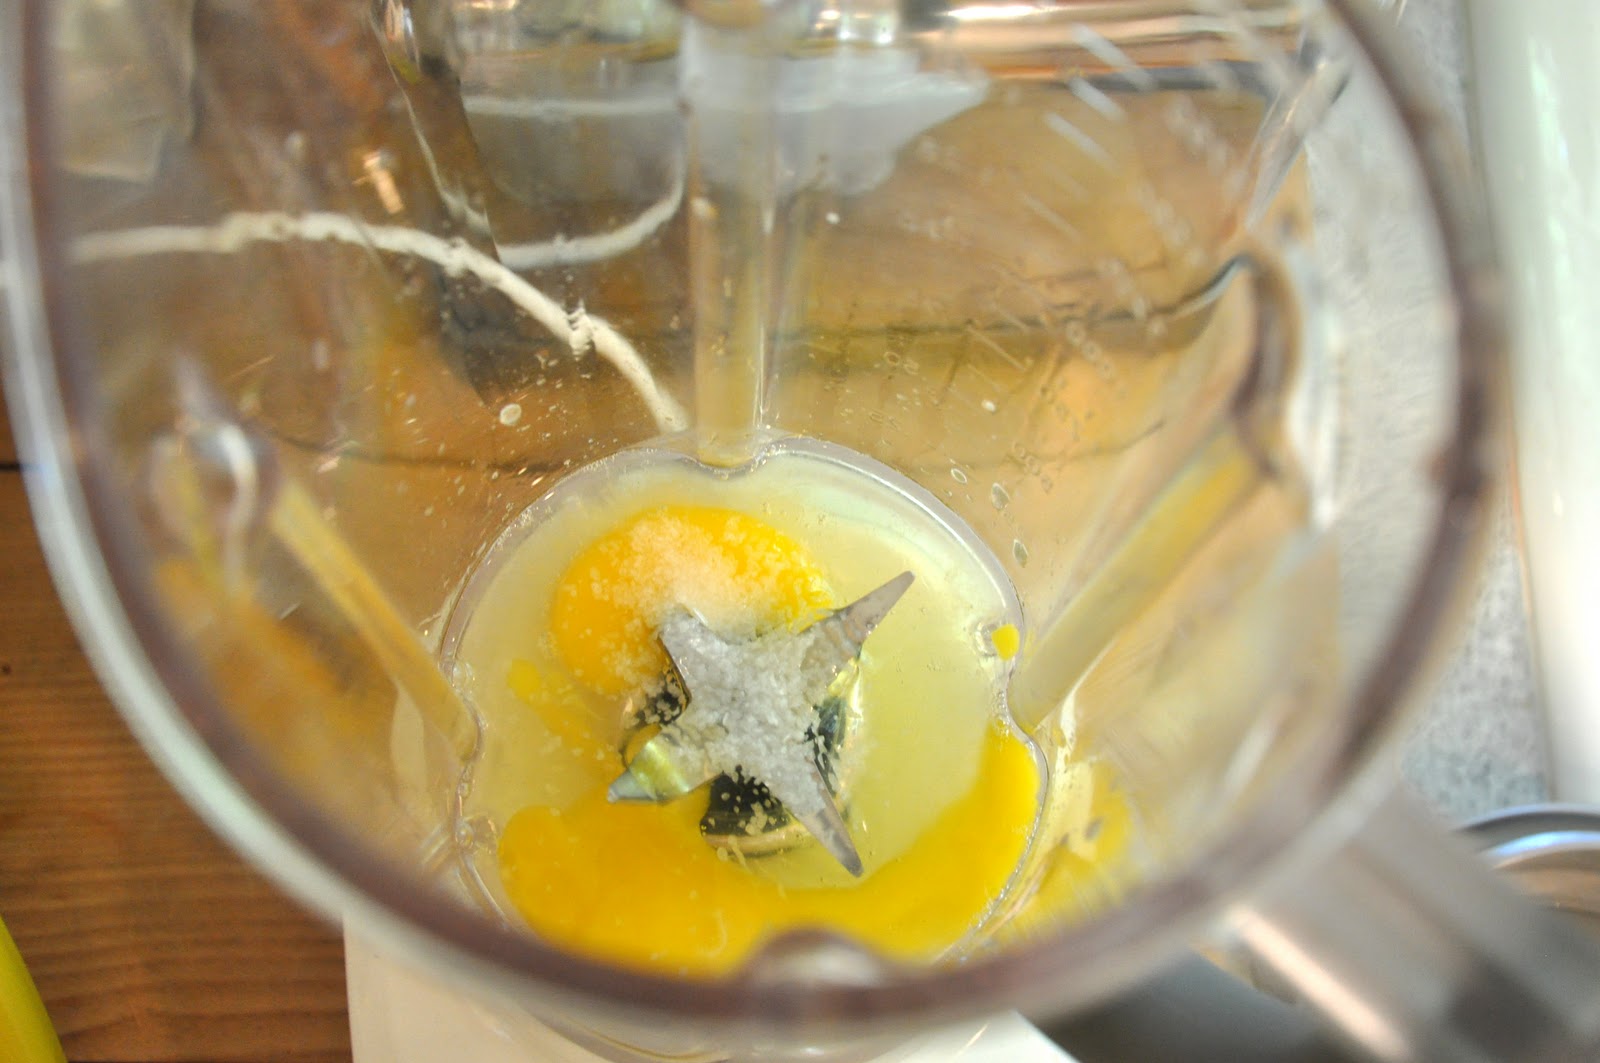
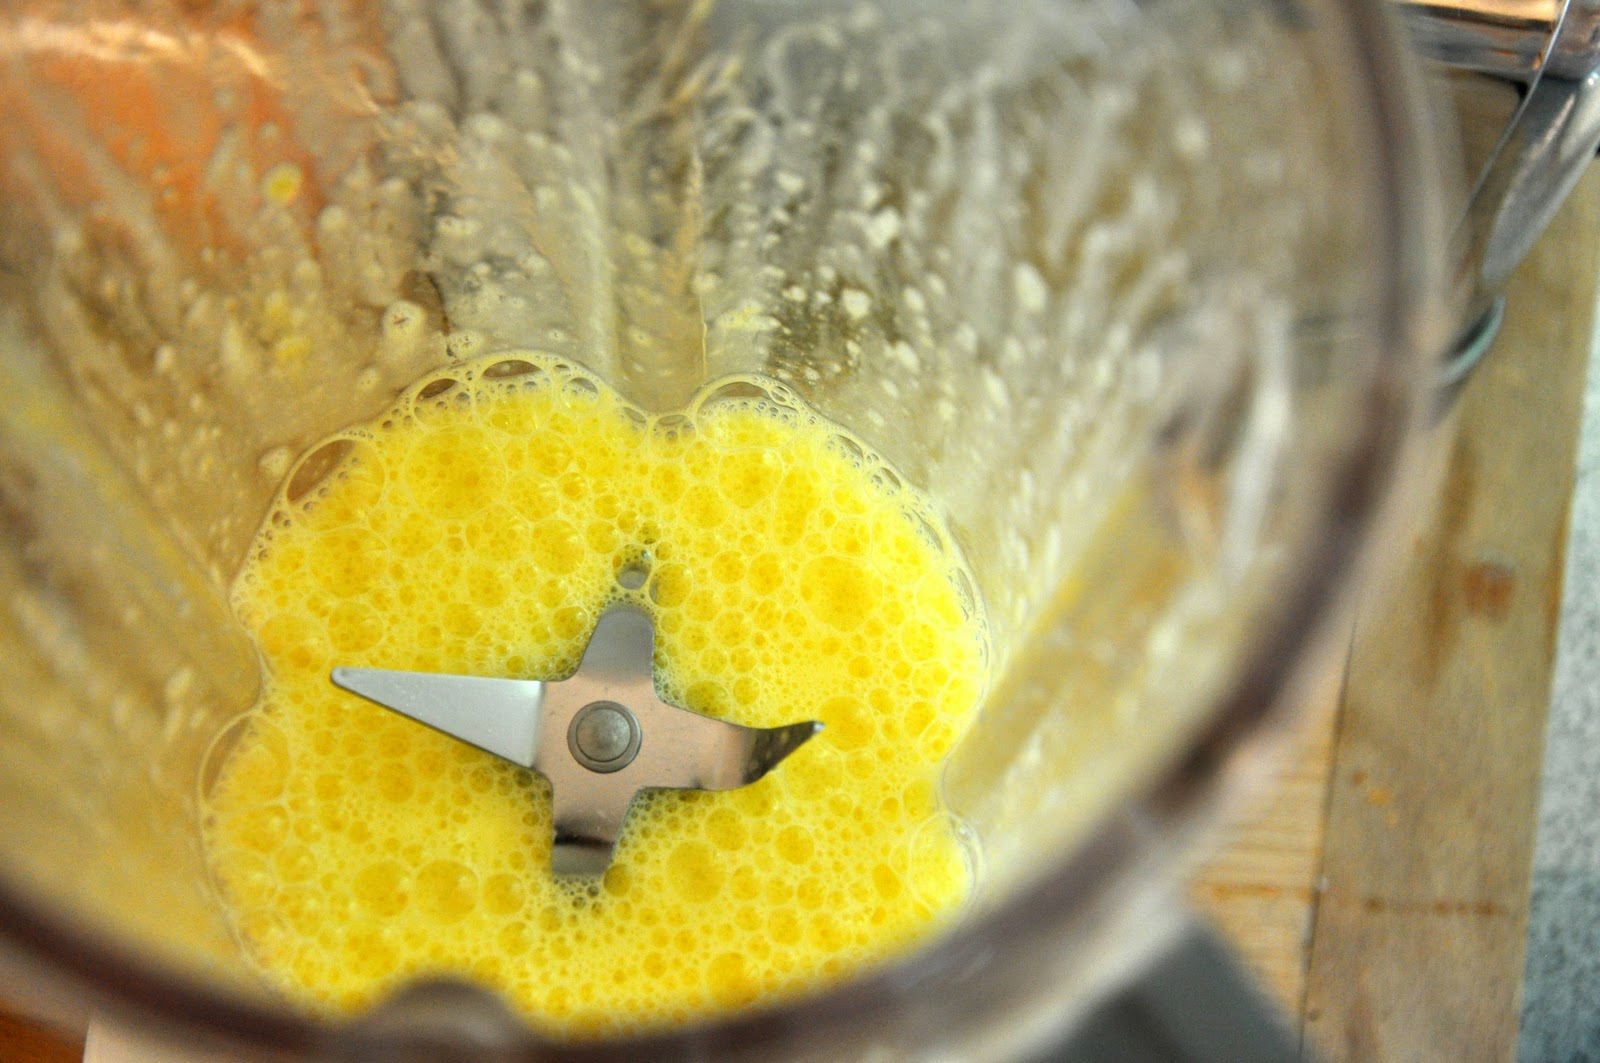
While the meat is cooling, it is time to turn to the sauce. You begin by making a mayonnaise in a blender: place two whole eggs (not just the yolks) in a blender with the juice of half a lemon and pinch of salt.


  Then turn on the blender to 'purée' and let it go for just a few seconds. The egg mixture will have turned frothy:

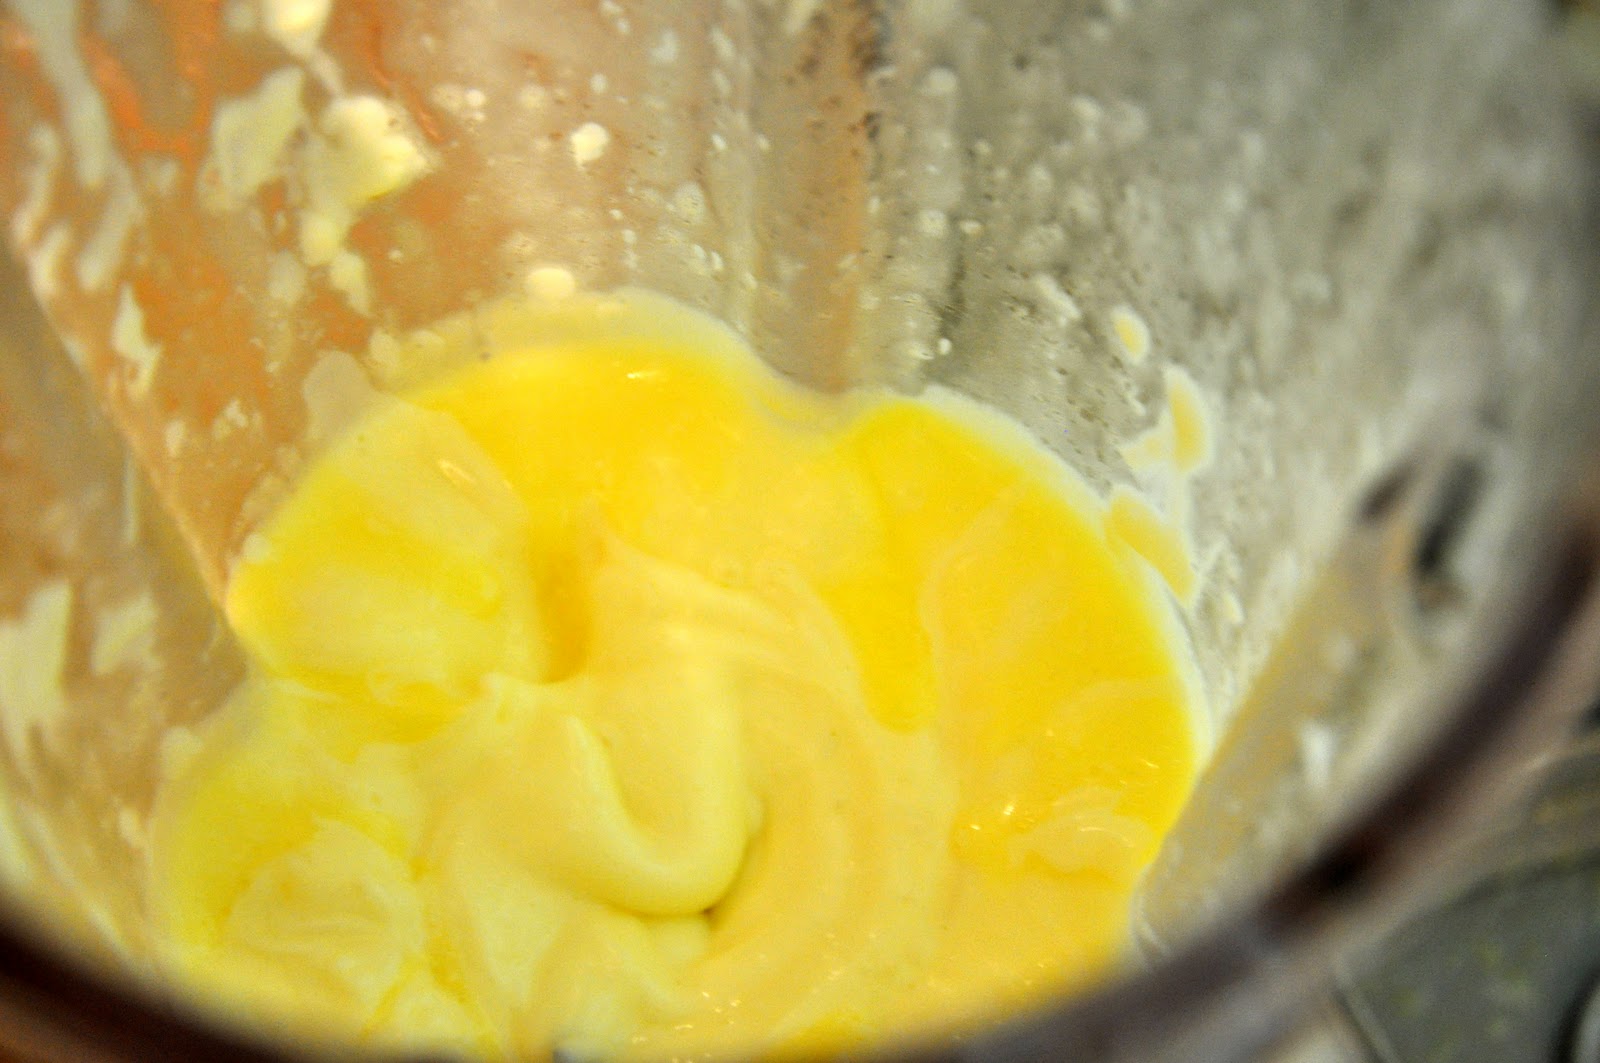
Now turn the blender on again and, with the little clear plastic 'window' in the lid removed, starting pouring in olive oil little in a slow but steady stream, until the eggs and oil emulsify and you get a nice, thick and creamy mayonnaise. I believe that the classic proportions call for one cup of oil per egg, but I usually 'eyeball' it and stop when the mayo is nice and thick, as pictured below.


By the way, this is one case where so called 'light' olive oil may be better than the dark green fruity kind, which would give the sauce a too strong olivey taste. Or you can use Provençale olive oil, which is more delicate. 

In any event, once your mayo is ready, add a fillet or two of anchovy, a spoonful of capers and a can of tunafish (preferably packed in olive oil). Blend again until smooth. 


Then temper the sauce with a couple of spoonfuls of the meat cooking liquid, enough to produce a pourable but still quite quick sauce. Transfer to a bowl. 

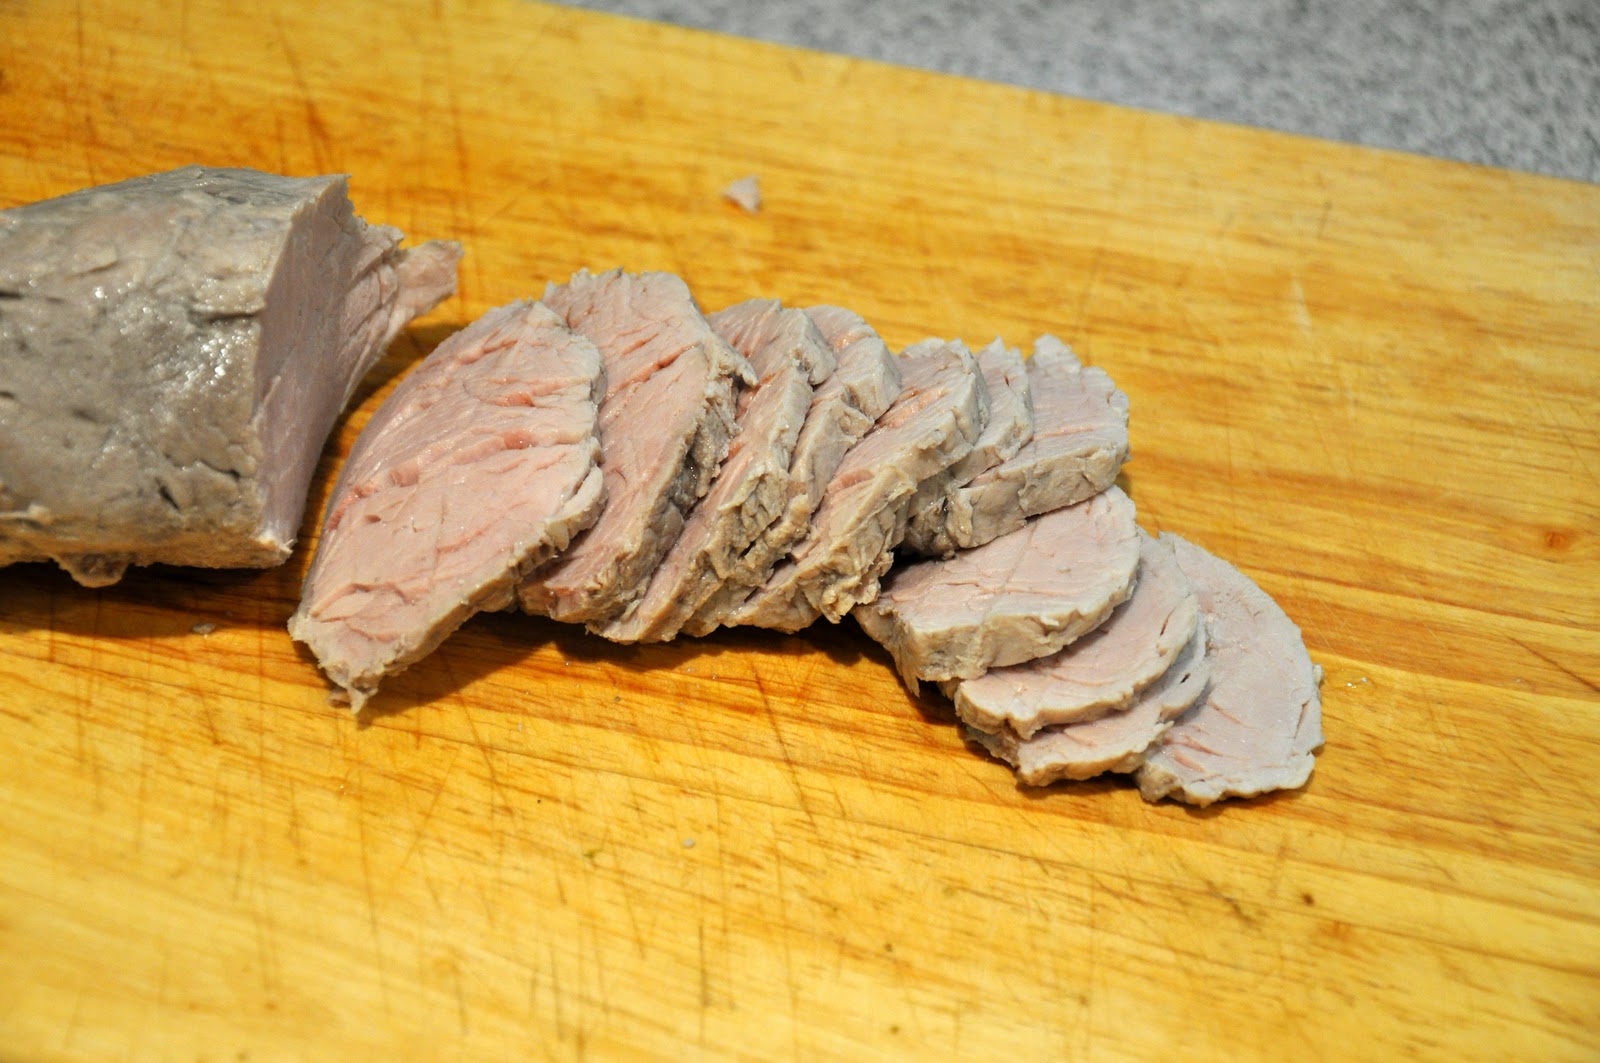
When the meat has achieved room temperature, remove it from its broth, pat it dry and place it on a cutting board. Slice it against the grain into thin slices.


Now take each slice (you'll probably need to do this by hand, otherwise use tongs) and dip in on each side in the tuna sauce and arrange the slices on a platter, each slice just slightly overlapping like so many roof tiles, in an attractive pattern. While pork tenderloin, there will be room for several rows of meat like so: 


Other cuts are larger, so you will probably need to make a single row or arrange them in a circular pattern on a large platter.
 
Finally, finish the dish off by pouring over the top the remaining sauce. While you can serve the dish right away, it develops better flavor if you let it sit for several hours, overnight or—in some recipes—for a few days, so the flavor of the tuna sauce penetrates the meat completely. Before you are ready to serve, garnish the dish with capers and, if you like a more elegant presentation, some thin slices of lemon around the edges and some parsley leaves. 

NOTES: If you want to save yourself the trouble or if you are worried about using raw eggs, you can use commercial mayonnaise instead of making it yourself. Just add a good two cups of mayo into the blender along with the tuna, anchovies and capers and whizz away. Or you can try the original recipe, which did not call for mayonnaise at all. Artusi, for example, calls for passing the mashed tunafish through a sieve, then adding enough olive oil and lemon juice to produce a nice creamy sauce. You can achieve a similar effect in the blender, set on 'liquify'. Artusi also suggests not throwing the cooking liquid away, but saving it for use in a risotto, which strikes me as good advice. 

You can also simplify the dish a bit by doing what most recipes call for: rather than coating each slice of vean in the sauce, line the bottom of your platter with some sauce, lay down the slices and cover them with the rest of the sauce. The slice by slice method is my own 'take' on the recipe, but one that I think pays off, as it ensures that each and every slice is enveloped in the sauce, keeping it moist and lending maximum flavor.

As mentioned, veal loin is the classic meat. And the classic cuts are either the coscia (leg), girello (top round) or magatello (eye of round), all of which allow for long simmering without drying out; modern recipes  sometimes call for the fesa (rump). In the US, these cuts of veal are not all that common, so veal loin can be substituted—and simmered for less time, more like 45-60 minutes than 60-90. These days, pork loin or turkey breast are common substitutes, even in Italy. And, if you ask me, pork tenderloin makes for a wonderful version of this dish—every bit as good, perhaps even better, than the original. 

The origins of vitello tonnato are subject to some confusion, in part because it is typical of two  adjoining but different regions of northern Italy, Lombardia and Piemonte.. According to Anna del Conte in her Gastronomy of Italy, the original version, without mayonnaise but include a bit of cream, comes from Lombardia. When it was taken up by the piemontesi, they added the mayo under French influence. On the other hand, the Oxford Companion to Italian Food has an entirely different explanation: they say that the mayonnaise version is indeed from Piemonte and the original one while the Milanese version is served hot, larded with garlic and pot roasted, the cooking liquid mixed with tunafish and thickened with a roux. And many Italians apparently believe that the dish has French origins, perhaps because of its French-sounding dialectal name, vitel tonnè, but that is apparently not the case. 

It is a summer dish par excellence that can serve as antipasto or a light secondo, as you prefer. In Lombardia, strongly associated with the summer holiday of Ferragosto on August 15, but, if you ask me, vitello tonnato is just too good to serve it only once a year.


Sunday, January 24, 2010

How to Make Polenta

Polenta is one of the most emblematic dishes of the northern Italian cuisines from the Veneto to Lombardia to Piemonte. It is also one of the oldest foods eaten in Italy, dating back at least to 990 BCE. In its original form, polenta—known to the ancient Romans as pulmentum—was a porridge made from spelt. In later ages other grains such as barley and millet as well as pulses and even chestnuts were used to make various kinds of gruels eaten generally by the poor. It is said to have originally been an Etruscan dish, which the Romans adopted and spread throughout the Empire, although today polenta is not particularly important in the cooking of Tuscany or (with one exception) Lazio. In the 1600s, after maize, a New World grain, was introduced into Italy by the Venetians, polenta took on the form we know today.

Polenta, as befits la cucina povera, is quite simple to make but requires patience and care. Polenta was traditionally made by the fire, cooked in a copper pot known as a paiolo, hung close to the fireplace and stirred  with a wooden stick known as a tarai (or tarel in some areas). Polenta today is usually made on top of a stove, and besides the traditional method, some modern methods have been developed.

Traditional method for making polenta: In a paiolo or other large pot, preferably made of copper, bring some lightly salted water to the simmer. I find that a ratio of 1 liter (1 quart) of water for 250g (1/2 lb.) of polenta flour works well. Have some more water on hand, simmering in a saucepan or kettle at the back of the stove:


When the water in paiolo has come to the simmer, add the polenta in a constant but gradual stream—in Italian they say 'a pioggia' or like rain—stirring the pot all the while with a whisk or wooden spoon in one direction until all the polenta has been incorporated into the water:


NB: This technique should avoid the awful fate of badly made polenta: the formation of unpleasant lumps or grumi. (I find the use of a whisk, while unconventional, is particularly helpful.) But don't be surprised if you wind up with a few lumps on your first few attempts to make polenta; it is part of the learning process.

The polenta will soon thicken. Turn down the heat to low immediately; be careful, as polenta has a tendency to spatter if it 'boils'. If this happens, take the paiolo off heat for a moment and add some water. That will stop the sputtering, and you can return to the heat and continue to stir:


If you have been using a whisk, you will eventually need toswitch to a wooden spoon as the polenta thickens. Continue stirring and, when the polenta gets too thick to stir without great effort, add some of the hot water you have kept in reserve and continue to stir:


Although some recipes call for you to stir constantly throughout the cooking period to avoid scorching the bottom, I find that if the heat is low enough and you keep the polenta rather loose by adding water from time to time, you only need to stir every so often—say every 5 minutes or so. The polenta should simmer like this for at least 45 minutes, and it is even better after an hour. Some recipes even call for cooking the polenta for 90 minutes—something I've never had the patience to do.

The polenta is done when it is perfectly creamy and has attained the consistency you desire. The polenta should pull away from the pot when you run your spoon across the bottom of the pot:


Depending on your tastes and the use you will be making of the polenta, it can be either all'onda, or rather soft like a risotto, or quite stiff. (More on this later.) If you want a stiff polenta, stop adding water for the last 15-20 minutes or so, and allow the polenta to thicken; you will need to stir more during this final period.

 
A nice thick polenta 

Pressure cooker method: The traditional method, even without constant stirring, is quite a job. If you want to cut down both on time and effort, you can make polenta in a pressure cooker. To avoid scorching the bottom, use more water than you normally would (say 25% more) and as soon as the polenta begins to thicken a bit, close the lid and bring the pot up to pressure. Turn down the heat to the barest flame, just enough to maintain the pressure, and cook for 20 minutes. Release the pressure, either gradually by just letting it come down by itself off heat, or 'forcing' the pressure down by opening the valve and/or running the pot under cold water in the sink. Remove the lid. Bring the pot back to the stove and over gentle heat begin stirring your polenta. Depending on the consistency you want, add some more water to loosen the polenta or, if it is already rather looser than you want your final product to be, just keep stirring as the polenta thickens.

Slow cooker/rice cooker method: Although I don't own a slow cooker and only occasionally use a rice cooker, I find this method attractive. You mix your polenta flour with cold water (like the pressure cooker, use about 25% more than you would normally) and a pinch of salt in the cooker, close the lid and proceed to cook according to the instructions for your machine (usually 6 hours on low, 3 hours on high). Some recipes call for you to grease the inside of the cooker with a bit of butter or oil to prevent scorching.

Oven method: This is one I've never tried, but it is said that you can make polenta by mixing cold water and polenta flour in a casserole and placing it in moderate oven (180°C, 350°F) to bake for about 45 minutes, stirring it at least once towards the end of the cooking period. 

Electric polenta pot: My favorite method back in Italy was to use an electric paiolo or polenta pot. After the initial addition of polenta flour, as soon as the polenta began to thicken, you attached a paddle with an electric motor to the top of the pot and plugged it in. The paddle would rotate slowly, stirring the polenta, for as long as you wished to cook it. It is a wonderful invention but I had to give it away before leaving Italy, because of the difference in current. Despite having looked high and low, I have not managed to find anything comparable in the US.

Instant polenta: Even in Italy, partially pre-cooked 'instant' polenta,  sometimes called polenta lampo or 'lightning polenta', which can be eaten after only 5-10 minutes of simmering, is quite popular. Of course, it goes without saying that both taste and texture suffer when compared to 'real' polenta. But the result is acceptable in some dishes where the polenta is paired with an especially hearty condimento, like the Roman classic, polenta con spuntature e salsicce.

NOTES: Polenta is traditionally served heaped onto a large wooden board, in the middle of which a shallow well is formed to hold the sauce or other condimento to go with it. Served this way, polenta is paired with a broad variety of dishes from meat to vegetables to fish. Traditionally, polenta was cut with a heavy string, served with wooden spoons and eaten on wooden plates, as contact with metal was said to ruin its flavor. (This was the original reason for cooking polenta in copper pot, since unlike other metals copper was said not to have this deleterious effect.) These days, a serving platter will do, and the advent of stainless steel has rendered these precautions unnecessary, although like many, I still use copper and wood implements. It just feels right…

There are other ways to serve polenta. While still warm, thickly cooked polenta (either leftover or made for the purpose) can be spread in a shallow layer on a plate or cookie sheet or other flat surface and left to cool; the polenta hardens as it cools and is then cut into squares or other shapes. These can be fried or grilled and used as a kind of contorno, or as the bed of a crostino. The polenta squares can also be arranged in a casserole with béchamel, cheese and sauce like lasagne to make a 'polenta pasticciata'.


There are various types of polenta flour you should use according to the region and dish you are making, as well as your personal taste. The most common type of polenta flour is called bramata, a medium-coarse, yellow cornmeal. It is used for rustic polenta dishes and is well suited for chilling and grilling or baking. It is the kind most often found both inside and (especially) outside Italy. You can use it as a kind of 'all purpose' polenta flour. For a finer texture, which results in a softer, more refined polenta, use the kind of polenta known as fioretto, which is very finely ground. In parts of northern Italy, particularly in the Veneto, a finely ground white cornmeal called polenta bianca is quite commonly used to accompany local dishes like baccalà alla vicentina. A rather unusual, but delicious polenta is made with a mixture of buckwheat and cornmeal, called polenta taragna, both very coarsely ground. It is very typical of the Valtellina—the Alpine area of Lombardia which is home to the buckwheat pasta known as pizzoccheri—and also eaten a further to the south, in the areas around Brescia and Bergamo. Rather than a sauce, copious amounts of cheese and butter are usually added just before serving this kind of polenta.

Although polenta is typically thought of (and is) a northern dish, polenta is eaten all over Italy. And although Rome is not really polenta country, in the winter the aforementioned hearty dish of polenta with sausages and spareribs is much appreciated there. Angelina also made polenta, rather soft, served with a simple sugo di pomodoro or with ragu. In my family the story goes that she learned to make polenta to please my grandfather, who had fought in the First World War against the Austrians and, while up north, developed a taste for the stuff. (Following an long tradition, as puls was the usual ration for Roman soldiers in ancient times.) The story may be apocryphal, however, as polenta is also popular in the area she came from around Benevento and Avellino, perhaps a holdover from the times when polenta was enjoyed all over the Roman world.


Sunday, December 27, 2009

Mezzelune al brasato


Here's a wonderful way to 'recycle' leftover brasato or other pot roast—as a filling for stuffed pasta:

Prepare the filling by finely chopping the leftover roast in a food processor together with an egg or two, lots of grated parmesan cheese and, if you like, a few spoonfuls of the leftover sugo (gravy) from the roast. Season, if need be, with salt and pepper to taste. (A bit of nutmeg is also nice.) Make sure the mixture is quite smooth and not too dry. If it is a bit too stiff, add another egg.

Meanwhile, you can make fresh pasta dough and cut it into rounds about 5 cm (3 in) in diameter—or do what I did tonight, and use some 'Hong Kong style dumpling wrappers', ready-made round disks of 'pasta' (see  Notes below). Brush them lightly with some water to help them stick together and then place a heaping teaspoon of the filling in the center of each disk, (see photo above).

Fold the pasta disk over and then seal the round edge by pressing down firmly with your fingers, starting at the center and working your way to each end with both hands. (This helps avoid the filling oozing out.)  (See photo at left.) Proceed until you have used up your ingredients.

You can cook your mezzelune right away, or let them dry a bit before using. If, however, they are to wait for more than a half hour or so, cover them with a towel to prevent them from drying out too much.


Bring abundant well salted water to a soft boil, then add your mezzelune (being careful not to mangle them!) to the boiling water. Adjust the heat so that they boil gently. Do not allow the water to come to rolling boil or they may break apart. Cook for only 2-4 minutes, depending on how long they have been waiting around.

When the mezzelune are done, scoop them out of the water with a large slotted spoon. You can dress them in a number of ways. Here are three possibilities:

Al burro e salvia: Perhaps the most common (and, to my mind, the best) way is to melt a good amount of butter (say 50g/2 oz per serving) in a skillet with some sage, allowing the sage to 'simmer' in the butter but not allowing the butter to color at all. Then add your mezzelune to the skillet, along with a bit of the pasta water and a bit of grated parmesan cheese. Toss together over medium heat very quickly and serve with additional parmesan on top.

Al sugo d'arrosto: If you have any gravy left over from the brasato, you can re-heat a bit of it in a skillet and toss the mezzelune in it. Serve with some grated parmesan on the side for those who want some.

Al sugo di pomodoro: You can also dress the mezzelune with a very simple sugo di pomodoro, known in the English-speaking world as a 'marinara sauce'.

These mezzelune are also very nice served in brodo, in homemade broth.


 Mezzeluna al sugo d'arrosto

NOTES: Those round Hong Kong style dumpling wrappers were quite a discovery! I found them at H Mart, a Korean-owned Asian supermarket with branches all over the US and South Korea. (Besides these useful wrappers, they have excellent meats, fish and produce at very reasonable prices.) Another well known 'short cut' for making stuffed pasta is to use wonton wrappers, but I generally find these to be just a bit too fine for Italian pasta dishes; they tend to get overwhelmed by the stuffing and/or sauce (though I have used eggroll wrappers to make cannelloni with very satisfactory results). These dumpling wrappers, on the other hand, while still a bit too 'translucent' when cooked, are a nice golden yellow and a bit thicker, and have a rather firmer texture—in short, they look and react to cooking much more like real fresh egg pasta. (The looks are, however, partially deceiving: their yellow color actually comes from using Yellow Dyes #3 and 5...)

In Piemonte, where this dish originates, the usual pasta to be stuffed with this brasato filling is actually agnolotti (aka ravioli) a kind of square pasta. But since I had round pasta on hand, I used made them into another common stuffed pasta shape, the mezzaluna, or 'half moon', made by folding the pasta disk in half as described above. You can also make round ravioli by placing one disk on top of another—with the filling in between them, of course.

Sunday, December 20, 2009

Brasato al vino rosso


There's nothing like a good pot roast on a cold winter's day! Though it may come as a surprise to some, Italians also make pot roast, which is known variously as brasato or stracotto, but with a 'continental' twist: the favorite cooking medium for Italian pot roast is red wine.

Although it is not absolutely necessary, I find that the roast has extra depth of flavor if it is allowed to marinate. You place a beef roast into a ceramic bowl or pot into which it will fit snugly, then add the 'holy trinity' of onion, carrots and celery, each cut up into wedges or large chunks, a whole garlic clove or two, some whole peppercorns, a few cloves and a bay leaf or two. Pour over ample robust red wine—usually you'll need a whole bottle. Leave the roast to marinate in its red wine bath overnight or even longer in the fridge. If the liquid does not entirely cover the roast, turn it every so often to ensure even marination. Let the roast come back to room temperature before cooking. (NB: Even if you don't have 24 hours to spare, you can marinate the meat for a few hours, or from the morning to the evening, in which case I'd leave it out of the fridge.

Remove the roast from the marinade and pat dry. Then, in a round or oval Dutch oven, melt about two spoonfuls of lard, add a sprig of rosemary and a garlic clove and brown the roast well on all sides., seasoning well with salt and pepper as you go. (Remove the garlic if it browns too much.) Then straining the marinade liquid through a sieve, pour it slowly over the roast. The liquid should come about 2/3 of the way up the roast. Lower the heat, cover the pot and allow it to simmer slowly until tender, about 2 or 3 hours (depending on the size of the roast), turning the roast every half hour or so to ensure even cooking. (Add some broth or water if it dried out too much, but normally there should be ample liquid without adding more.)

When the roast is done, remove it from the pot to a carving board to cool off a bit. (This will make it easier to slice.) While it is cooling, bind the remaining liquid a bit in the pot either with some beurre manié or with a cornstarch slurry (see below). The resulting sauce should have a nice liaison without actually being thick. Slice the roast on a serving platter and pour over a bit of the sauce. Serve with the remaining sauce in a sauceboat.


NOTES: The cut of beef I like best for pot roast is chuck, but rump roast or the bottom round are also good cuts. Avoid lean cuts, including top or center round, which are 'prettier' but tend to dry out. What you want is a good, rather tough piece of meat with plenty of fat and sinew that will break down during the long simmering, enriching the meat as it cooks. (I have seen some recipes that call for a sirloin pot roast to be served medium rare, but I have never tried it.) The roast should be tied so it does not fall apart during the braising.
The red wine, as mentioned, should be full-bodied. In Piemonte, the traditional choice is Barolo, but at today's prices you may want to opt for something a bit more modest...

Of course, there are numerous variations, mostly having to do with the aromatics or herbs to be included in the marinade or braising liquid. The addition of pancetta to the braising pot along with the garlic and rosemary is a common addition (and one I usually follow, but not today—as we were snowed in!) Some recipes (including many of the most traditional ones) call for larding the roast with pancetta. Some recipes call for chopping up the marinade vegetables and sautéing them as a soffritto. And some also call adding a bit of chopped tomato to the braising liquid. In some versions, you add just a bit of braising liquid at a time, in the manner of an arrosto morto, rather than all at once at the beginning of the braising. Another variation mentioned In Alessandro Molinari Pradelli's La cucina lombarda is the addition of lots of thinly sliced onion to melt into the braising liquid, a variation called brasato alle cipolle.

Brasato is the usual word for pot roast in Lombardy and Piemonte. I understand that stracotto is the more common name in Tuscany. This recipe is more typical of a brasato. A stracotto alla fiorentina usually includes only a cup or so of red wine, which is allowed to evaporate in the usual Italian way, after which a goodly amount of tomato purée is added in which the roast braises, making it somewhat similar to the southern Italian ragù.

By the way, if you don't use the marinade vegetables as a soffritto, you might want to try glazing them and serving with as a rustic contorno, which is what I did: pick out as many of the cloves and peppercorns as you can find. No need to be too fussy about—it does no harm to leave a few behind.) Then place them in a skillet with water enough to come about halfway up their height, along with a few spoonfuls of sugar, a pinch of salt and a nice clump of butter. Turn the heat up to medium-high and let the water boil down until it has completely evaporated. As the water evaporates, the vegetables will begin to caramelize in the butter and melted sugar. Allow them to take on a nice golden color, without burning of course, and you're done. Serving the glazed vegetables around the sliced roast makes for an attractive presentation.

The braising liquid can be served as is, especially if it's already reduced enough to have reached a 'sauce' consistency. Otherwise, as mentioned you can bind the liquid either with a beurre manié, which is simply flour blended with softened butter, or with a cornstarch blended with cold water to make a slurry. The beurre manié will lighten the color of the liquid and render it opaque, while the cornstarch slurry will thicken it without changing its color or transparency. If you've used the marinade vegetables as a soffritto, then you can simply blend the liquid and vegetables together, or pass them through the finest mesh of a food mill, which will emulsify and thicken it 'naturally'.

Lard is not a necessity—you can use olive oil, of course, or a combination of oil and butter if you prefer. But there is nothing like lard for browing meat and, since we were out of pancetta, I thought that it would add a bit more depth of flavor.

Brasato aka stracotto is often served with mashed potatoes, which make a wonderful foil for that rich, unctuous sauce. If so, I would go a bit more lightly on the butter content of the mashed potatoes, as the sauce is already quite rich. Polenta is also a popular choice. Cipolline all'agrodolce or glazed carrots are also great accompaniments, especially if you want to precede the roast with pasta as a first course.

For the fans of French cooking out there, you will no doubt have noticed how similar this recipe for brasato is the beouf à la mode (see also the Larousse Gastronomique, under "Beef" and Escoffier, Le Guide Culinaire, under Piece de Beouf à la Mode, dite aussi à la Bourgeoise"). I am not sure of the exact relationships, but seeing as Piemonte borders on France and Lombardy borders on Piemonte, the resemblance should not surprise us.

Leftover brasato is wonderful as a stuffing for pasta, known as either agnolotti or ravioli al brasato. (Since I have leftovers, I may blog on that dish soon.) And, finally, you can prepare beef cut into large cubes in exactly the same way, in which case your brasato becomes a stufato (similar to a daube in French cuisine).

Pot Roast on Foodista

Friday, November 6, 2009

Taglierini al sugo d'arrosto


Here's a neat idea for a really quick and savory pasta whenever you happen to roast  veal, chicken, beef or pork. Save the drippings and use them as a sauce for pasta—a sugo d'arrosto. It's that simple. If your roasting pan is flameproof, you can even throw your pasta right into the pan. Otherwise, deglaze and scrape up the sucs from your roasting pan (together with the fat and any bits and pieces of meat and vegetables if you like) then save it for your pasta. Gently heat up your sugo d'arrosto in a skillet and add your cooked pasta, and mix well over low heat, adding some of the pasta water to help coat the pasta. with the sauce. Depending on the roast, you may want to mix in or top with a little grated parmesan cheese.

For this dinner, I used the all juices and bits and pieces of pancetta, chicken and rosemary left over from the pollo in porchetta I had made the previous evening. It was so tasty on its own that it didn't need or want cheese.

NOTES: This sauce, which hails from the Piemonte region, where it is also called tocco d'arrosto, meaning literally a 'touch of the roast'. It is typically used to dress taglierini (known as tajarin in Piemontese dialect) as picture above, but it is lovely also with tagliatelle or even to dress stuffed pasta like agnolotti. Almost any fresh egg pasta would probably do, as would even a 'factory' pasta like rigatoni. If you want an elegant dish, you can strain the sauce through a sieve, but personally I really like all the bits and pieces.

If you haven't made a roast, Marcella Hazan offers an alternative recipe in her Essentials of Classic Italian Cooking. It calls for making a 'mock' sugo d'arrosto—which for some reason she calls a butter and rosemary sauce—by sautéing a sprig of rosemary and a few garlic cloves in butter and then melting a beef bouillon cube into the resulting sauce. It's not bad at all, although obviously second best to using real sucs from a roast.

Saturday, October 3, 2009

Bollito and other boiled dinners

Some of our favorite Sunday meals during the cold weather months are boiled dinners. I usually make homemade broth in the afternoon and, not wanting anything to go to waste, the boiled meat and vegetables that went into the pot are usually dinner that night.

Bollito misto
If you've made the broth with beef, you'll have lesso di manzo, also known as bollito di manzo. (The verbs lessare and bollire both mean 'boil'.) If you've used chicken, pollo lessato. And, if you want to serve one of the great classic dishes of northern Italian cooking, you can try bollito misto--made with beef, chicken or capon, veal breast, veal tongue, and/or calf's head, pig's foot, and one of two sausages originally from Modena, called cotechino and zampone, (often eaten with lentils on New Year's Eve, but that's another story). The sausages have a strong taste, so you should boil them separately. They can be hard to find outside Italy but available (sometimes) online or in the better Italian food shops, especially around holiday time. In Italy, you'll find them in every supermarket in December, pre-cooked and vacuum packed--just heat and serve.

A classic accompaniment is mostarda di cremona, a medieval concoction of candied fruits made with a bit of mustard seed, which gives it a sweet and spicy taste. Very unusual for the modern palate, but I really like it. If you can't find mostarda, as odd as it might sound, chutney makes for a great substitute.

By the way, if the main point of your exercise is to serve the meats, you should vary the recipe for broth a bit: first, simmer the vegetables for about an hour or so before adding the meat(s). This creates a kind of court bouillon that will flavor the meat, and adding the meat to the already simmering water will allow the meat to retain more of its own flavor rather than lending it to the broth. And you may want to take more care about the cooking times of the different cuts of meat, especially with the chicken and any other poultry, than you would  when making broth. You can hold back the quicker cooking meats, for which you'll need to calculate backwards: so if your beef will take about 3 hours to cook, for example, wait two hours before adding the chicken, which will generally take about an hour. In the alternative, and a perhaps a bit simpler, you can always take out some pieces when they're done cooking and return them to the pot when everything else if cooked. If you want to eat the vegetables, too, you can add them about an hour before the end of the cooking time rather than pre-cooking them, but remember always to bring the water to the simmer before you add the meat. By the way, don't be misled by the name 'boiled dinner': you should not literally boil the meats and vegetables; besides clouding the broth, hard boiling will tend to toughen the meats.
 
Bollito is the ultimate make-ahead meal; just let it sit (uncovered) and reheat gently whenever you're ready to eat.


Salsa verde and salsa rossa

In fancy restaurants, bollito is often served from a cart in which the various cuts of meat are still swimming in their cooking broth, in various compartments, and slices are carved for your at tableside. This ensures that the meats are still warm and moist when you eat them. Of course, this is not practical for the home cook, so I generally serve my bollito is large pieces in a large, heated serving bowl, with various ladlefuls of broth on top to keep it moist.

Bollito is almost invariably served with one or more sauces. My favorite is salsa verde or green sauce. It was laborious to make in the old days when the use of a mortar and pestle was obligatory. These days, using a blender or food processor, it's very easy: you whiz together garlic, capers, anchovies, lots of parsley, vinegar and olive oil, season with salt and pepper to taste. If you like a little heat (and in our house we generally do) add some red pepper flakes. Some variations call for cornichons, and I add them on occasion. The texture should be smooth and saucy, but not a puree, each of the elements should be identifiable, so don't overblend. If it's too thick, add more oil until it reaches a 'saucy' consistency. Another typical sauce for bollito (which I don't like nearly as much) is salsa rossa made by simmering tomatoes with a soffritto of onions and red bell pepper until well reduced (about 15-20 minutes), passing it through a food mill or blending it, and then simmering the resulting puree with some vinegar and sugar to give it a slightly sweet and sour taste. Another popular sauce, from Verona, is called peara', made with bread crumbs sauteed in butter and bone marrow, adding broth and lots of freshly ground pepper until it swells and becomes smooth. It's wonderfully unctuous.

If you're feeling in an austere mood, you can always enjoy your bollito simply with some sale grosso (coarse sea salt).

Bollito misto is a meal in itself, but is often accompanied by mashed potatoes. Being the frugal folks, in our house we often just serve the vegetables that cooked with the meats. If you're really hungry, a classic first course to precede a bollito is tortellini in brodo, made, of course, with the broth from the bollito itself. The classic wine to drink with bollito is a dry Lambrusco, although I find it goes well with many different red wines, so long as they're not too heavy, like a Bardolino or a Pinot Noir.

Boiled meats were once a common thing, and many recipes have developed over the years for using leftovers in various forms of lesso rifatto, in which the leftover meat is braised with other ingredients, often with onions and/or tomato sauce. Although not particularly Italian, I love to use leftover boiled chicken to make creamed chicken over rice. And leftover boiled meats also make their way into salads, croquettes, and stuffings for ravioli...

New England Boiled Dinner

Italians are hardly the only ones who make boiled dinners. It is, I would dare say, almost universal. Here in America, corned beef and cabbage is a venerable, if disappearing, form of the boiled dinner. Add other root vegetables like onions, carrots, turnip, rutabagas, potatoes and parsnips and you have a New England Boiled Dinner (see photo). An equally good--IMHO even better--version is made with a picnic pork shoulder instead of the corned beef.

The New England Boiled Dinner is traditionally served with mustard or horseradish sauce, but since my significant other doesn't care for either mustard or horseradish, I tried to come up with an alternative. Believe it or not, I decided to try Green Goddess Dressing! Sounds bizarre until you realize that homemade Green Goddess Dressing is basically an Italian salsa verde made with sour cream and/or mayo instead of olive oil. And the experiment worked very well, if I do say so myself.

Other Boiled Dinners
There are many other versions of the boiled dinner, from the French poule au pot (boiled chicken) and pot au feu, made from beef shank, ribs and marrowbones, often boiled in broth rather than water for a richer flavor, and served with coarse salt and cornichons, ttp the Spanish cocido and the Portuguese cozido, to the puchero popular in Argentina and Uruguay, to the Irish Boiled Dinner, very close to the New England Boiled Dinner, to the Japanese shabu-shabu or the Chinese Mongolian Hot Pot. As far as I'm concerned, they're all wonderful!

One last TIP: If you want to cut down on the time, you can use a pressure cooker. It'll need to be a large one, of course, big enough to hold all the meats, vegetable and water. You need to boil and skim at the beginning, as you would for a normal broth, then rather than lowering the temperature to a gentle simmer, you cover and let the pressure rise. Figure about 1/3 the time that it would normally take (15-30 minutes for chicken, 1 hour for beef). The result is not quite the same, I'm sorry to say, but acceptable. In such cases, I often allow the broth to simmer for 20-30 minutes after you've released the pressure, which gives it a bit more flavor. 

Bollito Misto With Salsa Verde on Foodista