Showing posts with label American. Show all posts

Friday, November 5, 2010

Fried Catfish


While Italian or other European dishes appear on our table most days, once in a while I do like to cook a dish from the New World, too. American food has a less than stellar reputation abroad. For many Europeans, it usually brings to mind junk food, fast food and just plain bad food. The stereotype is not totally unjustified—like many stereotypes there is some truth behind the caricature—but what most non-Americans and even a lot of Americans don't realize is that the US does have its own repertoire of wholesome, authentic traditional dishes. And not all of them are heavy, either, like this simple but tasty Southern dish: fried catfish.

In this recipe, catfish fillets are simply dredged in seasoned cornmeal and fried in vegetable oil. Since catfish, a bottom-feeder, can have a slightly gritty flavor, it benefits from pre-soaking in buttermilk (or just plain milk) before frying.

Ingredients (for 4 servings)

4 catfish fillets
Buttermilk (or milk) to cover the fillets
Cornmeal for dredging
Salt and pepper
1-2 tablespoons of Old Bay seasoning (optional)
Vegetable oil
Lemon wedges (for garnish)

Directions

Place the catfish fillets in a wide bowl and cover with the buttermilk or milk. Let it soak for about an hour (although even 30 minutes will improve the flavor).

Remove the fillets from the milk and dredge them in the cornmeal. Pat them on both sides to make sure the cornmeal coating adheres well.

Fry the fillets in about an inch of moderately hot oil, about 5 minutes per side, until nice and golden brown. Serve hot with lemon wedges.
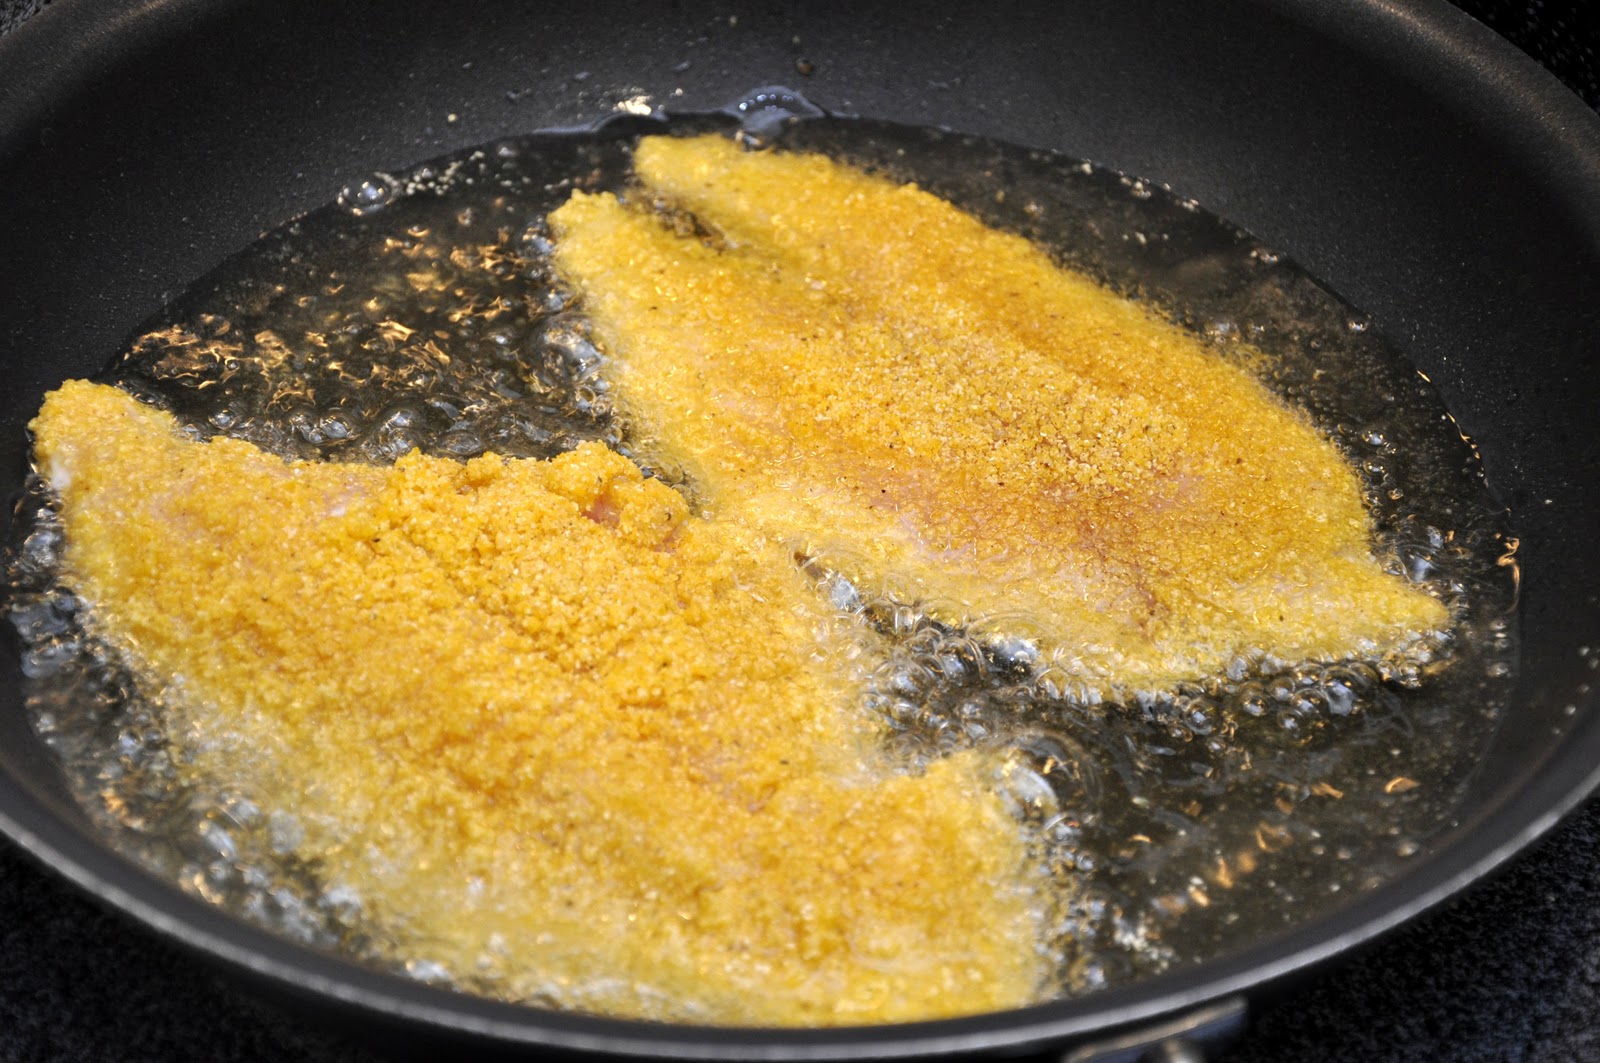
Lively but gentle bubbling is a good sign...

NOTES: As you can see, the recipe is simplicity itself. Like all frying, though, you do need to take care to regulate the temperature of the oil: too hot, and the coating will brown too quickly or even burn, not hot enough and your fish will turn out greasy. Your temperature is right when the oil bubbles in a lively but gentle fashion around the edges of the fillets.

The simplest recipes call for seasoning the cornmeal with just salt and pepper, but living as I do on the shores of the Chesapeake Bay, of course I add a dash of Old Bay seasoning. Many southern recipes I've seen, on the other hand, call for Lawry's Seasoned Salt, cayenne pepper, paprkia or Cajun seasoning. Some recipes will tell you to mix flour with the cornmeal and/or add some baking powder, which I assume will give you a 'puffy' crust—although I have yet to try it.

The frying medium, too, can vary. While most recipes call for vegetable oil of some type, you will see recipes that use butter or another kind of oil (even olive oil, which I assume is a modern adaption) or—and I tend to think this is the most traditional—bacon drippings. Many (perhaps most) recipes call for deep frying but I think shallow-frying works just as well.

I like simplicity, so for me this dish needs nothing more than some lemon wedges as garnish, but, of course, some people will want to use 'tartar sauce', a combination of mayonnaise, capers, and finely chopped pickles and shallots (or onions). As a side dish, to keep it simple, I find a rice pilaf goes very well, followed by a simply dressed green salad. More classic accompaniments include 'hush puppies', deep-fried cornmeal beignets, braised collard greens and—what else?—macaroni and cheese. Any of these will make for a much more substantial meal.

Friday, July 9, 2010

Pulled Pork “Pibil”


We hosted a block party on the 5th of July and I was casting around for inspiration when I hit upon a great post on barbecue by my fellow blogger Drick of Drick's Rambling Cafe. Drick is from Alabama, where they know a thing or two about real barbecue. Now, I've done a lot of grilling in my life but true barbecue—slow cooking over a very low, smoking fire—was something new for me and, frankly, a bit intimidating. Images of whole pigs or sides of beef sitting on enormous grates, smoking for an entire afternoon, had convinced me that barbecue was not something that you could easily do at home. But Drick kindly relieved me of that misconception: a fine barbecue could be had with a backyard gas or charcoal barbecue using gentle indirect heat. 

So I knew that I wanted to feature real barbecue for the block party and, after some vacillation between ribs and pulled pork, I decided on the pulled pork. And then some great Mexican dishes to go with. Here was the menu:
Pulled Pork "Pibil"
Frijoles fronterizos
Calabitas con crema
Ensalada de nopales
All accompanied by guacamole, salsa mexicana (aka "pico de gallo") and salsa verde (aka tomatillo sauce), as well as, of course, lots of tortillas to make soft tacos. 

I'll get around to featuring all of these dishes, but today I will focus on the main event, the pulled pork. As Drick explains, it is actually quite easy to do. In fact, although it takes long, slow cooking, like a lot of such dishes it practically cooked itself. Typically, you begin by coating your roast with a 'dry rub' (a mixture of dried herbs and spices) and letting it sit, as long as overnight, to marinate. You then slow cook the roast over gentle, indirect heat, basting it with a 'mopping sauce' (a thin usually acidic liquid that is traditionally applied with a miniature mop, hence the name), until the meat is fork tender. 

Since my party was going to have a Mexican theme, I decided to use a simplified version of the marinade you would use to make cochinita pibil, a typically Yucatan way of making suckling pig with Mayan origins. The marinade consists of a wet rather than a dry rub, made by blending together chile powder, pimentón (smoked paprika), salt, pepper, garlic, cumin and oregano, moistened with enough juice of naranja agria (bitter orange) so it takes on the texture of a thick paste. Since I didn't have naranja agria, I approximated the flavor using regular, freshly squeezed orange juice, mixed with the juice of half a lime. The night before, I rubbed this paste all over the pork shoulder and stuck it in the fridge overnight. (If you want the real, authentic color and flavor, add achiote (annatto) to the marinade, but, there again, I didn't have it on hand.)

The next day, an hour before I began to cook, I took the pork out of the fridge to come back to room temperature. After pre-heating the barbecue, I slapped the pork on the grill over indirect heat—meaning that you make sure that the burner(s) directly under the meat is turned off (for a gas grill) or clear away any briquettes under the meat (for a charcoal grill). In my case, I had burners on either side of the meat but if your barbecue is smaller—say with only two burners—just turn one off and leave the other on. 

You cover the barbecue and adjust the flame so that the temperature inside hovers around 300-350° F (150-180° C) and continue cooking until the meat reaches an internal temperature of around 180-190° F (85-90° C), which in this case, for a four-pound (2 kilo) roast took about 4 hours. Pork is safe to eat at a much lower internal temperature (as low as 160°F or 70°C) but to reach that wonderful falling apart tenderness that characterizes pulled pork, you'll need to wait. 

But, as I said, the process is quite painless. Just turn the meat from time to time and baste it with a mopping sauce. In this case, I simply used that same combination of orange and lime juice. The only tricky part was trying to keep the temperature inside the barbecue at the right temperature. I'm sure it's something that becomes second nature after some practice, but this being my first attempt, I found that it was just too easy for the temperature to get too high—which resulting in a slightly charred (but still delicious!) outside crust. 


When your meat is done, take it off the grill and let it rest, covered with aluminum foil, for about 30 minutes. Like any other roast, this ensures that the meat will remain juicy. Then you can either cut the meat up or—as the name suggests—pulled it apart pulling the meat apart with two forks. Pour over any accumulated juices and sprinkle with a bit of salt if you think it needs it.

I have to tell you, the meat was absolutely wonderful. Tender, juicy, savory… just slightly spicy. It made an incredible filling, topped with a bit of salsa verde or guacamole, for soft tacos. Not bad for a first attempt. The guests were impressed. (I even caught one of them afterwards sneaking a few more pieces of meat in the kitchen—a true compliment!)

So, my friends, if like me you've been wary of barbecue, take a tip from Drick and take the plunge. I'm sure you'll enjoy the results! 

NOTES: The cut of pork is very important. Shoulder is the ideal cut. Do not attempt this dish with pork loin, which is much too lean and will dry out. 

If you want to make real cochinita pibil, line a Dutch oven with softened banana leaves, lay some sliced onion at the bottom of the pot and take your pork should (or suckling pig if you have it) and lay it over, covering it with the tops of the leaves. Cover and roast in a moderate oven for at least 90 minutes. Traditionally, the dish was cooked by burying it and starting a fire over the pig, so I would think that you could simulate that by using a barbecue. Some recipes call for adding a bit of water and simmering it over the top of the stove or in a pressure cooker. 

For some American style dry rubs and mopping sauces, be sure to check out this great post from Drick's blog.


Saturday, June 26, 2010

Frank’s Sausage and Peppers


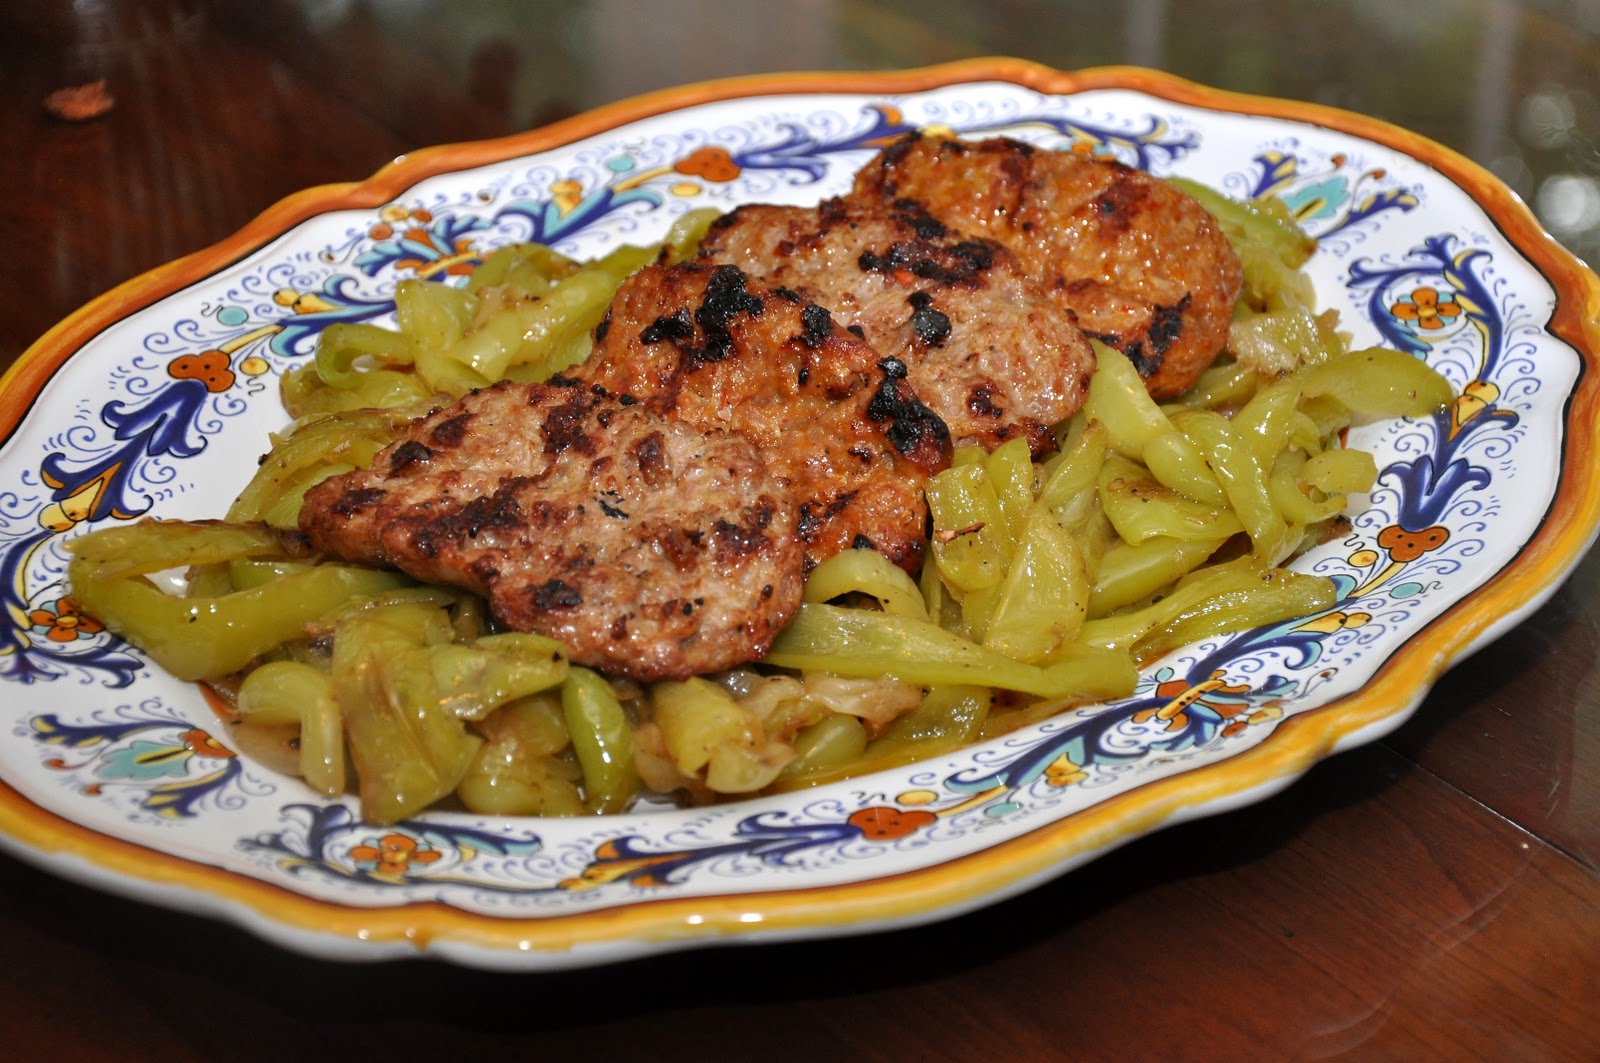
What would summer be without this perennial Italian-American favorite? It's hard to imagine an Italian street fair without the enticing aroma of sausages being grilled on portable barbecues while peppers and onions are sizzling away on a near-by griddle. Isn't just the thought of it enough to make you hungry? Here's my take on this classic.

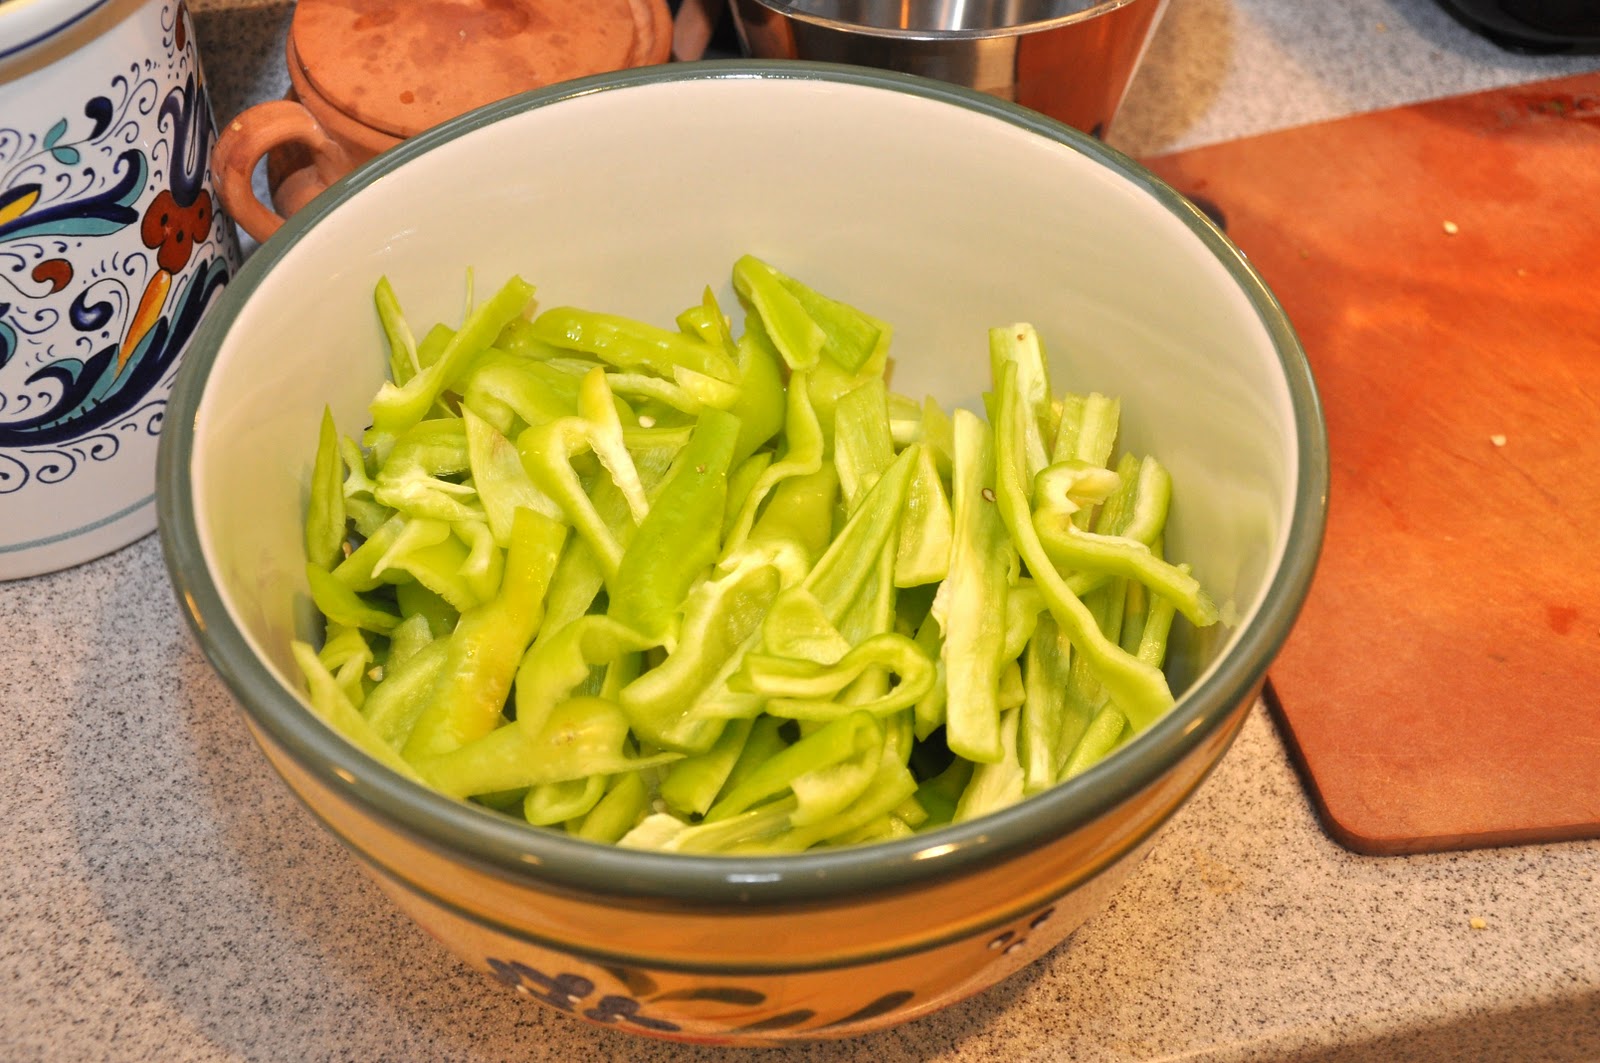
First you make a kind of peperonata—the fried peppers and onions that make for such a popular summer side dish—by taking a nice heap of 'frying peppers', the thin, longish light-green peppers that Italians call friggitelli, cutting off their tops and slicing them in half from top to bottom. Remove the seeds and any white ribs you find inside. (This kind of pepper has a lot less than regular bell peppers, but you will still find some.) Then slice them vertically into thin strips:


Measurements don't much matter, but I find that a half pound (250g) of peppers per person is about right. That may look like a lot of peppers to begin with, but they reduce considerably while cooking.

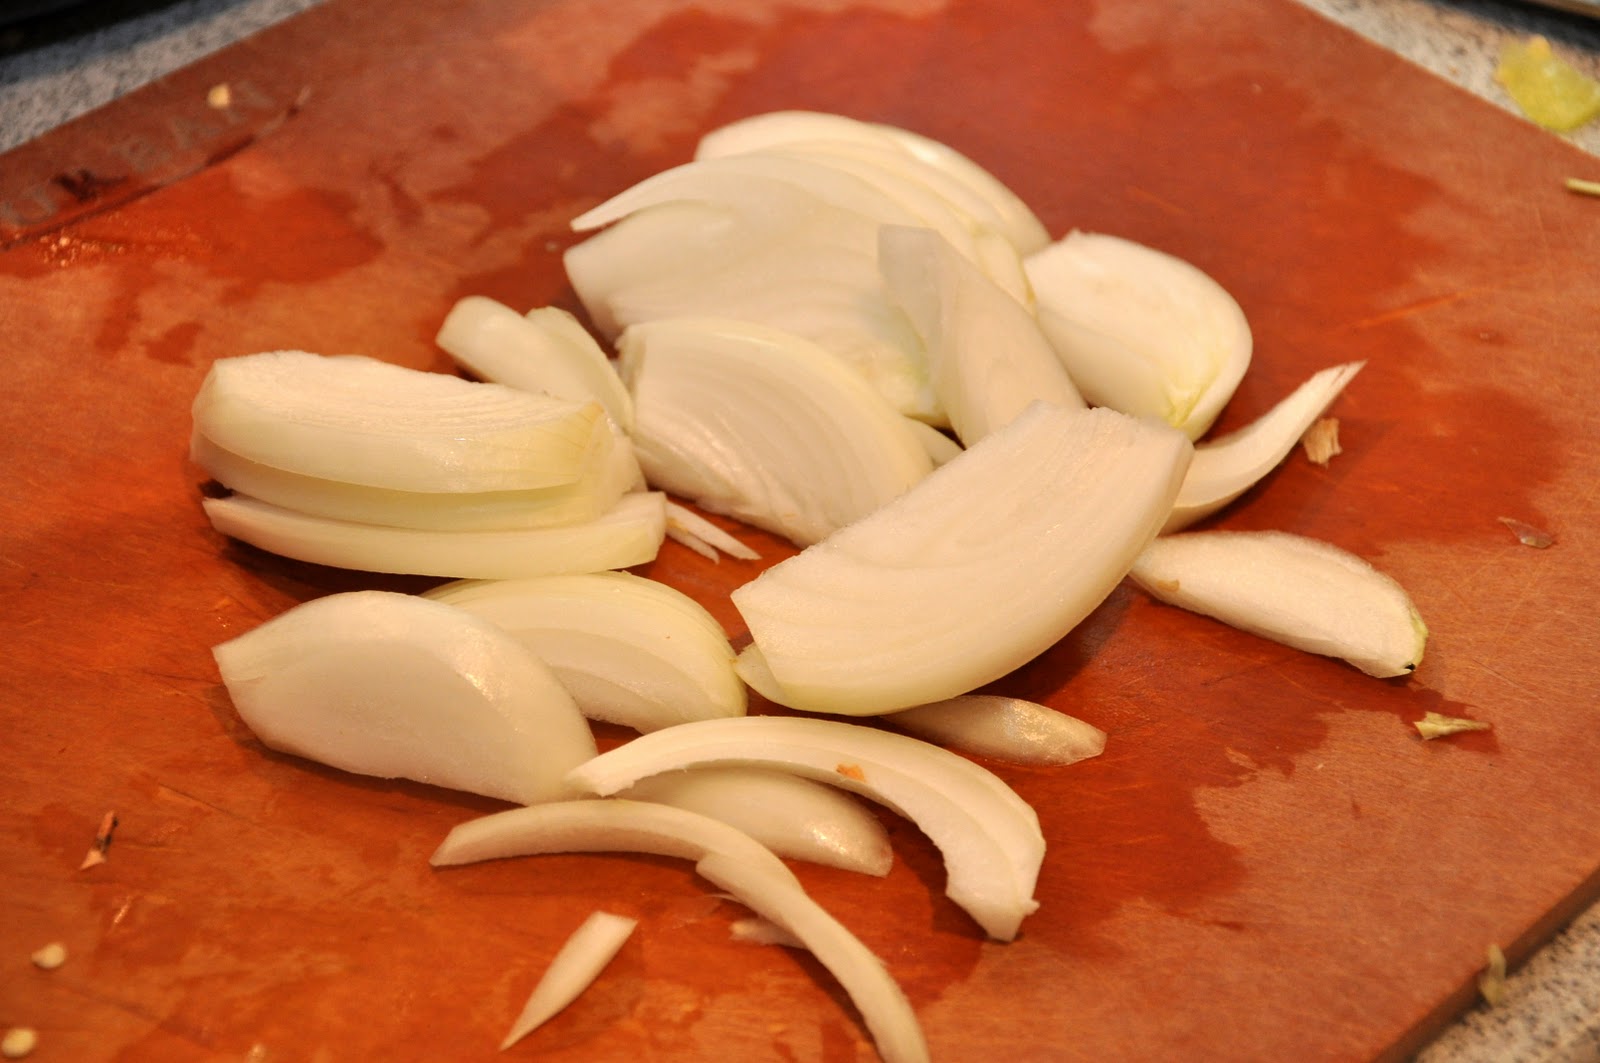
Then peel an onion and slice it in half from top to bottom. Trim off the root and then slice each half vertically into thin but not paper-thin slices. Make sure you slice the onion vertically—that is, from  root to tip with the grain. If you slice onion horizontally—across the grain—the onion pieces will 'melt' into the dish as it cooks. That's what you want for most dishes where the onion is there purely for it savory flavor. But in this dish, the onion is more than just a flavoring, it is a component in its own right: put another way, it's not just part of the harmony, it has a solo:


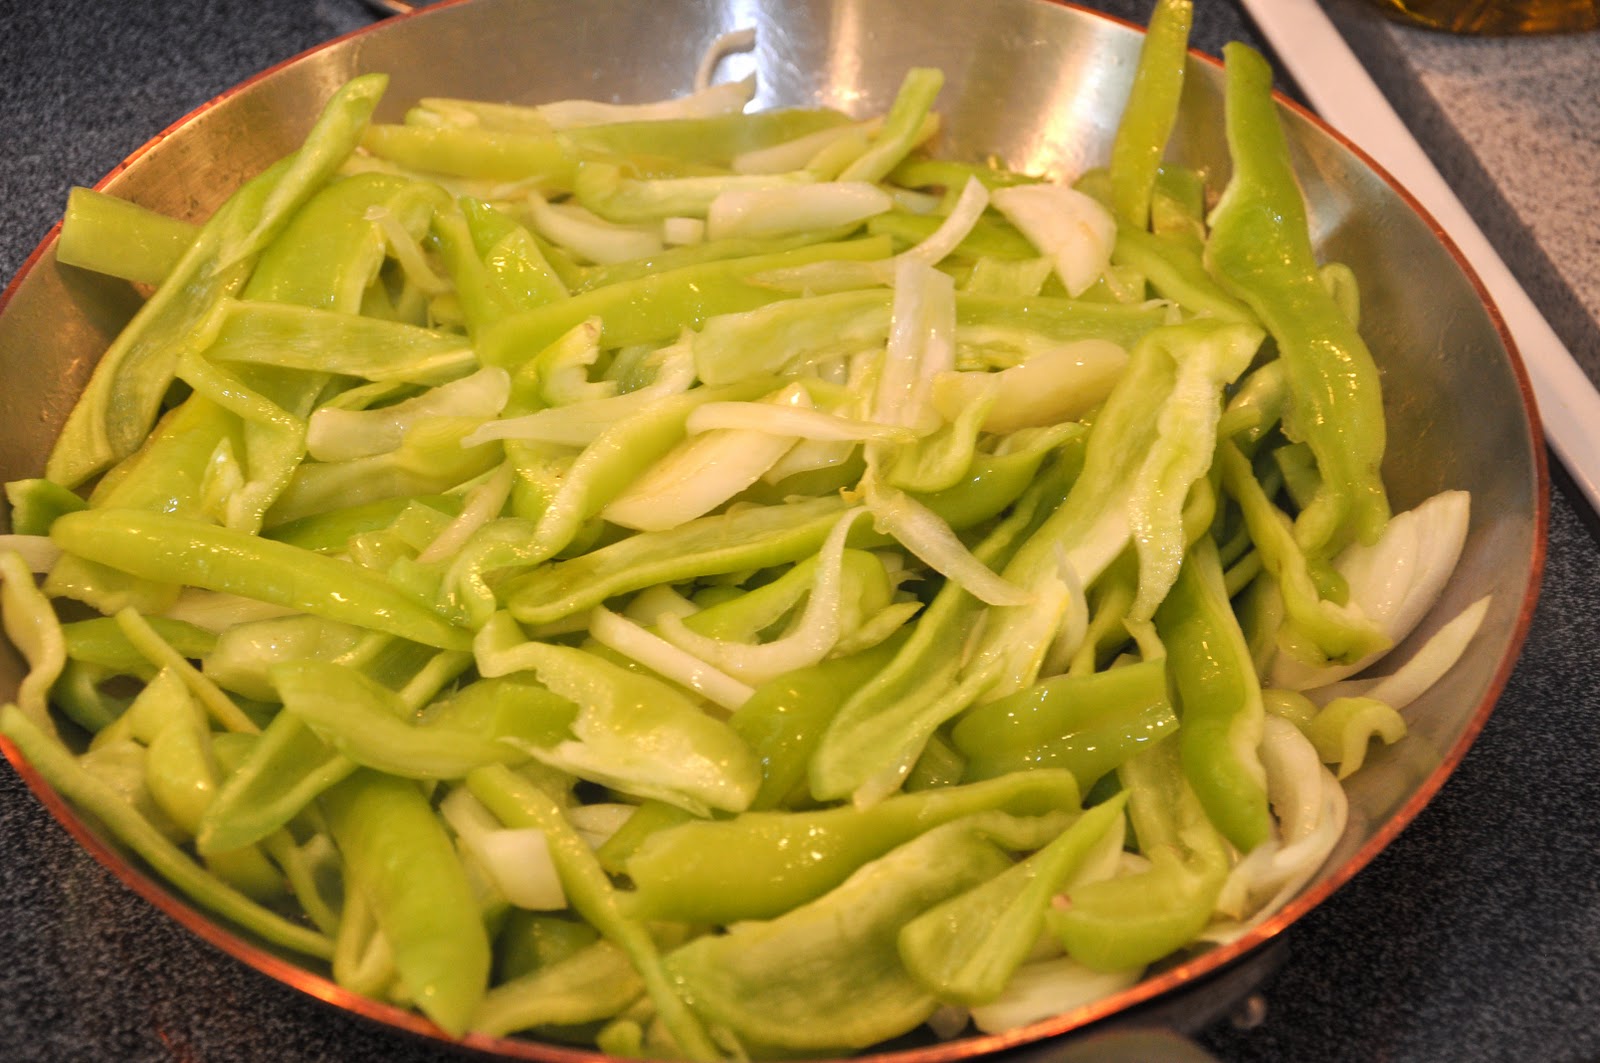
The exact amounts don't much matter, but in this dish the peppers are the real star, so one medium onion is enough for a pound (500g) of peppers. Now heat a skillet and when it is hot, add a generous amount of olive oil. Before the oil begins to smoke, add you sliced peppers and onions. Mix well with some tongs (or a spatula) and lower the heat. 


Maintain a moderate flame so that the vegetables are sizzling nicely in the oil without browning too much. As they cook, the peppers and onions will reduce considerably. Hold off seasoning the dish, as adding salt early on will tend to 'melt' the onion. Instead, season well about halfway through the cooking time (which is to say, after 10-15 minutes) with salt and pepper. Make sure that the vegetables are nicely coated with olive oil—they should glisten like a salad. If they are a bit dry, don't hesitate to add some more oil. When the peppers are just about tender—and they should be fully tender, neither crisp-tender nor mushy—turn up the heat and let the vegetables caramelize, mixing often so they brown nicely but don't burn. Then take them off the heat and cover them. Let them 'rest' like that while you turn to the sausages.


Now it's time to grill the sausages. As you probably know, when cooked whole it is best to prick sausages here and there with the tip of a paring knife or the prongs of a fork. This prevents the filling from 'exploding' out of its skin as it cooks. But there is another way to treat sausages before grilling: butterfly them by slitting them down one side and opening them like a book. This not only allows the sausages to cook more quickly, but exposes more of the sausage to caramelization. If you like the taste of crisy pork, you are bound to like this technique. Your sausages should like something like this before cooking:


Then place the sausages on a hot grill, skin side down first, turning them from time to time, When they are nicely crisp and brown on both sides, serve them on top of the peppers and onions, which you will have laid out on a platter as a bed for the sausages to lie on. 


NOTES: It may come as a surprise, but sausages and peppers is not a particularly common dish in Italy. Although it is not unheard of to add sausages to cook along with a peperonata, the dish has nothing like the iconic place in Italian cooking that it does in Italian-American tradition. You will look in vain in the major Italian cookbooks for sausages and peppers, even those specializing in Neapolitan  or southern Italian cooking. In southern Italy, it is far more common to pair sausages and broccoletti or cime di rapa, known as broccoli rabe in English. Typical of Neapolitan cooking is the use of the young shoots of the same plant, which are known as friarelli. (NB: Confusingly, frying peppers or friggitelli are sometimes also called friarelli.) In the north, you are more likely to find sausage cooked with Savoy cabbage, radicchio or Tuscan kale rather than peppers. None of which to belittle this dish. On the contrary, the match of sausage and peppers is a delicious match, one that was really meant to be. 

A common variation of this dish is the addition of tomato or some tomato sauce to the peperonata when it is about halfway done. By the time the tomato reduces the peppers should also be done. Some people like to add a bit of red pepper flakes as well, although I don't recommend it. If you like some spice, use 'hot' sausages—although I usually not very partial to them, they really go well in this dish. You can also add just a pinch of oregano to the peperonata, but not too much, as the flavor of oregano is very pronounced. But do avoid the use of too many dried herbs or that awful invention called 'garlic powder', which makes everything it touches taste rancid. The elements of this dish—the sausages, onions and peppers—all have tremendous flavor. They don't really need the 'help' of artificial ingredients. 

If you don't have a grill handy, the sausages can be fried in the same skillet. You can brown them at the very beginning, then remove them to make your peperonata, then add them back to the skillet when the peppers are almost tender to finish cooking. Or, when the peppers are almost tender, you can push the peperonata to the sides of the skillet and brown the sausages in the center, then mix everything up and let it cook gently until the sausages are cooked through and the peppers are tender. 

Sausages and peppers are often eaten as the filling for a 'hero' sandwich, but I like it just as it is, with some crusty bread on the side. If you have leftovers, the dish reheats well; it also makes a fantastic filling for a frittata. Some people also use it as a condimento for pasta. Not my cup of tea, as they say, but if you do use it this way, make sure to cut up the sausage into bite-sized pieces. Here a little tomato sauce helps give it a saucy consistency that works well with pasta.


Saturday, October 10, 2009

Seared sea scallops over potato «risotto»

This blog is dedicated to simple home cooking, mostly because that's the kind of cooking—and eating—I like best. But every once and while, the urge to make something 'fancy' strikes. So when a friend from Rome visited last night, I decided to put on the ritz and serve this elegant 'restaurant' dish of seared sea scallops on a bed on potatoes cut into small cubes and simmered with broth to resemble risotto and surrounded by a heavenly cream sauce.


Step 1: Begin by making the sauce: Sweat half a fennel, a leek and 2 shallots, all fined chopped, in some butter until tender. Add a splash of white wine and let that reduce by half. Then add a pint of cream and a few fronds pulled from the fennel stalk. Bring to a boil and simmer until the cream has thickened a bit. Transfer the mixture to a blender and blend at the highest setting (usually 'liquify') until the sauce is completely smooth. Return the sauce to the pan. (If you really want to get fancy, strain the purée through a sieve—but I skipped this step.) If too thick, add a bit more cream or milk until you have the consistency you want. Just before you need it, warm it up again and add another bit butter and minced chives.


Step 2: Then make the mock risotto: Sweat a shallot and a pint of mushrooms in butter until tender. Then add one or two diced potato and a fresh bay leaf. Begin to add chicken stock (or broth) a ladleful at a time and allow to thicken before adding more, just as if you were making an actual risotto. Continue to cook until the potatoes are tender but not mushy—depending on how finely you've cubed your potatoes, this should only take 5 minutes or so. Adjust the seasoning if needed.


Step 3: Finally, just before you are ready to eat, sear your scallops (about 2 per person) in a lightly greased non-stick pan over high heat. About 2 minutes per side should do.


Step 4: Assemble the dish by spooning a portion of the mock risotto in the center of each plate, then surround with the cream sauce and top the risotto with the scallops. Serve immediately.


NOTES: The whole dish, while it involved three separate elements and a final assembly, is actually fairly quick and easy to make. You can make things even easier by making the sauce and risotto ahead and heating them up gently just before you need them.


The original recipe (see below) calls for diver scallops, but last night I used regular sea scallops, which were perfectly delicious. (The centers of the scallops will still be quite 'rare' after this short cooking period. If you are squeamish about semi-raw seafood, then you can let it cook a bit more in a hot oven for, say, 5 minutes—but the scallops will be less sweet when cooked entirely through. Or you can slice each scallop in half across its mid-drift so they cook more quickly.)


The potatoes should be waxy, not mealy, the kind that you would use for potato salad or a gratin, like Yukon Golds. Since the potato is meant to mimic a risotto, it is best to cube it just as finely as you can manage, no more than a millimeter/1/8 inch wide. And, for that special touch, warm the plates before serving.


This recipe comes from Restaurant Eve in Old Town Alexandria, via fellow blogger and Foodbuzzer, "Kiss My Spatula". I have made some adjustments, however, to give this dish a personal touch. The tips and tricks noted above are my own.

Sea Scallop on Foodista

Sunday, August 23, 2009

Quick Note: Crab cakes with salsa

I've posted about crab cakes before. Just a quick note on a 'brainstorm' that worked out pretty well tonight: crab cakes with Mexican salsa and a drizzle of olive oil:


Worth a try.

NB: Tonight I had some prepared salsa sitting around, but surely freshly made salsa would have been even better.

Thursday, July 30, 2009

Pan-fried soft-shell crab and "Italian" cole slaw


One of the things I miss most about Italy is the wonderful Mediterranean seafood. But there is at least one area where North America may best the old country--soft-shell crab, especially here on the shores of the Chesapeake Bay. It's soft-shell crab season again, and those of us living here are especially lucky to have the exquisite soft-shell blue crab, whose season begins in May and lasts until July. The flavor is ineffably sweet, its texture a wonderful mix of crispy and soft. Time to enjoy it while we can!

I like my soft-shell crabs as simply made as possible, cleaned (see below) and dipped in flour seasoned with salt, pepper and--a Chesapeake Bay must--some Old Bay spice. You shallow-fry the crabs for 2 minutes or so on each side, until golden brown, in hot oil. That's all there is to it.

Cole slaw is a classic side for fried soft-shell crabs. As a healthier alternative to the traditional cole slaw with mayo, I 'invented' an Italian-style cole slaw: to the usual shredded cabbage and carrots, you add shredded fennel, very thinly sliced red onion and roughly chopped parsley. Dress with a fruity olive oil and lemon juice, and season with salt and pepper. The result is lovely to look at and really refreshing. Unlike other cole slaws, it is best eaten right away.

Of course, "Italian cole slaw" is something of an oxymoron, as cole slaw is not a traditional Italian dish, but I thought I was being awfully clever and original making an old American dish with an Italian accent. Well, as it turns out, I had "discovered America" as they say in Italian. There are already multiple recipes for my 'invention' on the 'net. Ah well...

NOTES: Soft shell crabs are actually just normal blue crabs that are molting their hard shell. They have to be caught and eaten within about four days after molting or the shell will grow back. Crabs only do this in the late Spring and summer months, hence they are strictly seasonal. (See this Wiki article for details.)

There are a number of other ways to fry soft-shell crabs. And even simpler version is simply to fry the crabs in oil or butter, without flouring. (I find this, however, a bit too simple.) Soft-shell crab can also be dipped in egg after flouring, not unlike Angelina's fried vegetables. You can also fry soft-shell crabs like Southern Fried Chicken, soaking the crabs in buttermilk before dipping in seasoned flour. You can also bread them as you would a chicken cutlet. They can be deep fried instead of pan fried if you like, but I find deep frying a bit too heavy and, in any event, less convenient for home cooking. Be careful when you fry soft-shell crabs, by the way, as they are quite 'juicy' and are liable to splatter. Wear an apron and be ready to jump!

Soft-shell crabs are generally sold live and need to be cleaned before cooking by snipping off their 'apron' and face and removing their lungs. Here a video that shows you how. If you find this a bit too brutal or just don't want to be bothered, you can buy them pre-cleaned or ask your friendly fish monger to clean them for you. These crabs are extremely perishable and should be eaten the same day you buy them--a good idea for any seafood, actually.

Fried Soft Shell Crabs on Foodista

Saturday, July 25, 2009

Maryland-style Crab Cakes


To tell the truth, I only recently started making crab cakes, so I'm no expert at it. But last night I decided I wanted to make my own, so I scoured the internet for recipes. There are lots of ways of making crab cakes, but the basic ingredients are crab meat (obviously!), preferably either lump--which I used--or backfin, mayonnaise, egg and just enough bread crumbs to bind the mixture. (A bad commercial crab cake will often have so much bread that it tastes more like stuffing.) You can flavor this mixture with an assortment of other things, most commonly mustard, minced scallion, worcestershire sauce, salt, pepper,parsley, and, here on the shores of the Chesapeake, a dash of Old Bay seasoning is a must. (Many recipes call for some chopped bell pepper, but I find that the taste of the pepper overwhelms the taste of the crab, so I always omit it.) Make sure to mix gently (a spatula works best) and not to overmix--you don't want an entirely even texture and the crab meat should remain in smallish chunks. You then form the cakes, which can either be perfectly rounded, almost like a large meatball, or slightly flattened like a hamburger. You then fry the cakes in moderately hot oil until golden brown on the outside. If frying crab 'balls', you should deep fry them. Crab 'burgers' can be shallow fried. If shallow frying, you need to be careful when you turn them, since the cakes do tend to fall apart, even with the various binding agents.

Crab cakes are typically served with cole slaw and French fries, but I prefer to serve them simply on a bed on green salad dressed with oil and vinegar (or oil and lemon). Tartar sauce is also de rigueur but they are already so rich, I find a slice of lemon to sprinkle on top is all the condiment that I need.

NOTES: The freshness and type of crabmeat really makes all the different between a great crab cake and an ordinary one. Find the best crabmeat you can afford, and try not to get the kind that breaks up into shreds. Crab cakes should contain nice hunks of crab meat, not have a uniform texture.

Obviously, this was not one of Angelina's specialities--but I like it anyway! :=))


Crab Cakes on Foodista

Wednesday, July 15, 2009

Blackened Tilapia (with notes on making salads the Italian way)


You may be thinking that we eat nothing but rich Italian dishes in our house. Well, it is true that we mostly eat Italian--and why not, no other cuisine that I know of has so many dishes that are quick, easy, healthy and, to my taste at least, delicious. But from time to time I do branch out and prepare other kinds of food. Here's a dish that is neither Italian nor rich: tonight we had cajun-inspired blackened tilapia fillets over a bed of green salad garnished with cherry tomatoes, with a few steamed red baby potatoes on the side.

Making the fish could hardly be easier or quicker: you brush some tilapia fillets with olive oil, then rub with ground spices of your choice. (The oil adds flavor and helps the spices to adhere and form the dark crust that is characteristic of this dish.) There are lots of recipes for the spice rub online, just google 'blackened fish'. Tonight I used a combination of paprika, white pepper, cayenne, garlic powder, salt and a bit of cumin. (If using, go easy on the cumin--a little goes a long way.) You then get a lightly oiled cast iron or other heavy non-stick pan smoking hot (literally), then add the fillets, letting a dark crust form on one side and then the other. (Do not move the fillets during this operation except to flip them over once, otherwise you will prevent a nice crust from forming and may break up the delicate flesh of the fillets.) Serve over green salad dressed with oil and vinegar, or oil and lemon (see below) and, if you like, garnish with cherry tomatoes. The whole dish takes around 15 minutes to make!

We like tilapia in our house, but you can really use just about any kind of fish fillets you like, although I imagine a white-fleshed fish would do best and suspect that, by contrast, an oily fish like mackerel would not work very well (although salmon is quite good cooked this way).

NOTE: Although this post was not supposed to be about Italian food, I can't resist a few words about making salad in the Italian manner, which can be nicely summed up by the following proverb:
A ben condire l'insalata, ci vuole un avaro per l'aceto, un giusto per il sale e uno strambo per l'olio.
Which, loosely translated, means: "to properly dress a salad, you need a miser to add the vinegar, a judge to add the salt and a spendthrift to add the oil." In other words, there are only three ingredients for dressing the salad and the proportions are as indicated--very little vinegar, the 'right' amount of salt (not too much, not too little) and a generous amount of oil. The taste of the oil, in fact, should dominate, not--as is usually the case for oil-and-vinegar dressings in the States but also (albeit to a lesser extent) in a French vinaigrette--the vinegar. Of course, this means that a fruity extra-virgin olive oil is essential.

The other thing that sets the Italian approach apart is that the dressing does not exist separately from the salad itself. You don't make the dressing in a bowl (as for a vinaigrette) you add the three ingredients, seriatum, to the greens, tossing after each addition. I usually start with the oil, then the vinegar and then finally the salt. Then taste and adjust for balance. (I'm not sure, however, if there are any hard and fast rules about the order.)

Once dressed, serve the salad immediately, as it will begin to wilt almost immediately--unless, of course, you are using iceberg lettuce, but the less said on that subject, the better. The most popular mix for salads in Italy is called (in Rome at least) misticanza. It's quite similar to the mixed baby greens you can buy here in States. Salads of arugula only (called rughetta in Rome, rucola in standard Italian) are also quite popular, and often serve as a bed for sliced steak (tagliata di manzo) as featured in my Italian cookout post.--it's a fabulous combination.